07blackg5 Build Thread. Operation Moneypit


 06-11-2015, 12:03 AM
#407
Finally got something done. More major than my other recent updates, but nothing crazy. Still something I've been putting off forever....
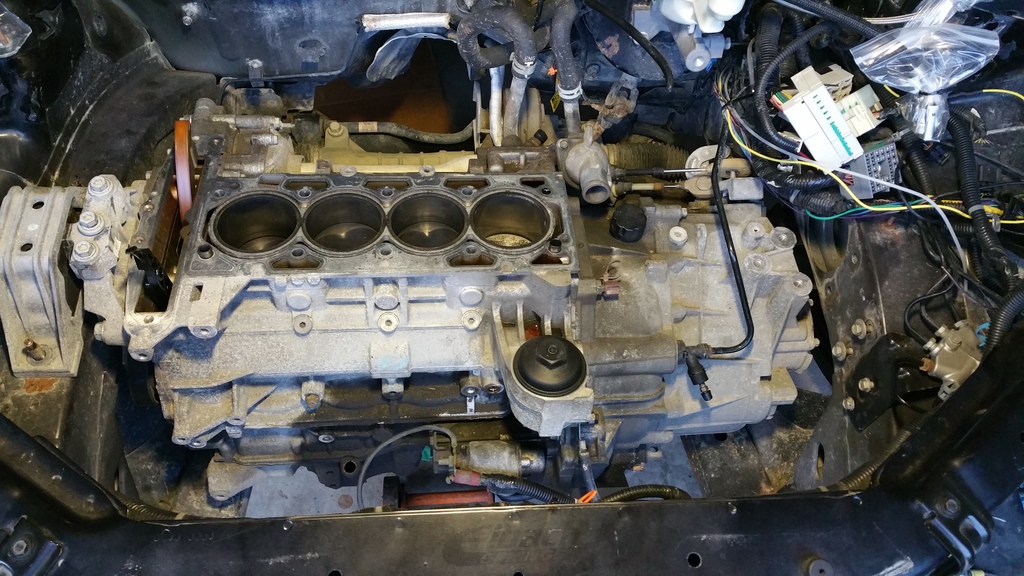
I paint penned the manifold holes so I wouldnt derp out and drill any extras. There are 2 other m6x1 holes on the drivers side of the head that I covered in tape. I then did a super professional job masking off the exposed areas. I set the valve cover on to keep shrapnel out as well. The head is going to be re-cleaned, but I still wanted to keep as much **** out as possible.

Shiny new m8x1.25 tap

First hole drilled out. The 17/64" bit was about the same as the OD of an m6 bolt, so it self alligned and basically just took the threads out. Easy as pie, but still nerve wracking lol.

I tapped the top center hole, and verified that it was proper/the depth was adequate before I went Jean-Claude Van Damme on the whole thing. After it checked out, I drilled out the rest of the holes.


Finishing up....

I cleaned off the paint pen, and test fit the manifold. If it fits, that bitch ships!


Overall it turned out pretty well, and went smoother than expected. You can tell that two of the bolts are ever-so-slightly off axis, and I was worried it would cause issues. When i test fit the manifold, everything threaded right in and sits flush. No issues whatsoever, which was relieving.
I also want to tap a boost reference port on the side of the manifold for the boost gauge and FPR somewhere in the area where I am pointing. Not sure how I am going to set it up yet, but I may run a small vacuum block, or maybe just a small 1/8npt Y fitting that isn't massive.

The FPR mounts directly to the side of the fuel rail, so you can see how it would make for a short and sweet vacuum line. This fuel rail needs cleaning up lol

And speaking of the fuel rail, I have to make some sort of bracket to support the hardline of the rail. Either off the furl rail mount bolt, or a valve cover bolt.

I paint penned the manifold holes so I wouldnt derp out and drill any extras. There are 2 other m6x1 holes on the drivers side of the head that I covered in tape. I then did a super professional job masking off the exposed areas. I set the valve cover on to keep shrapnel out as well. The head is going to be re-cleaned, but I still wanted to keep as much **** out as possible.
Shiny new m8x1.25 tap
First hole drilled out. The 17/64" bit was about the same as the OD of an m6 bolt, so it self alligned and basically just took the threads out. Easy as pie, but still nerve wracking lol.
I tapped the top center hole, and verified that it was proper/the depth was adequate before I went Jean-Claude Van Damme on the whole thing. After it checked out, I drilled out the rest of the holes.
Finishing up....
I cleaned off the paint pen, and test fit the manifold. If it fits, that bitch ships!
Overall it turned out pretty well, and went smoother than expected. You can tell that two of the bolts are ever-so-slightly off axis, and I was worried it would cause issues. When i test fit the manifold, everything threaded right in and sits flush. No issues whatsoever, which was relieving.
I also want to tap a boost reference port on the side of the manifold for the boost gauge and FPR somewhere in the area where I am pointing. Not sure how I am going to set it up yet, but I may run a small vacuum block, or maybe just a small 1/8npt Y fitting that isn't massive.
The FPR mounts directly to the side of the fuel rail, so you can see how it would make for a short and sweet vacuum line. This fuel rail needs cleaning up lol
And speaking of the fuel rail, I have to make some sort of bracket to support the hardline of the rail. Either off the furl rail mount bolt, or a valve cover bolt.
06-16-2015, 01:40 AM
#410
Got a few things accomplished today. Drilled out the nipple on the lsj manifold, and tapped it for a plug. I put a few marks on the manifold filing down the burred edges. haha its obviously never going to be seen, but I still felt bad since it is a minty manifold.

I also bolted up the fuel rail and FPR in order to check for clearances/where to run the new vacuum barb, and ran into a small, but aggravating issue. The 07-08 l61 cam sensor is in the direct path of the return line. Basically the most direct way to run the line is right through the cam sensor, which older l61 and lsj dont have in this location.

You can see here that if the line was attached, it would hit

If I got a new straight fitting, I could run the line down and around the sensor, but the line is not very flexible and requires a large radius. Not sure if this will work until I have the block/trans/fusebox in and know exactly where it will be run. Im sure I could get it to work like this, but my issue is the amount of stress put on the fpr/fuel rail from the tight radius in the line. I'm pretty confident this will workout fine, but I'm not sure how much extra "slack" there is in the line to work with. The difference between the 2 setups is minimal, but still potentially an issue. Worst case I just end up needing a longer section of hose. I am also deleting the EVAP canister from the rear of the car, so depending on how that works out I may have needed longer hose regardless. We will find out when that time comes

The other obvious option is to run a line between the rail and FPR, and mount the regulator somewhere else in the bay. It is my goal keep it on the rail, so this is a last resort. I spent a lot of time minimizing the amount of wires and lines in the bay, and it would kill me to add more than necessary. If i feel like the line is too stressed making the bend, and/or I cannot run the line safely/properly, I will just have to suck it up and remote mount it.
I also pulled the valve cover nipple from the crankcase to intake connection. I plan on plugging the hole, and venting to atmosphere through a oil cap breather. I was going to tap it tonight, but I dont have the correct size tap/plug.
I also bolted up the fuel rail and FPR in order to check for clearances/where to run the new vacuum barb, and ran into a small, but aggravating issue. The 07-08 l61 cam sensor is in the direct path of the return line. Basically the most direct way to run the line is right through the cam sensor, which older l61 and lsj dont have in this location.
You can see here that if the line was attached, it would hit
If I got a new straight fitting, I could run the line down and around the sensor, but the line is not very flexible and requires a large radius. Not sure if this will work until I have the block/trans/fusebox in and know exactly where it will be run. Im sure I could get it to work like this, but my issue is the amount of stress put on the fpr/fuel rail from the tight radius in the line. I'm pretty confident this will workout fine, but I'm not sure how much extra "slack" there is in the line to work with. The difference between the 2 setups is minimal, but still potentially an issue. Worst case I just end up needing a longer section of hose. I am also deleting the EVAP canister from the rear of the car, so depending on how that works out I may have needed longer hose regardless. We will find out when that time comes
The other obvious option is to run a line between the rail and FPR, and mount the regulator somewhere else in the bay. It is my goal keep it on the rail, so this is a last resort. I spent a lot of time minimizing the amount of wires and lines in the bay, and it would kill me to add more than necessary. If i feel like the line is too stressed making the bend, and/or I cannot run the line safely/properly, I will just have to suck it up and remote mount it.
I also pulled the valve cover nipple from the crankcase to intake connection. I plan on plugging the hole, and venting to atmosphere through a oil cap breather. I was going to tap it tonight, but I dont have the correct size tap/plug.
06-17-2015, 06:42 AM
#413
Senior Member
iTrader: (6)

Get a union or pipe nipple so you can mount the line like you have it in the first pic showing the issue. You'll have the 45* with the AN fitting not the line, then you can mount the line pretty close to where you planned initially.
06-24-2015, 11:28 PM
#414
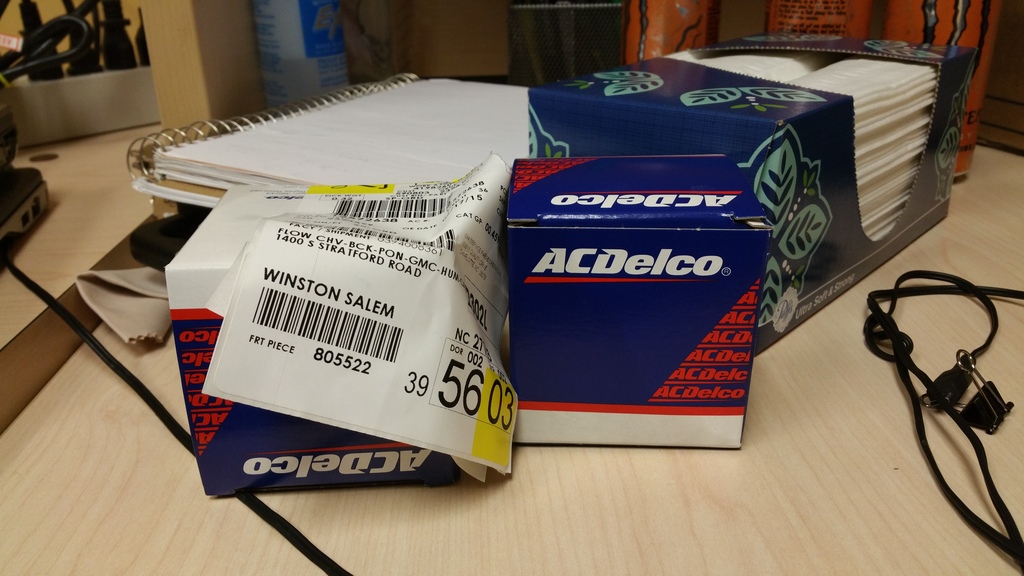
Got my OTTP s4 cams, as well as my "revised lifters" in the mail this week. haha Boring picture:
I'm headed to OTTP tomorrow and needed to get the "downpipe" off of my car for Josh to modify, and pick up some misc parts. The stupid v-band was seized and gave me hell. had to torch and beat it with a flathead/hammer, but finally got it off. GBrunner has dibs on the catback, so i figured I would start pulling that as well.
It steps down to a 2.5 exit, so he is going to cut and weld in a 3" section and flange.
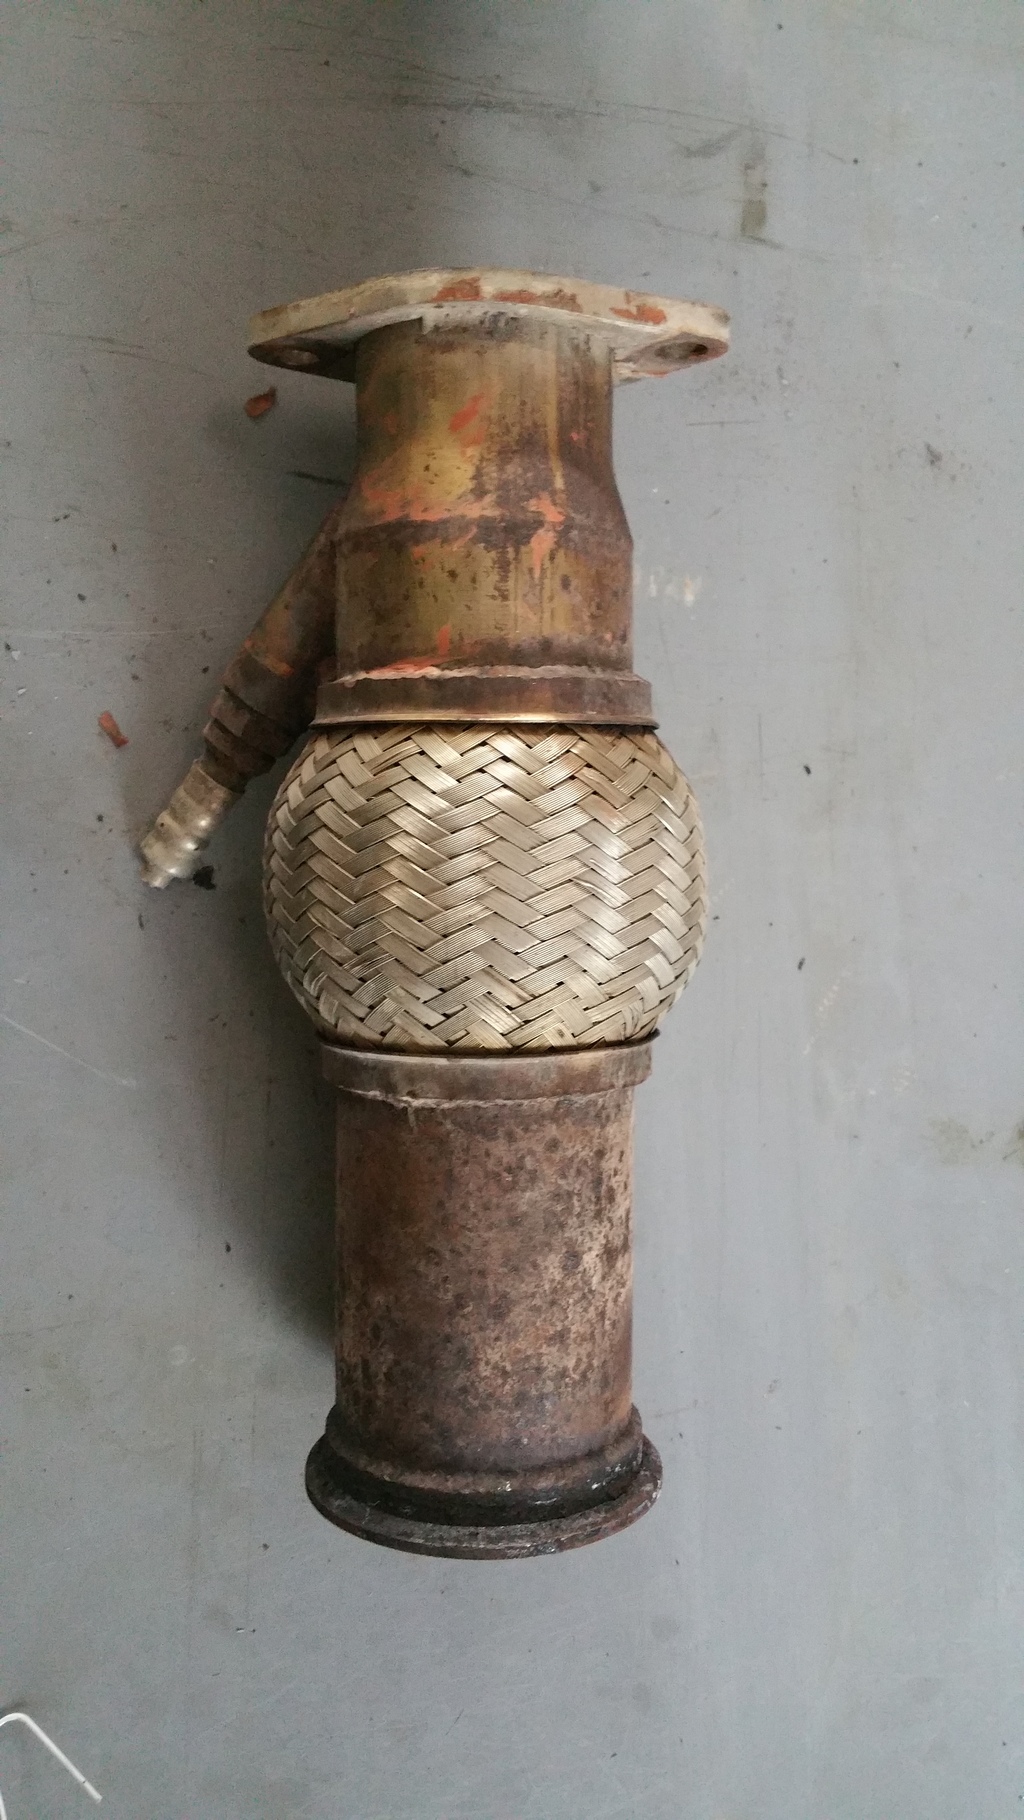
Just because I was finally able to get it out, and it is glorious haha:

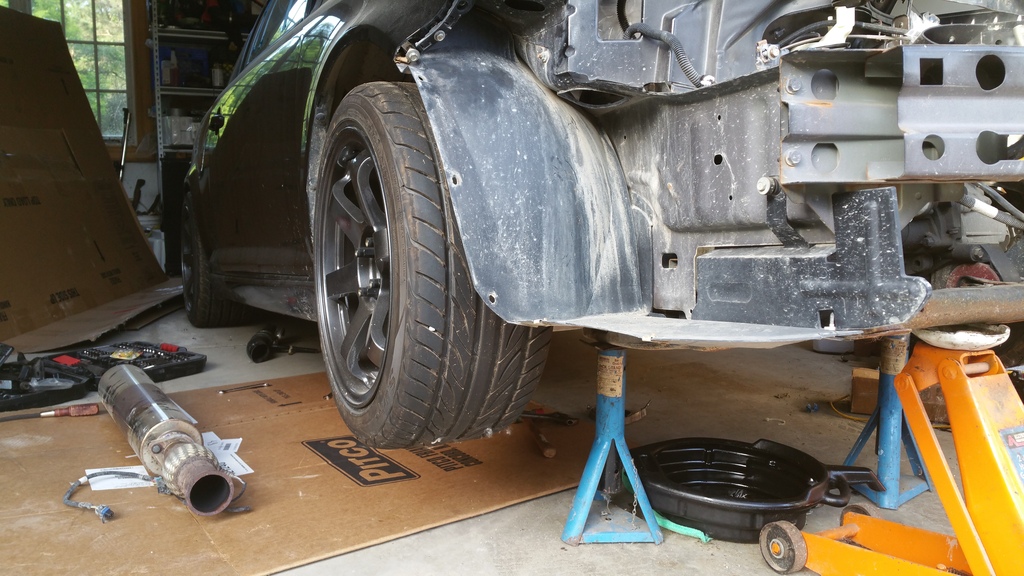
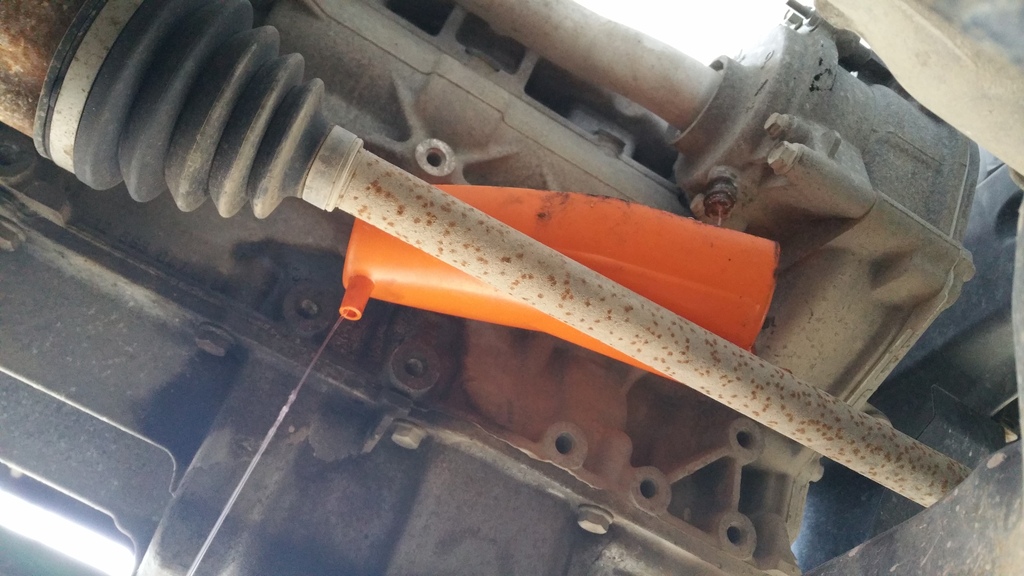
While the car was up in the air, I drained the rest of the coolant, and used my dads Harley oil filter drip tray to keep from making a mess. Worked out perfectly
The tires looked meaty while I was under the car, but the picture doesnt give the same effect

It started getting dark, so I started pulling the last few remaining sensors than needed to come off. I just need to disconnect the heater core, shifter cables, clutch line, starter cables, and them Im ready to pull axles/ball joints/steering rack/swaybar/etc and drop the subframe. Progress has been slower than expected, but some things have come up. Still waiting on the shortblock, but inching along in the meantime.
I'm headed to OTTP tomorrow and needed to get the "downpipe" off of my car for Josh to modify, and pick up some misc parts. The stupid v-band was seized and gave me hell. had to torch and beat it with a flathead/hammer, but finally got it off. GBrunner has dibs on the catback, so i figured I would start pulling that as well.
It steps down to a 2.5 exit, so he is going to cut and weld in a 3" section and flange.
Just because I was finally able to get it out, and it is glorious haha:
While the car was up in the air, I drained the rest of the coolant, and used my dads Harley oil filter drip tray to keep from making a mess. Worked out perfectly
The tires looked meaty while I was under the car, but the picture doesnt give the same effect
It started getting dark, so I started pulling the last few remaining sensors than needed to come off. I just need to disconnect the heater core, shifter cables, clutch line, starter cables, and them Im ready to pull axles/ball joints/steering rack/swaybar/etc and drop the subframe. Progress has been slower than expected, but some things have come up. Still waiting on the shortblock, but inching along in the meantime.

 08-31-2015, 03:05 PM
#422
I didn't really read your entire build but just for reference, i have done a build like this already. i have provided links below. second link has a video of my car running with a tvs.
https://www.cobaltss.net/forums/2-2l...thread-238062/
https://www.cobaltss.net/forums/2-2l...ey-e85-279983/
https://www.cobaltss.net/forums/2-2l...thread-238062/
https://www.cobaltss.net/forums/2-2l...ey-e85-279983/
08-31-2015, 04:01 PM
#423
I didn't really read your entire build but just for reference, i have done a build like this already. i have provided links below. second link has a video of my car running with a tvs.
https://www.cobaltss.net/forums/2-2l...thread-238062/
https://www.cobaltss.net/forums/2-2l...ey-e85-279983/
https://www.cobaltss.net/forums/2-2l...thread-238062/
https://www.cobaltss.net/forums/2-2l...ey-e85-279983/
09-03-2015, 07:32 AM
#424

I love this build! However I have some questions about the previous build. What were you spraying before you started playing with the AFRs and what were you spraying when it blew lol. Hopefully I can avoid any issues because I do not have a spare block. I'd also like to know more about that WOT box and how much of a pain it was to wire into a cobalt. Also PM sent about the long tube header.