How to: L61 to LE5 conversion (lots of pics)
 05-20-2012, 09:49 PM
#1
New Member
Thread Starter

Join Date: 02-28-10
Location: Elroy, TX
Posts: 36
Likes: 0
Received 0 Likes
on
0 Posts
How to: L61 to LE5 conversion (lots of pics)
I had my progress thread in the 2.4L section, but I figured the how to thread should be posted to the 2.2L section.
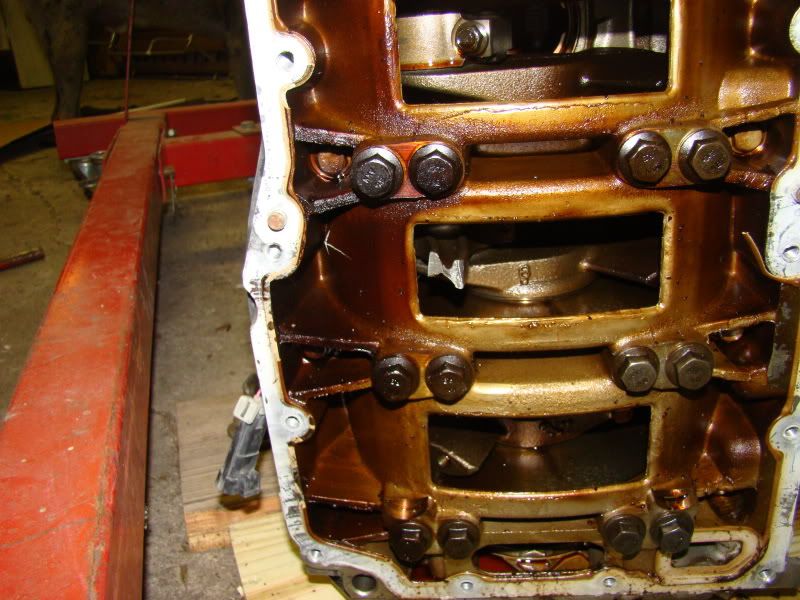
So, the story starts with the wife driving my '08 Cobalt LS with injen cold air intake thru a low water crossing. Motor hydrolocked and snapped the #3 connecting rod in half. The piece attached to the crank got whipped around several times, damaging the block and then finally wedged into the lower crankcase (see pic below). So, block being damaged spelled new engine to me.
Next, I went to eBay and ordered a 2.4L LE5 out of an '08 Malibu with 20K miles (1/3 of my mileage). It took about a week to arrive and to my dismay, included zero connectors.
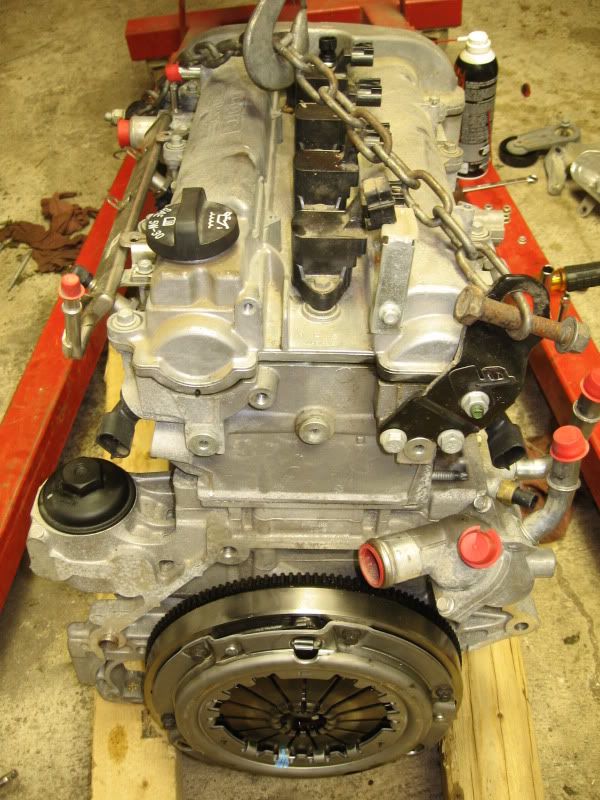
Since the 2.4L is externally identical to the 2.2L, it bolted up to the trans and all mounts as normal.
Now comes the really fun part, wiring and ECM. Since the '08 Cobalt L61 and LE5 share the same ECM part number, the ECM only needed a reflash. I reflashed the ECM myself with a stock tune from a junked '08 SS/NA, 5 speed. According to the pinouts, the ECM connector C1 (body harness) is the same for L61 and LE5. That means the only connector needing to be modified is the C2 connector. There are 3 components that are added on the LE5: the Intake & Exhaust Cam Actuator Solenoids and the Exhaust Cam Position Sensor. Since my junkyard motor didn't come with them, I bought the 3 connectors.
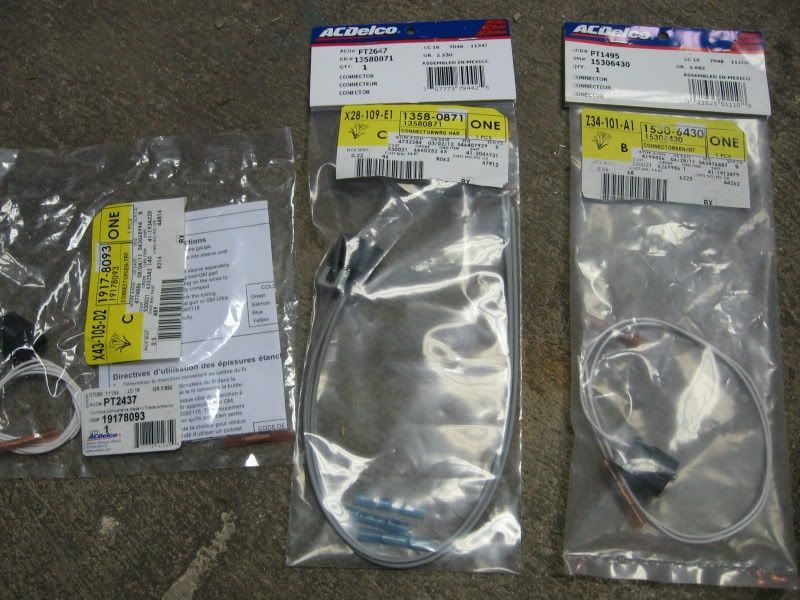
GM Part Numbers -
Intake Cam Phaser Solenoid - 15306430
Exhaust Cam Phaser Solenoid - 19178093
Exhaust Cam Position Sensor - 13580871
Here is the ECM connector C2 pinout:
Here is the electrical diagram for the 3 connectors to add:

So, added circuits are:
5284 - Intake Cam Actuator Solenoid 5 volt reference (ECM C2 pin 15)
6753 - Intake Cam Actuator Solenoid Low reference (ECM C2 pin 60)
5282 - Exhaust Cam Actuator Solenoid 5 volt reference (ECM C2 pin 14)
6754 - Exhaust Cam Actuator Solenoid Low reference (ECM C2 pin 61)
5297 - Exhaust Cam Position Sensor 5 volt reference (ECM C2 pin 34)
5273 - Exhaust Cam Position Sensor Signal (ECM C2 pin 47)
5296 - Exhaust Cam Position Sensor Low reference (ECM C2 pin 21)
Here is where extreme care should be taken. Disassemble the ECM connector C2 until it looks like this pic.
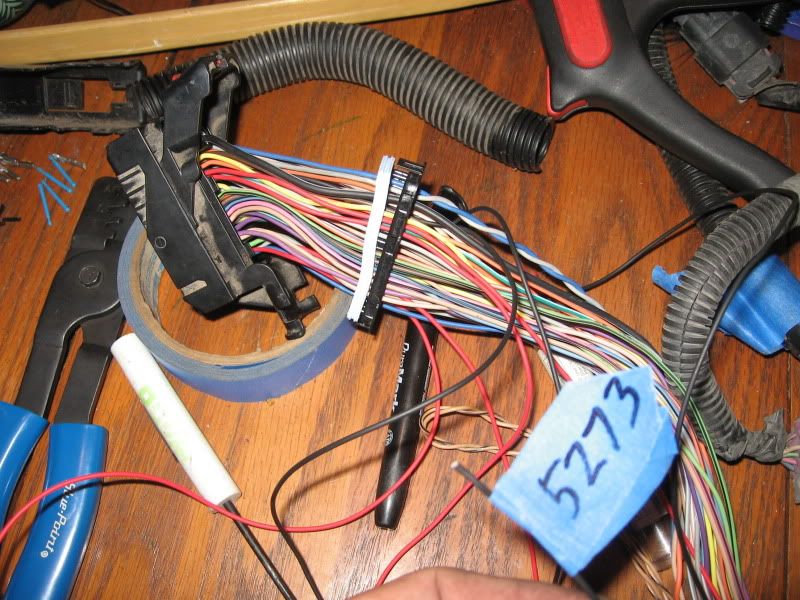
I slowly added wires with GM terminal part numbers 33467-0003 soldered on. Feed the terminal through the connector first and then fish the wires through the gray weather pack seal and then through the black cpa (connector position assurance). Re-assemble the connector and run the wires along the harness to their final destination. I left the connector attachment for when I get the harness into the car.
Next is install of the harness and all accessories. You can see the blue tape with each individual circuit labeled.
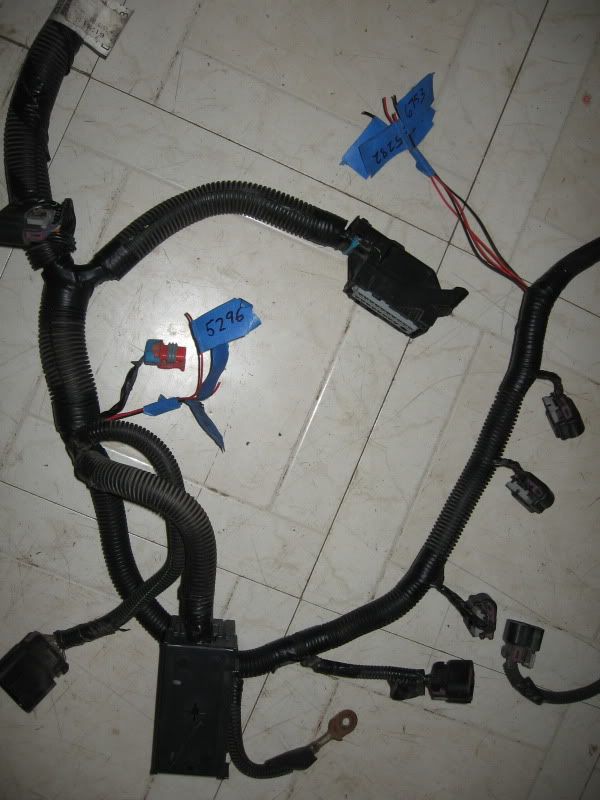
Here are the 2 Cam Actuator Solenoid connectors soldered in.
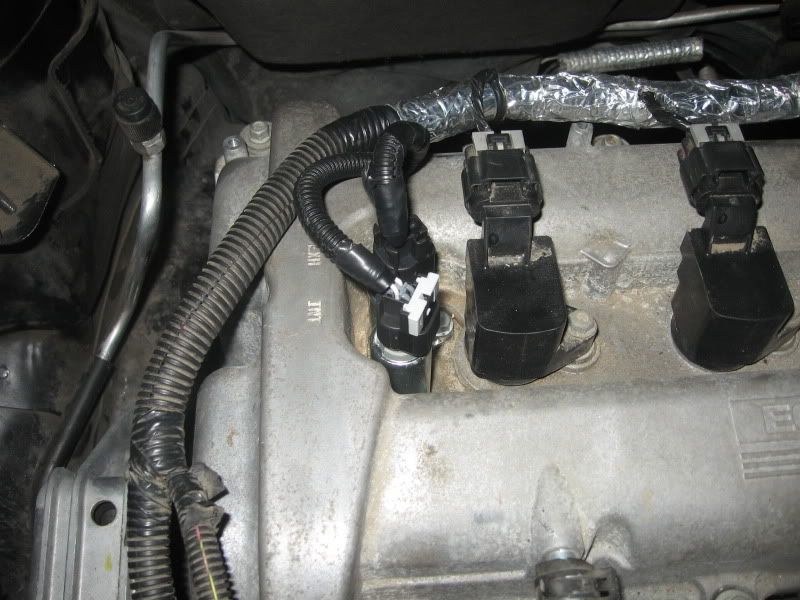
And here is a pic of the Exhaust Cam Position Sensor. Hard to see but it looks factory.
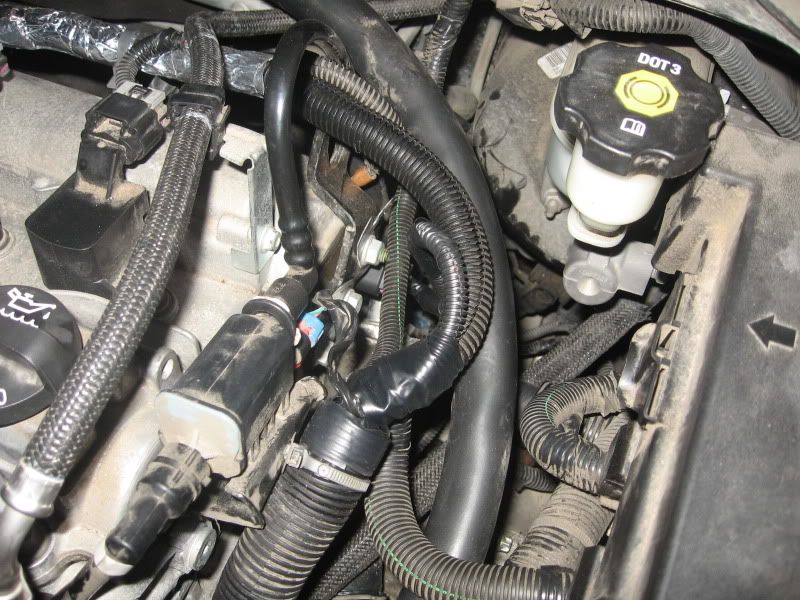
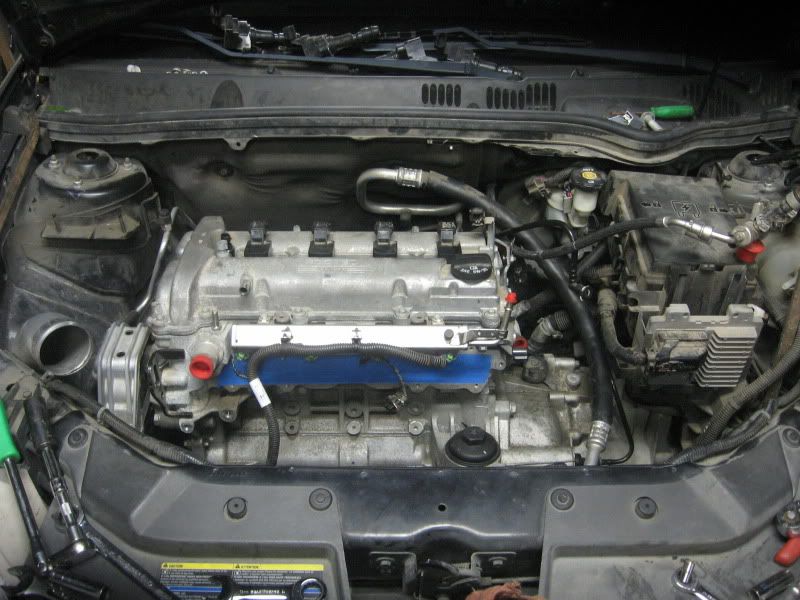
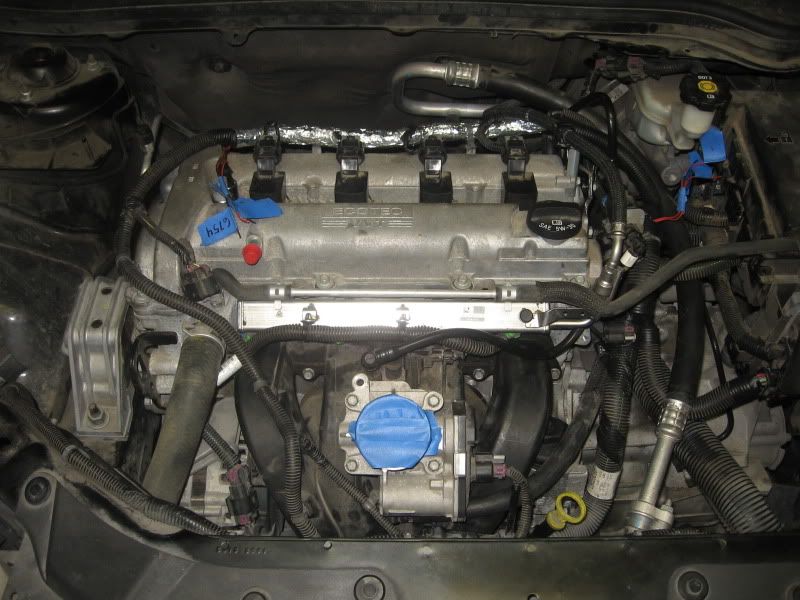
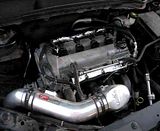
And here you see the final assembled product.

Despite having to run the 2.2L throttle body, its runs great. It bogs more than normal if I have too much load and the wrong gear, but that's operator error. When I shift right, its feels much more alive than the 2.2L ever did. Results video below.
So, the story starts with the wife driving my '08 Cobalt LS with injen cold air intake thru a low water crossing. Motor hydrolocked and snapped the #3 connecting rod in half. The piece attached to the crank got whipped around several times, damaging the block and then finally wedged into the lower crankcase (see pic below). So, block being damaged spelled new engine to me.
Next, I went to eBay and ordered a 2.4L LE5 out of an '08 Malibu with 20K miles (1/3 of my mileage). It took about a week to arrive and to my dismay, included zero connectors.
Since the 2.4L is externally identical to the 2.2L, it bolted up to the trans and all mounts as normal.
Now comes the really fun part, wiring and ECM. Since the '08 Cobalt L61 and LE5 share the same ECM part number, the ECM only needed a reflash. I reflashed the ECM myself with a stock tune from a junked '08 SS/NA, 5 speed. According to the pinouts, the ECM connector C1 (body harness) is the same for L61 and LE5. That means the only connector needing to be modified is the C2 connector. There are 3 components that are added on the LE5: the Intake & Exhaust Cam Actuator Solenoids and the Exhaust Cam Position Sensor. Since my junkyard motor didn't come with them, I bought the 3 connectors.
GM Part Numbers -
Intake Cam Phaser Solenoid - 15306430
Exhaust Cam Phaser Solenoid - 19178093
Exhaust Cam Position Sensor - 13580871
Here is the ECM connector C2 pinout:
Here is the electrical diagram for the 3 connectors to add:
So, added circuits are:
5284 - Intake Cam Actuator Solenoid 5 volt reference (ECM C2 pin 15)
6753 - Intake Cam Actuator Solenoid Low reference (ECM C2 pin 60)
5282 - Exhaust Cam Actuator Solenoid 5 volt reference (ECM C2 pin 14)
6754 - Exhaust Cam Actuator Solenoid Low reference (ECM C2 pin 61)
5297 - Exhaust Cam Position Sensor 5 volt reference (ECM C2 pin 34)
5273 - Exhaust Cam Position Sensor Signal (ECM C2 pin 47)
5296 - Exhaust Cam Position Sensor Low reference (ECM C2 pin 21)
Here is where extreme care should be taken. Disassemble the ECM connector C2 until it looks like this pic.
I slowly added wires with GM terminal part numbers 33467-0003 soldered on. Feed the terminal through the connector first and then fish the wires through the gray weather pack seal and then through the black cpa (connector position assurance). Re-assemble the connector and run the wires along the harness to their final destination. I left the connector attachment for when I get the harness into the car.
Next is install of the harness and all accessories. You can see the blue tape with each individual circuit labeled.
Here are the 2 Cam Actuator Solenoid connectors soldered in.
And here is a pic of the Exhaust Cam Position Sensor. Hard to see but it looks factory.
And here you see the final assembled product.
Despite having to run the 2.2L throttle body, its runs great. It bogs more than normal if I have too much load and the wrong gear, but that's operator error. When I shift right, its feels much more alive than the 2.2L ever did. Results video below.

 05-20-2012, 09:56 PM
#3
New Member
Thread Starter
Join Date: 02-28-10
Location: Elroy, TX
Posts: 36
Likes: 0
Received 0 Likes
on
0 Posts
Or just don't let the wife drive it. Somebody suggested running the injen as a sri AFTER I purchased a GMPP sri. Haven't figured out what I'm gonna do. I do know the wife is not allowed to drive it if its raining.
 Moderator
 12-24-2013, 12:36 AM
#7
Junior Member

Join Date: 05-31-09
Location: San Antonio
Posts: 420
Likes: 0
Received 0 Likes
on
0 Posts
Does anyone know how it would work if you wanted to put a LE5 where a LAP was? The wiring harness already had the intake and exhaust solenoid and exhaust can sensor from the get go??
 12-24-2013, 01:16 AM
#9
Senior Member
Join Date: 06-11-10
Location: NKY
Posts: 950
Likes: 0
Received 0 Likes
on
0 Posts
 12-24-2013, 03:59 PM
#11

He already had a 2.4 manifold I think, because the manifold shown in the car isn't a stock 2.2 nor is it from a 2008 2.4.
Very nice work though. Anyone know if it would be possible to swap one of the older 2.4s with the forged internals?
Very nice work though. Anyone know if it would be possible to swap one of the older 2.4s with the forged internals?


 01-29-2014, 12:30 PM
#15

Pretty good job done there. Now someone has to do this with an LNF engine. I'd like to see how that is done. If I had seen this 6 to 7 months ago I could have made this a winter project, instead I gave up on the 2.2 and an searching for a SS/TC sedan.

Thread
Thread Starter
Forum
Replies
Last Post

