Rotated mount installation M35 LSJ/LNF
 06-09-2011, 10:20 PM
#1

Rotated mount installation M35 LSJ/LNF
Sometimes I have gotten feedback that folks have installed rotated mounts and have vibrations. That really should not happen, although the mounts will not have the same isolation as stock, the inserts are stiffer and there is no real way around that,
The principle behind the mounts is to rotate the motor up at the back, down at the front, to move the axle out put shafts in better alignment with the axle output flange at the knuckle. The rotation was developed and engineered with help from GM, when I was under contract to produce Cobalt road race cars in 2004/2005.
So you know.
As OTT copied my mounts, under an agreement they made with me, and which later OTT reneged totally with great prejudice to me,if their mounts give trouble go see them.
That said, I will be happy to help and advise customers and non customers, who have issues with mount installation, as best I can, My mounts are different .
I also know a lot more about these mounts than most folks do. Its easy, I drive the delta platform and work on the platform every day servicing customer cars, and working on race cars and my own car.
Like ZZP we have a full service race shop. Unlike ZZP we dont build customer motors , I rely on Kurt Urban for LS motors, and GMR for my LSJ stuff, and a local engine re build shop for machine work.
So understand that the rotated mount concept exploits the soft driver side torque axis mount, and repositions the passenger side mount as the shoulder bolts that secure these mounts have a large hole in the mount that permits relocation.
Please note that the automatic transmission Delta's do not need this type of rotation, the car was designed for the automatic, and the manual transmissions happen to be about 15 mm out of alignment by comparison.
Here we go:
Today I installed a stage 1 mount in an LSJ . I did it,not on the hoist as we normally do, but on two jack stands, figuring that is the way most folks will do it on their own.
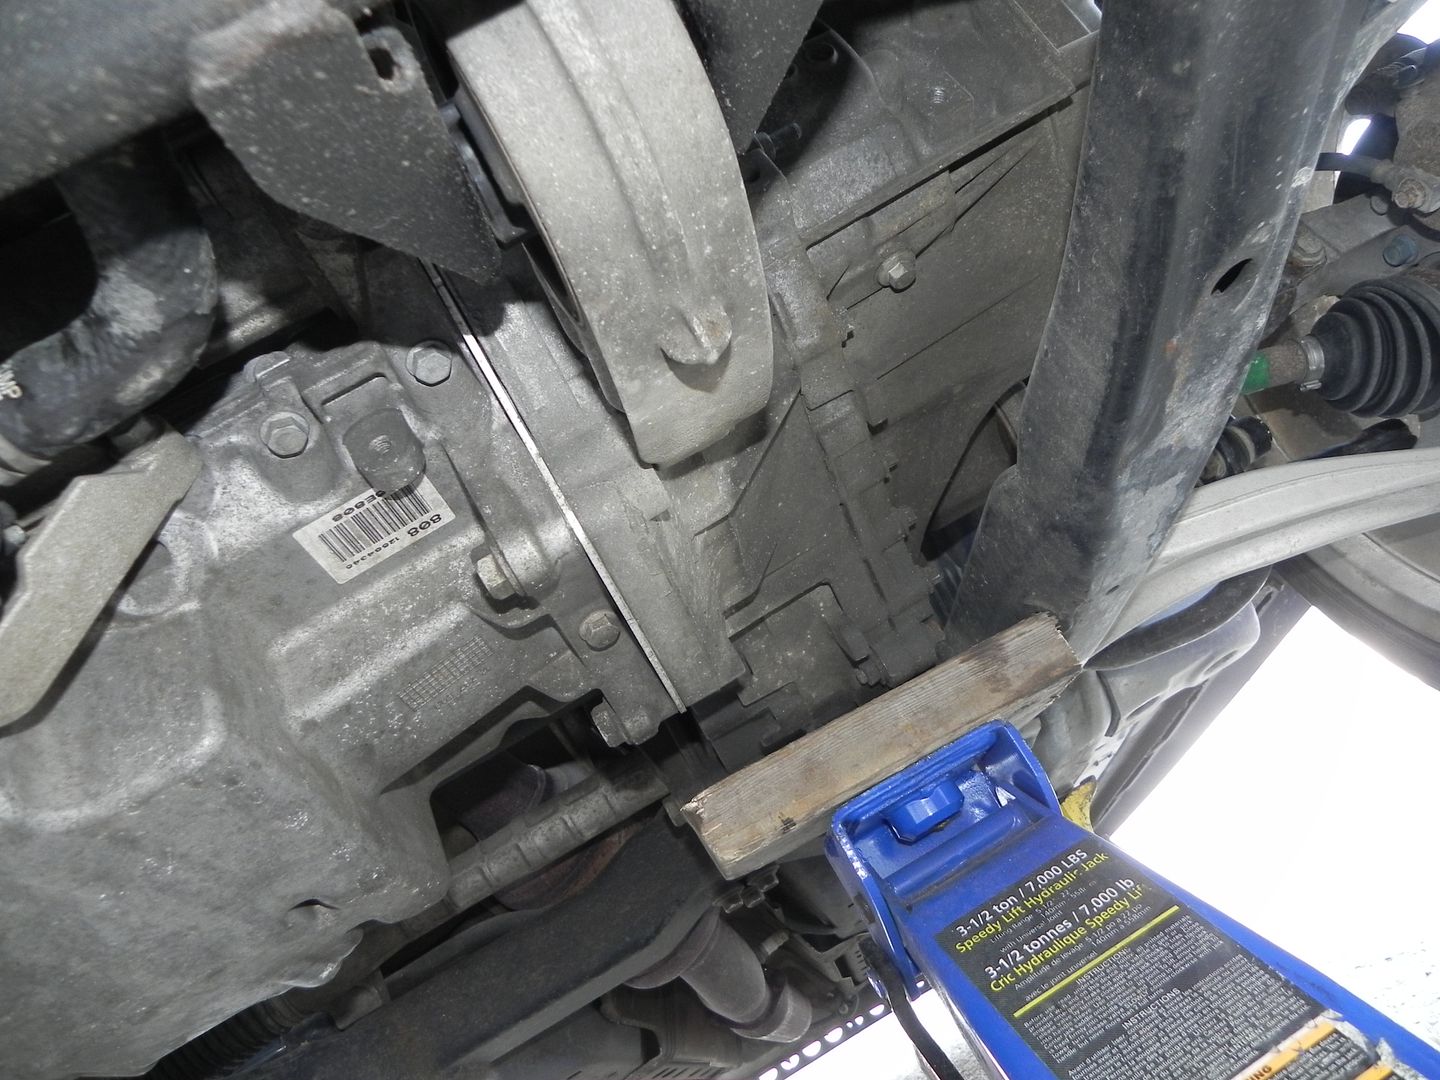
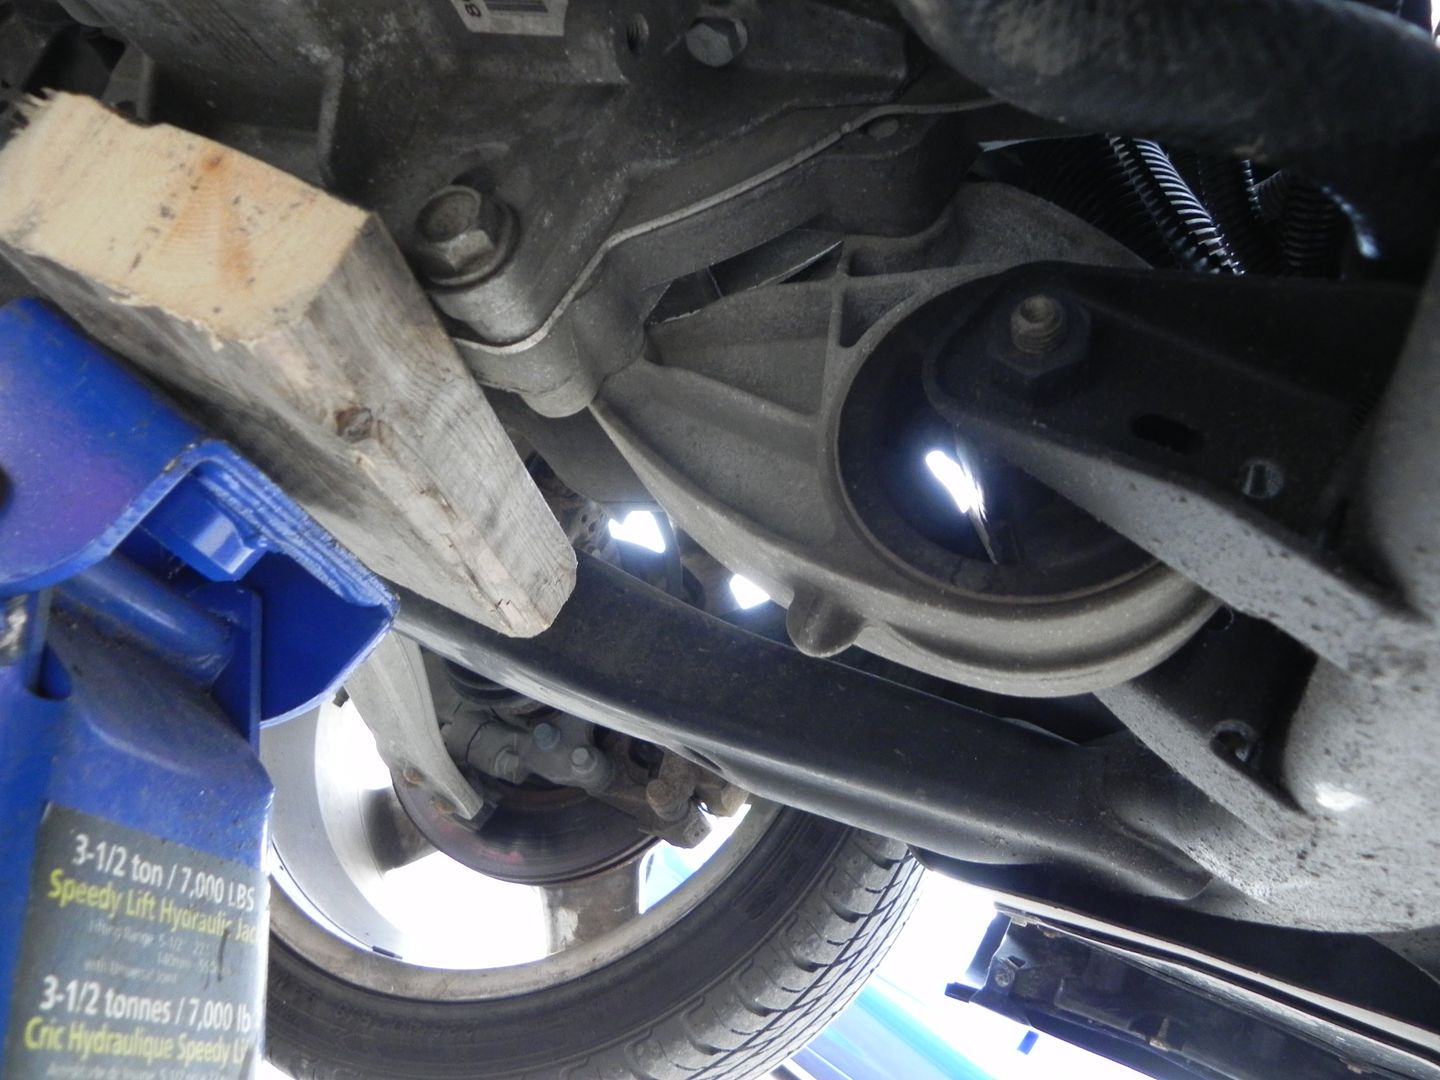
1. First job is to get the car properly secured , well up in the air and on jack stands. Then using a piece of wood to spread jacking load, gently support the engine at the transmission differential area.
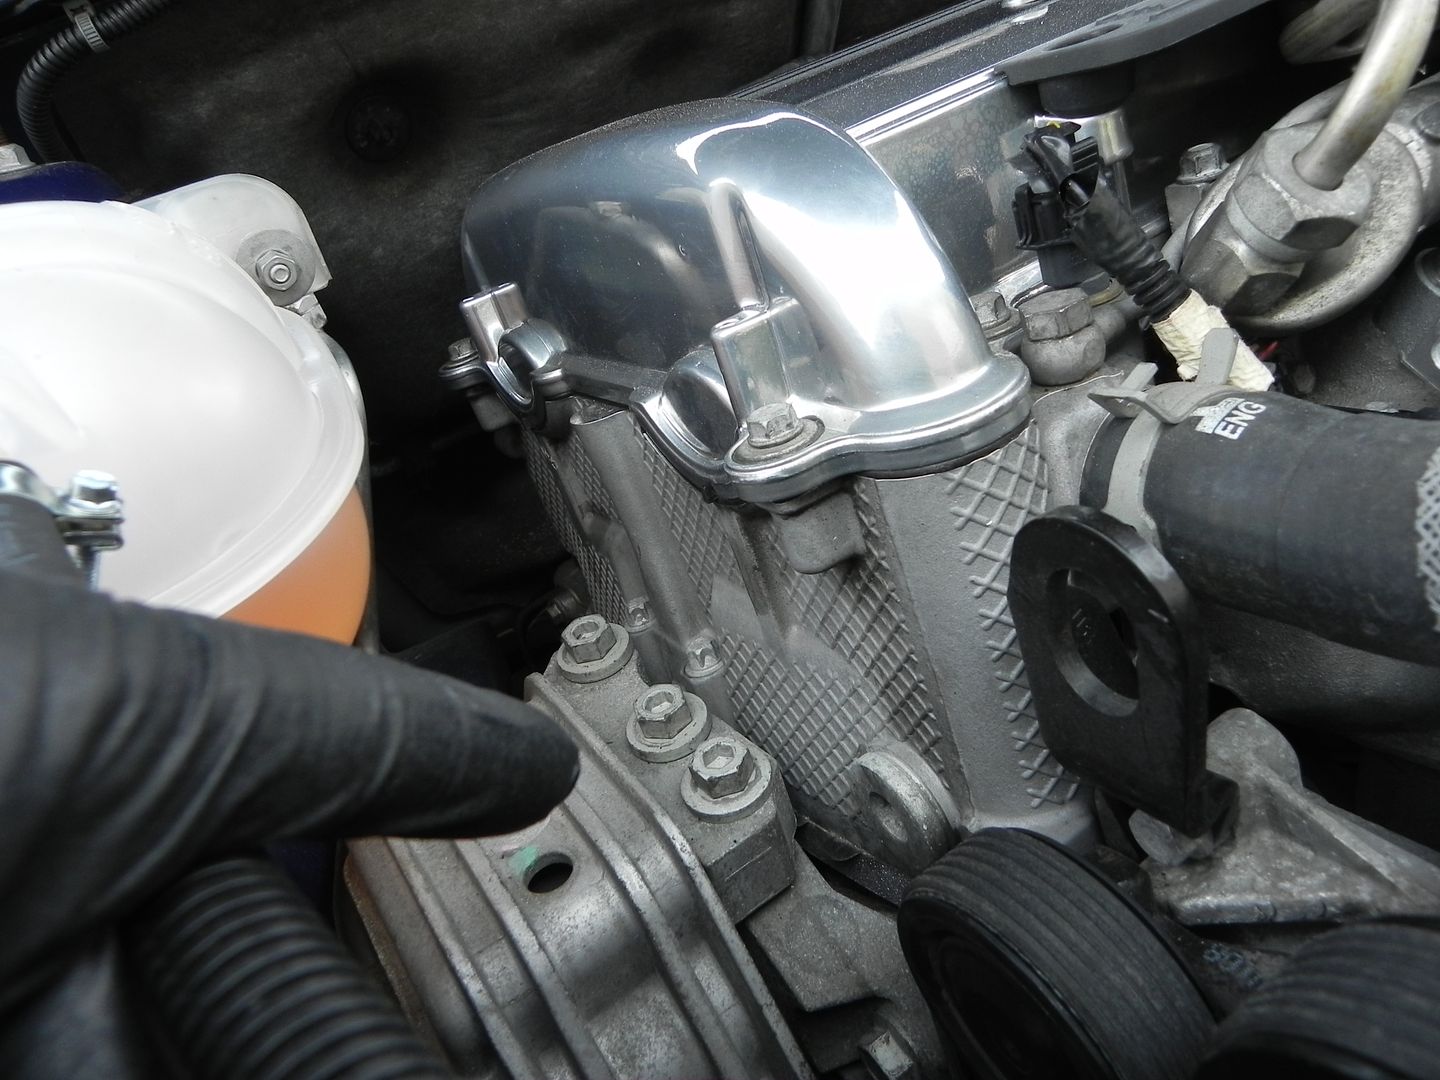
Now go up top and release a couple/three turns the top passenger side mount bolts. (15 mm socket)
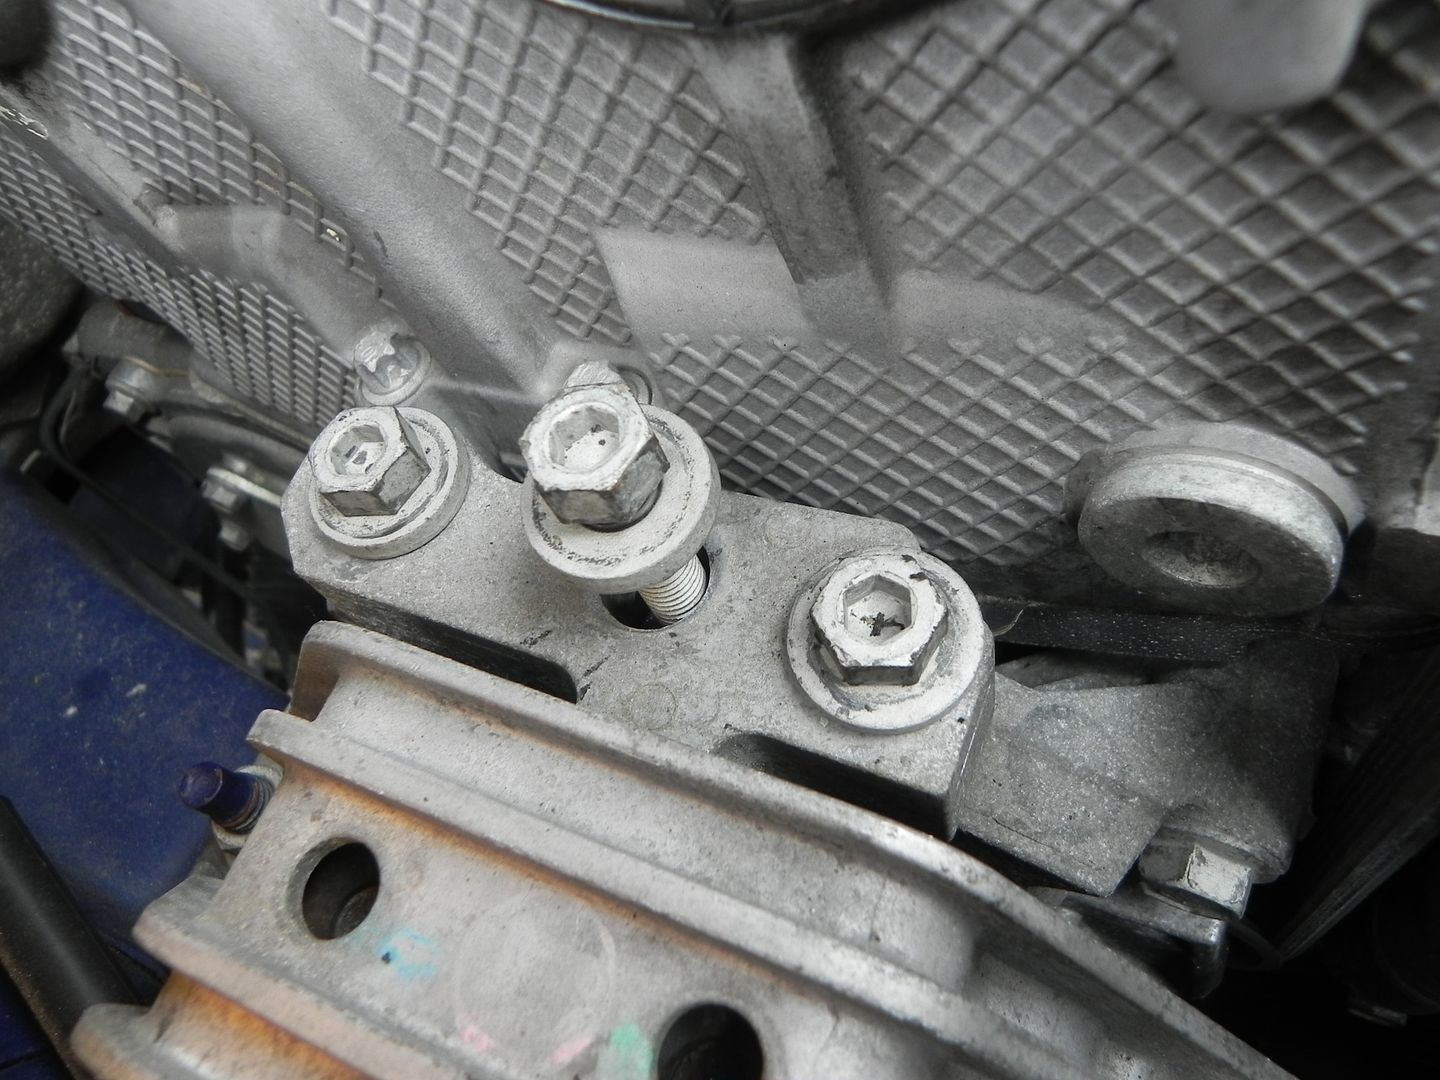
2. Now go underneath and remove the 3 bolts that go through the cradle pedestal (15 mm socket)
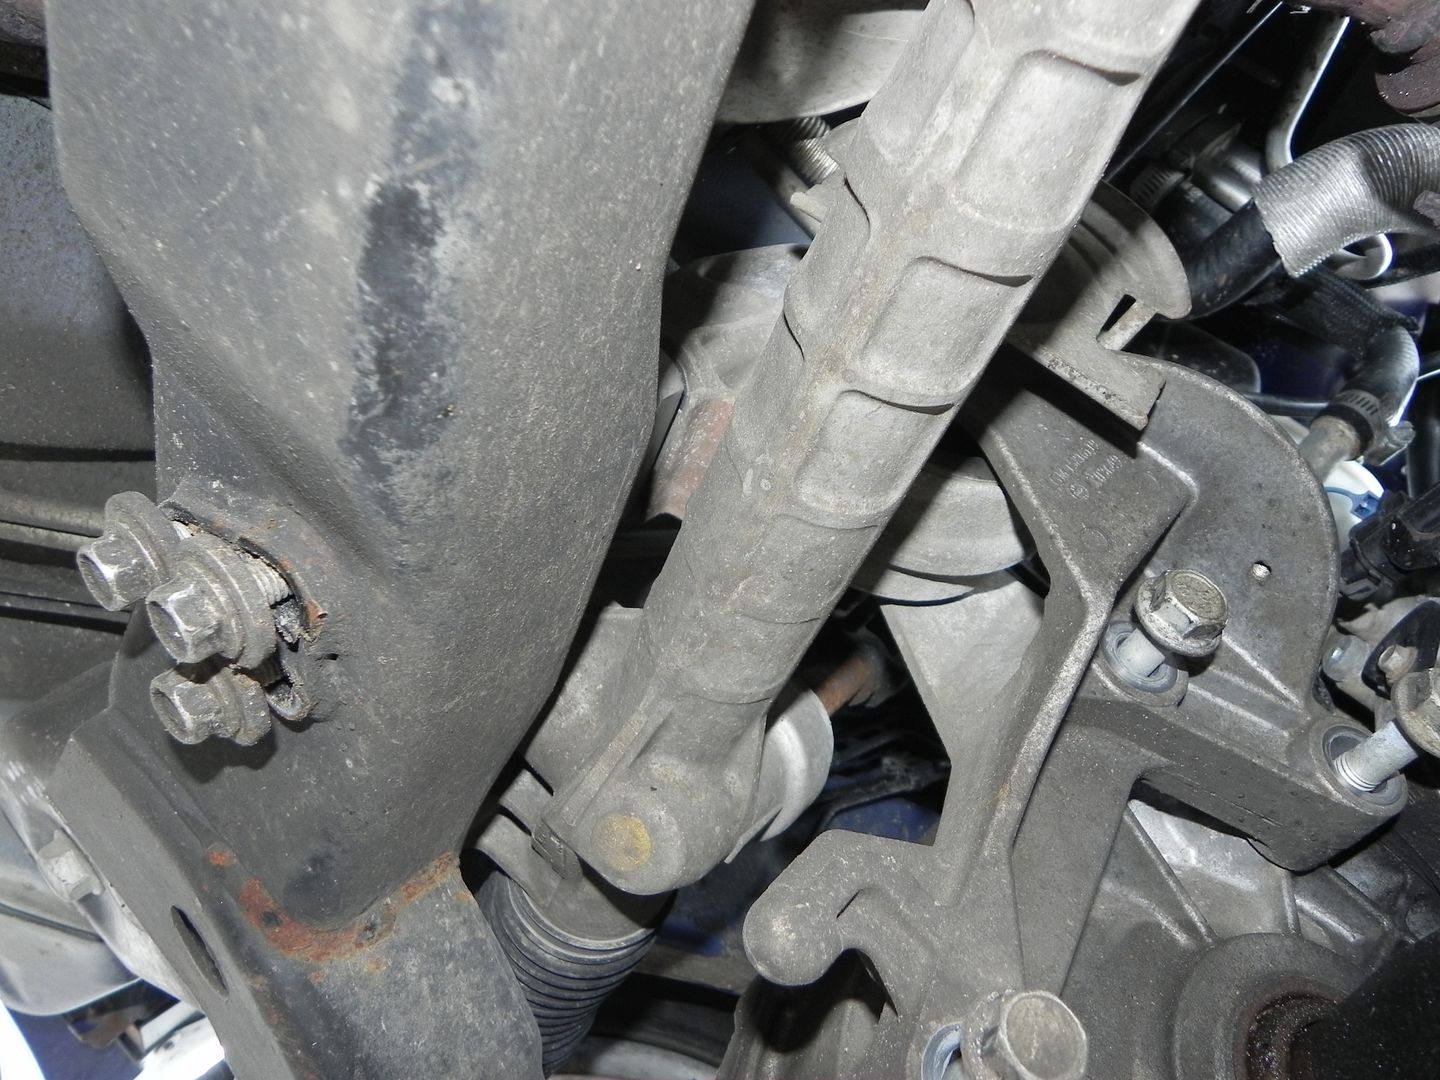
Then release the three rear motor mount bolts that locate the entire rear mount bracket to the transmission bell housing.
3. you will notice the bolts in all these cases have shoulders. That's important. Also don't remove all the bolts from the rear mount bracket. If you do for any reason, be sure to start each bolt by hand /don't tighten one bolt hard and then the next. The bracket will distort and make installation difficult.
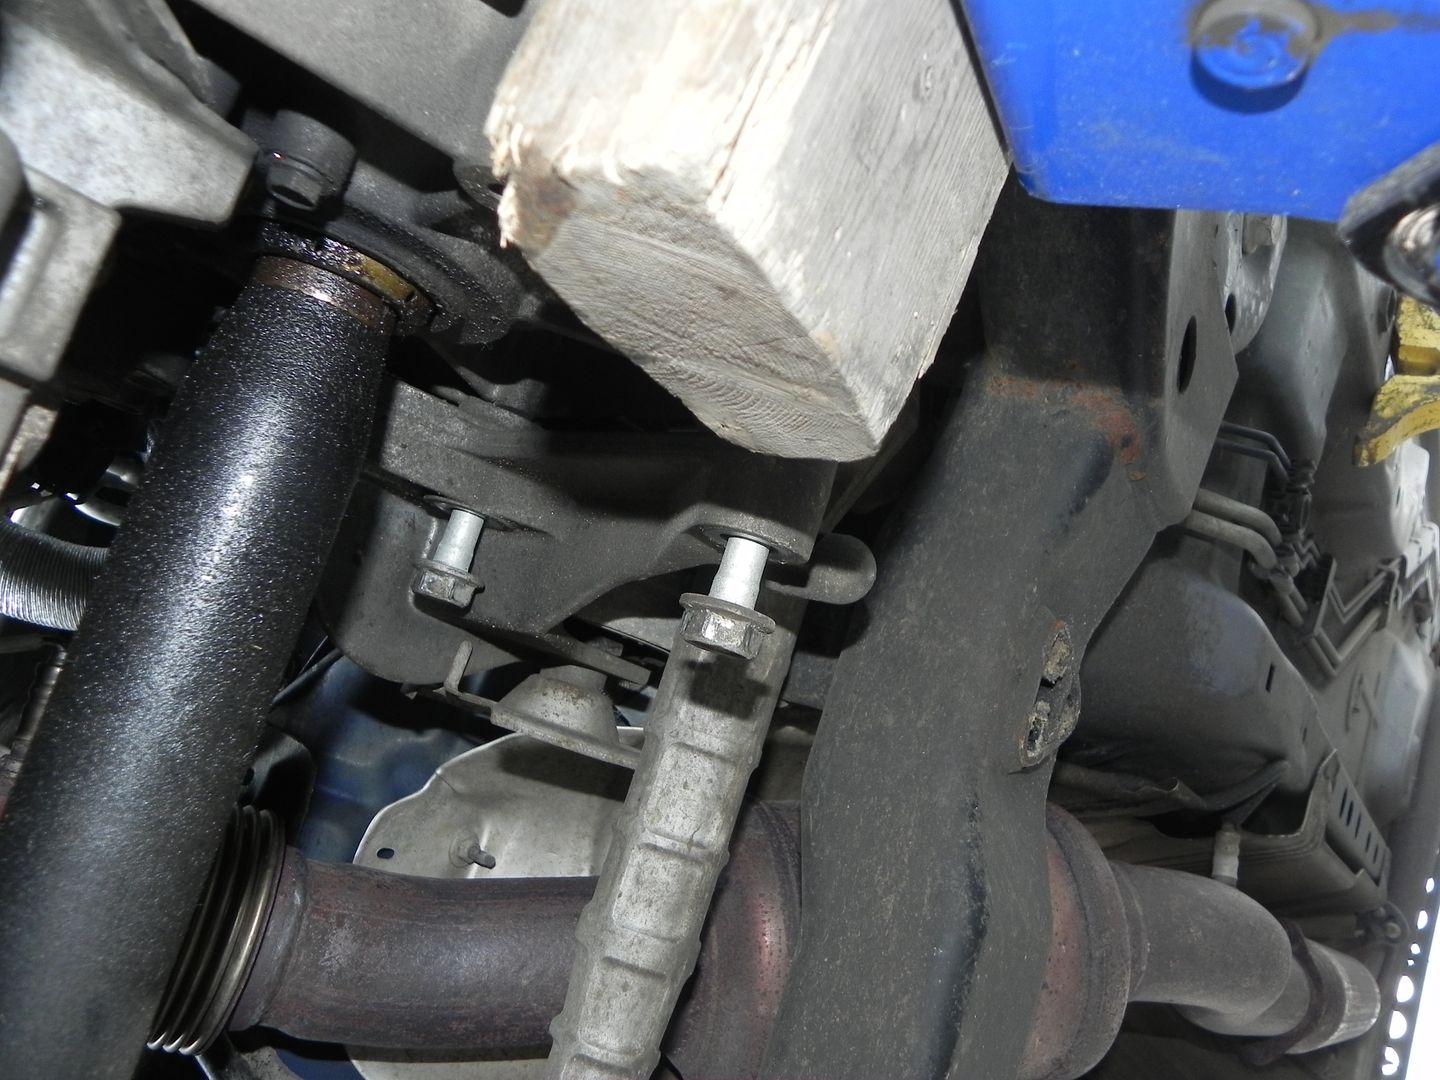
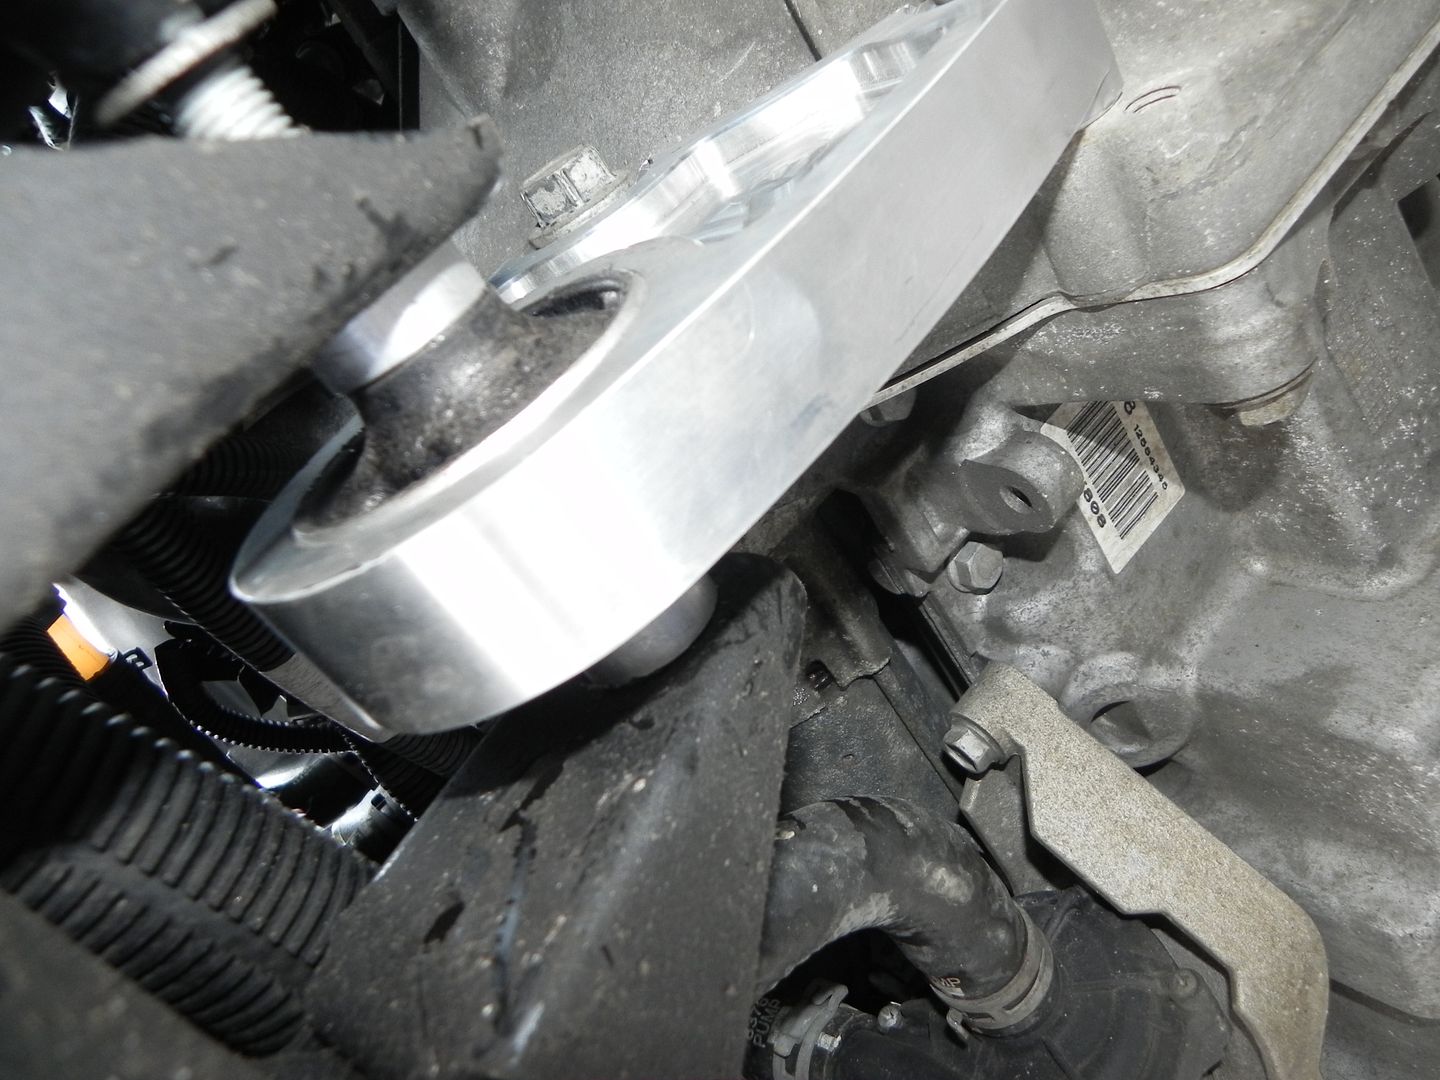
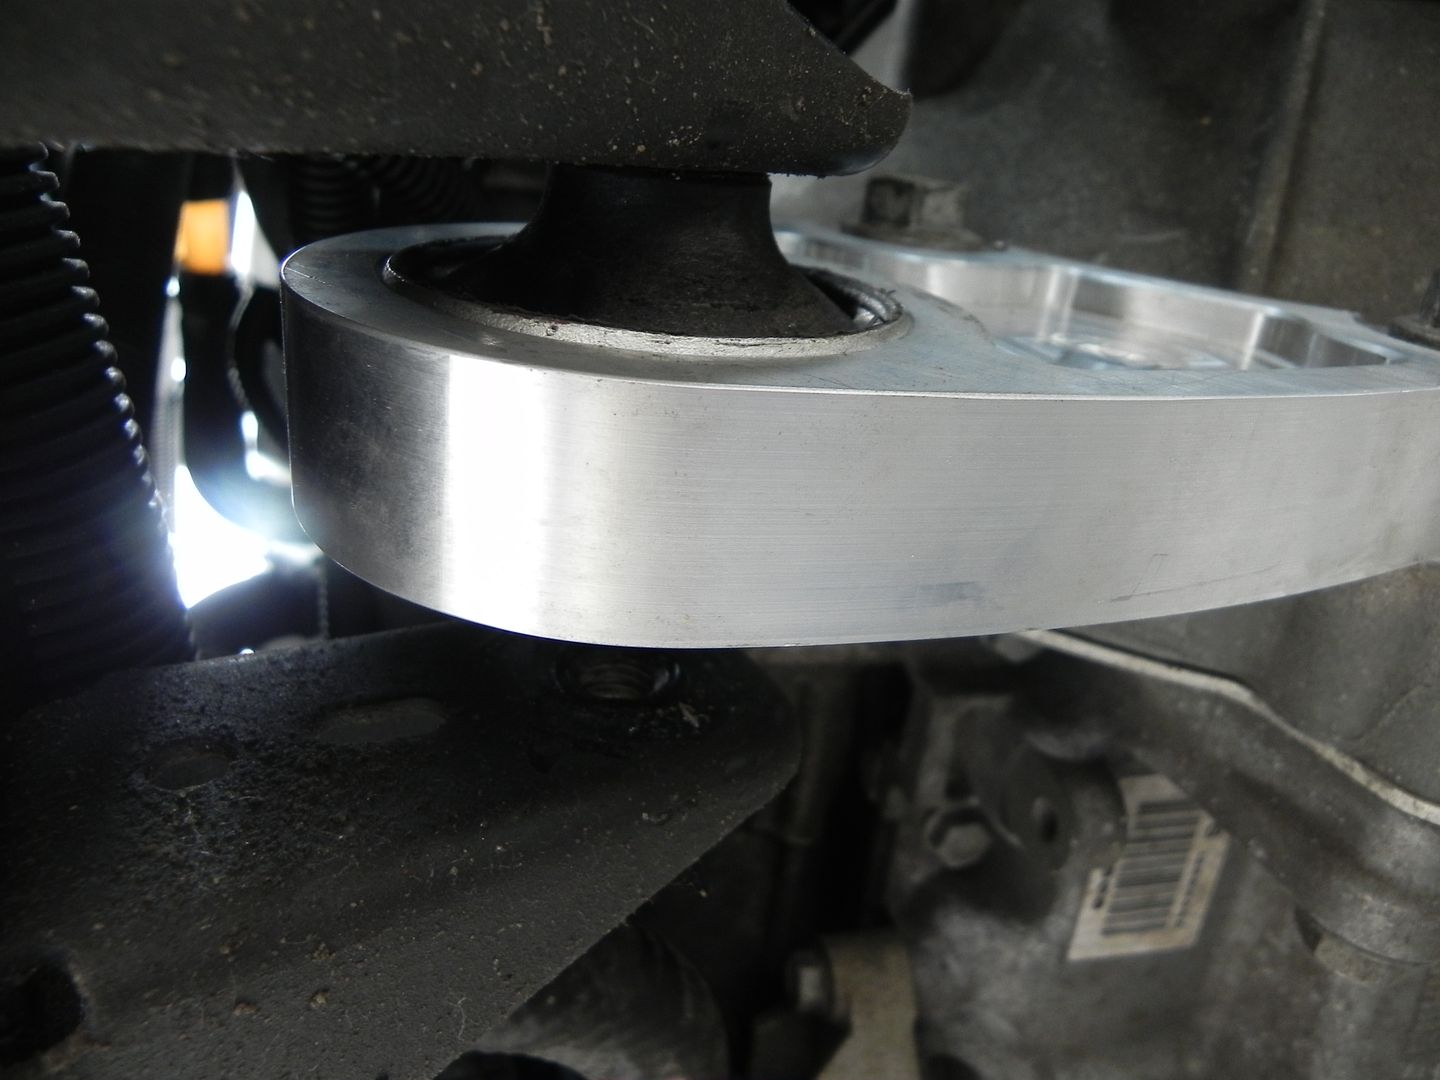
4. Now raise the rear of the motor (the jack is already in position) and install the keyhole spacer (stage 1). Then lower the motor and replace the 3 long pedestal bolts by hand, not tight.
4 A
NOTE:If installing stage 2 mounts remove the entire rear mount bracket, (use a Christmas tree fastener removal tool to remover the 02 sensor clips) install the new rear mount, which does not require a key hole spacer, do not tighten the cross bolt and the re-install the bracket and mount assembly.
5. Go to the front. Reposition the jack so it is forward under the pan/bell housing area.
6. Remove the front mount completely.
7. Then offer up the new front mount and start the two bolts that secure the mount to the transmission. Snug them up but not tight.
8. Now lower the motor so the mount lines up with the through bolt holes, place the spacers provided, one each side, and snug the cross bolt.
NOTE: there are four mounts on any delta. The front and rear ones are quite firm, rubber inserts with voids.
the top mounts, are actually referred to as �torque axis� mounts. The passenger one is quite firm the drivers side is very soft. Very soft.
so when on jack stands, its possible for the motor to slide over to the soft side and compress the new front mount to one side.
This could be left that way, and stack the two spacers together, BUT if you do this the motor will not be �balanced� on the mounts and excessive vibration may result. repostion the jack, and using a lever move the motor assembly back to the passenger side and place the spacers correctly on each side of the mount.
9. Now all the mounts are in place, torque all the fasteners, starting the rear lower, the rear bracket, the front mount and then back up to the top.
average torque is about 40 ft lbs...individual specific torque values can be found by searching 37/42/76 etc.
10. If working on a 2.2 f23 manual, with our F23 mount set, this is a composite mount with 4 bolt mounting to trans and engine. On the F23 access is convenient, and you can loosen the driver side mount bracket bolts (there are three) to help balance the motor. I do not do this on LSJ and LNF assemblies, the drivers side mount is very soft and compliant.
Hope this helps.
The principle behind the mounts is to rotate the motor up at the back, down at the front, to move the axle out put shafts in better alignment with the axle output flange at the knuckle. The rotation was developed and engineered with help from GM, when I was under contract to produce Cobalt road race cars in 2004/2005.
So you know.
As OTT copied my mounts, under an agreement they made with me, and which later OTT reneged totally with great prejudice to me,if their mounts give trouble go see them.
That said, I will be happy to help and advise customers and non customers, who have issues with mount installation, as best I can, My mounts are different .
I also know a lot more about these mounts than most folks do. Its easy, I drive the delta platform and work on the platform every day servicing customer cars, and working on race cars and my own car.
Like ZZP we have a full service race shop. Unlike ZZP we dont build customer motors , I rely on Kurt Urban for LS motors, and GMR for my LSJ stuff, and a local engine re build shop for machine work.
So understand that the rotated mount concept exploits the soft driver side torque axis mount, and repositions the passenger side mount as the shoulder bolts that secure these mounts have a large hole in the mount that permits relocation.
Please note that the automatic transmission Delta's do not need this type of rotation, the car was designed for the automatic, and the manual transmissions happen to be about 15 mm out of alignment by comparison.
Here we go:
Today I installed a stage 1 mount in an LSJ . I did it,not on the hoist as we normally do, but on two jack stands, figuring that is the way most folks will do it on their own.
1. First job is to get the car properly secured , well up in the air and on jack stands. Then using a piece of wood to spread jacking load, gently support the engine at the transmission differential area.
Now go up top and release a couple/three turns the top passenger side mount bolts. (15 mm socket)
2. Now go underneath and remove the 3 bolts that go through the cradle pedestal (15 mm socket)
Then release the three rear motor mount bolts that locate the entire rear mount bracket to the transmission bell housing.
3. you will notice the bolts in all these cases have shoulders. That's important. Also don't remove all the bolts from the rear mount bracket. If you do for any reason, be sure to start each bolt by hand /don't tighten one bolt hard and then the next. The bracket will distort and make installation difficult.
4. Now raise the rear of the motor (the jack is already in position) and install the keyhole spacer (stage 1). Then lower the motor and replace the 3 long pedestal bolts by hand, not tight.
4 A
NOTE:If installing stage 2 mounts remove the entire rear mount bracket, (use a Christmas tree fastener removal tool to remover the 02 sensor clips) install the new rear mount, which does not require a key hole spacer, do not tighten the cross bolt and the re-install the bracket and mount assembly.
5. Go to the front. Reposition the jack so it is forward under the pan/bell housing area.
6. Remove the front mount completely.
7. Then offer up the new front mount and start the two bolts that secure the mount to the transmission. Snug them up but not tight.
8. Now lower the motor so the mount lines up with the through bolt holes, place the spacers provided, one each side, and snug the cross bolt.
NOTE: there are four mounts on any delta. The front and rear ones are quite firm, rubber inserts with voids.
the top mounts, are actually referred to as �torque axis� mounts. The passenger one is quite firm the drivers side is very soft. Very soft.
so when on jack stands, its possible for the motor to slide over to the soft side and compress the new front mount to one side.
This could be left that way, and stack the two spacers together, BUT if you do this the motor will not be �balanced� on the mounts and excessive vibration may result. repostion the jack, and using a lever move the motor assembly back to the passenger side and place the spacers correctly on each side of the mount.
9. Now all the mounts are in place, torque all the fasteners, starting the rear lower, the rear bracket, the front mount and then back up to the top.
average torque is about 40 ft lbs...individual specific torque values can be found by searching 37/42/76 etc.
10. If working on a 2.2 f23 manual, with our F23 mount set,
this is a composite mount with 4 bolt mounting to trans and engine. On the F23 access is convenient, and you can loosen the driver side mount bracket bolts (there are three) to help balance the motor. I do not do this on LSJ and LNF assemblies, the drivers side mount is very soft and compliant.Hope this helps.

The following users liked this post:
ionRL_585 (12-03-2021)

 06-10-2011, 02:54 PM
#6

Nice write up John!!
Folks on here forget the very important step of loosening the 3-upper engine mount bolts. I myself had that issue a year or so ago when I installed my mounts until a very helpful member let me in on the tip.
Folks on here forget the very important step of loosening the 3-upper engine mount bolts. I myself had that issue a year or so ago when I installed my mounts until a very helpful member let me in on the tip.
 06-22-2011, 01:21 AM
#8

Great write-up! I used this while installing my ZZP mounts. How bad/long should my car vibrate for? It's been a 3-4 days now and at idle my dash shakes a decent amount. From what I understand though the ZZP mounts are "solid rubber". What are yours?
06-22-2011, 07:15 AM
#9
When I installed my powel rotated mount I had next to zero vibration from day one. The only time I feel any vibes at all is when the A/C is on, and still they are minor.
06-22-2011, 09:38 AM
#10
Platinum Member
Great how-to John! Did mine like that about 6 months ago.
Mine vibrates some when I have the rear defroster on. With the AC on - - - not so much.
I have the OTTP knock-off though, before I discovered you.
Mine vibrates some when I have the rear defroster on. With the AC on - - - not so much.
I have the OTTP knock-off though, before I discovered you.
06-22-2011, 02:20 PM
#11
Senior Member
iTrader: (2)

Join Date: 02-26-09
Location: Ontario, Canada
Posts: 1,040
Likes: 0
Received 0 Likes
on
0 Posts
If only we would of had these instructions when installing them it wouldn't of taken forever to get them installed.
Dave - "Hey Darren how long will those take to put in?"
Darren - "Oh only about half an hour"
Man I was pissed that day...haha
Dave - "Hey Darren how long will those take to put in?"
Darren - "Oh only about half an hour"
Man I was pissed that day...haha
 07-22-2011, 03:08 PM
#15
Senior Member

I used this with my ZZP mounts, and it took 2 weeks to break in. But overall was not that bad, took 2 people to make sure the trans was lined up, but eh. FYI, if you have a bigger DP this makes it a royal PITA!
 03-02-2012, 12:56 PM
#19
New Member

Join Date: 03-01-12
Location: uxbridge
Posts: 176
Likes: 0
Received 0 Likes
on
0 Posts
I used the zzp mounts and now over a month they still have a nasty vibration only settled in a small amount. i love the mounts tho what a difference in drive ability. just gotta get used to the concussions from the vibrateing.
03-23-2012, 03:43 PM
#21
New Member
Join Date: 03-01-12
Location: uxbridge
Posts: 176
Likes: 0
Received 0 Likes
on
0 Posts
^^^^^^ strange approach to sell parts, making one feel silly for spending money on something one had hoped would solve one's issues with breaking motor mounts. lol but now you have me interested. =)


