2.0 LSJ Engine: (How-to) Port & Polish your Supercharger!
 03-21-2008, 10:08 PM
#1
Senior Member
Thread Starter
(How-to) Port & Polish your Supercharger!
I'll try & explian this the best I can, This thread on Polishing will help with tools reguired!Detailing Polishing 101 (How-To) - Cobalt SS Network
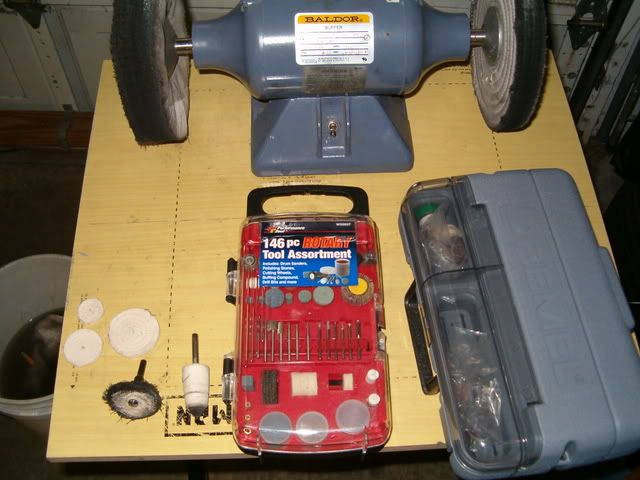
1st some of the tools
1 dremel
1 dremel kit as seen in Pic #1
In Pic #1 you can see a sanding wheel on the right side of kit with a Yellow top, It is 80 grit & That wheel is the 1 I used the most to do this Job! Actually I wore it down to nothing so if you get 1 >> Get 2, I got that kit at Pep boys automotive. There are also grinding stones & bits in that Kit that are useful!
Pic #1
Ok Now that you Know what you need it's time to start taking apart the supercharger!
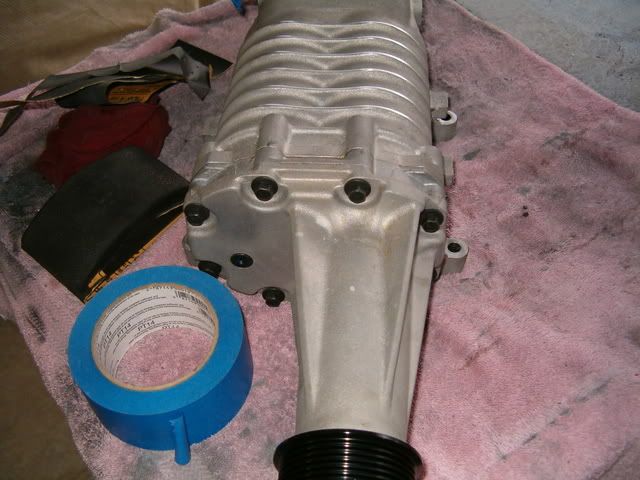
In pic #2 you will see a black drain Plug for the Oil! there is at the most 3 ounces of fluid in the snout you need to drain out that plug & catch in a clean cup or what ever if you plan on reusing it!
Now that the Oil is drained Take out all bolts on the snout, After removing the bolts use a small Flat head screw driver to get the casing to separate as it does some oil may come out so be sure to hold it over a catch pan!
Pic #2
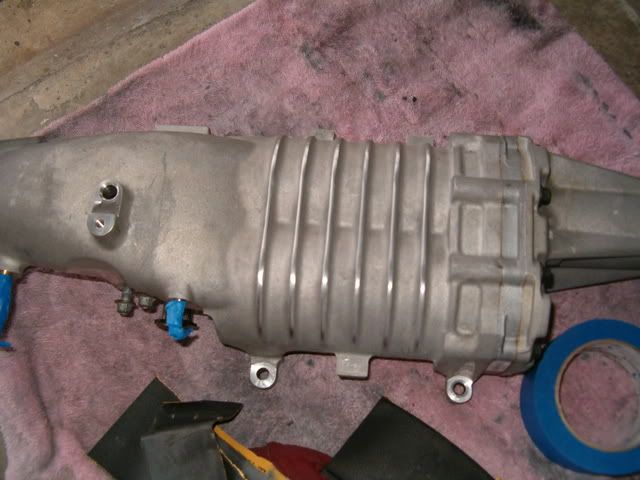
Now that you have all the oil drianed separate the Snout from the rest of the casing by prying it apart just be carefull not to scare up the surface were the 2 meet! With the snout off you will be looking at the drive gears which are mounted to the center plate seen in Pic #3 as the darker gray Plate between the Housing & the Snout! when you pry this plate off the Blades for the supercharger will come with it so be Carefull & slide them straight out!
This step is not that difficult just be easy when separating the the plates!
Pic #3
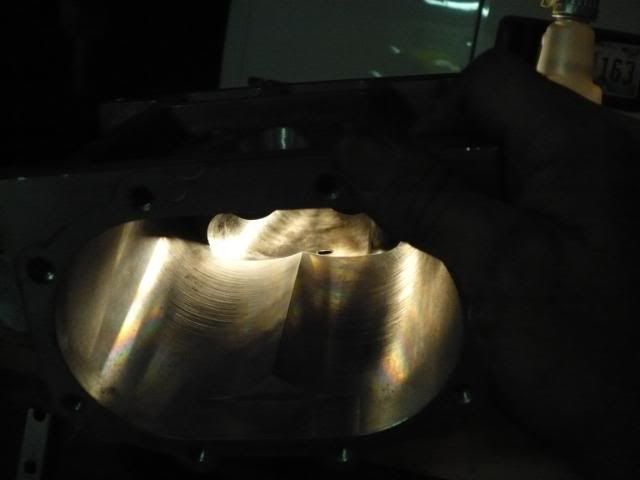
Now you have a supercharger that looks like this from the snout end! In this Picture at the Bottom of the supercharger you can see 2 Holes>> Them are the bearings for the Blades to rest in>> You need to fill them to the top with Paper Towel or Toilet Paper so no Shavings from the sanding gets in them or the bearings will be shot!
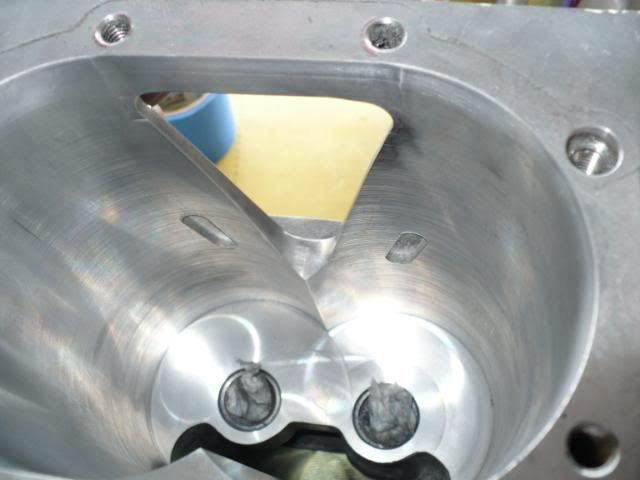
Ok Now it is Time to start Porting & Polishing your Supercharger, looking at it from the neck end you can see all the roughness & Slag inside as seen in Pic #4 & #5
Pic #4
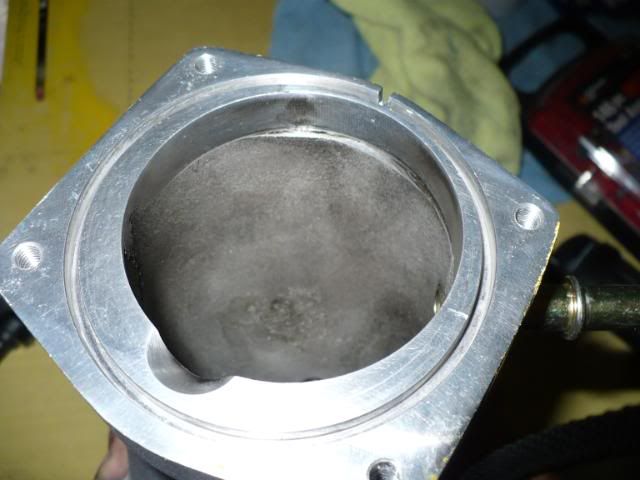
Pic #5
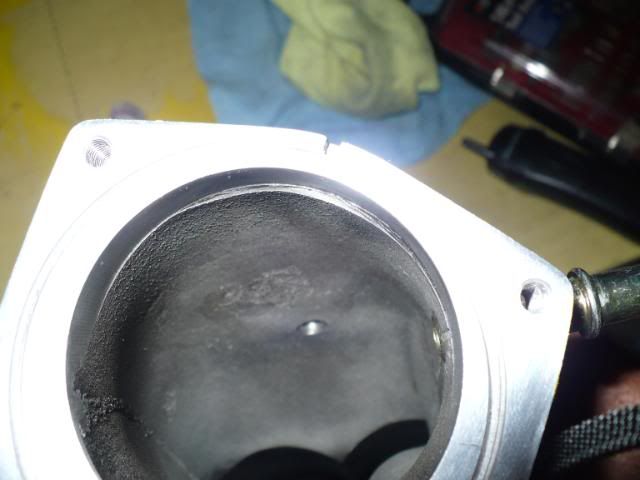
All the rough areas should be sanded down smooth>>> This will reguire you reaching in from both ends the Neck end & the Blade end with your dremel, Just be carefull when reaching in the Blade end not to mess up the machined finish! If you have an extension for you dremel for this step it helps alot when you have big hands!
When sanding inside the Housing you will have to use the different size sanding wheels that come in the dremel Kit! It will be up to you to decide which 1 ones to use where, The 3 I used the Most where the small drum, The large drum & the Yellow paddle wheel as stated above!
Polishing it after sanding follows the guidlines stated in the Polishing link at top of page!
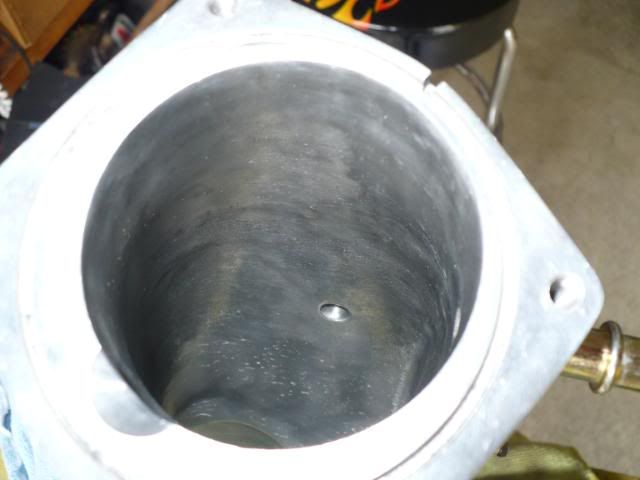
Now you Neck & The inlet Chamber should be Smooth & Looking good as seen in Pics #6 & #7
Pic #6
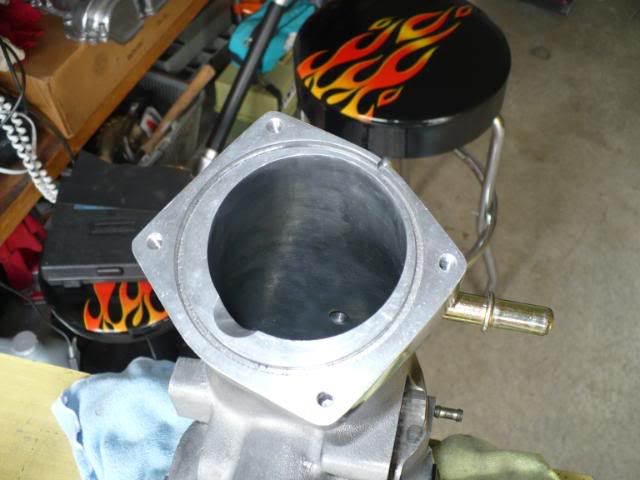
Pic #7
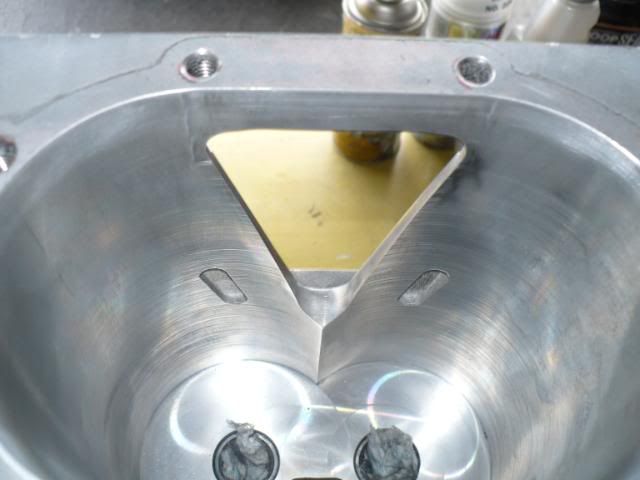
Now it is time for the Outlet port, this is up to you on how Much to remove But removing to much can hurt! I simple took a ruler & mark a Line around the triangle just under 1/8 of a inch all the way around all 3 sides on the bottom side! Now grind the opening to the Lines you put on the Bottom keeping it as straight as possible! when done it will look like pic #8 >> Again be carefull not to hit the machined finish were the Blades go & if you do sand it with some 1000 grit to smooth it back out & dont leave any Metal burrs!
Make sure to Blow out the metal shavings often & to clean it out well before moving to the Polishing! The left over shavings could play hell on your Supercharger if not clean out well!
Now Polish everything with your Polishing wheels & metal Polish to a shine, Then wipe it down with a clean colth & blow out with air! Your supercharger should look like this!
Looking from the Blades back thru the neck!
Looking from the neck end!
just a few more shots!
Now put your supercharger back together the same way you took it apart, remove the tissue from the bearings that you put in Install the Blades! Now line up the up the 2 Dimples on the Snout shaft with the recessed holes on the Main gear drive & slide together>>> then replace your Bolts & refill with Oil.
Your done!
I did this in 1 1/2 days & I would suggest that you practice a little 1st on something to get use to the tools if you are not acustom to sanding with a Dremel!
Happy Modding!
1st some of the tools
1 dremel
1 dremel kit as seen in Pic #1
In Pic #1 you can see a sanding wheel on the right side of kit with a Yellow top, It is 80 grit & That wheel is the 1 I used the most to do this Job! Actually I wore it down to nothing so if you get 1 >> Get 2, I got that kit at Pep boys automotive. There are also grinding stones & bits in that Kit that are useful!
Pic #1
Ok Now that you Know what you need it's time to start taking apart the supercharger!
In pic #2 you will see a black drain Plug for the Oil! there is at the most 3 ounces of fluid in the snout you need to drain out that plug & catch in a clean cup or what ever if you plan on reusing it!
Now that the Oil is drained Take out all bolts on the snout, After removing the bolts use a small Flat head screw driver to get the casing to separate as it does some oil may come out so be sure to hold it over a catch pan!
Pic #2
Now that you have all the oil drianed separate the Snout from the rest of the casing by prying it apart just be carefull not to scare up the surface were the 2 meet! With the snout off you will be looking at the drive gears which are mounted to the center plate seen in Pic #3 as the darker gray Plate between the Housing & the Snout! when you pry this plate off the Blades for the supercharger will come with it so be Carefull & slide them straight out!
This step is not that difficult just be easy when separating the the plates!
Pic #3
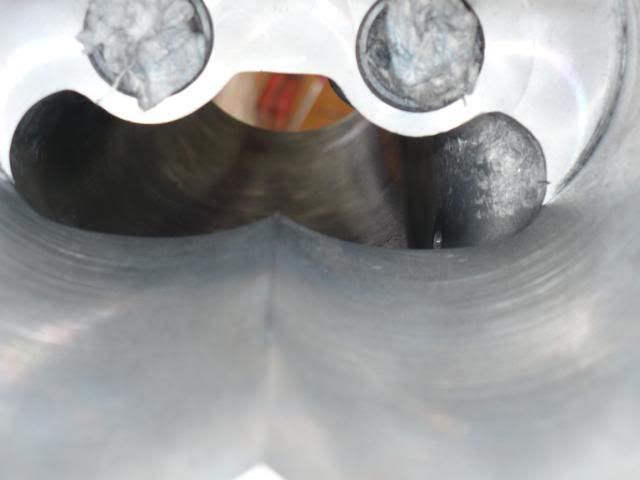
Now you have a supercharger that looks like this from the snout end! In this Picture at the Bottom of the supercharger you can see 2 Holes>> Them are the bearings for the Blades to rest in>> You need to fill them to the top with Paper Towel or Toilet Paper so no Shavings from the sanding gets in them or the bearings will be shot!
Ok Now it is Time to start Porting & Polishing your Supercharger, looking at it from the neck end you can see all the roughness & Slag inside as seen in Pic #4 & #5
Pic #4
Pic #5
All the rough areas should be sanded down smooth>>> This will reguire you reaching in from both ends the Neck end & the Blade end with your dremel, Just be carefull when reaching in the Blade end not to mess up the machined finish! If you have an extension for you dremel for this step it helps alot when you have big hands!
When sanding inside the Housing you will have to use the different size sanding wheels that come in the dremel Kit! It will be up to you to decide which 1 ones to use where, The 3 I used the Most where the small drum, The large drum & the Yellow paddle wheel as stated above!
Polishing it after sanding follows the guidlines stated in the Polishing link at top of page!
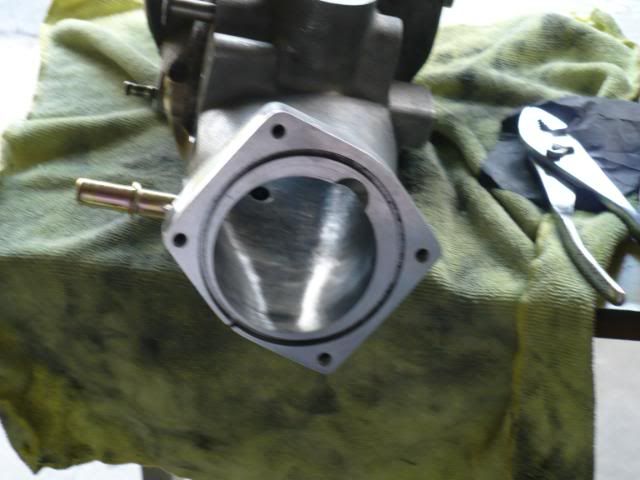
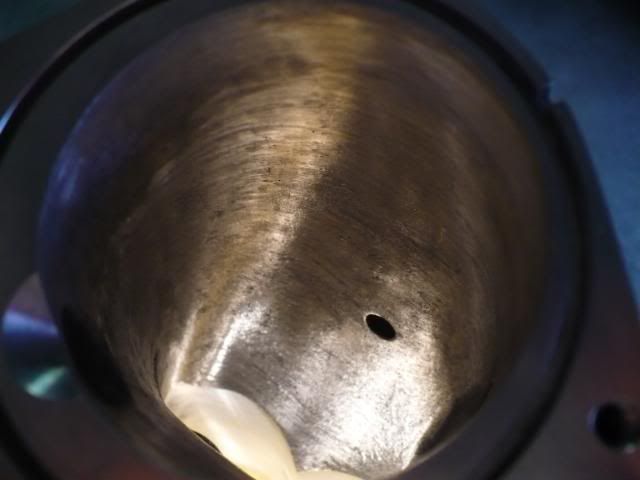
Now you Neck & The inlet Chamber should be Smooth & Looking good as seen in Pics #6 & #7
Pic #6
Pic #7
Now it is time for the Outlet port, this is up to you on how Much to remove But removing to much can hurt! I simple took a ruler & mark a Line around the triangle just under 1/8 of a inch all the way around all 3 sides on the bottom side! Now grind the opening to the Lines you put on the Bottom keeping it as straight as possible! when done it will look like pic #8 >> Again be carefull not to hit the machined finish were the Blades go & if you do sand it with some 1000 grit to smooth it back out & dont leave any Metal burrs!
Make sure to Blow out the metal shavings often & to clean it out well before moving to the Polishing! The left over shavings could play hell on your Supercharger if not clean out well!
Now Polish everything with your Polishing wheels & metal Polish to a shine, Then wipe it down with a clean colth & blow out with air! Your supercharger should look like this!
Looking from the Blades back thru the neck!
Looking from the neck end!
just a few more shots!
Now put your supercharger back together the same way you took it apart, remove the tissue from the bearings that you put in Install the Blades! Now line up the up the 2 Dimples on the Snout shaft with the recessed holes on the Main gear drive & slide together>>> then replace your Bolts & refill with Oil.
Your done!
I did this in 1 1/2 days & I would suggest that you practice a little 1st on something to get use to the tools if you are not acustom to sanding with a Dremel!
Happy Modding!
Last edited by TommyP; 05-17-2012 at 09:34 PM.


 03-24-2008, 02:29 PM
#6
Senior Member
Thread Starter
Haven't been to the dyno again but I have been on the dyno before this with no other mods done, so when I do I will lett you Know! Some of the gains are quicker response>> Hp not so much>> but cooler intakes temps which help alot! Plus it is free if you do it yourself!
Plus it is free if you do it yourself!
03-27-2008, 11:19 AM
#7
Senior Member
Join Date: 10-01-06
Location: Maidstone, SK
Posts: 5,134
Likes: 0
Received 0 Likes
on
0 Posts
As I mentioned in most of the intake threads, the gains from this are most evident when using a smaller pulley (below 2.9/3.0").
Just like a bigger intake, a ported throat allows for less restriction though the inlet passage.
I'd get into the idea of absolute vacuum, but it's best to just try to accept that a bigger intake, TB, and inlet passage is going to allow for better gains when pushing the blower hard.
On another note, take a close look at the last picture. Notice it's not 'polished' to a mirror finish. This is because the air traveling though is in a laminar vacuum state. Mirror polishing won't actually provide any gains. A simple sanding to ~1000grit is generally good enough.
BTW, good write up. It's about time someone mentioned this here.
03-27-2008, 12:09 PM
#8
Senior Member
Thread Starter
As I mentioned in most of the intake threads, the gains from this are most evident when using a smaller pulley (below 2.9/3.0").
Just like a bigger intake, a ported throat allows for less restriction though the inlet passage.
I'd get into the idea of absolute vacuum, but it's best to just try to accept that a bigger intake, TB, and inlet passage is going to allow for better gains when pushing the blower hard.
On another note, take a close look at the last picture. Notice it's not 'polished' to a mirror finish. This is because the air traveling though is in a laminar vacuum state. Mirror polishing won't actually provide any gains. A simple sanding to ~1000grit is generally good enough.
BTW, good write up. It's about time someone mentioned this here.
Just like a bigger intake, a ported throat allows for less restriction though the inlet passage.
I'd get into the idea of absolute vacuum, but it's best to just try to accept that a bigger intake, TB, and inlet passage is going to allow for better gains when pushing the blower hard.
On another note, take a close look at the last picture. Notice it's not 'polished' to a mirror finish. This is because the air traveling though is in a laminar vacuum state. Mirror polishing won't actually provide any gains. A simple sanding to ~1000grit is generally good enough.
BTW, good write up. It's about time someone mentioned this here.

 04-29-2008, 04:32 PM
#11
Senior Member
Join Date: 10-01-06
Location: Maidstone, SK
Posts: 5,134
Likes: 0
Received 0 Likes
on
0 Posts
04-29-2008, 04:34 PM
#12
Senior Member
 05-14-2008, 11:16 AM
#16
Senior Member

Join Date: 07-21-07
Location: Florida
Posts: 3,608
Likes: 0
Received 0 Likes
on
0 Posts
 07-08-2008, 11:19 PM
#18
Senior Member

Join Date: 05-13-08
Location: up my own ass
Posts: 2,050
Likes: 0
Received 0 Likes
on
0 Posts
i just finished mine last week. i did a mild port job. a lil less than 1/8th of an inch on the 2 sides of the triangle and then a mild port on the snout part. i feel a bit more torque down low on my stock pulley. also its a tad louder. love this mod.
 07-10-2008, 02:39 PM
#22
Senior Member
Thread Starter
I haven't been back to the dyno yet, but the whine starts alot earlier & the response is alot better & My IAT2 temps dropped right at 10 degrees with having the dual pass system & a Dual Pass H/E along with this porting it runs as cool as a cucumber!
No problem anytime
No problem anytime
 02-22-2009, 01:19 AM
#25
Senior Member
Thread Starter
No you will see when you get the blower out & apart, where the blades sit it is machined from the factory leave it alone. The triangle just take out maybe 1/8 inch all the way around!

