Other/Misc: Retrofit Heated Mirrors **(56k Run Away)**
 11-27-2010, 02:33 PM
#1
Member
Thread Starter

Join Date: 06-29-08
Location: Minnesota
Posts: 327
Likes: 0
Received 0 Likes
on
0 Posts
Retrofit Heated Mirrors **(56k Run Away)**
Time Needed: Weekend (easily less but I sidetracked easily)
Level of difficulty: Moderate
Equipment needed:
Dremel
10mm socket
7mm socket
Screwdriver flat & philips
ATM Add-A-Circuit
Spare fuse
Extreme weather adhesive/sealant I used DAP auto/marine
Wire I used 16ga
Flat tool for prying up trim
Pocket knife
Handlebar heaters. These are available at most powersports dealerships make sure to get the sheet type heaters and not the cylindrical ones.
Steps:
1.) Remove door panels. Instructions can be found here
2.) Remove mirrors. There are three bolts on the inside of the door. Unplug all wires.
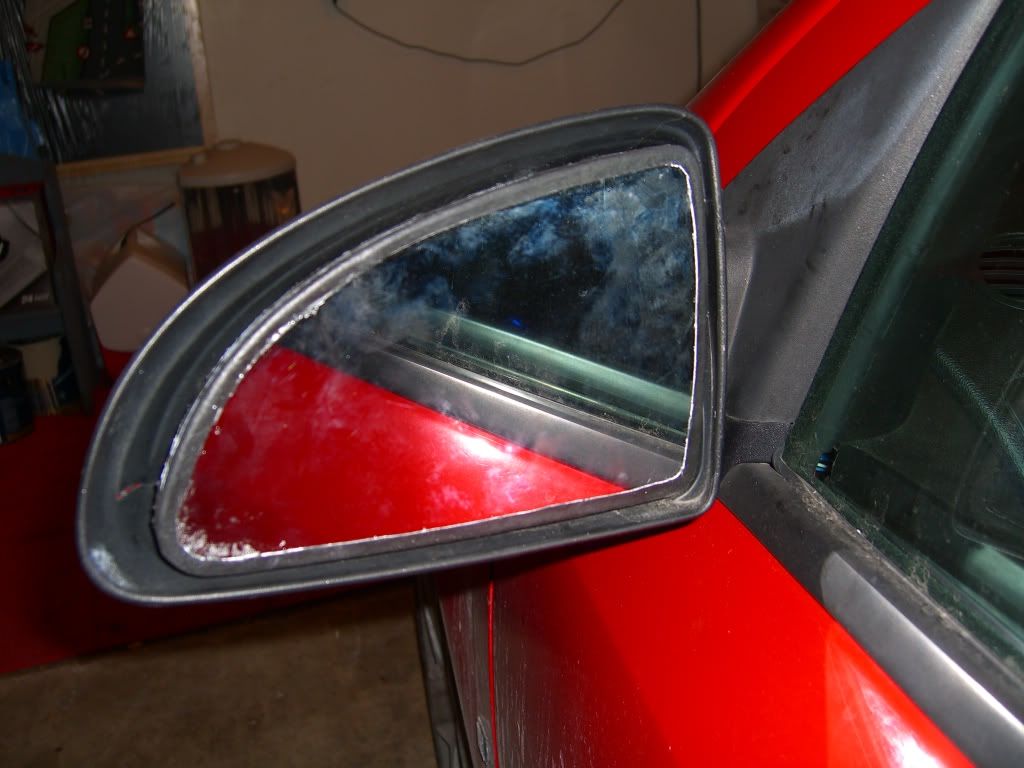
3.) Now that you have the mirrors off you need to take the glass off of the assembly. To do this adjust the mirror so that you fit your fingers behind and pull back the clips, there are 4 sets of 2 clips. Once you get 2 sets off you should be able to just pull it off.
Your mirrors won't look like this yet, this is just to give you an idea of where the clipps are.
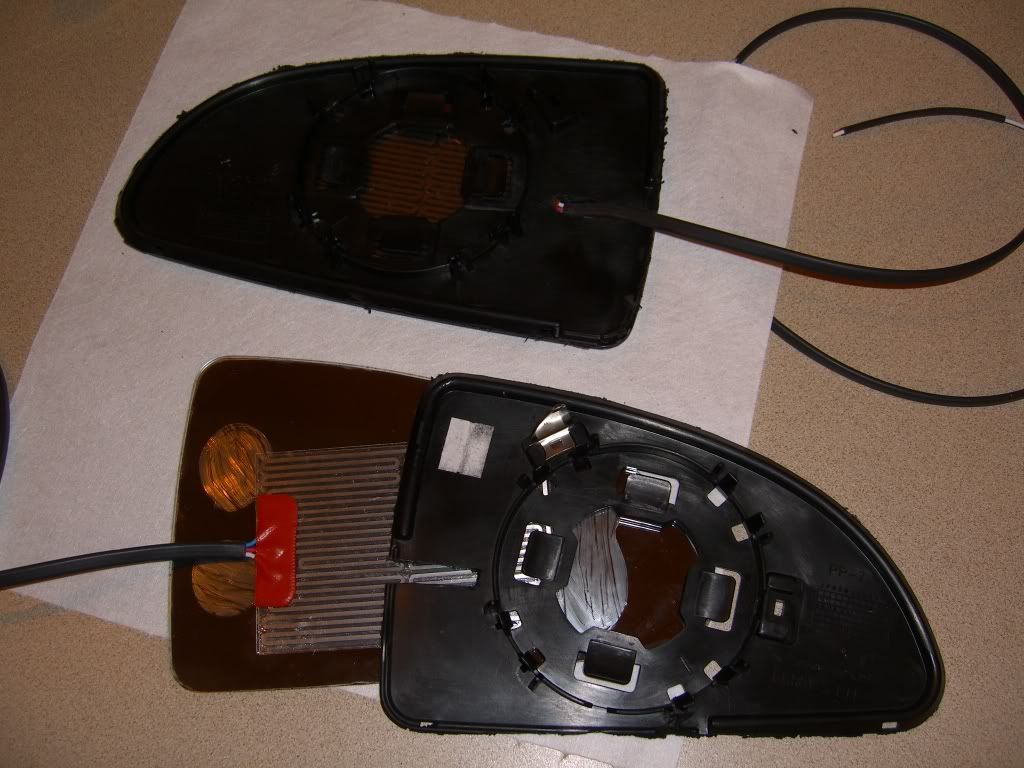
4.)Now that you have the glass by itself you need to get the glass separated from the back plastic. This is were the dremel comes in.
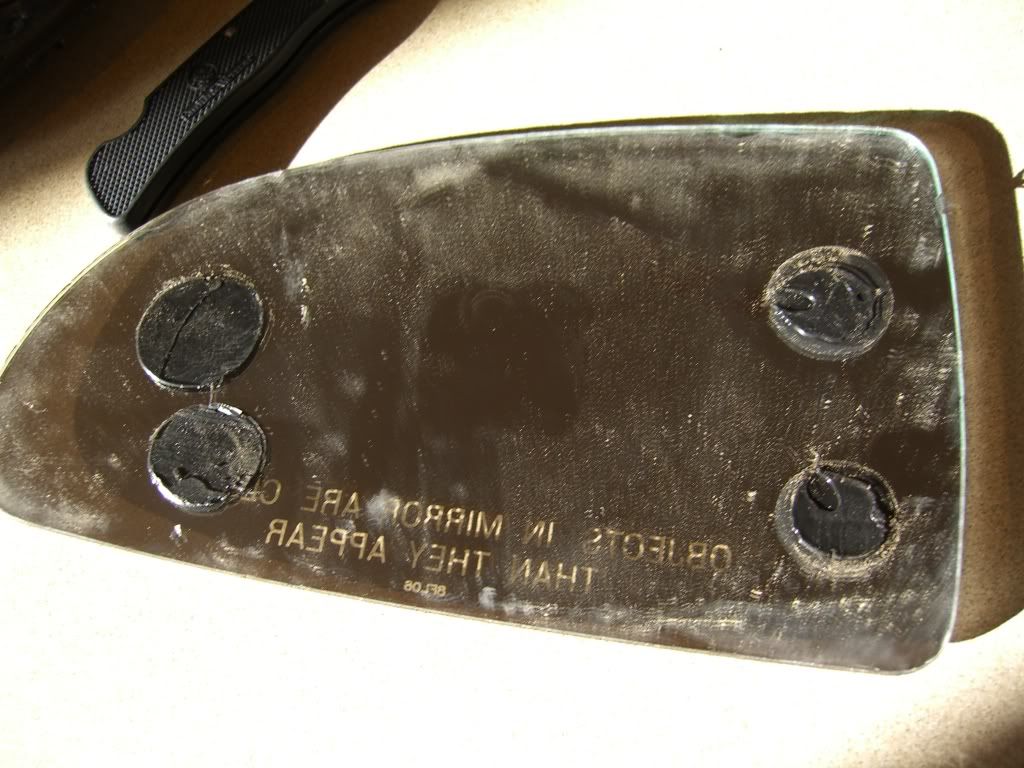
We need to turn this
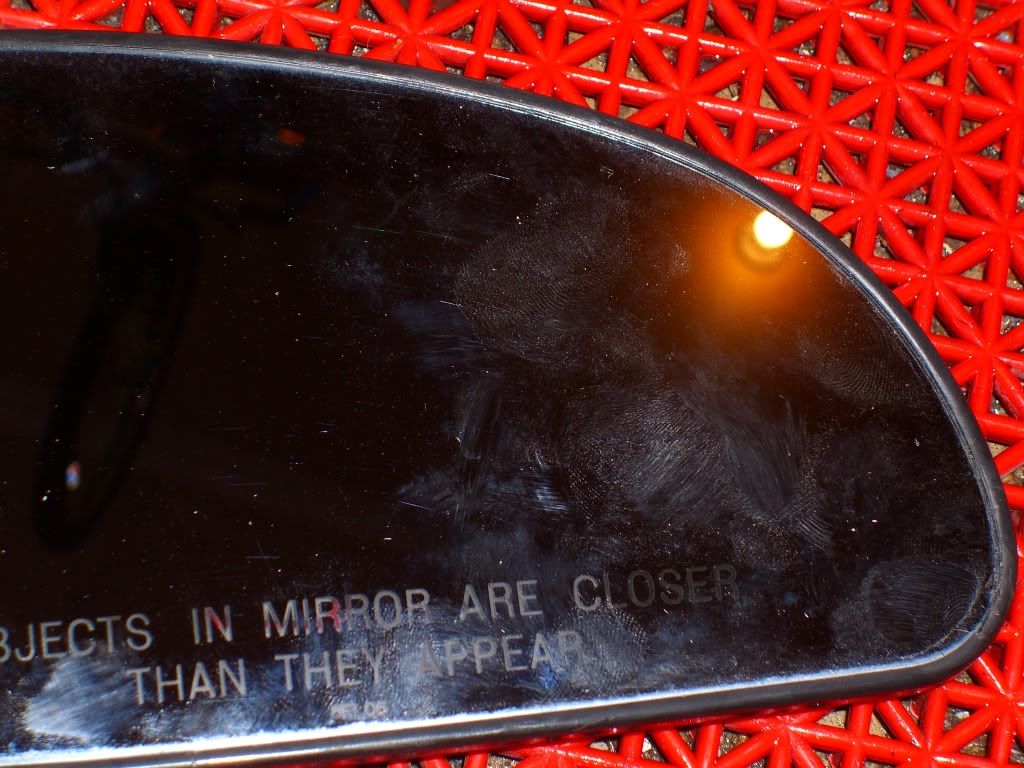
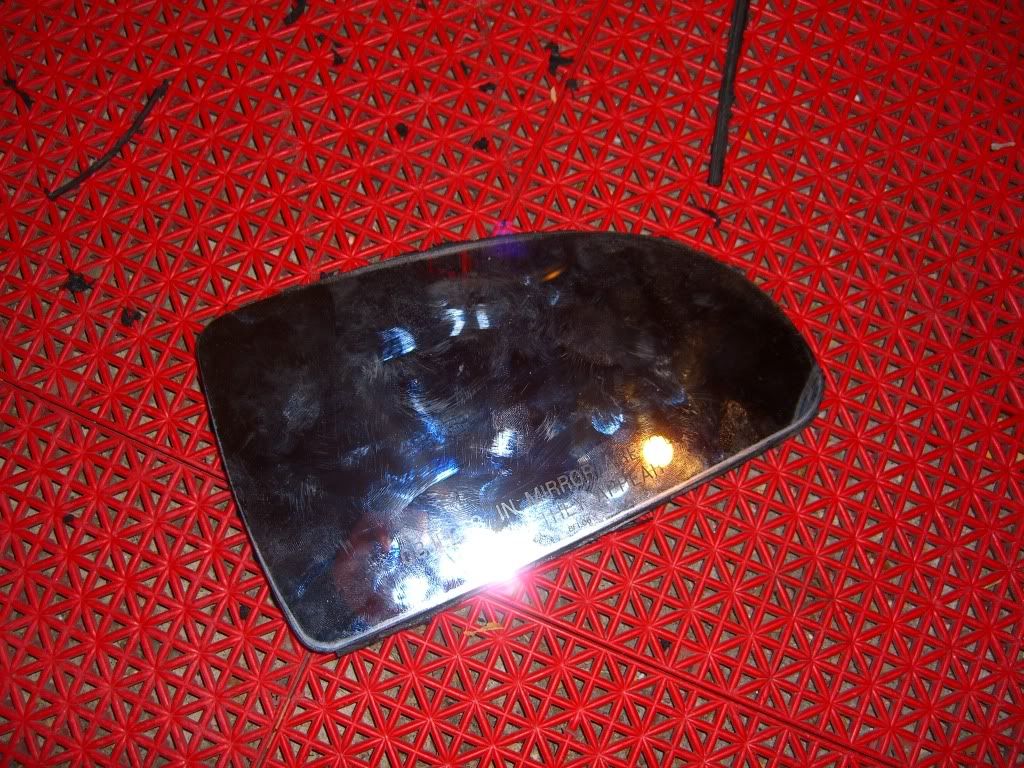
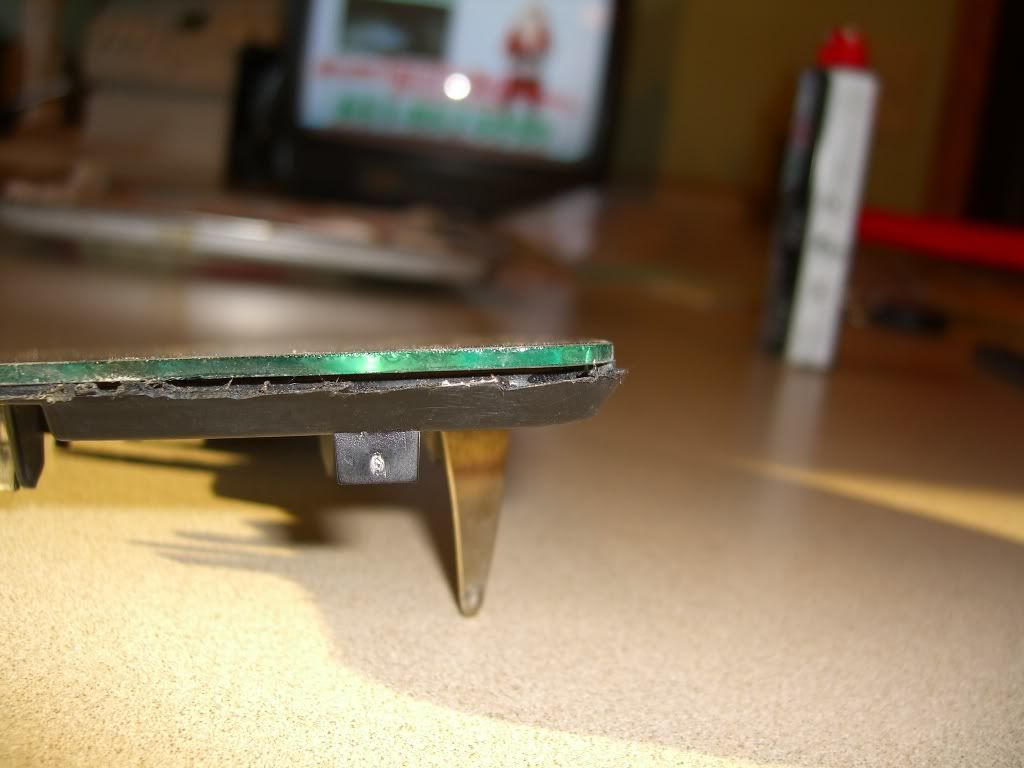
Into this. All you have to do is take your cutting disc, and cut off the lip.
A quick side shot to give an idea where to cut.
5.) Now that you have the lip cut off the only thing holding the glass to it is four dots of silicone adhesive. So just run your knife in-between the glass and the plastic and that should free it up. After you have them separated just use your knife to cut off the extra adhesive.
To give you an idea what your cutting.
6.) Give the mirrors and plastic a good wash, they need to be clean for the heatpads to stick.
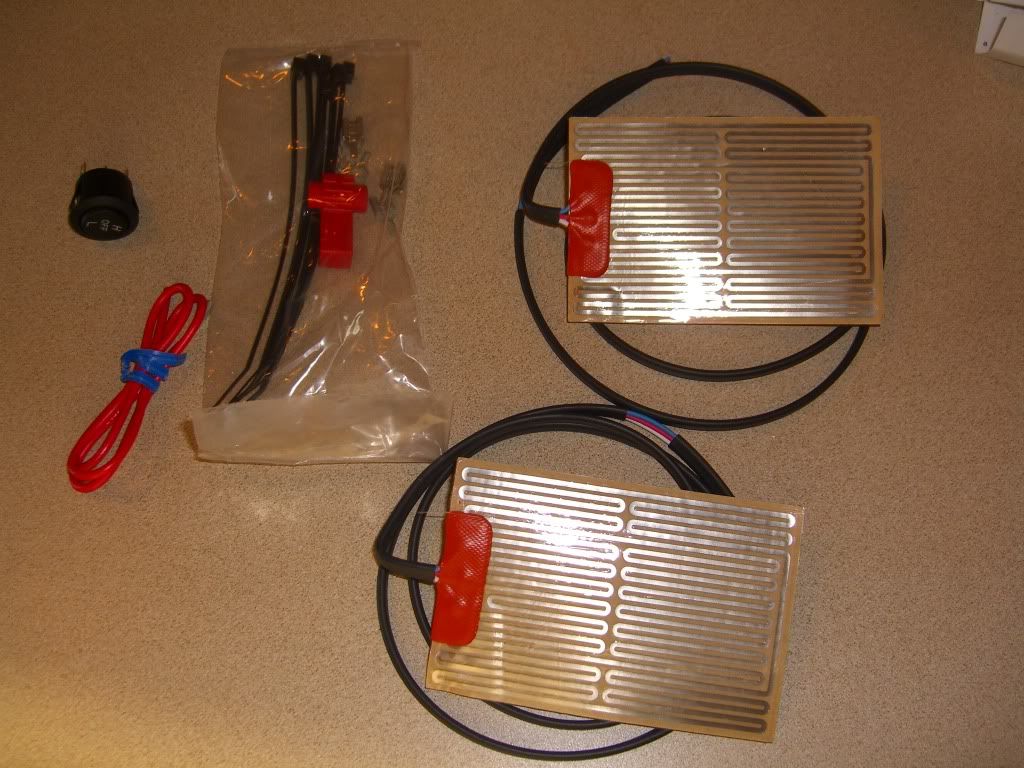
7.) Grab the heater sheets from you kit, remove the wax paper and carefully stick them in the middle of the mirror glass.
The heater kit.
Heaters applied to glass.
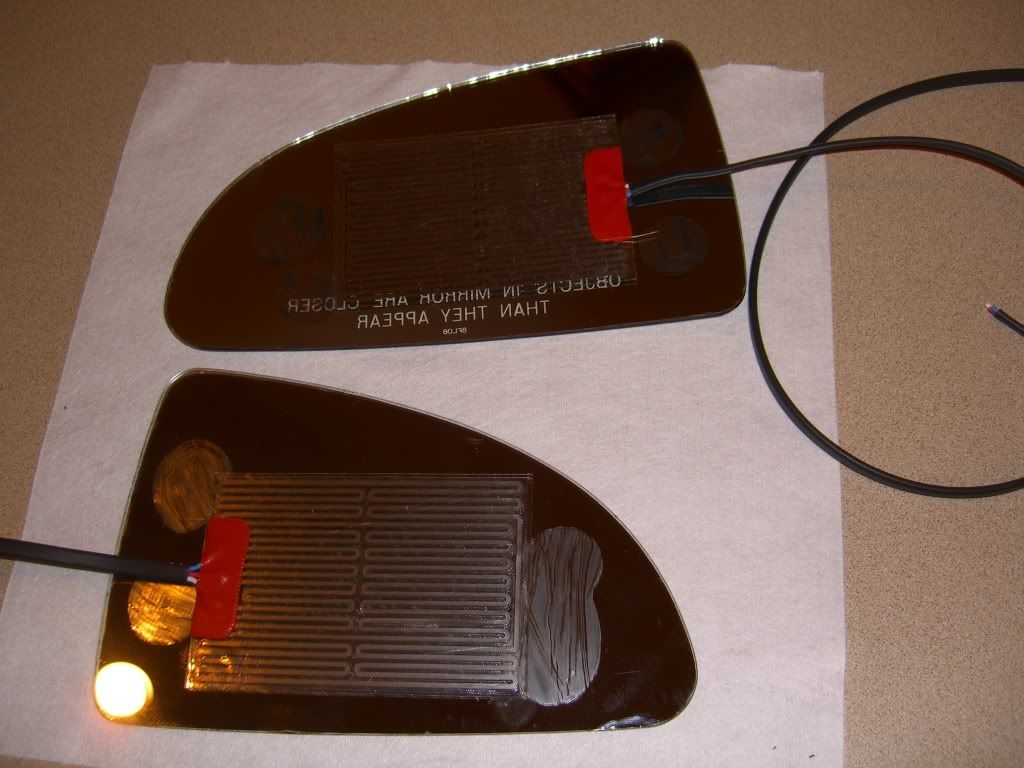
8.) Now grab your dremel again and cut some a slot for the heater wire like pictured below.
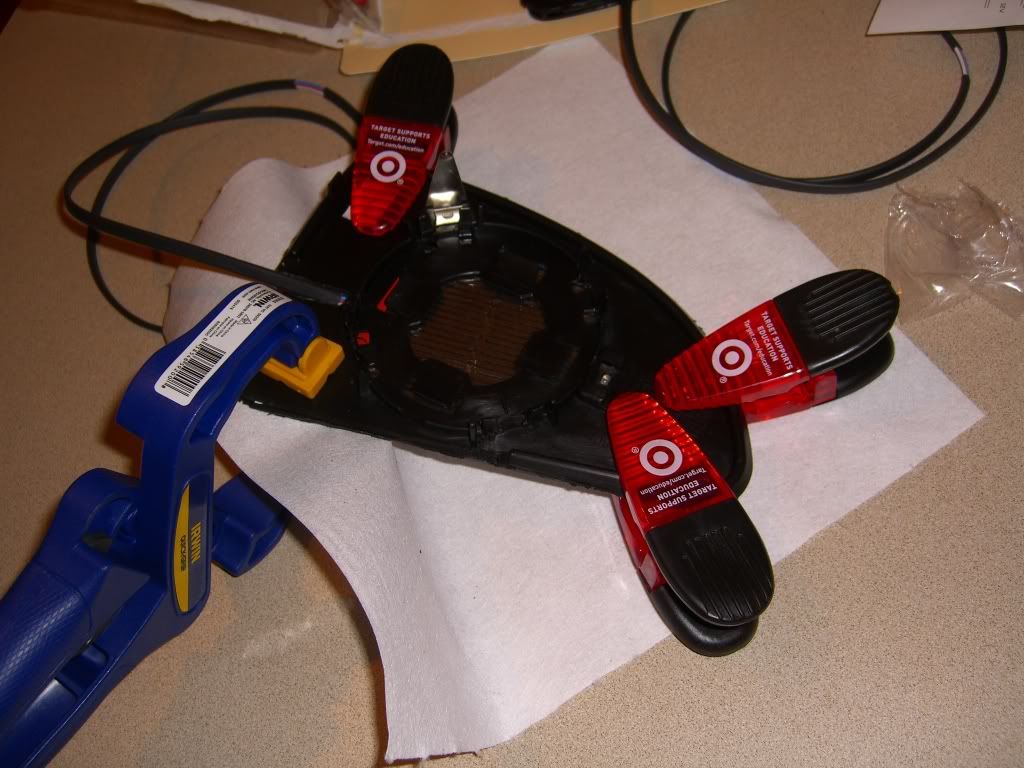
9.) Once you have the back plastic cut to fit the heater wires you can glue it down with whatever adhesive your using. I used a little bit more than what was originally used. After the glue is applied sandwich the two pieces and clamp them together like so.
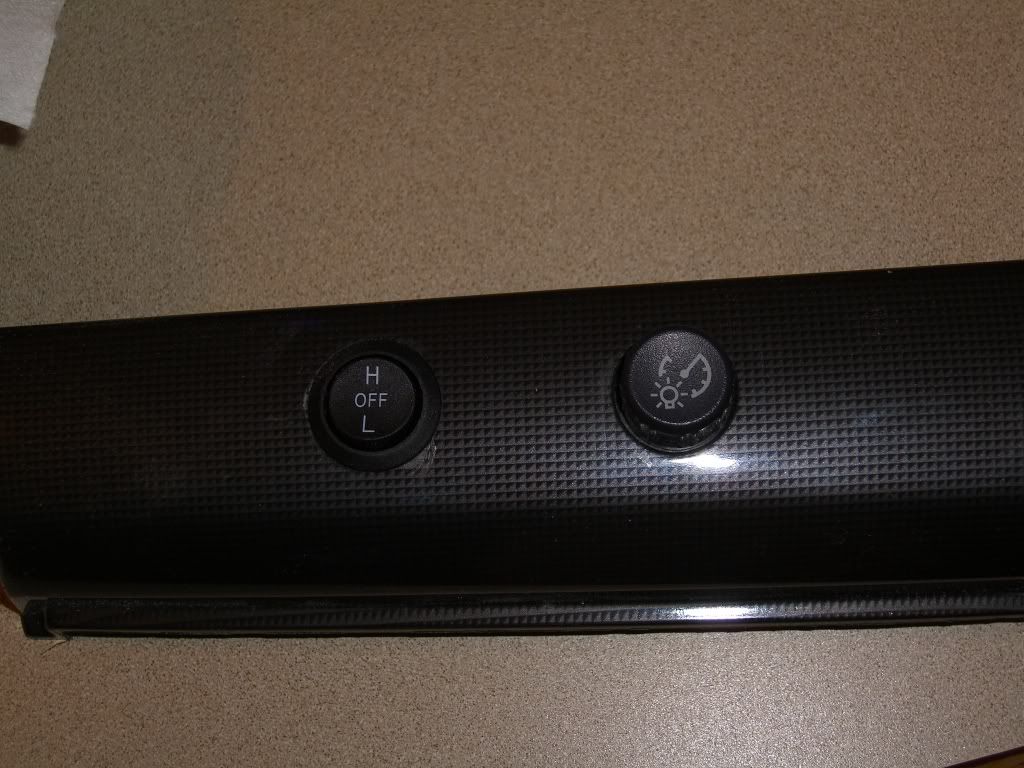
10.) While the glue is drying this would be a good time to fit your switch to the trim piece. My car came without foglights and just a dummy button in its place, so I figured that be as good a place as any to put it. The dummy button is actually molded into the trim piece so you need to grab your dremel again to cut it out. I used the cylindrical stone type grinding bit which worked perfectly for my application. This part will obviously be subjective to which heater kit you use.
This how mine turned out.
11.) Once the glue is dried grab you dremel and cutting disc and remove and excess glue/plastic. I just ran my cutting disk flus with the edge of the glass so there would be no back plastic showing
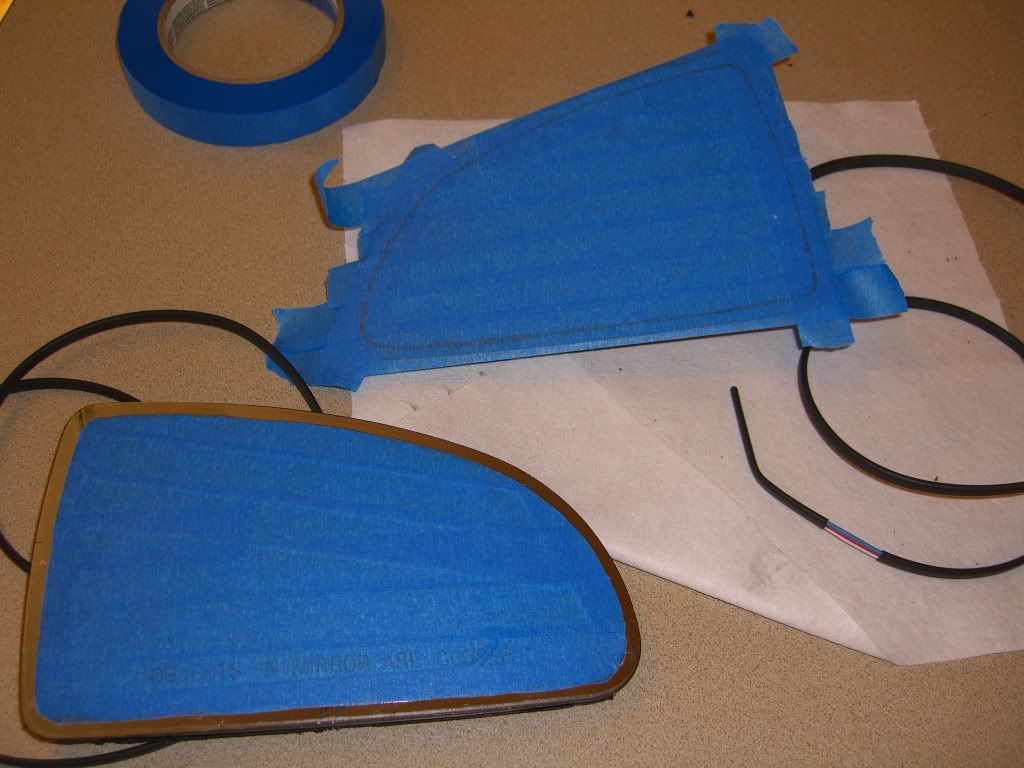
12.) I decided to use plastic dip around the edges of the mirror for appearances sake so the following will be based on your personal preferences. Tape off the the mirror so that you have the desire edge thickness like so.
13.) Apply primer.
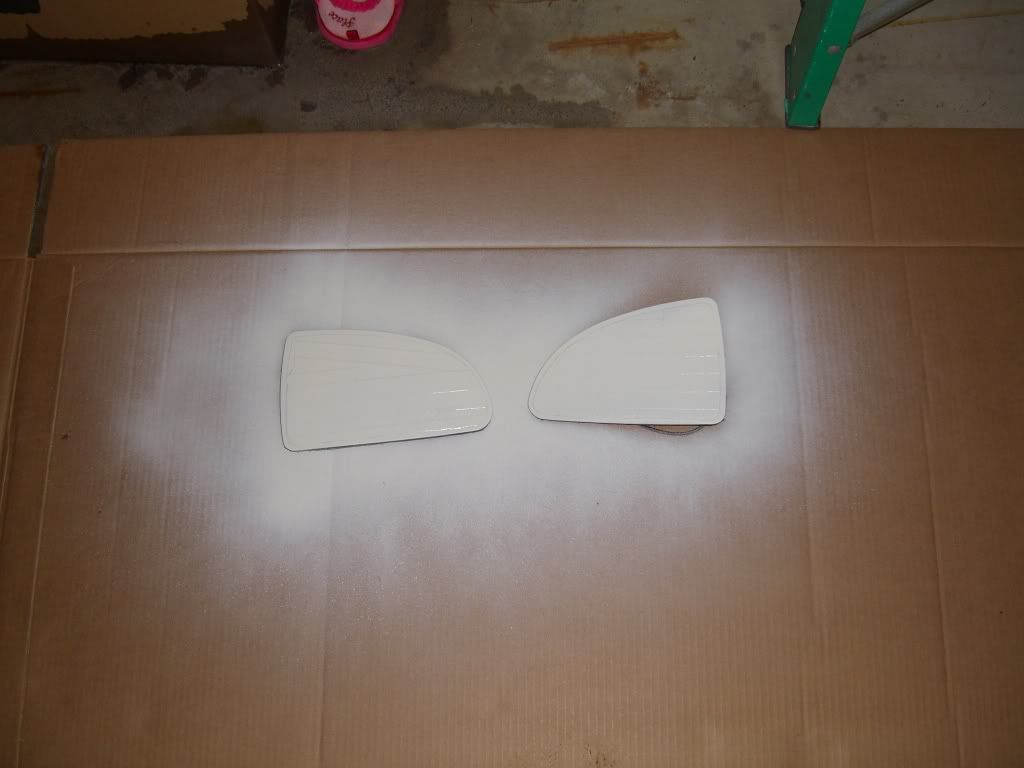
14.) Once the primer is dry apply the plasti-dip in as many coats as you desire.
15.) After the plastidip has dried pull up the tape, you'll probably have to cut along the tape with a knife to get a good clean line. Make sure you don't put too much pressure on the glass, turns out its fragile I cracked mine a little.
16.) Use a little reverse engineering to reassemble your mirrors.
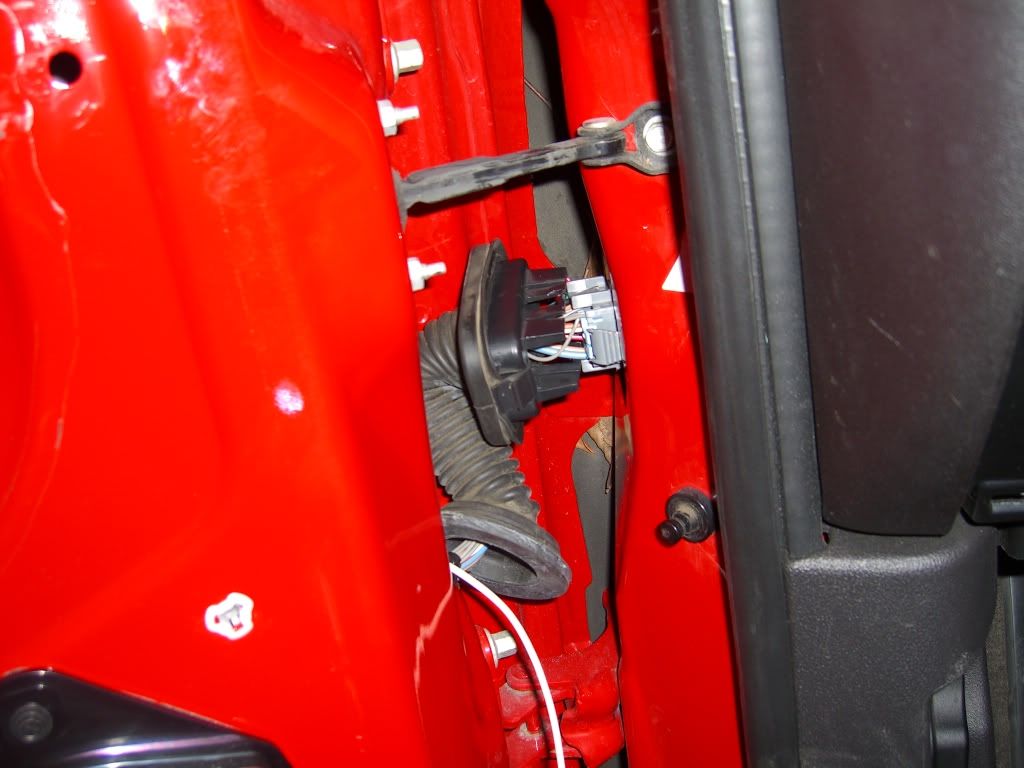
!7.) Now its time for the hardest part, getting the wire from the door to the cabin through the bent rubber tube. With a little messing around you can get the tube separated from the door and cabin like so.
18.) String the wire to wherever you want your switch located, no going to go in depth on this since every case will be different.
19.) Tap in to your fuse of choice, I used an add a fuse for neatness.
20.) Hook up your switch.
21.) Test out your heaters..
22.) Put all your dash, door and trim pieces back together.
Finished Product, I f'd up on a couple things one of the heaters don't work & the plastidip isn't very clean looking but I was getting impatient so I just left it to be fixed in the future. The side that does work does so very well though.
That should cover it, if you think I'm missing any step just let me know and I'll fix it accordingly.
Level of difficulty: Moderate
Equipment needed:
Dremel
10mm socket
7mm socket
Screwdriver flat & philips
ATM Add-A-Circuit
Spare fuse
Extreme weather adhesive/sealant I used DAP auto/marine
Wire I used 16ga
Flat tool for prying up trim
Pocket knife
Handlebar heaters. These are available at most powersports dealerships make sure to get the sheet type heaters and not the cylindrical ones.
Steps:
1.) Remove door panels. Instructions can be found here
2.) Remove mirrors. There are three bolts on the inside of the door. Unplug all wires.
3.) Now that you have the mirrors off you need to take the glass off of the assembly. To do this adjust the mirror so that you fit your fingers behind and pull back the clips, there are 4 sets of 2 clips. Once you get 2 sets off you should be able to just pull it off.
Your mirrors won't look like this yet, this is just to give you an idea of where the clipps are.
4.)Now that you have the glass by itself you need to get the glass separated from the back plastic. This is were the dremel comes in.
We need to turn this
Into this. All you have to do is take your cutting disc, and cut off the lip.
A quick side shot to give an idea where to cut.
5.) Now that you have the lip cut off the only thing holding the glass to it is four dots of silicone adhesive. So just run your knife in-between the glass and the plastic and that should free it up. After you have them separated just use your knife to cut off the extra adhesive.
To give you an idea what your cutting.
6.) Give the mirrors and plastic a good wash, they need to be clean for the heatpads to stick.
7.) Grab the heater sheets from you kit, remove the wax paper and carefully stick them in the middle of the mirror glass.
The heater kit.
Heaters applied to glass.
8.) Now grab your dremel again and cut some a slot for the heater wire like pictured below.
9.) Once you have the back plastic cut to fit the heater wires you can glue it down with whatever adhesive your using. I used a little bit more than what was originally used. After the glue is applied sandwich the two pieces and clamp them together like so.
10.) While the glue is drying this would be a good time to fit your switch to the trim piece. My car came without foglights and just a dummy button in its place, so I figured that be as good a place as any to put it. The dummy button is actually molded into the trim piece so you need to grab your dremel again to cut it out. I used the cylindrical stone type grinding bit which worked perfectly for my application. This part will obviously be subjective to which heater kit you use.
This how mine turned out.
11.) Once the glue is dried grab you dremel and cutting disc and remove and excess glue/plastic. I just ran my cutting disk flus with the edge of the glass so there would be no back plastic showing
12.) I decided to use plastic dip around the edges of the mirror for appearances sake so the following will be based on your personal preferences. Tape off the the mirror so that you have the desire edge thickness like so.
13.) Apply primer.
14.) Once the primer is dry apply the plasti-dip in as many coats as you desire.
15.) After the plastidip has dried pull up the tape, you'll probably have to cut along the tape with a knife to get a good clean line. Make sure you don't put too much pressure on the glass, turns out its fragile I cracked mine a little.
16.) Use a little reverse engineering to reassemble your mirrors.
!7.) Now its time for the hardest part, getting the wire from the door to the cabin through the bent rubber tube. With a little messing around you can get the tube separated from the door and cabin like so.
18.) String the wire to wherever you want your switch located, no going to go in depth on this since every case will be different.
19.) Tap in to your fuse of choice, I used an add a fuse for neatness.
20.) Hook up your switch.
21.) Test out your heaters..
22.) Put all your dash, door and trim pieces back together.
Finished Product, I f'd up on a couple things one of the heaters don't work & the plastidip isn't very clean looking but I was getting impatient so I just left it to be fixed in the future. The side that does work does so very well though.
That should cover it, if you think I'm missing any step just let me know and I'll fix it accordingly.
Last edited by nickadolph; 11-28-2010 at 07:56 AM.
 12-12-2010, 12:25 AM
#3
Member
Thread Starter
Join Date: 06-29-08
Location: Minnesota
Posts: 327
Likes: 0
Received 0 Likes
on
0 Posts
 12-12-2010, 01:41 AM
#8
Member
Thread Starter
Join Date: 06-29-08
Location: Minnesota
Posts: 327
Likes: 0
Received 0 Likes
on
0 Posts
Just residue from the tape, I've cleaned up the lines since then and it looks pretty good now.


 11-06-2011, 09:29 AM
#13
Senior Member

Go check out my thread for it on g5club.net here there's alot more info. I got the heaters for $30 at the motorcycle dealership. But if you do it you'll want to go to a mirror shop and have them cut some tempered glass to use, because the heat cracked mine.
11-16-2011, 05:10 PM
#14
Member

Join Date: 06-16-05
Location: Newfoundland
Posts: 318
Likes: 0
Received 0 Likes
on
0 Posts
12-02-2011, 11:07 PM
#15
Member
iTrader: (3)

Join Date: 11-25-11
Location: Paintsville, Ky
Posts: 228
Likes: 0
Received 0 Likes
on
0 Posts
its mirrored plate glass, i worked at a glass company, and you cant cut the passenger side cause it convex mirror with a curve, or objects will no longer be closer than they appear, lol........and you could only cut the inside of the mirror trim facing the door and use fishing string to run between the glass and plastic to cut the 4 sections of glue....kind of like you do for removing badges

Thread
Thread Starter
Forum
Replies
Last Post

