Pictures & Videos Your pictures, photoshops, and videos.

My Modded Lnf Intake Manifold

Thread Tools
 
Search this Thread
 
Old 08-03-2015, 12:19 PM
  #26  
Senior Member
iTrader: (16)
 
blueLNFftw's Avatar
 
Join Date: 07-22-12
Location: Florida
Posts: 10,397
Received 84 Likes on 69 Posts
Originally Posted by Snail_SS
Thats not a bad idea either would only have to get the codes turned off tho with my tuner thats like 1hr away lol
You dont have a HPT cable?
You can do it yourself.
Old 08-03-2015, 12:21 PM
  #27  
Senior Member
iTrader: (16)
 
blueLNFftw's Avatar
 
Join Date: 07-22-12
Location: Florida
Posts: 10,397
Received 84 Likes on 69 Posts
Originally Posted by Snail_SS
Thats not a bad idea either would only have to get the codes turned off tho with my tuner thats like 1hr away lol
My car is done the way I listed out.

I am probably going to add a small vacuum manifold though since I am wanting 3 feeds. 2 for my Synapse and 1 for my boost gauge. Figure it will look cleaner than a couple "T" fititngs.
Old 08-03-2015, 12:29 PM
  #28  
Senior Member
Thread Starter
 
KMO43's Avatar
 
Join Date: 01-21-12
Location: Calgary
Posts: 6,820
Received 84 Likes on 73 Posts
Originally Posted by blueLNFftw
-You need to remove two codes that pop from removing the solenoid.
-Delete the vacuum canister and remove it.
-Remove the vacuum barb from the lower charge pipe. (stock pipe needs a silcone cap glued onto it. Aftermarket pipes need a 1/8 NPT plug).
-Remove the solenoid and the tubing.
-Run the BPV or BOV directly to the vacuum port on the IM.
-Tuck the electrical connector under the rad support
This is what I was planning on doing
Old 08-03-2015, 12:31 PM
  #29  
Senior Member
iTrader: (16)
 
blueLNFftw's Avatar
 
Join Date: 07-22-12
Location: Florida
Posts: 10,397
Received 84 Likes on 69 Posts
Originally Posted by KMO43
This is what I was planning on doing
Looks so much nicer. BPV and BOV are a lot quicker to respond.

Put some liquid/paste thread sealer on the 1/8npt plug if you have an aftermarket cold side. They tend to leak after they have had something installed and removed a couple times.
Old 08-03-2015, 01:22 PM
  #30  
Senior Member
Thread Starter
 
KMO43's Avatar
 
Join Date: 01-21-12
Location: Calgary
Posts: 6,820
Received 84 Likes on 73 Posts
Here e the pics

I cut off the tabs
Name:  20150214_114857_zpssymr5pb9.jpg
Views: 353
Size:  243.5 KB

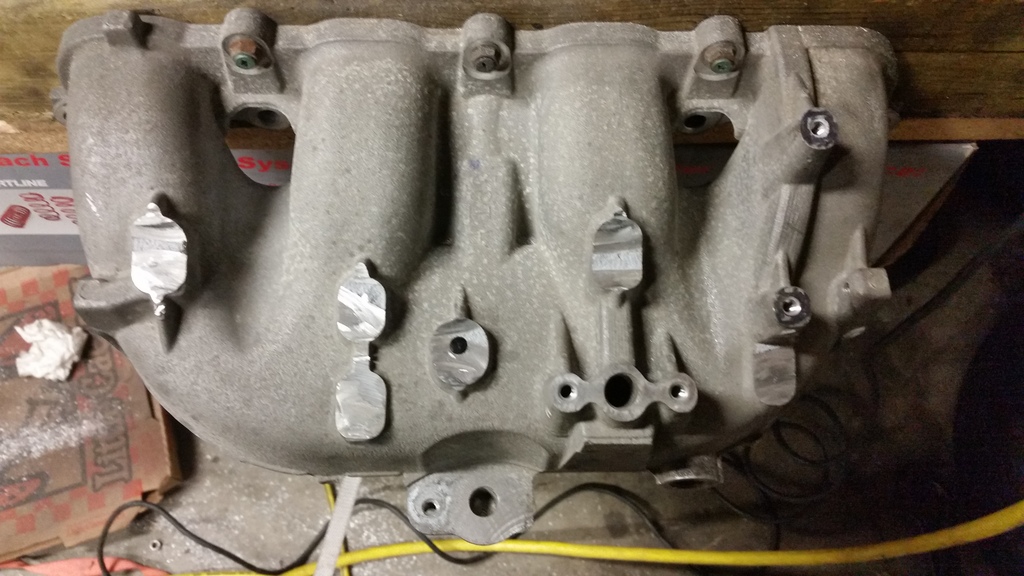
Grinded down the tabs
Name:  20150214_120554_zps8qzkxsaz.jpg
Views: 431
Size:  225.4 KB

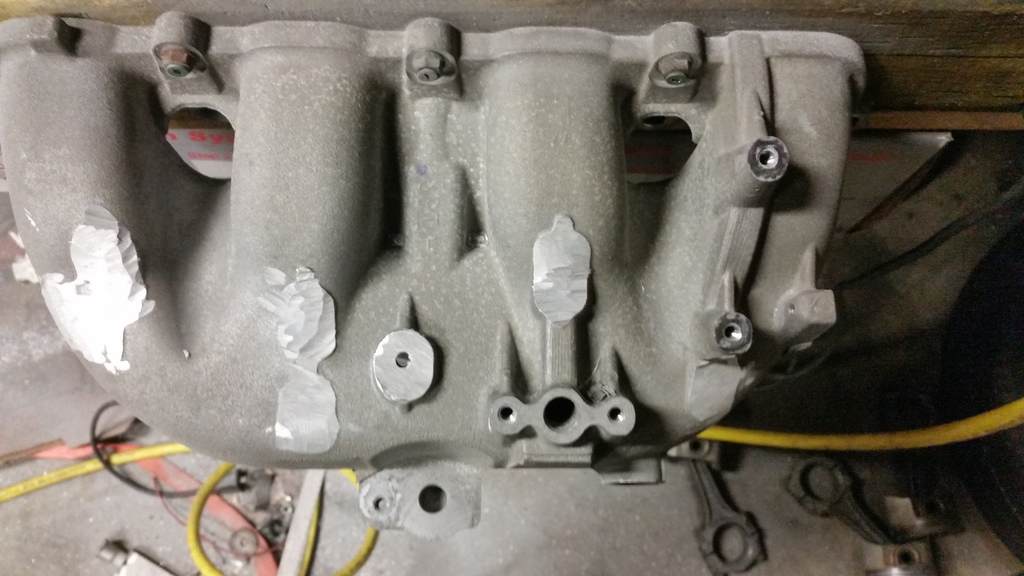
Smoothed the whole intake
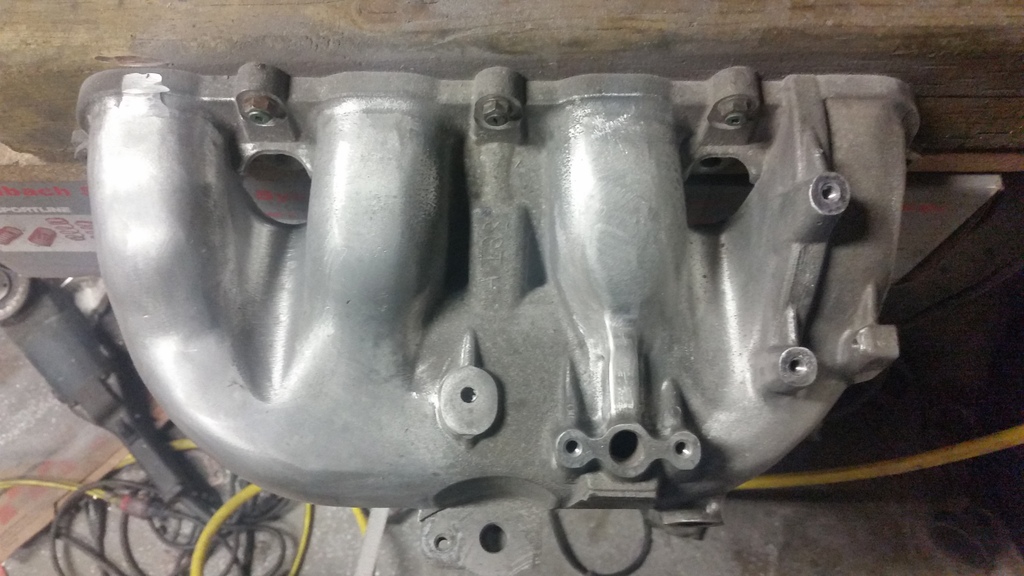
Name:  20150214_132757_zpstogpyulk.jpg
Views: 412
Size:  221.4 KB

Sandblasted
Name:  20150328_104257_zpskrxxksp9.jpg
Views: 381
Size:  214.6 KB
Old 08-03-2015, 01:30 PM
  #31  
Senior Member
iTrader: (16)
 
blueLNFftw's Avatar
 
Join Date: 07-22-12
Location: Florida
Posts: 10,397
Received 84 Likes on 69 Posts
Why did you cut off the vacuum port?
Old 08-03-2015, 01:33 PM
  #32  
Senior Member
Thread Starter
 
KMO43's Avatar
 
Join Date: 01-21-12
Location: Calgary
Posts: 6,820
Received 84 Likes on 73 Posts
Originally Posted by blueLNFftw
Why did you cut off the vacuum port?
It stuck out big time I could only cut it that much so I could still plug it. I'll be putting my boost sensor for my aem gauge and the vacuum line both underneath the manifold
Old 08-03-2015, 01:34 PM
  #33  
Senior Member
iTrader: (16)
 
blueLNFftw's Avatar
 
Join Date: 07-22-12
Location: Florida
Posts: 10,397
Received 84 Likes on 69 Posts
Ah.
You should have had a welder fill it in.
Old 08-03-2015, 01:36 PM
  #34  
Senior Member
Thread Starter
 
KMO43's Avatar
 
Join Date: 01-21-12
Location: Calgary
Posts: 6,820
Received 84 Likes on 73 Posts
Originally Posted by blueLNFftw
Ah.
You should have had a welder fill it in.
Ya but I wanted the option to still use it if needed
Old 08-03-2015, 01:43 PM
  #35  
Senior Member
iTrader: (16)
 
blueLNFftw's Avatar
 
Join Date: 07-22-12
Location: Florida
Posts: 10,397
Received 84 Likes on 69 Posts
When I do mine I will be cutting off the ledge that EVAP sits on and welding the hole shut. The OEM vac location will be welded shut as well.
I will have 4 1/8NPT vacuum ports coming out of the front where the EVAP used to be (TTR style). No EVAP. Pulling all of the lines and will have a small filter under the back of the car.
Old 08-03-2015, 01:44 PM
  #36  
Senior Member
Thread Starter
 
KMO43's Avatar
 
Join Date: 01-21-12
Location: Calgary
Posts: 6,820
Received 84 Likes on 73 Posts
Originally Posted by blueLNFftw
When I do mine I will be cutting off the ledge that EVAP sits on and welding the hole shut. The OEM vac location will be welded shut as well.
I will have 4 1/8NPT vacuum ports coming out of the front where the EVAP used to be (TTR style). No EVAP. Pulling all of the lines and will have a small filter under the back of the car.
Nice I basically just wanted mine smoothed and white
Old 02-08-2016, 01:52 PM
  #37  
Senior Member
 
cranemaster's Avatar
 
Join Date: 08-22-10
Location: Saskatchewan, Canada
Posts: 2,293
Received 2 Likes on 2 Posts
that looks awesome
Old 02-08-2016, 06:57 PM
  #38  
Senior Member
Thread Starter
 
KMO43's Avatar
 
Join Date: 01-21-12
Location: Calgary
Posts: 6,820
Received 84 Likes on 73 Posts
Originally Posted by cranemaster
that looks awesome
Thanks! I should update this with the finished pics
Old 02-08-2016, 07:45 PM
  #39  
Senior Member
iTrader: (1)
 
double clutch's Avatar
 
Join Date: 01-30-13
Location: Michigan
Posts: 2,759
Received 132 Likes on 109 Posts
Yes you should
Old 02-08-2016, 11:02 PM
  #40  
Super Moderator
Platinum Member
iTrader: (66)
 
riceburner's Avatar
 
Join Date: 05-18-11
Location: West Chicago, IL
Posts: 39,848
Received 87 Likes on 74 Posts
made it ready for a supercharger?
Old 02-08-2016, 11:56 PM
  #41  
Senior Member
Thread Starter
 
KMO43's Avatar
 
Join Date: 01-21-12
Location: Calgary
Posts: 6,820
Received 84 Likes on 73 Posts
Originally Posted by riceburner
made it ready for a supercharger?
You know im a turbo boy
Old 02-09-2016, 02:33 AM
  #42  
Senior Member
Thread Starter
 
KMO43's Avatar
 
Join Date: 01-21-12
Location: Calgary
Posts: 6,820
Received 84 Likes on 73 Posts
Name:  20150801_223149_zpslhshbln6.jpg
Views: 632
Size:  168.7 KB
Name:  20150801_220903_zpsfblniulm.jpg
Views: 337
Size:  140.5 KB
Old 02-19-2016, 07:19 AM
  #43  
Senior Member
iTrader: (3)
 
robk's Avatar
 
Join Date: 06-27-10
Location: Indianapolis, IN
Posts: 932
Likes: 0
Received 1 Like on 1 Post
Looks very good KMO43!! Seeing this has definitely inspired me to clean mine up as well. Altho I wont get going to the extreme as you did with relocating things, I just don't see the point in all the other "extras" that are on there(im sire they are needed for other models as such). But very clean indeed!!

robk
Old 02-19-2016, 09:48 AM
  #44  
Senior Member
Thread Starter
 
KMO43's Avatar
 
Join Date: 01-21-12
Location: Calgary
Posts: 6,820
Received 84 Likes on 73 Posts
Originally Posted by robk
Looks very good KMO43!! Seeing this has definitely inspired me to clean mine up as well. Altho I wont get going to the extreme as you did with relocating things, I just don't see the point in all the other "extras" that are on there(im sire they are needed for other models as such). But very clean indeed!!

robk
Thanks! I'll be posting the finished engine bay pics soon
Old 04-13-2016, 07:37 PM
  #45  
Senior Member
Thread Starter
 
KMO43's Avatar
 
Join Date: 01-21-12
Location: Calgary
Posts: 6,820
Received 84 Likes on 73 Posts
Name:  736b2513-8830-4536-bfc8-82d092abcbbd_zpsugu4t2w6.jpg
Views: 422
Size:  324.0 KB

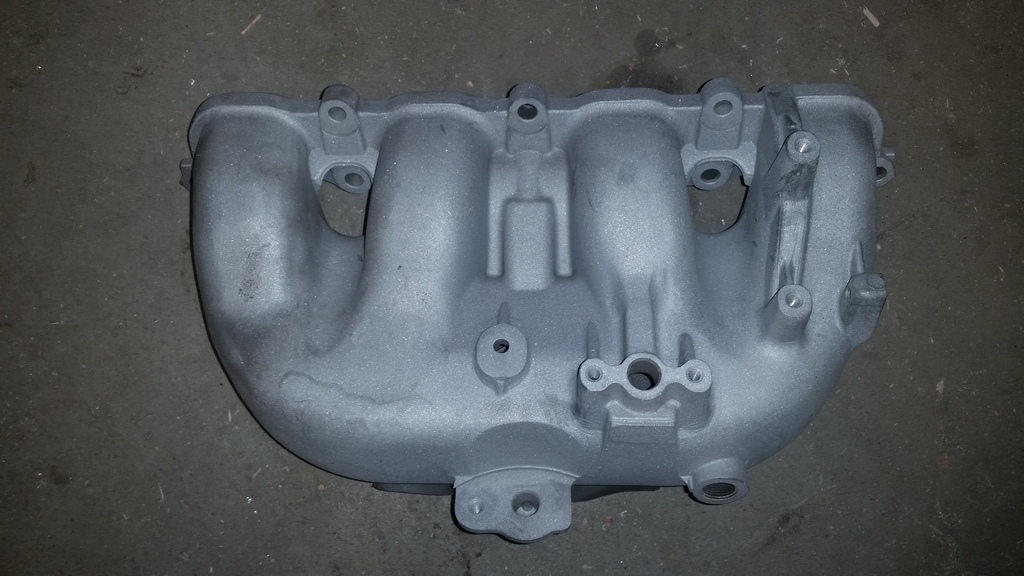
Gonna repaint it again
Old 04-13-2016, 08:00 PM
  #46  
Moderator
Platinum Member
Moderator
iTrader: (3)
 
Snail_SS's Avatar
 
Join Date: 04-18-14
Location: El Paso, TX
Posts: 16,465
Received 603 Likes on 561 Posts
That looks really good
Old 04-13-2016, 08:38 PM
  #47  
Senior Member
Thread Starter
 
KMO43's Avatar
 
Join Date: 01-21-12
Location: Calgary
Posts: 6,820
Received 84 Likes on 73 Posts
Originally Posted by Snail_SS
That looks really good
Thanks it's really clean I asked an LSJ guy what I did to it and he couldn't tell. I have to redo it because the clear didn't take at all
Old 04-14-2016, 07:05 AM
  #48  
Senior Member
iTrader: (3)
 
robk's Avatar
 
Join Date: 06-27-10
Location: Indianapolis, IN
Posts: 932
Likes: 0
Received 1 Like on 1 Post
Where did you mount the solenoid that sits on the #2 runner at??

robk
Old 04-14-2016, 07:18 AM
  #49  
Senior Member
Thread Starter
 
KMO43's Avatar
 
Join Date: 01-21-12
Location: Calgary
Posts: 6,820
Received 84 Likes on 73 Posts
Originally Posted by robk
Where did you mount the solenoid that sits on the #2 runner at??

robk
It's deleted, my AEM boost gauge sensor and the barb fitting are underneath the #2 port
Old 04-14-2016, 11:35 AM
  #50  
Senior Member
iTrader: (3)
 
robk's Avatar
 
Join Date: 06-27-10
Location: Indianapolis, IN
Posts: 932
Likes: 0
Received 1 Like on 1 Post
Originally Posted by KMO43
It's deleted, my AEM boost gauge sensor and the barb fitting are underneath the #2 port
Hmmm, interesting

robk
Related Topics
Thread
Thread Starter
Forum
Replies
Last Post
taintedred07
2.0L LNF Performance Tech
32
05-28-2022 03:47 AM
DarrenGC
2.2L L61 Performance Tech
18
12-24-2021 01:55 PM
KMO43
Featured Car Showcase
37
09-27-2015 08:53 PM
GBRunner24
Featured Car Showcase
3
09-26-2015 06:44 PM
OrangeCoba
Problems/Service/Maintenance
0
09-25-2015 06:06 PM


Quick Reply: My Modded Lnf Intake Manifold


All times are GMT -4. The time now is 03:30 PM.