2007 Supercharged Cobalt SS Clutch Replacement
 04-25-2014, 08:42 PM
#1
New Member
Thread Starter

Join Date: 04-25-14
Location: Ohio
Posts: 7
Likes: 0
Received 0 Likes
on
0 Posts
2007 Supercharged Cobalt SS Clutch Replacement
I have seen that the How-to Section has to be approved by the Admins, So I will post this here... If I have gotten this wrong, please move or delete...
As I said in my introduction I go by 'Toyotakarl' as I predominately work on Toyotas... I am an ASE certified tech and I serve as an Admin on the Eric the Car guy Forum...
I replaced my nephews clutch and figured some here may be interested in some pics and descriptions...
Hope this helps...
Regards,
Karl
So the clutch on my Nephews 2007 Cobalt SS (Supercharged) had given up the ghost. It was slipping in all gears and needed a replacement. I had heard that this was an 8 hour job� I think that may be for a non-supercharged version� My nephew will assist and be my "Step and Fetch it", as his mechanical skills are limited.... I did not break anything and only took a 10 minute lunch break and used many power tools... Even with that this job took around 12 hours to do, and while it was not terribly difficult, there were many things that needed to be done.
We replaced the Flywheel, Flywheel bolts (they are Torque To Yield/TTY), clutch, pressure plate, J- pipe, Throwout/slave assembly... Total cost for this job was around $500... Some money could have been saved by having the flywheel re-surfaced, but we only had the weekend to do this job, so my nephew just bought a new one...
The front subframe of the car has to be removed to drop the transmission, and that is about the most difficult part of the job..
I started with disconnecting the negative battery cable in the trunk, then lifted up the car and placed it on jackstands� I had to use the body to support the weight because to remove the trans I would need to remove the subframe/cradle.

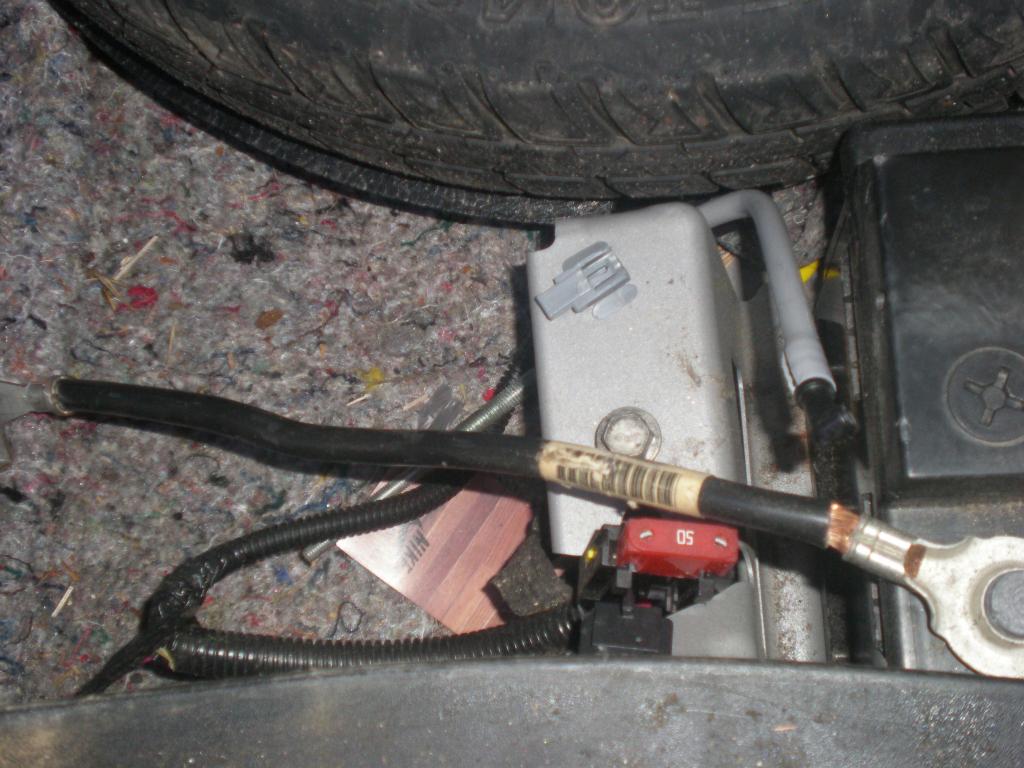
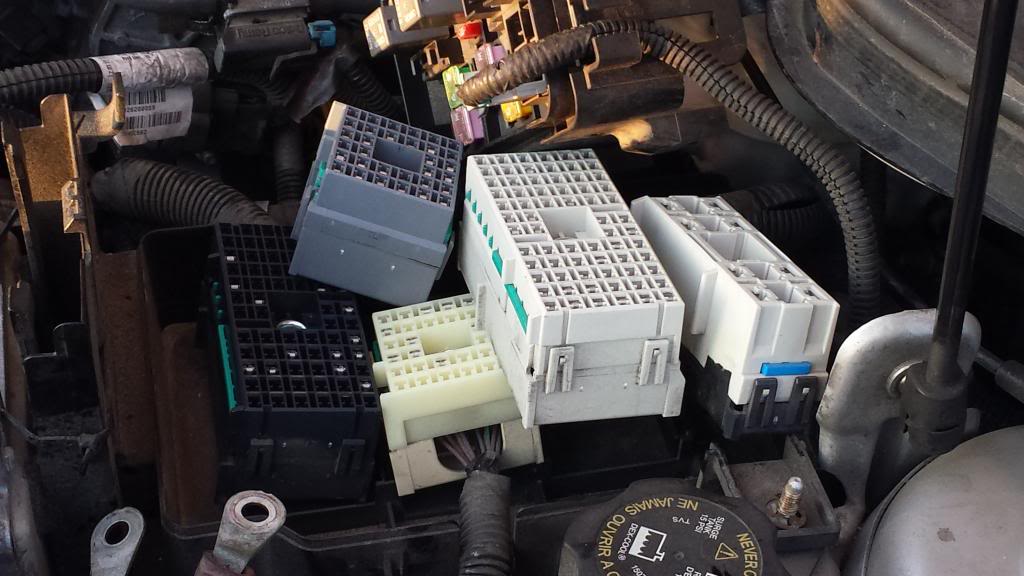
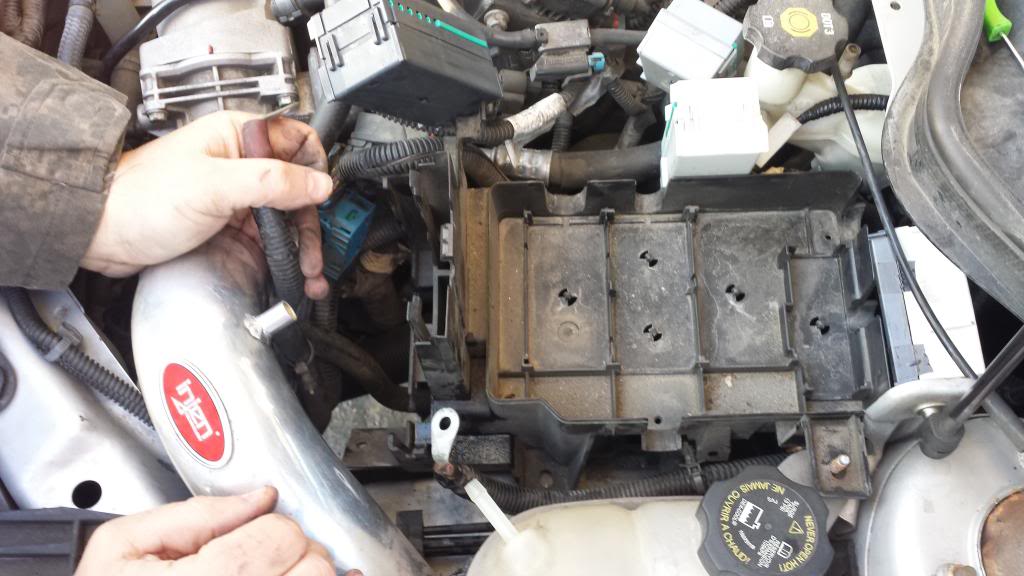
I removed the air intake pipe and then removed the main fuse panel in the car� A 7mm on my small battery powered hand impact made short work of this�
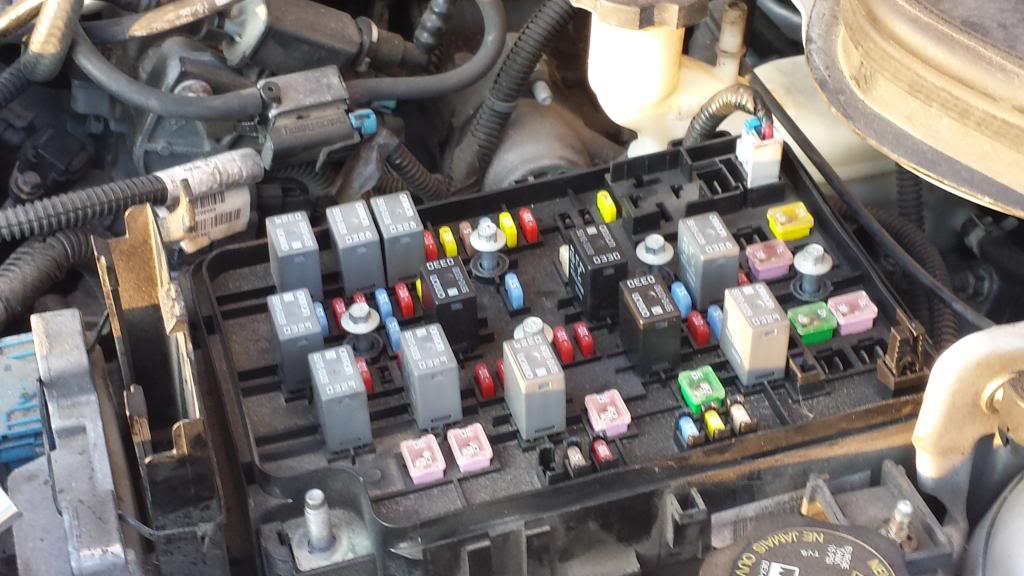
Top fuse panel removed
Now I needed to remove the lower panel. There were two clips that held on the upper portion and two 13mm bolts that attached it to the lower portion.
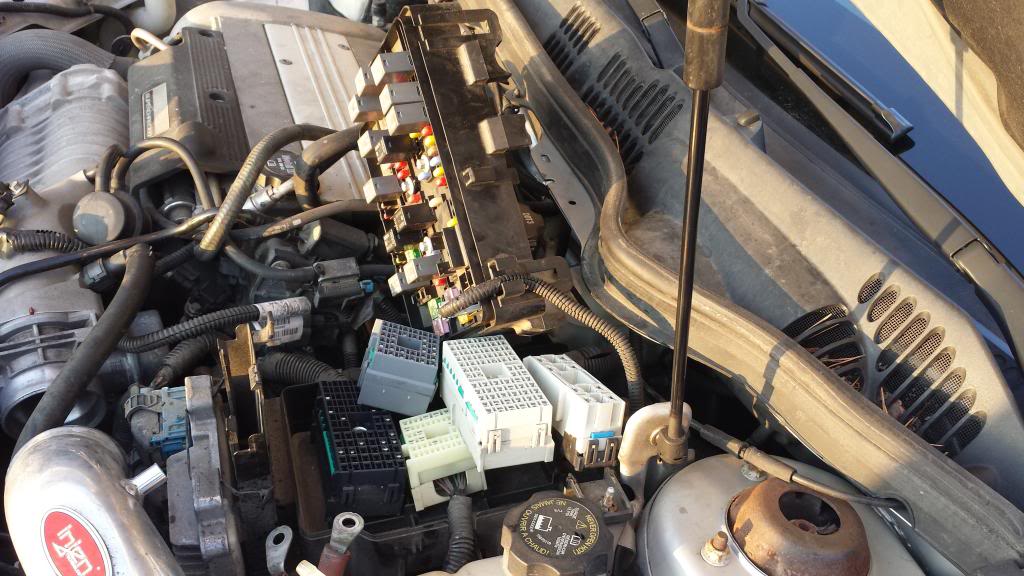
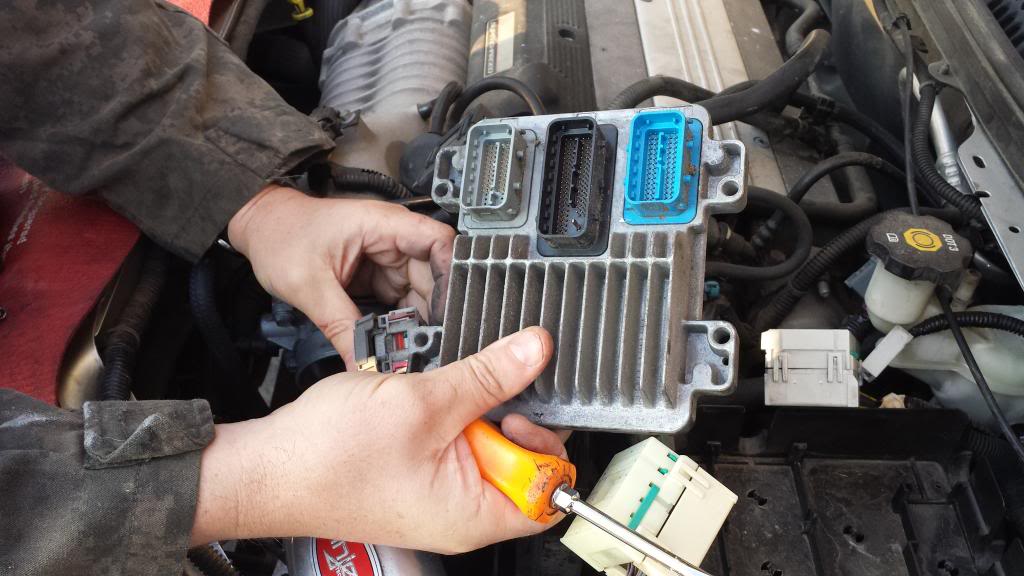
Removal of ECU� Three quick release attachments� Simple..
Moved away all the wires to access lower fuse panel assembly
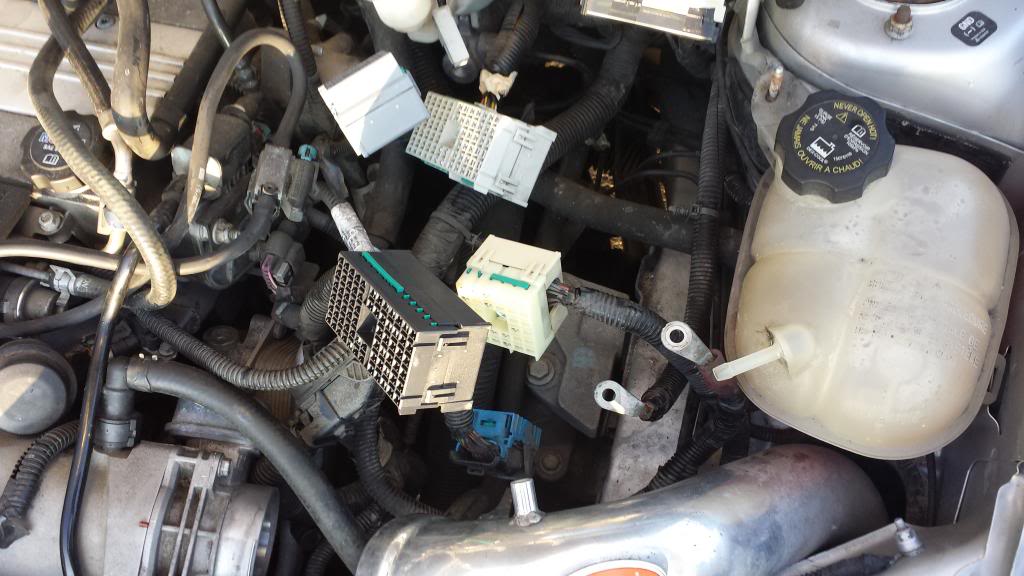
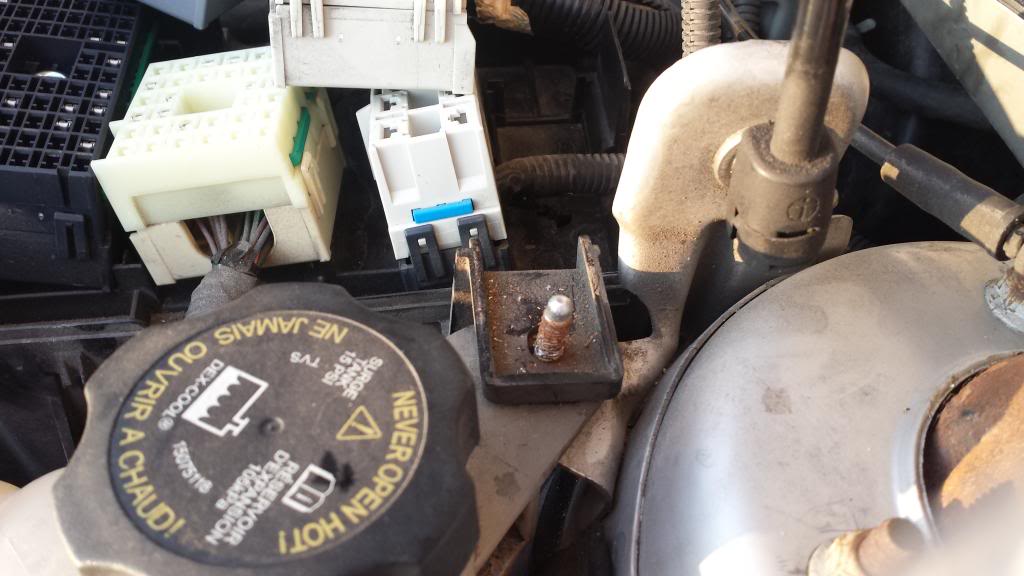
Once I removed this, I disconnected the linkage arms and the Vehicle speed sensor. The linkage arms just pop of when you pry them with a screwdriver or prybar.

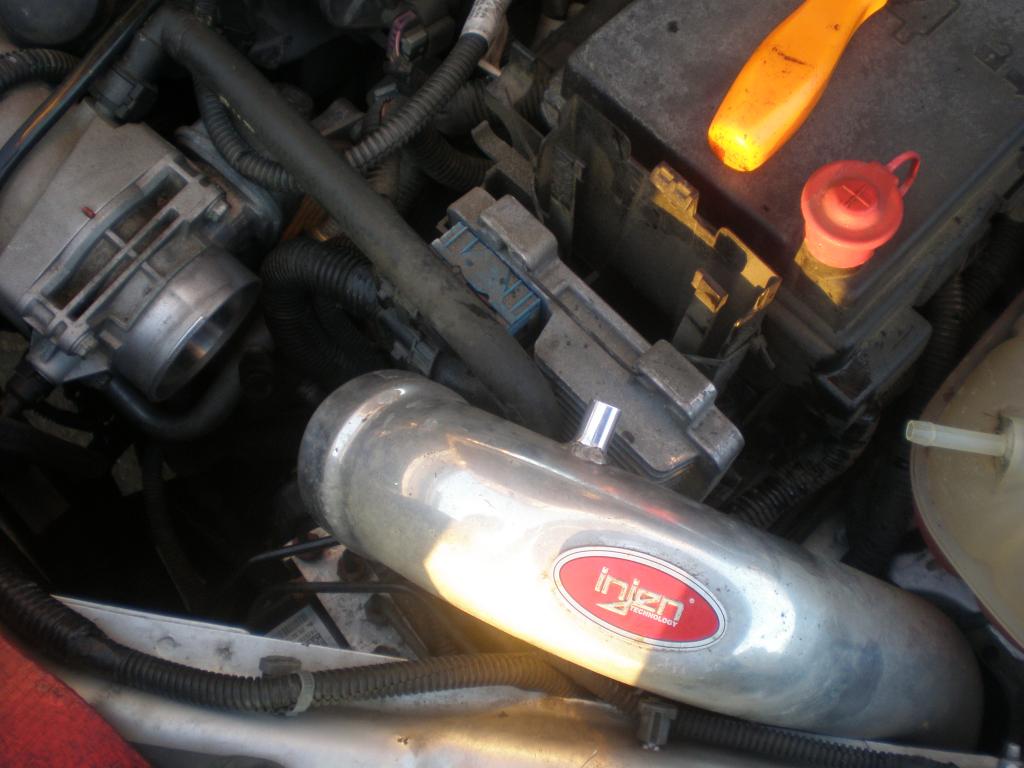
Next is to unplug these wires/connectors and get access to remove oil cooler (located under the throttle body)� It may not be absolutely necessary to remove the oil cooler, but definitely makes it easier to bleed the clutch� The clutch bleeder is underneath it and access even coming from the bottom of the engine was practically non-existent.
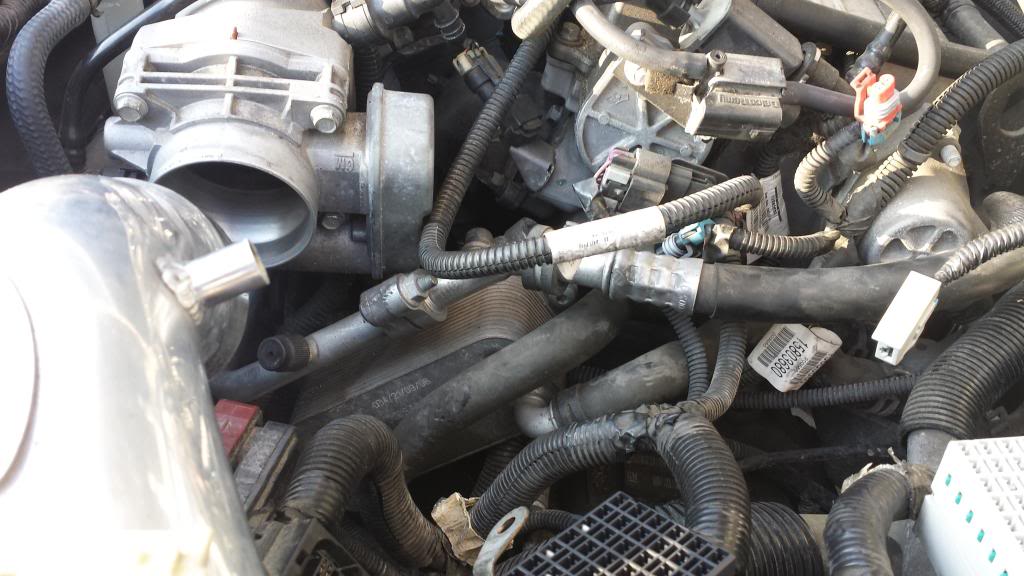
Clearing things out still�
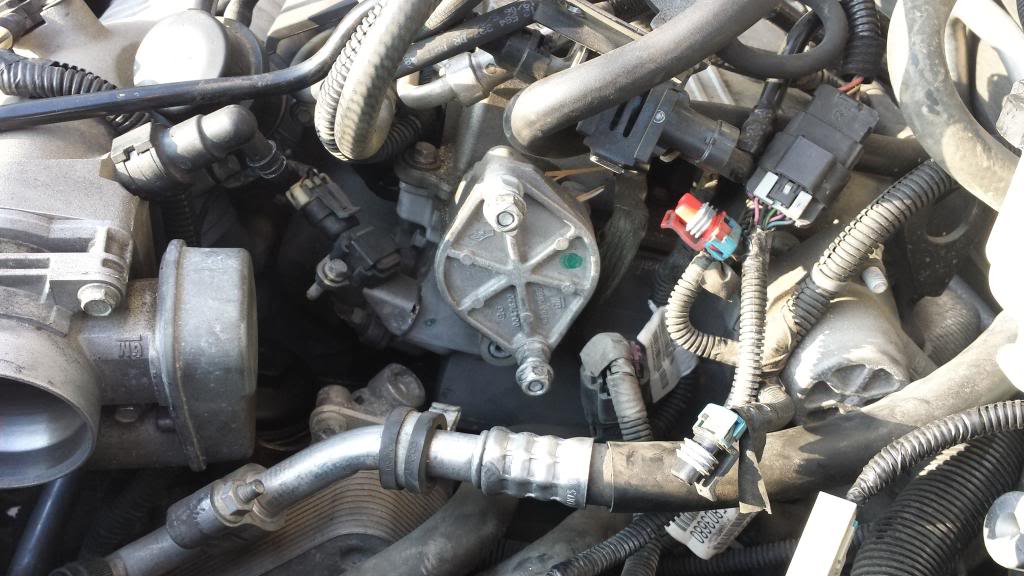
Setting up the drain pan for removal of the oil cooler (3X13mm bolts)
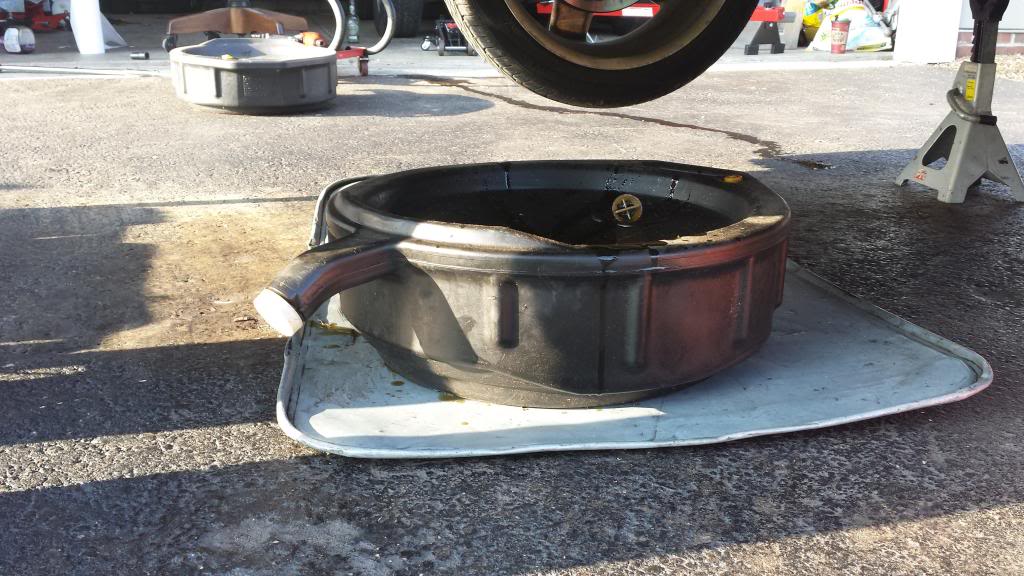
Clearing more out

Oil cooler unbolted (and some oil will spill!)
Oil cooler (side shown that goes against engine)�
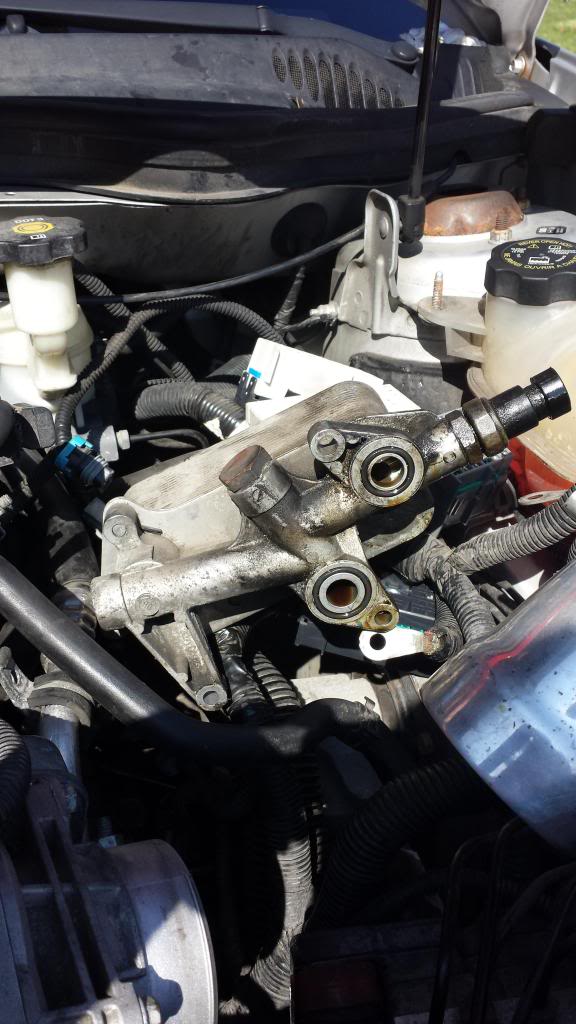
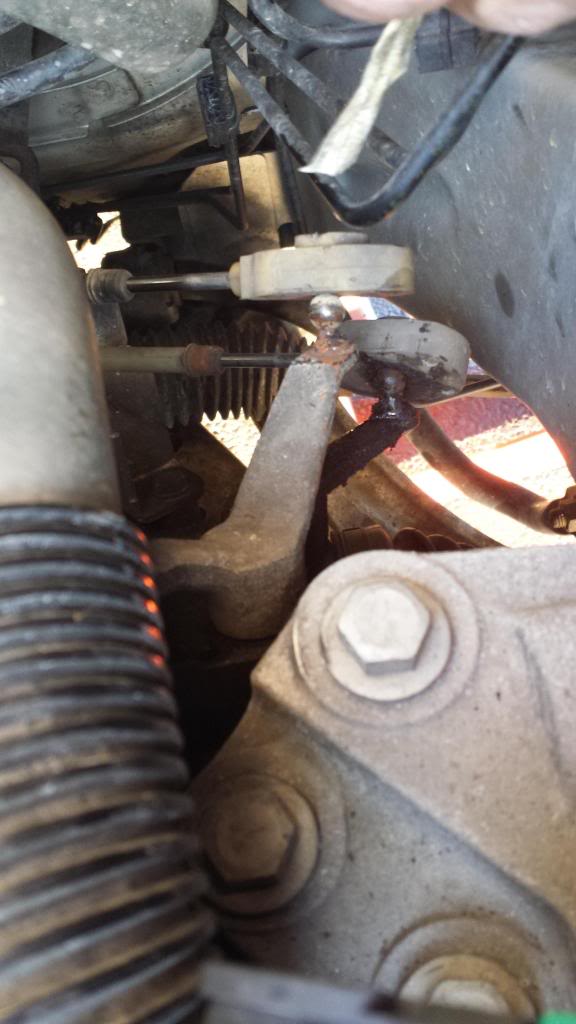
Now unbolting transmission linkage mount (2X13mm bolts)
As I said in my introduction I go by 'Toyotakarl' as I predominately work on Toyotas... I am an ASE certified tech and I serve as an Admin on the Eric the Car guy Forum...
I replaced my nephews clutch and figured some here may be interested in some pics and descriptions...
Hope this helps...
Regards,
Karl
So the clutch on my Nephews 2007 Cobalt SS (Supercharged) had given up the ghost. It was slipping in all gears and needed a replacement. I had heard that this was an 8 hour job� I think that may be for a non-supercharged version� My nephew will assist and be my "Step and Fetch it", as his mechanical skills are limited.... I did not break anything and only took a 10 minute lunch break and used many power tools... Even with that this job took around 12 hours to do, and while it was not terribly difficult, there were many things that needed to be done.
We replaced the Flywheel, Flywheel bolts (they are Torque To Yield/TTY), clutch, pressure plate, J- pipe, Throwout/slave assembly... Total cost for this job was around $500... Some money could have been saved by having the flywheel re-surfaced, but we only had the weekend to do this job, so my nephew just bought a new one...
The front subframe of the car has to be removed to drop the transmission, and that is about the most difficult part of the job..
I started with disconnecting the negative battery cable in the trunk, then lifted up the car and placed it on jackstands� I had to use the body to support the weight because to remove the trans I would need to remove the subframe/cradle.
I removed the air intake pipe and then removed the main fuse panel in the car� A 7mm on my small battery powered hand impact made short work of this�
Top fuse panel removed
Now I needed to remove the lower panel. There were two clips that held on the upper portion and two 13mm bolts that attached it to the lower portion.
Removal of ECU� Three quick release attachments� Simple..
Moved away all the wires to access lower fuse panel assembly
Once I removed this, I disconnected the linkage arms and the Vehicle speed sensor. The linkage arms just pop of when you pry them with a screwdriver or prybar.
Next is to unplug these wires/connectors and get access to remove oil cooler (located under the throttle body)� It may not be absolutely necessary to remove the oil cooler, but definitely makes it easier to bleed the clutch� The clutch bleeder is underneath it and access even coming from the bottom of the engine was practically non-existent.
Clearing things out still�
Setting up the drain pan for removal of the oil cooler (3X13mm bolts)
Clearing more out
Oil cooler unbolted (and some oil will spill!)
Oil cooler (side shown that goes against engine)�
Now unbolting transmission linkage mount (2X13mm bolts)
 04-25-2014, 08:44 PM
#2
New Member
Thread Starter
Join Date: 04-25-14
Location: Ohio
Posts: 7
Likes: 0
Received 0 Likes
on
0 Posts
Now was time to start to remove the Axle shafts.
Simple work here
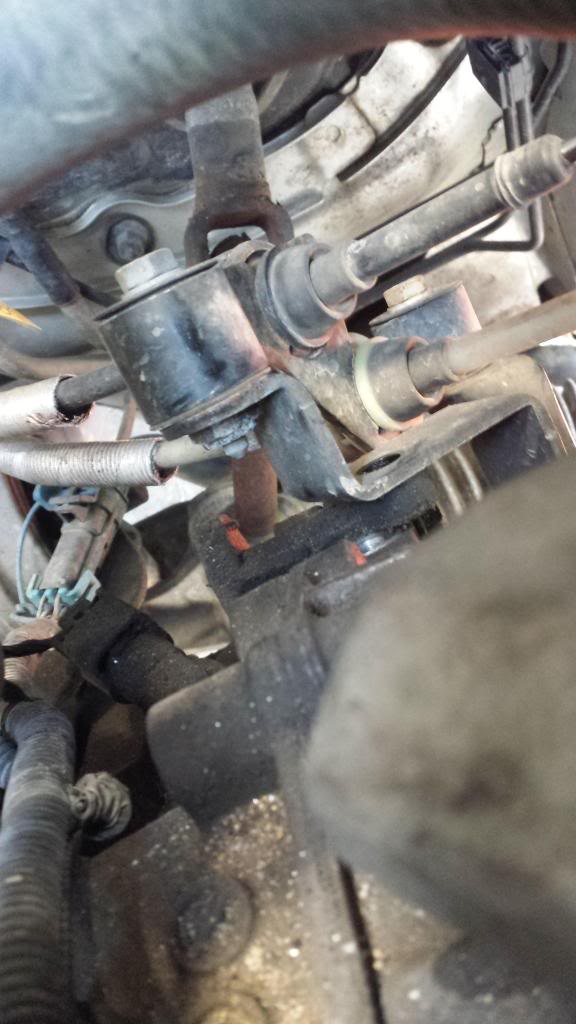
Remove tie rod nut and disconnect Tie rod (1 X 18mm Nut)
Remove balljoint. This is 1X16mm Bolt with 1 X 15mm Nut and remove balljoint assembly (nut gets installed on rearward direction of car)
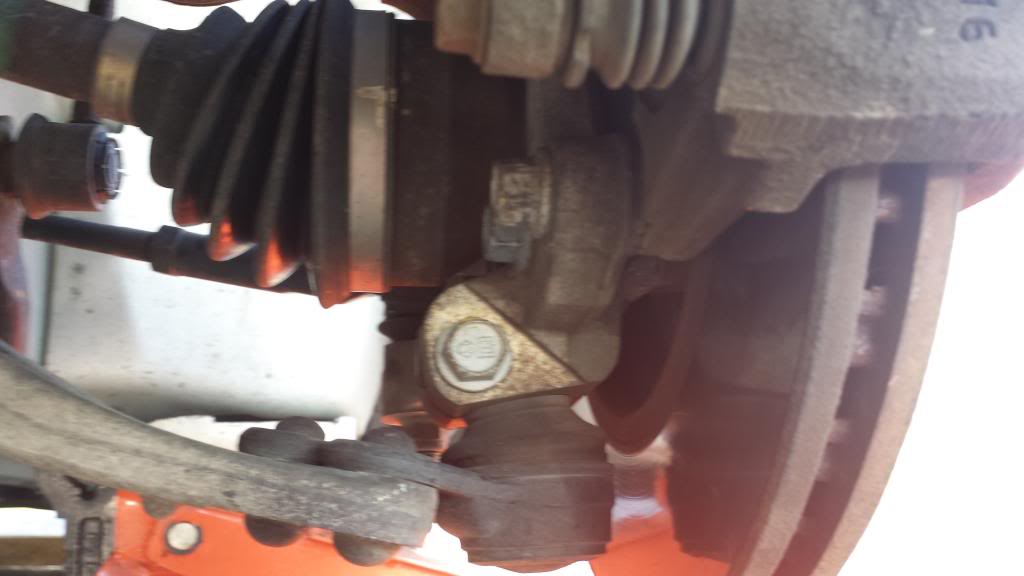
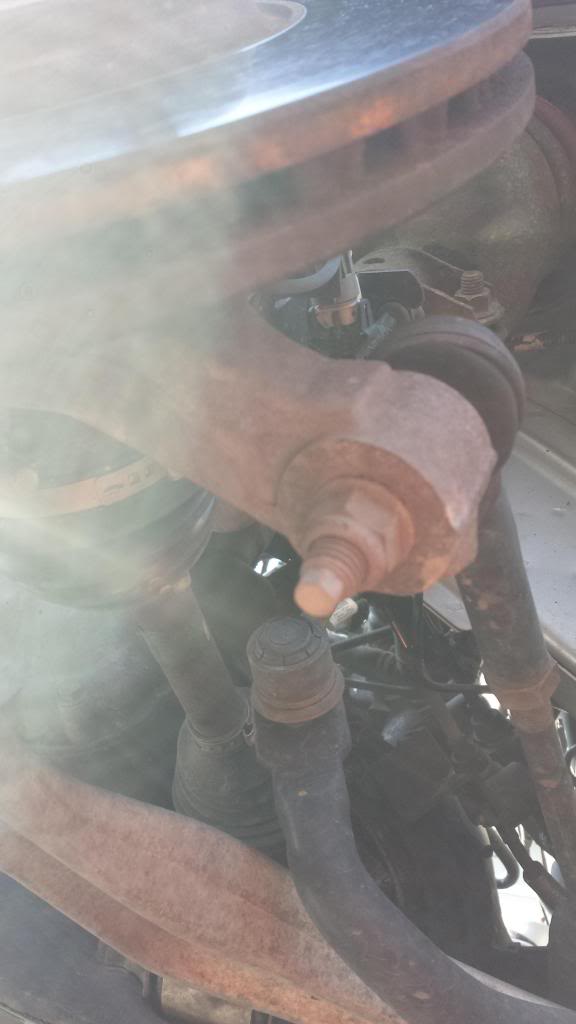
Remove 30mm Axle nut with washer and remove axle shaft from knuckle�
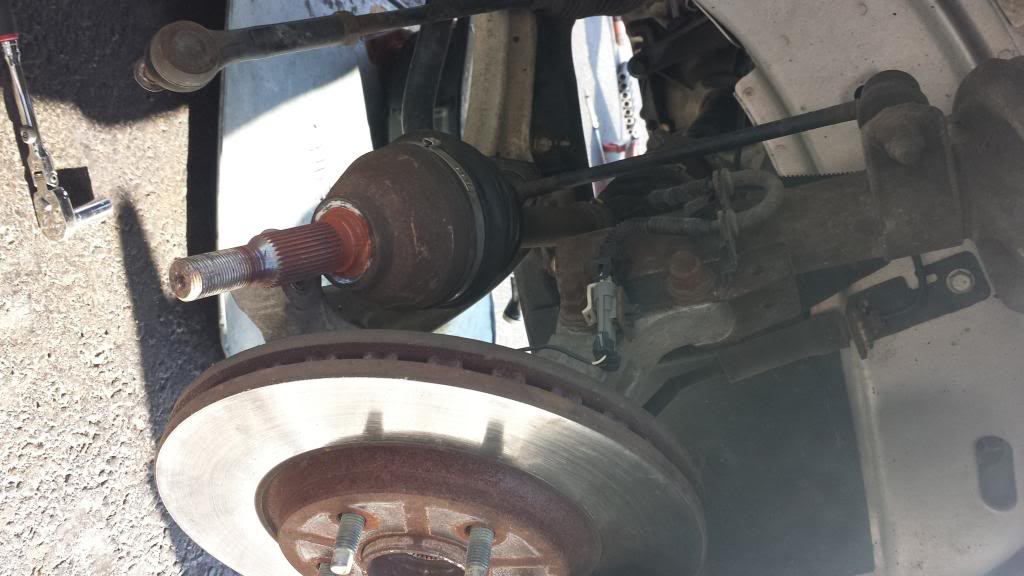
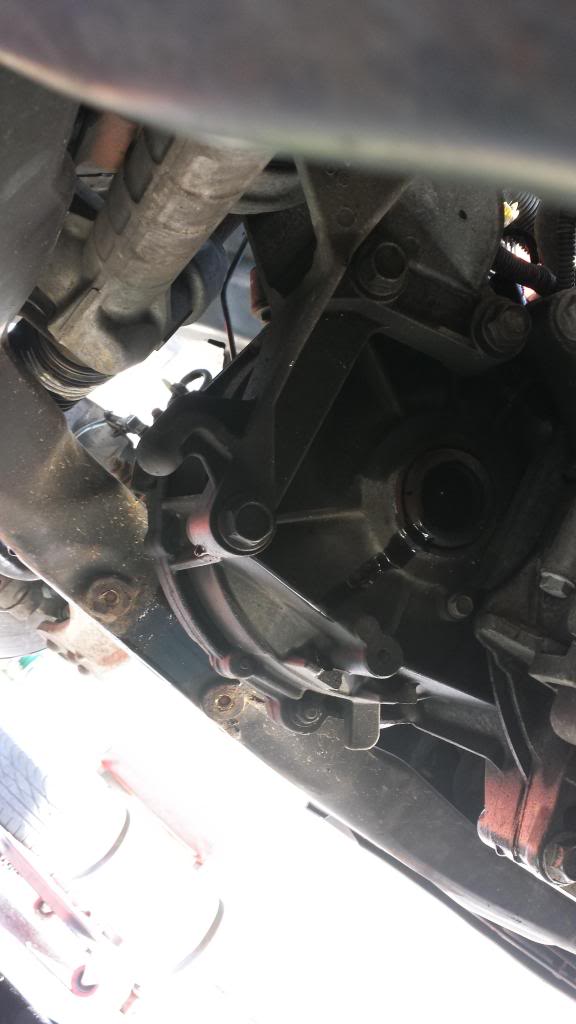
Do this on both sides. The exception is the passenger side which has a carrier bearing and the requires removal. There are 3 bolts holding this on, then remove axle shaft as an assembly�
View from passenger side with axle shaft removed.
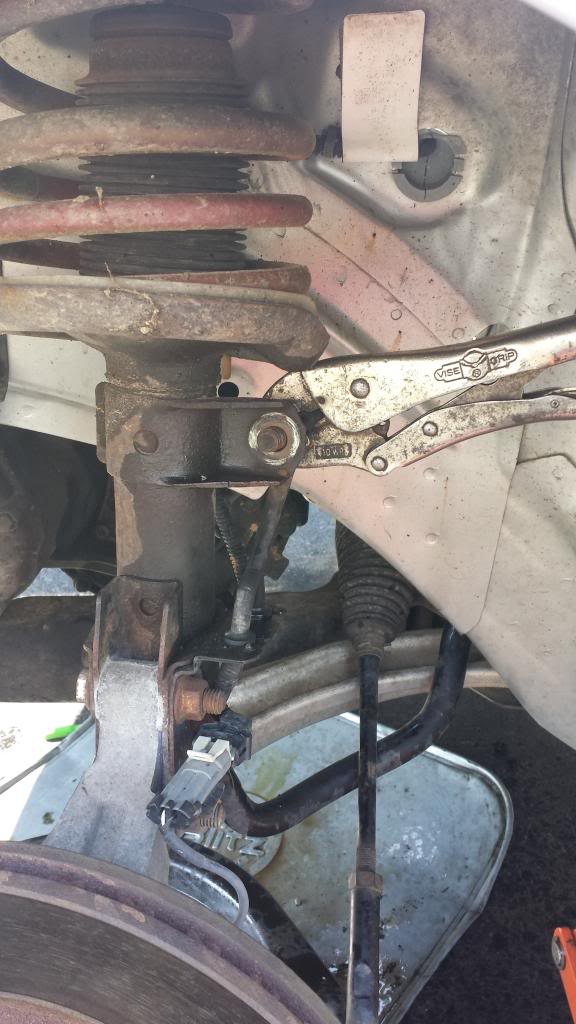
Also when dropping the front cradle/frame the sway bar links need disconnected. We could not do this without destroying our sway bar links� Had to use a vise grip to get traction to unbolt these� The good thing is the replacement ones have room for a hex wrench on the bolt shaft for easy removal (when we have to do struts on this car)
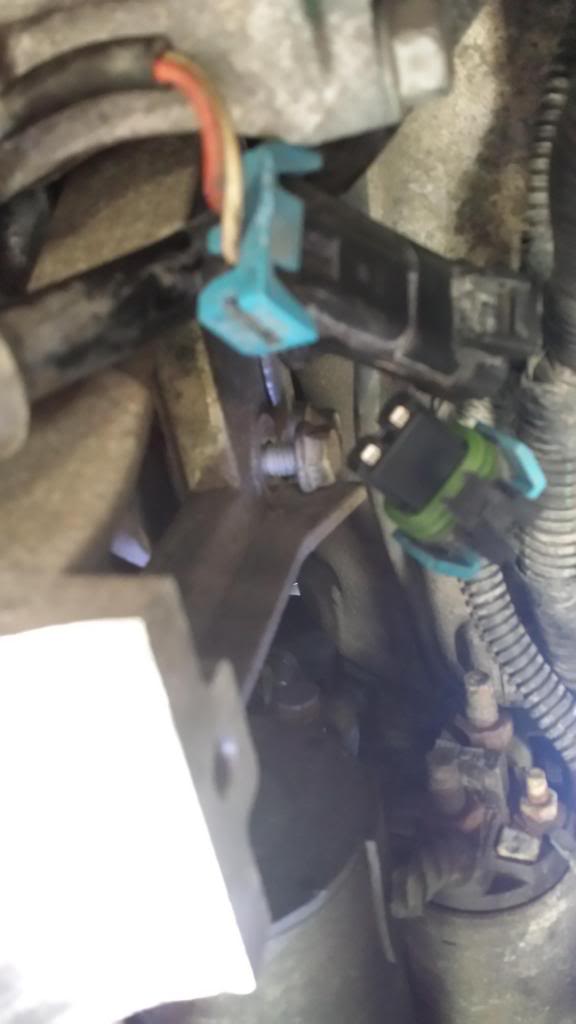
Next was to remove the starter to get access to the Transaxle bellhousing bolts� However before the starter can be removed, the Supercharger cooling pump needs to be out of the way (to get access to starter bolts). There are 2 x 13 mm bolts holding the pump to the bracket.
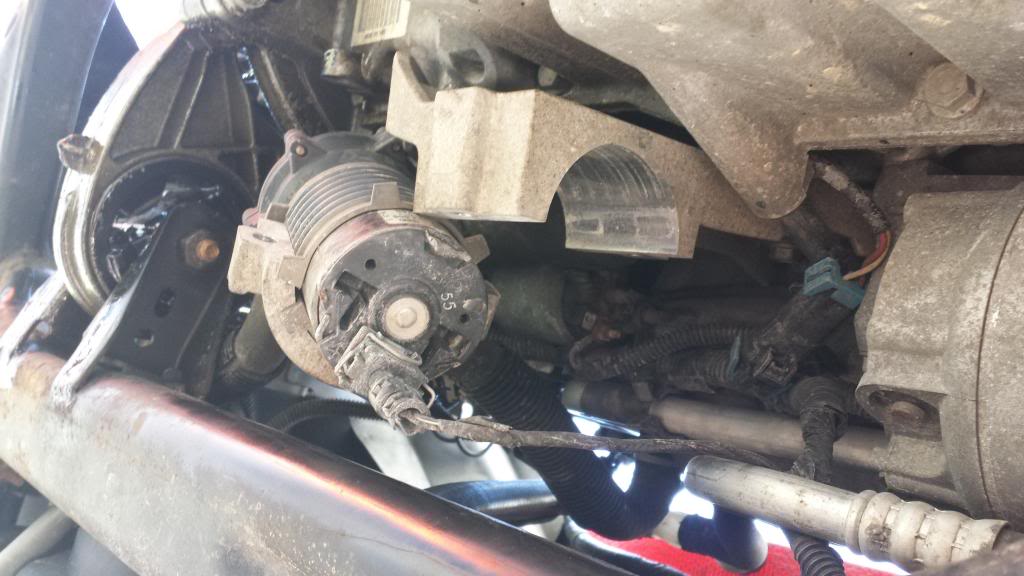
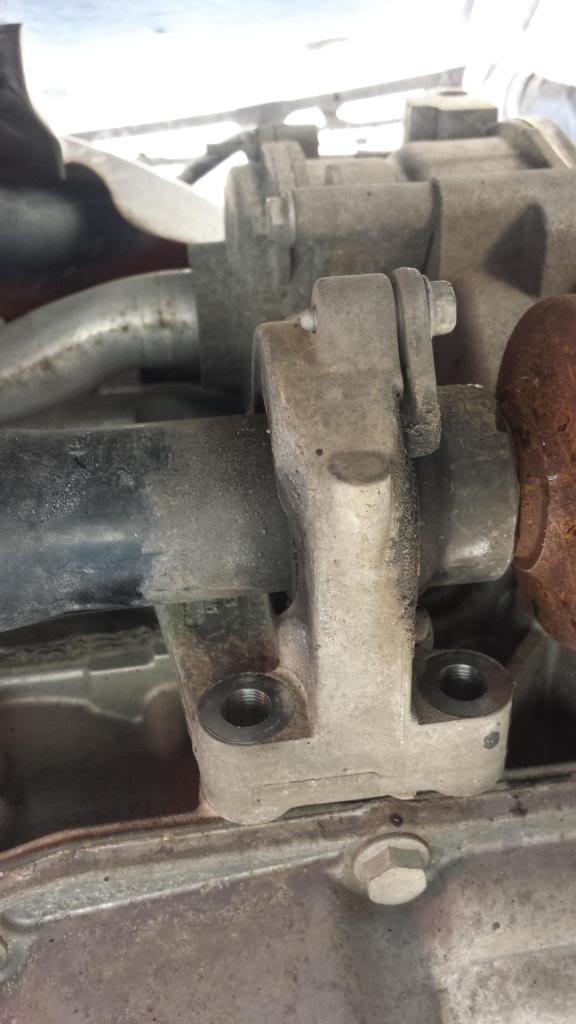
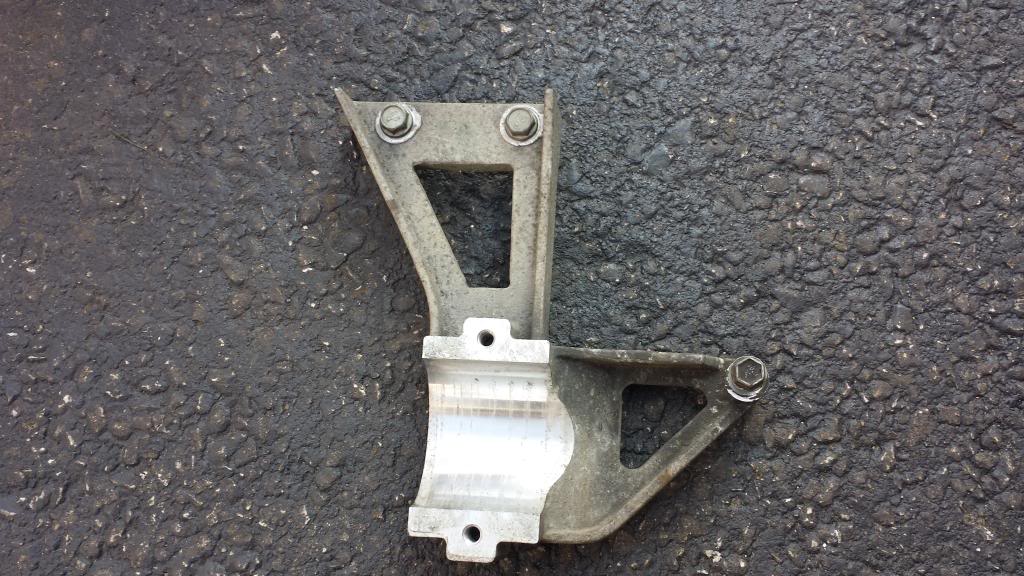
Then the bracket must be removed. 3 x 13mm bolts (longest bolt is the lowest bolt)
Bracket removed
Now you have access to get to the top starter bolt. There are two bolts for the starter, the lower one is easy to see and remove� The upper one requires the use of an extension and feel it into place and then unbolt it�
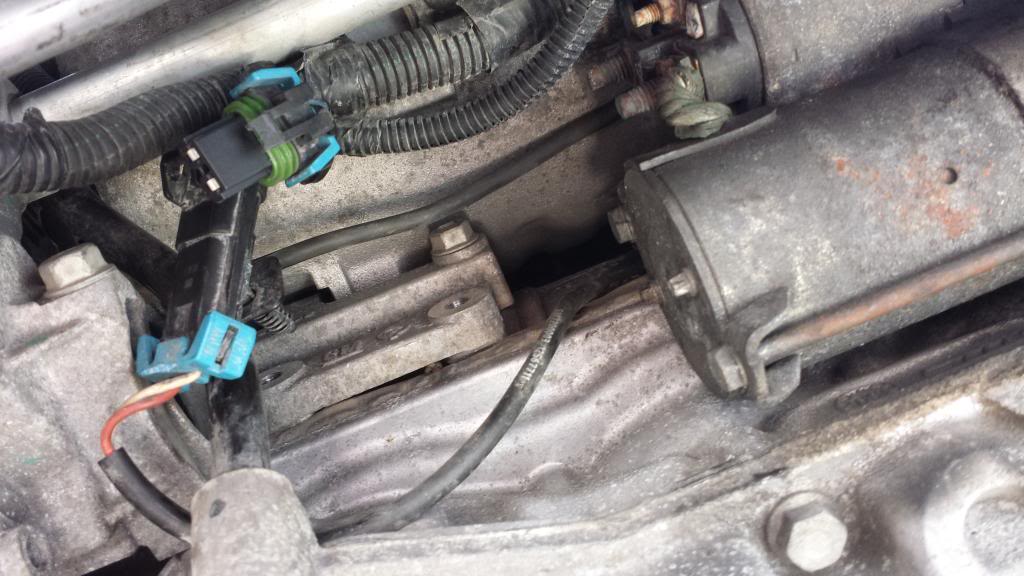
Starter removed..

Next was setting up the engine hanger� I must say, this HF model worked like a champ and throughout the process never even budged�
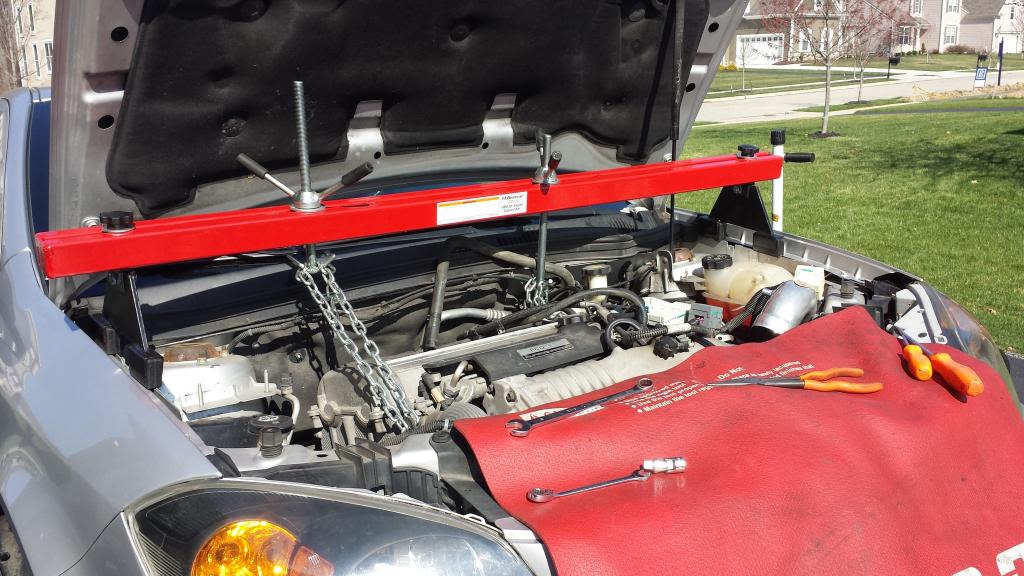
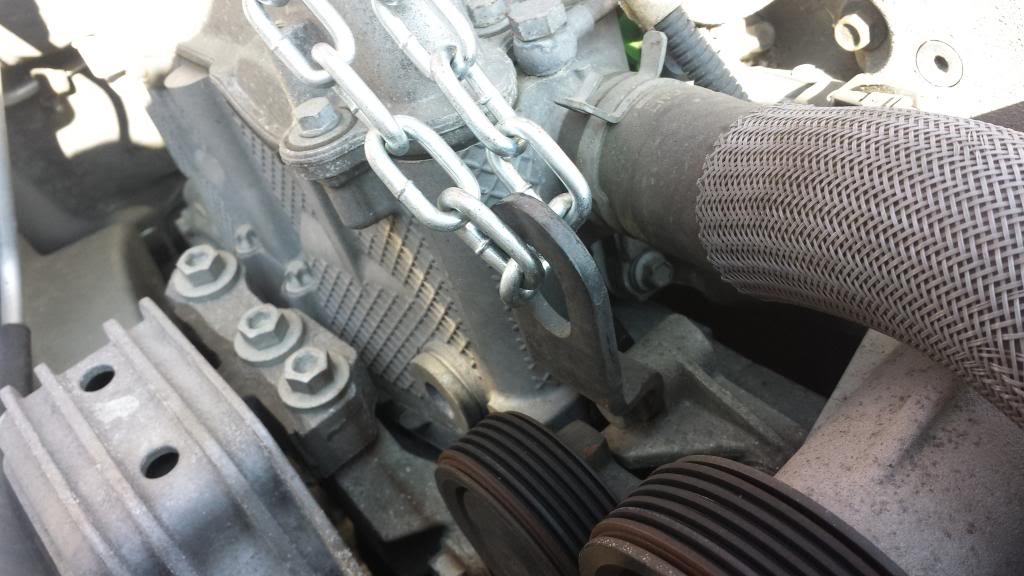
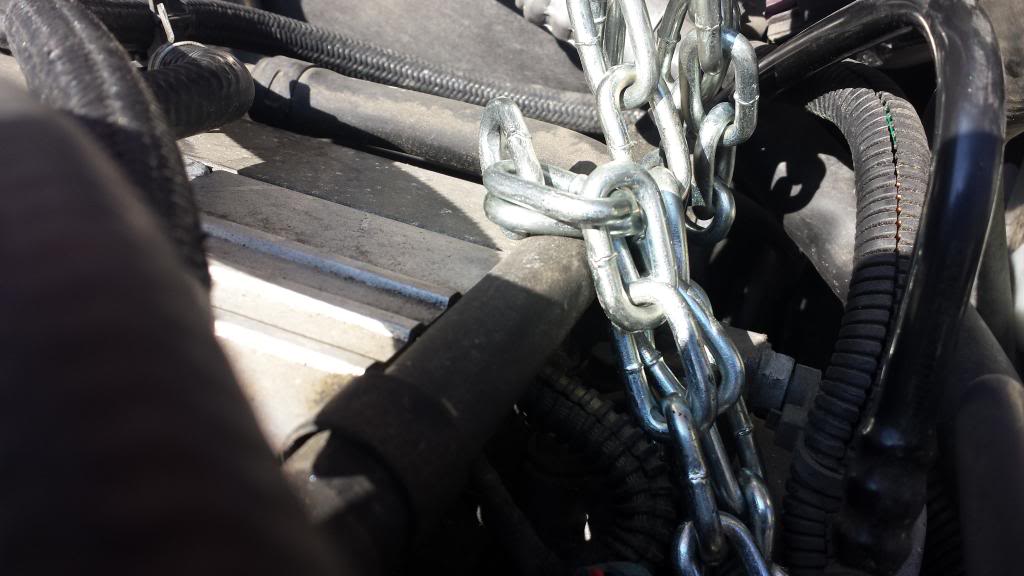
Supported on pinch welds, not on side of fenders (don�t want to bend fenders)
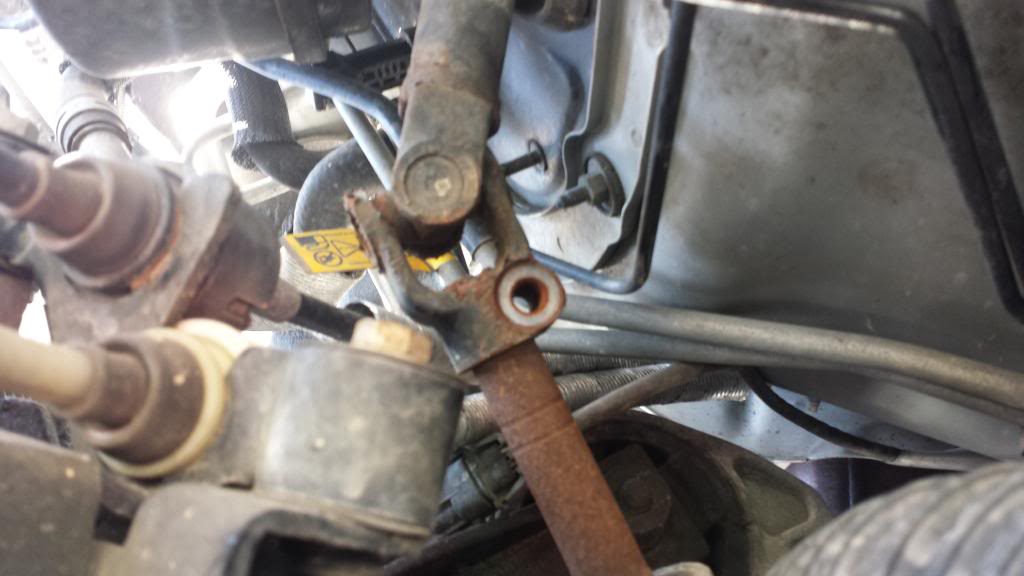
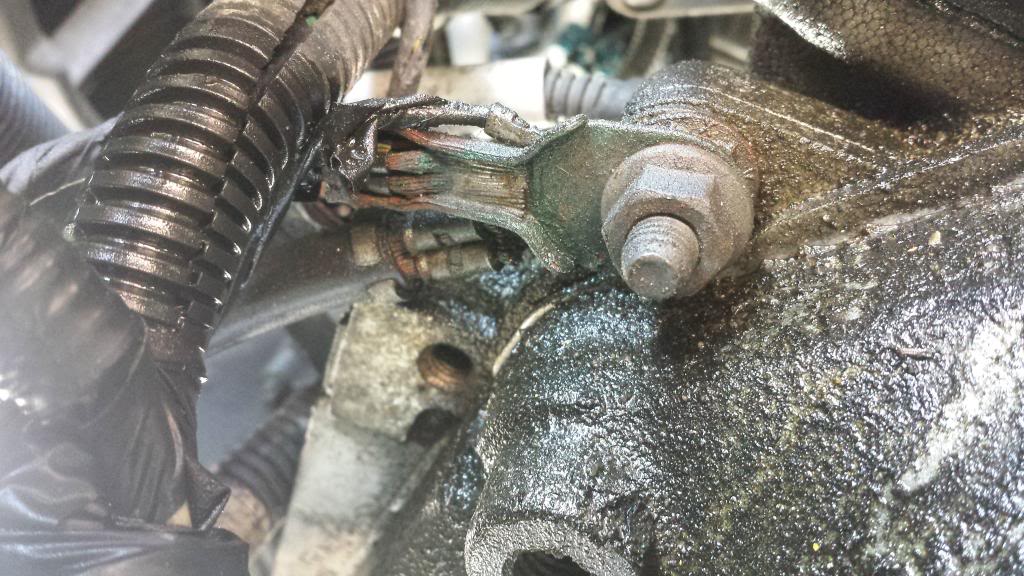
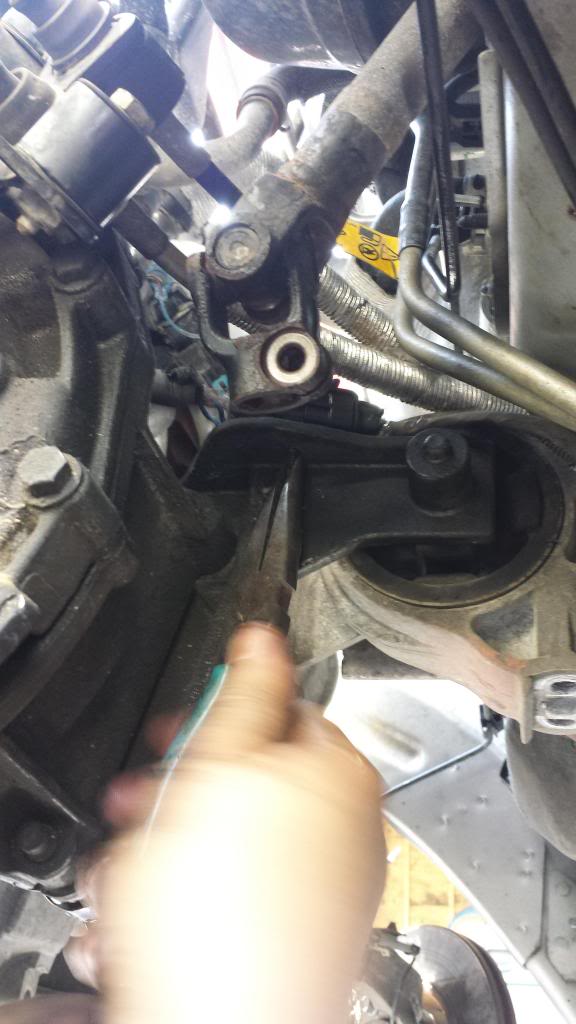
Next I removed the 13mm Steering bolt on the Steering intermediate shaft.
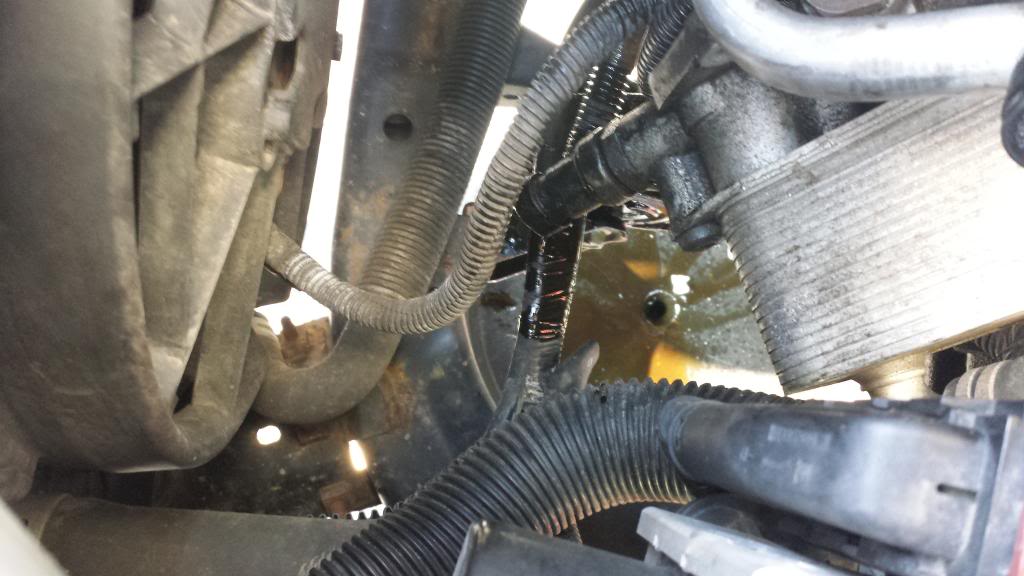
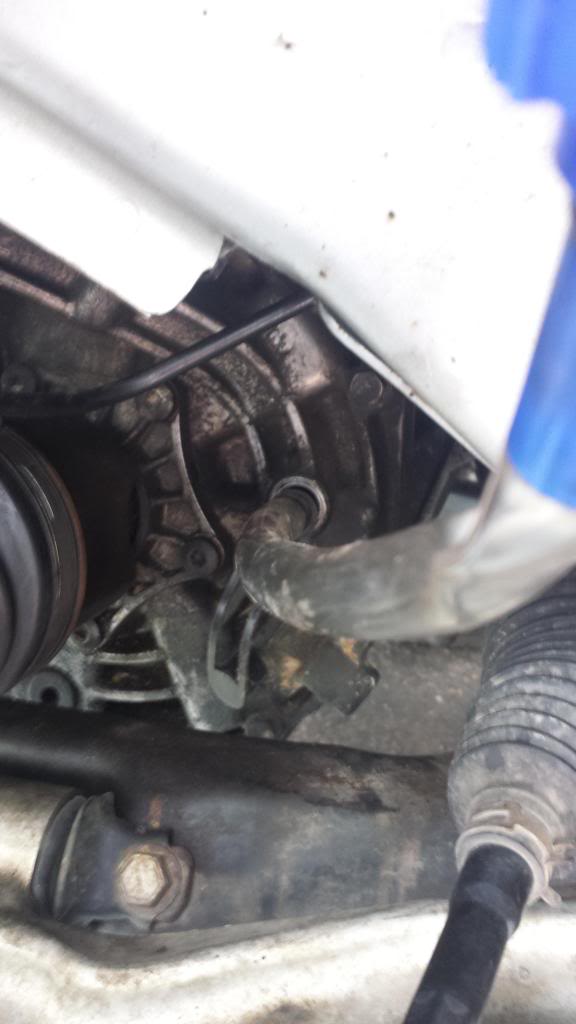
Began removing transmission to engine bolts, this is the top one (note I had to remove the oil cooler to get access)� Also note the clutch bleed valve is now easy to see (and remove)�
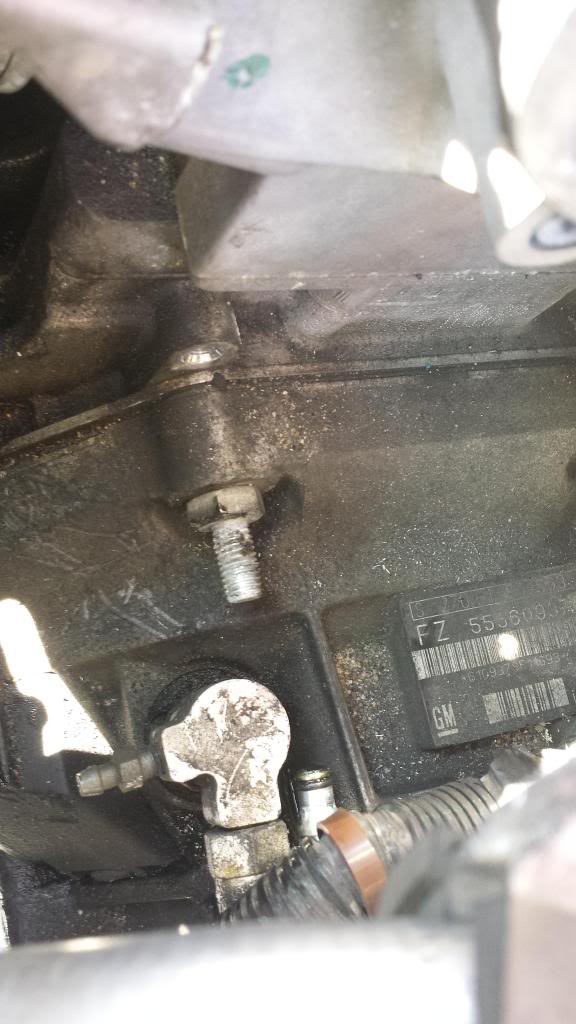
Clutch bleed valve removed (just pop out clip on side of it with small screwdriver)� Be careful not to lose the clip�
Remove nut and remove grounds (on transaxle)�
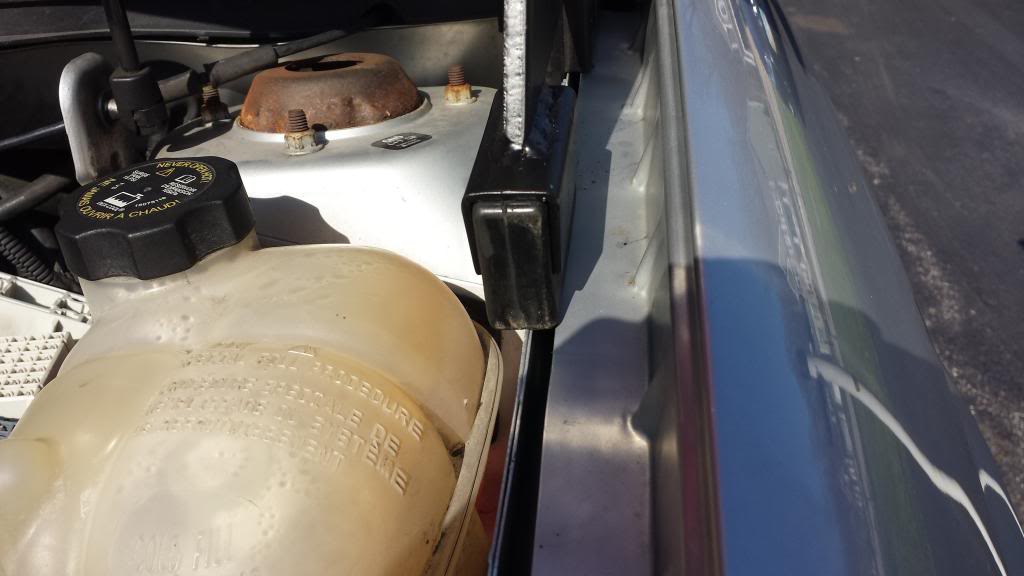
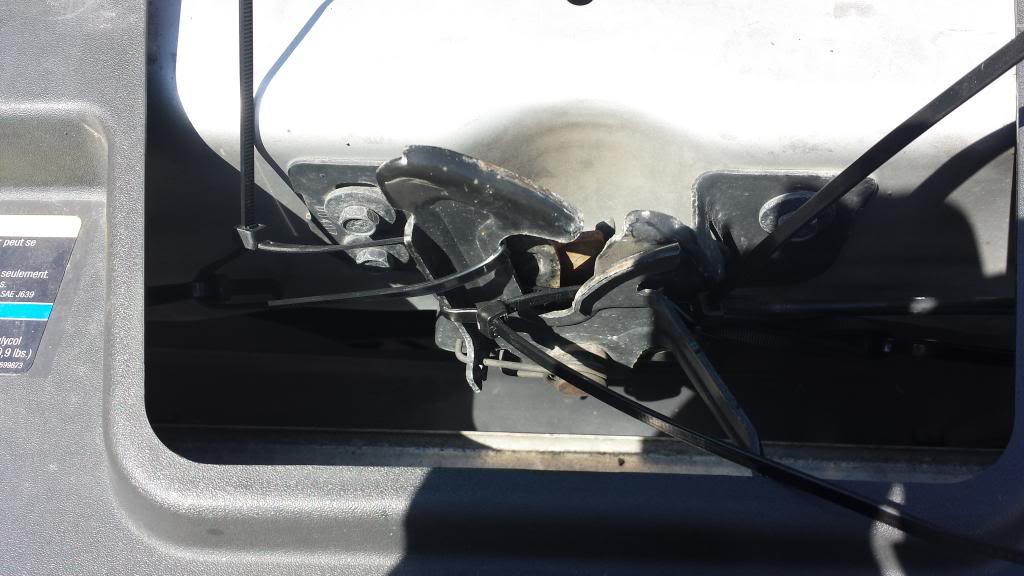
In preparation for the removal of the lower subframe/cradle, the radiator NEEDS to be supported by something (the subframe holds it up)�. I used zip ties and joined them together in loops for the required distance from where the radiator hoses attach to the radiator up to the hood locking mechanism� I used this mechanism to provide the support for the radiator�
Also removed the two front lower splash shields for access so the subframe could easily drop...
Simple work here
Remove tie rod nut and disconnect Tie rod (1 X 18mm Nut)
Remove balljoint. This is 1X16mm Bolt with 1 X 15mm Nut and remove balljoint assembly (nut gets installed on rearward direction of car)
Remove 30mm Axle nut with washer and remove axle shaft from knuckle�
Do this on both sides. The exception is the passenger side which has a carrier bearing and the requires removal. There are 3 bolts holding this on, then remove axle shaft as an assembly�
View from passenger side with axle shaft removed.
Also when dropping the front cradle/frame the sway bar links need disconnected. We could not do this without destroying our sway bar links� Had to use a vise grip to get traction to unbolt these� The good thing is the replacement ones have room for a hex wrench on the bolt shaft for easy removal (when we have to do struts on this car)
Next was to remove the starter to get access to the Transaxle bellhousing bolts� However before the starter can be removed, the Supercharger cooling pump needs to be out of the way (to get access to starter bolts). There are 2 x 13 mm bolts holding the pump to the bracket.
Then the bracket must be removed. 3 x 13mm bolts (longest bolt is the lowest bolt)
Bracket removed
Now you have access to get to the top starter bolt. There are two bolts for the starter, the lower one is easy to see and remove� The upper one requires the use of an extension and feel it into place and then unbolt it�
Starter removed..
Next was setting up the engine hanger� I must say, this HF model worked like a champ and throughout the process never even budged�
Supported on pinch welds, not on side of fenders (don�t want to bend fenders)
Next I removed the 13mm Steering bolt on the Steering intermediate shaft.
Began removing transmission to engine bolts, this is the top one (note I had to remove the oil cooler to get access)� Also note the clutch bleed valve is now easy to see (and remove)�
Clutch bleed valve removed (just pop out clip on side of it with small screwdriver)� Be careful not to lose the clip�
Remove nut and remove grounds (on transaxle)�
In preparation for the removal of the lower subframe/cradle, the radiator NEEDS to be supported by something (the subframe holds it up)�. I used zip ties and joined them together in loops for the required distance from where the radiator hoses attach to the radiator up to the hood locking mechanism� I used this mechanism to provide the support for the radiator�
Also removed the two front lower splash shields for access so the subframe could easily drop...
04-25-2014, 08:45 PM
#3
New Member
Thread Starter
Join Date: 04-25-14
Location: Ohio
Posts: 7
Likes: 0
Received 0 Likes
on
0 Posts
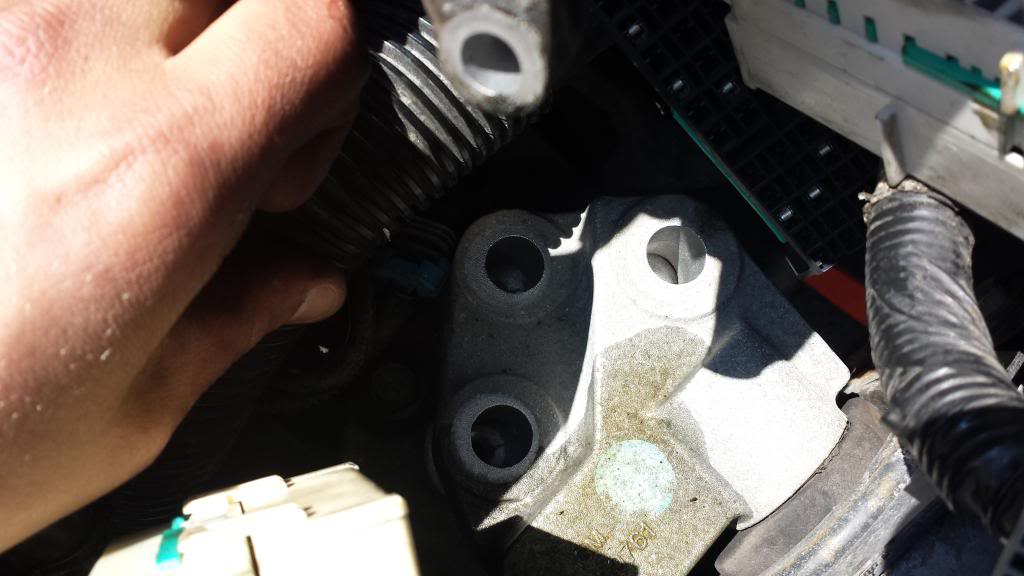
Once this was done, I disconnected the rear motor mount to subframe (3 bolts) out of the bottom of the subframe (these are vertical)…
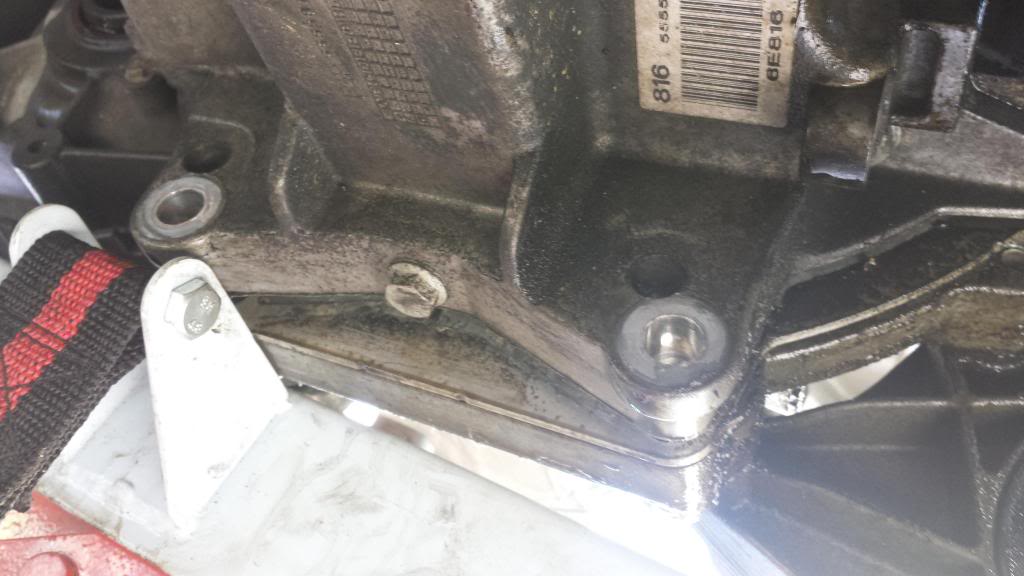
Then I removed the front motor mount bolt. (note, I did not remove the front motor mount assembly)... Found that it was not necessary..
Then I removed the remaining transmission to engine bolts…
Then removed the four lower subframe bolts… Helps to have a helper here… The bolts are 22mm…
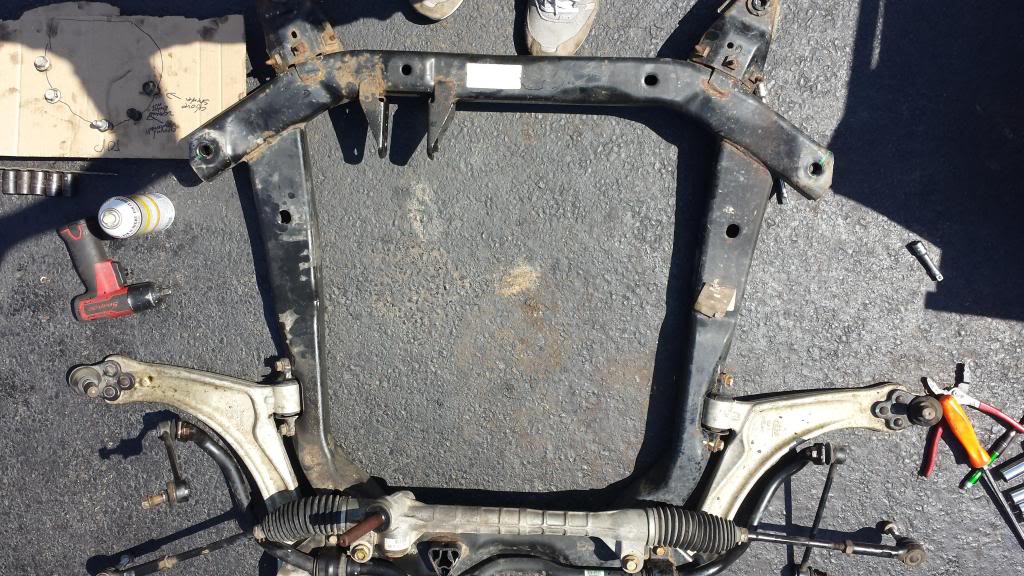
Moved subframe away from the car… (note the template I made for the transmission to engine bolts on the cardboard piece)… Sometimes bolts are not the same length and can be hell to get right if you put them back in the wrong holes…
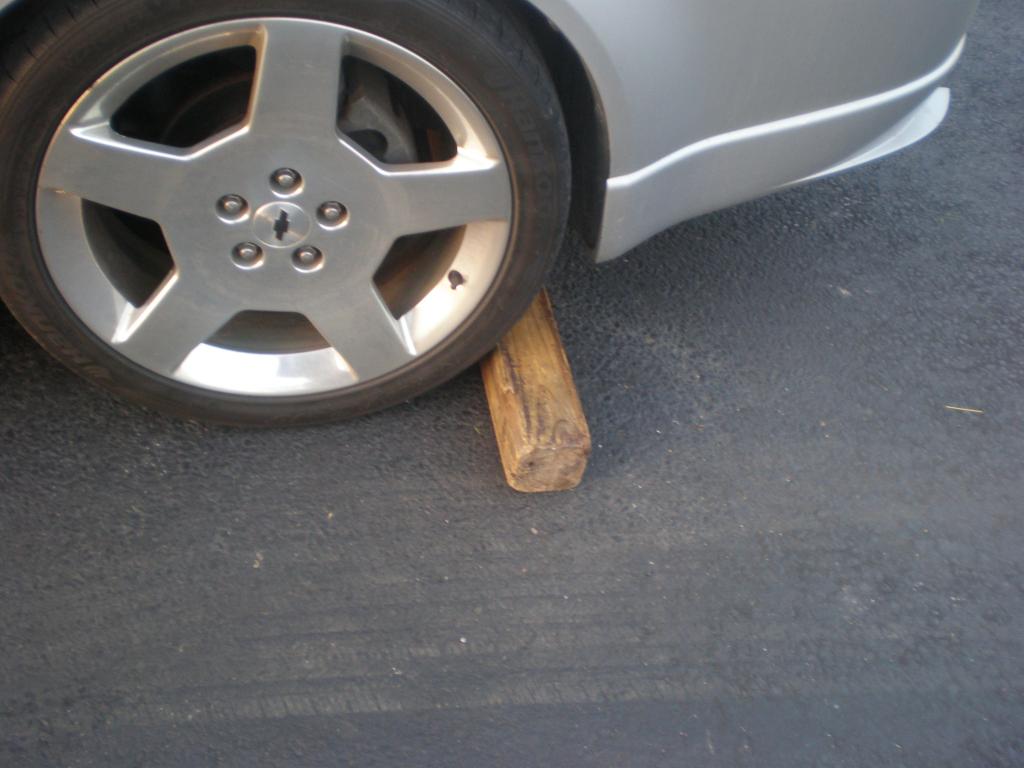
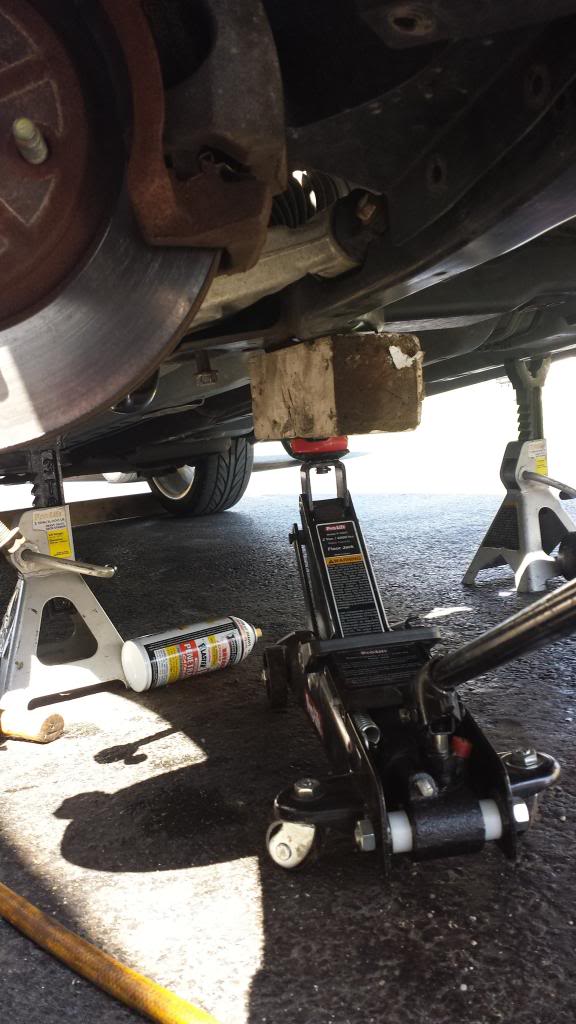
Then I placed a block of wood on a small jack and held the engine in position… similar to this…
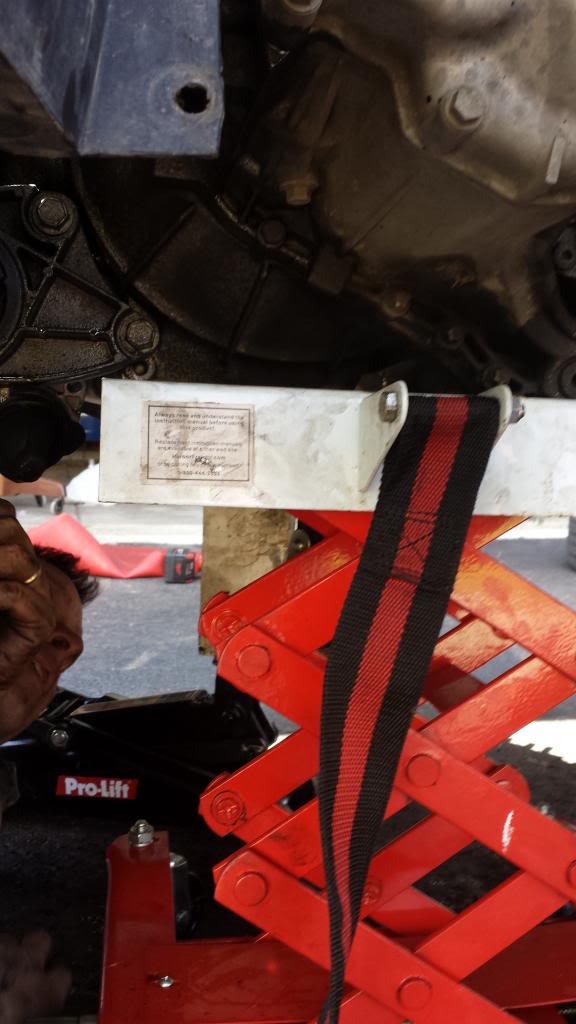
Then I used the transmission jack to support the transmission
Then removed upper transmission mount bolts (3 X 16mm)
All bolts out of Engine/trans
Next, pulled trans back and lowered trans jack… Trans out.. Note front motor mount still attached...
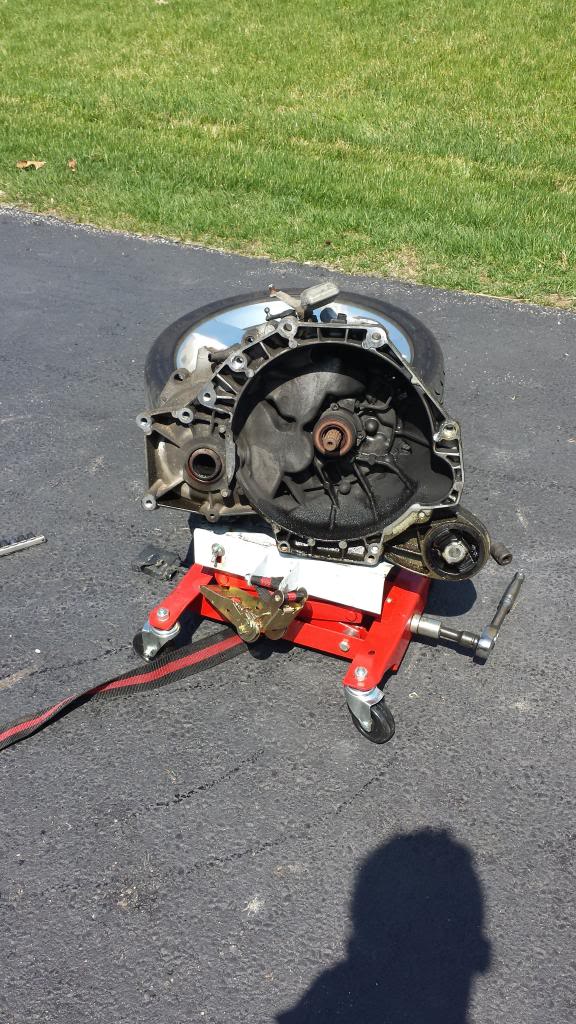
This pi�ata is whacked open,... Now, Time for my candy…
It took around 5 hours to get to this point…. Not really hard and didn’t have any issues… Just lots of steps….
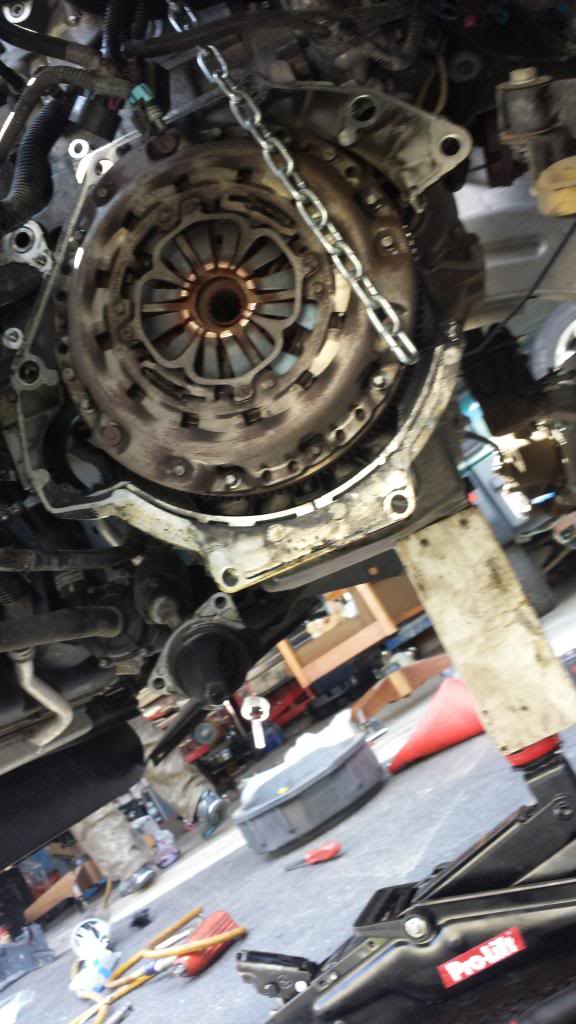
Now was the time to remove the pressure plate, clutch and flywheel… The pressure plate came off with an E10 socket on an impact (to keep the flywheel from turning)
Here is the old flywheel and clutch
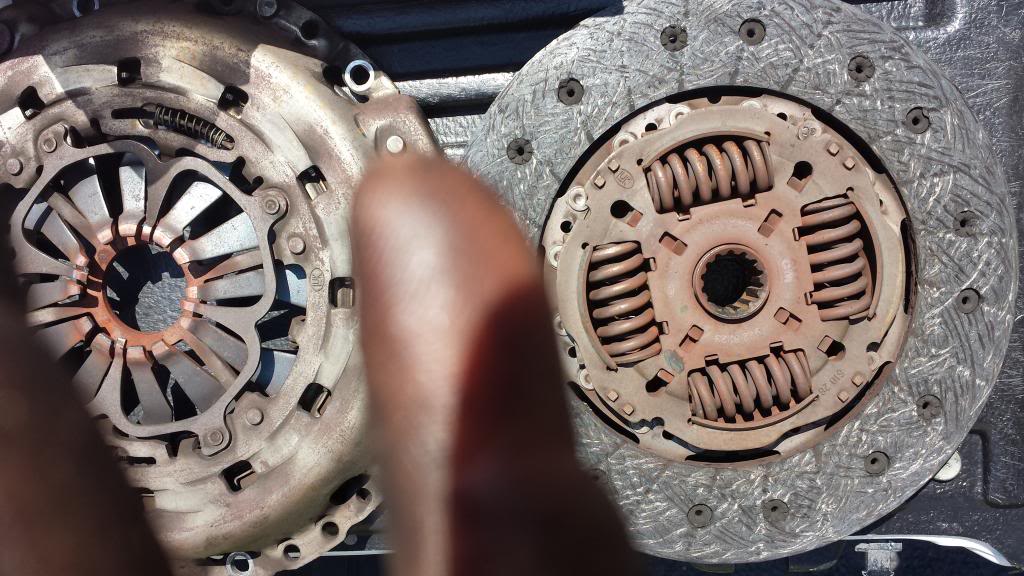
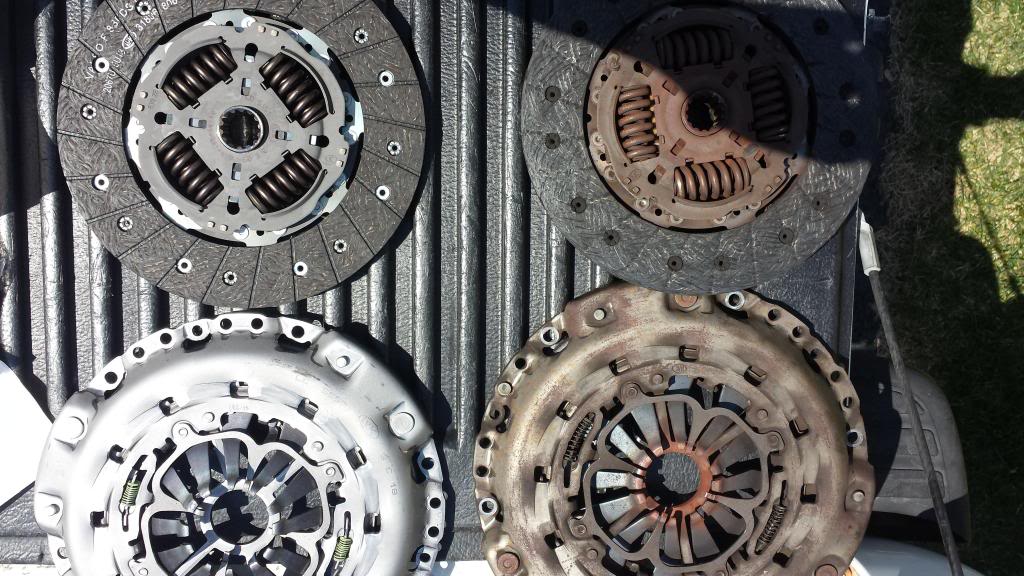
Comparing old and new…
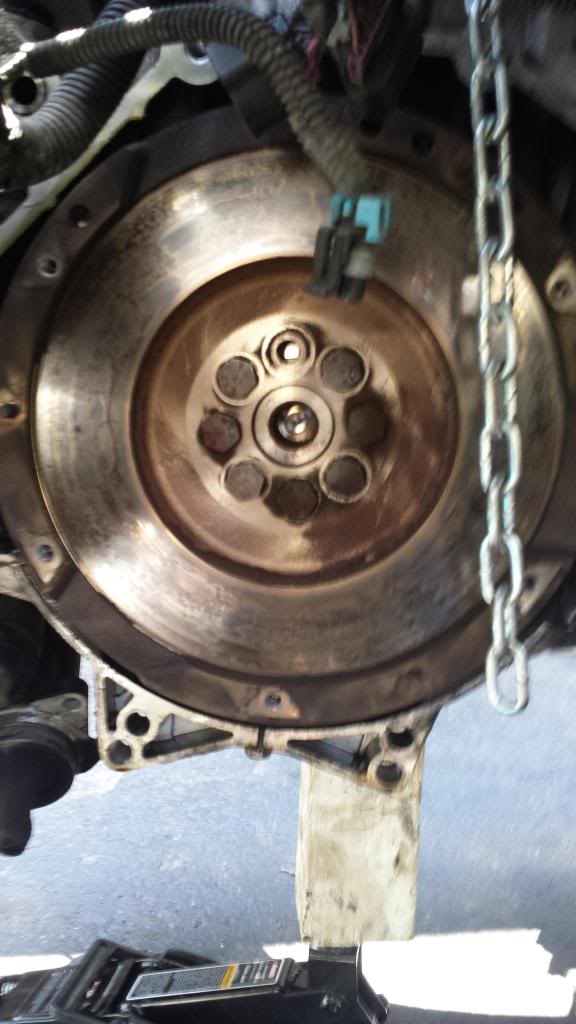
Removing Flywheel bolts…
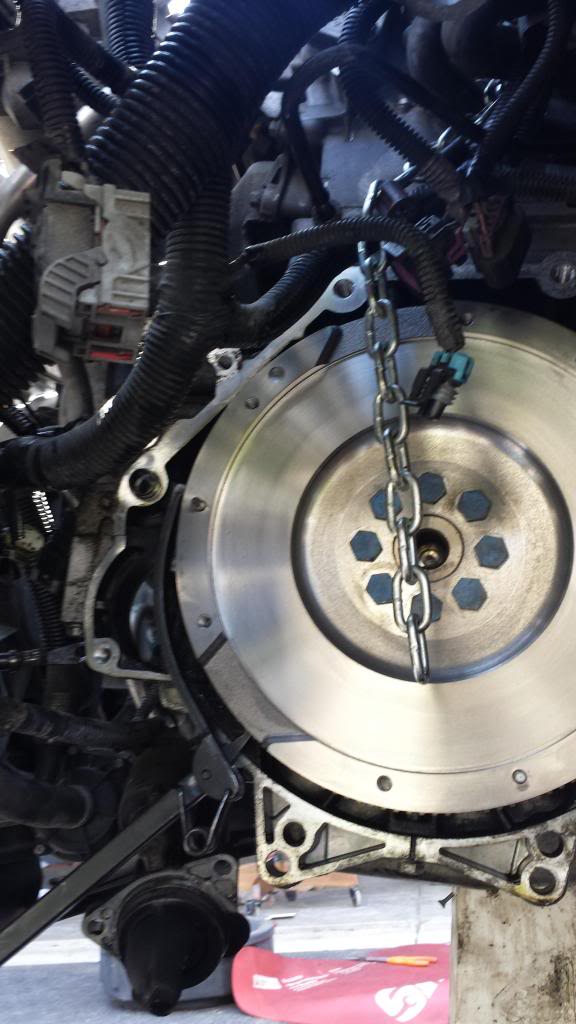
Installing new flywheel bolts… Had to use a flywheel holder to keep the flywheel from moving (see lower left).… Torqued in star pattern… 15 Ft-lbs, 39 Ft-lbs, then 25 degree final turn..
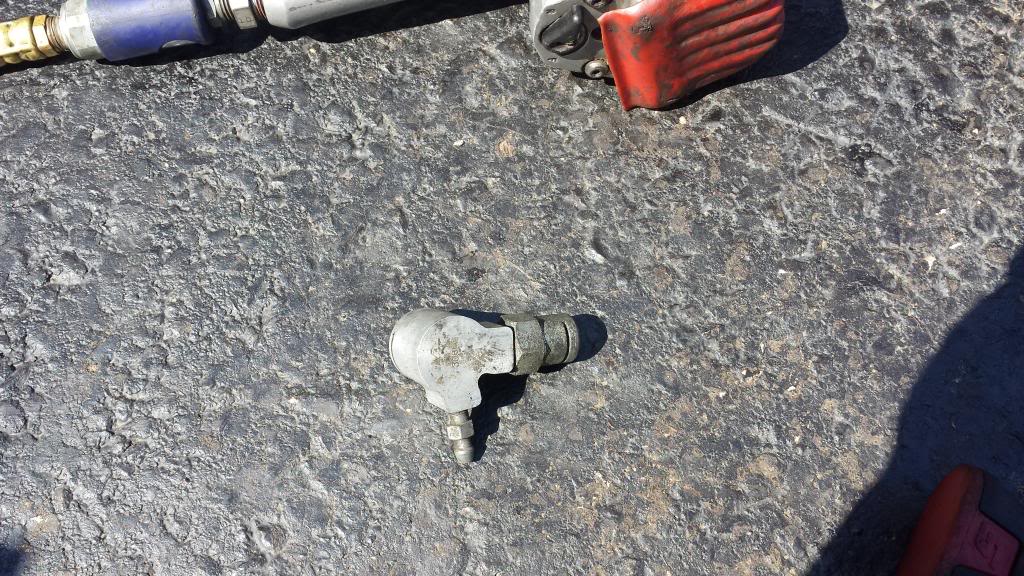
Disconnected J-pipe from Throwout/Slave assembly…. This is a 9mm fitting…. Had to dust off a 9mm wrench… Can’t even remember the last time I used a 9mm….
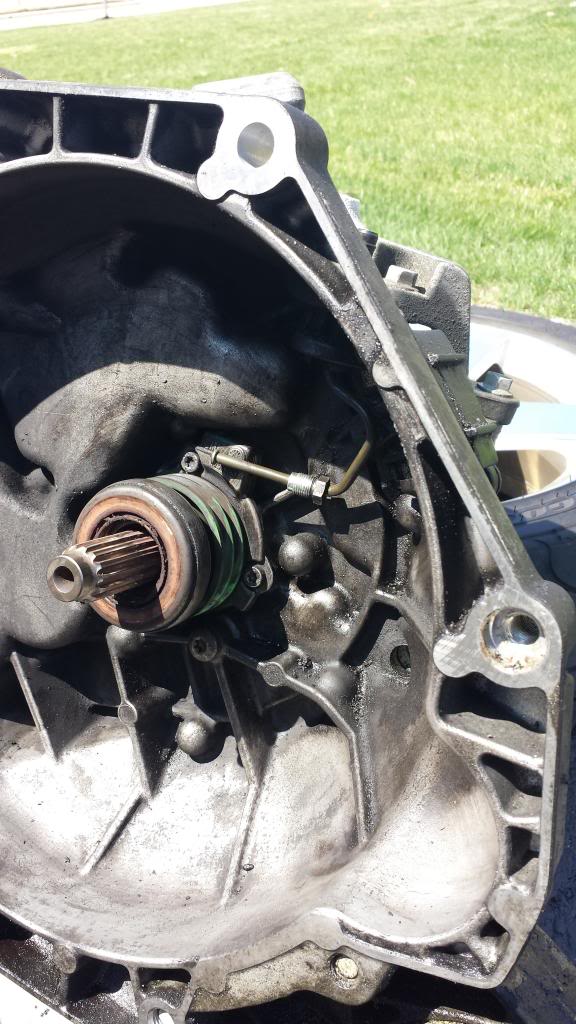
Additionally, for those who don’t know, this clutch assembly does not use a typical Arm and throwout bearing… The slave cylinder is attached to the throwout bearing… Most cars use an arm and an external (out of the trans) slave cylinder… Making it easier to repair if the slave has an issue…. I can see the good and bad of this system so I really don’t have any other point to make…
The old throwout bearing was bad and was making noise whenever the clutch pedal was depressed… An in-hand examination definitely confirmed this…
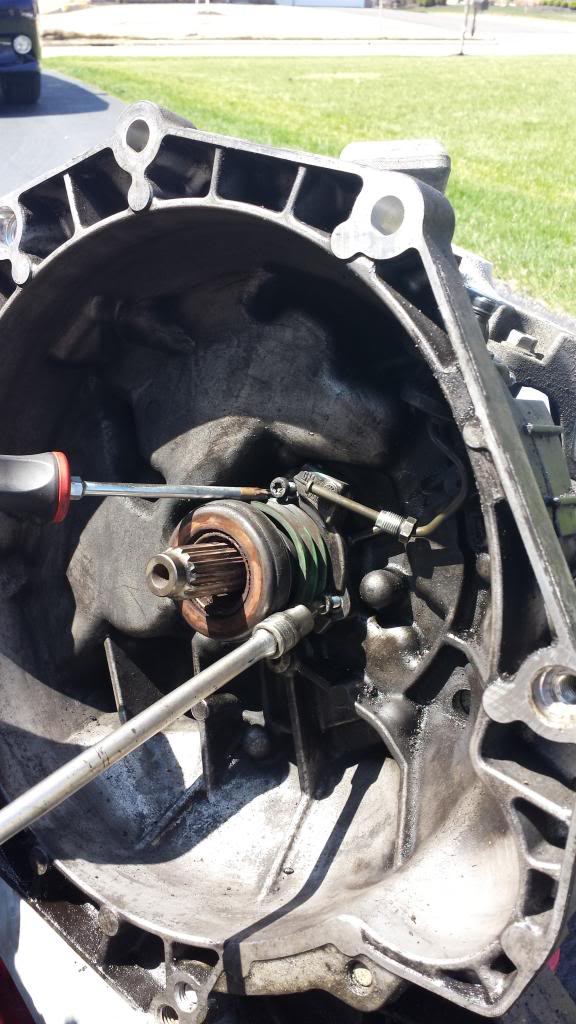
The assembly is held on by 3 x Torx 30 bolts… These can strip easily, I could not get a socket on it straight to break the bolt loose, so I used a T30 screwdriver, pressed hard against it and applied an adjustable wrench to the bolster… All three “popped” easily, and then I could remove them with a socket… These are known to strip easily, so care should be taken here…
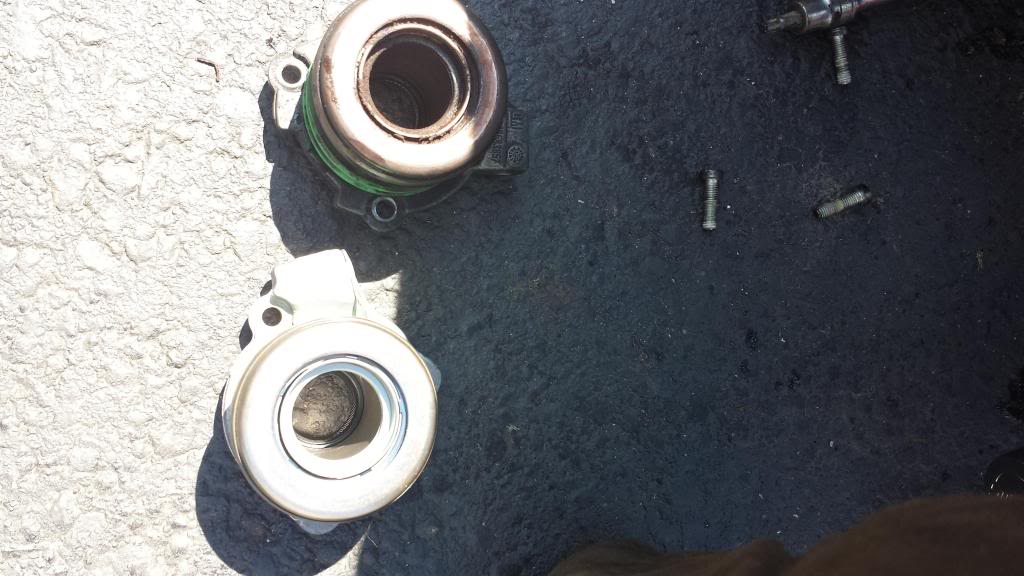
Old and new
To replace the J-pipe, push the plastic round holder up and there are two disconnects that you can release with a small screwdriver… This is plastic and can break easily, so take care here…
All re-assembled…
Next, I removed the fill plug (to be sure I could!)… This is a Hex fitting and came out with no issues… I lost some fluid when removing the trans… This trans takes about two quarts and as I would find out later, lost almost a quart…. Also this trans fluid is expensive…. $30 a quart… Only available around me at the GM dealership (Advance Auto and Autozone don’t stock it)…
I did not get pics of the clutch installation tool and bolting up the new pressure plate, but it was simple, Use the clutch installation tool to hold the clutch in place, then put the pressure plate over it and bolt the pressure plate down...all while making sure the flywheel was staying aligned. I torqued the pressure plate bolts to 22 Ft-lbs and all was good...
Then came the time to put it all back together… A thing I did differently from just going in reverse was to re-install the starter with the sub-frame still off… Had more access to get in that top hidden bolt…
Also, I hooked up the bleed nipple to a vacuum pump and bled it from the back and then did the pump and bleed method... No issues getting great pedal..
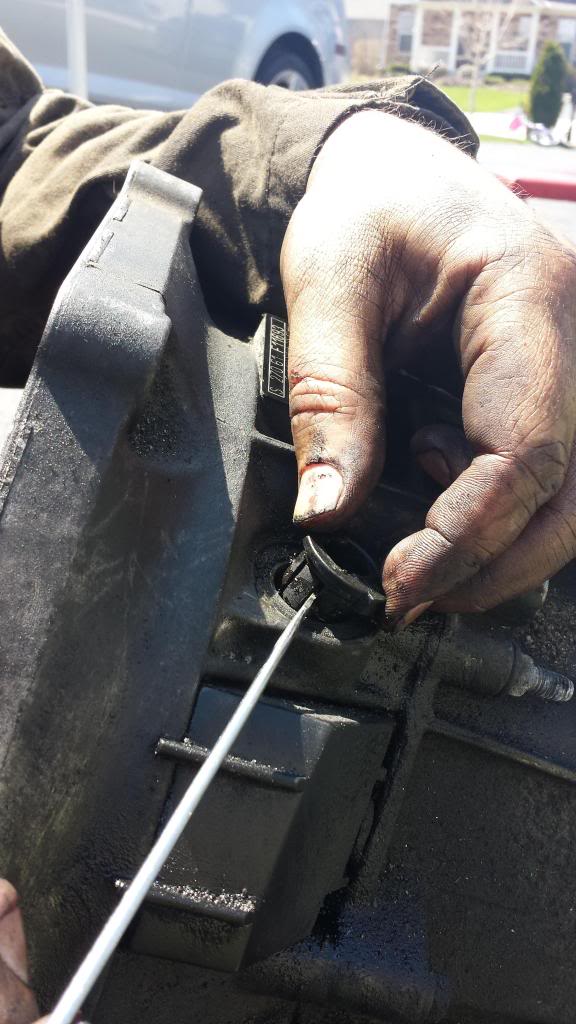
With everything back in place I had to check the fluid level… There is no dipstick on this car and the proper trans fluid level is when the top plug on the trans is open and is at the level of the opening…
Here is what I used…
The plug location on the drivers side…
Filling…
Once filled, I put the tire back on and took her for a spin… Worked Great!!! No more slipping clutch… I also told my nephew not to go hard on it for 500 miles and let the clutch break in… Also, I told him since he saw me do it, the next time it went bad it was going to be him replacing it..…
Cheers!
-Karl
Then I removed the front motor mount bolt. (note, I did not remove the front motor mount assembly)... Found that it was not necessary..
Then I removed the remaining transmission to engine bolts…
Then removed the four lower subframe bolts… Helps to have a helper here… The bolts are 22mm…
Moved subframe away from the car… (note the template I made for the transmission to engine bolts on the cardboard piece)… Sometimes bolts are not the same length and can be hell to get right if you put them back in the wrong holes…
Then I placed a block of wood on a small jack and held the engine in position… similar to this…
Then I used the transmission jack to support the transmission
Then removed upper transmission mount bolts (3 X 16mm)
All bolts out of Engine/trans
Next, pulled trans back and lowered trans jack… Trans out.. Note front motor mount still attached...
This pi�ata is whacked open,... Now, Time for my candy…
It took around 5 hours to get to this point…. Not really hard and didn’t have any issues… Just lots of steps….
Now was the time to remove the pressure plate, clutch and flywheel… The pressure plate came off with an E10 socket on an impact (to keep the flywheel from turning)
Here is the old flywheel and clutch
Comparing old and new…
Removing Flywheel bolts…
Installing new flywheel bolts… Had to use a flywheel holder to keep the flywheel from moving (see lower left).… Torqued in star pattern… 15 Ft-lbs, 39 Ft-lbs, then 25 degree final turn..
Disconnected J-pipe from Throwout/Slave assembly…. This is a 9mm fitting…. Had to dust off a 9mm wrench… Can’t even remember the last time I used a 9mm….
Additionally, for those who don’t know, this clutch assembly does not use a typical Arm and throwout bearing… The slave cylinder is attached to the throwout bearing… Most cars use an arm and an external (out of the trans) slave cylinder… Making it easier to repair if the slave has an issue…. I can see the good and bad of this system so I really don’t have any other point to make…
The old throwout bearing was bad and was making noise whenever the clutch pedal was depressed… An in-hand examination definitely confirmed this…
The assembly is held on by 3 x Torx 30 bolts… These can strip easily, I could not get a socket on it straight to break the bolt loose, so I used a T30 screwdriver, pressed hard against it and applied an adjustable wrench to the bolster… All three “popped” easily, and then I could remove them with a socket… These are known to strip easily, so care should be taken here…
Old and new
To replace the J-pipe, push the plastic round holder up and there are two disconnects that you can release with a small screwdriver… This is plastic and can break easily, so take care here…
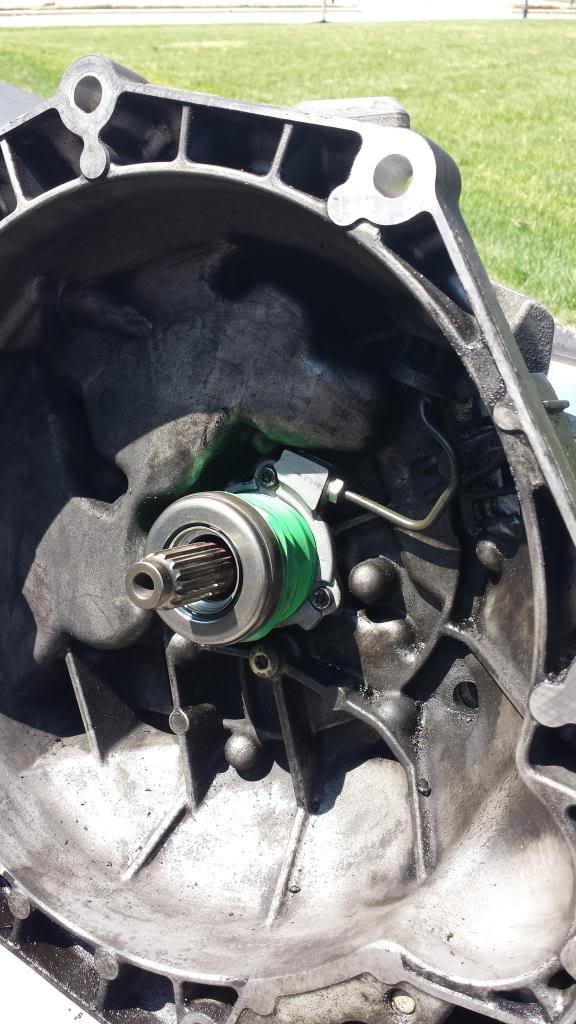
All re-assembled…
Next, I removed the fill plug (to be sure I could!)… This is a Hex fitting and came out with no issues… I lost some fluid when removing the trans… This trans takes about two quarts and as I would find out later, lost almost a quart…. Also this trans fluid is expensive…. $30 a quart… Only available around me at the GM dealership (Advance Auto and Autozone don’t stock it)…
I did not get pics of the clutch installation tool and bolting up the new pressure plate, but it was simple, Use the clutch installation tool to hold the clutch in place, then put the pressure plate over it and bolt the pressure plate down...all while making sure the flywheel was staying aligned. I torqued the pressure plate bolts to 22 Ft-lbs and all was good...
Then came the time to put it all back together… A thing I did differently from just going in reverse was to re-install the starter with the sub-frame still off… Had more access to get in that top hidden bolt…
Also, I hooked up the bleed nipple to a vacuum pump and bled it from the back and then did the pump and bleed method... No issues getting great pedal..
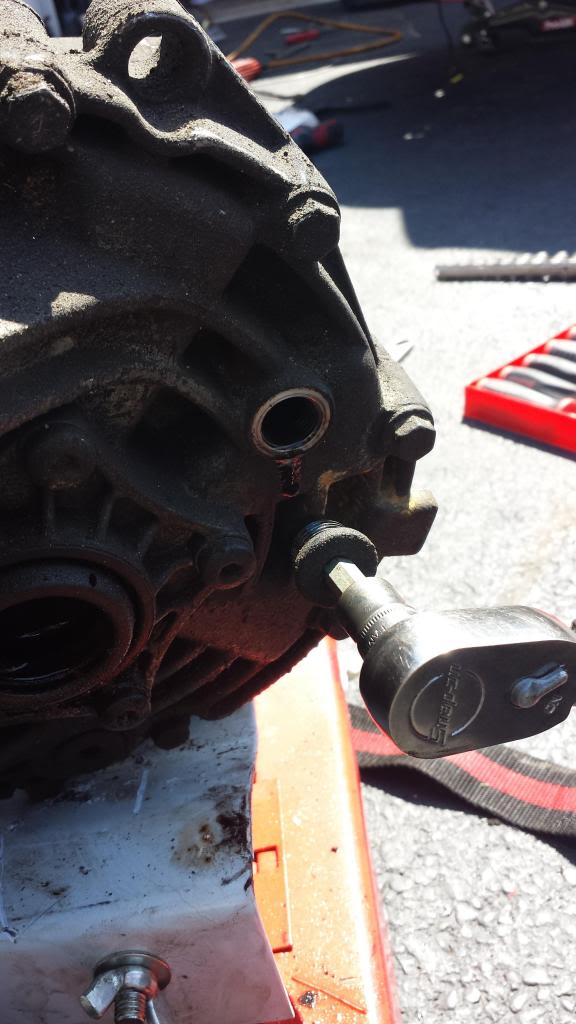
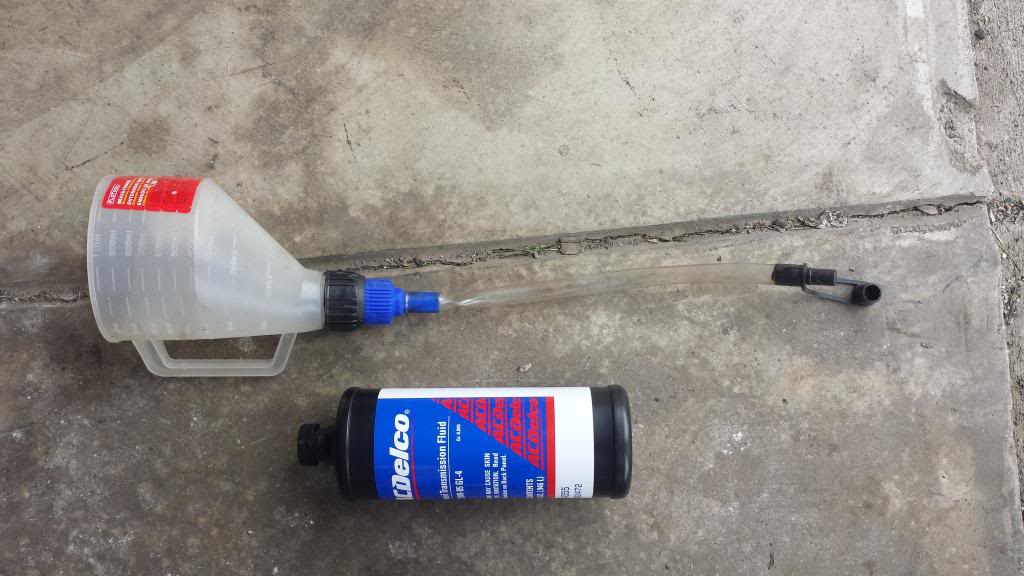
With everything back in place I had to check the fluid level… There is no dipstick on this car and the proper trans fluid level is when the top plug on the trans is open and is at the level of the opening…
Here is what I used…
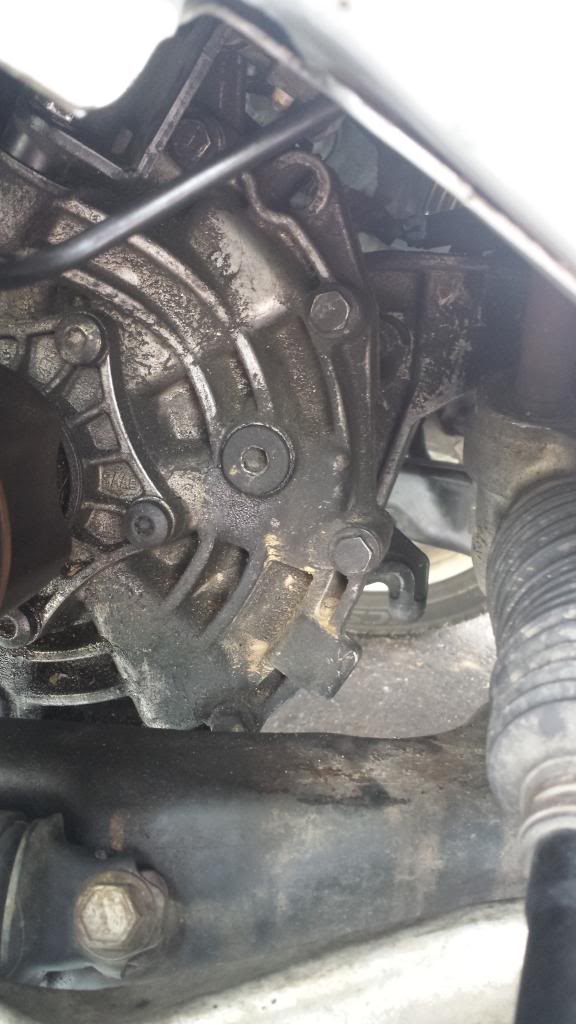
The plug location on the drivers side…
Filling…
Once filled, I put the tire back on and took her for a spin… Worked Great!!! No more slipping clutch… I also told my nephew not to go hard on it for 500 miles and let the clutch break in… Also, I told him since he saw me do it, the next time it went bad it was going to be him replacing it..…
Cheers!
-Karl
Last edited by ToyotaKarl; 04-25-2014 at 09:46 PM.
04-25-2014, 09:15 PM
#4
Very nice write-up, a couple extra steps but not bad.
Me I prefer to drop the subframe right away, with it out you have plenty of access to pull the starter and axles and such without removing anything else like the I/C pump bracket. Also if you use a vacuum bleeder as per GM instructions you don't even need clutch bleeder access and for sure don't need to pull the oil cooler.
I also leave the steering rack hanging in the car to avoid issues with the pinch bolt and alignment, and also to make it easier on me to remove the subframe by myself on the ground. But what you did is the correct way so no arguments from me there.
Thanks for taking the time to post complete pictures and such, this will be helpful for a lot of the kids trying to learn.
04-25-2014, 09:26 PM
#5
New Member
Thread Starter
Join Date: 04-25-14
Location: Ohio
Posts: 7
Likes: 0
Received 0 Likes
on
0 Posts
Very nice write-up, a couple extra steps but not bad.
Me I prefer to drop the subframe right away, with it out you have plenty of access to pull the starter and axles and such without removing anything else like the I/C pump bracket. Also if you use a vacuum bleeder as per GM instructions you don't even need clutch bleeder access and for sure don't need to pull the oil cooler.
I also leave the steering rack hanging in the car to avoid issues with the pinch bolt and alignment, and also to make it easier on me to remove the subframe by myself on the ground. But what you did is the correct way so no arguments from me there.
Thanks for taking the time to post complete pictures and such, this will be helpful for a lot of the kids trying to learn.
Me I prefer to drop the subframe right away, with it out you have plenty of access to pull the starter and axles and such without removing anything else like the I/C pump bracket. Also if you use a vacuum bleeder as per GM instructions you don't even need clutch bleeder access and for sure don't need to pull the oil cooler.
I also leave the steering rack hanging in the car to avoid issues with the pinch bolt and alignment, and also to make it easier on me to remove the subframe by myself on the ground. But what you did is the correct way so no arguments from me there.
Thanks for taking the time to post complete pictures and such, this will be helpful for a lot of the kids trying to learn.
I really debated pulling that oil cooler. It looks like getting that top Trans bolt would be a pain but do-able...
I did vacuum bleed from that top nipple and saw I could get underside access with the oil cooler on, but it looked like a real pain... I need to obviously read how to bleed this without using that bleed nipple, but everything I saw said to use it.... Oh well... Live and learn..
As far as the subframe first... that is a good point... I still think that upper starter bolt would have been a PITA to do with that I/C pump/bracket in the way... but if I ever do this again I will keep that in mind... The Axles came out with no issues, so I don't think that would have given me any time savings...
That Oil cooler and I/C pump stuff probably did slow me down about 45 minutes as far as removal and installation was concerned... So that makes sense about being closer to the book time..
The Steering intermediate u-joint assembly caused no issue... Came out and went in smooth.... I read about both ways to do it, and figured this was the easiest..
Thanks again for the comments!
Cheers!
-Karl
04-26-2014, 05:57 PM
#6
I use a vacuum adapter on the master cyl bottle and if you do the bleeding in a couple steps of pumping the pedal and applying vacuum for 5-10 min, I usually do it while i'm buttoning up the fuse box and such, after the 3rd or 4th round you have a nice pedal with no mess and no touching the bleeder at all.
What I do for the starter upper bolt a deep socket and extension laid in first, then a ratchet to break it loose. At that point it usually comes out by hand. Yes it's a bitch and you are working blind but it's still way easier than taking that lower I/C pump bracket out
I'm not trying to find any fault with your method, just offering my thoughts in the 10 or so times i've done it to possibly help the future undertakers. Again, thanks a lot for taking the time to lay it out step by step with pics, this will help people for sure.
Last edited by ItalianJoe1; 04-28-2014 at 08:29 PM. Reason: Automerged Doublepost
04-26-2014, 08:15 PM
#7
New Member
Thread Starter
Join Date: 04-25-14
Location: Ohio
Posts: 7
Likes: 0
Received 0 Likes
on
0 Posts
After taking off the oil cooler and knowing what I know now, I would definitely skip that step and get an extension in there to take off the top Transaxle to engine bolt...
Also, knowing the distance with an extension to get that top starter bolt, I would also give that a try....
I really do appreciate the comments and knowing both of those before I started would have saved me some time....
I figure I could do this a second time in 10 hours or maybe a little less, now that I know where everything goes and those tips you gave me...
Appreciate it and thanks for the input...
P.S. Just out of curiosity, do you know what the book time on this job is supposed to be?
-Karl
The following users liked this post:
Linkinpark21585 (05-14-2019)
04-28-2014, 08:28 PM
#9
Actually looked it up today, was 6.8 hours to replace the flywheel, add .2 for the slave so call it 7 hours total.
Makes me feel bad for doing them so cheap for people at times. I've since gone back up on price a bit and i'm still way under what any shop gets, and my clutch jobs leave right every time. I've cleaned up a couple that other people have botched themselves or at shops.
Makes me feel bad for doing them so cheap for people at times. I've since gone back up on price a bit and i'm still way under what any shop gets, and my clutch jobs leave right every time. I've cleaned up a couple that other people have botched themselves or at shops.
04-29-2014, 12:45 PM
#10
New Member
Thread Starter
Join Date: 04-25-14
Location: Ohio
Posts: 7
Likes: 0
Received 0 Likes
on
0 Posts
Actually looked it up today, was 6.8 hours to replace the flywheel, add .2 for the slave so call it 7 hours total.
Makes me feel bad for doing them so cheap for people at times. I've since gone back up on price a bit and i'm still way under what any shop gets, and my clutch jobs leave right every time. I've cleaned up a couple that other people have botched themselves or at shops.
Makes me feel bad for doing them so cheap for people at times. I've since gone back up on price a bit and i'm still way under what any shop gets, and my clutch jobs leave right every time. I've cleaned up a couple that other people have botched themselves or at shops.
By the way... What do you normally see that is botched?
Cheers!
-Karl
04-29-2014, 07:02 PM
#11
For me it's either been issues with the slave/line not being sealed properly or whatever, or people not cleaning the input shaft and having a clutch that doesn't release properly. Both are due to inexperienced people doing the jobs but still, not right. Cleanliness is very important and people don't appreciate that.
I actually had a car come to me from a local Nissan shop that builds some very fast cars, they charged him only $250 to do the clutch because they had no clue. The clutch line coming out of the trans had a fitting welded onto an extension piece and the distribution/bleeder block was about 6 inches from the casing. It leaked like crazy and within a couple hours of him leaving from their shop. I was pulling the engine anyway so I took care of it while it was out, but it's scary what passes for an acceptable job to some people.
I always suggest, if you aren't VERY mechanically inclined, to not attempt this job on this car solo. On some platforms it's far easier, this car is not one of them. I can have the transmission out of my 350Z and on the floor in under an hour taking my time. This car you really have to hustle and know exactly what you are doing to knock it out in a day. 10 hours as you said is about right for a first timer that has a lot of mechanical knowledge and tools. The average guy who has never pulled a trans, this is a full weekend job and might end up not being right at the end.
04-29-2014, 07:33 PM
#12

Very nice step by step. I just did this job for the first time on my cobalt. Not a ASE car tech but I'm a diesel tech so job is no biggie. I found it easier to hold the engine up with a engine hoist and drop it to maneuver the trans back in. Oil cooler stayed but I did see it giving issues. Was not job impending. Aside that real awesome job. 12 hours and pictures being taken? Pretty fast lol. I did do my first clutch in bout 7 hours. But that was with a 2nd pair of hands helping.
04-30-2014, 02:08 PM
#13
New Member

Join Date: 04-22-14
Location: Denver
Posts: 16
Likes: 0
Received 0 Likes
on
0 Posts
What clutch did you guys go with for the cobalt 22 2007 supercharged. My clutch is starting to wore out too. It's been slipping. I heard GMPP and turbotechracing with a stage 2 clutch but not sure which one. Also, anyone know anybody in colorado that can install a clutch for a decent price??
 04-30-2014, 08:07 PM
#15
Senior Member

Great write up. I need a new clutch installed in my 06 LSJ. I have all the parts in hand but hesitant on attempting it myself. Anybody know of some reliable shops or people in the New England area who could install it for me?
05-28-2020, 03:55 PM
#16
New Member

Join Date: 05-28-20
Location: Louisiana
Posts: 1
Likes: 0
Received 0 Likes
on
0 Posts
Re install transmission
I'm having trouble putting the trans back in myself I'm using the same transmission lift he used but with out the engine support bar any tips to help me out ?

Thread
Thread Starter
Forum
Replies
Last Post