2.2 L61 Engine: Hunter's How to Install M62 on 2.2l Cobalt
 08-15-2008, 04:19 AM
#1

Hunter's How to Install M62 on 2.2l Cobalt
To start with, The most advanced thing I have ever done to my car is install my header and downpipe. I am definitely not experienced, so if I could do this, then you probably can too. I would say befre this install, I had almost no technical experience working on cars, and while I can identify many parts, I have never touched 95% of them before this install. My car was also a 2.2 L61, with an automatic transmission, and Secondary Air Injection. If I can get the setup to work on this car, it will work on any cobalt...
Unfortunately, I can't make a list of needed items as I obtained most of my parts from different places, and I dont know what they all were, etc. Some tools however, I do know:
Basic socket wrench set (mostly using 7mm, 8mm, 10mm, and 13mm)
Soldering Iron
Solder
Flux
Heat shrink (smallest available)
Flat head screwdriver
Phillips head screwdriver
Jack and stands
Rubber Mallet Helps
Pliers
Some of the parts you will need however are as follows:
LSJ Intake Manifold
M62 Supercharger
New injectors (atleast 42lb/hr) and harness
Lower manifold bracket and the bolt for it
Coolant Pump and Bracket Pieces
LSJ Intake
LSJ Upper Radiator Hose
LSJ Idler Pulley
LSJ Tensioner Pulley
LSJ Stock or Stage II belt, depending upon pulley size you're using
LSJ Throttle Body (stock will work, but it will be restrictive, won't flow well, and needs to have holes drilled for it)
LSJ MAP/IAT2 sensor
IM-Head Gasket
SC-IM Gasket
M8 1.25 thread 120mm bolts X 3 (these are hard to come by. Look for a specialty store)
I HIGHLY RECCOMEND LABELING THE PARTS YOU REMOVE, MAINLY THE BOLTS, NUTS, AND SCREWS, AS MOST OF THESE WILL BE REUSED.
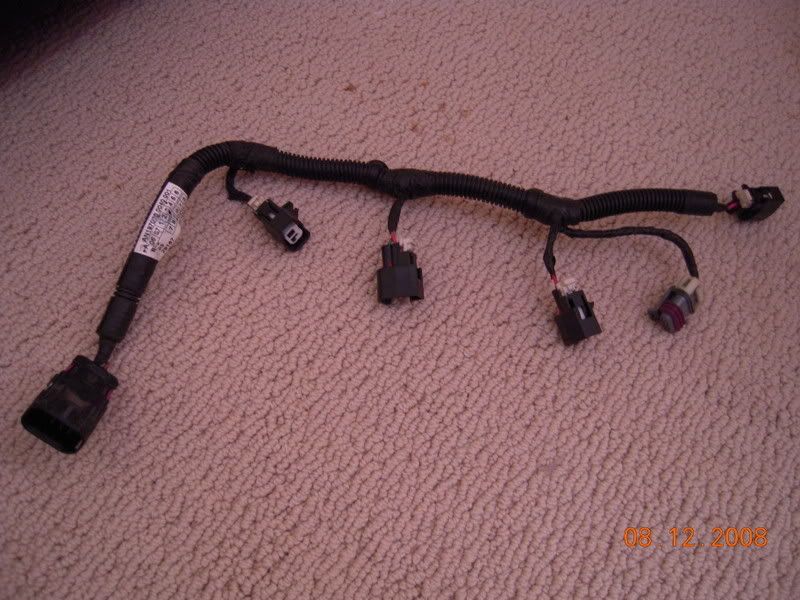
STEP ONE: Making The Injector Harness
Start with both your stock harness, and the harness that fits your injectors
stock:
new:
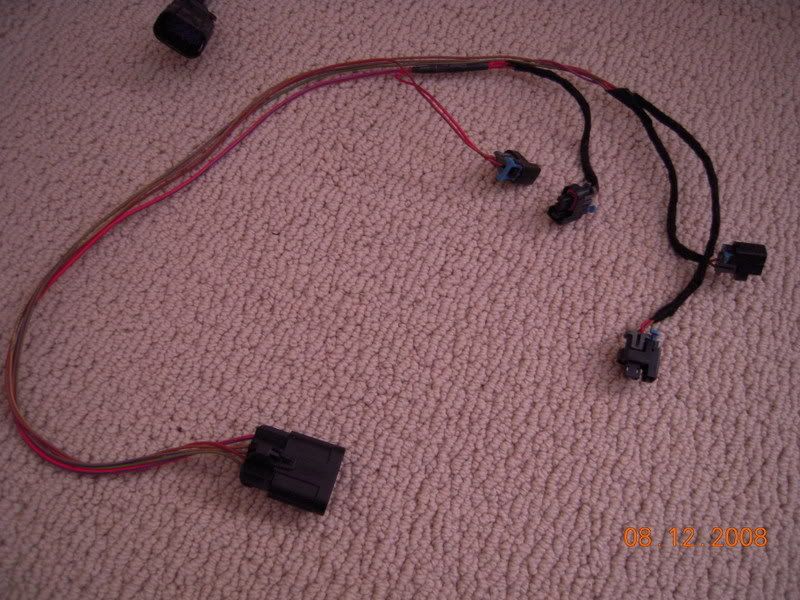
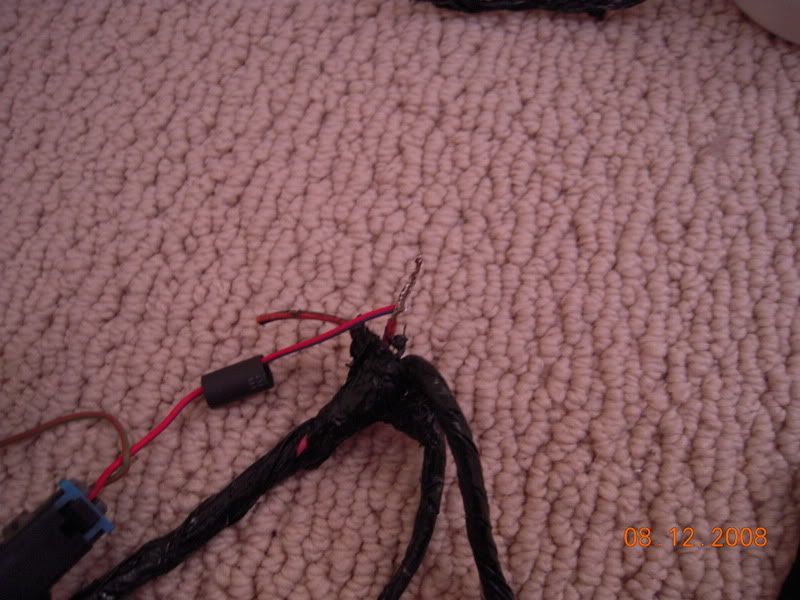
Start by removing the wiring from the wire looms and removing any electrical tape that was used....there will probably be a lot and it might take a while. Cut off one of the injectors from your stock harness, and one of the injectors on your new harness.
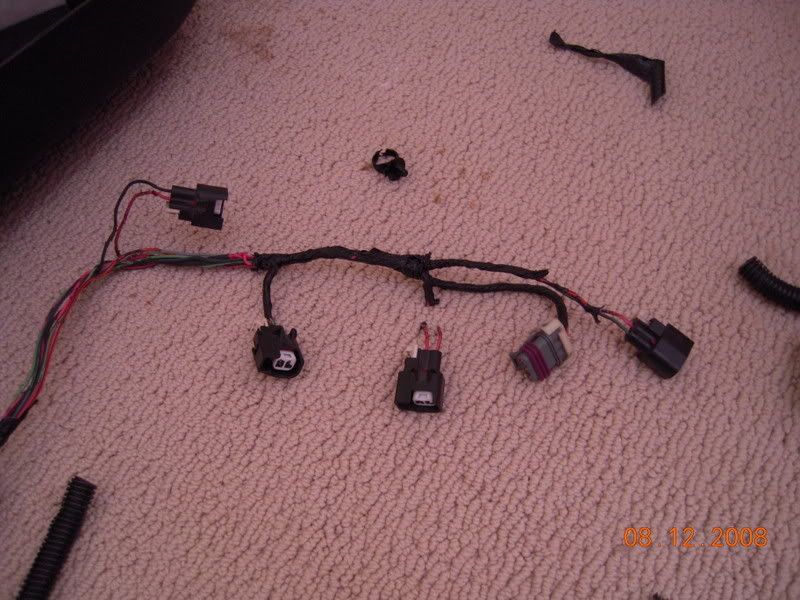
Strip the wires of the injector you just cut, then repeat on your stock harness on the wiring side (not the old injecotr). Once this is done, check which wires are the grounds for each injector. For me, one harness's ground wires were all pink (one pink wire per clip) and the other harness's ground wires were all pink with a blue stripe., as seen in the below picture.
Make sure you slide a shrink wrap tube around one of the wires before twisting them!
Take the ground from your stock harness and twist it with the ground end of your injector clip
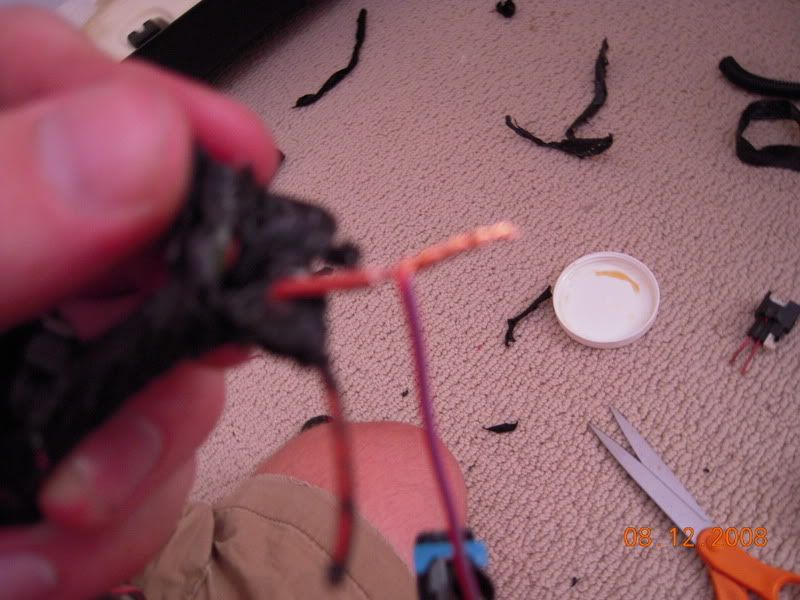
Dip the exposed metal in flux, and solder it up with a good solid connection
Slide the shrink wrap you put on one ofthe wires earler to cover your new soldered connection and shrink it with the soldering iron
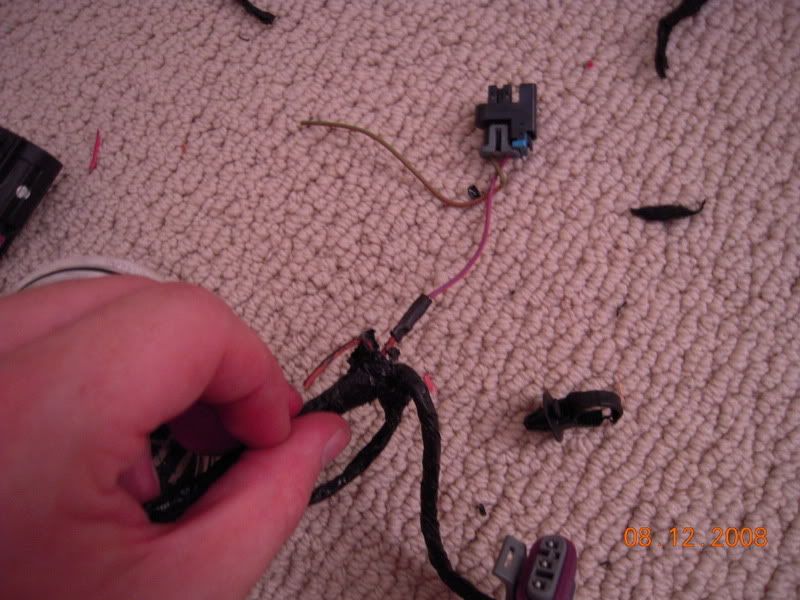
Repeat these steps 7 more times, making sure you are connecting ground for ground and positive for positive every time.
Stuff your new wiring harness into its loom from earlier (I had some new red wire loom I used)
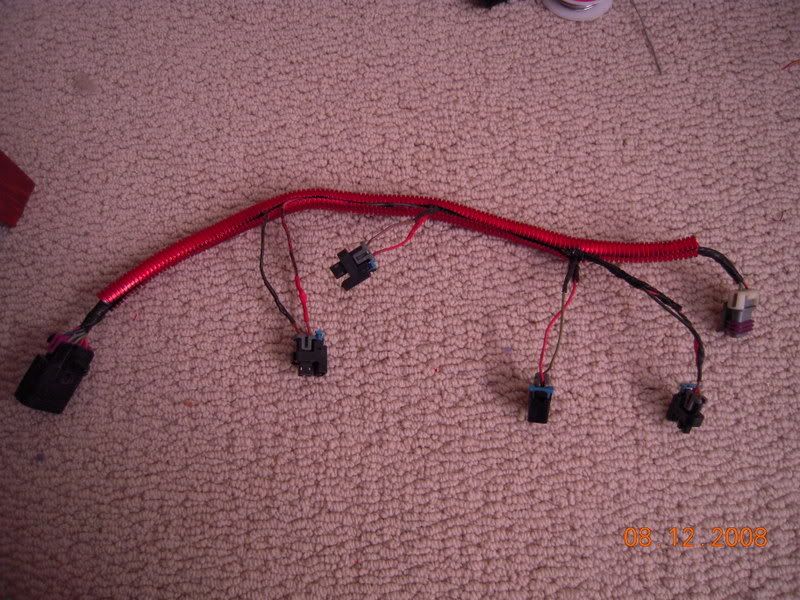
Congradulations, you now have a custom wiring harness for larger injectors for a 2.2l
Plug everything back into place, and install your new injectors as well using this how-to: https://www.cobaltss.net/forums/show...ight=injectors
You dont need to plug in the MAP sensor to your new harness, as the MAP sensor will be removed anyway when you swap out intake manifolds.
STEP TWO: Removing Bumper and Headlights
You will need to remove the front bumper and headlights to better reach all of the components you will be removing and installing.
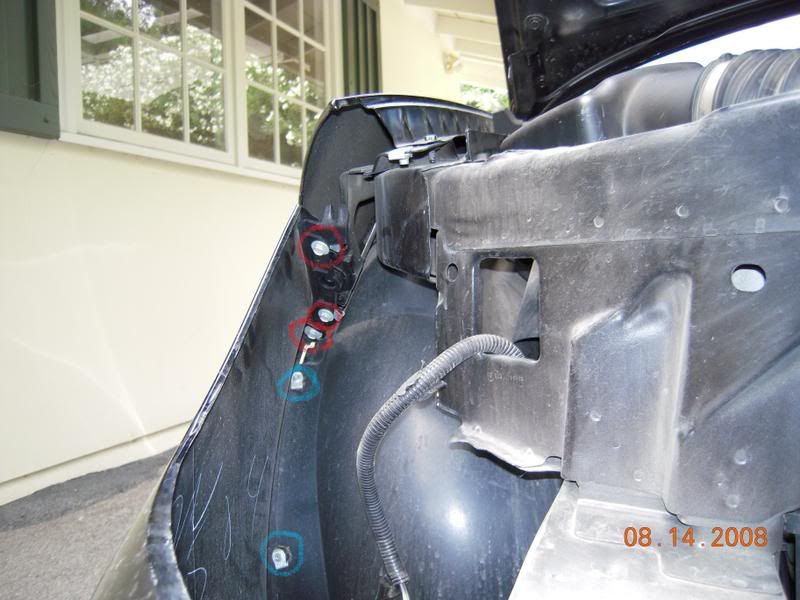
Start by removing these screws in red:
You should be able to remove the headlights now by unplugging them from the connector. Repeat on the other side.
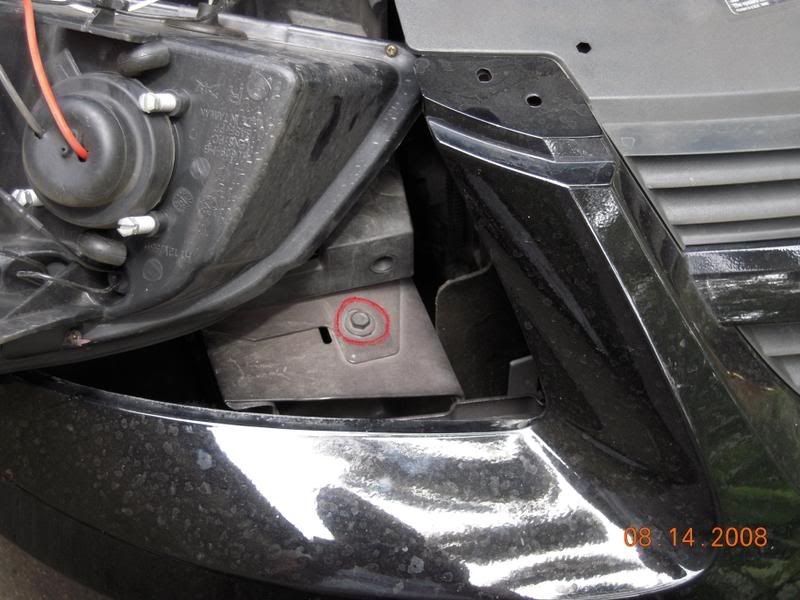
Next remove these bolts in red
The blue screws must be removed from inside the wheel well. There will be several of them bordering the edge of the bumper. Repeat on other side.
The screws in red will allow this piece to fall
Heres a better picture of where the screws will be
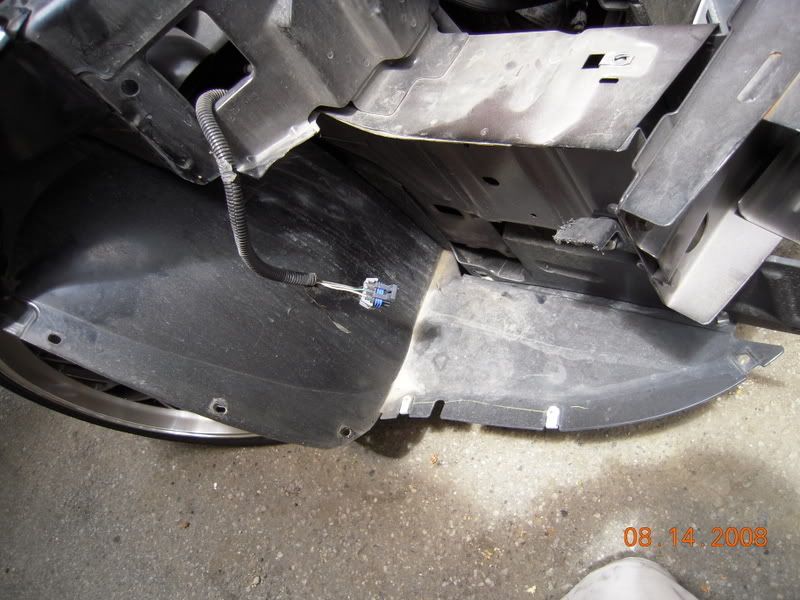
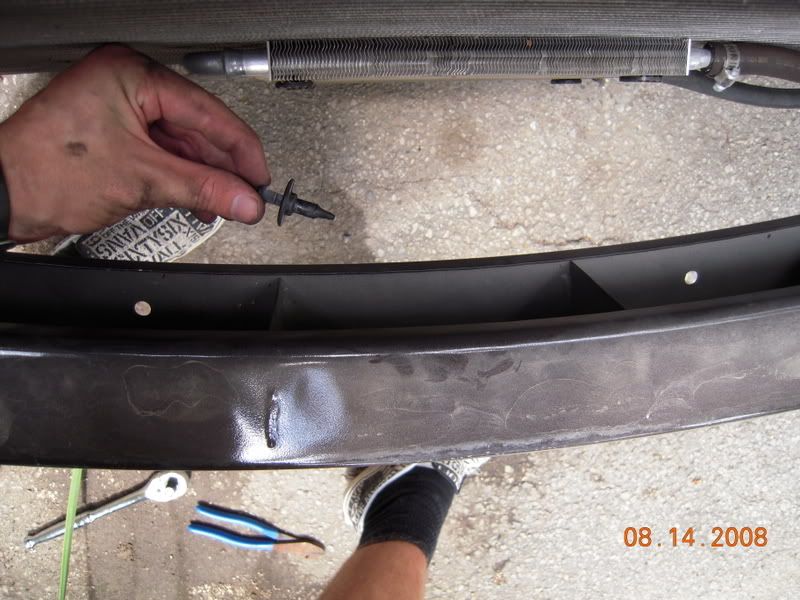
Finally, there's two more plastic clips on the front of the bumper on the inside. pull the small circular part up and then the clip should push out
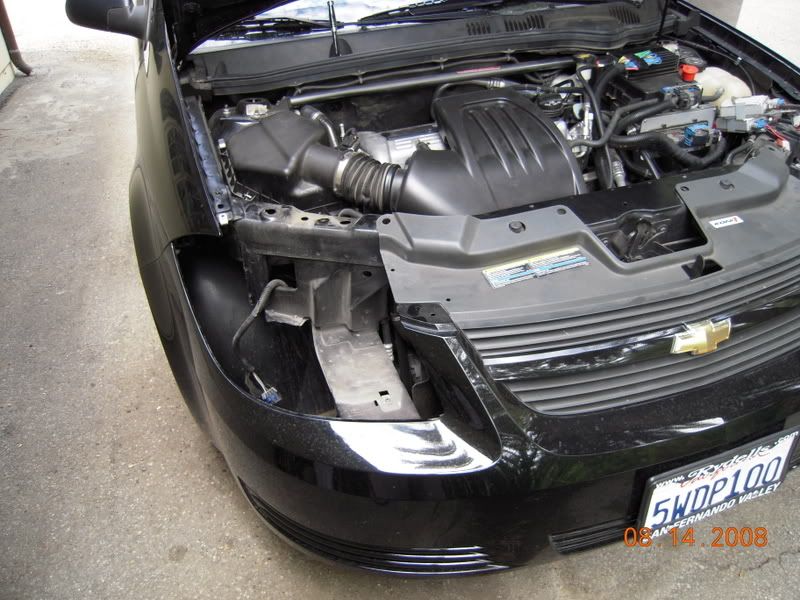
This should be your end result:
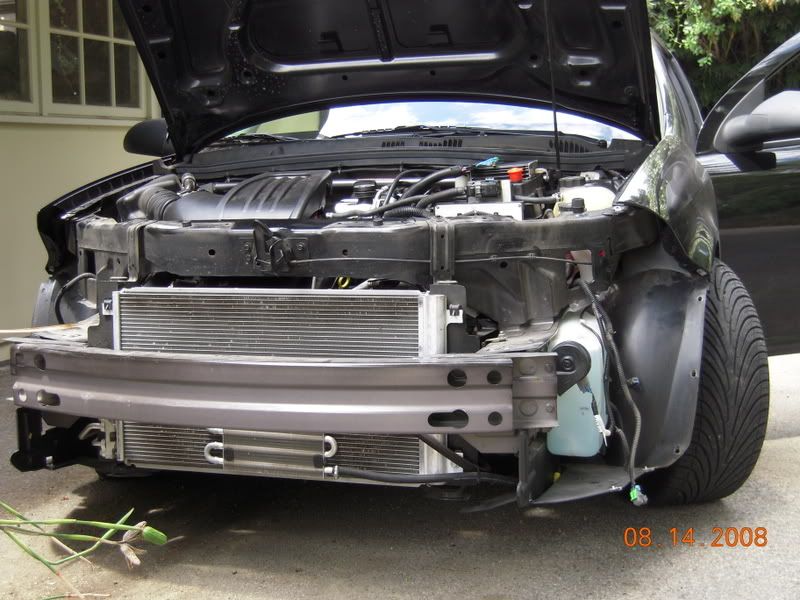
IDK about you guys, but I think the balt looks pretty beastly without the bumper...lol
STEP THREE: Intake, Throttle Body, and Manifold Removal
We'll start with the intake.
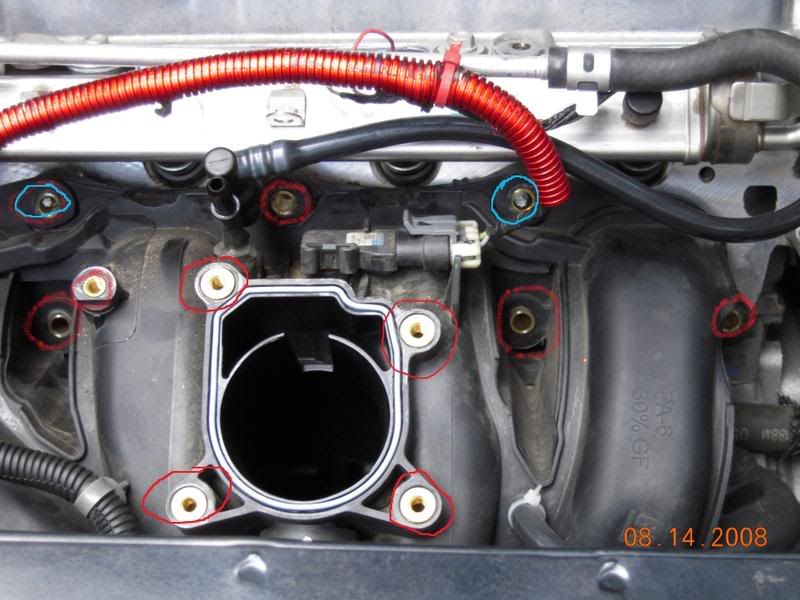
Start by removing these nuts
Remove this screw as well
I already removed the baffles earlier, but if you still need to, the dremel may come in handy here, as it's a bitch to wedge out.
Lets move on to the TB and Manifold.
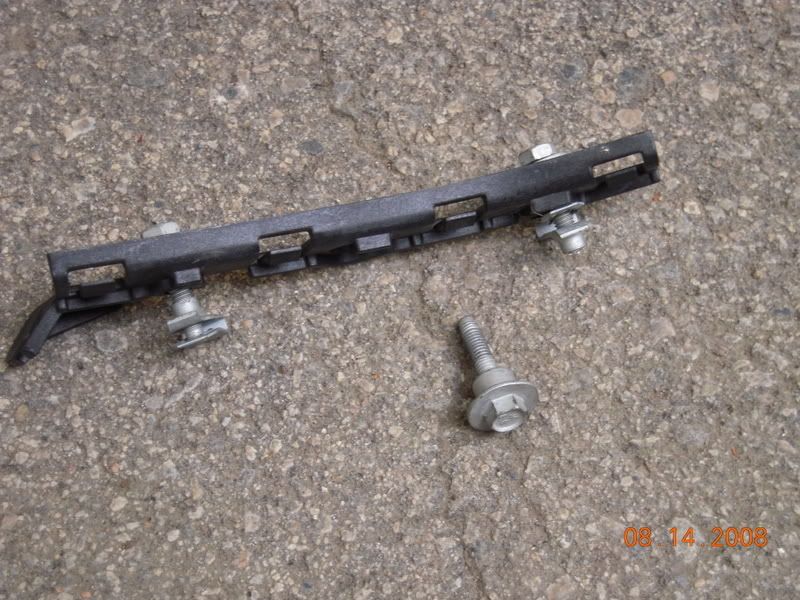
Remove the red bolts and the blue nuts. Set these aside.
Next, pull out the clips that hold the wiring looms in place. There are quite a few, but all of them should just pull right out.
Remove all the vaccuum lines from the manifold, and don't forget the one in the back of the manifold on the driver's side. The stock manifold is pretty difficult to pull out, but it will fit. You should be left with a nice empty space, staring at your intake valves.
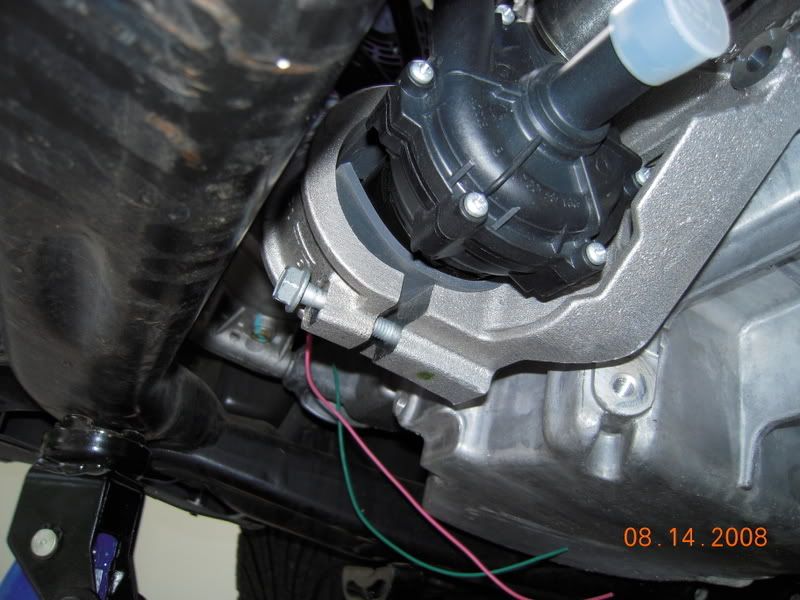
MY CAR had the SAI injection, andn the pump will get in the way of the next step. To remove it, cut the clamps holding the hose onto the stock airbox, and the one leading to the pump on the exhaust side. The pump itself can be removed by unscrewing either 2 or 3 bolts attached to the pump. They are easily accessed from underneath the car. Most members will not have this issue however (depending on year or if your car had the California Emissions Package)
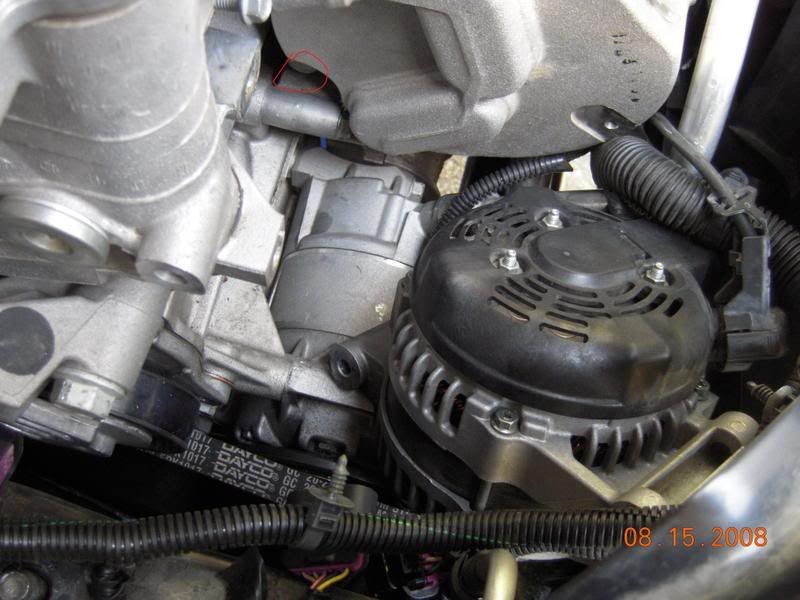
STEP FOUR: Installing the SC Manifold
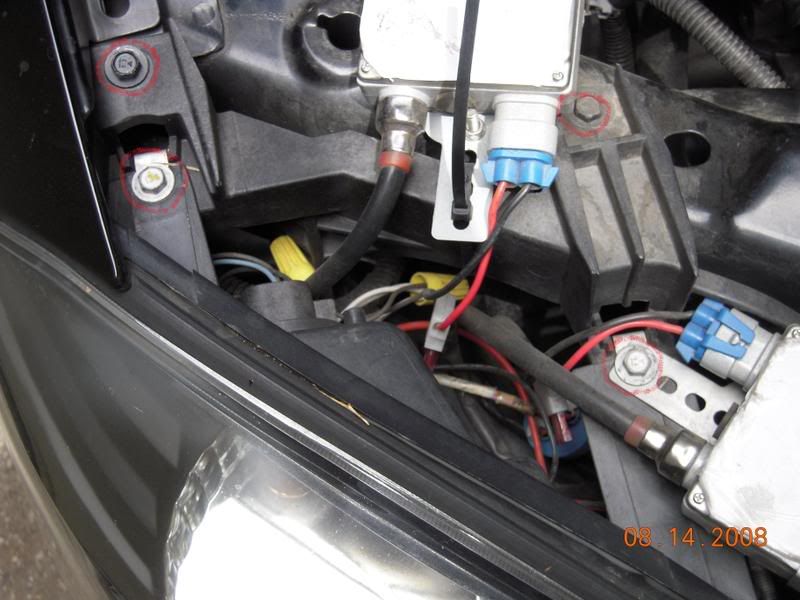
First, we need to make room for the mounting bracket. Start by removing the grounding wire on the bolt in red, and put it (along with the ground thats already there) on the bolt in blue. The bracket will be placed on the bolts in green.
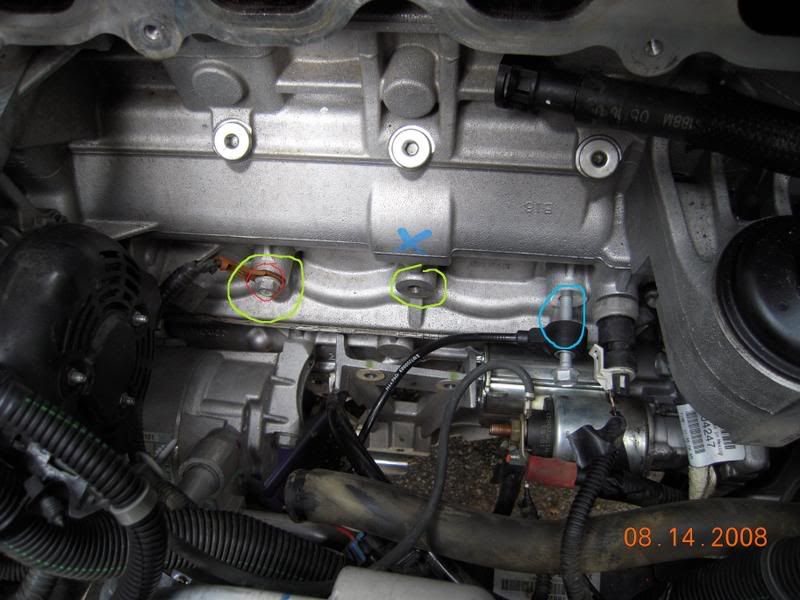
This is the bracket I'm talking about BTW
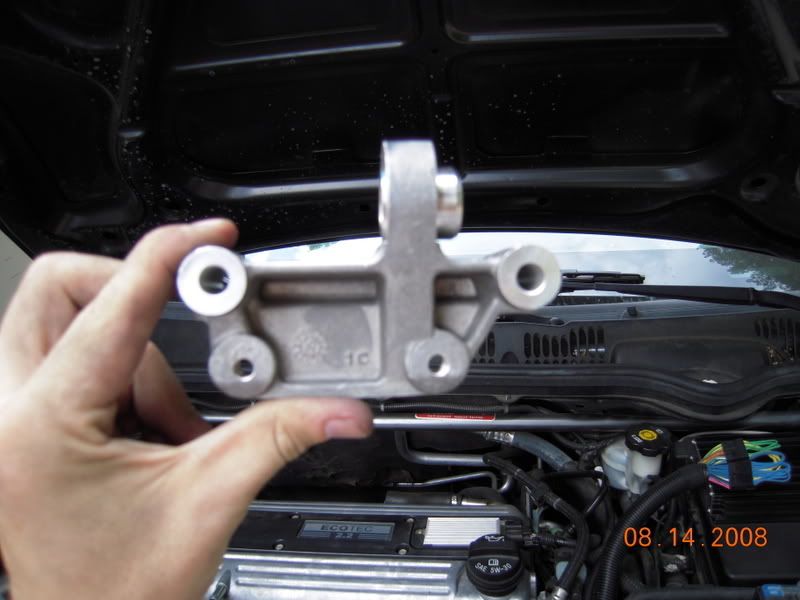
Install it as I said earlier, with the part numbers facing the front of the car.
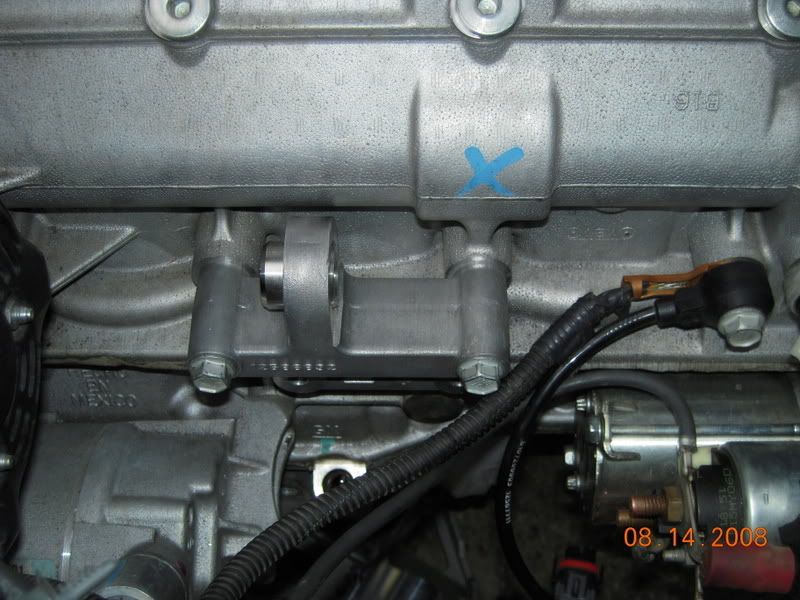
You will be bolting the HE Pump into this bracket as well as the manifold. We'll start with the pump.
Install the bracket so that two bolts lead through the bracket and screw into the bolt holes that were unused on the mounting bracket just below the green bolts three pictures up. The pump bracket should be pointed so that the end with only one bolt hole points towards the drivers side. Place the pump, along with whatever cushion you have, into the bracket, making sure the outlet side is pointing straight up.
Then install the smaller piece and bolt it into place.
Unfortunately, I can't make a list of needed items as I obtained most of my parts from different places, and I dont know what they all were, etc. Some tools however, I do know:
Basic socket wrench set (mostly using 7mm, 8mm, 10mm, and 13mm)
Soldering Iron
Solder
Flux
Heat shrink (smallest available)
Flat head screwdriver
Phillips head screwdriver
Jack and stands
Rubber Mallet Helps
Pliers
Some of the parts you will need however are as follows:
LSJ Intake Manifold
M62 Supercharger
New injectors (atleast 42lb/hr) and harness
Lower manifold bracket and the bolt for it
Coolant Pump and Bracket Pieces
LSJ Intake
LSJ Upper Radiator Hose
LSJ Idler Pulley
LSJ Tensioner Pulley
LSJ Stock or Stage II belt, depending upon pulley size you're using
LSJ Throttle Body (stock will work, but it will be restrictive, won't flow well, and needs to have holes drilled for it)
LSJ MAP/IAT2 sensor
IM-Head Gasket
SC-IM Gasket
M8 1.25 thread 120mm bolts X 3 (these are hard to come by. Look for a specialty store)
I HIGHLY RECCOMEND LABELING THE PARTS YOU REMOVE, MAINLY THE BOLTS, NUTS, AND SCREWS, AS MOST OF THESE WILL BE REUSED.
STEP ONE: Making The Injector Harness
Start with both your stock harness, and the harness that fits your injectors
stock:
new:
Start by removing the wiring from the wire looms and removing any electrical tape that was used....there will probably be a lot and it might take a while. Cut off one of the injectors from your stock harness, and one of the injectors on your new harness.
Strip the wires of the injector you just cut, then repeat on your stock harness on the wiring side (not the old injecotr). Once this is done, check which wires are the grounds for each injector. For me, one harness's ground wires were all pink (one pink wire per clip) and the other harness's ground wires were all pink with a blue stripe., as seen in the below picture.
Make sure you slide a shrink wrap tube around one of the wires before twisting them!
Take the ground from your stock harness and twist it with the ground end of your injector clip
Dip the exposed metal in flux, and solder it up with a good solid connection
Slide the shrink wrap you put on one ofthe wires earler to cover your new soldered connection and shrink it with the soldering iron
Repeat these steps 7 more times, making sure you are connecting ground for ground and positive for positive every time.
Stuff your new wiring harness into its loom from earlier (I had some new red wire loom I used)
Congradulations, you now have a custom wiring harness for larger injectors for a 2.2l
Plug everything back into place, and install your new injectors as well using this how-to: https://www.cobaltss.net/forums/show...ight=injectors
You dont need to plug in the MAP sensor to your new harness, as the MAP sensor will be removed anyway when you swap out intake manifolds.
STEP TWO: Removing Bumper and Headlights
You will need to remove the front bumper and headlights to better reach all of the components you will be removing and installing.
Start by removing these screws in red:
You should be able to remove the headlights now by unplugging them from the connector. Repeat on the other side.
Next remove these bolts in red
The blue screws must be removed from inside the wheel well. There will be several of them bordering the edge of the bumper. Repeat on other side.
The screws in red will allow this piece to fall
Heres a better picture of where the screws will be
Finally, there's two more plastic clips on the front of the bumper on the inside. pull the small circular part up and then the clip should push out
This should be your end result:
IDK about you guys, but I think the balt looks pretty beastly without the bumper...lol
STEP THREE: Intake, Throttle Body, and Manifold Removal
We'll start with the intake.
Start by removing these nuts
Remove this screw as well
I already removed the baffles earlier, but if you still need to, the dremel may come in handy here, as it's a bitch to wedge out.
Lets move on to the TB and Manifold.
Remove the red bolts and the blue nuts. Set these aside.
Next, pull out the clips that hold the wiring looms in place. There are quite a few, but all of them should just pull right out.
Remove all the vaccuum lines from the manifold, and don't forget the one in the back of the manifold on the driver's side. The stock manifold is pretty difficult to pull out, but it will fit. You should be left with a nice empty space, staring at your intake valves.
MY CAR had the SAI injection, andn the pump will get in the way of the next step. To remove it, cut the clamps holding the hose onto the stock airbox, and the one leading to the pump on the exhaust side. The pump itself can be removed by unscrewing either 2 or 3 bolts attached to the pump. They are easily accessed from underneath the car. Most members will not have this issue however (depending on year or if your car had the California Emissions Package)
STEP FOUR: Installing the SC Manifold
First, we need to make room for the mounting bracket. Start by removing the grounding wire on the bolt in red, and put it (along with the ground thats already there) on the bolt in blue. The bracket will be placed on the bolts in green.
This is the bracket I'm talking about BTW
Install it as I said earlier, with the part numbers facing the front of the car.
You will be bolting the HE Pump into this bracket as well as the manifold. We'll start with the pump.
Install the bracket so that two bolts lead through the bracket and screw into the bolt holes that were unused on the mounting bracket just below the green bolts three pictures up. The pump bracket should be pointed so that the end with only one bolt hole points towards the drivers side. Place the pump, along with whatever cushion you have, into the bracket, making sure the outlet side is pointing straight up.
Then install the smaller piece and bolt it into place.
Last edited by HunterKiller89; 02-03-2009 at 01:49 PM.
 08-15-2008, 04:13 PM
#2
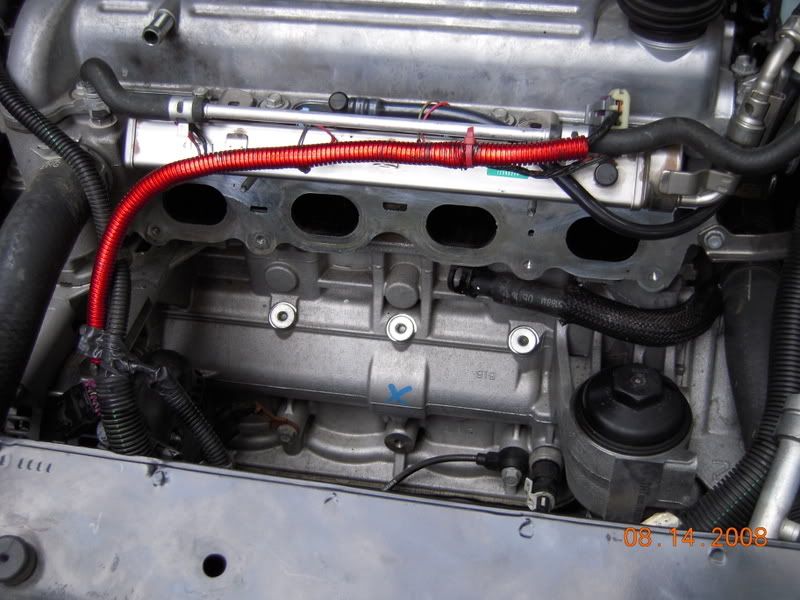
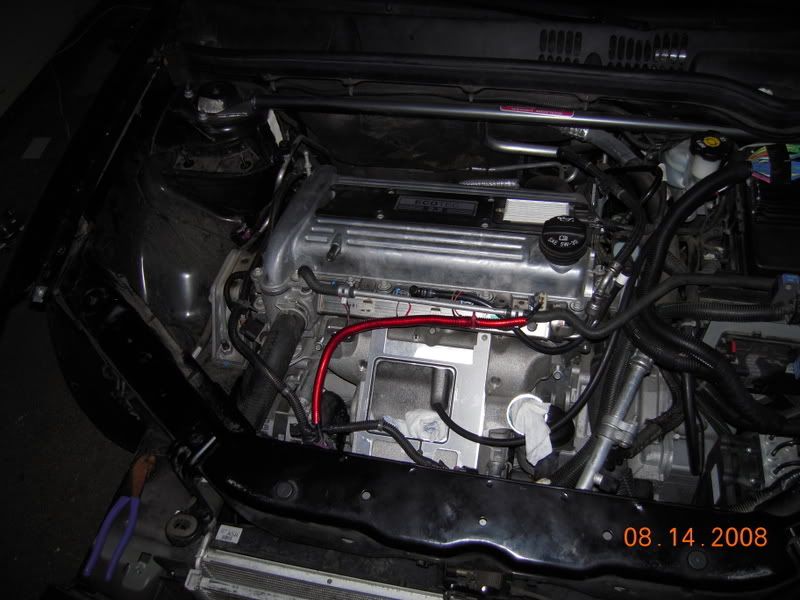
Now we can install the manifold. It fits right into place where the old one was, and i believe uses a few less bolts to hold down. Don't forget the bolt on the bottom of the manifold that goes through the mounting brakcet from earlier and remember the intake manifold gasket!
Homestly, I ended up breaking off the dipstick tube trying to get it in, but I still couldnt do it due to a large metal pipe on the bumper side leaving me little room. I proceeded to unbolt it, and found out it was full of free-on...needless to say, I'll need to recharge my AC system after this project. If you can get the manifold in without doing this, then great, but this is one option you can take if you are having trouble like I did.
EDIT: after some research, I found I only had this issue due to me having an automatic transmission. You will have more clearance when installing this on a manual cobalt.
Here's the end result of today's work:
STEP FIVE: Miscellaneous Things...
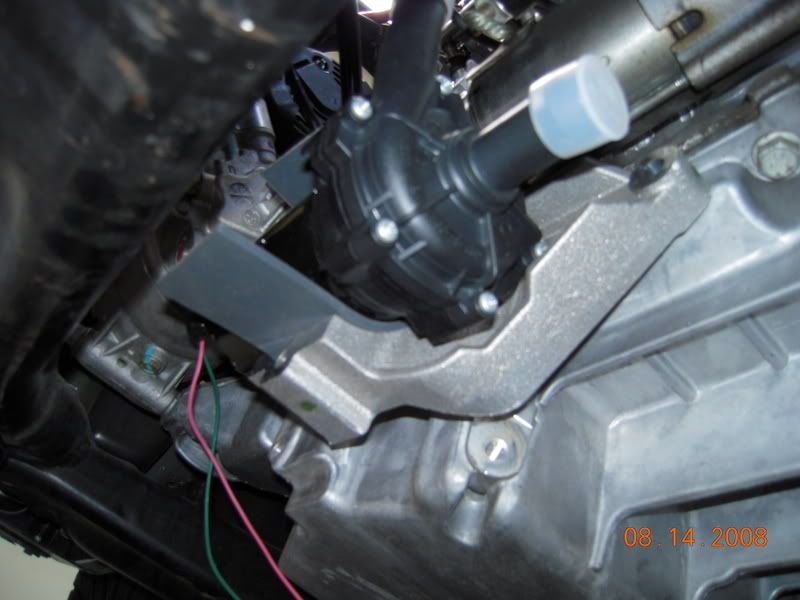
You're going to have to install a different radiator hose to allow the SC to fit, so lets remove that now. It's held on by two clamps. Squeeze the ends together and it loosens.
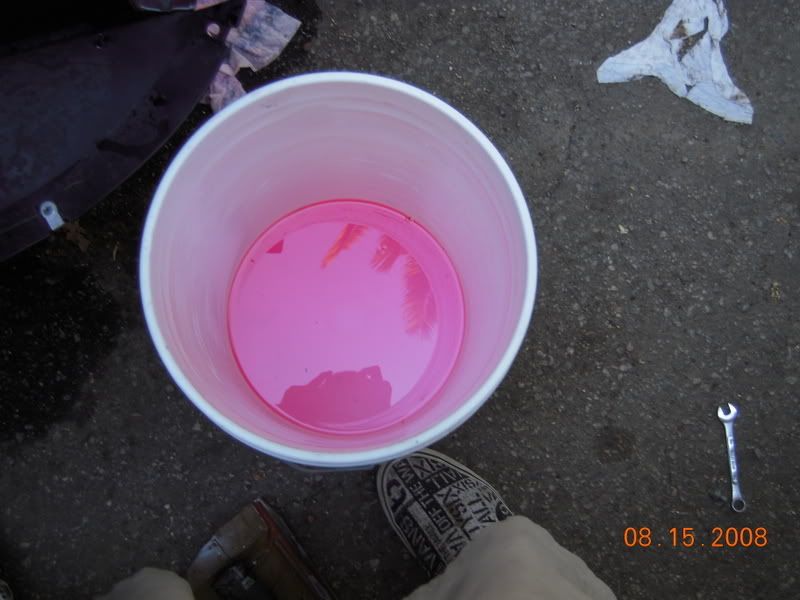
You're going to want to catch the coolant with something...a decent amount will flow out.
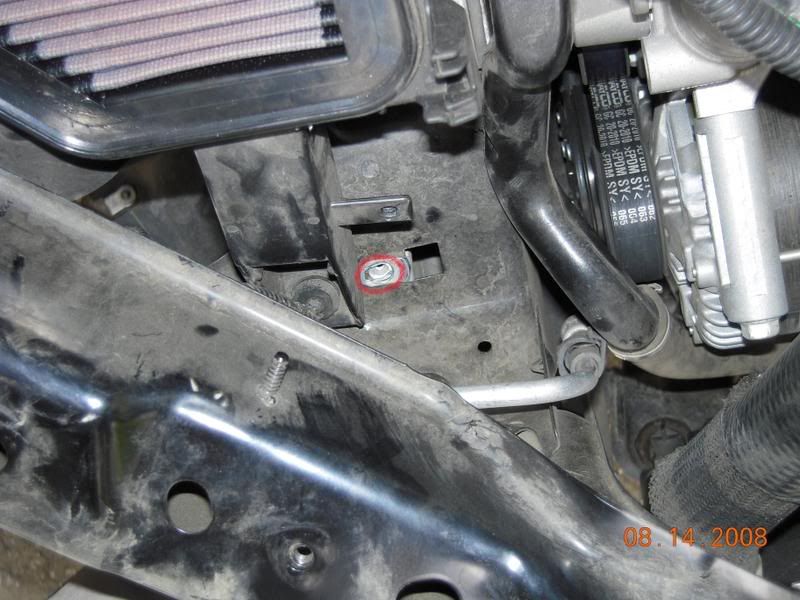
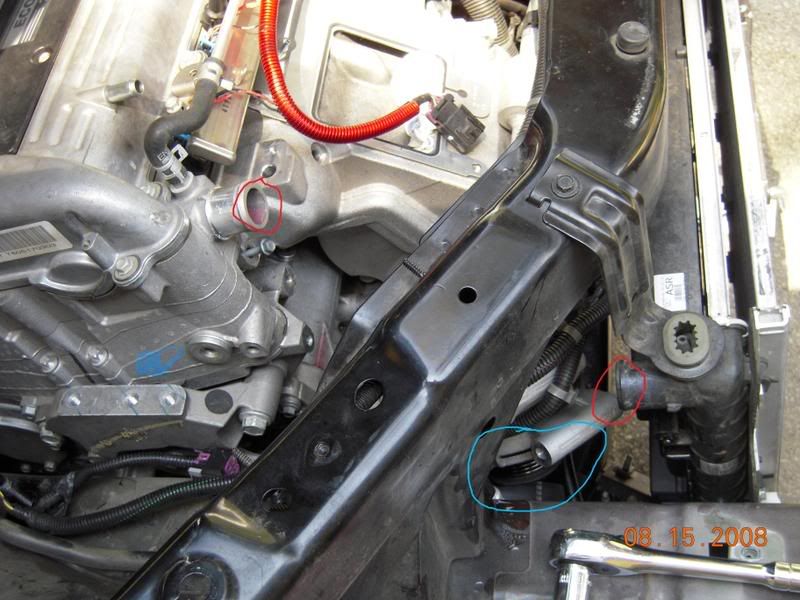
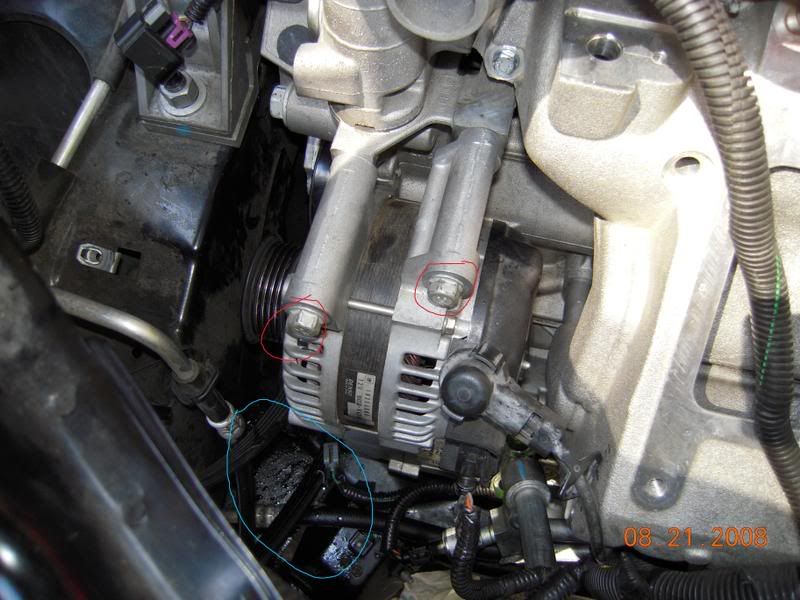
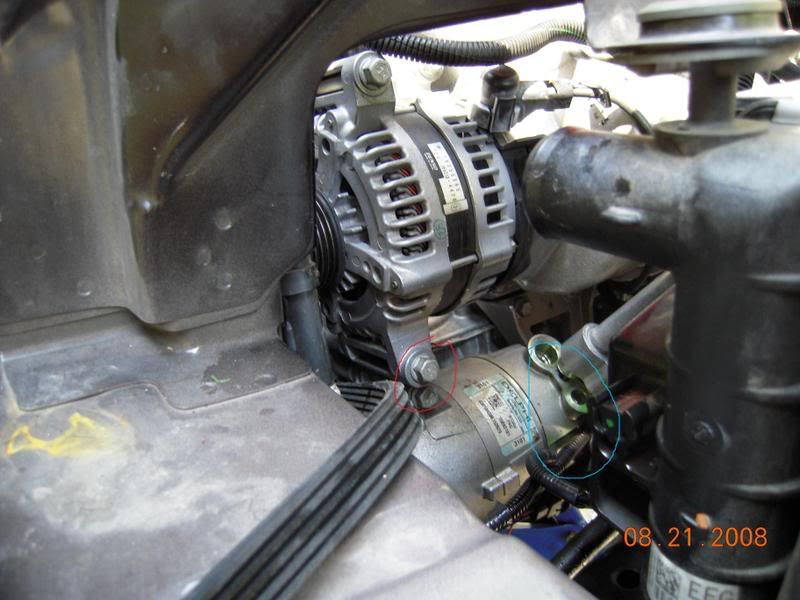
You also should remove the alternator to allow your stock belt to come off and to reach the bolt underneath the manifold that needed to be screwed in to secure the manifold.
The hole for the bolt is in red.
There are three bolts for the alternator. Remove them and the alternator will drop a few inches and release the belt.
(check out the freeon from earlier...oops. It doesn't evaporate btw)
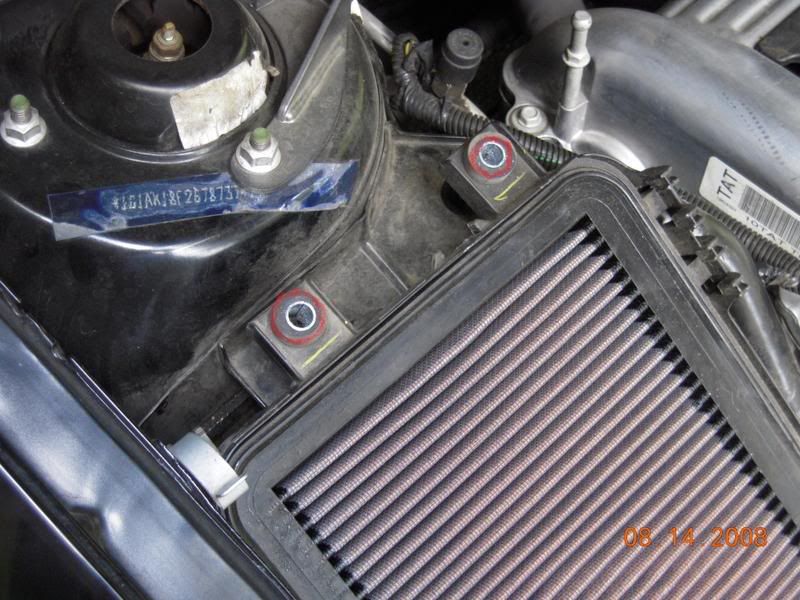
STEP SIX: Installing Your New Intake System
It's pretty simple. Three bolts hold in your windshield washer fluid reservoir on the drivers side. Remove the windshied washer reservoir and replace it with your LSJ intake.
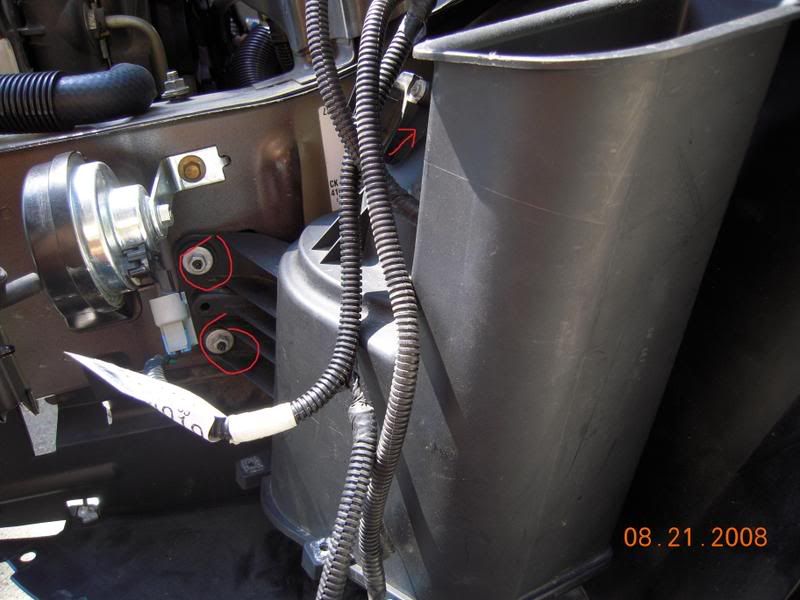

Note the MAF sensor should be reinstalled from your stock intake into the slot shown here^^
UPDATE: I'm waiting on a couple of parts to come in that I thought I already had...so not a lot will happen this weekend. Sorry guys.
STEP SEVEN: Re-Wiring The Throttle Body Harness For An LSJ Throttle.
You will need to re-pin the wiring harness for the TB to be able to run the LSJ throttle body. Courtesy of Vince, here are the wiring diagrams:

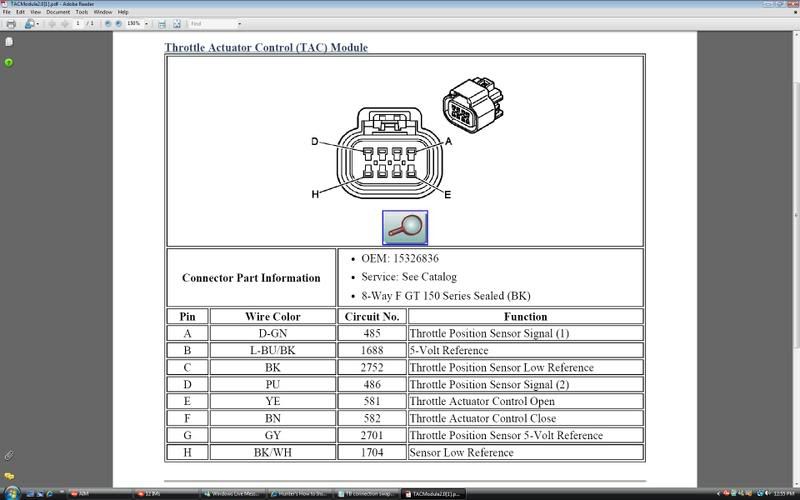
Using those diagrams, you can determine that these wires need to be swapped
B-H...Tan/White swaps with Light Blue/Black
C-G...Grey swaps with Tan
E-F...Brown swaps with Yellow
I personally could not get the pins out of the stock cvonnector, so I just cut the wires and soldered them back on with the above wres swapped. soldered the same as the injector harness in step 1.
STEP EIGHT: Installing The Idler And Tensioner And Re-Installing The Alternator
The bolts that hold the Tensioner and Alternator in place must be 1 inch longer than the stock bolts. The size is (i believe) metric M8 1.25 thread 120mm long, but it might be 130mm long. Just measure the stock ones and add about 25mm to find out for sure. This size is not sold at most locations like Lowes or Home Depot, and you will probably need to find a specialty store to obtain them. Most basic hardware stores will only carry that bolt in sizes up to 80-90mm, not 120mm
STEP NINE: Installing The Supercharger..
Homestly, I ended up breaking off the dipstick tube trying to get it in, but I still couldnt do it due to a large metal pipe on the bumper side leaving me little room. I proceeded to unbolt it, and found out it was full of free-on...needless to say, I'll need to recharge my AC system after this project. If you can get the manifold in without doing this, then great, but this is one option you can take if you are having trouble like I did.
EDIT: after some research, I found I only had this issue due to me having an automatic transmission. You will have more clearance when installing this on a manual cobalt.
Here's the end result of today's work:
STEP FIVE: Miscellaneous Things...
You're going to have to install a different radiator hose to allow the SC to fit, so lets remove that now. It's held on by two clamps. Squeeze the ends together and it loosens.
You're going to want to catch the coolant with something...a decent amount will flow out.
You also should remove the alternator to allow your stock belt to come off and to reach the bolt underneath the manifold that needed to be screwed in to secure the manifold.
The hole for the bolt is in red.
There are three bolts for the alternator. Remove them and the alternator will drop a few inches and release the belt.
(check out the freeon from earlier...oops. It doesn't evaporate btw)
STEP SIX: Installing Your New Intake System
It's pretty simple. Three bolts hold in your windshield washer fluid reservoir on the drivers side. Remove the windshied washer reservoir and replace it with your LSJ intake.
Note the MAF sensor should be reinstalled from your stock intake into the slot shown here^^
UPDATE: I'm waiting on a couple of parts to come in that I thought I already had...so not a lot will happen this weekend. Sorry guys.
STEP SEVEN: Re-Wiring The Throttle Body Harness For An LSJ Throttle.
You will need to re-pin the wiring harness for the TB to be able to run the LSJ throttle body. Courtesy of Vince, here are the wiring diagrams:
Using those diagrams, you can determine that these wires need to be swapped
B-H...Tan/White swaps with Light Blue/Black
C-G...Grey swaps with Tan
E-F...Brown swaps with Yellow
I personally could not get the pins out of the stock cvonnector, so I just cut the wires and soldered them back on with the above wres swapped. soldered the same as the injector harness in step 1.
STEP EIGHT: Installing The Idler And Tensioner And Re-Installing The Alternator
The bolts that hold the Tensioner and Alternator in place must be 1 inch longer than the stock bolts. The size is (i believe) metric M8 1.25 thread 120mm long, but it might be 130mm long. Just measure the stock ones and add about 25mm to find out for sure. This size is not sold at most locations like Lowes or Home Depot, and you will probably need to find a specialty store to obtain them. Most basic hardware stores will only carry that bolt in sizes up to 80-90mm, not 120mm
STEP NINE: Installing The Supercharger..
Last edited by HunterKiller89; 01-14-2009 at 10:21 PM.


 08-21-2008, 11:26 PM
#24
Senior Member

Join Date: 06-22-08
Location: PA
Posts: 1,320
Likes: 0
Received 0 Likes
on
0 Posts