Dual Pass intercooler
 12-29-2006, 05:46 PM
#76
Senior Member
Thread Starter
Join Date: 04-03-06
Location: Mesa, AZ
Posts: 7,571
Likes: 0
Received 0 Likes
on
0 Posts
Well the pipe tap was to tap threads into the hole you drilled so you could insert the fitting. In the end it didn't work, we had to have it welded, but the threads helped hold it in.
 12-29-2006, 07:23 PM
#77
Senior Member
Join Date: 10-08-05
Location: AZ
Posts: 5,295
Likes: 0
Received 0 Likes
on
0 Posts
The tap is kinda expensive and I would skip attempting to tap it and go straight to welding it in. There is too little material to successfully tap it IMO. Blown go almost all the fittings from the Parker Store.
12-29-2006, 07:39 PM
#78
Senior Member
Join Date: 10-08-05
Location: AZ
Posts: 5,295
Likes: 0
Received 0 Likes
on
0 Posts

The both washers go on the end of the core, the large one closest to the fins, then the smaller one, and lastly the o-ring.
01-09-2007, 10:37 PM
#79
Member

Join Date: 10-06-06
Location: arizona
Posts: 266
Likes: 0
Received 0 Likes
on
0 Posts
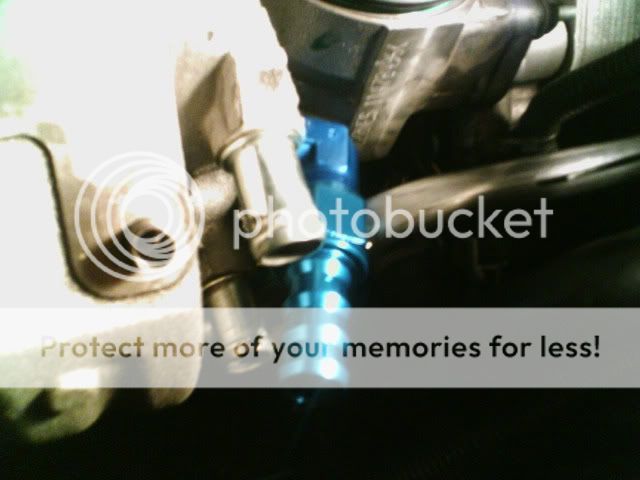
ok this is what i have  i have this fiting im goin to cut it like this
so i can weld it nice and straigth then im goin to use this big ass bit to drill a pilot hole to the plate am i rigth so far then the rest switch the core as my aplications needs it put everything back and that is it
so i can weld it nice and straigth then im goin to use this big ass bit to drill a pilot hole to the plate
Last edited by gilbert; 01-09-2007 at 11:21 PM.
01-09-2007, 10:45 PM
#81
Member
Join Date: 10-06-06
Location: arizona
Posts: 266
Likes: 0
Received 0 Likes
on
0 Posts
well the fitings and the hose i got them from parker store they make lubrication equipment like hydraulick hoses the y conector from crate engine and the bit u can get it anyware 
 01-09-2007, 10:55 PM
#84
Member
Join Date: 10-06-06
Location: arizona
Posts: 266
Likes: 0
Received 0 Likes
on
0 Posts
01-09-2007, 11:06 PM
#87
Senior Member
Join Date: 10-08-05
Location: AZ
Posts: 5,295
Likes: 0
Received 0 Likes
on
0 Posts
01-09-2007, 11:16 PM
#88
Member
Join Date: 10-06-06
Location: arizona
Posts: 266
Likes: 0
Received 0 Likes
on
0 Posts
Click on the image in your vBgarage and it will open a window with a larger image. Right click and get the properties from the larger image.
-----------------------------------------------------------------------------------------------------
thx man
-----------------------------------------------------------------------------------------------------
thx man
01-10-2007, 11:44 AM
#90
Member
Join Date: 10-06-06
Location: arizona
Posts: 266
Likes: 0
Received 0 Likes
on
0 Posts
i cut the threads off in an angle to get a nice straigth surface to weld it and it fits pretty nice in there i was wondering in the pict u have the bit seems a lot smaller then 1/2 inch is it ?
01-10-2007, 05:18 PM
#91
Senior Member
Thread Starter
Join Date: 04-03-06
Location: Mesa, AZ
Posts: 7,571
Likes: 0
Received 0 Likes
on
0 Posts
Yeah, it was, that was the pilot hole for the big 1/2" bit.
EDIT* Don't forget to use a wire brush or something to take the anodizing off the fitting, other wise the weld won't seal properly
EDIT* Don't forget to use a wire brush or something to take the anodizing off the fitting, other wise the weld won't seal properly
01-11-2007, 10:42 AM
#93
Member
Join Date: 10-06-06
Location: arizona
Posts: 266
Likes: 0
Received 0 Likes
on
0 Posts
i thick is cheep by the way this r my iat2 temps at idle is 115 at 45mph is 80 and it goes down the more i step on it , r this the # u r geting 2 ? also what temp do u see o the gage of the car i usually i see 185 , would like to get those down 2 but dont know how any ideas
01-11-2007, 10:47 AM
#94
Member
Join Date: 10-06-06
Location: arizona
Posts: 266
Likes: 0
Received 0 Likes
on
0 Posts
01-16-2007, 03:17 PM
#98
Senior Member
Join Date: 07-18-05
Location: Canada eh!
Posts: 2,130
Likes: 0
Received 0 Likes
on
0 Posts
 01-16-2007, 06:50 PM
#99
Senior Member
Thread Starter
Join Date: 04-03-06
Location: Mesa, AZ
Posts: 7,571
Likes: 0
Received 0 Likes
on
0 Posts
cool yeah i took it to a place and they sand it for a while charge me 10 $ to weld it
i thick is cheep by the way this r my iat2 temps at idle is 115 at 45mph is 80 and it goes down the more i step on it , r this the # u r geting 2 ? also what temp do u see o the gage of the car i usually i see 185 , would like to get those down 2 but dont know how any ideas
i thick is cheep by the way this r my iat2 temps at idle is 115 at 45mph is 80 and it goes down the more i step on it , r this the # u r geting 2 ? also what temp do u see o the gage of the car i usually i see 185 , would like to get those down 2 but dont know how any ideas
01-25-2007, 02:08 PM
#100
Senior Member
iTrader: (1)
Join Date: 09-12-06
Location: Michigan
Posts: 3,319
Likes: 0
Received 0 Likes
on
0 Posts
Good job on the install Blown, and good luck to everyone doing there Dual pass. i wouldnt beable to do this. I'd **** up. it looks way complicated. would a shop do the install for me like a Chevy dealer? with out buying the stage kit? i would jsut buy the end plate and stuff.