General Suspension: How To: install DC sports strut bar
 03-11-2007, 03:30 PM
#1
Senior Member
Thread Starter
Join Date: 05-19-06
Location: Beaver, PA (outside Pittsburgh)
Posts: 6,976
Likes: 0
Received 1 Like
on
1 Post
How To: install DC sports strut bar
Wow. i cant believe there is not a how to on this. oh well. here it goes
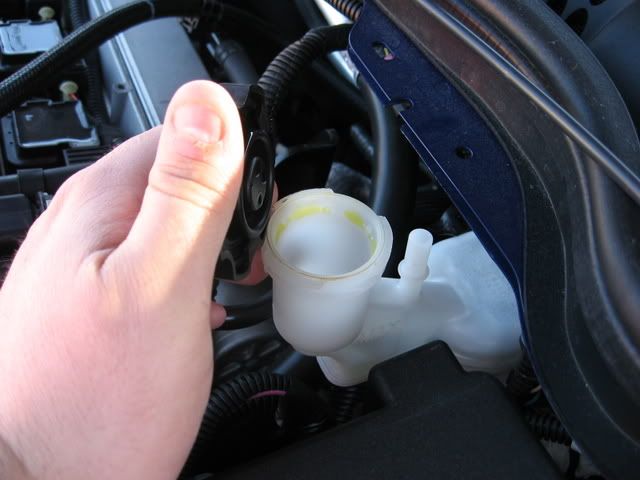
1. Remove brake fluid reservoir cap
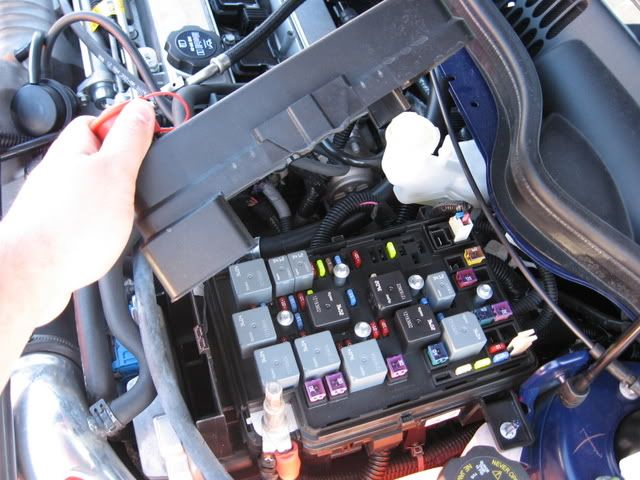
2. Remove the fuse box cover
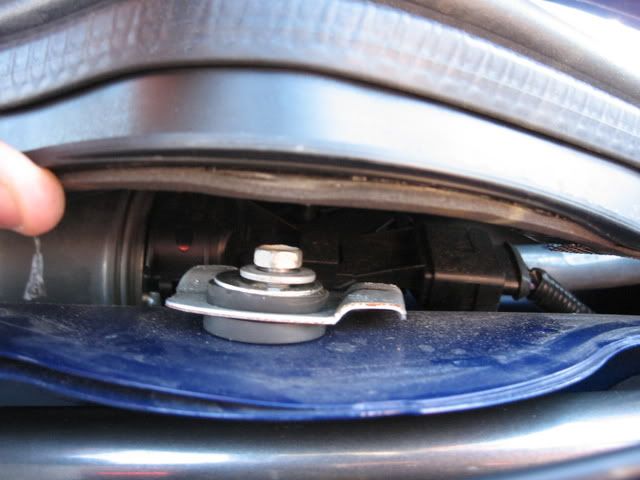
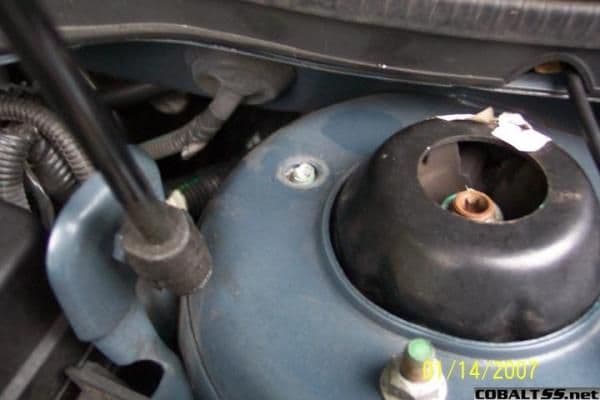
3. Lift up plastic cowl finisher to reveal a 10mm bolt that runs through 2 rubber bushings. You just have to unscrew it so it is out of the way. DO NOT TAKE IT OUT!!
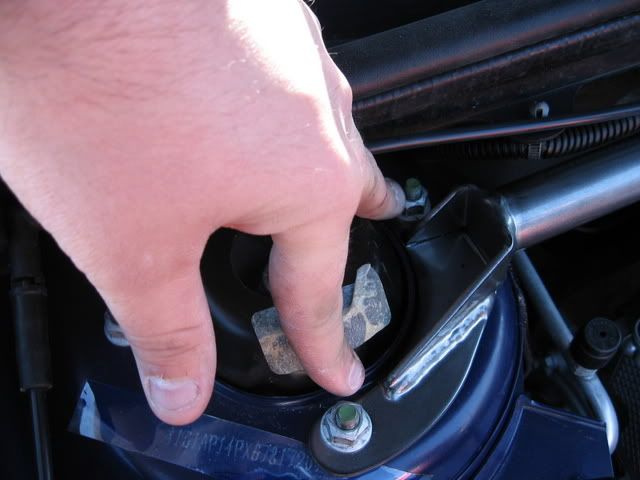
4.Remove the 2 13mm nuts from the driver and passenger side strut towers. I forgot to take a picture before so here they are already installed
5. Now the fun part. You have to finangel the strut tower bar in from the passenger side to the drivers side. Just slide the notches to the drivers side studs sticking up. Easier said then done.
6. After the light tussel you, your car, and the strut brace have reattach the 4 13mm bolts. Replace fuse box cover and brake reservoir cap. You will now have this
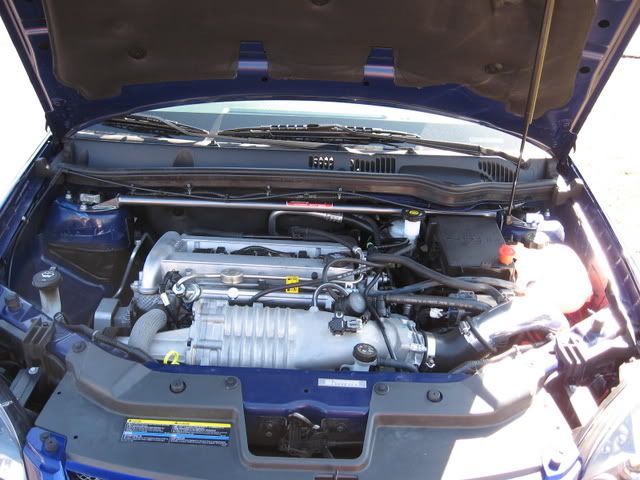
7. Go out and enjoy your new found handling
1. Remove brake fluid reservoir cap
2. Remove the fuse box cover
3. Lift up plastic cowl finisher to reveal a 10mm bolt that runs through 2 rubber bushings. You just have to unscrew it so it is out of the way. DO NOT TAKE IT OUT!!
4.Remove the 2 13mm nuts from the driver and passenger side strut towers. I forgot to take a picture before so here they are already installed
5. Now the fun part. You have to finangel the strut tower bar in from the passenger side to the drivers side. Just slide the notches to the drivers side studs sticking up. Easier said then done.
6. After the light tussel you, your car, and the strut brace have reattach the 4 13mm bolts. Replace fuse box cover and brake reservoir cap. You will now have this
7. Go out and enjoy your new found handling
Last edited by TommyP; 05-17-2012 at 09:06 PM.
 03-11-2007, 05:13 PM
#4
Senior Member

Join Date: 05-23-06
Location: Racine, Wisconsin
Posts: 1,017
Likes: 0
Received 0 Likes
on
0 Posts
I heard that you should jack the front up before you put it in that way it relieves the pressure on the struts and is stronger once you get the strut brace in. Just stating what I heard, may not be true but sweet write up, I heard they can be trick on our cars.
03-11-2007, 05:34 PM
#5
Senior Member

Join Date: 03-02-06
Location: Fleetwood, PA
Posts: 620
Likes: 0
Received 0 Likes
on
0 Posts
Thata a nice how-to man  good work man. And you don't neccesarily need to jack up the car unless you can't get the holes to line up then you can loosen the 3rd nut and jack it up and it will pop on. Also one suggestion would be to pull off the sticker on the middle of the strut bar and put one of the decals that they sent with on the middle cause it looks much nicer
good work man. And you don't neccesarily need to jack up the car unless you can't get the holes to line up then you can loosen the 3rd nut and jack it up and it will pop on. Also one suggestion would be to pull off the sticker on the middle of the strut bar and put one of the decals that they sent with on the middle cause it looks much nicer
03-11-2007, 06:21 PM
#6
Senior Member
Thread Starter
Join Date: 05-19-06
Location: Beaver, PA (outside Pittsburgh)
Posts: 6,976
Likes: 0
Received 1 Like
on
1 Post
Thata a nice how-to man good work man. And you don't neccesarily need to jack up the car unless you can't get the holes to line up then you can loosen the 3rd nut and jack it up and it will pop on. Also one suggestion would be to pull off the sticker on the middle of the strut bar and put one of the decals that they sent with on the middle cause it looks much nicer
good work man. And you don't neccesarily need to jack up the car unless you can't get the holes to line up then you can loosen the 3rd nut and jack it up and it will pop on. Also one suggestion would be to pull off the sticker on the middle of the strut bar and put one of the decals that they sent with on the middle cause it looks much nicer
03-11-2007, 08:42 PM
#9
Senior Member

Join Date: 07-09-06
Location: PA
Posts: 7,451
Likes: 0
Received 0 Likes
on
0 Posts
Nice write up, hope to be using that soon enough. As for taking a turn quicker, congrats! 10mph is a big differance IMO. Now if only I could find a strut bar to gain me +10mph trap times in the 1/4th lol, trap at like 118 haha would be sick!
 03-12-2007, 06:37 PM
#11
Senior Member

Join Date: 05-16-06
Location: CT
Posts: 6,298
Likes: 0
Received 0 Likes
on
0 Posts
 03-12-2007, 10:14 PM
#15
Senior Member
Join Date: 05-16-06
Location: CT
Posts: 6,298
Likes: 0
Received 0 Likes
on
0 Posts
Fortunately, no.
Heres the thread: https://www.cobaltss.net/forums/suspension-67/just-few-nuts-bolts%3B-how-hard-could-45449/
Heres the thread: https://www.cobaltss.net/forums/suspension-67/just-few-nuts-bolts%3B-how-hard-could-45449/
03-12-2007, 10:20 PM
#17
Senior Member
Join Date: 12-30-06
Location: Red Deer, Alberta
Posts: 3,214
Likes: 0
Received 0 Likes
on
0 Posts
Excuse me for not knowing lol, but on your last picture showing what it looks like when it's done there's a part installed on the top of your engine. What is that????
03-13-2007, 08:15 PM
#18
Senior Member
Join Date: 03-30-06
Location: Exit 29, NY
Posts: 3,014
Likes: 0
Received 0 Likes
on
0 Posts
Nice write up, but wut did u do all that work for? When I installed mine, all i did was loosen 2 nuts on the driverside, take off 2 of the nuts on the passengerside and slide it on. Had to jack the passengerside up a lil to get the holes to line up, but thats it. Just toqured them back down and was good to go.
later
later
03-13-2007, 08:20 PM
#19
Senior Member
Thread Starter
Join Date: 05-19-06
Location: Beaver, PA (outside Pittsburgh)
Posts: 6,976
Likes: 0
Received 1 Like
on
1 Post
Nice write up, but wut did u do all that work for? When I installed mine, all i did was loosen 2 nuts on the driverside, take off 2 of the nuts on the passengerside and slide it on. Had to jack the passengerside up a lil to get the holes to line up, but thats it. Just toqured them back down and was good to go.
later
later
HUH???? More specific please.
Last edited by Dead Zen; 03-13-2007 at 08:20 PM. Reason: Automerged Doublepost
03-13-2007, 08:25 PM
#20
Senior Member
Join Date: 03-30-06
Location: Exit 29, NY
Posts: 3,014
Likes: 0
Received 0 Likes
on
0 Posts
Im suprised people didnt bitch about there not being a pix of the nuts being loosened and taken off... somebody might get confused... lol.... j/k...
Nice work.
later
Nice work.
later
03-27-2007, 08:36 PM
#21
New Member

Join Date: 02-14-07
Location: North Jersey
Posts: 177
Likes: 0
Received 0 Likes
on
0 Posts
I think he removed the ECOTECH Supercharger Plate. I just checked on mine and that "tubing" I THINK youre talking about is under that.

