General Suspension: How To change Control Arm Bushings

 06-07-2012, 05:20 AM
#53

the best for auto x are spherical cabs we sell, but you would need alloy arms for that if you do not have them. we have some reasonably priced new alloy arms. The castor changes with the alloy arms the combination would help turn in, as the control arm moves in under load with any rubber bushing, which causes positive camber and overheats the outer rib and wears it out qwik....auto x is a great way to start.
09-21-2012, 09:02 AM
#54
Senior Member
Join Date: 12-10-04
Location: Cleveland, OH
Posts: 1,206
Likes: 0
Received 0 Likes
on
0 Posts
Just a FYI for anyone who uses this how to.
By loosen he means completely remove. I "loosened" the bolt and was trying to get that pin to drop without taking the bolt completely out.
Once I removed the bolt completely the control arm pin slid right out of the nuckle.
#2-Remove tire and loosen bolt that connects the Control arm to the steering nuckle found here. Size is 16mm you will want to socket one side and hold the nut on other.
Once I removed the bolt completely the control arm pin slid right out of the nuckle.
 09-28-2012, 01:56 PM
#56
New Member

Join Date: 09-28-12
Location: Macon, GA
Posts: 4
Likes: 0
Received 0 Likes
on
0 Posts
I did this not too long ago. The stock holey ones were ripped to hell & back. I went with the solid Moog ones. Unfortunately, my father-in-law's bushing press was too small for the FE1 arm, and I had to go to a local shop to push them. Only charged me $20 for both sides though, so it wasn't bad. In doing so, I realized the process for this is a 180 degree flip from my old EG Civic. Taking them OFF the Cobalt was easy, but frustrating as mess to put back on. My Civic was no ends of trouble to remove, but went back on in a jiffy.
02-10-2013, 09:03 PM
#57
New Member

Join Date: 02-10-13
Location: NJ
Posts: 2
Likes: 0
Received 0 Likes
on
0 Posts
Hello everyone,
I found this forum because I was searching for information about changing the lower control arm on a 2005 cobalt. This step by step guide is fantastic, but I have one quick question...
I read on another forum that some people have trouble getting the frame bolt off (the one that attached the rear bushing). Apparently, the nut is welded to the frame, and if the nut breaks loose, the bolt and nut spin freely in the frame. Have any of you experienced this? Is there a way to avoid this? Should I use air tools or hand tools?
Any help would be appreciated.
Thanks
02-10-2013, 09:18 PM
#58
^^ it happens. Lots of PB blaster or penetrating oil up top... and I am not sure an Impact is as good as a strong bar with a long 4 ft pipe extension to tell the truth...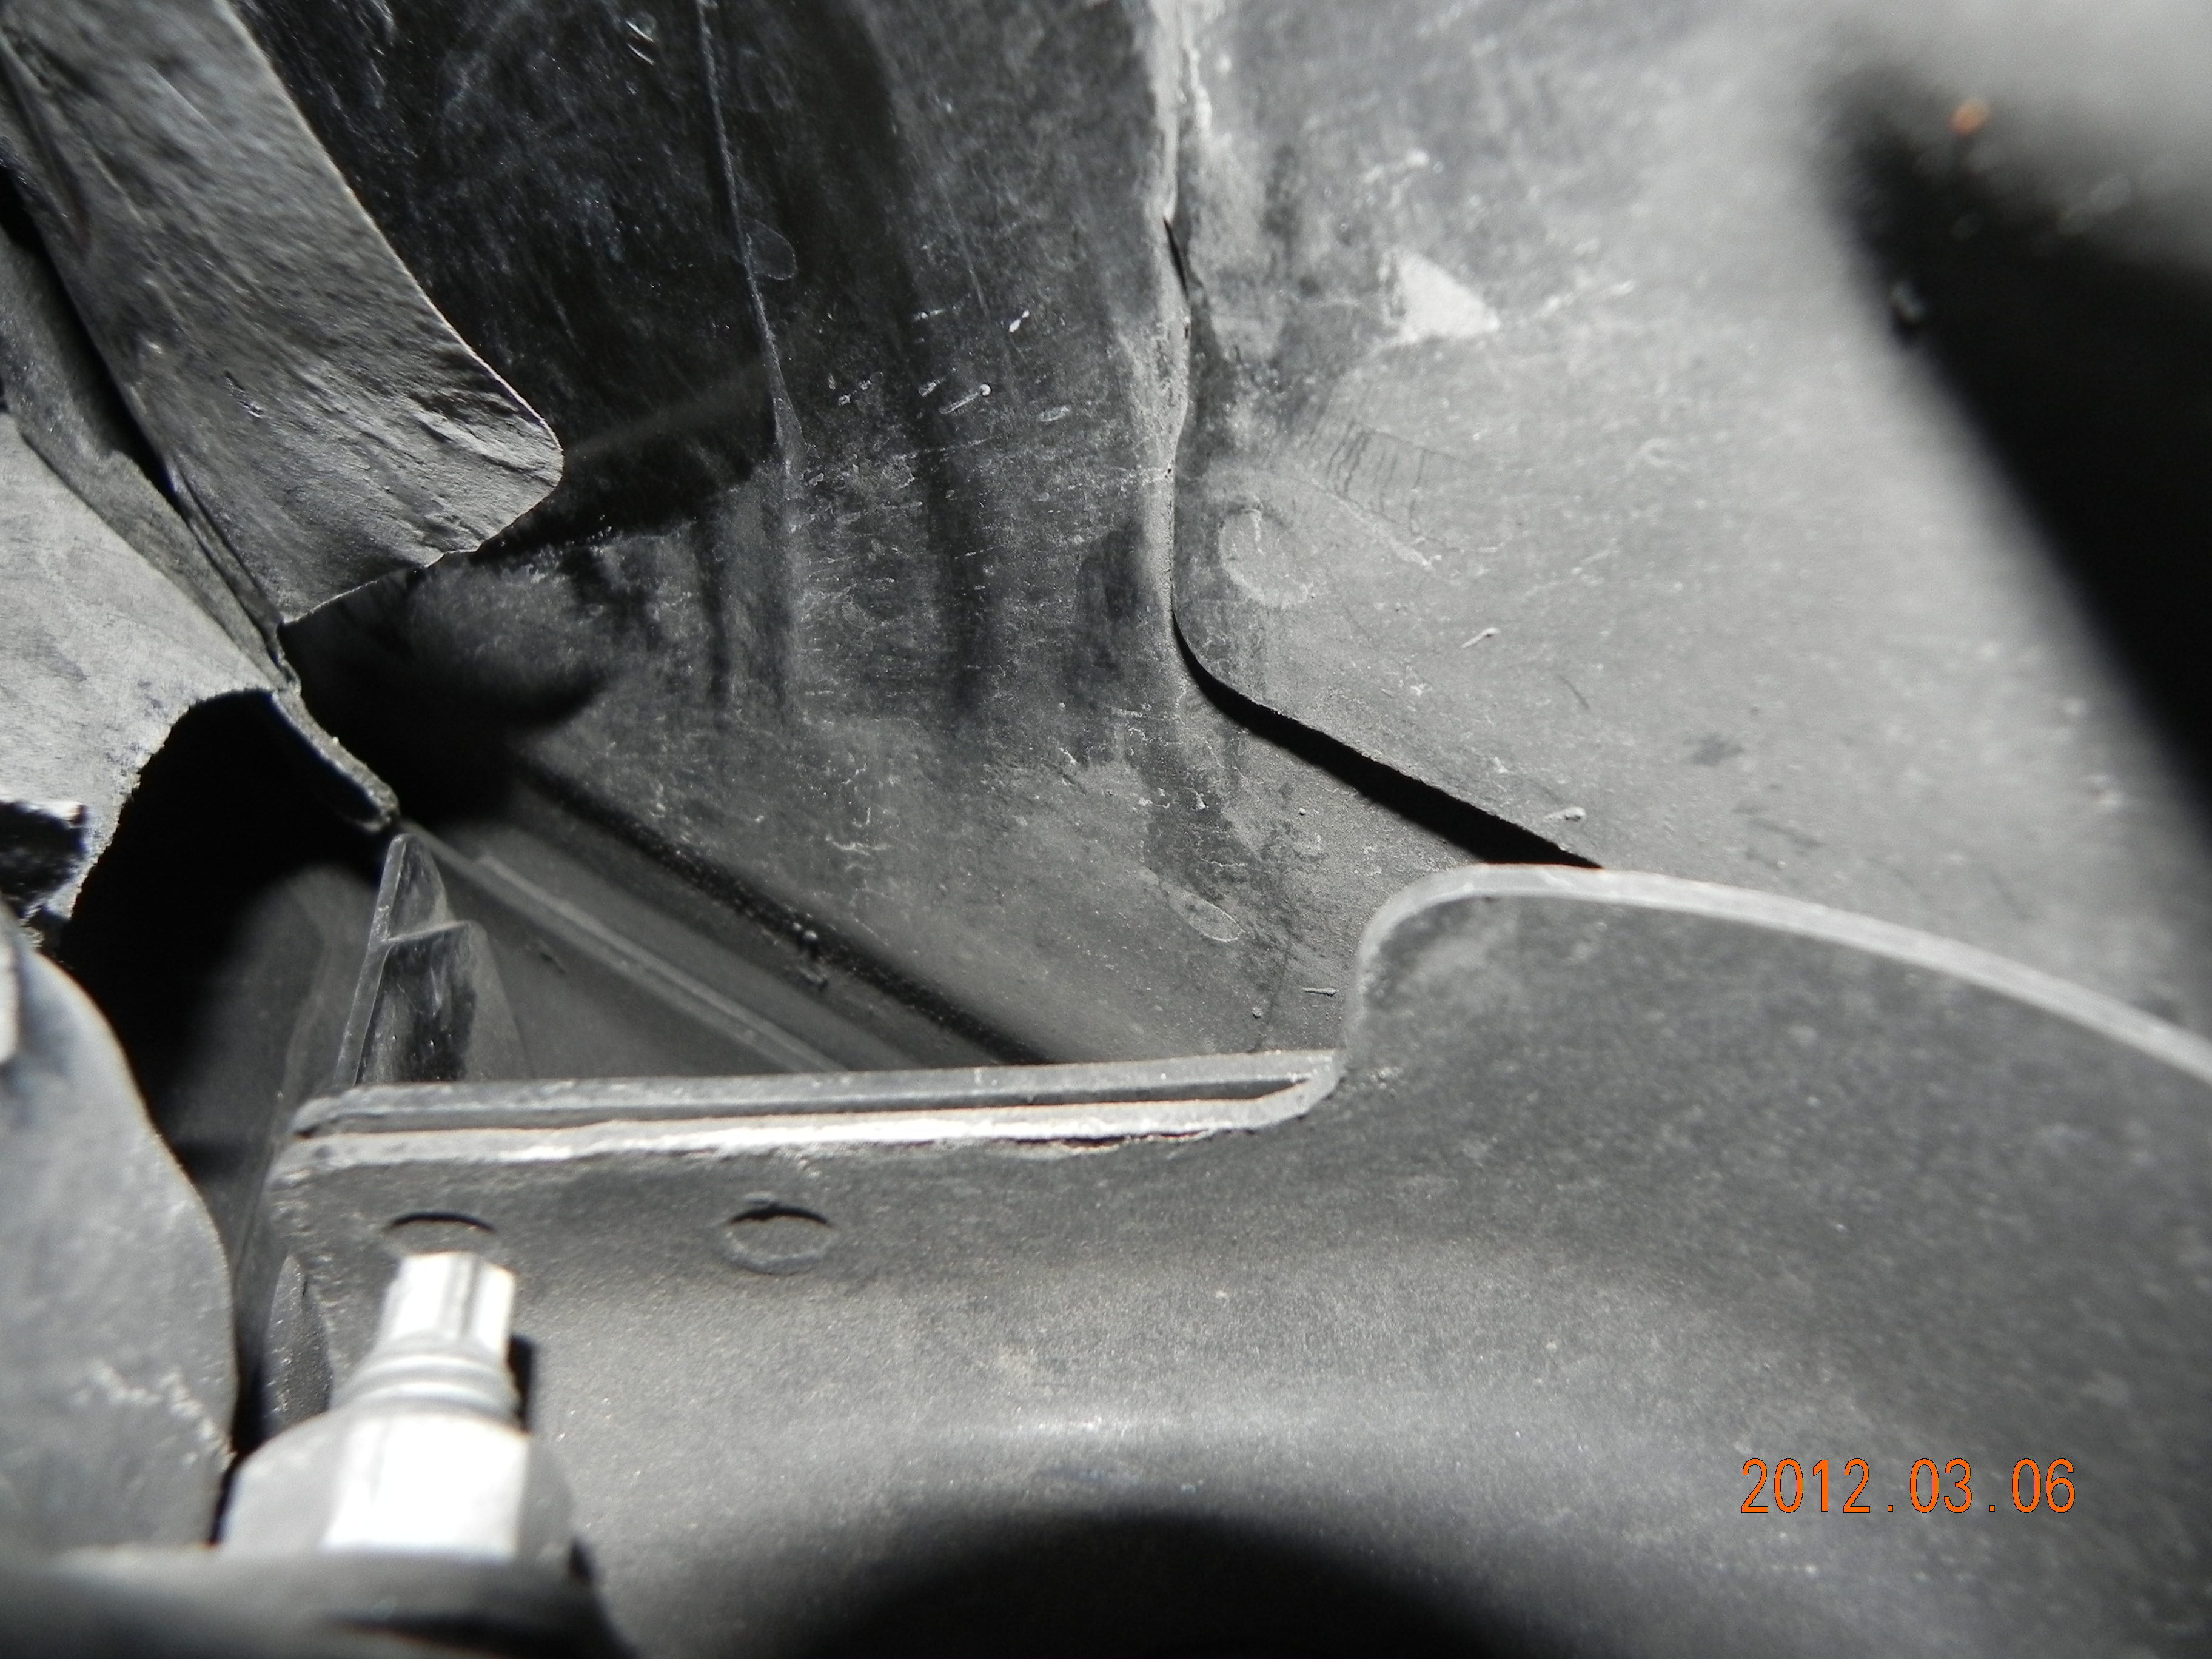
its up here on the passenger side
this drawing pathetic as it is, shows the control arm bushing where the sleeve can actually rust to the bolt, and then the upper captive nut which can break loose and spin if you are unlucky. Lots of penetrating oil, and like I said, I am not sure an impact is a good thing. Sometimes we have to heat everything with a cutting torch and its an ugly mess. Best be patient and let the penetrating oil sit over nite
Last edited by Powell Race Parts; 02-10-2013 at 09:37 PM.
02-11-2013, 10:13 PM
#59
New Member
Join Date: 02-10-13
Location: NJ
Posts: 2
Likes: 0
Received 0 Likes
on
0 Posts
This is extremely helpful. I'm trying to avoid stripping that nut at all costs. If it happens, I'm screwed. I'm a DIYer without a torch or anything like that.
How often does this nut break off and spin freely? (This is a 2005 Cobalt with original suspension). Also, why specifically would an impact wrench be bad? Do you think that I'm more likely to strip that nut that way? I've been getting advice from a few people on this. Half the people say to use air tools and the other half say to use hand tools. I can't make up my mind. Haha. Lastly, if the captive nut is hidden, how do I get PB blaster in there? Should I just douse the whole area?
Sorry for all the questions, but I can't afford to run into that problem. If you think I'm better off bringing it into a shop, let me know.
Anyway, thanks! This picture is exactly what I needed.
Last edited by matthewross1987; 02-11-2013 at 10:45 PM.
02-13-2013, 08:43 AM
#61

Im really glad that this how-to still is helping people. I was so frustrated when i did mine i couldnt believe with all the CAB problems these cars have that no one else had made one lol.
I only had to loosen the bolt coming out of the knuckle #2 as i also had a rummer mallet to help slide it out. Although removing probably would make it much easier.
Pb Blaster in any suspension install on original parts i have found is your Best Friend lol. Rubber mallet being close 2 lol
I only had to loosen the bolt coming out of the knuckle #2 as i also had a rummer mallet to help slide it out. Although removing probably would make it much easier.
Pb Blaster in any suspension install on original parts i have found is your Best Friend lol. Rubber mallet being close 2 lol
03-06-2013, 06:30 AM
#62
New Member

Join Date: 03-06-13
Location: Brunswick, Oh
Posts: 4
Likes: 0
Received 0 Likes
on
0 Posts
Some questionable repairs after an accident left the passenger cradles captive nut spinning in the bore. Anyone out there know how to get it out? The bolt keeps spinning. Drivers side came out with hand ratchet (nothing was torqued). Tips of cradle bolts were ground to a point, & then installed. Thanks, Larry
03-06-2013, 07:14 AM
#63
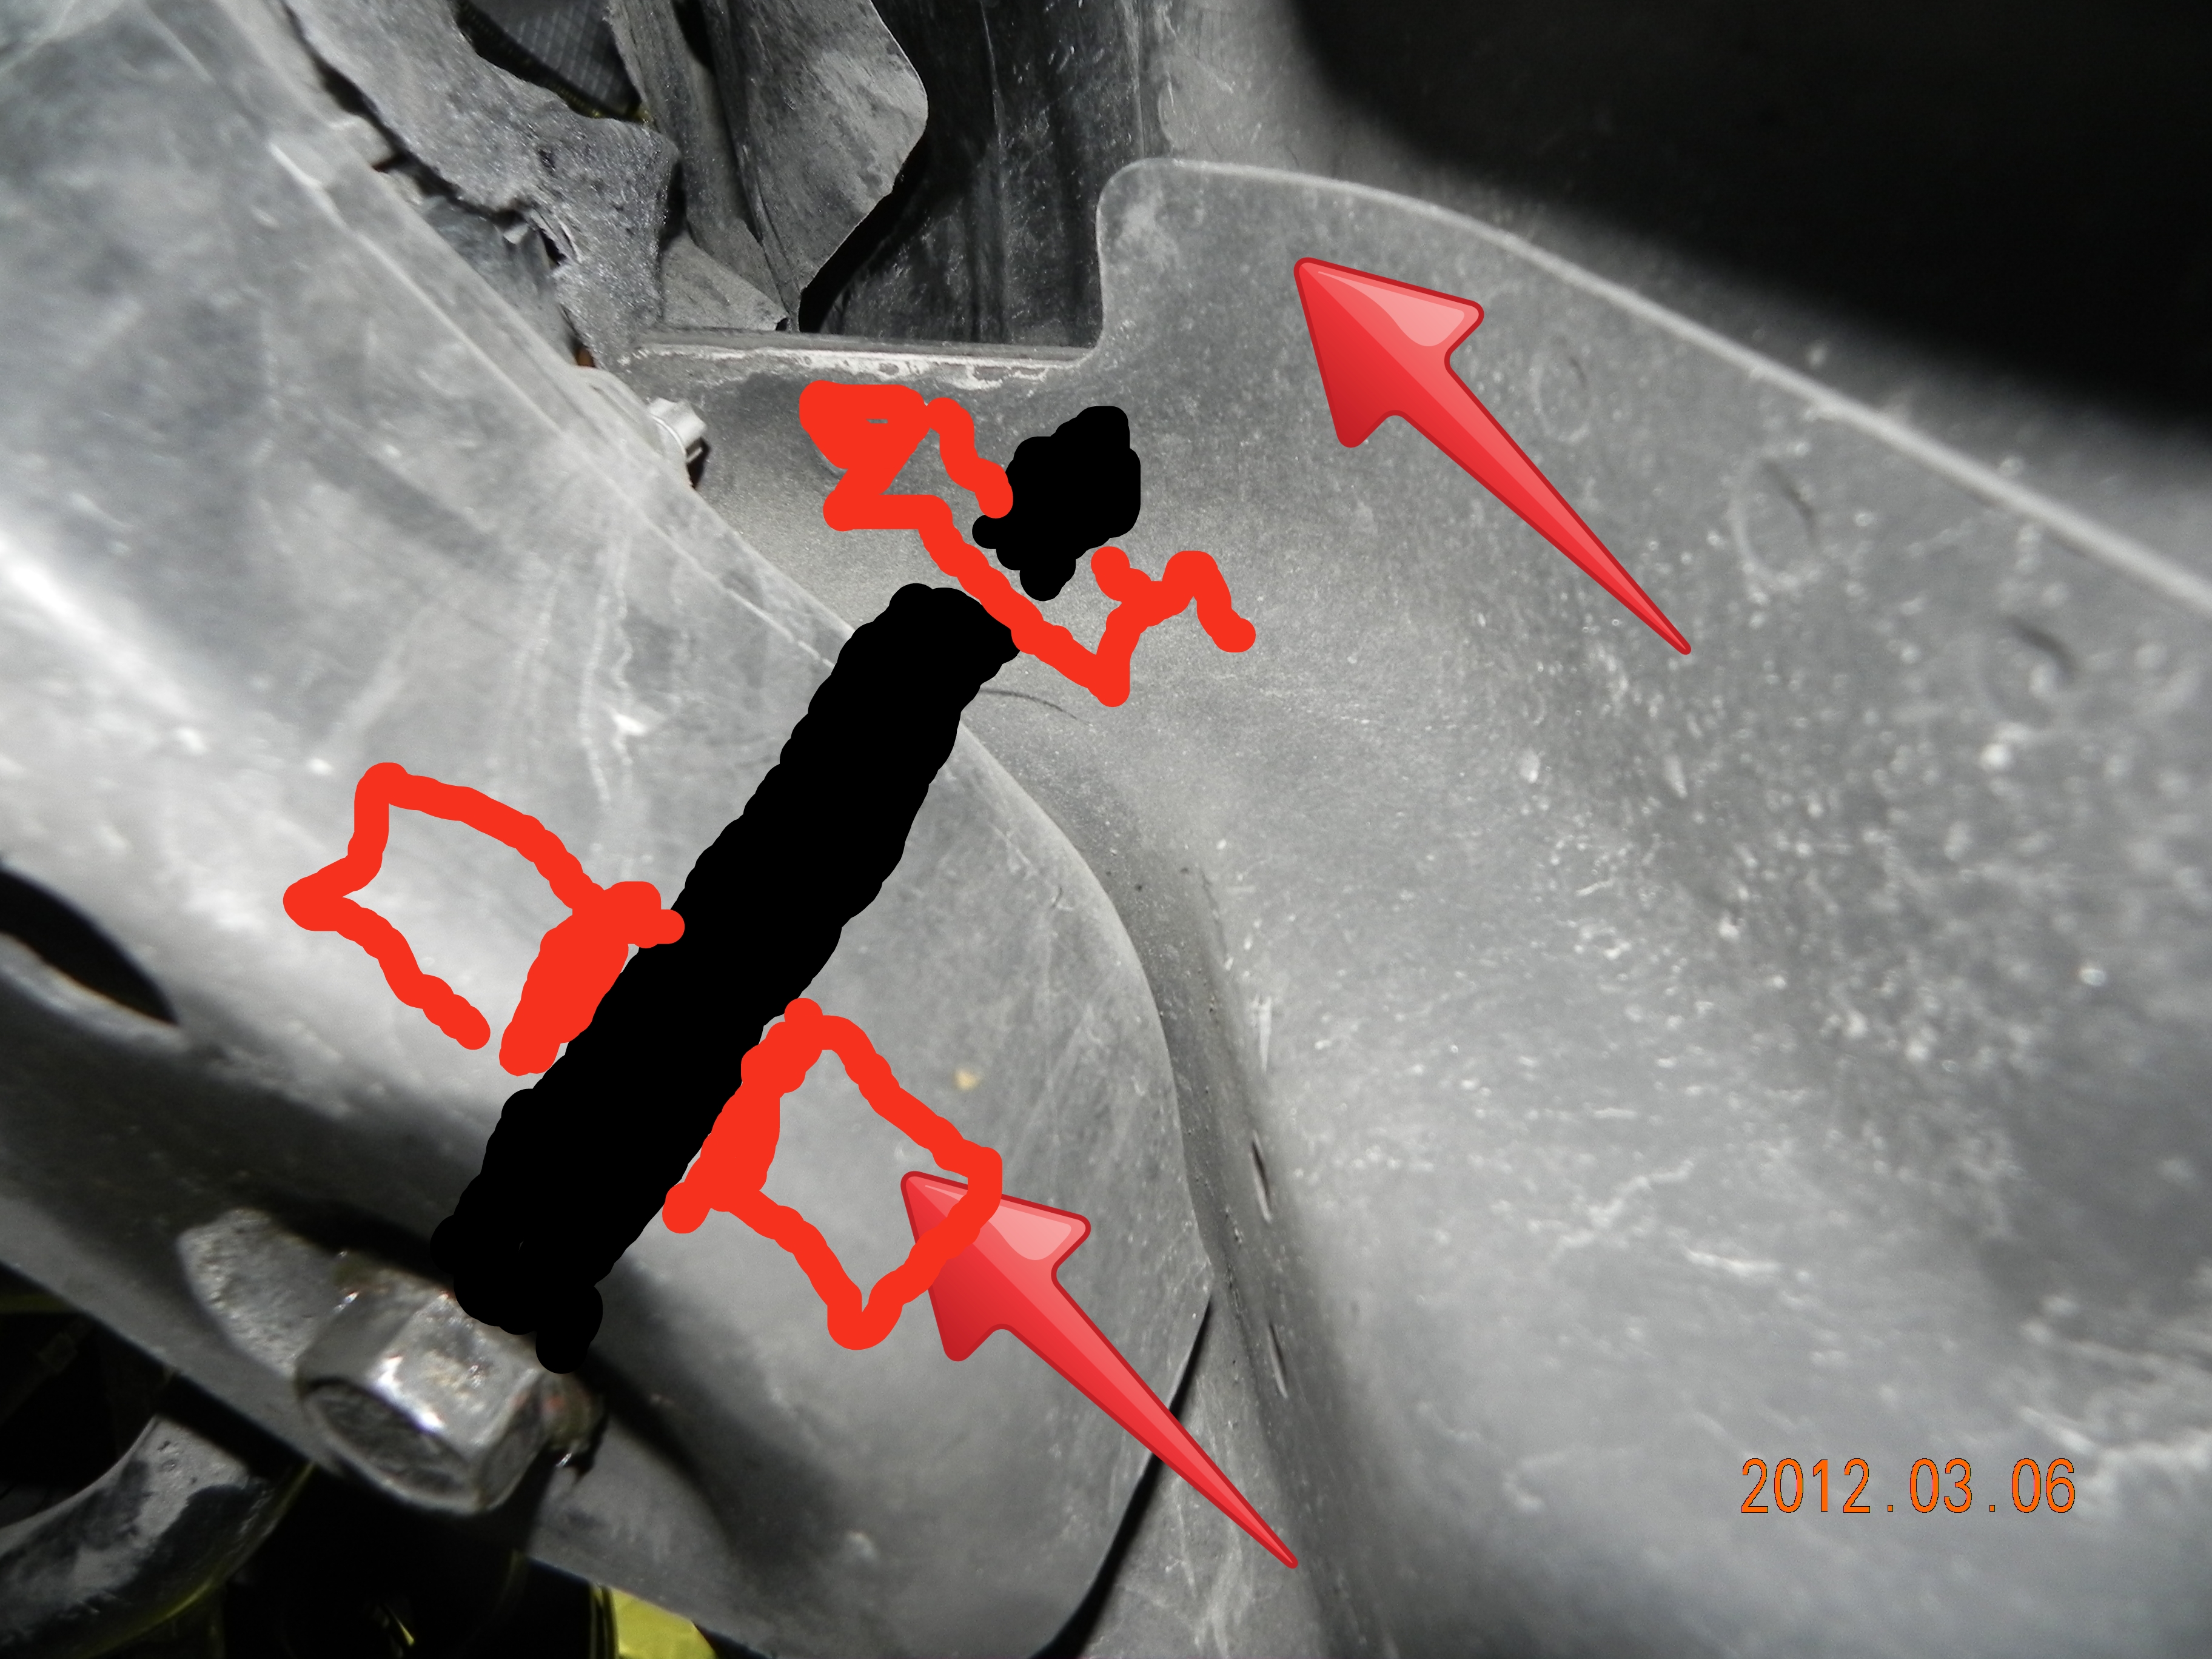
the stock cradle bolt has a wedged shaped tip. The passenger side is accessible with difficulty' break it out and replace with new bolt, nut and washer. You can get the bolts from crate engine depot, the washer and nyloc nut ( use stainless) at Fastenal.
this crude picture shows you where you can get inside at the top. Try cutting the bolt head off so you can drop the cradle it will be easier; sometimes you can get a stick welder and weld the nut. Its a reeal pita job, sorry to say

this crude picture shows you where you can get inside at the top. Try cutting the bolt head off so you can drop the cradle it will be easier; sometimes you can get a stick welder and weld the nut. Its a reeal pita job, sorry to say
03-06-2013, 08:19 AM
#64
New Member
Join Date: 03-06-13
Location: Brunswick, Oh
Posts: 4
Likes: 0
Received 0 Likes
on
0 Posts
Cradle/control arm bolt
Some questionable repairs after an accident left the passenger cradles captive nut spinning in the bore. Anyone out there know how to get it out? The bolt keeps spinning. Drivers side came out with hand ratchet (nothing was torqued). Tips of cradle bolts were ground to a point, & then installed. Thanks, Larry
05-30-2013, 01:24 PM
#66
New Member

Join Date: 03-27-13
Location: Huntsville, Alabama
Posts: 50
Likes: 0
Received 0 Likes
on
0 Posts
how hard/stupid would it be to press in the new bushings with a vise? maybe use a piece of wood as a buffer between the vise jaws and the bushing?
just a thought. $15-20 to pay someone to press them might as well be free. but weekends are my only time to work on my car and i don't know if any machine shops are open on the weekends.
just a thought. $15-20 to pay someone to press them might as well be free. but weekends are my only time to work on my car and i don't know if any machine shops are open on the weekends.
05-30-2013, 01:31 PM
#67
If the captive nut spins cut the bolt off at the head the problem is the Center sleeve rusts to the bolt. the bolt will go out the top in the passenger side. Pictures maybe tomorrow I spent four hours on one yesterday cutting torch to remove arm and bolt. It's frugly
 05-30-2013, 01:40 PM
#69

how hard/stupid would it be to press in the new bushings with a vise? maybe use a piece of wood as a buffer between the vise jaws and the bushing?
just a thought. $15-20 to pay someone to press them might as well be free. but weekends are my only time to work on my car and i don't know if any machine shops are open on the weekends.
just a thought. $15-20 to pay someone to press them might as well be free. but weekends are my only time to work on my car and i don't know if any machine shops are open on the weekends.
I used a ball joint removal/install kit to press out the old cabs. Worked great. Removed the control arms, pressed out/pressed in the bushings, & reinstalled in under an hour with a coffee break.
I've seen people use a vice though, but it makes the job a little harder.
Jack the steering knuckle up a bit to help get the control arm & the bushing lined up with the cradle bolt hole when you go to reinstall, or you will fight with it for hours.
Just don't jack up the steering knuckle to high, or you risk popping the half shaft bearings out. Trust me I know, happened to me when I did the passenger side. I got carried away with jacking the knuckle up. Now I'm replacing an axle (easy job though).
As Powell mentioned, use PB plaster (I like liquid wrench) on the craddle bolt. I used good ol' arm strength and a breaker bar to loosen/remove the bolt.
Last edited by Staged07SS; 05-30-2013 at 01:49 PM.
06-01-2013, 08:11 AM
#70
I will post pictures later; a couple of days ago I had a steel arm FE1 car with the center of the cab bushing, the metal sleeve, rusted solid to the cab bolt. I had to cut the arm off and the bolt; the actual captive nut was not rusted, the sleeve stopped the bolt from dropping as it was undone, so that wrecked the captive nut assembly.
Oxy acetylene torch and a lot of work to fix. Not to be attempted without proper equipment.
Oxy acetylene torch and a lot of work to fix. Not to be attempted without proper equipment.
06-04-2013, 04:33 PM
#71
New Member

Join Date: 07-05-06
Location: Bellingham, WA
Posts: 169
Likes: 0
Received 0 Likes
on
0 Posts
Hey guys so looking to give my suspension a little R&R, plan on doing the sway bar bushings & end links along with these control arm bushings. Wanting to get all the knocks out i was wondering what you guys would call this part along with if the necessity would be there to replace these?
sorry if its obvious but took a copy of the pics from the earlier page to try and target the part im looking to identify:

Thanks!
Taylor
sorry if its obvious but took a copy of the pics from the earlier page to try and target the part im looking to identify:
Thanks!
Taylor
06-05-2013, 07:15 AM
#72
Hey guys so looking to give my suspension a little R&R, plan on doing the sway bar bushings & end links along with these control arm bushings. Wanting to get all the knocks out i was wondering what you guys would call this part along with if the necessity would be there to replace these?
sorry if its obvious but took a copy of the pics from the earlier page to try and target the part im looking to identify:

Thanks!
Taylor
sorry if its obvious but took a copy of the pics from the earlier page to try and target the part im looking to identify:
Thanks!
Taylor
 lower ball joint of course, thanks!