HOW TO: proper two bucket wash. (pic heavy)
 08-07-2013, 07:41 PM
#1

HOW TO: proper two bucket wash. (pic heavy)
I have spent years trying to have the mind of a ‘detail freak’. Always loving to take our cars to shows, we all want to keep our prized rides looking great. Unfortunately, properly washing your car is not as easy as wiping it with a wet washcloth and letting it dry in the sun.
This wash IS a process and a half, but it is worth it and you will see why. This is also a long write up and might seem unnecessary, but there are explanations for why I do things the way I do them every step of the way. Novices and veterans alike may learn a thing or two. All I’m trying to do is keep your paint as new as possible, without requiring polishing.
A car covered in wash and swirl marks vs. one that isn’t is significant when it comes to viewing it in any light. Light will relect and scatter off of swirl marks, which makes the car look dull. A car with perfect paint has that deep, wet look to it at all times, which we all want. Washing your car the way I am describing will not remove any of these scratches, but prevent you from inducing any more of them. I’m not saying its 100% guaranteed, but its about as good as it gets, as far as practicality is concerned.
First things first:
DO NOT use dish soap unless you want to strip your wax off the car
Never touch your paint unless it is freshly cleaned, or wet and covered in soap/detail spray.
Throw away your deer skin shamois.
ALL things that are used for cleaning your wheels, under the hood, etc. should be kept separate from things used to clean the car itself. This means separate bucket, wash mitt and everything.
If possible, wash your car in the garage, or at least in the shade. Less time will be spent trying to work fast and keeping the car wet when you are cool in the shade.
The aim of this type of wash is to
a) clean the car perfectly to a showroom look every time (duh! :P )
b) avoid any type of swirl/wash marks in the process. This is done by keeping the surfaces sudsy and lubricated, as well as touching them as little as possible.
c) efficient dry
Average time: 1 hour to 1 and a half hours.
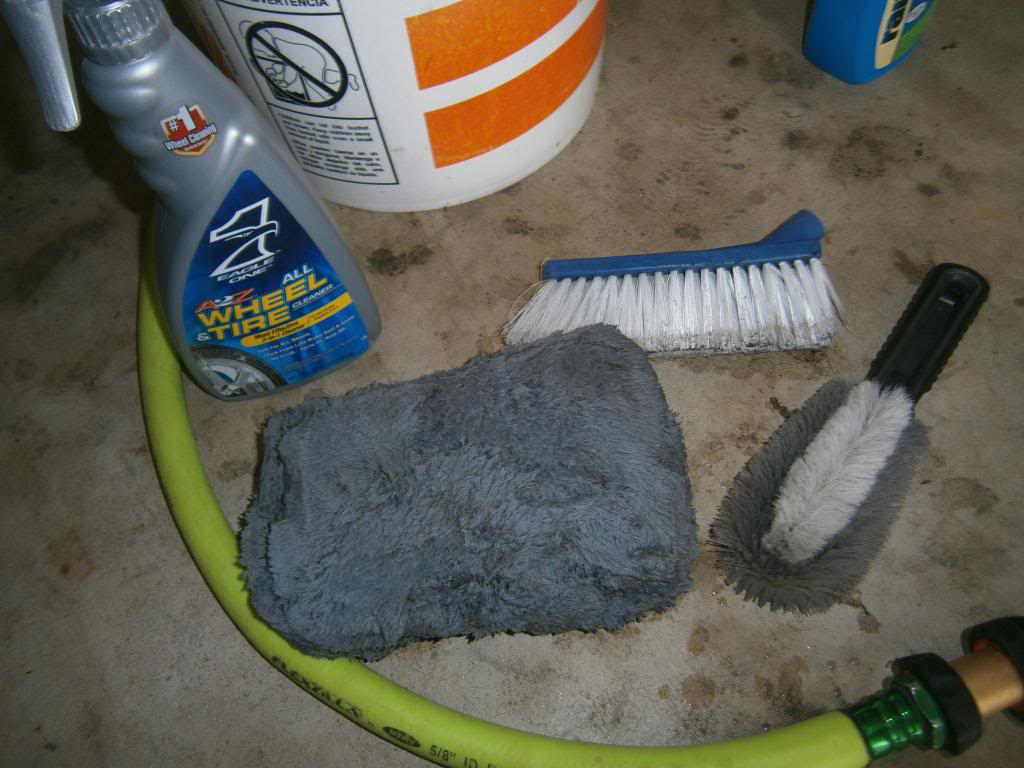
Things needed:
A dirty cobalt
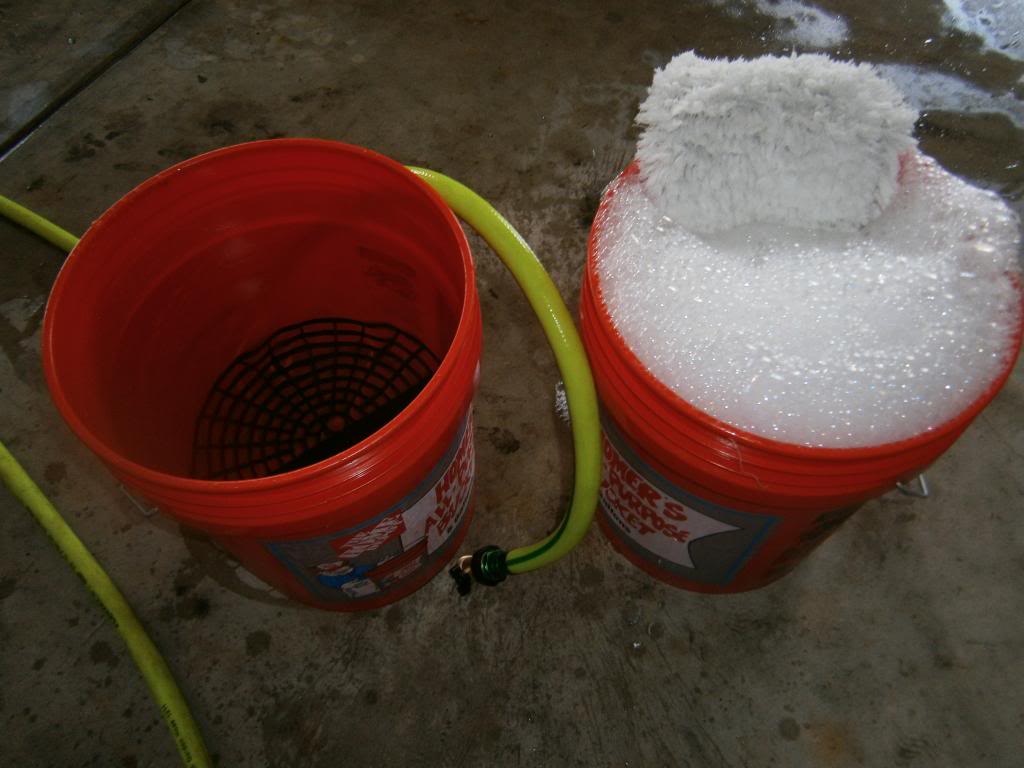
TWO 5 gallon buckets with grit gaurds (grit gaurds sold on ebay for ~10-15 each)
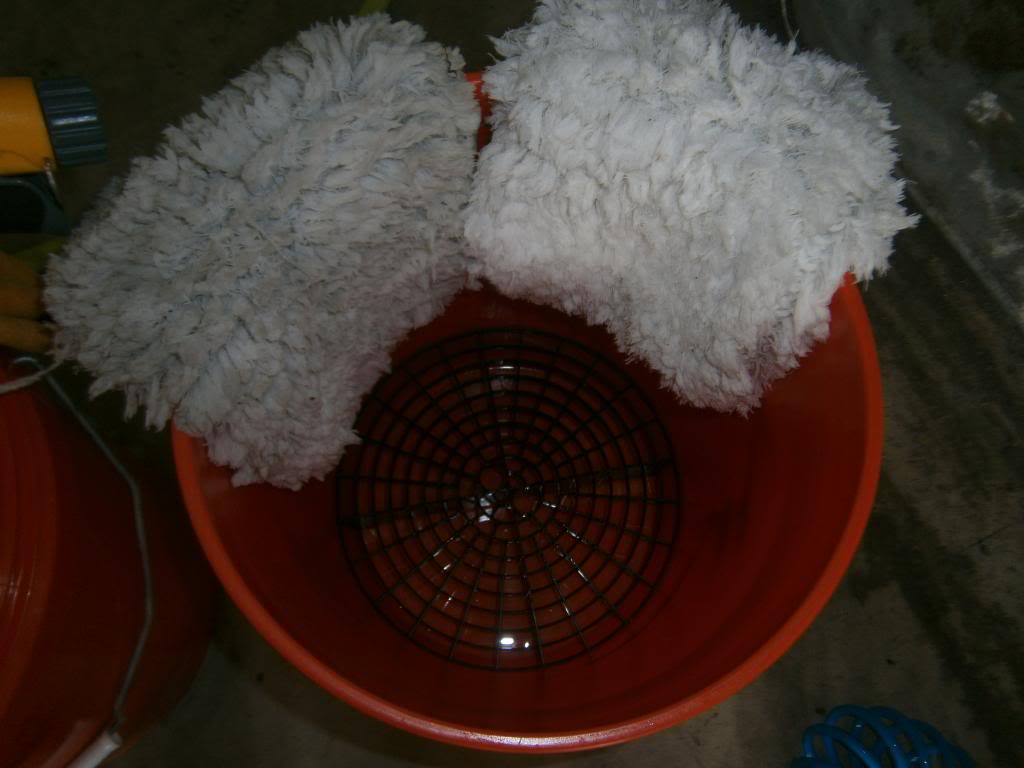
TWO microfiber wash mitts. One for the top half of the car, one for the bottom half. The dividing line is the top of your wheel wells.
Car soap of your choice. DO NOT use dish soap. (unless you want to strip the wax off to polish your paint)
The point of car shampoo/soap is to LIFT the dirt off and suspend it from the paint. The sudsier the better, as this ensures high lubricity between your wash mitt and the paint.
Bug & Tar remover spray. Helps for.. well, removing bug, tar, and bird ****. Spray this on before you initially rinse the car.
edit: A tip from colodude18 that you could try instead! get a hot wet microfiber towel and soak it over the spots where bugs and stuff are for a few minutes, then it should come right off as well, without stripping your wax off. i'm actually gonna do that from now on!
A foam gun. I picked this badboy up at autozone for 20 bucks and it works great. Preferably, I’d use a real foam device with a power washer, but I do not have a power washer.
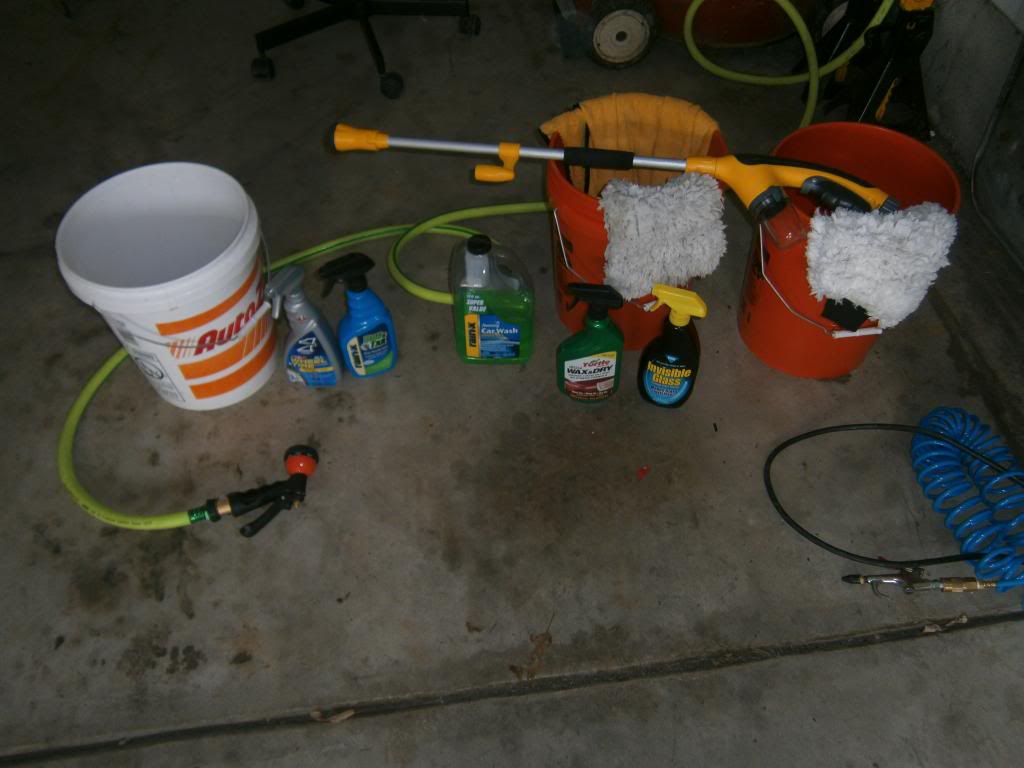
A separate, different kind of bucket (to keep wheel cleaning stuff in)
Wheel soap. I have been using eagle all wheel cleaner and it works great for dissolving brake dust and the road grime and dirt on my rims, tires and brake calipers.
A separate wash mitt (NOT the one you are using to clean the paint!) to wash the rim with.
A tire brush and scrubber brush for you wheel wells. (to clean your wheels well! )
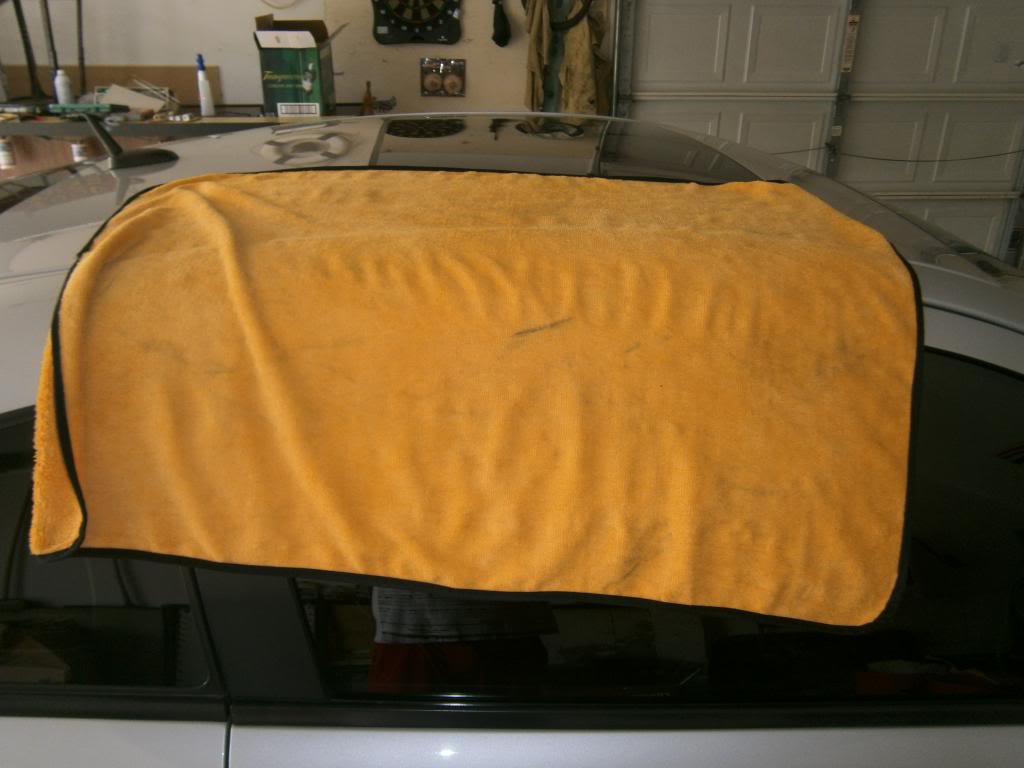
A bigass microfiber towel. This one I got off chemical guys dot com for $10, and it has two sides. A plush side and a micro-microfiber side. This is for drying with.
Look at the size of this badboy!
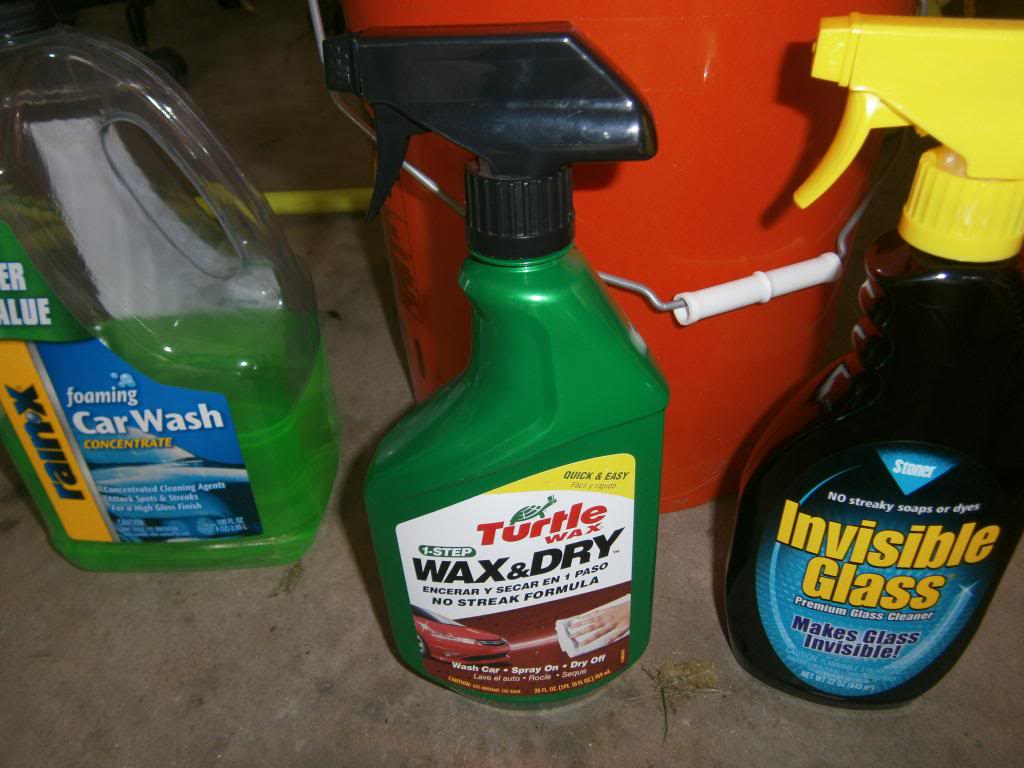
Detail spray/spray wax/wax as you dry spray. For using while drying.
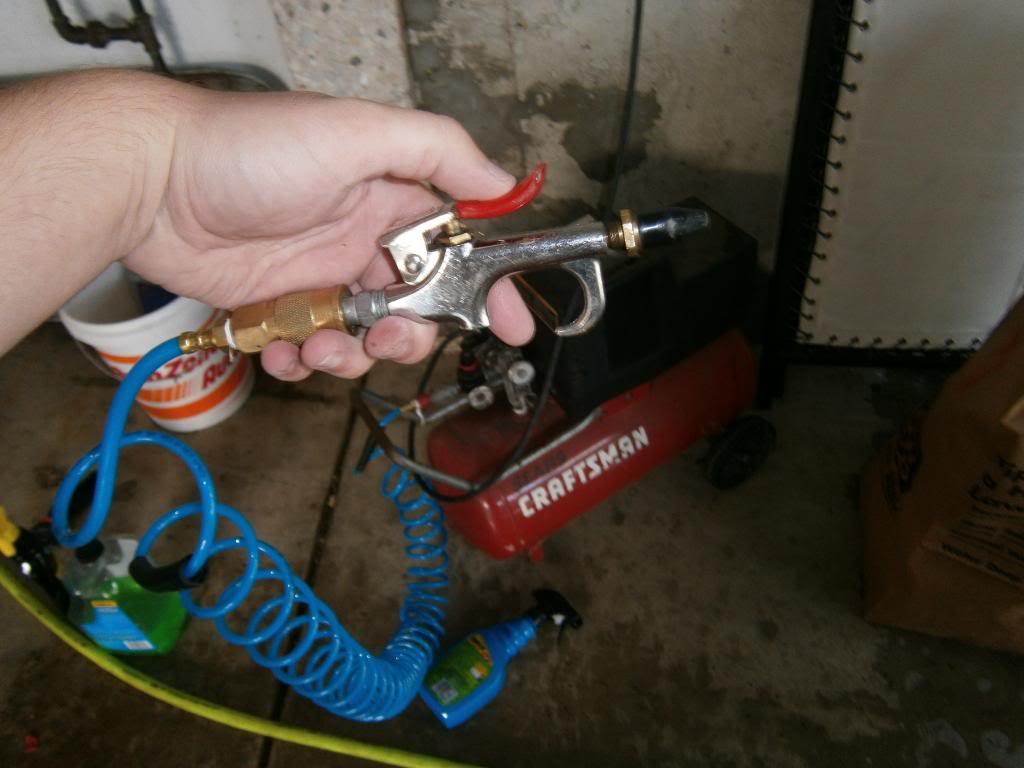
Optional: an air compressor with air spray attachment. This works great for getting water out of those little crevices all over the car, like your door handles, grilles, lug nuts, mirrors, etc. Disclaimer: these CAN spray oil/debris at your paint, to use this at your own risk. A heat/detail gun is recommended but I don’t have one.
STEP ONE:
Wheels.
First off, spray all of your wheels down. Knock all dirt off that you can. On a freshly driven car, your brakes will be hot, and this will help cool them down, keeping water from drying so fast while you wash them.
Now, doing one wheel at a time, do this:
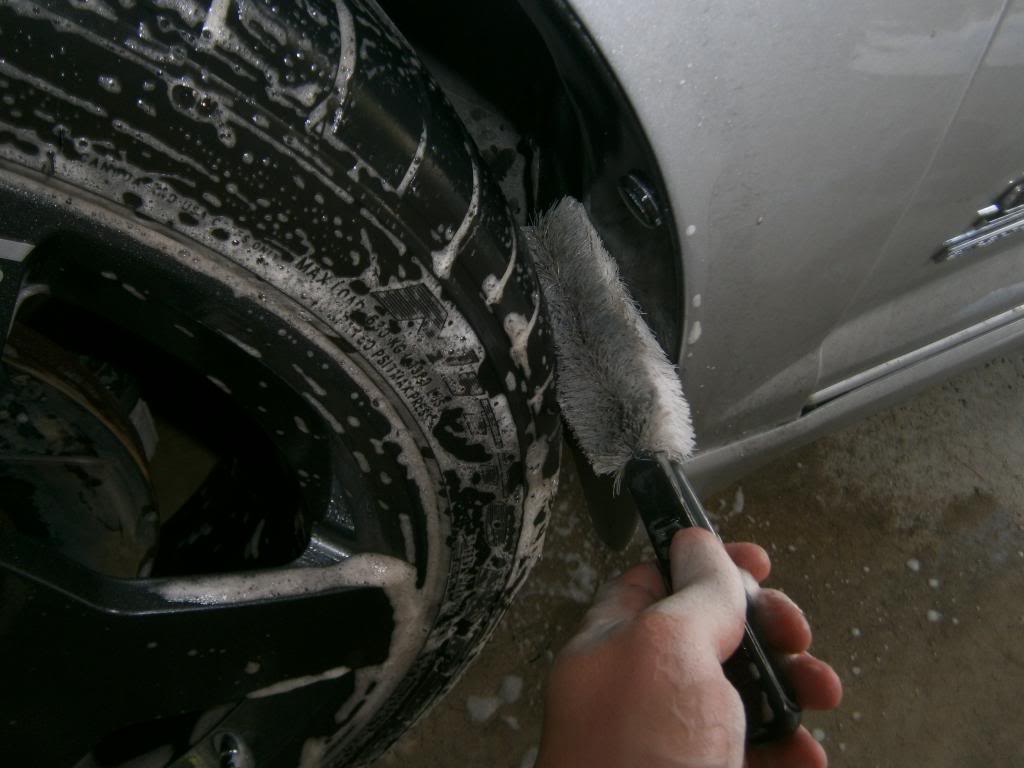
Spray the wheel cleaner all over the rim, tire, inside of the rim, brake caliper, and wheel well.
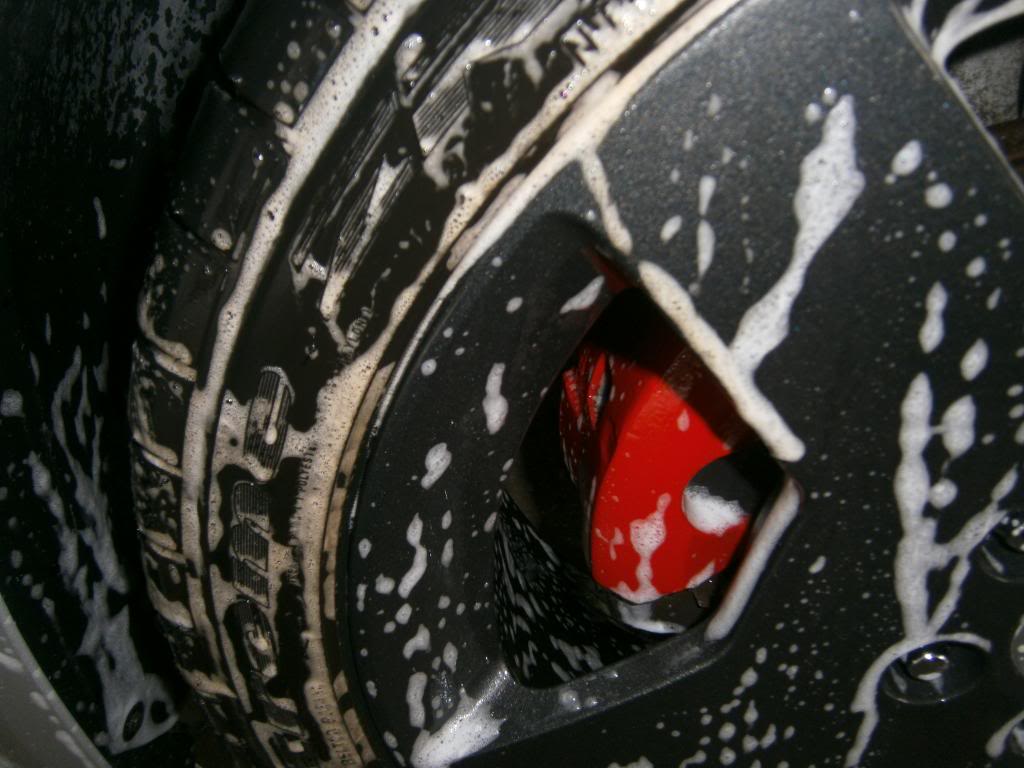
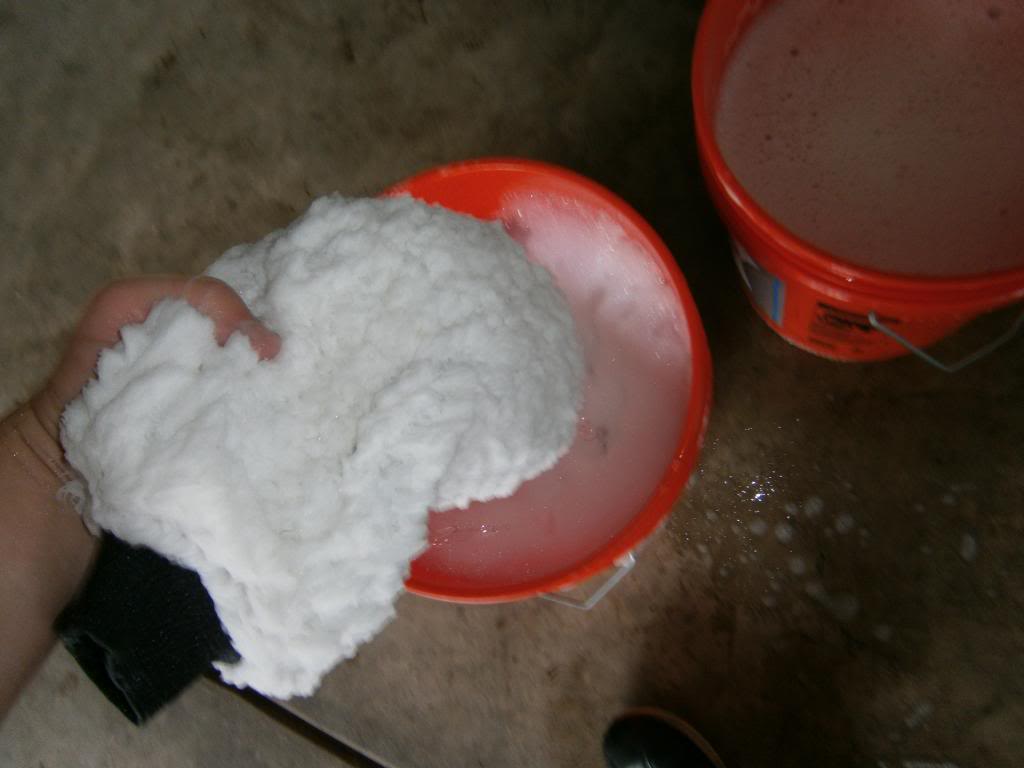
Keeping your wheel wash mitt wet and also covered in wheel soap, wipe the entire outside surface of the rim, then move inside and do the whole inside of the rim, and then the caliper for what its worth.
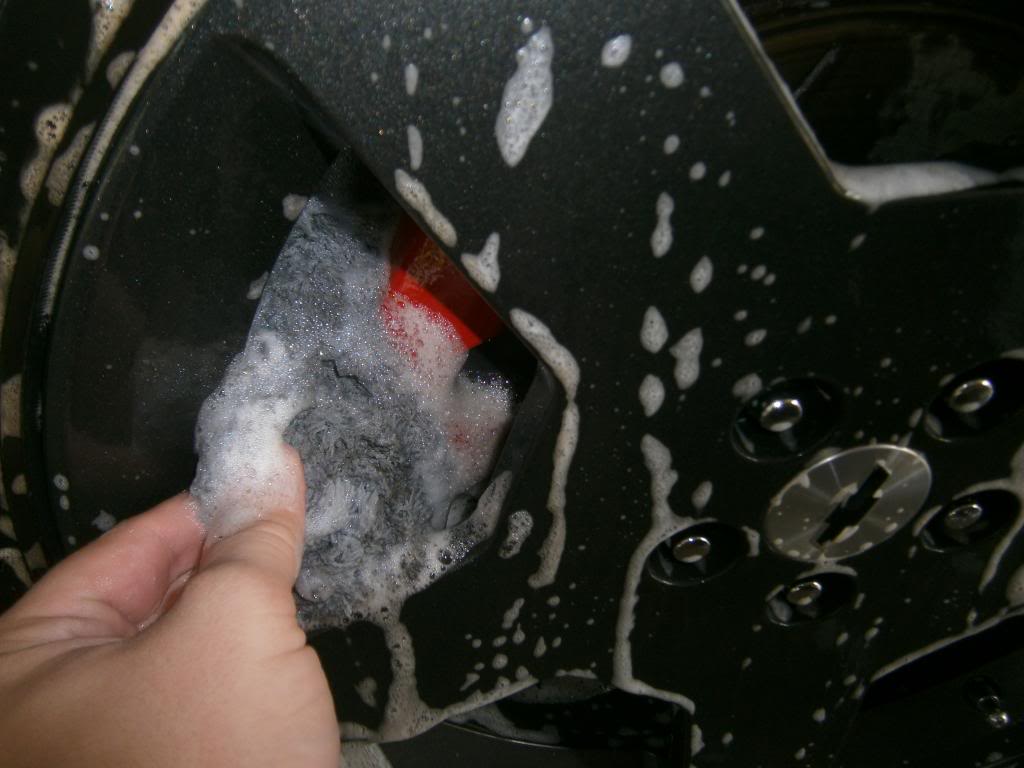
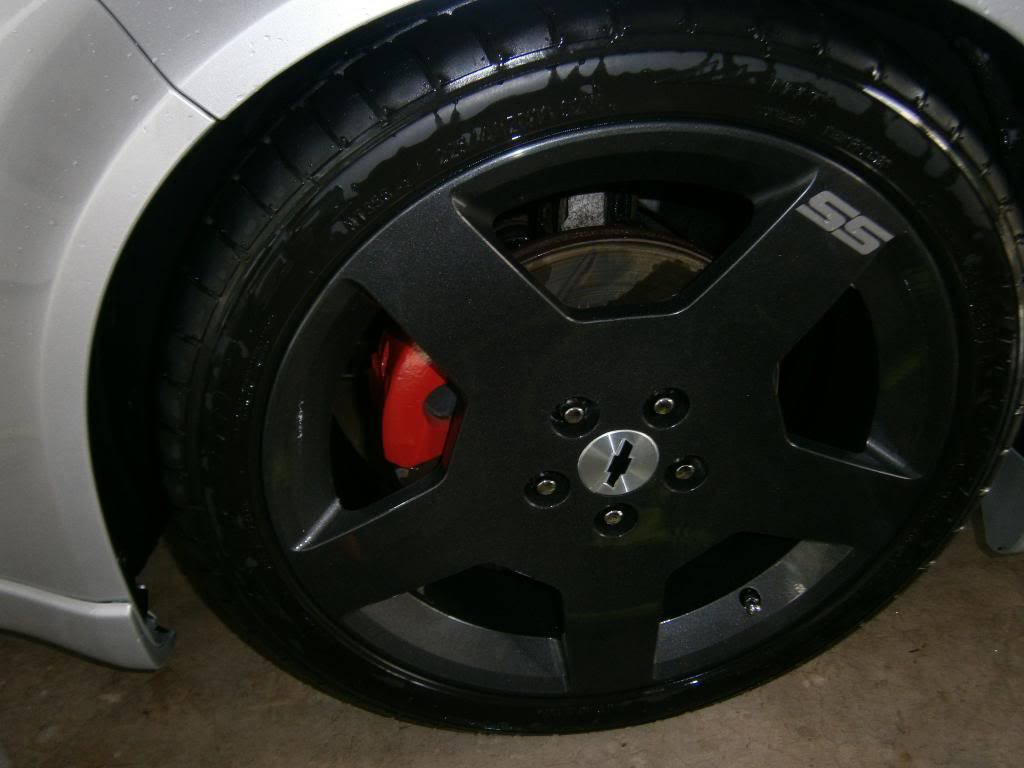
Look at all that crap! I just washed this car three days ago, it rained once!
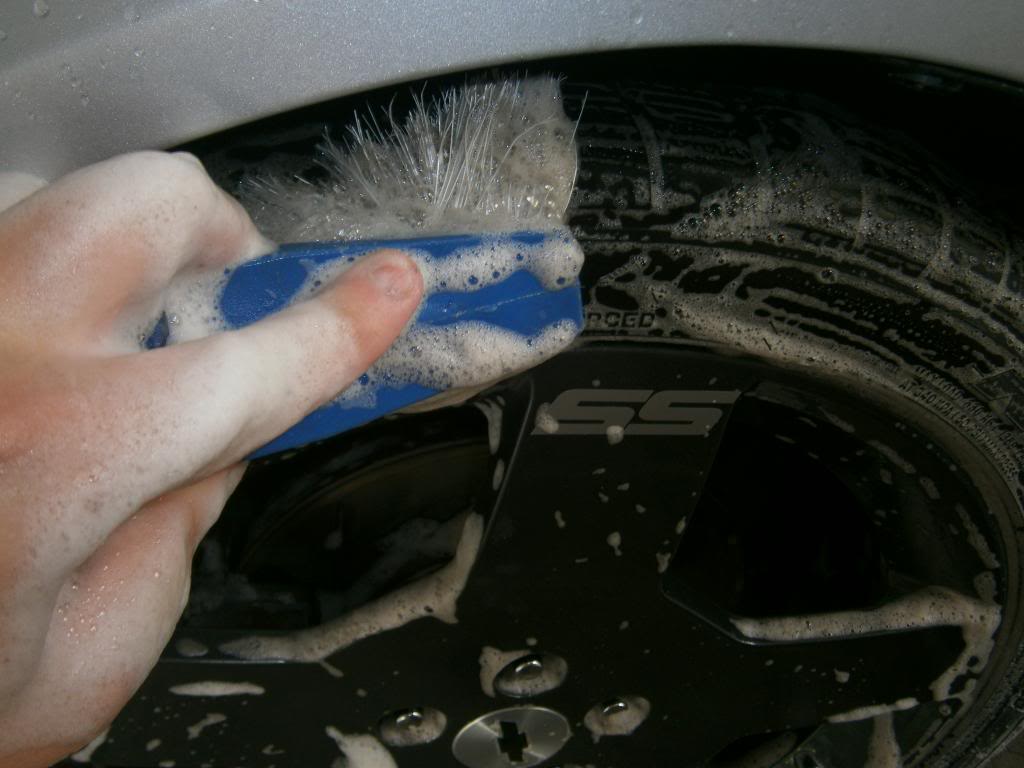
Then, scrub the tire with your tire brush…
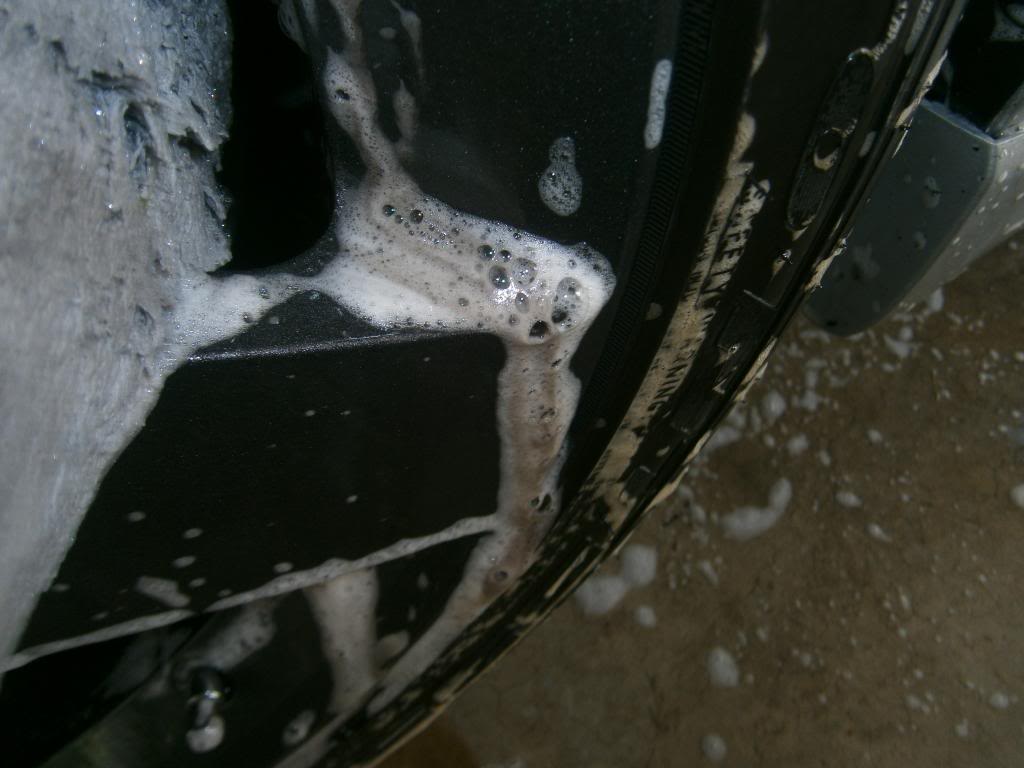
Then everywhere you can reach in your wheel well with your wheel well scrubber tool.
Now rinse the rim, AND all of your cleaning utensils for the next wheel.
It is especially important to keep the wheel mitt clean between wheels, especially powdercoated ones, because it picks up a lot of grime on the inside of each rim, that you do not want to scrape all over the next rim.
When all the wheels have been cleaned, now its time to do the car.
This wash IS a process and a half, but it is worth it and you will see why. This is also a long write up and might seem unnecessary, but there are explanations for why I do things the way I do them every step of the way. Novices and veterans alike may learn a thing or two. All I’m trying to do is keep your paint as new as possible, without requiring polishing.
A car covered in wash and swirl marks vs. one that isn’t is significant when it comes to viewing it in any light. Light will relect and scatter off of swirl marks, which makes the car look dull. A car with perfect paint has that deep, wet look to it at all times, which we all want. Washing your car the way I am describing will not remove any of these scratches, but prevent you from inducing any more of them. I’m not saying its 100% guaranteed, but its about as good as it gets, as far as practicality is concerned.
First things first:
DO NOT use dish soap unless you want to strip your wax off the car
Never touch your paint unless it is freshly cleaned, or wet and covered in soap/detail spray.
Throw away your deer skin shamois.
ALL things that are used for cleaning your wheels, under the hood, etc. should be kept separate from things used to clean the car itself. This means separate bucket, wash mitt and everything.
If possible, wash your car in the garage, or at least in the shade. Less time will be spent trying to work fast and keeping the car wet when you are cool in the shade.
The aim of this type of wash is to
a) clean the car perfectly to a showroom look every time (duh! :P )
b) avoid any type of swirl/wash marks in the process. This is done by keeping the surfaces sudsy and lubricated, as well as touching them as little as possible.
c) efficient dry
Average time: 1 hour to 1 and a half hours.
Things needed:
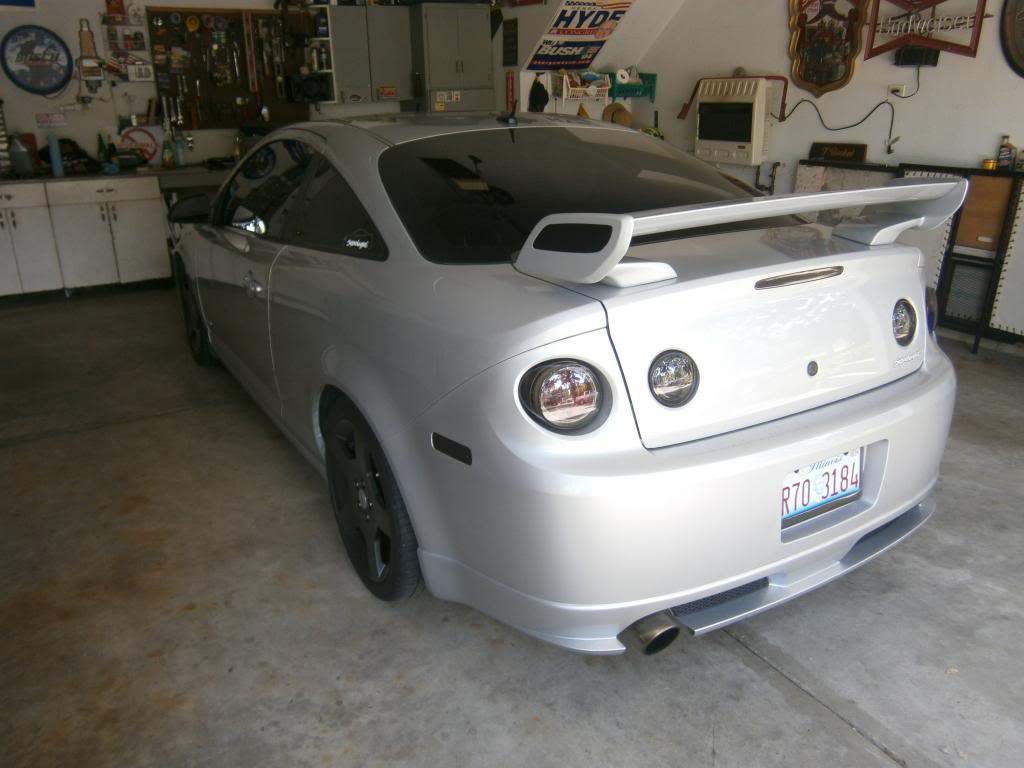
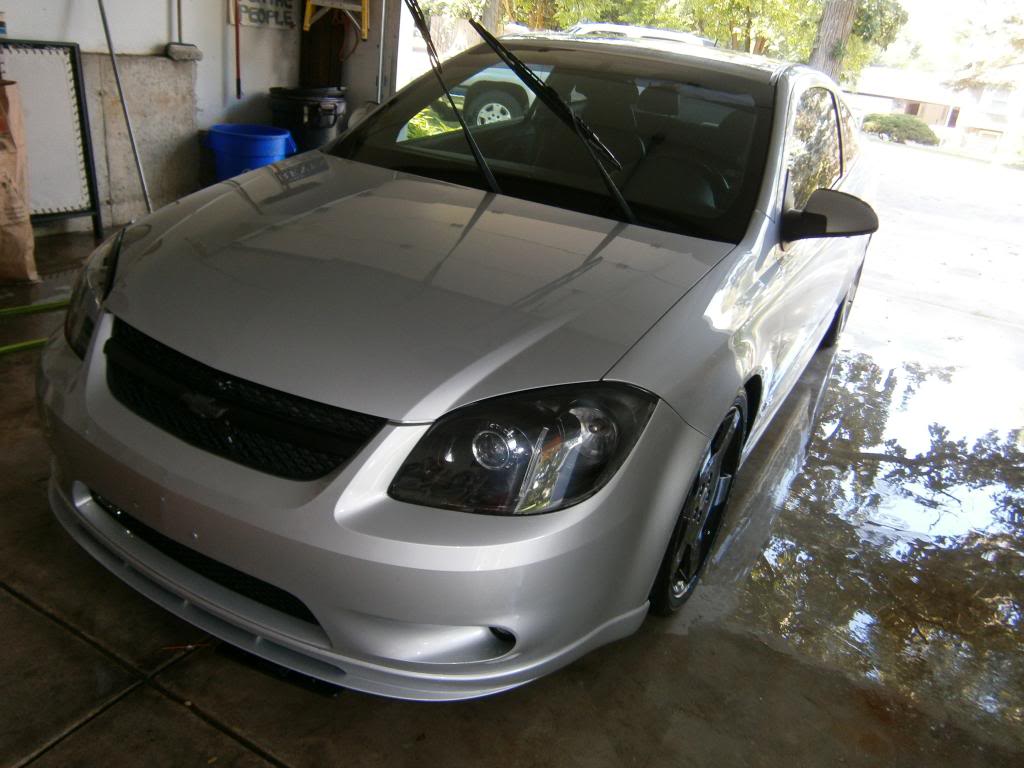
A dirty cobalt


TWO 5 gallon buckets with grit gaurds (grit gaurds sold on ebay for ~10-15 each)

TWO microfiber wash mitts. One for the top half of the car, one for the bottom half. The dividing line is the top of your wheel wells.
Car soap of your choice. DO NOT use dish soap. (unless you want to strip the wax off to polish your paint)
The point of car shampoo/soap is to LIFT the dirt off and suspend it from the paint. The sudsier the better, as this ensures high lubricity between your wash mitt and the paint.
Bug & Tar remover spray. Helps for.. well, removing bug, tar, and bird ****. Spray this on before you initially rinse the car.
edit: A tip from colodude18 that you could try instead! get a hot wet microfiber towel and soak it over the spots where bugs and stuff are for a few minutes, then it should come right off as well, without stripping your wax off. i'm actually gonna do that from now on!
A foam gun. I picked this badboy up at autozone for 20 bucks and it works great. Preferably, I’d use a real foam device with a power washer, but I do not have a power washer.

A separate, different kind of bucket (to keep wheel cleaning stuff in)
Wheel soap. I have been using eagle all wheel cleaner and it works great for dissolving brake dust and the road grime and dirt on my rims, tires and brake calipers.
A separate wash mitt (NOT the one you are using to clean the paint!) to wash the rim with.
A tire brush and scrubber brush for you wheel wells. (to clean your wheels well!

A bigass microfiber towel. This one I got off chemical guys dot com for $10, and it has two sides. A plush side and a micro-microfiber side. This is for drying with.
Look at the size of this badboy!

Detail spray/spray wax/wax as you dry spray. For using while drying.

Optional: an air compressor with air spray attachment. This works great for getting water out of those little crevices all over the car, like your door handles, grilles, lug nuts, mirrors, etc. Disclaimer: these CAN spray oil/debris at your paint, to use this at your own risk. A heat/detail gun is recommended but I don’t have one.

STEP ONE:
Wheels.
First off, spray all of your wheels down. Knock all dirt off that you can. On a freshly driven car, your brakes will be hot, and this will help cool them down, keeping water from drying so fast while you wash them.
Now, doing one wheel at a time, do this:
Spray the wheel cleaner all over the rim, tire, inside of the rim, brake caliper, and wheel well.

Keeping your wheel wash mitt wet and also covered in wheel soap, wipe the entire outside surface of the rim, then move inside and do the whole inside of the rim, and then the caliper for what its worth.

Look at all that crap! I just washed this car three days ago, it rained once!

Then, scrub the tire with your tire brush…

Then everywhere you can reach in your wheel well with your wheel well scrubber tool.

Now rinse the rim, AND all of your cleaning utensils for the next wheel.
It is especially important to keep the wheel mitt clean between wheels, especially powdercoated ones, because it picks up a lot of grime on the inside of each rim, that you do not want to scrape all over the next rim.

When all the wheels have been cleaned, now its time to do the car.
Last edited by riceburner; 08-07-2013 at 11:27 PM.
 08-07-2013, 07:42 PM
#2
First!
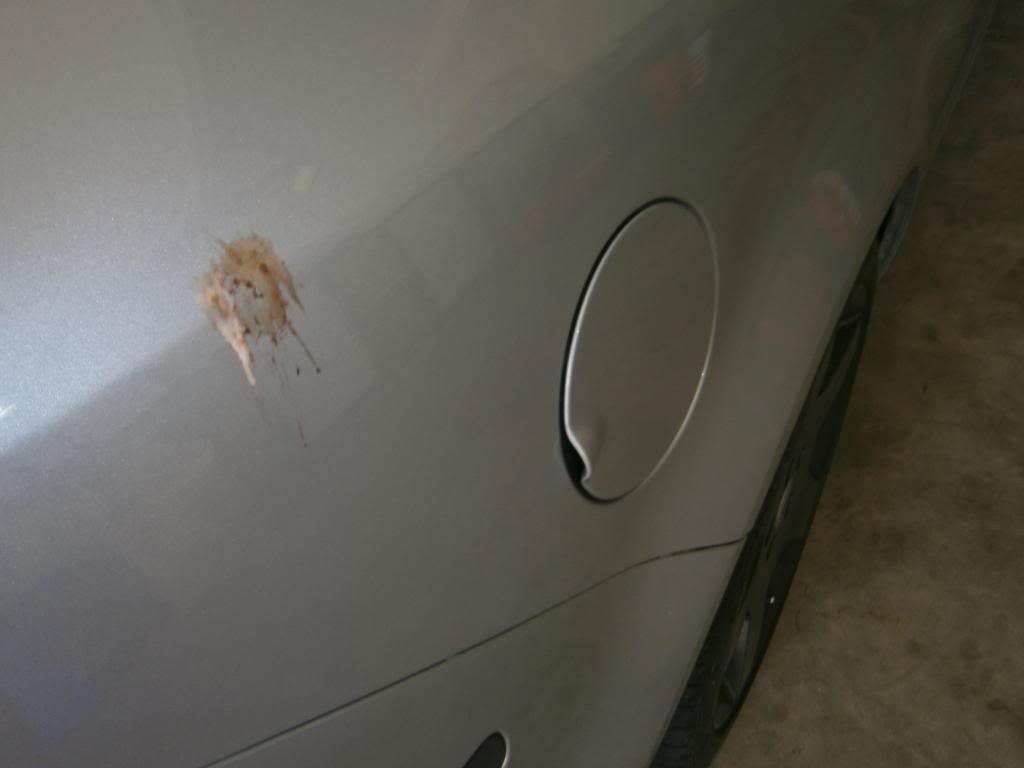
If there are bugs all over your bumper, tar behind your wheels, etc, spray some of that bug and tar remover on. Note: it is recommended to wax these areas when the car is dry, as these cleaners are much more hyper active that car soap � hence they work so well for removing these things.
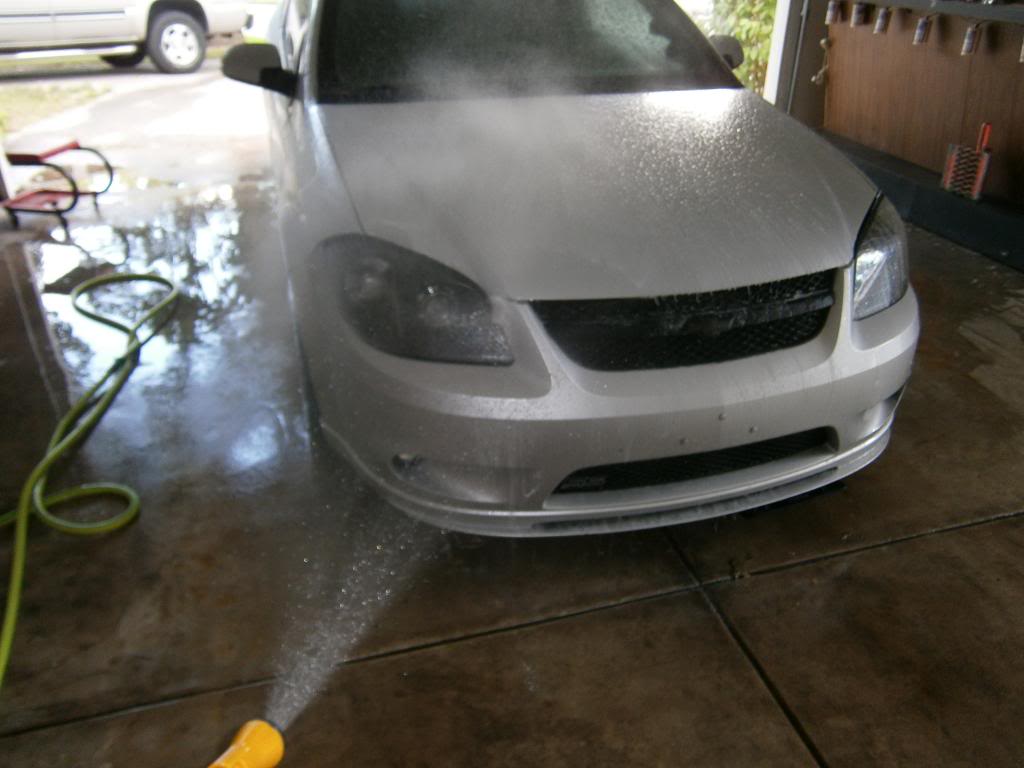
Spray the entire car down. Like the wheels, be sure to knock as much dirt, grime, and bird **** off of the car. If you used bug and tar remover, rinse it all off. I prefer to use the �flat� option on my hose sprayer selector thing for this part for the higher pressure.
Remember that bird ****? All gone. Didn�t even hit it with the bug stuff.
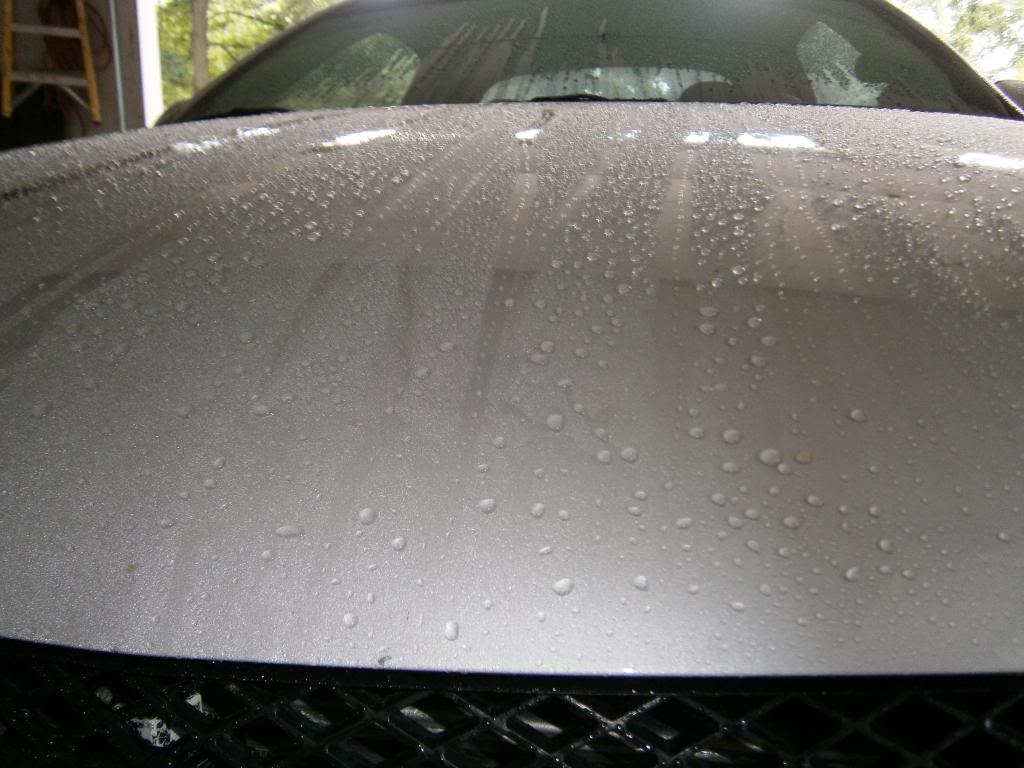
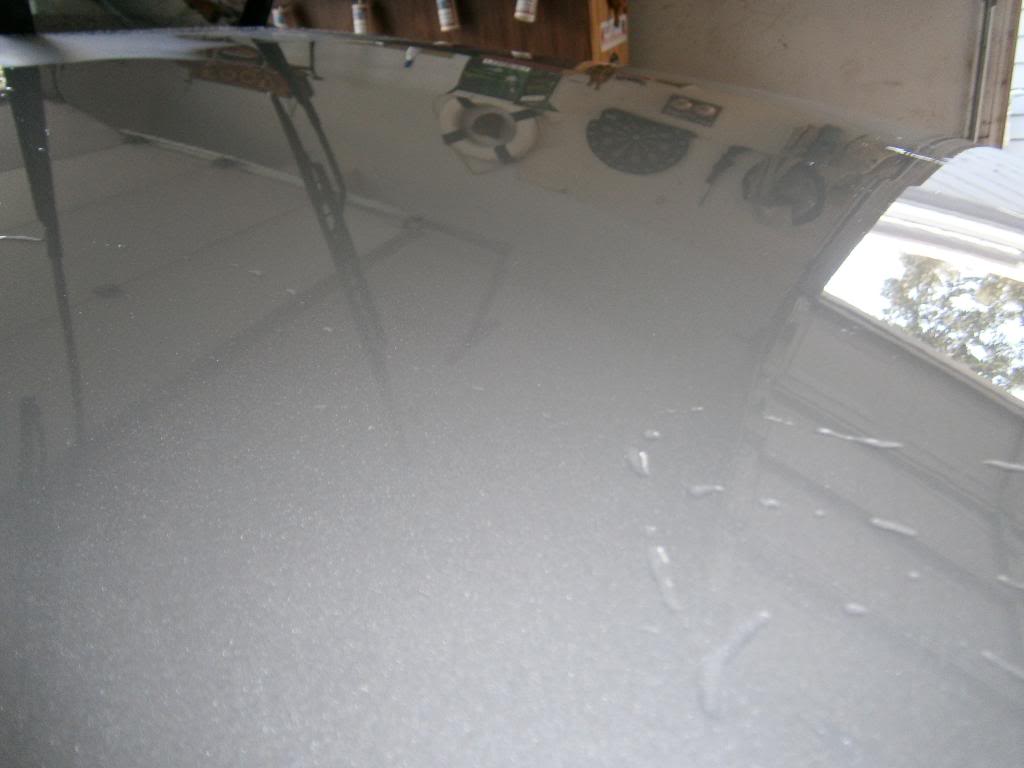
This is how you know you have good paint: See how the water has beaded up and is attempting to roll right off of the car. If the whole car is staying wet with small water droplets, your paint is porous and in poor condition, and needs to be clay barred, polished and waxed.
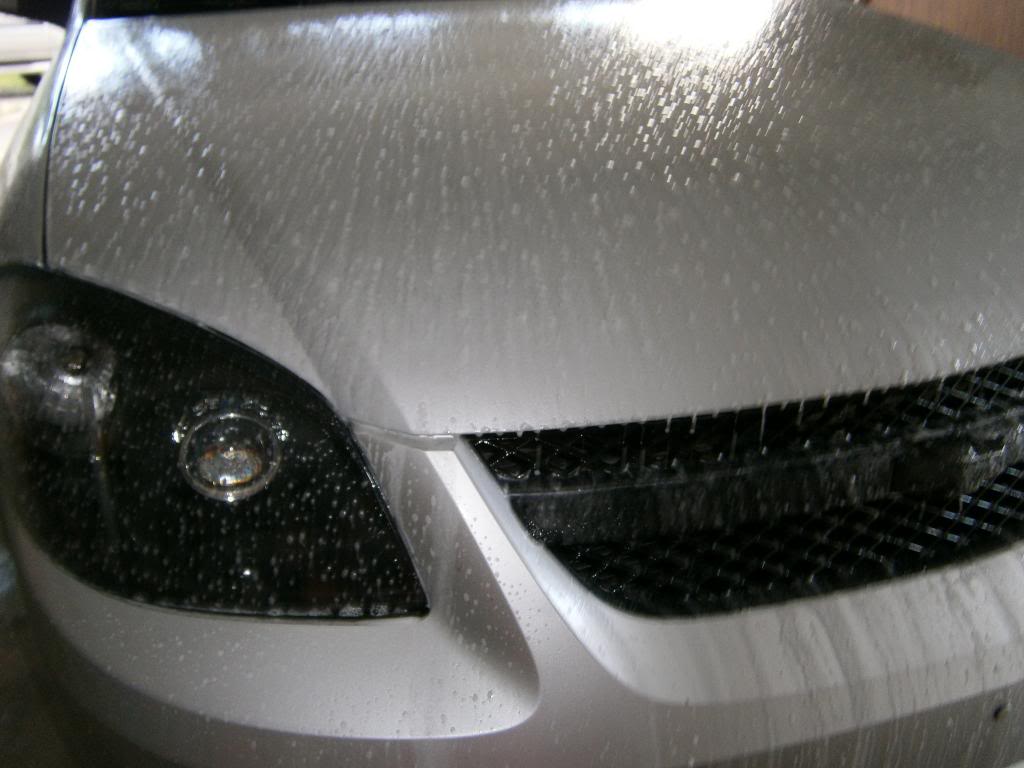
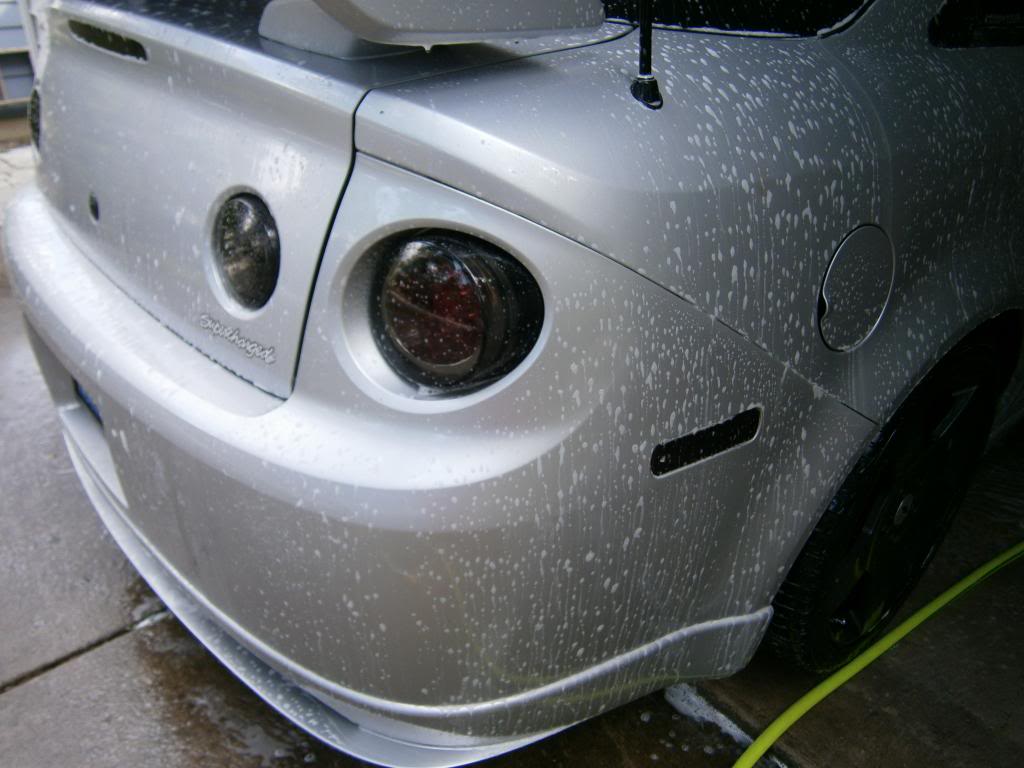
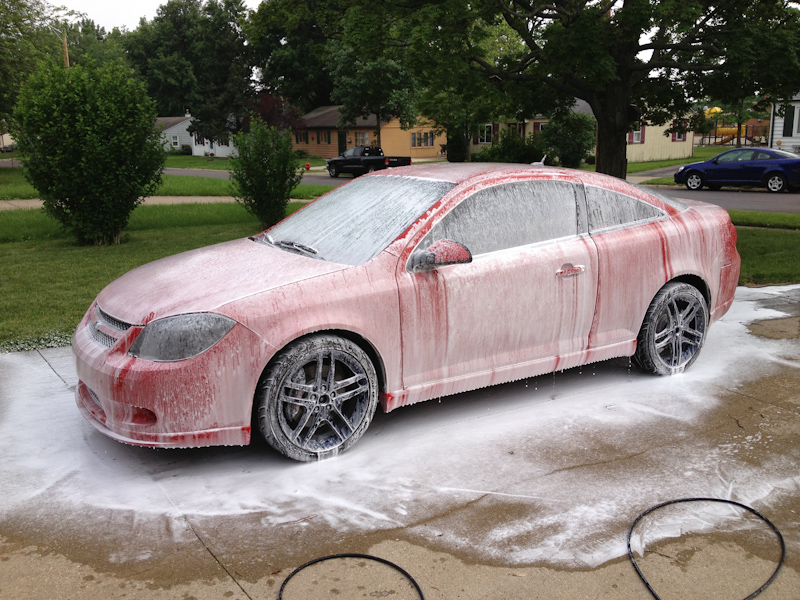
Now that we have everything off possible, it is time to cover the car in soap.
As said before, you do not want to touch the car with no soap on it. Even wet surfaces that are dirty, with initial contact with a soapy mitt, can still get scratched. Like what wheel soap does, is to break up the grime and suspend it off the paint. This way, all your soapy mitt is doing is guiding the dirt away from the paint.
Hence, we are spraying the car with a soap gun. This will ensure the entire car is ready to be wiped with the mitt, and the dirt will be lifted and ready to be guided off. Worse comes to worse, fill up a spray bottle with car soap and water and do it that way.
Cover the whole car�
And now, fill up your buckets.
Heres the point of the two buckets.
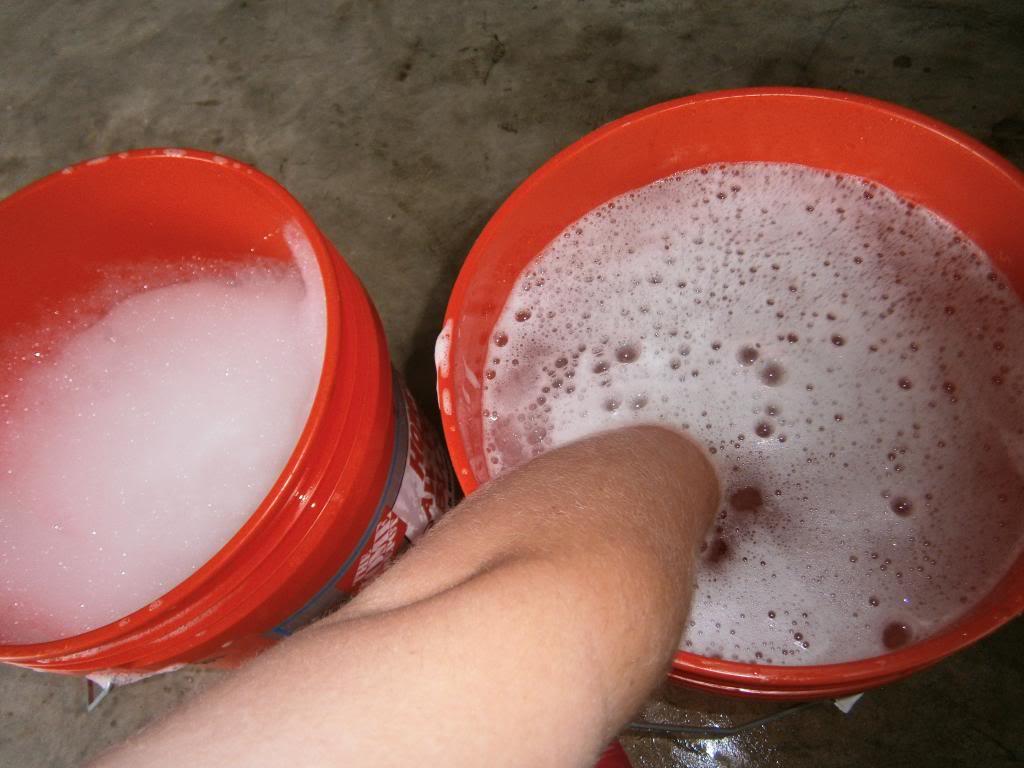
One bucket is filled with a good glob of soap and water. Drop in the soap, and fill it up to agitate the soap and produce as much suds as possible.
The other bucket is filled around � full with just water. This is your washmitt rinse bucket.
Now the name of the game here is top-down, side to side. Since the soap and water are trying to move down, dragging the dirt along with it, the only way to wash a car is from the top down.
Your first pass with the wash mitt will be top dead center of the car.
Your mitt will NOT move in swirling motions. You will move the mitt in one direction across the paint, guiding the dirt off of it.
Also, you aren�t going to be really applying any pressure on the paint. You are simply sliding the mitt over the paint, not scrubbing it over the paint. Again, we are doing everything we can to reduce wash marks here.
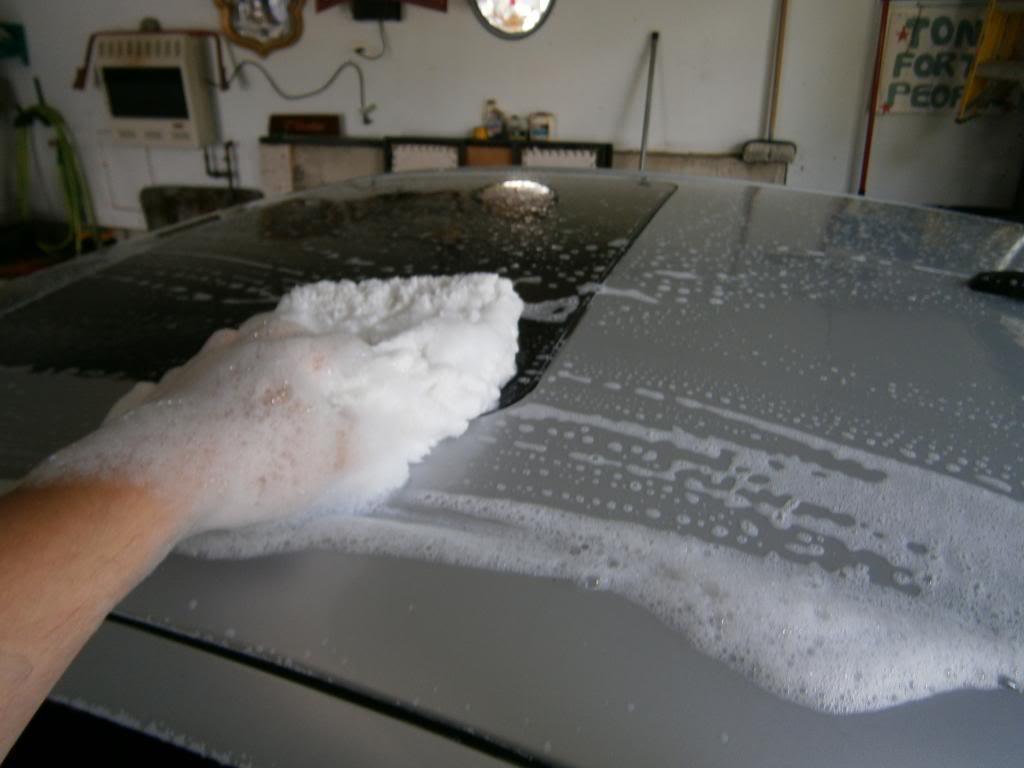
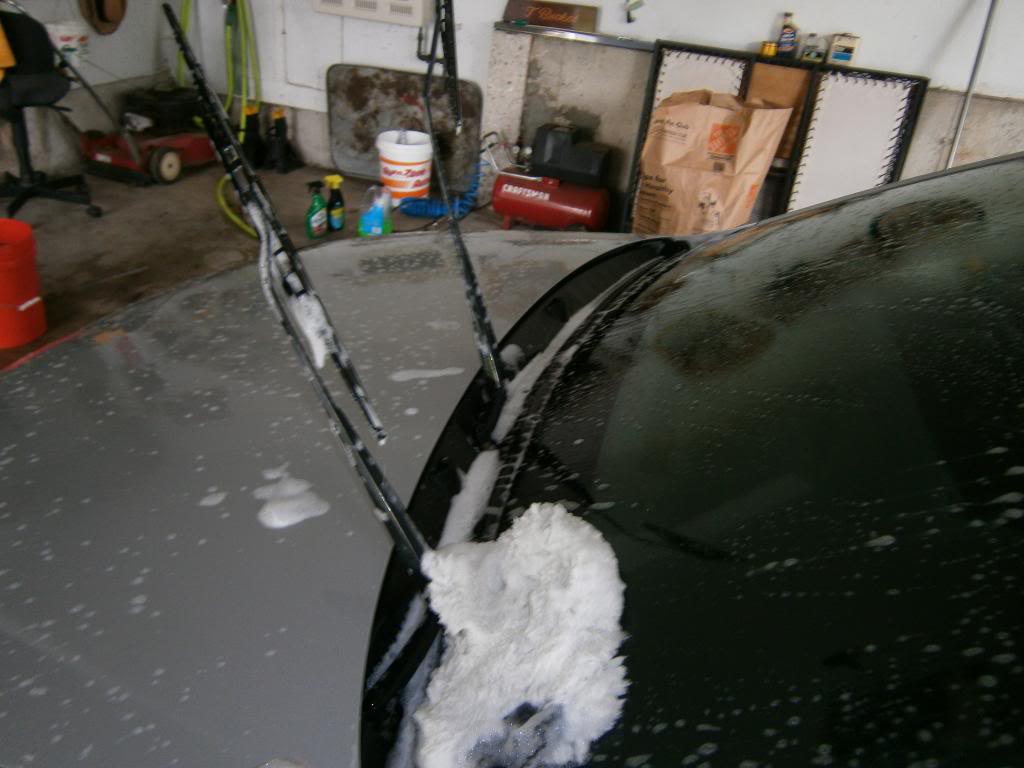
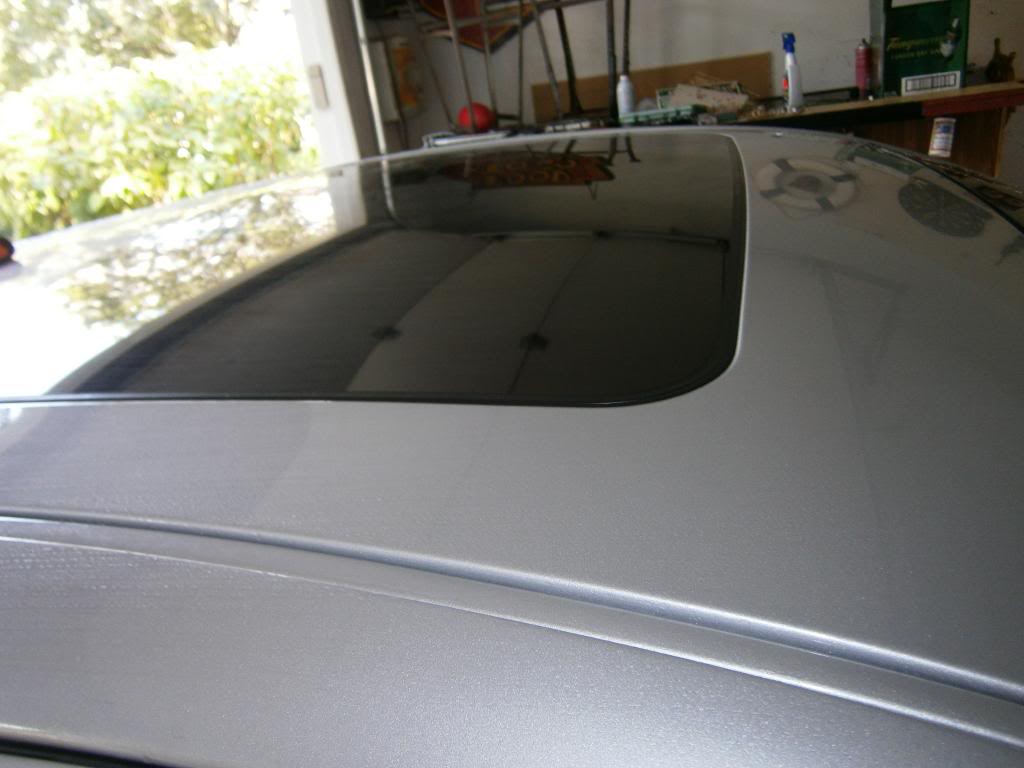
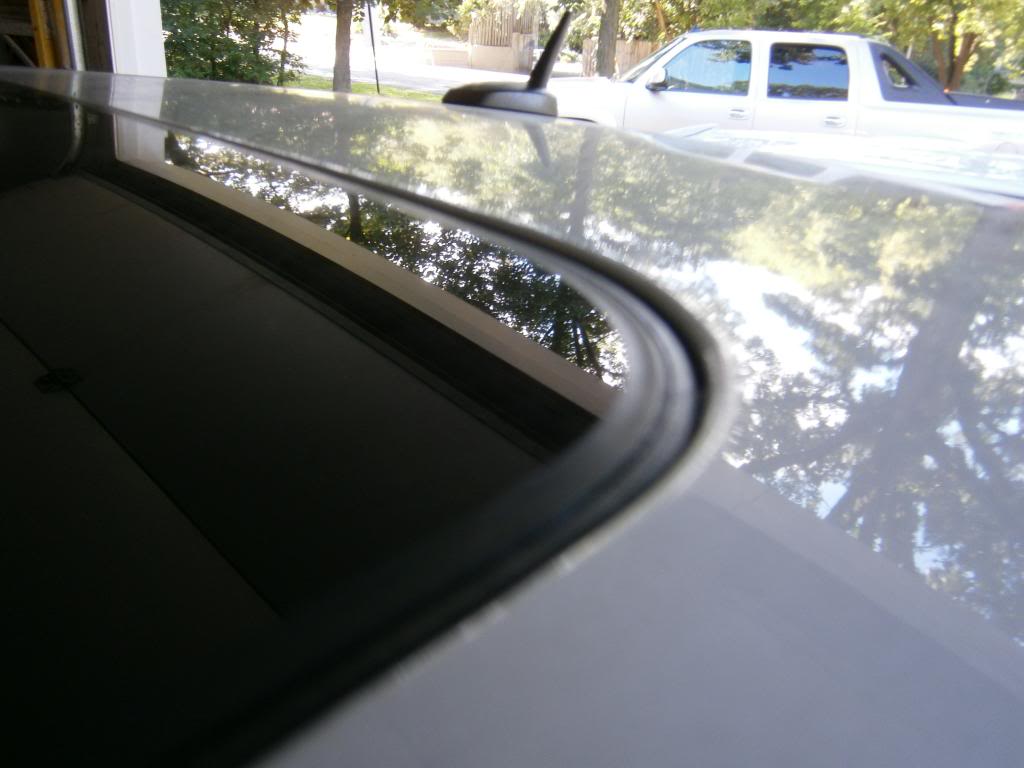
Work across the whole roof of the car, then move around and do the windshields and windows. Note: put your windshield wipers up J
After this, dunk your mitt in the rinsing bucket and rub it against the grit guard at the bottom. These grit gaurds are there to help get the grime off of your mitt, and the fins along the bottom of them keep that grime from mixing back up with the rest of the water in the bucket. That is why they are so important to have.
Now, obviously, dunk your mitt back into the soapy water and get it re-sud�zd. Again, rub it on the bottom of the bucket first, to ensure your mitt is ready to wash again.
Do the hood, spoiler, and maybe the top of your trunk
Clean, re sud�z.
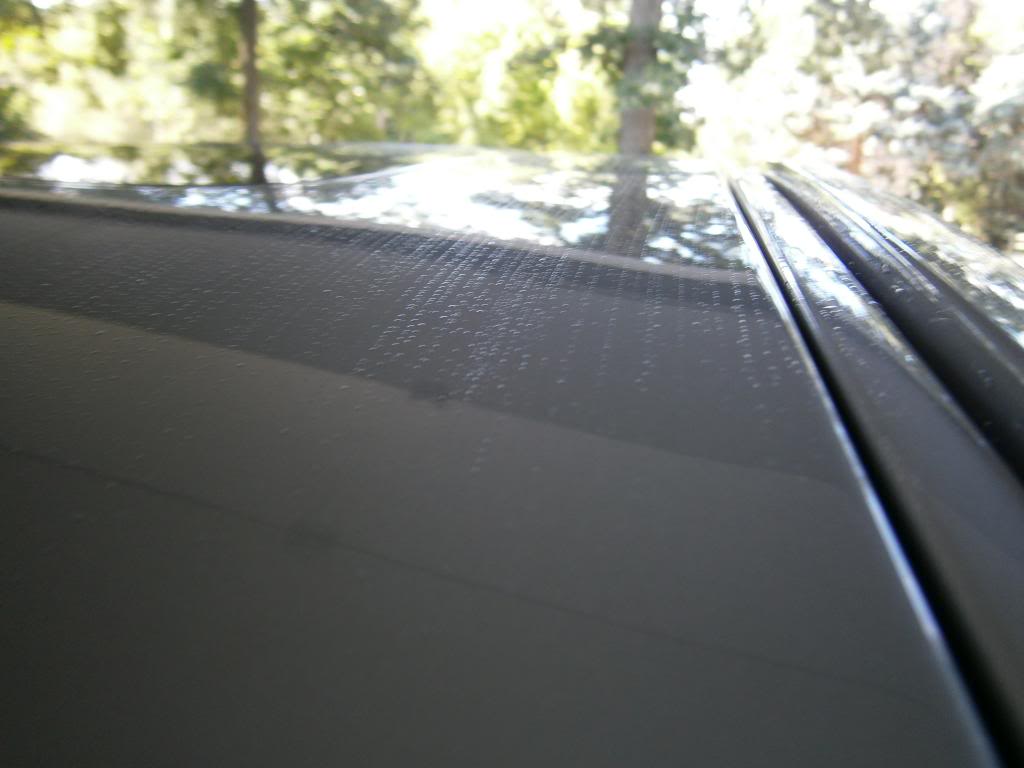
Top side of wheel wells up. Go up to your window line, get the rest of it.
At this point, you may notice that areas of your car are dry or drying. This is not good. Re spray those areas, either with your foam gun or just with water. You do not want to wipe your sudsy mitt over dry paint, ever. Nor do you want soap to dry on the car, because then it wont wash off with the dirt as easily. Ensure that the whole car is wet through the entire washing process.
Now, with your second wash mitt, do the front bumper, then the sides of the car, then the rear bumper, then the lower valences around the car, re-washing the mitt inbetween sections. These are the dirtiest sections of the car, with the front bumper being the cleanest and the bottom of the rear bumper and side panels being the dirtiest.
Once the entire car is washed, and every inch of the paint has had the mitts pass over them, and even perhaps you scrubbed with a (separate) tire scrubber on the grilles, it is time to rinse.
This is pretty straight forward, but theres a trick, too.
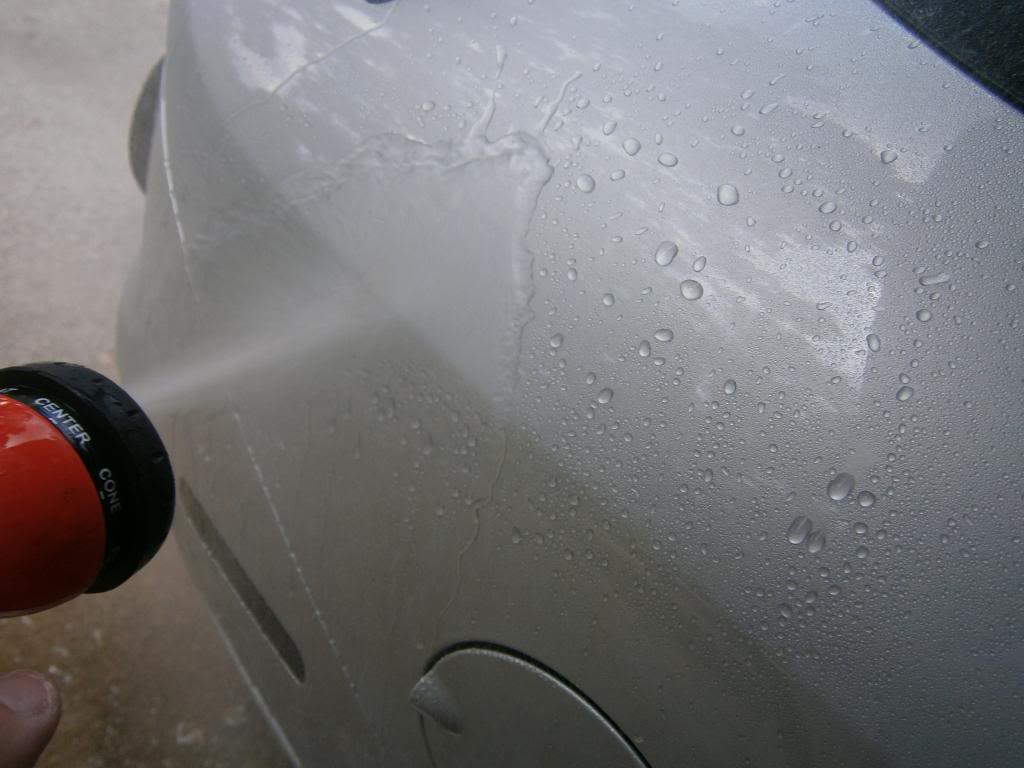
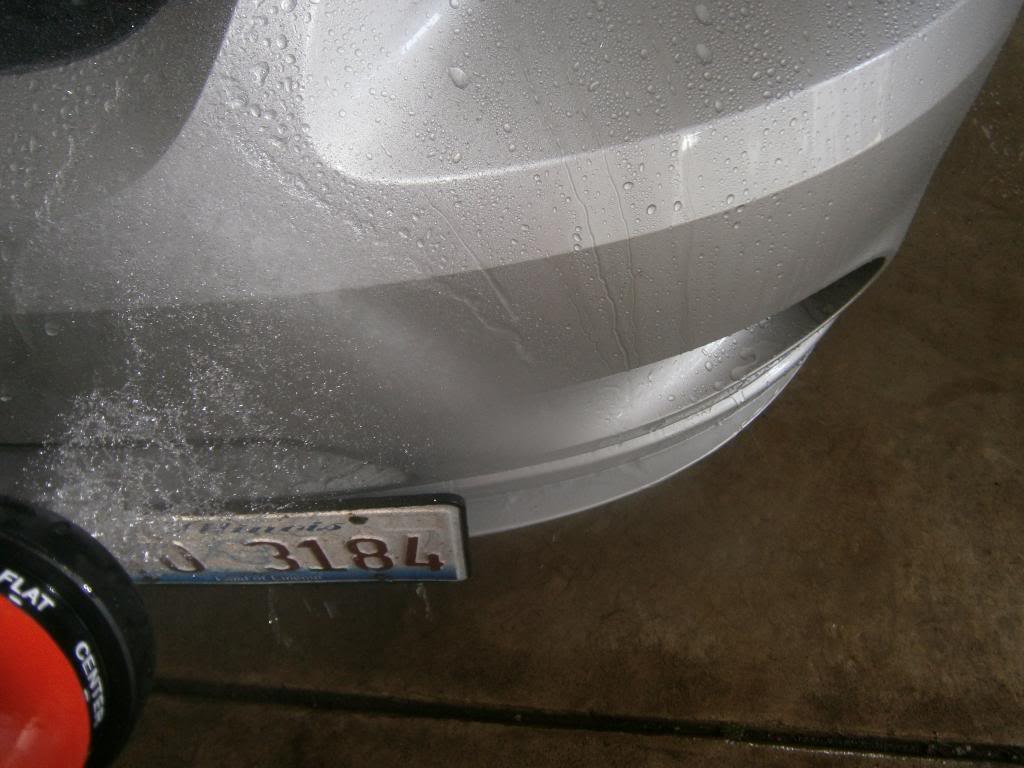
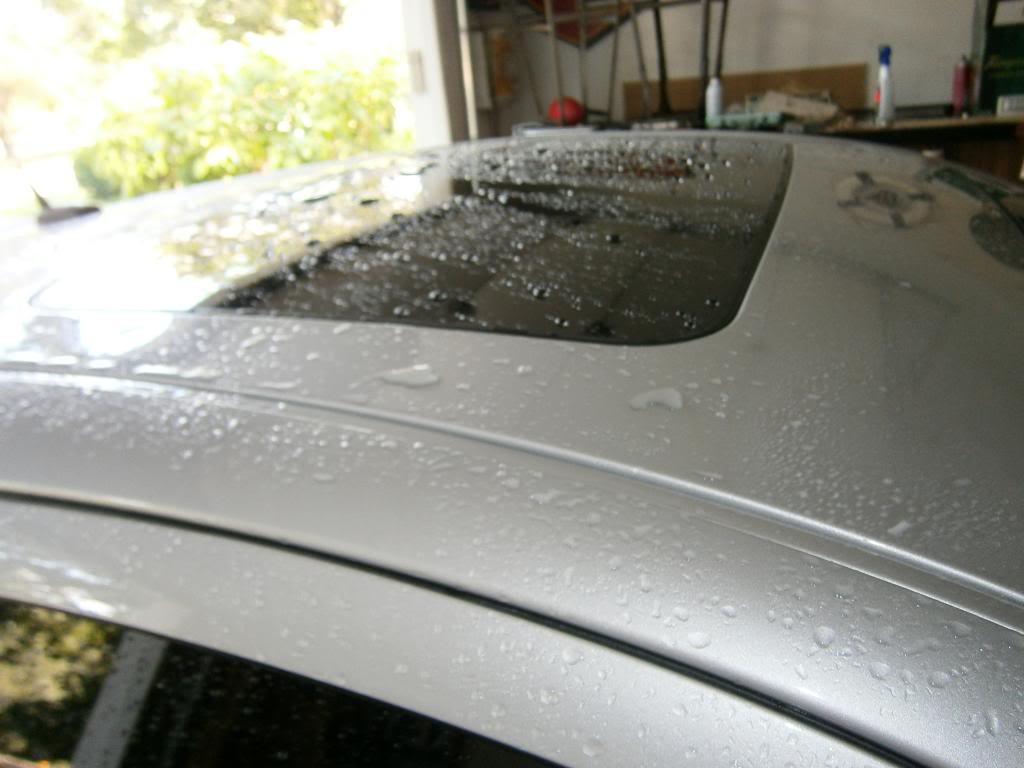
Obviously you work from the top down. But, with your hose selector off and water coming straight out of the hose at a steady, water fountain like stream, holding as shown in the pic below, (look up water sheeting on youtube) the water will slide off your paint with the suds, leaving behind bone dry paint.
While spraying

Right after spraying, haven�t wiped down anything. No camera tricks
Now, once the whole car is rinsed, get your CLEAN, big microfiber towel, (make sure it is CLEAN and washed between uses!!) and get it completely wet, and drench it out like you would your conventional shamois. A dry microfiber towel, and a regular 1�x1� microfiber do not dry as well as this double-soft one. But a wet microfiber or a waffle weave do a few things: They suck up water like a wet vac, and they do nto scratch your car in the process. (remember, lots of your car could/should already be dry by now )
)
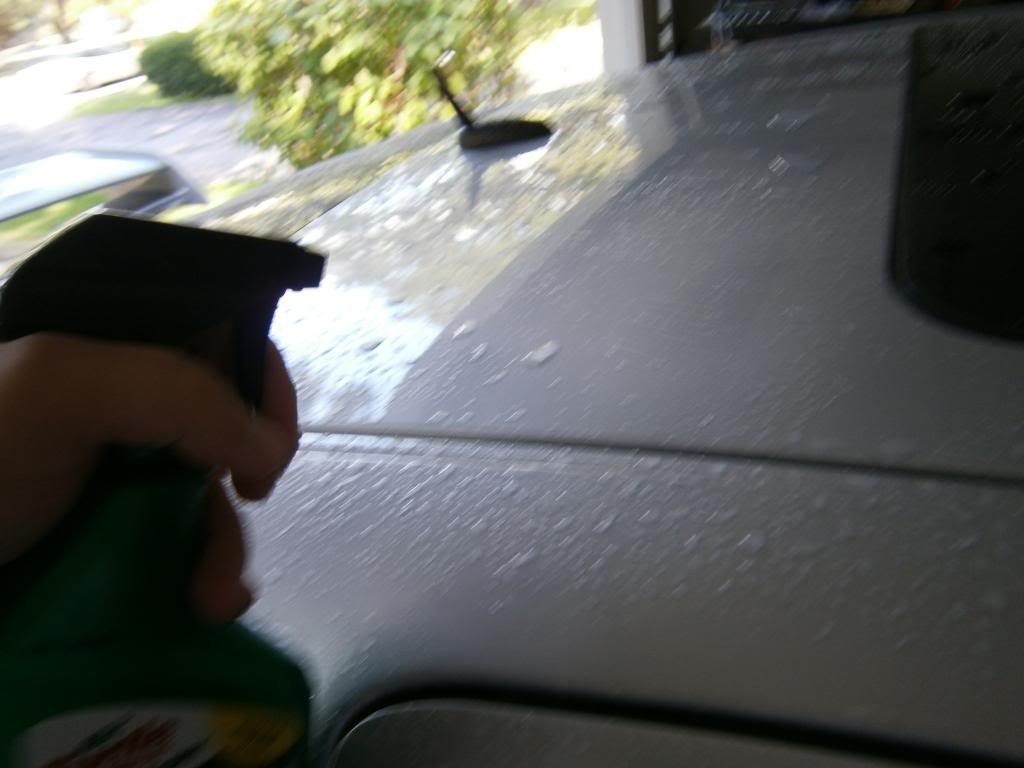
Spray the car down in your detail spray. I�m using turtle wax �wax as u dry�. It smells great, and leaves behind some wax protection, but most importantly, makes sure that the surfaces are lubricated while drying them. Just mist over most of the panels, you don�t need to use a whole hell of a lot.
Check out the action on this microfiber. Simply dragging the more plush side over the top of the car ONE time, and it went from covered in water to almost bone dry. Try doing THAT with your chamois!
Before first microfiber pass:
After. At this point the paint has been touched TWO times. Once with the wash mitt, and one pass over with the damp, lubricated microfiber.
Heres what I�m talking about with the coarse and micro-micro sides. The plush side is for soaking up the bulk water, the micro side is for the second pass.

Without even wringing out the towel once, I get the whole car almost dry..
Now I just wring out the towel and mop up the rest of these trailers�
Now its all bone dry
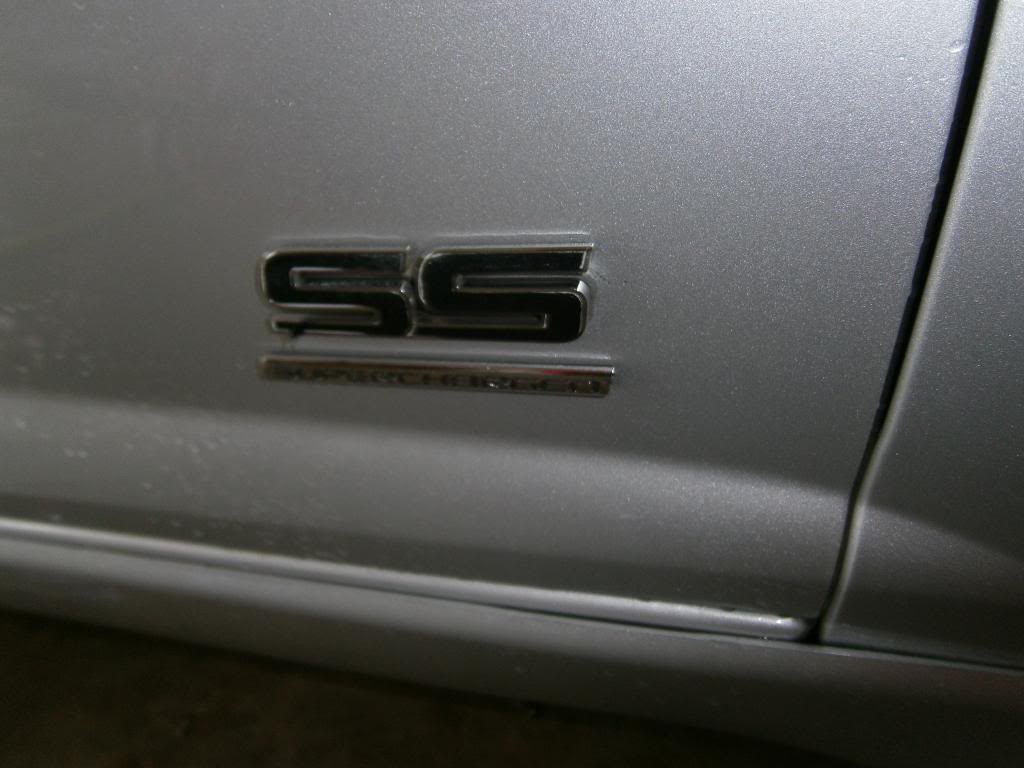
Now use your hair dryer, air compressor, heat gun, whatever you got, to get all the water out of all those nooks and crannys. Your mirrors, ss badges, grilles, lug nuts. This way, when you drive away after washing, all this water wont be coming out of those places running down your paint, and letting dirt stick to it leaving water spots by the time you get to the show
If there are bugs all over your bumper, tar behind your wheels, etc, spray some of that bug and tar remover on. Note: it is recommended to wax these areas when the car is dry, as these cleaners are much more hyper active that car soap � hence they work so well for removing these things.
Spray the entire car down. Like the wheels, be sure to knock as much dirt, grime, and bird **** off of the car. If you used bug and tar remover, rinse it all off. I prefer to use the �flat� option on my hose sprayer selector thing for this part for the higher pressure.
Remember that bird ****? All gone. Didn�t even hit it with the bug stuff.


This is how you know you have good paint: See how the water has beaded up and is attempting to roll right off of the car. If the whole car is staying wet with small water droplets, your paint is porous and in poor condition, and needs to be clay barred, polished and waxed.

Now that we have everything off possible, it is time to cover the car in soap.
As said before, you do not want to touch the car with no soap on it. Even wet surfaces that are dirty, with initial contact with a soapy mitt, can still get scratched. Like what wheel soap does, is to break up the grime and suspend it off the paint. This way, all your soapy mitt is doing is guiding the dirt away from the paint.
Hence, we are spraying the car with a soap gun. This will ensure the entire car is ready to be wiped with the mitt, and the dirt will be lifted and ready to be guided off. Worse comes to worse, fill up a spray bottle with car soap and water and do it that way.
Cover the whole car�


And now, fill up your buckets.
Heres the point of the two buckets.
One bucket is filled with a good glob of soap and water. Drop in the soap, and fill it up to agitate the soap and produce as much suds as possible.
The other bucket is filled around � full with just water. This is your washmitt rinse bucket.

Now the name of the game here is top-down, side to side. Since the soap and water are trying to move down, dragging the dirt along with it, the only way to wash a car is from the top down.
Your first pass with the wash mitt will be top dead center of the car.
Your mitt will NOT move in swirling motions. You will move the mitt in one direction across the paint, guiding the dirt off of it.
Also, you aren�t going to be really applying any pressure on the paint. You are simply sliding the mitt over the paint, not scrubbing it over the paint. Again, we are doing everything we can to reduce wash marks here.

Work across the whole roof of the car, then move around and do the windshields and windows. Note: put your windshield wipers up J

After this, dunk your mitt in the rinsing bucket and rub it against the grit guard at the bottom. These grit gaurds are there to help get the grime off of your mitt, and the fins along the bottom of them keep that grime from mixing back up with the rest of the water in the bucket. That is why they are so important to have.

Now, obviously, dunk your mitt back into the soapy water and get it re-sud�zd. Again, rub it on the bottom of the bucket first, to ensure your mitt is ready to wash again.

Do the hood, spoiler, and maybe the top of your trunk
Clean, re sud�z.
Top side of wheel wells up. Go up to your window line, get the rest of it.
At this point, you may notice that areas of your car are dry or drying. This is not good. Re spray those areas, either with your foam gun or just with water. You do not want to wipe your sudsy mitt over dry paint, ever. Nor do you want soap to dry on the car, because then it wont wash off with the dirt as easily. Ensure that the whole car is wet through the entire washing process.
Now, with your second wash mitt, do the front bumper, then the sides of the car, then the rear bumper, then the lower valences around the car, re-washing the mitt inbetween sections. These are the dirtiest sections of the car, with the front bumper being the cleanest and the bottom of the rear bumper and side panels being the dirtiest.
Once the entire car is washed, and every inch of the paint has had the mitts pass over them, and even perhaps you scrubbed with a (separate) tire scrubber on the grilles, it is time to rinse.
This is pretty straight forward, but theres a trick, too.
Obviously you work from the top down. But, with your hose selector off and water coming straight out of the hose at a steady, water fountain like stream, holding as shown in the pic below, (look up water sheeting on youtube) the water will slide off your paint with the suds, leaving behind bone dry paint.
While spraying

Right after spraying, haven�t wiped down anything. No camera tricks

Now, once the whole car is rinsed, get your CLEAN, big microfiber towel, (make sure it is CLEAN and washed between uses!!) and get it completely wet, and drench it out like you would your conventional shamois. A dry microfiber towel, and a regular 1�x1� microfiber do not dry as well as this double-soft one. But a wet microfiber or a waffle weave do a few things: They suck up water like a wet vac, and they do nto scratch your car in the process. (remember, lots of your car could/should already be dry by now
Spray the car down in your detail spray. I�m using turtle wax �wax as u dry�. It smells great, and leaves behind some wax protection, but most importantly, makes sure that the surfaces are lubricated while drying them. Just mist over most of the panels, you don�t need to use a whole hell of a lot.

Check out the action on this microfiber. Simply dragging the more plush side over the top of the car ONE time, and it went from covered in water to almost bone dry. Try doing THAT with your chamois!
Before first microfiber pass:

After. At this point the paint has been touched TWO times. Once with the wash mitt, and one pass over with the damp, lubricated microfiber.

Heres what I�m talking about with the coarse and micro-micro sides. The plush side is for soaking up the bulk water, the micro side is for the second pass.

Without even wringing out the towel once, I get the whole car almost dry..

Now I just wring out the towel and mop up the rest of these trailers�

Now its all bone dry

Now use your hair dryer, air compressor, heat gun, whatever you got, to get all the water out of all those nooks and crannys. Your mirrors, ss badges, grilles, lug nuts. This way, when you drive away after washing, all this water wont be coming out of those places running down your paint, and letting dirt stick to it leaving water spots by the time you get to the show
 08-07-2013, 07:43 PM
#3

use a different rag/microfiber to soak up all the water in your door sills, trunk sill, under the hood, your wheels, etc…

And BAM! Clean car city. This is therealfuckingdeal.com if you ask me.

When you are done, be sure to throw your wash mitts and microfibers into the washing machine. As clean as you keep them during the wash process, its the only way to be sure that you are keeping them totally clean and ready to use. Once the wash mitt is showing discoloration, throw it away and spend the $5 on a new one. Same for the drying towel, same for the wheel wash mitt.
Last edited by riceburner; 08-07-2013 at 11:25 PM.

 08-07-2013, 08:09 PM
#9
Thanks yall. Like it says in the how to it takes bout an hour and a half. I did it in that time while trying to take pics and **** haha
Ima be doing one on the 7424 as well i plan to do the claybar, polish and wax in a seperate how to.
Ima be doing one on the 7424 as well i plan to do the claybar, polish and wax in a seperate how to.


 08-07-2013, 10:18 PM
#15
It looks like you need to wash your drying towel.
Have you tried a waffle weave style towel? They work pretty good for me. I dry the car with two usually and then go over again with regular microfiber and quick detail to get any streaks.
Big big fan of the foam cannon too. It really loosens up any bugs/dirt/etc. before even touching the car.
Have you tried a waffle weave style towel? They work pretty good for me. I dry the car with two usually and then go over again with regular microfiber and quick detail to get any streaks.
Big big fan of the foam cannon too. It really loosens up any bugs/dirt/etc. before even touching the car.
Last edited by Grave; 08-07-2013 at 10:26 PM.
 08-07-2013, 10:26 PM
#17
Member

Join Date: 08-05-09
Location: wisconsin
Posts: 229
Likes: 0
Received 0 Likes
on
0 Posts
08-07-2013, 11:21 PM
#18

Excellent write up Rice! I approve and it's good to see that more Cobalt owners are serious about detailing their ride!
I don't have very much to add, you pretty much described the procedure I use for my car washes step-by-step.
Here's a few tips/things I do:
1. Before my 2-bucket wash, I always drive to the coin car wash and power wash my car down to get the worst dirt/sand off. My car is never very dirty, but ever time it rains here in Colorado, we get a bunch of desert sand with each drop... I use high pressure soap/jabon de pression alta and DON'T RINSE. Soapy water can dry on your car without a problem. It will not cause water spots.
2. Instead of using bug and tar remover, which will strip off your wax, consider soaking a microfiber towel in hot soapy water and draping it over the bug splatters for 5 or 10 minutes. After that they'll rinse right off.
3. Not all microfiber towels are created equal. General rule is: if it has a label on it, it's no good. Labels themselves will scratch paint and even when you rip them off, the thread they are sewed onto the towel with will still scratch. Good quality microfiber typically comes from South Korea (as opposed to China) and is not cheap. I understand everyone has a budget, but get the best you can afford. My wax/polishing towels are 12.95 a piece. My waffle weave drying towels (I have 8 lol) are 40 bucks a piece. I get all my towels (all my car detailing supplies, for that matter) from Adams. Their warehouse is 2 miles from my house lol.
A great acid test to see if your microfiber will scratch, is this: Get a brand new, unused DVD (NOT a CD!) and run your towel over it several times. Now hold it against the sun or a bright light and inspect it for scratches. If it scratches the DVD, it will certainly scratch your clear coat!
4. I don't have a compressor and have found this thing to be a great tool for drying the nooks, crannies, wheels and engine compartment:

It's about 80 bucks, it's 1.3HP (!) and produces an amazingly strong stream of heated air! And all it needs to run is an electrical outlet.
Just my $0.02. Kudos again to riceburner for this awesome how-to!
I don't have very much to add, you pretty much described the procedure I use for my car washes step-by-step.
Here's a few tips/things I do:
1. Before my 2-bucket wash, I always drive to the coin car wash and power wash my car down to get the worst dirt/sand off. My car is never very dirty, but ever time it rains here in Colorado, we get a bunch of desert sand with each drop... I use high pressure soap/jabon de pression alta and DON'T RINSE. Soapy water can dry on your car without a problem. It will not cause water spots.
2. Instead of using bug and tar remover, which will strip off your wax, consider soaking a microfiber towel in hot soapy water and draping it over the bug splatters for 5 or 10 minutes. After that they'll rinse right off.
3. Not all microfiber towels are created equal. General rule is: if it has a label on it, it's no good. Labels themselves will scratch paint and even when you rip them off, the thread they are sewed onto the towel with will still scratch. Good quality microfiber typically comes from South Korea (as opposed to China) and is not cheap. I understand everyone has a budget, but get the best you can afford. My wax/polishing towels are 12.95 a piece. My waffle weave drying towels (I have 8 lol) are 40 bucks a piece. I get all my towels (all my car detailing supplies, for that matter) from Adams. Their warehouse is 2 miles from my house lol.
A great acid test to see if your microfiber will scratch, is this: Get a brand new, unused DVD (NOT a CD!) and run your towel over it several times. Now hold it against the sun or a bright light and inspect it for scratches. If it scratches the DVD, it will certainly scratch your clear coat!
4. I don't have a compressor and have found this thing to be a great tool for drying the nooks, crannies, wheels and engine compartment:
It's about 80 bucks, it's 1.3HP (!) and produces an amazingly strong stream of heated air! And all it needs to run is an electrical outlet.
Just my $0.02. Kudos again to riceburner for this awesome how-to!
Last edited by colodude18; 08-07-2013 at 11:27 PM.
08-07-2013, 11:22 PM
#19
yeah... unless its a professional place, dont go to a car wash... its not worth the money, and if its a drive thru one it'll scratch the hell out of your paint.
colodude18 - added that to the o.p good tips!
colodude18 - added that to the o.p good tips!
Last edited by riceburner; 08-07-2013 at 11:27 PM.
 08-07-2013, 11:54 PM
#21
Yes we are a rare breed! 99% of all car owners don't give a **** or maybe they do but they're just too ignorant. I'm sure you're familiar with the looks I get from neighbors when I do my detail process every single weekend. "You're washing it again?" "Can you do mine next?" "You're gonna wash the paint of that thing!"etcetera, etcetera. Idiots. lol
08-08-2013, 12:12 AM
#23
Yes we are a rare breed! 99% of all car owners don't give a **** or maybe they do but they're just too ignorant. I'm sure you're familiar with the looks I get from neighbors when I do my detail process every single weekend. "You're washing it again?" "Can you do mine next?" "You're gonna wash the paint of that thing!"etcetera, etcetera. Idiots. lol
 Instead of trying to explain to people that thier POS is not going to look like my car from wax alone, I just simply reply with Turtle Wax (Even though nothing Turtle Wax makes touches my car
08-08-2013, 12:20 AM
Instead of trying to explain to people that thier POS is not going to look like my car from wax alone, I just simply reply with Turtle Wax (Even though nothing Turtle Wax makes touches my car
08-08-2013, 12:20 AM
#24
The whole wax = shine myth is very widespread... Which i will diffuse in my next how to. I used to believe it too... You can tape off your hood and wax half of it twenty times its gonna be well protected but no shinier and no less swirls
08-08-2013, 12:26 AM
#25
Yes we are a rare breed! 99% of all car owners don't give a **** or maybe they do but they're just too ignorant. I'm sure you're familiar with the looks I get from neighbors when I do my detail process every single weekend. "You're washing it again?" "Can you do mine next?" "You're gonna wash the paint of that thing!"etcetera, etcetera. Idiots. lol

