2.0 LNF Engine: How To: Remove Intake Manifold
 11-12-2013, 07:01 PM
#1

How To: Remove Intake Manifold
Welcome to the how-to on removing your LNF manifold. I do not know your particular reason why you are removing it (and please do not PM me why) but I hope this helps out. I certainly answered a few of my own questions during this process.
1. Equipment Needed:
You will need a variety of sockets, wrenches (not so much), extensions, bendy snake things, and of course beer. The bolt head sizes you will be removing are 10mm, 13mm, and 8mm.
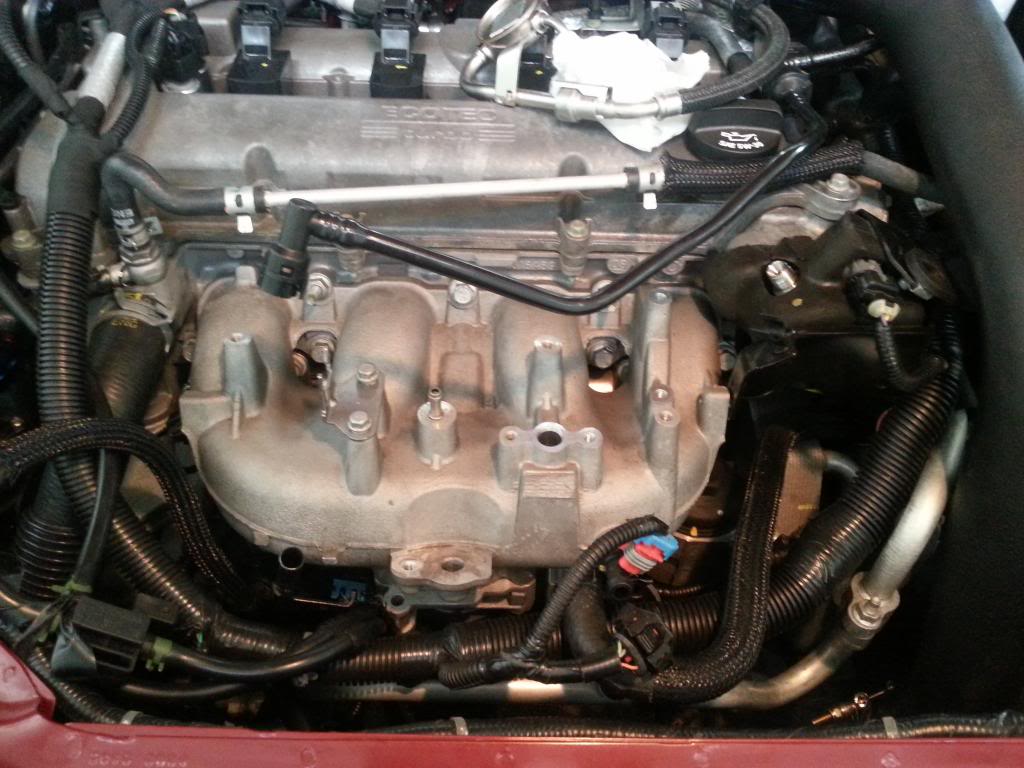
2. Remove the stuff on the manifold:
Start by removing everything you can see that is attached to your intake manifold. This includes the evap purge solenoid, the vacuum tank lines and bypass solenoid, brake vacuum line, fuel inlet line, throttle body control plug, dipstick, support bar, cold side pipe, and AC line support. You might be wondering how to remove a couple of these things. Don’t worry. Grab a beer (or one of those wine cooler/b**ch beers if you must) and read on, I will detail the particulars.
The AC line support needs to come off. The coil harness is in the way and attached by a Christmas tree plug/zip tie combo. Just cut it but SAVE IT. Remove the 10mm bolt. When you go to reinstall everything, just cut the rest of the zip tie off and insert a regular zip tie through the lock. Then you can zip the new one through itself and you are golden!
Now that it is out of the way you can get at the throttle body plug. It is similar to the MAF plug. The center grey piece needs to be pressed in with a screw driver while it is also pulled towards the driver side. Reference picture:
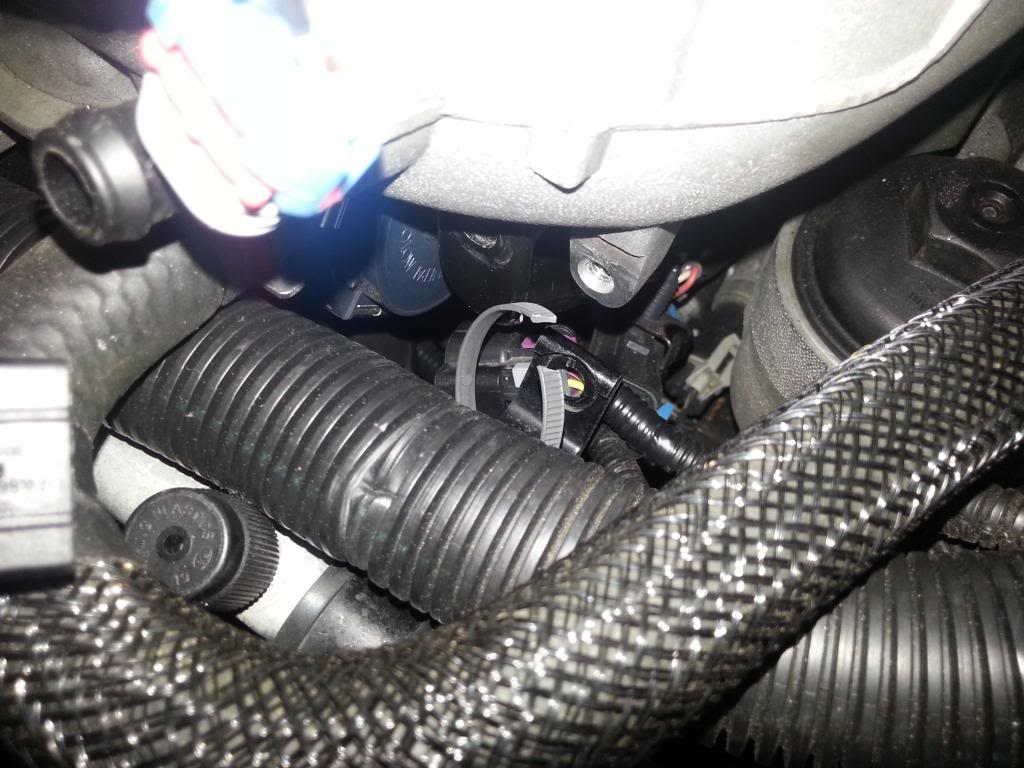
Now you can remove the manifold support bar bolt. It is a 13mm. After you get the throttle body plug out of the way you need to loosen but not remove the 13mm at the base of that support bar so that you can swivel the bar to the driver side of the car. I used an extension and a universal joint to get it from the top. It is the nut in the very center of the image at the end of the black bar. It also holds the vacuum tank bracket in. Make sure to have your negative battery cable off by this point (do it after you de pressurize the fuel system in the next step listed) or else you will certainly touch the connections on your starter while attempting to loosen the nut.
Now loosen the barrel band that secures the cold side pipe to the throttle body. It is an 8mm. (way easier than using a flathead). I used a bendy snake to get a good angle on it. No photo because my memory card went all corrupt on me...
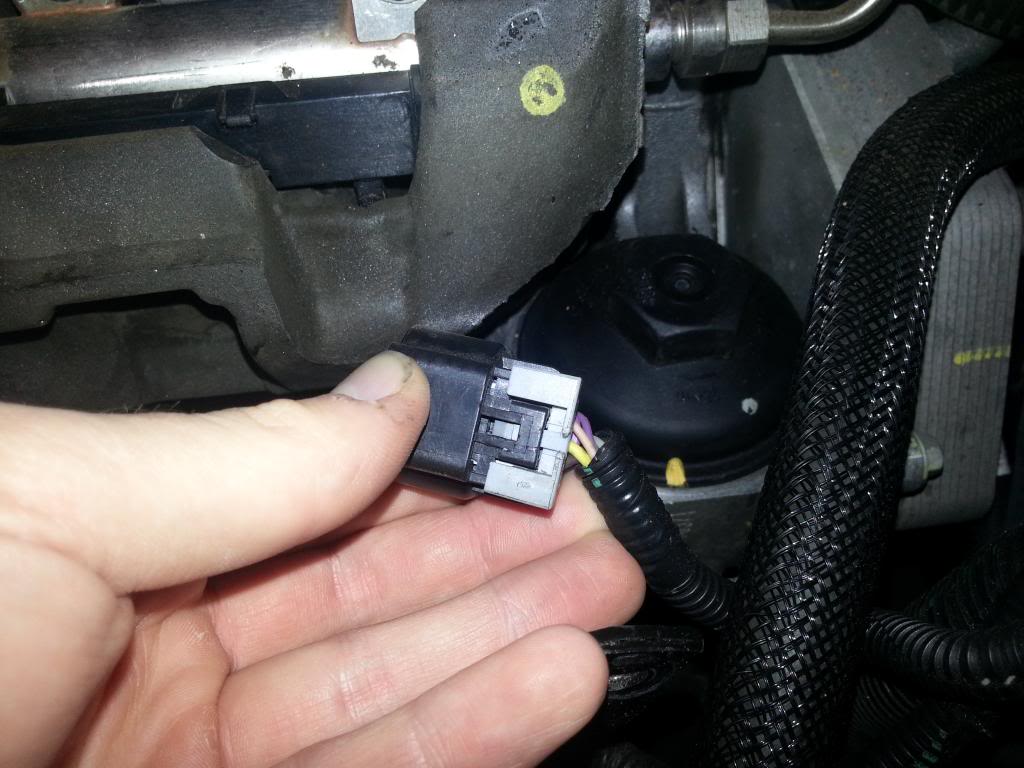
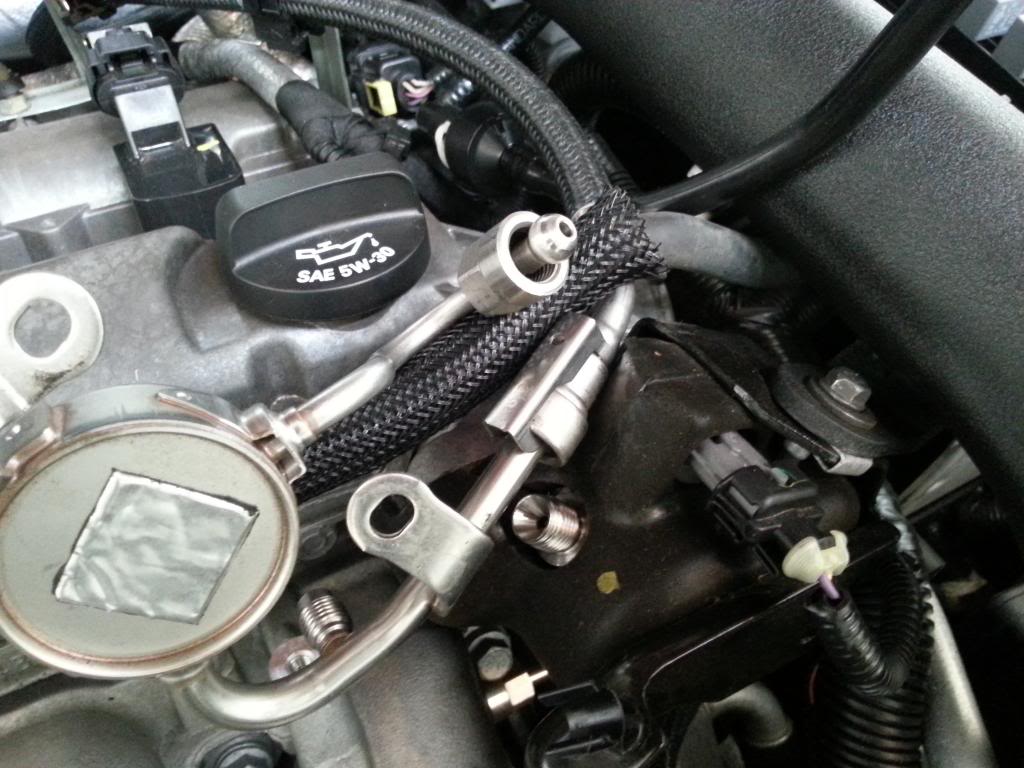
The fuel inlet line will be a PITA if you leave it. Don’t worry, you can remove it safely. It is not high pressure and it is not going to start pulsating a liquid stream of fire the moment you undo it. Just open the gas cap, pull the fuel pump fuse and try to turn the car over. It will not start. Remove your negative battery cable. Then remove the 2 10mm bolts holding the fuel pulse dampener (the metal disk) and then the line going to the high pressure fuel pump. Use a paper towel in case it takes a leak. This is what the fitting looks like (see no gaskets to break. It is just a metal acorn/flare fitting) Set it aside.
There is a bolt going between the high pressure fuel pump cover/shield and the manifold. It is a 10mm. Remove it as well.
Also remove the 10mm bolt that holds the dipstick on the manifold. Pull out the dipstick from the oil pan so that it gives more room for you to work.
3. Manifold Removal
Now that you have all the stuff off it is time to prepare to remove the manifold itself. I tied anything that could get in the way back with tape, as well as popped out the dipstick so that it would be more out of the way.
Start by removing the 7 manifold bolts/nuts. They are 13mm. I used an extension to make it easy.
The manifold should easily rock around. Now comes the fun part. You have to wiggle the manifold out passed the high pressure fuel pump shield. It will hit the shield and rub it. You can try to flex it back at the same time. It is going to be a PITA but it will come out, trust me. This was one of the most frustrating parts of the removal process.
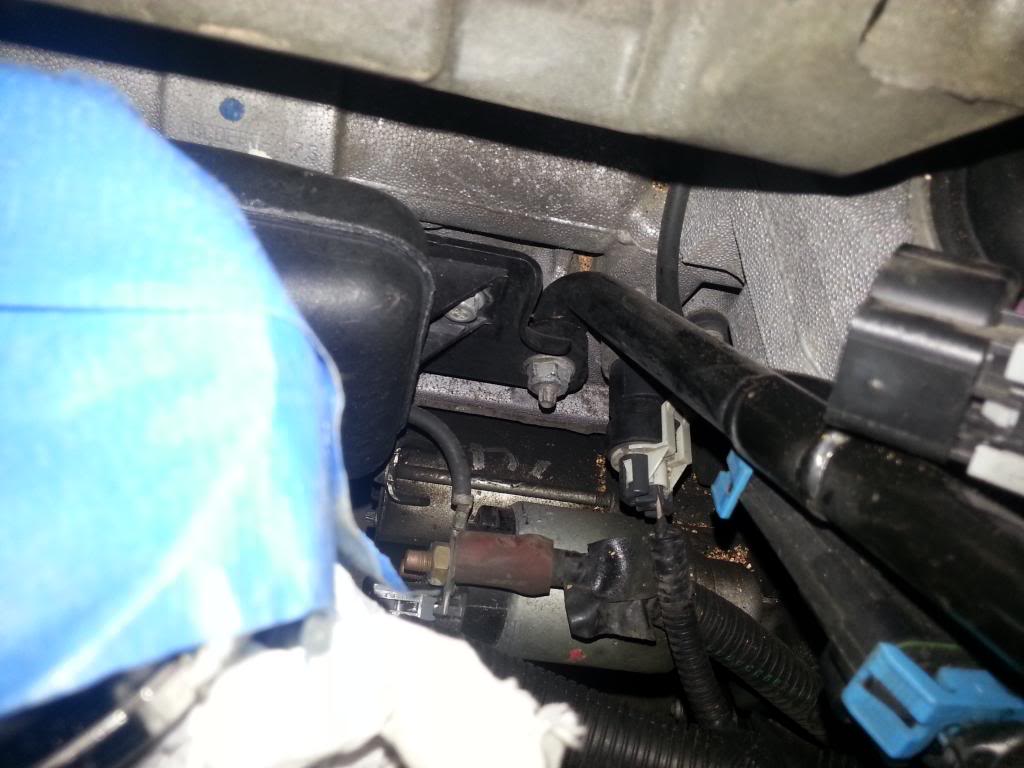
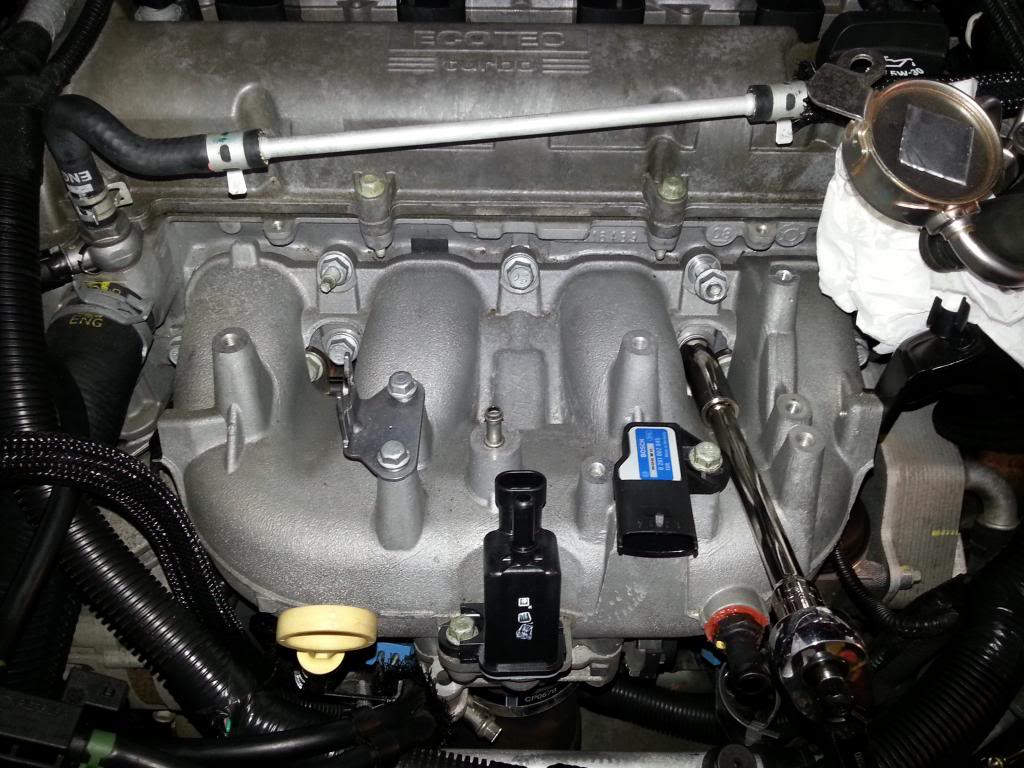
Here it is with the manifold off and a new gasket installed:
CONGRATULATIONS! You did it! Now if you were reading this to prepare for LNF valve cleaning how to, then you can find that here: https://www.cobaltss.net/forums/how-...emoval-304188/
For reinstall use a new gasket (recommended) and torque the manifold bolts/nuts from the center outwards in an opposite alternating pattern. Torque for the 13mm are 16 ft lbs and 10mm are 89 inch lbs.
1. Equipment Needed:
You will need a variety of sockets, wrenches (not so much), extensions, bendy snake things, and of course beer. The bolt head sizes you will be removing are 10mm, 13mm, and 8mm.
2. Remove the stuff on the manifold:
Start by removing everything you can see that is attached to your intake manifold. This includes the evap purge solenoid, the vacuum tank lines and bypass solenoid, brake vacuum line, fuel inlet line, throttle body control plug, dipstick, support bar, cold side pipe, and AC line support. You might be wondering how to remove a couple of these things. Don’t worry. Grab a beer (or one of those wine cooler/b**ch beers if you must) and read on, I will detail the particulars.

The AC line support needs to come off. The coil harness is in the way and attached by a Christmas tree plug/zip tie combo. Just cut it but SAVE IT. Remove the 10mm bolt. When you go to reinstall everything, just cut the rest of the zip tie off and insert a regular zip tie through the lock. Then you can zip the new one through itself and you are golden!

Now that it is out of the way you can get at the throttle body plug. It is similar to the MAF plug. The center grey piece needs to be pressed in with a screw driver while it is also pulled towards the driver side. Reference picture:

Now you can remove the manifold support bar bolt. It is a 13mm. After you get the throttle body plug out of the way you need to loosen but not remove the 13mm at the base of that support bar so that you can swivel the bar to the driver side of the car. I used an extension and a universal joint to get it from the top. It is the nut in the very center of the image at the end of the black bar. It also holds the vacuum tank bracket in. Make sure to have your negative battery cable off by this point (do it after you de pressurize the fuel system in the next step listed) or else you will certainly touch the connections on your starter while attempting to loosen the nut.

Now loosen the barrel band that secures the cold side pipe to the throttle body. It is an 8mm. (way easier than using a flathead). I used a bendy snake to get a good angle on it. No photo because my memory card went all corrupt on me...
The fuel inlet line will be a PITA if you leave it. Don’t worry, you can remove it safely. It is not high pressure and it is not going to start pulsating a liquid stream of fire the moment you undo it. Just open the gas cap, pull the fuel pump fuse and try to turn the car over. It will not start. Remove your negative battery cable. Then remove the 2 10mm bolts holding the fuel pulse dampener (the metal disk) and then the line going to the high pressure fuel pump. Use a paper towel in case it takes a leak. This is what the fitting looks like (see no gaskets to break. It is just a metal acorn/flare fitting) Set it aside.

There is a bolt going between the high pressure fuel pump cover/shield and the manifold. It is a 10mm. Remove it as well.
Also remove the 10mm bolt that holds the dipstick on the manifold. Pull out the dipstick from the oil pan so that it gives more room for you to work.
3. Manifold Removal
Now that you have all the stuff off it is time to prepare to remove the manifold itself. I tied anything that could get in the way back with tape, as well as popped out the dipstick so that it would be more out of the way.
Start by removing the 7 manifold bolts/nuts. They are 13mm. I used an extension to make it easy.

The manifold should easily rock around. Now comes the fun part. You have to wiggle the manifold out passed the high pressure fuel pump shield. It will hit the shield and rub it. You can try to flex it back at the same time. It is going to be a PITA but it will come out, trust me. This was one of the most frustrating parts of the removal process.
Here it is with the manifold off and a new gasket installed:

CONGRATULATIONS! You did it! Now if you were reading this to prepare for LNF valve cleaning how to, then you can find that here: https://www.cobaltss.net/forums/how-...emoval-304188/
For reinstall use a new gasket (recommended) and torque the manifold bolts/nuts from the center outwards in an opposite alternating pattern. Torque for the 13mm are 16 ft lbs and 10mm are 89 inch lbs.
Last edited by Wired; 11-15-2013 at 11:18 AM.


Thread
Thread Starter
Forum
Replies
Last Post