When you click on links to various merchants on this site and make a purchase, this can result in this site earning a commission. Affiliate programs and affiliations include, but are not limited to, the eBay Partner Network.
Ok This may take a week or so to do, but after having to help a few people, and them never having everything they need to properly do an s257 install. Im gonna make a how to. Wont have a lot of pics on how to do it cause im done my setup so I cant take any. but ill try to use old pics to show what to do. I am doing this how to the way I did it, it doesn't need to be exactly this way.
Tools you will need.
All of them haha. im gonna need guys to chime in on tools and net sizes if I forget.
Parts you will need. ottp or zzp, whatever you choose, I prefer zzp with some, ottp for others, and some stuff I got else where.
Main Parts
-s257 turbo
-zzp t3 exhaust manifold. - better design
-zzp turbo downpipe and dump tube, or recirc downpipe, which u may have to mod like I had to cause it didn't line up with wastegate.
-zzp 3.5 inch turbo intake
-zzp upper charge pipe with 50mm bov flange
-zzp lower charge pipe with maf relocate
-tial 38 mm wastegate or whatever u choose
-tial 50mm bov
-zzp intercooler or whatever u want. I don't recommend stock.
-3.5 inch 90 degree coupler....apparently one on zzp intake does not work with 257 properly. so get elsewhere like I did.
-zzp extended turbo outlet coupler
-3 inch vband clamp for downpipe
-3.5 inch worm clamp for turbo coupler
-t3 turbo gasket
-stock exhaust manifold gasket
-new downpipe to exhaust gasket if you wish, not really needed since iv reused em without issues
-1/8 npt to hose barb if you plan of getting boost reference from turbo port.
-I recommend a new set of exhaust manifold nuts. don't need the studs so just keep em as spares (zzp sells em)
-vacuum hose. forget which size. for boost solenoid relocate since it don't bolt to turbo anymore. can check what u got to see what size u need.
stage 8 cam locking turbo bolts (HIGHLY Recommended) Will need to be cut with grinder to 1 inch or slightly more because they come in 1.25 inch and are too long.
powell stainless turbo brace
1/8 npt to barb or an4 fitting (boost reference. most people will use barb, don't use an4 unless your like me and converted everything to an4)
Oil Feed And Drain (can be bought from zzp or ottp but I made my own cause I didn't like either kit so this is list of mine)
-zzp oil feed fitting for block. its m12 1.75 to an4
-1/4 npt to an4 stainless fitting for turbo oil feed on turbo
-2 an4 90 degree steel or stainless steel hose ends
-4 feet an4 braided stainless hose for oil feed ( will need around 3 feet of that, install one 90 degree end and connect to turbo feed when turbo is installed and run line as described in how to to make sure you have the correct length.)
- 1 an10 45 degree hose end (aluminum is fine)
-1 an10 straight hose end
- about a foot of an10 braided stainless line (will need exactly 5 15/16 inches. Any bigger and line will kink, any smaller and block fitting wont sit all the way down)
-treadstone performance an10 oil drain fitting for block
-prl motorsports an10 t3 ported oil drain fitting for turbo
Coolant Lines (Deleted or for running Wastegate cooling)
Coolant Line Delete
-m14 1.5 plug or oil pan bolt
-m14 1.5 to 3/8 barb fitting.
Wastegate Water Cooling
-m14 1.5 to an4 banjo fitting for rear feed line
-m14 an4 banjo fitting. (u don't need the bolt as you will reuse the stock bolt with the barb fitting on it for overflow. so toss the bolt and just use the an4 fitting part.)
-m8 1.0 banjo bolt (replaces the one that comes with wg for cleaner look)
-coolant feed line with one 90 degree an4 end and one straight an4 end
-coolant return line with 2 straight an4 ends (will add line length later as I cant remember and have to check. I just used devils own meth lines because the actual line is an3 and the ends are an4 which is all you need)
PCV Mods
(You pcv system will have to be slightly modded because 257 does not come with a port to connect the valve cover port to the turbo) Step 1
- the middle 90 degree port on valve cover will have to be removed, shortened on the side that goes into the valve cover, then sealed back in with red locktite
if you don't it will not allow the wastegate to sit on its flange proper so you have too. Or if you wanna change it like I did and keep the hose stock size, you will need
-90 degree 1/4 npt to an6 adapter ( remove vc and drill that hole out with 7/16 bit then tap with 1/4 npt tap. and use liquid Teflon on threads of fitting and screw in as much as u can...just make sure it doesn't bottom out inside vc.) Step 2
You will need a port as close to turbo as you can for the pcv line on passenger side of the valve cover. 2 ways of doing it. 1 - you can buy a fitting that can be inserted into the 90 degree turbo inlet coupler so u can be right by the turbo (this is what im going to) 2 - you can weld a 1/4 npt bung into your intake as close to the turbo as you can...so just above the coupler.
Either way you do this I think its best to get rid of the stock line and remove the fitting from the valve cover and tap the hole 1/8 npt.
- To do this 1- remove the stock fitting (can heat up the area if ur vc isn't painted, grab fitting with vicegrips, then hit the vice grips with hammer. mine came out pretty easy like this. if u have any other tricks go for it) 2- once removed, take off valve cover from head 3 - grease 1/8 npt tap and slowly start tapping hole 1 or 2 turns then remove tap, clean and grease and go again 1 or 2 turns. ( it would be even better if u could have someone holding it u so u can tap from bottom so gravity will keep any shavings from falling into the vc) 4 - when done screw in whatever fitting you are gonna use with sealant on threads. Recommend
I highly recommend using a steel 1/8 npt to an6 fitting, drill out the npt side of the fitting so it matches the hole diameter of the stock fitting. the steel fitting has enough material that it will not weaken it to breaking point, there will be a lot left. this is what I did. Then you can use a 1/4 npt to an6 fitting on intake and simply make a line. very easy. If your going the coupler fitting route like me, which is usually a hose barb, you can simply use a steel 1/8 npt to hose barb fitting there. drill it out if you can. I have an an6 still because its routing to a catch can.
ok Lets get started....
First things first, Stock Turbo System Removal
1 - lift car on lift or put on jack stands. If your only doing front wheels, put wheel blocks behind back tires so it don't roll and kill you, we want you alive to enjoy new setup.
You will want to drain the oil and coolant out of the motor. Oil not 100% necessary, but its a new turbo, be kind to it.
Ill assume if your doing this you know how to drain the oil.
Coolant is a little messy, remove overflow tank cap then there is a coolant drain plug on the water pump, show in pic. remove it, try to use large drain pan...it helps a little, but mostly, just get out the way.
after coolant has stopped, put plug back in and tighten to 16 ft lbs
2 - Remove whatever intake you have. if stock, take it all out, airbox, tube, remove maf and store in safe place.
- remove vacuum line from bpv and unplug the boost solenoid
- remove upper charge pipe and remove coupler on turbo
- remove pcv line that runs from manifold to turbo, 10mm bolt on turbo and pull hard. Use a quick disconnect tool to remove from fitting.
to remove from valve cover, id just grab with vice grip and hit vice grips with hammer, it will come eventually, heat up area on vc if its stubborn. You wont be reusing it anyway.
- Goto front of engine and pull the coolant over flow hose off the fitting by upper rad hose, there may be some spillage of coolant, have rags handy.
- Remove turbo coolant return hose from other fitting.
- remove banjo bolt and fitting.
- if you are not doing waste gate water cooling, install the m14 1.5 to hose barb fitting with a little liquid Teflon sealant on threads, then reinstall overflow hose.
- if you are doing wg cooling, using crushwashers on either side of fitting, install the m14 to an4 banjo fitting with an4 facing same was as stock did, use stock banjo bolt, tighten hand tight, do not fully tighten as you will want to align it when installing coolant line.
3 - Remove O2 housing and manifold heat shields, a few 10mm bolts. if they are seized up, turn that **** till it breaks cause you won't need any of the parts anymore, Pointless wasting time trying to get it out.
4 - On drivers side of engine is the connector for the primary o2 sensor, unplug it, you will be removing it. While your doing that you may as well remove it from o2 housing. I recommend using a o2 sensor socket cause it makes it a lot easier, if you don't wanna buy one, a wrench will do. I think 19mm ( fix that when I check mine)
- remove coolant return line banjo bolt from front of turbo facing engine. take out coolant line.
- remove oil feed line banjo bolt on top of turbo.
Go Under Car
5 - Remove secondary o2 sensor, if you are gonna use it on new setup, tuck it up somewhere safe, if not, unplug it and remove, plug is somewhere by rear trans mount. just follow wire. 6 - Remove 1st exhaust hanger past downpipe, makes it a lot easier.
- remove 4 nuts connecting dp to o2 housing, break em if you have to, no point struggling unless you want to sell the o2 housing, then remove the 3 on connecting dp to rest of exhaust and remove the downpipe. (not sure if anything else is connected to downpipe, if so take it off)
- Remove the turbo brace. unbolt from o2 housing and engine block. after its off, replace nut back onto stud on engine block, you will need it later for the new turbo brace if you decided to get it.
7 - Remove turbo oil drain line from turbo, you will not be reusing this line so I recommend you cut it shorter, bend it and ziptie it and put it back in the block so no dirt gets in there till your ready for new line.
- remove coolant feed banjo bolt from side of turbo
- remove oil feed banjo from block behind water pipe. may be hard to get in there. Remove oil feed line and if you have something to put in block hole to keep clean, do it.
not sure if you can get at coolant feed banjo on coolant pipe yet but if you can remove it as well and take coolant line out.
8 - removing o2 housing and turbo, its a pain to do o2 alone, so ill show you how to do it together with turbo.
- put a floor jack under trans and give it a tiny bit of pressure just enough so its resting on trans.
- now remove the rear trans mount. take out 3 bolts on trans and the 3 bolts under the subframe, also the through bolt that connects the 2 pieces that goes through the bushing, you have to toss the heatshield anyway or mod it or the new downpipe will not go in. Remove the mount fully.
- Now remove the 4 bolts connecting turbo to manifold and take the turbo and o2 housing out together. just saved 30 minutes and probably some cussing.
- next get at that manifold, there are 10 13mm nuts holding it on, remove all 10, you cant see them all so feel for them. once they are off, pull off the manifold and you are done with the stock turbo system removal.
- reinstall the rear trans mount minus the heat shield or if you want the heat shield, which u don't really need (can heat wrap the downpipe if your worried) just put it back on till you come to where you need to mod it.
- 3 bolts on trans goto 41 ft lbs
- 3 on the subframe goto 44 ft lbs
- the 1 through bolt going through bushing goes to 66 ft lbs
- If you haven't got that coolant line banjo off yet, now would be the time, lots of room to get at it now.
Installation Of S257 Setup
1 - Install New exhaust Manifold Gasket. It only Goes One Way.
- put manifold onto studs, may have a little trouble cause the heater core pipes get in the way a little, but keep trying, it will go on eventually. took me a few minutes
- install the new manifold nuts and tighten them finger tight, they wont go all the way as they are a kind of locking nut to prevent them from backing off so u need a socket or wrench to snug them up. Below is the correct sequence to tighten them in. Tighten nuts to 10 Ft Lbs in the correct sequence
- You will need to do the second part to this once you have run the engine through a heat cycle. So once its all together and driving. Go for a drive, make sure you get to operating temp. Then park and let cool, Then retorque the manifold nuts in the correct sequence to 10 ft lbs again.
- I made a special wrench to get those hard to reach nuts, you may have to get creative.
2 - before installing turbo you must do a few things
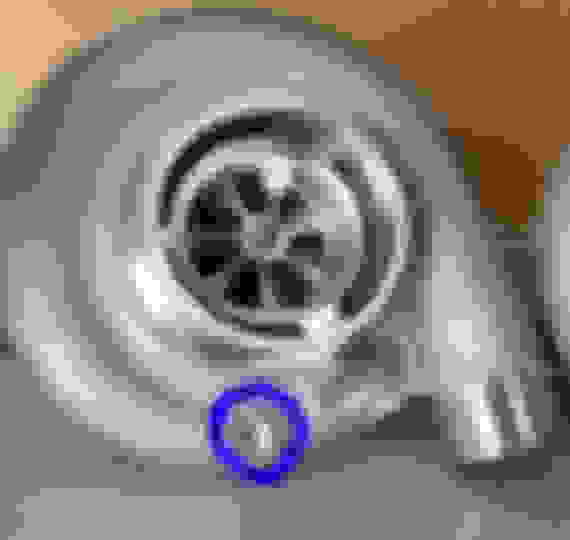
- remove all the bolts on the compressor side of the turbo that keep the compressor housing on. blue circled bolts, all the way around
- be vary carful removing it so you don't damage compressor wheel. when the housing is off, you need to drill a hole in the following port, the port is already threaded, so use a smaller drill bit then the threads obviously, to punch the port through in the back into the compressor airway, this will be your boost reference port.
- the threads are 1/8 npt so drill 1/16th hole or whatever you feel comfortable doing, just don't damage the threads. after that's done it wouldn't hurt to run a deburring tool on the inside of that if you can.
- clean out the housing with compresses air till your sure all shavings are out.
- reinstall the compressor housing, but do not completely tighten the bolts.
- loosen all the bolts on the turbine housing enough so it can rotate.
- tighten one bolt on both turbine and compressor housing enough so they wont move, and they are in a place you will be able to access when you put the turbo on the manifold.
- now get under car with turbo, loosen the bolts and roughly line up the turbine housing so it will site proper on the t3 flange, then roughly line up the compressor housing so the exit will face up and out the top of the engine the way stock turbo did. once u think u got it make sure those 2 bolts are snug again and mount the turbo and install bolts hand tight, 2 bolts is fine, one in opposite corners. (DO NOT USE T3 GASKET YET)
- now that turbo is on manifold you can loosen both turbine and compressor bolts and turn the center section so that the oil drain is facing straight down at the ground, remember you cars front wheels are off the ground so its at an angle so use the motor itself as reference. when your happy, tighten the one turbine housing bolt, and if u can get at a few more, tighten them as well. I kinda felt how hard it was to loosen them and tried to tighten them to the same feel. turbine side u can do a little tighter, but compressor side is aluminum and easy to strip, be carful.
now completely line up the compressor side. go up top and throw on the turbo coupler so you can perfectly line it up where you want it, may have to loosen and tighten that bolt a few times till you're happy. once you are happy, tighten as many of the compressor side bolts as you can.
- now remove the turbo again, put it on the table and tighten the rest of the bolts you couldn't reach when it was installed.
- install 1/8 npt to barb fitting or 1/8 npt to an4 in the boost reference port (whichever route you choose to take, I used an4) A little thread sealant wont hurt.
- Install oil feed 1/4 npt to an4 fitting in oil feed port on top side of center section. ( its the smaller port with the threads, if your not sure which one) I used some anti seize rated for 2500 degrees here for sealant, but I don't think you need any, its npt. make it good and tight. just don't break it, this is why I used stainless that and it holds up to heat good.
- install oil drain fitting. If you got the fittings I listed and made your own lines ( instructions will be at bottom when done) then screw the 45 degree an10 fitting onto the ported turbo oil drain fitting as tight as it will go and screw the straight end of the line onto the an10 block fitting. now bolt it up to turbo. 89 inch lbs (not sure what size bolts, but I think oil drain fitting comes with right size)
- now go under car, remove the stock temp block fitting you have there for protection, and take off oring and put the oring on the new block fitting.
- take turbo under the car, install the new block fitting into the block, now you have something to take most of the weight of the turbo so its not so damn heavy and hard to install.
- now you can grab t3 gasket, and stage8 bolts and bolt the turbo up to manifold with oil drain already installed....2 birds with one stone. hand tighten the 2 top bolts, do not fully tighten yet will have to remove the 2 bottom bolts for brace install.
-
- turbo brace install is easy. remove the 2 bottom bolts of the turbo and install the top plate, don't fully tighten yet.
- put the longer bottom plate up behind the water pipe and line up with the hole on the top plate. put bottom hole on plate on the stud in the block that the stock brace used. hand tighten nut you saved from stock brace.
- bolt the 2 plates together with supplied hardware and tighten. now tighten 4 turbo bolts to 38 ft lbs - tighten nut at bottom of brace to 15-18 ft lbs - now install the locking cams on stage 8 bolts. make sure they are installed so the cam will hit the turbine housing if the bolts move counter clockwise. if you have to give the bolts a little extra so the cam will sit as close to housing as possible when installed.
- install locking clips. turbo is now installed along with an10 oil drain (if you went with custom an10 line)
- if you did not make an10 oil lines, install oil drain line now.
-install oil feed line. custom oil feed line should be about 3 feet long and have 2 90 degree ends on it. its a good idea to install a heat sleeve on it.
- route line behind the turbo brace and attach to an4 oil feed fitting in block, this is a pain but you will get it.
- route the line up around the the front of compressor housing and between it and the firewall and connect to an4 fitting on the turbo. tighten decent but not to much, its an an fitting, doesn't need to be super tight. oil lines are now installed. pics below of routing.
Wastegate Install
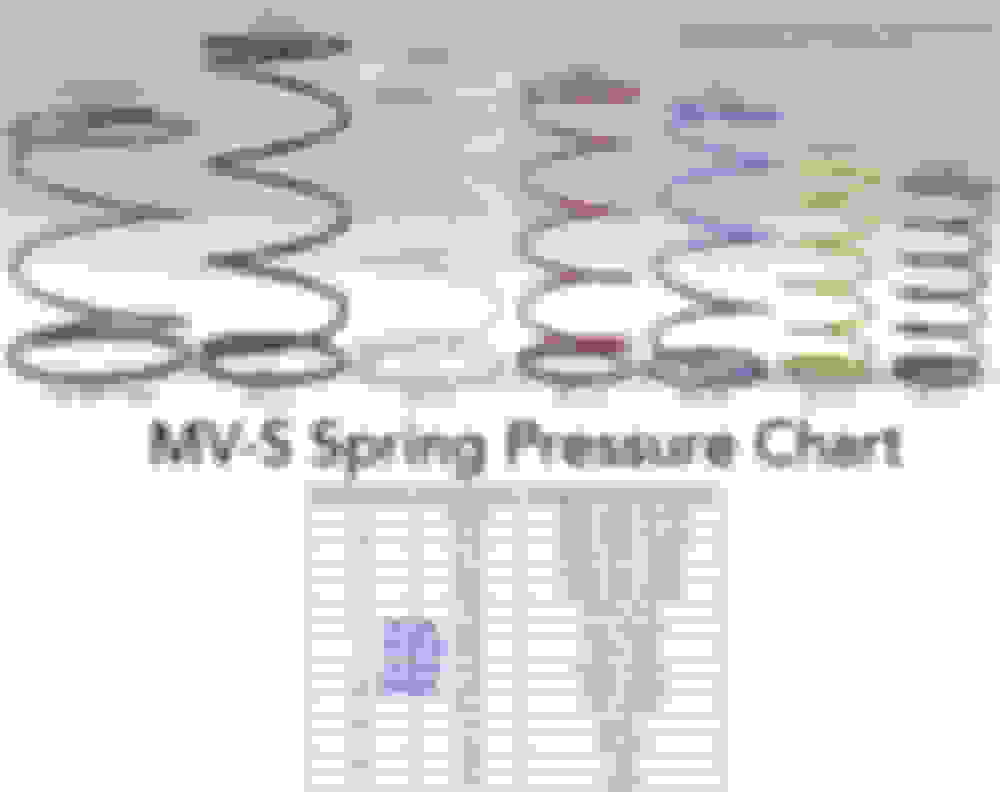
- First you need to decide what spring you want to run. Too soft and you wont be able to boost to higher boost levels, too hard and your min boost will be pretty high. I recommend around 20- 24 psi springs. Notice : The Tial wg spring chart is based on a perfectly built exhaust manifold and wg opening placement of 1:1 ratio. which mean for every psi of spring pressure there is and equal 1 psi of exhaust pressure opposing it. The zzp manifold is not a perfect 1:1 setup so the spring chart is basically useless. I had to do a number of combinations of springs to find the right one. I used the black and green springs which on the chart is 13.05 psi, but with the zzp manifold it is actually 23-24 psi fully open. so keep that in mind. anything beyond the 13.05 spring setup on the chart will most likely net yo 28 plus psi spring pressure, so be careful. Below should give you an idea. 13.05 psi is the only one im 100% sure on, the others may be a few off.
The 6 screws around the top is what need to be removed to install spring(s) Dont forget this seal before intalling wg. Only goes one way Seal installed. Carful it doesnt fall out on install. The wg comes with 2, or 3 plugs i think in the kit. You need to plug every air port except the one you plan to use. The 2 h2o ports have no plugs so just leave em. When you have the top off, make sure this side of the top is facing opposite of the dump tube port. Especially if you use watercooling. It will be alot neater install. Yes if you dont use watercooling you can move it any way you want, but its just easier and cleaner this way, trust me.
Make sure you use one of the 3 bottom air ports, do not use the side too one, thats for electronic boost gauge setup. Also there is a port right on the top side of the wg, that stays open. If you don't want crap falling in there, just do what I did and install a 90 degree barb fitting or something thats not connected to anything.
- Installing the wg is pretty easy. put wg on manifold port, put vband around it in a position where you will be able to tighten the screw, needs allen wrench and 8mm wrench. Then while pushing down on the top of the wg….till u feel it go down like ur pushing on a spring.....its a very small amount, close the vband around the it. make sure the vband is fully closed, if its not you wont be able to get the screw through it. once you got that done, tighten it up with screw and nut but not totally, you still want the wg to be able to rotate for now...
- next put on the banjo barb fitting with crush washers. face the barb up so the hose will go over to turbo coupler, away from hot engine.
- now you will want to install the boost control, take the boost solenoid you took off the k04 and run the boost reference hose from the compressor housing to the solenoid the same way it was on k04....if you don't remember, it goes on the metal port on the solenoid. I recommend you use a long hose and put the solenoid somewhere by the air filter. I mounted mine there. next run a hose from the side port of the solenoid to the port you used on the wg, leave hose long enough so it will go over the turbo coupler. And you are done with that.
Downpipe And Dump Tube Install
- I recommend wrapping both dump tube and downpipe in heat wrap...at least the top part of downpipe and dump.
- for atmosphere dump, make sure the heat shield on the rear trans mount is gone or the top part is cut off, or it wont fit, with heat wrap I had to use a die grinder to grind out a little portion of the trans mount bracket so the dump tube fit, but my dump tube was the wrong one and had to be fixed so this may not be an issue.
- install the downpipe onto the vband flange on turbo and semi tighten vband clamp....leave it loose so downpipe can move up and down, but not too loose so it falls off, the align downpipe to exhaust, probably using a new gasket, and install the 3 bolts....use antiseize for future removal ease.
- take off the closest exhaust hanger so you can tighten that top bolt.
-tighten all 3 bolts
-now tighten the vband on the turbo. DO NOT OVERTIGHTEN......or if you ever need to remove it, will be a bad time cause you will have to cut it off. i didn't learn twice lol.
- next install the dump tube. pretty easy, just put it on the wg, install the vband, put it to position you need it rotating the wg to help get in the correct position. Once you are satisfied and it is not touching anything, tighten up the vband on the dump, then tighten up the wg vband.
- for a downpipe with recirc dump.....there is a possibility that when dp is on the dump will not connect to wg, if this is the case, you will have to cut the dump up top somewhere, align it, tack it, take of down pipe and weld it up. i had to do this with the 257.....your on your own on that one, id get a shop to do it if you don't wanna attempt.
- if it does line up, the steps are pretty much the same, just don't tighten downpipe vband till you have the dump vband on, then tighten both
- reinstall exhaust hanger and that completes downpipe and dump.
- Now connect the pcv hose to the middle vc port you modded
- install turbo coupler and line up with upper charge pipe and tighten
-install zzp intake, may have to pull off a few times to turn coupler to get it right. make sure it is not hitting valve cover.
- connect other pcv line from passenger side vc port to the intake port, or coupler port, which ever why you decided to go.
Refill Fluids
- install new oil filter and put new oil into engine.
- fill coolant reservoir, wait till it goes down, then fill again, I goto the middle lip on the res. Once you can start the car, pull the small coolant overflow hose off the barb fitting by upper rad hose and let the engine idle and suck in the coolant, keep adding if needed, once coolant comes out of the barb fitting it should be full. put hose back on, check it after every drive for a while and add more if needed.
- now assuming everything is connected, charge pipe and all that, you want to prime the turbo with oil. pull the injector fuse and the fuel pump fuse and crank the engine till oil pressure light goes off, or if you have a pressure gauge, till you get about 25-40 psi. once you do, put fuses back in, run the car, and check for leaks.
Get a base tune, drive car for one heat cycle, then let it cool, take off upper charge pipe from turbo coupler, remove coupler from turbo and retorque exhaust manifold nuts to 10 ft lbs.
- reinstall the coupler and charge pipe and you are done with s257 turbo install.
That's about it......I will look it over and see if I forgot anything, if you guys think I forgot anything let me know. this is from memory
So what do you do with the O2 sensor that was removed from Oem housing? also do you recommend a place to buy all the necessary fittings or a kit for oil feeds and such?
So what do you do with the O2 sensor that was removed from Oem housing? also do you recommend a place to buy all the necessary fittings or a kit for oil feeds and such?
The downpipe for this setup has a place for the o2. And just get fittings at Summit and build ur line or measure what u need and have them make it