Detailing: Polishing 101 (How-To)

 01-31-2007, 07:29 PM
#27
Senior Member
Thread Starter
 02-01-2007, 08:02 AM
#29
Senior Member
Thread Starter
02-11-2007, 04:26 PM
#30
Senior Member
Quick question. How much compound should I have on hand to do this? I have probably about 6oz left of my tripoli and white rouge. Should I go get some more? It's supposed to snow most of this week so I may try and tackle the valve covers.


 04-26-2007, 09:17 PM
#36
Senior Member
Thread Starter
Ty >>> Its Worth it if you take your Time!
NO If it is aluminum you do not have to Clear coat,, But you will have to maintain it every Now & Then! Several Local People & Friends have Done it & It Does great as Long as you Maintain it! Steel's Need to be Clearcoated it will Rust! Get Good Clearcoat so it holds up to heat & Time!
 11-27-2007, 12:12 PM
#37
Senior Member

Join Date: 04-12-06
Location: El Paso/Austin, TX
Posts: 713
Likes: 0
Received 0 Likes
on
0 Posts
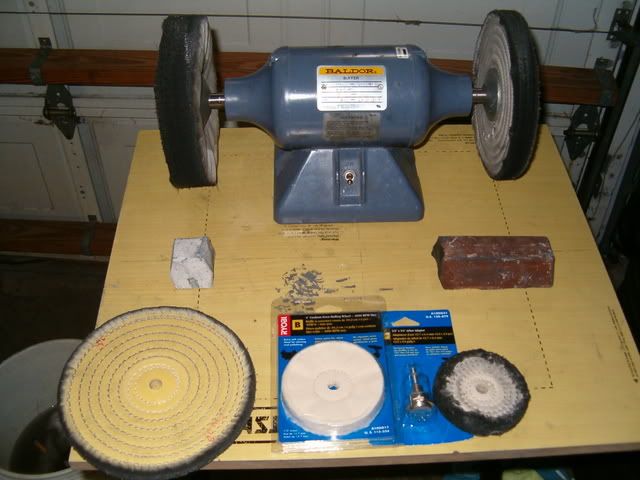
[QUOTE=BlilBT;718305]Ok I have had Plenty of People ask how to do this, So here you go! Not all tools are needed but Highly Recomended! To get a good result You must prep it good (ie: sanding), Because when you Polish it any Blemish's will show!
Now for the Tools needed,
1 Baldor Buffer or compatiable 8 inch or Bigger wheels (seen in Pic #1)
1 Sewn Cloth wheel & 1 Loose Cloth wheel for either the Buffer or Drill set (seen in Pic #1)
If you dont have a Buffer then Use a Drill with 1800 rpm to 2800 rpm with 4 inch wheels (seen in Pic #1)
1lb bar of White rouqe & 1lb bar of Tipoli (seen in Pic #1)
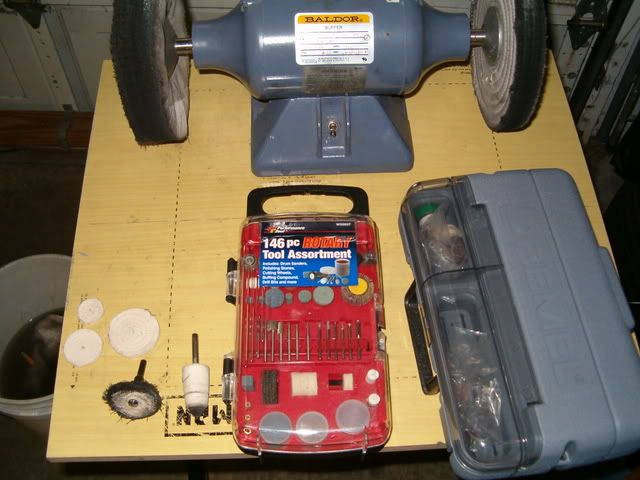
1 Dremel & attachments (seen in Pic #2)
1 set of 1 inch to 2 1/2 inch Sewn cloth wheels!(seen in Pic #2
1 Drill
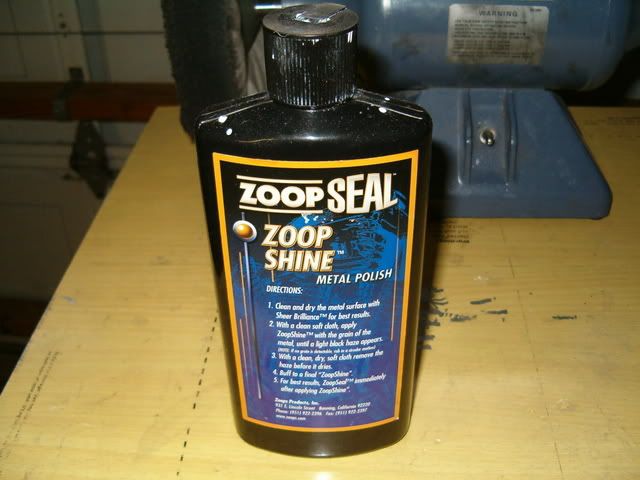
1 Bottle of Metal Polish (liquid) (seen in Pic#3) No Paste it will dull the Finish!
Wet Sand paper 220 grit thru 1500 Grit
These supplies can be had at eastwood.com, Sears & sometimes Home Depot!
Pic #1
Pic #2
Pic #3
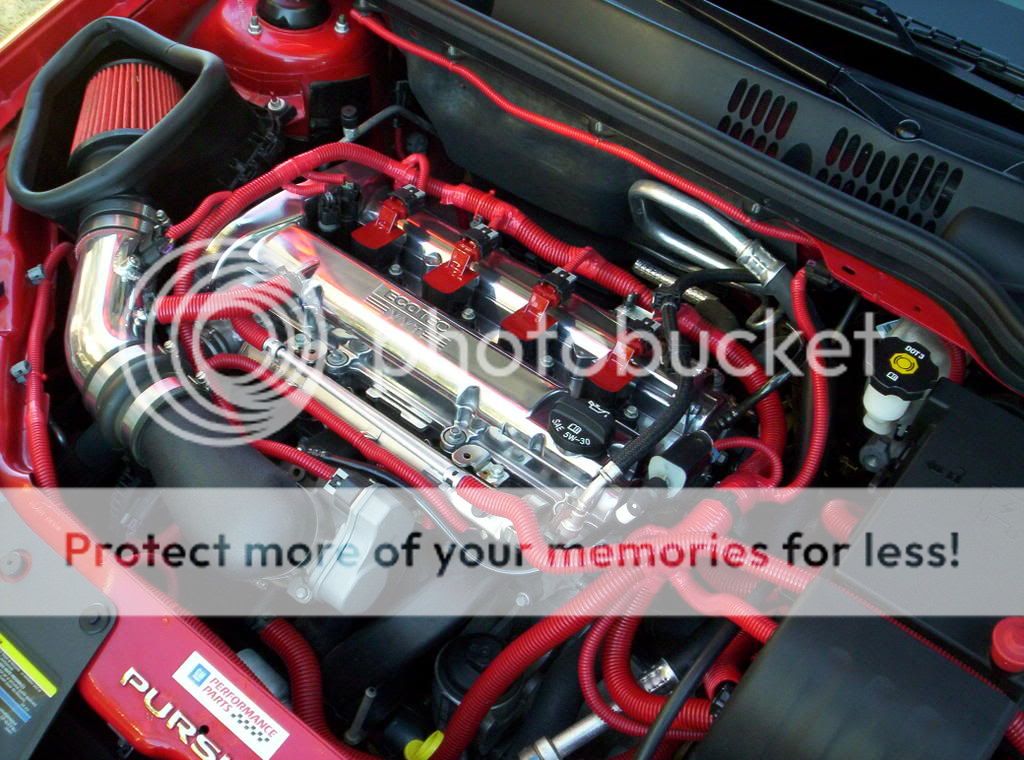
Ok Now time to start Polishing!
1st step is the Longest, I try to use a sanding Block where ever I can, makes for a Flat Surface Start by sanding your Piece with 220 grit, Then 400, Then 600, Then 800, Then 1000, then 1500 grit! Make sure to remove the scratches from the Prior grit Before you Move up to the Next 1!
If you Dont when you polish it, They will show!
Valve covers are Soft Metal so they require Up to 1500 grit, Motor Mounts & supercharger's only have to be sanded to 1000 grit!
when you say to remove the scatches from the prior grit before you move up to the next 1, what do mean are you supposed to buff or what?
Now for the Tools needed,
1 Baldor Buffer or compatiable 8 inch or Bigger wheels (seen in Pic #1)
1 Sewn Cloth wheel & 1 Loose Cloth wheel for either the Buffer or Drill set (seen in Pic #1)
If you dont have a Buffer then Use a Drill with 1800 rpm to 2800 rpm with 4 inch wheels (seen in Pic #1)
1lb bar of White rouqe & 1lb bar of Tipoli (seen in Pic #1)
1 Dremel & attachments (seen in Pic #2)
1 set of 1 inch to 2 1/2 inch Sewn cloth wheels!(seen in Pic #2
1 Drill
1 Bottle of Metal Polish (liquid) (seen in Pic#3) No Paste it will dull the Finish!
Wet Sand paper 220 grit thru 1500 Grit
These supplies can be had at eastwood.com, Sears & sometimes Home Depot!
Pic #1
Pic #2
Pic #3
Ok Now time to start Polishing!
1st step is the Longest, I try to use a sanding Block where ever I can, makes for a Flat Surface Start by sanding your Piece with 220 grit, Then 400, Then 600, Then 800, Then 1000, then 1500 grit! Make sure to remove the scratches from the Prior grit Before you Move up to the Next 1!
If you Dont when you polish it, They will show!
Valve covers are Soft Metal so they require Up to 1500 grit, Motor Mounts & supercharger's only have to be sanded to 1000 grit!
when you say to remove the scatches from the prior grit before you move up to the next 1, what do mean are you supposed to buff or what?
11-27-2007, 01:28 PM
#38
Senior Member
Thread Starter
when you say to remove the scatches from the prior grit before you move up to the next 1, what do mean are you supposed to buff or what?
__________________
No what it means is that 600 grit scratches need to be removed with 800 grit before you Move up to the next Highest grit! Another words it is alot harder to remove 600grit scratches with 1500 grit, step up accordingly & makes sure that you get all the prior 1s out before moving up to the next grit!
11-27-2007, 07:32 PM
#40
Senior Member
Thread Starter
11-27-2007, 09:01 PM
#42
Senior Member
Thread Starter
12-28-2007, 07:48 AM
#43
Senior Member

here is a link to valve cover removal....
and a pic...
http://www.g5club.net/forum/viewtopic.php?t=712
and a pic...
http://www.g5club.net/forum/viewtopic.php?t=712


 03-10-2008, 06:03 PM
#50
Senior Member
Thread Starter