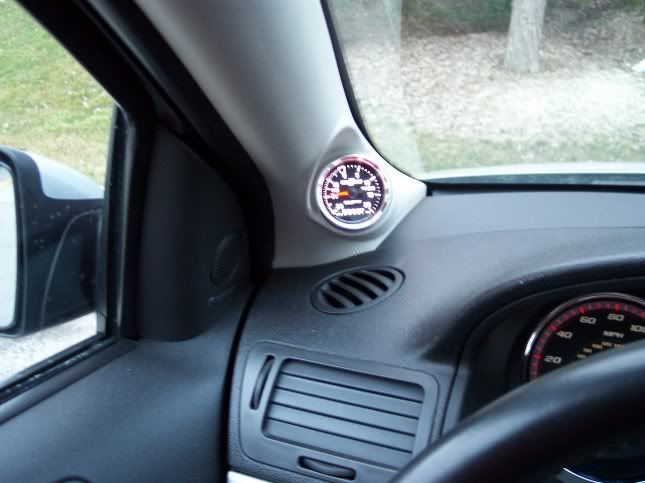
Interior: Those that have added autometer guages ....how I matched the bezel to our stock bezel
 03-25-2006, 11:40 AM
#1
Senior Member
Thread Starter

Join Date: 07-03-05
Location: South Bend , Indiana
Posts: 4,272
Likes: 0
Received 0 Likes
on
0 Posts
Those that have added autometer guages ....how I matched the bezel to our stock bezel
Most of the autometers come with either as black bezel or a silver bezel . I thought the silver bezels were just natural brushed aluminum I could easily polish to match the factory guage bezels ,but no . Its a Silver powder coat . Heres the process I used to strip the paint , prep and polish it .
First you have to tape up the clear gauge lens really good . I went over it with 3 layers because I would be sanding and using a polishing compound and your obviously not gonna beable to do it without touching the masked off area . Would hate to scratch the lens .
Heres how it came with a silver powdercoated bezel

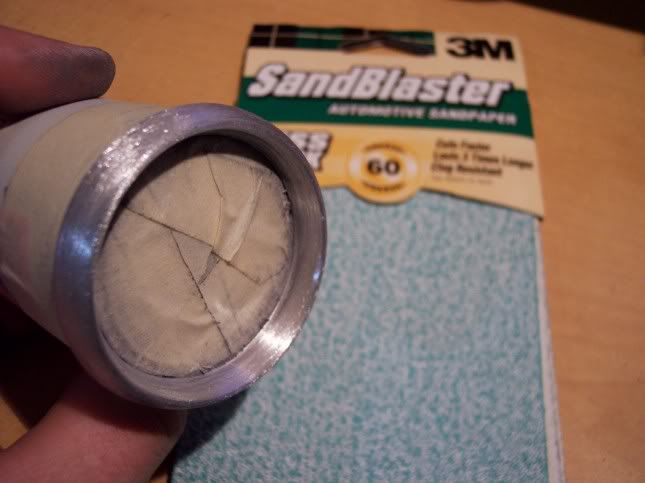
Now time to get the paint off . I thought 400 grit would do it . Well , it didnt even come close . So I went and got 60 grit paper for removing paint , aaaaah MUCH better .
This pic shows all the paint removed and the paper I used .
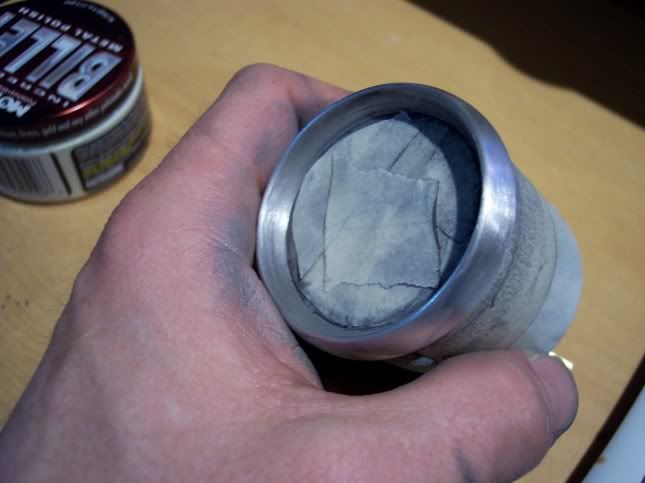
Next its time to smooth out the bezel and bring the finish back . The aluminum is soft and sands very easy . I used 400 grit 3m automotive paper for this step . You need to sand until you smooth out all the scratches caused by the coarse grit paper .
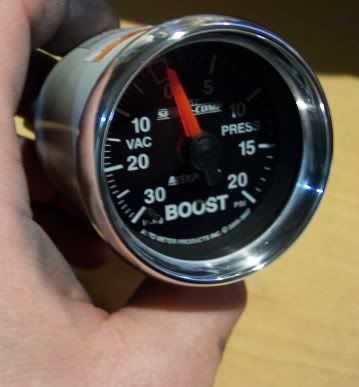
Now its ready to start polishing . For this I used a combination of mothers billet polish along with 1000 grit 3m automotive paper then the polish with 1500 grit paper . Then when that was done , I further polished it with a microfiber towel and more billet polish . Heres the end result .
Probably not a whole lotta people gonna have a need for this , but hey ....its here if anyone would ever be curious .
First you have to tape up the clear gauge lens really good . I went over it with 3 layers because I would be sanding and using a polishing compound and your obviously not gonna beable to do it without touching the masked off area . Would hate to scratch the lens .
Heres how it came with a silver powdercoated bezel
Now time to get the paint off . I thought 400 grit would do it . Well , it didnt even come close . So I went and got 60 grit paper for removing paint , aaaaah MUCH better .
This pic shows all the paint removed and the paper I used .
Next its time to smooth out the bezel and bring the finish back . The aluminum is soft and sands very easy . I used 400 grit 3m automotive paper for this step . You need to sand until you smooth out all the scratches caused by the coarse grit paper .
Now its ready to start polishing . For this I used a combination of mothers billet polish along with 1000 grit 3m automotive paper then the polish with 1500 grit paper . Then when that was done , I further polished it with a microfiber towel and more billet polish . Heres the end result .
Probably not a whole lotta people gonna have a need for this , but hey ....its here if anyone would ever be curious .
Last edited by TommyP; 10-06-2012 at 09:20 AM.


 03-25-2006, 01:35 PM
#7
Senior Member
Thread Starter
Join Date: 07-03-05
Location: South Bend , Indiana
Posts: 4,272
Likes: 0
Received 0 Likes
on
0 Posts
possibly , all I know is the 400 grit wouldnt even touch it . I went to buy more sand paper not wanting to have to go back again , haha .


 03-26-2006, 12:39 PM
#13
Senior Member
I did that same process to the covers on my projectors. It is awesome to see something go from a painted surface to chrome. I just didn't like the fact that my hands turned grey... lol

Thread
Thread Starter
Forum
Replies
Last Post