All Cars Café The landing pad for automotive discussions, news, articles, and opinions. A place for the community to kick back and chat about all cars.

EXNINJA's kit car build thread

Thread Tools
 
Search this Thread
 
Old Jul 11, 2018 | 01:10 PM
  #151  
exninja's Avatar
Thread Starter
Senior Member
iTrader: (1)
 
Joined: 02-20-09
Posts: 6,268
Likes: 419
From: UT
Check that. I just bought a set of bushings for a really good price so I'm going to rip those control arms off again. Oh well.
Reply
Old Jul 18, 2018 | 11:33 AM
  #152  
exninja's Avatar
Thread Starter
Senior Member
iTrader: (1)
 
Joined: 02-20-09
Posts: 6,268
Likes: 419
From: UT
Started installing the bushings and grease zerks

Reply
Old Jul 18, 2018 | 01:37 PM
  #153  
07blackg5's Avatar
Slobodan Milošević
iTrader: (8)
 
Joined: 11-05-07
Posts: 5,959
Likes: 215
From: Serbia
Scissor me Xerxes!
Reply
Old Jul 22, 2018 | 12:24 PM
  #154  
exninja's Avatar
Thread Starter
Senior Member
iTrader: (1)
 
Joined: 02-20-09
Posts: 6,268
Likes: 419
From: UT
Finished the bushings and put the rear end back together


Meanwhile I confirmed my suspicion on the source of the Miata's oil leak

Reply
Old Jul 23, 2018 | 09:19 AM
  #155  
Kolt's Avatar
Senior Member
 
Joined: 04-19-09
Posts: 4,427
Likes: 361
From: Jackson, TN
Originally Posted by exninja
Meanwhile I confirmed my suspicion on the source of the Miata's oil leak
That's nasty
Reply
Old Jul 23, 2018 | 10:35 AM
  #156  
exninja's Avatar
Thread Starter
Senior Member
iTrader: (1)
 
Joined: 02-20-09
Posts: 6,268
Likes: 419
From: UT
Originally Posted by Kolt
That's nasty
Yup. When the cam sensor o-ring didn't fix it I knew what it was. Glad I waited to fix it since I'm getting rid of it anyways.
Reply
Old Jul 23, 2018 | 11:16 AM
  #157  
07blackg5's Avatar
Slobodan Milošević
iTrader: (8)
 
Joined: 11-05-07
Posts: 5,959
Likes: 215
From: Serbia
where are the burnout videos?
Reply
Old Jul 29, 2018 | 11:11 AM
  #158  
exninja's Avatar
Thread Starter
Senior Member
iTrader: (1)
 
Joined: 02-20-09
Posts: 6,268
Likes: 419
From: UT
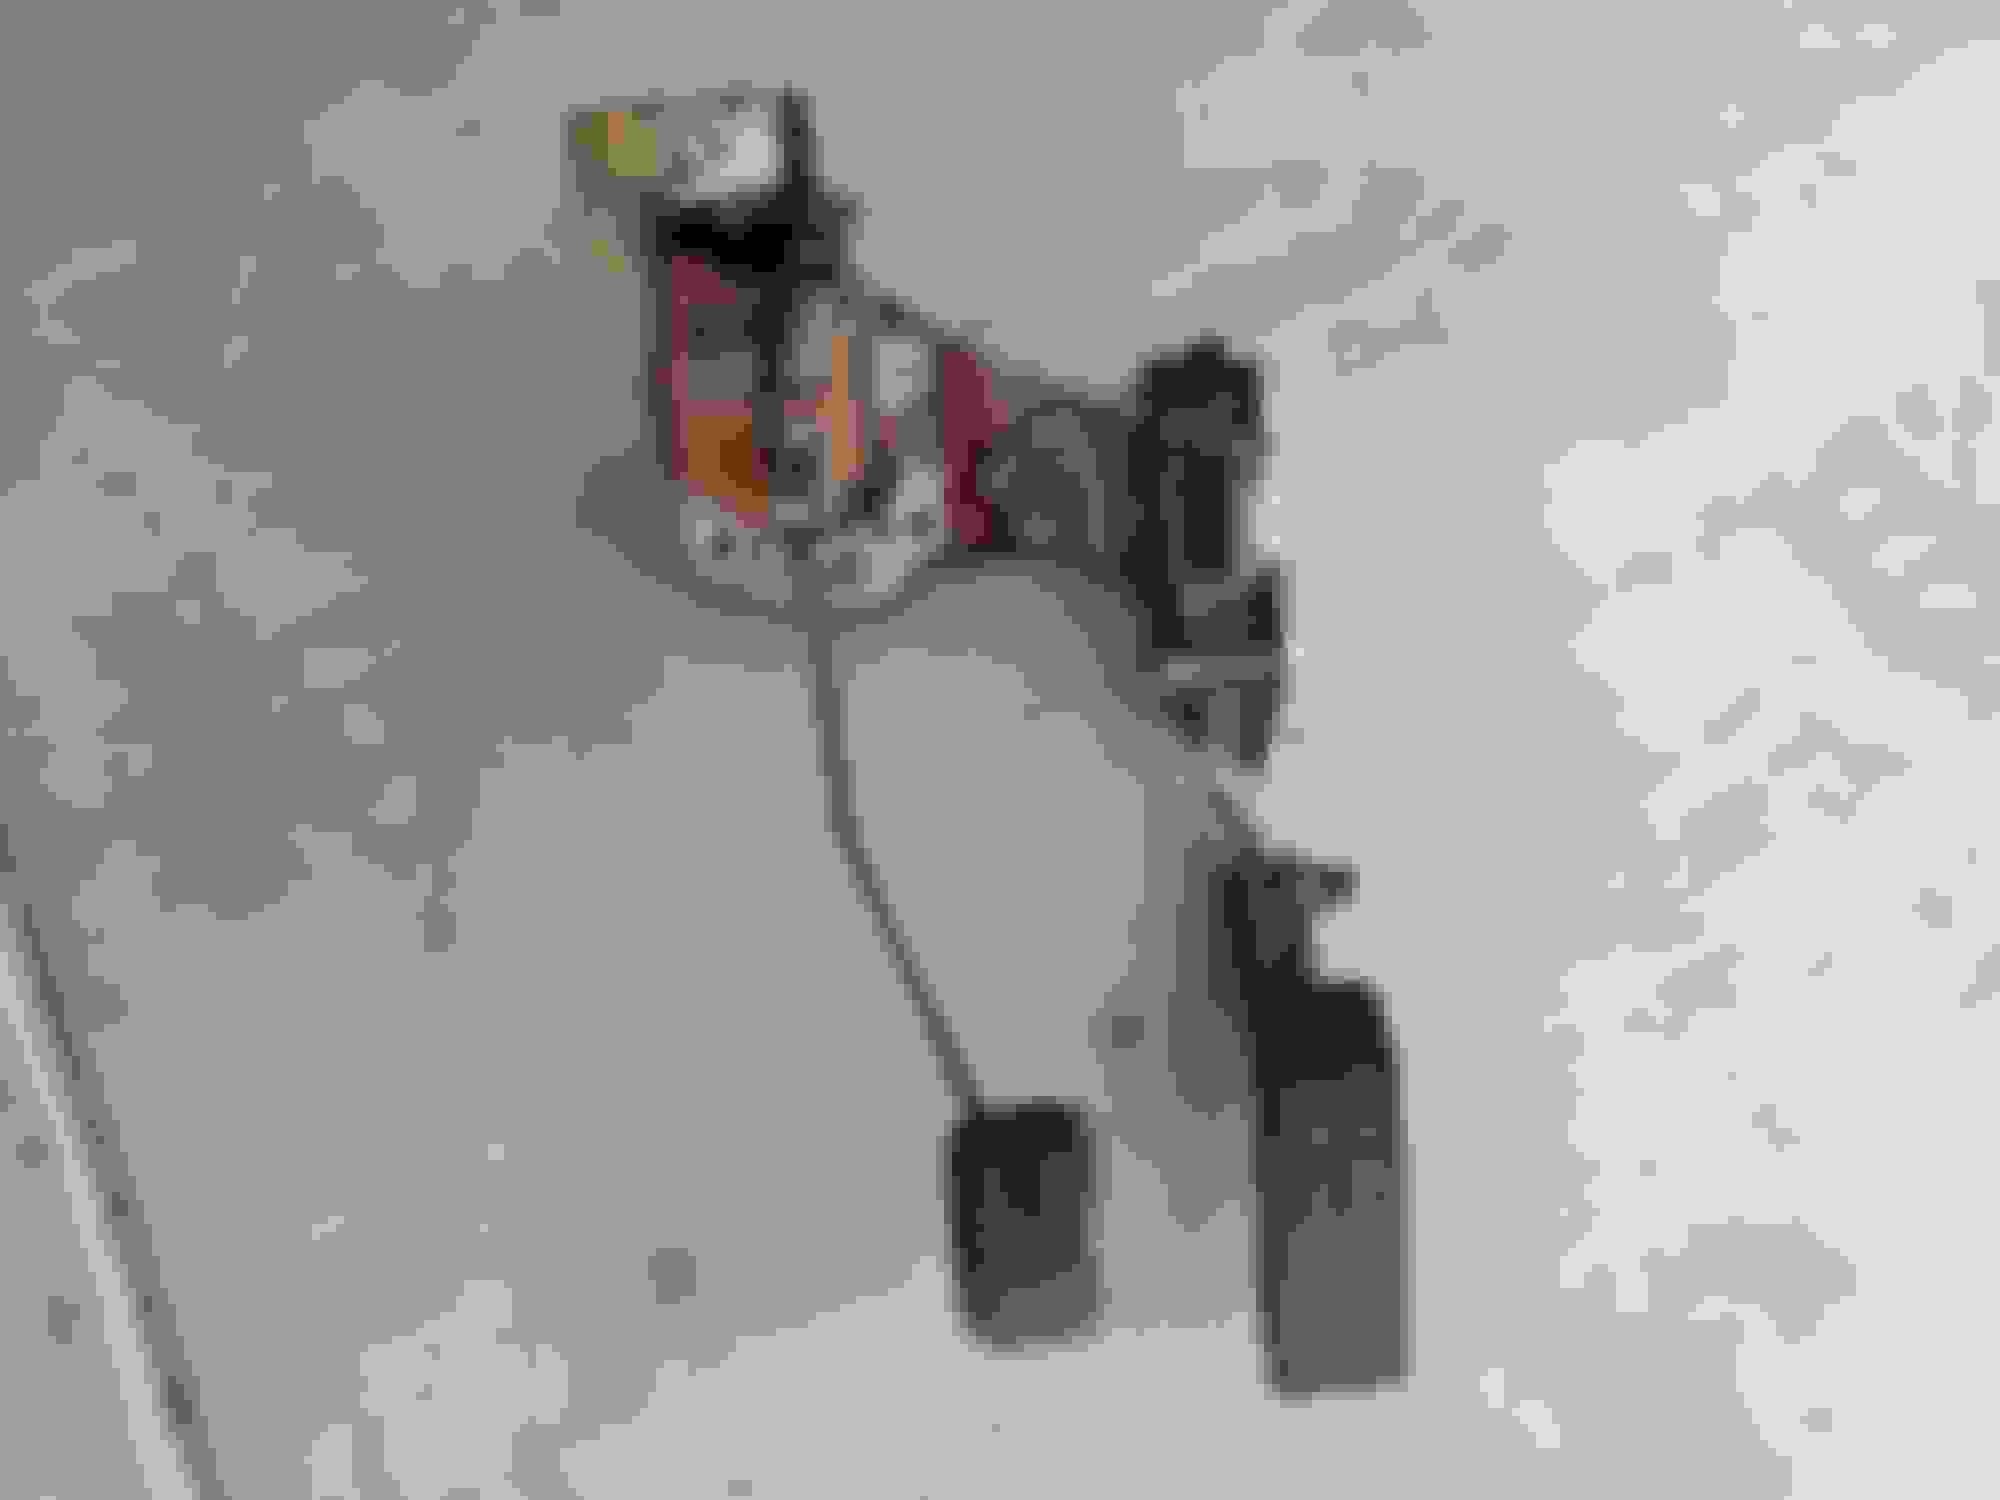
Made some progress this week. Put the control arms back together on the front. Did my first weld; I welded a CTS throttle pedal to the Miata pedal bracket:


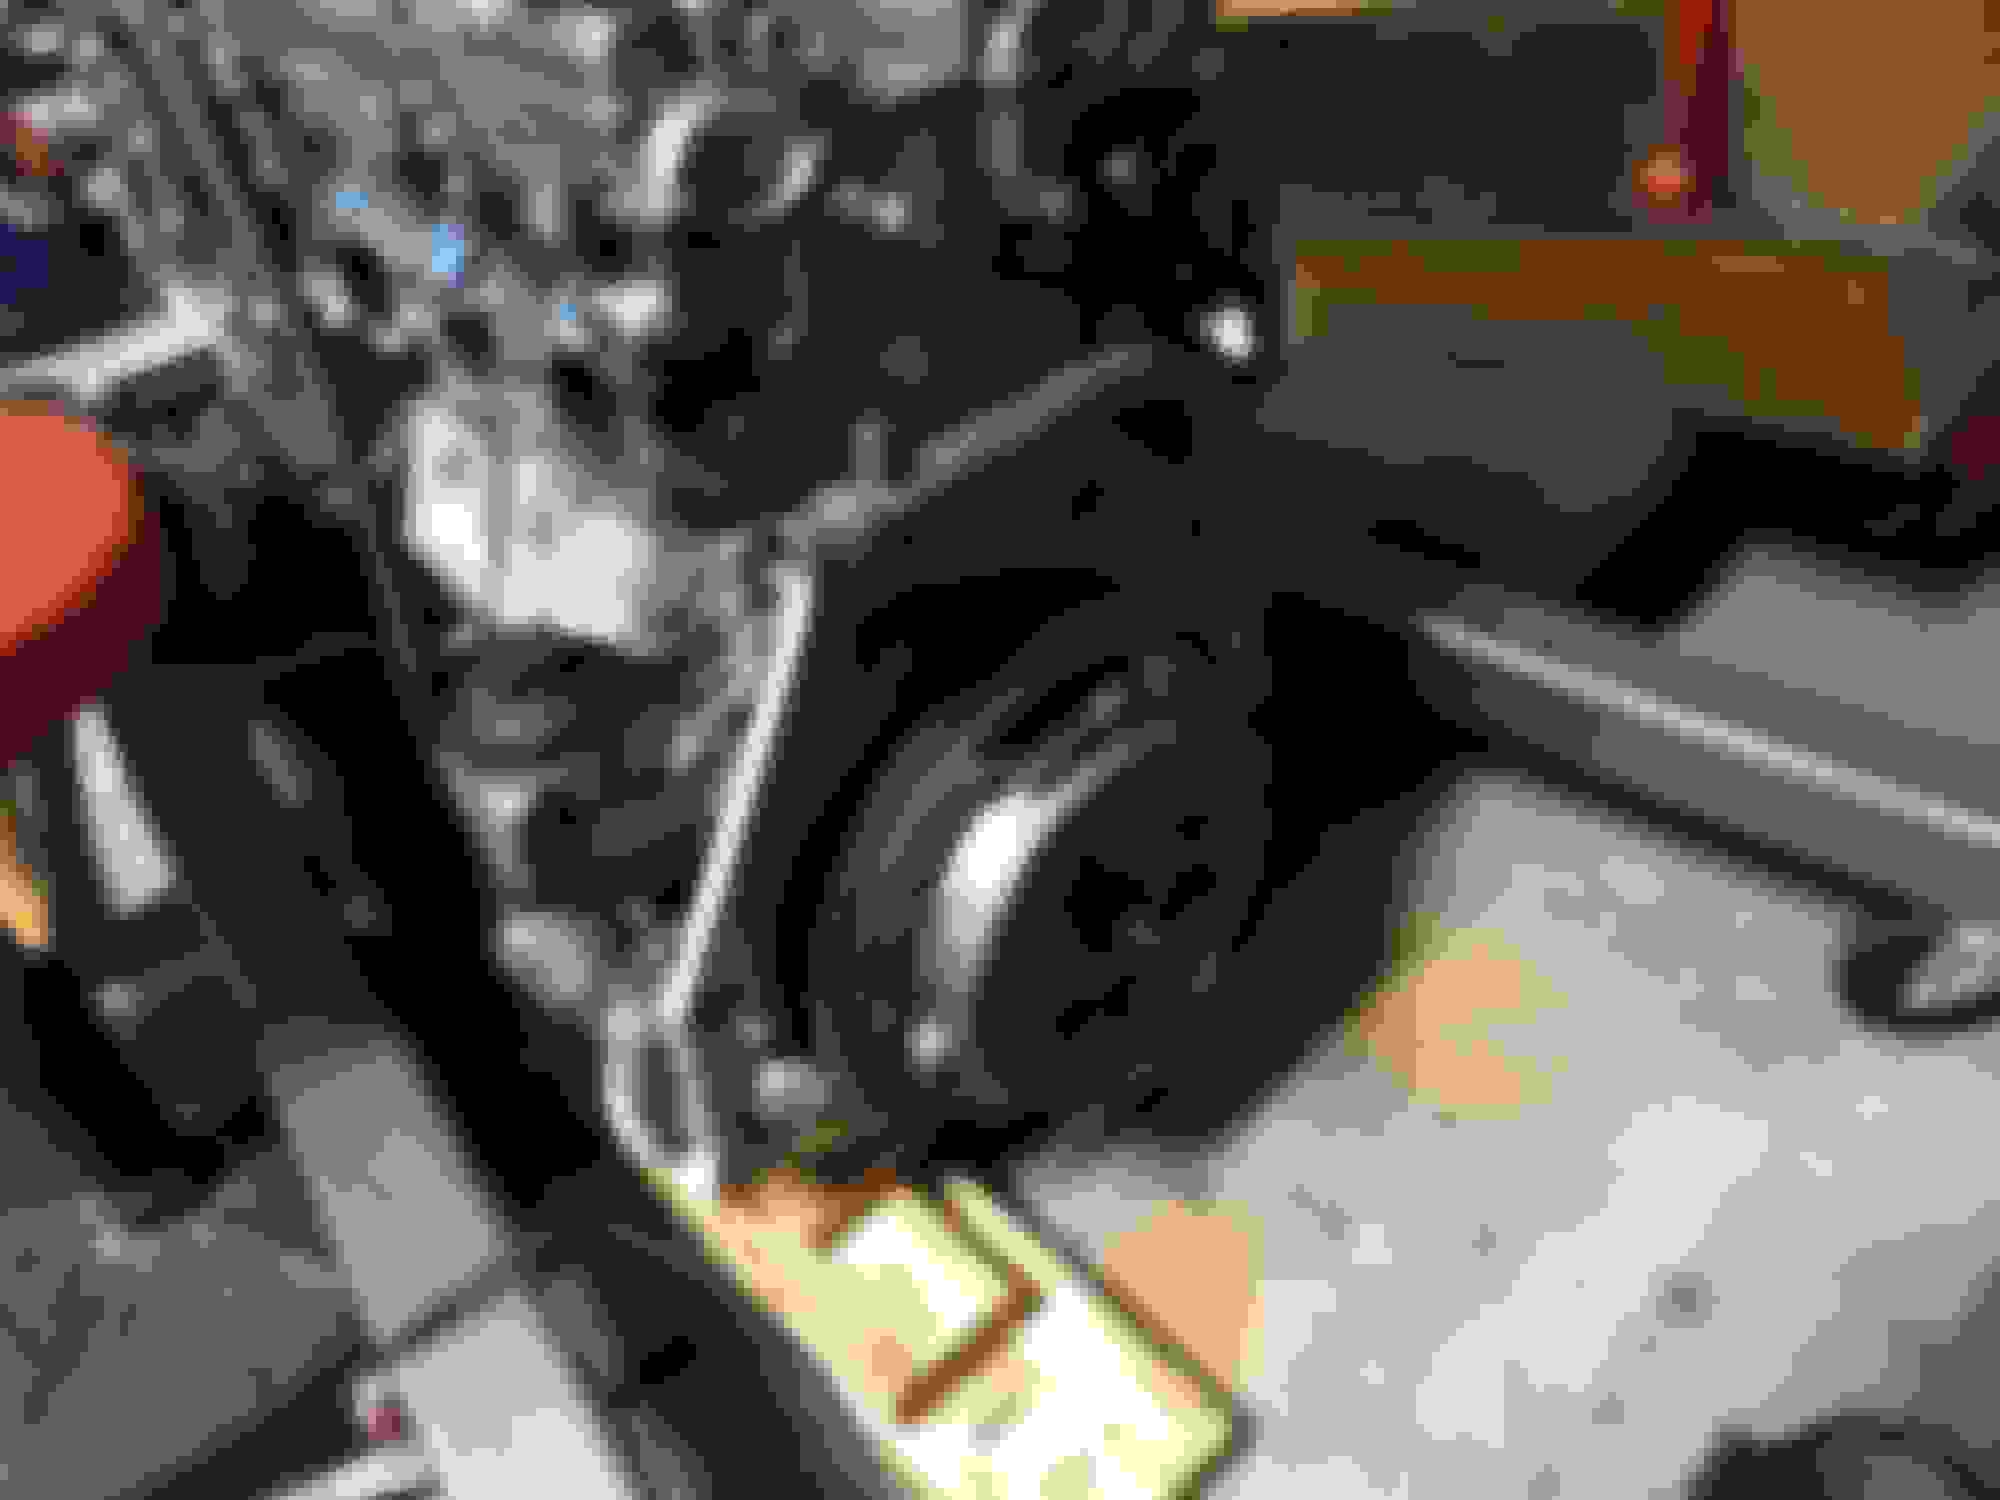
I then drilled holes in the Miata flywheel for the ecotec bolt pattern:

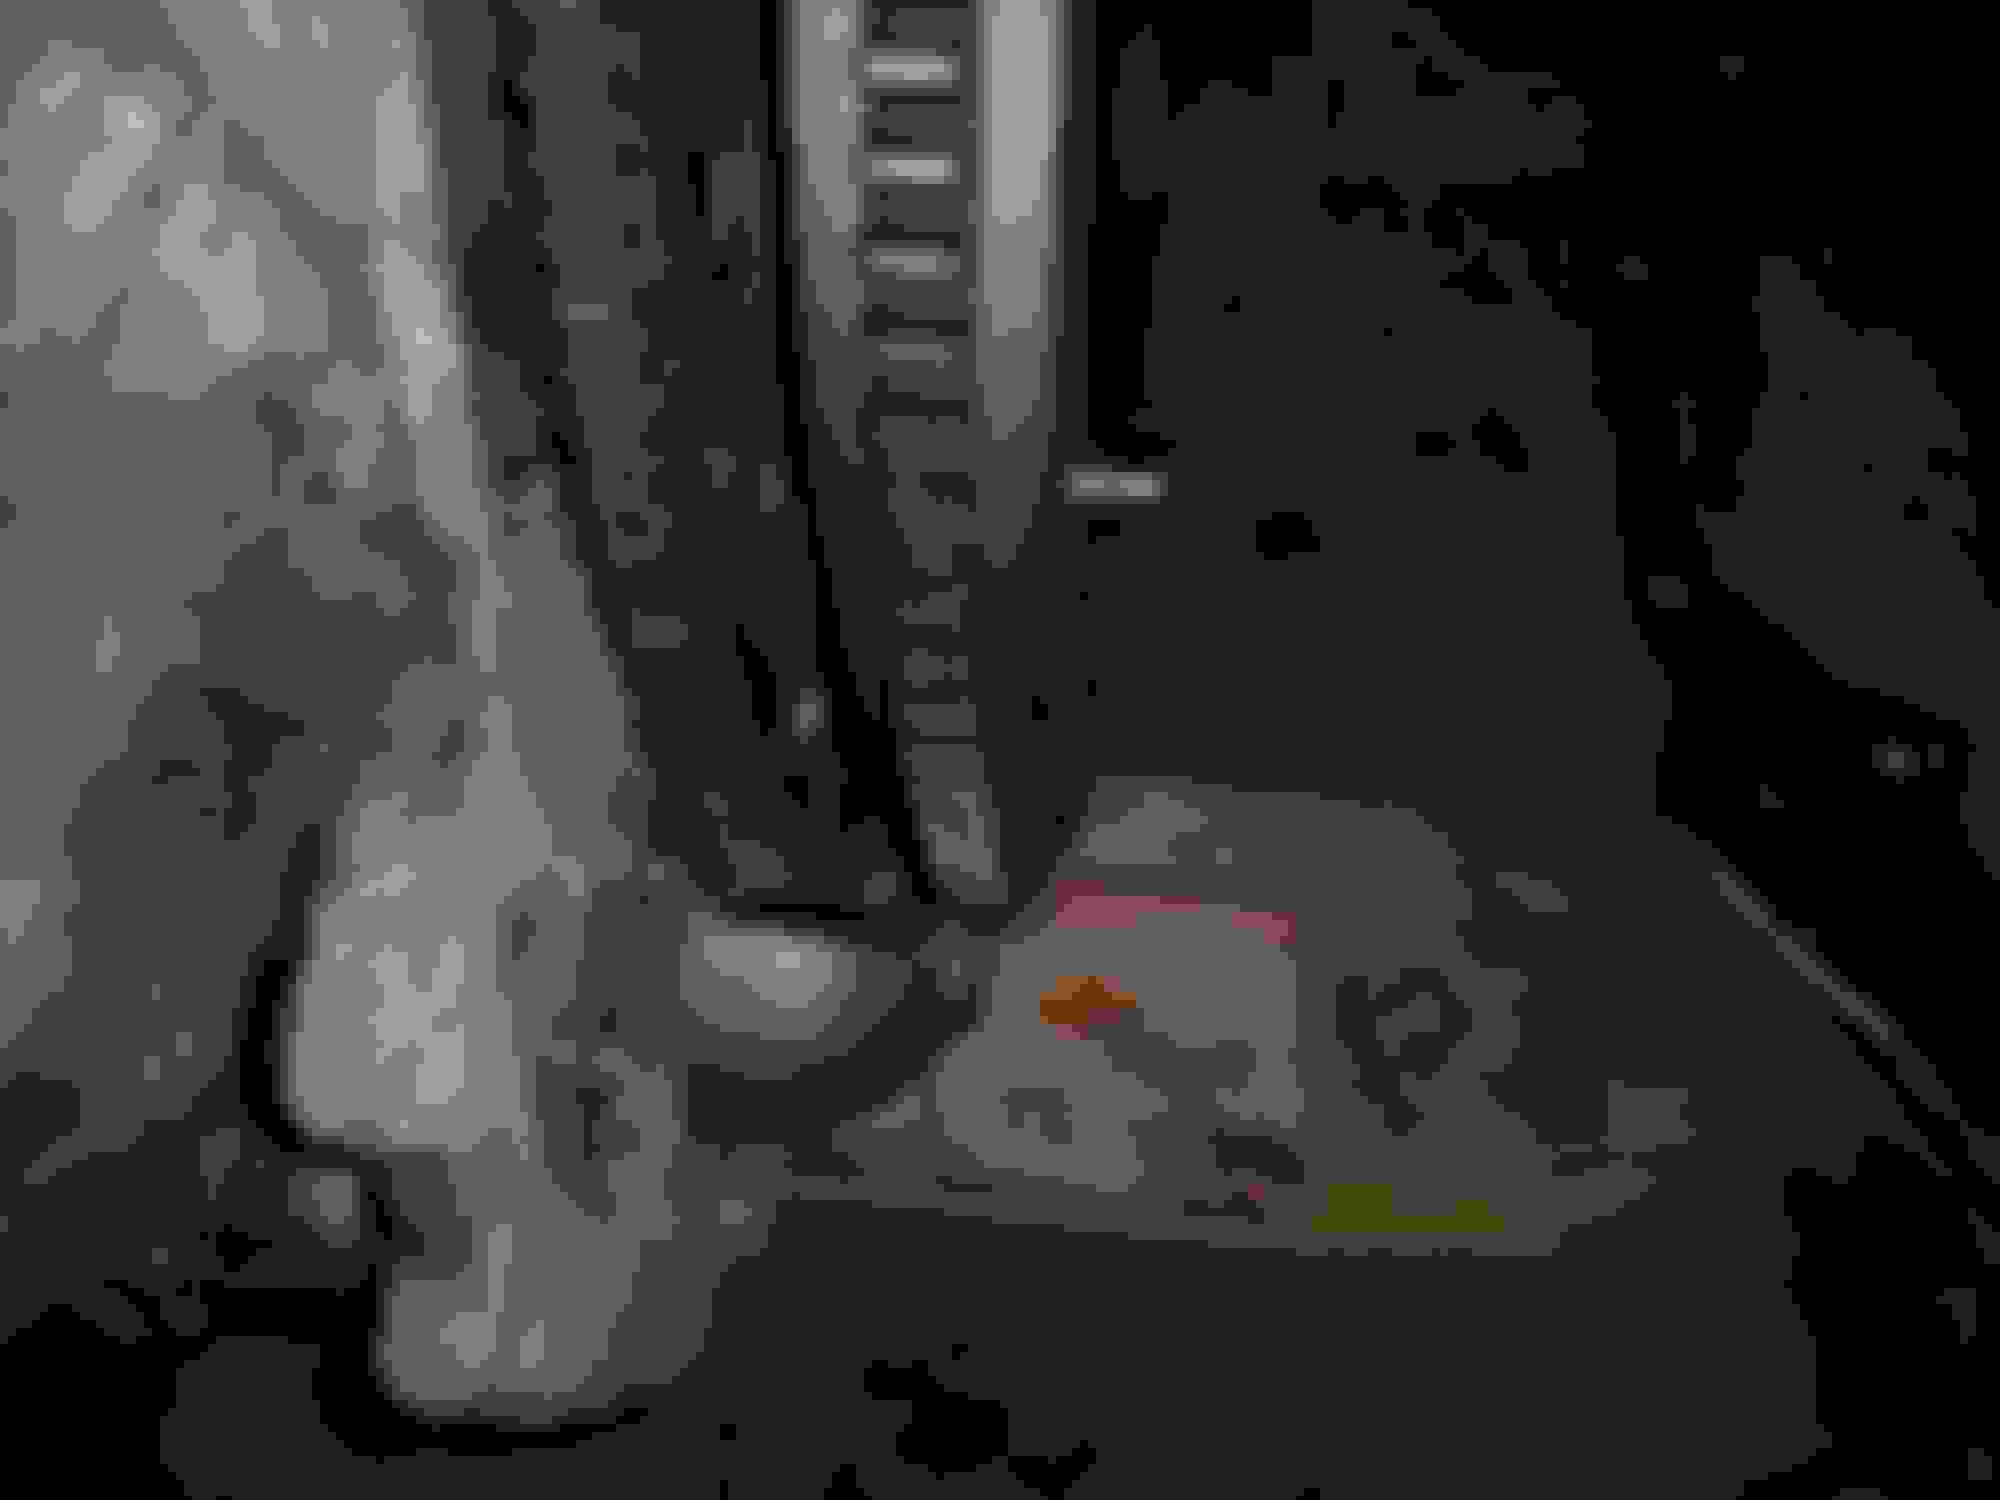
I also popped the oil pan off of the motor to start the oil pan swap process. I have the forged rods, so that was good. Didn't take a picture of that.
Reply
Old Jul 29, 2018 | 12:25 PM
  #159  
63 Nova SS's Avatar
Senior Member
iTrader: (3)
 
Joined: 06-12-12
Posts: 5,466
Likes: 316
From: Indiana
Nice to see you moving on it. Subframe looks nice.
Reply
Old Jul 29, 2018 | 09:25 PM
  #160  
exninja's Avatar
Thread Starter
Senior Member
iTrader: (1)
 
Joined: 02-20-09
Posts: 6,268
Likes: 419
From: UT
Thanks Nova!
Reply
Old Aug 4, 2018 | 12:52 AM
  #161  
exninja's Avatar
Thread Starter
Senior Member
iTrader: (1)
 
Joined: 02-20-09
Posts: 6,268
Likes: 419
From: UT
Took some convincing but the oil pan is on

Reply
Old Aug 4, 2018 | 08:25 AM
  #162  
jdbaugh1's Avatar
Senior Member
iTrader: (1)
 
Joined: 02-03-16
Posts: 6,435
Likes: 358
From: Kansas
Some of the holes not quite align or what?
Reply
Old Aug 4, 2018 | 02:56 PM
  #163  
exninja's Avatar
Thread Starter
Senior Member
iTrader: (1)
 
Joined: 02-20-09
Posts: 6,268
Likes: 419
From: UT
It was a little crooked, my guess is due to welding. The longer bolts had some trouble starting because of it. It should be sealed enough.
Reply
Old Aug 5, 2018 | 05:42 PM
  #164  
63 Nova SS's Avatar
Senior Member
iTrader: (3)
 
Joined: 06-12-12
Posts: 5,466
Likes: 316
From: Indiana
Nice!
Reply
Old Aug 10, 2018 | 06:12 PM
  #165  
exninja's Avatar
Thread Starter
Senior Member
iTrader: (1)
 
Joined: 02-20-09
Posts: 6,268
Likes: 419
From: UT
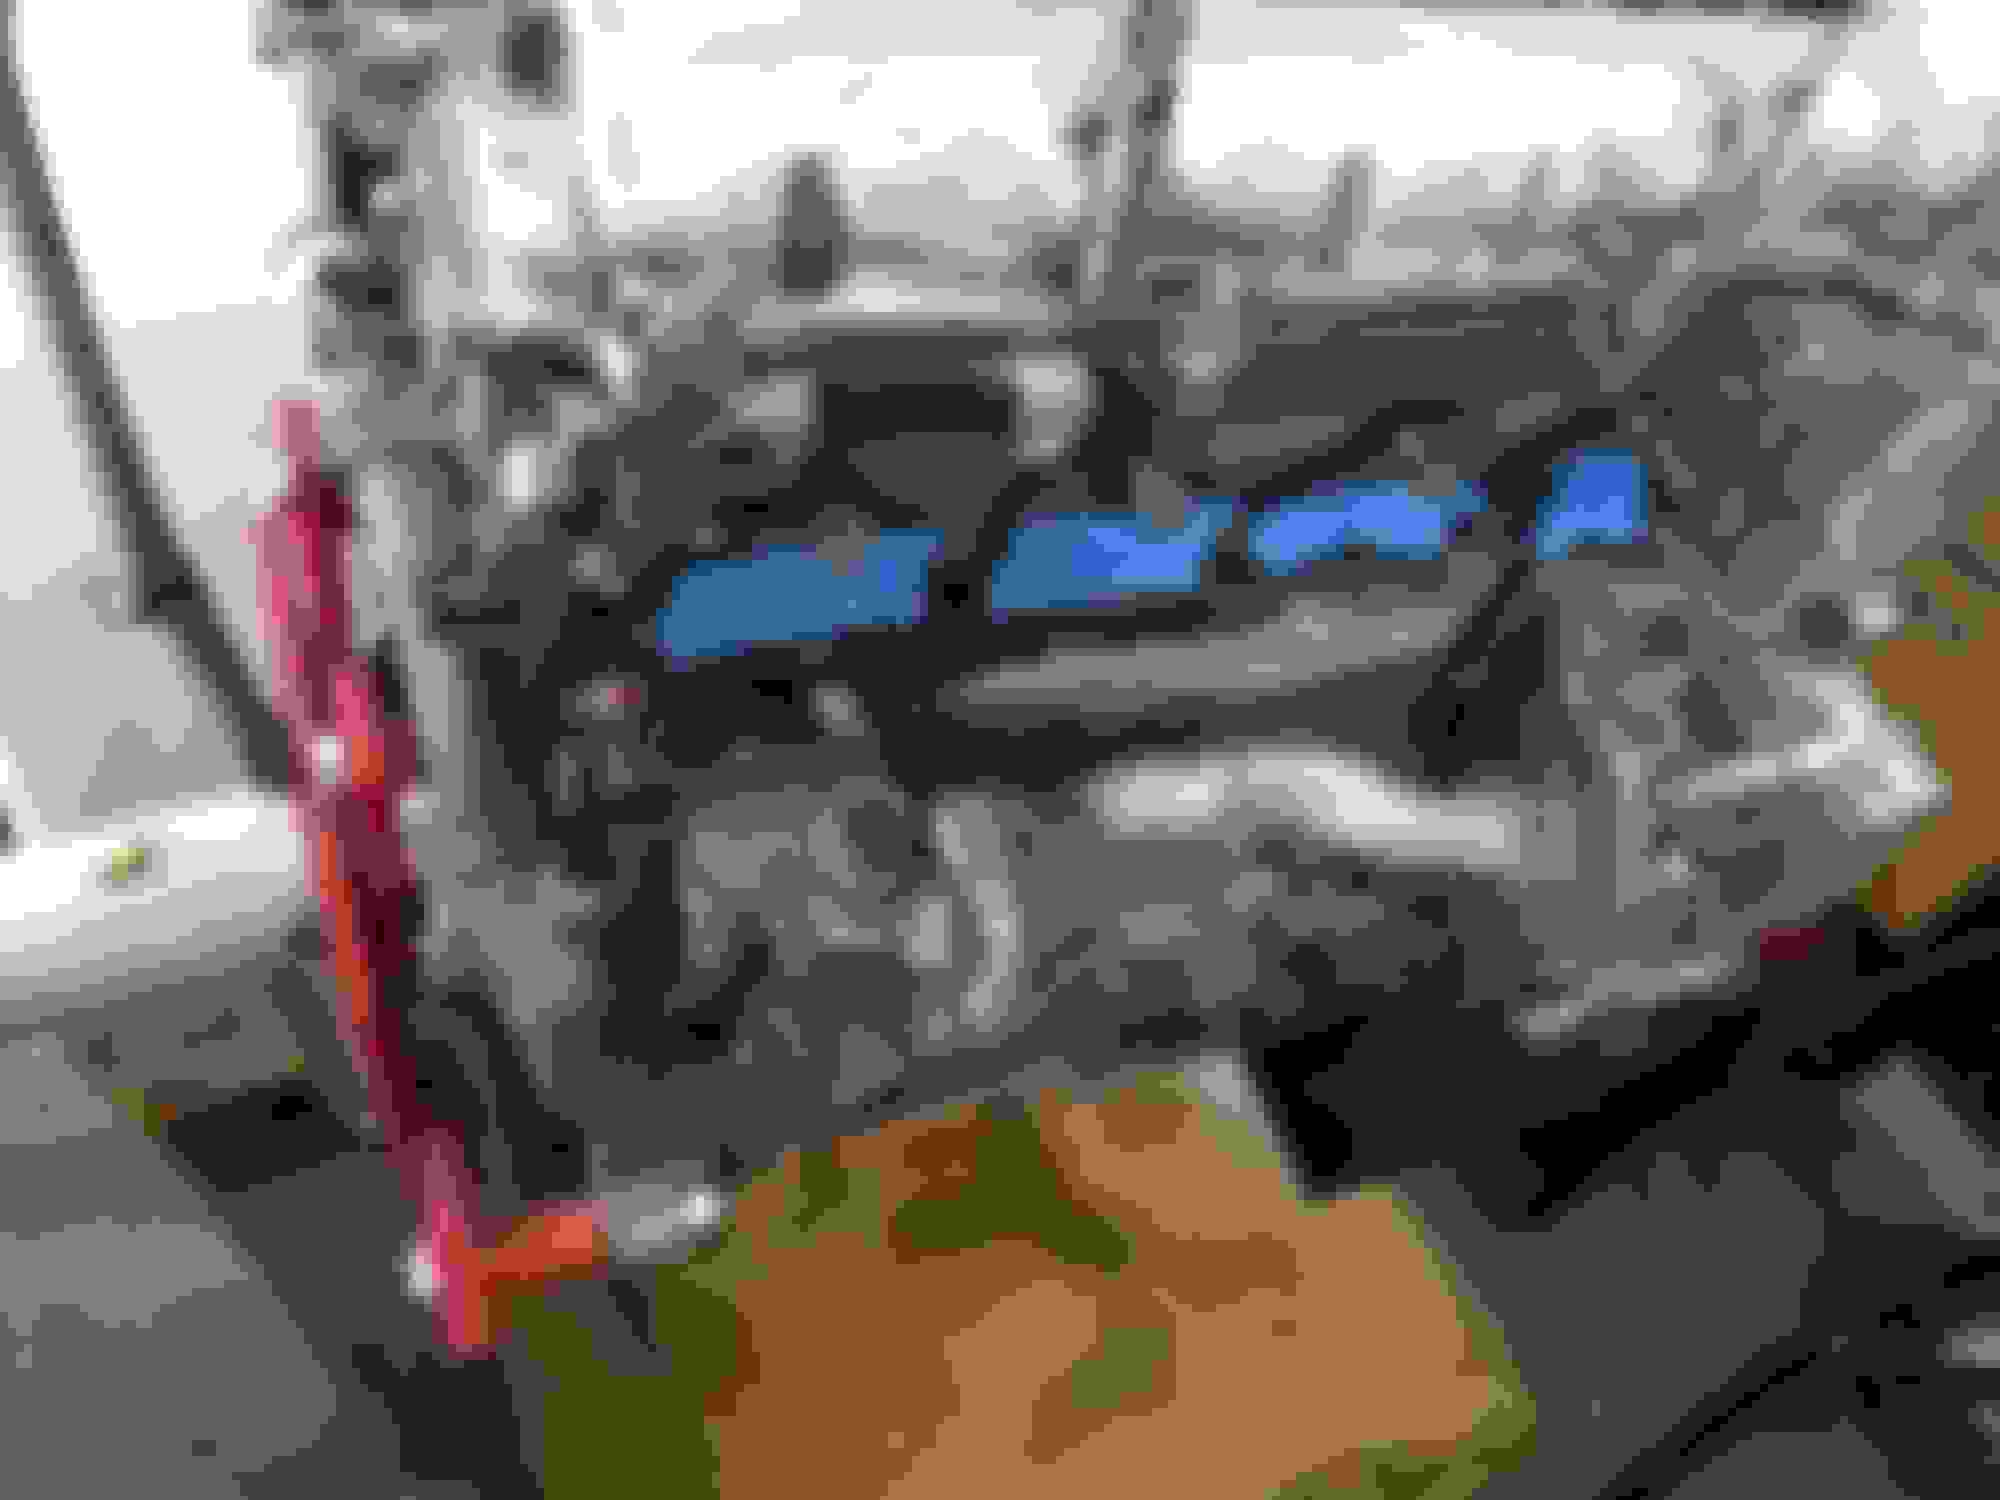
An eagle eye will spot the part that doesn't belong:


I used a thermostat housing from a 2.2 cavy. Word on the street is it will clear the Miata trans. The original requires a spacer, and this was easier (and doesn't leave the pipe crooked). Didn't do much last night otherwise, just drained the Miata motor and moved it out of the way. Right now I'm waiting on some arp bolts so I can mate the engine to the trans, then put the frame down on it. After that is fitting everything for welding brackets.
Reply
Old Aug 10, 2018 | 11:43 PM
  #166  
T-Man's Avatar
Senior Member
iTrader: (3)
 
Joined: 12-07-09
Posts: 1,461
Likes: 89
From: The Desert
Some fine progress with this lovely weather we're having! Nice job.
Reply
Old Aug 11, 2018 | 12:10 AM
  #167  
exninja's Avatar
Thread Starter
Senior Member
iTrader: (1)
 
Joined: 02-20-09
Posts: 6,268
Likes: 419
From: UT
Thanks! It's humid but bearable
Reply
Old Aug 11, 2018 | 08:07 AM
  #168  
ProfDNS's Avatar
Senior Member
 
Joined: 01-31-16
Posts: 5,330
Likes: 549
From: Frozen Wasteland of the North
Slowly but surely.
Reply
Old Aug 11, 2018 | 12:37 PM
  #169  
exninja's Avatar
Thread Starter
Senior Member
iTrader: (1)
 
Joined: 02-20-09
Posts: 6,268
Likes: 419
From: UT
Painfully slow but yes, progressing. I'm doing more than I thought I would during the summer. I've been held up by parts a lot.
Reply
Old Aug 11, 2018 | 03:13 PM
  #170  
ProfDNS's Avatar
Senior Member
 
Joined: 01-31-16
Posts: 5,330
Likes: 549
From: Frozen Wasteland of the North
You're not in a huge rush to finish it either since there is no "deadline" really. Just as soon as possible but not at a break-neck pace.
Reply
Old Aug 11, 2018 | 03:29 PM
  #171  
exninja's Avatar
Thread Starter
Senior Member
iTrader: (1)
 
Joined: 02-20-09
Posts: 6,268
Likes: 419
From: UT
My goal is to be able to enjoy it before next summer, especially since they are repaving a really fun road nearby. The hard part will be getting the electrical sorted since I'll basically be splicing together two harnesses. But yes, no deadline makes for a relaxing build as long as I can keep working on it.
Reply
Old Aug 26, 2018 | 04:21 PM
  #172  
exninja's Avatar
Thread Starter
Senior Member
iTrader: (1)
 
Joined: 02-20-09
Posts: 6,268
Likes: 419
From: UT
Small update.
Been doing some grinding this week. First I notched the bell housing so that the starter will fit:


Then I started putting the clutch, etc. together. The holes that I drilled in the flywheel were spot on. The ring gear of the flywheel interferes with the starter very slightly, so rather than remove the ring gear I just grinded the starter a little:


Loctite on the flywheel bolts, install the clutch, and the adapter plate:


Now just need to mate it to the transmission then I'll lower the frame onto it to start the wire harness.

Last edited by exninja; Aug 27, 2018 at 10:53 AM.
Reply
Old Aug 26, 2018 | 05:20 PM
  #173  
Snail_SS's Avatar
Moderator
Platinum Member
Moderator
iTrader: (3)
 
Joined: 04-18-14
Posts: 16,421
Likes: 603
From: El Paso, TX
That's reminds me of all the work I need to do on my car lol good progress man!
Reply
Old Aug 27, 2018 | 06:01 AM
  #174  
63 Nova SS's Avatar
Senior Member
iTrader: (3)
 
Joined: 06-12-12
Posts: 5,466
Likes: 316
From: Indiana
Notched the bellhousing- that's putting it mildly.
Reply
Old Aug 27, 2018 | 10:50 AM
  #175  
exninja's Avatar
Thread Starter
Senior Member
iTrader: (1)
 
Joined: 02-20-09
Posts: 6,268
Likes: 419
From: UT
Originally Posted by Snail_SS
That's reminds me of all the work I need to do on my car lol good progress man!
Thanks Snail! good luck on your swap

Originally Posted by 63 Nova SS
Notched the bellhousing- that's putting it mildly.
hahahahahahaha took forever with a grinder, made a mess, and still might be short (you can see the original line i marked).
Reply


All times are GMT -4. The time now is 08:28 PM.