2.0 LNF Engine: ZZP's ZFR Turbo Installion
 10-07-2012, 10:40 PM
#1

ZZP's ZFR Turbo Installion
I take no responsibility for your ignorance if you damage your car or hurt/kill yourself. Put the car on jack stands. Wear gloves and safety glasses where required. Not all exact step-by-step’s are covered here, but you’ll get a detailed understanding of what is needed to be done. Be safe and use your head.
I’ve written a helpful how-to on installing ZZP’s ZFR turbo (A Borg Warner EFR 6758 - ZZPerformance - ZFR Turbo #ZZ-ZFR ). This will probably work for any turbocharger installation though as all the steps are the same. I took around 10-12 hours for everything which includes dinner and a trip to home depot for a make shift breaker bar. I was in no hurry and took my time. Expect bolts to be seized/rusted if you have a lot of miles on your car. You’ll see why it took me so long. This turbo wasn’t exactly direct bolt-on. Some minor modifications had to be made to make it work.
Let’s get started. I’ve broken down things into categories to help you understand what’s needed before you just jump into a turbo swap like this.
Experience:
Personally, I’ve only done a turbo install on my 92 Dodge Stealth so this is my second time doing something like this (well 3 if you count 1 for each turbo on the Stealth lol). I don’t think much automotive knowledge is required here, but you haven’t at least done your own exhaust, intake, or intercooler installs I’d stay away from this one.
Requirements:
You’re going to want/need all of the basic upgrades (intake, downpipe, intercooler, etc) before swapping this turbo in. Reason being it’s just not cost effective to choke the new turbo with narrow exhaust piping and such. Also, from a reliability stand point; you are not going to want plastic parts such as your stock intercooler and charge piping on this setup. A new clutch will also be something to consider based on how much torque you want to make.
Plan to get a new tune with this turbo as well. You’ll still be able to drive the car around after the install, but I wouldn’t put off getting a tune too far away on your schedule.
I bought new gaskets for my install. I don’t think there is a reason to be a cheap ass for $20 worth of gaskets on a $2000 turbo. Some of my banjo bolt gaskets/washers tore when loosening them so it’s a good idea to at least purchase those.
Coolant Banjo Washers - 12626102 (3 are needed)
Turbo Oil Return Gasket - 12589435
Turbo Mounting Gasket - 12618586
Exhaust manifold Gasket – 12622668 (if you have to take off your exhaust manifold)
Tools:
You need lots of them. I’m not going to go into detail here, but here is a picture of what I had pulled out of my box after install was done. Ratchet wrenches aren’t required, but make things much easier. Various ratchet extensions and swivels are needed to reach hard to get to nuts/bolts.
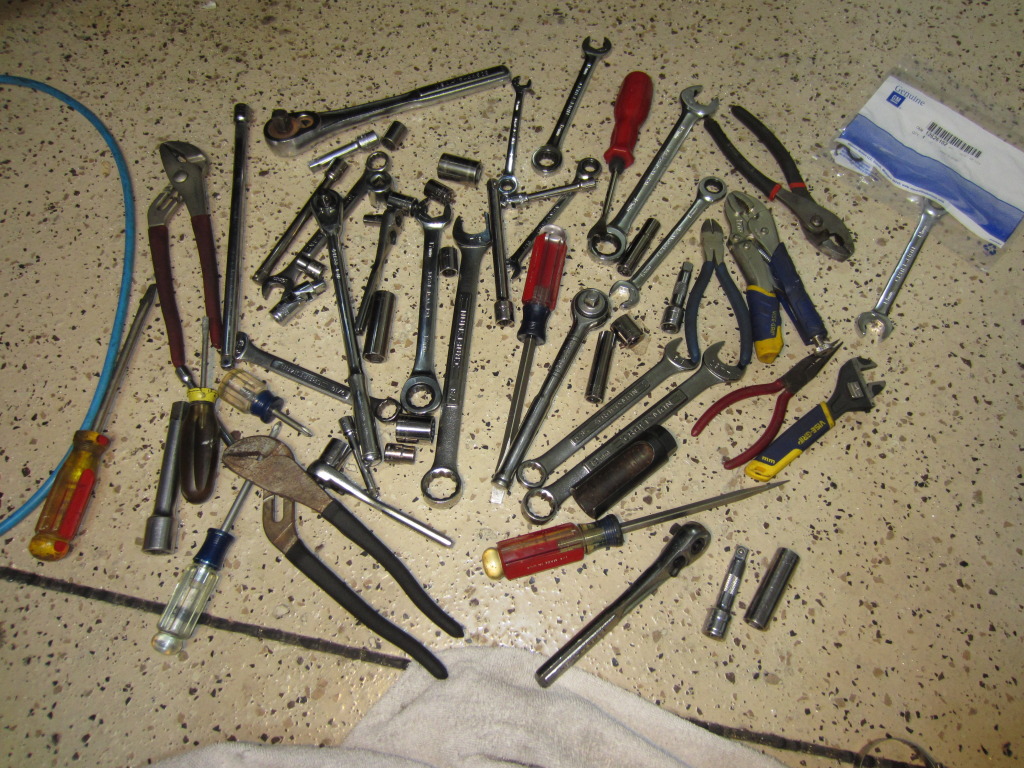
Also, organization goes a long way. Set aside nut or bolts in a specific area or screw them back in after taking off the part. Guessing which bolts go to where can be no fun.
Losing a ratchet and trying to find it during install can eat up even more time. You can easily see here which sockets I have out.

Procedure:
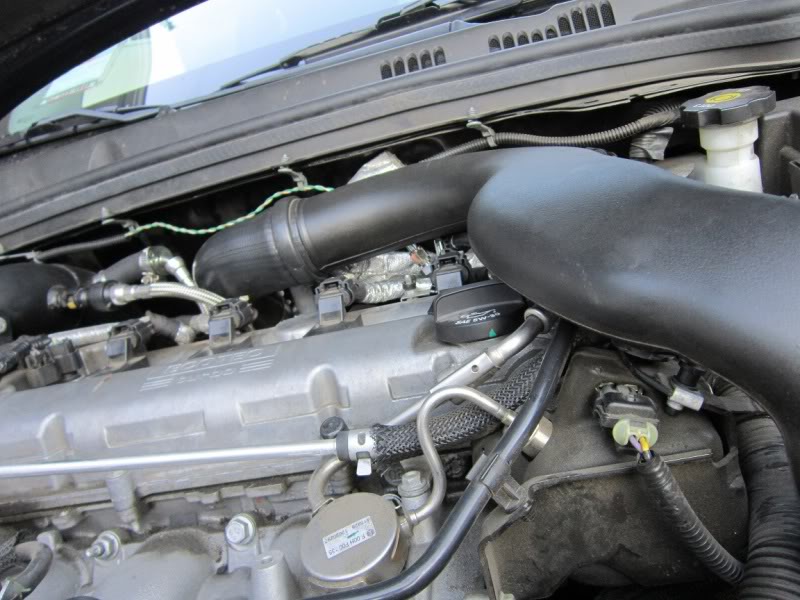
1. Remove your charge pipe and intake piping. Get it all out of the way. The PVC tube that goes from the turbo to the valve cover can be tapped out with a flat head screw driver and a hammer. Key word here - "tapped".
2. Remove the 2 top heat shield bolts seen here ( 10mm). All heat shields have to be removed for this turbo to fit.
3. Remove your downpipe. There are 4 15mm buts holing it in place. Also you will be losening the bolts for the bracket that supports the downpipe and o2 housing. You won't be able to fully remove this bracket until the o2 housing bolts are also loose.
4. Remove secondary o2 sensor from the pipe before completely removing it. Unplug the 02 sensor from the engine. The connector is near the rear transmission mount. There are 3 15mm bolts that connect the downpipe to the rear exhaust portion.
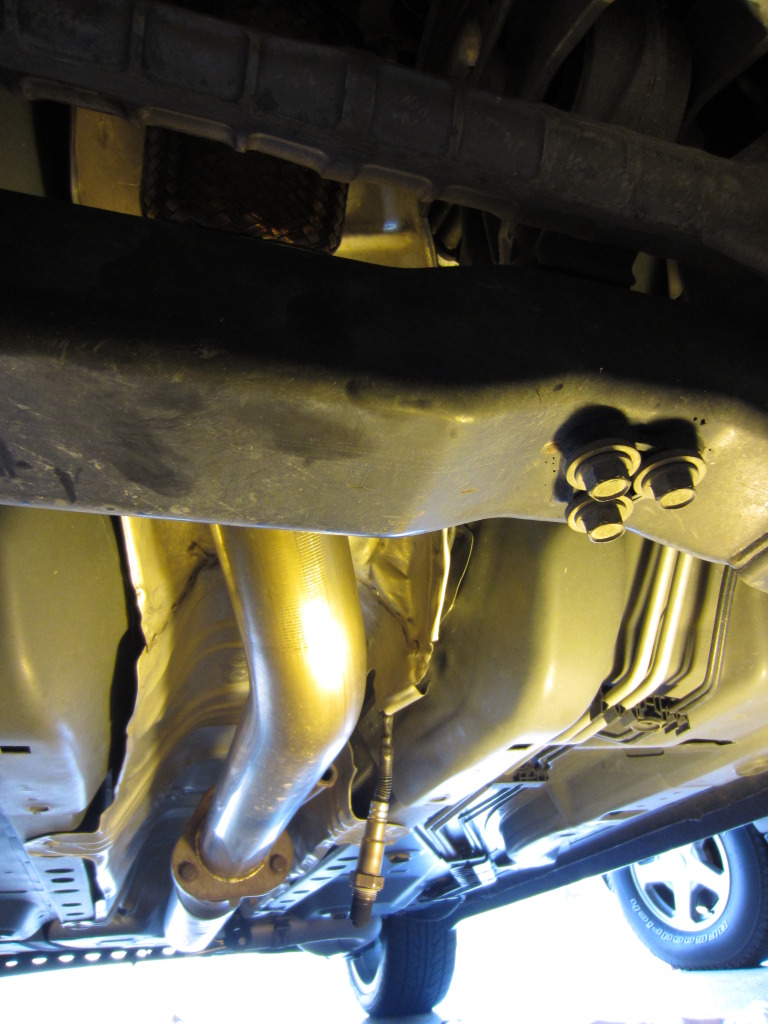
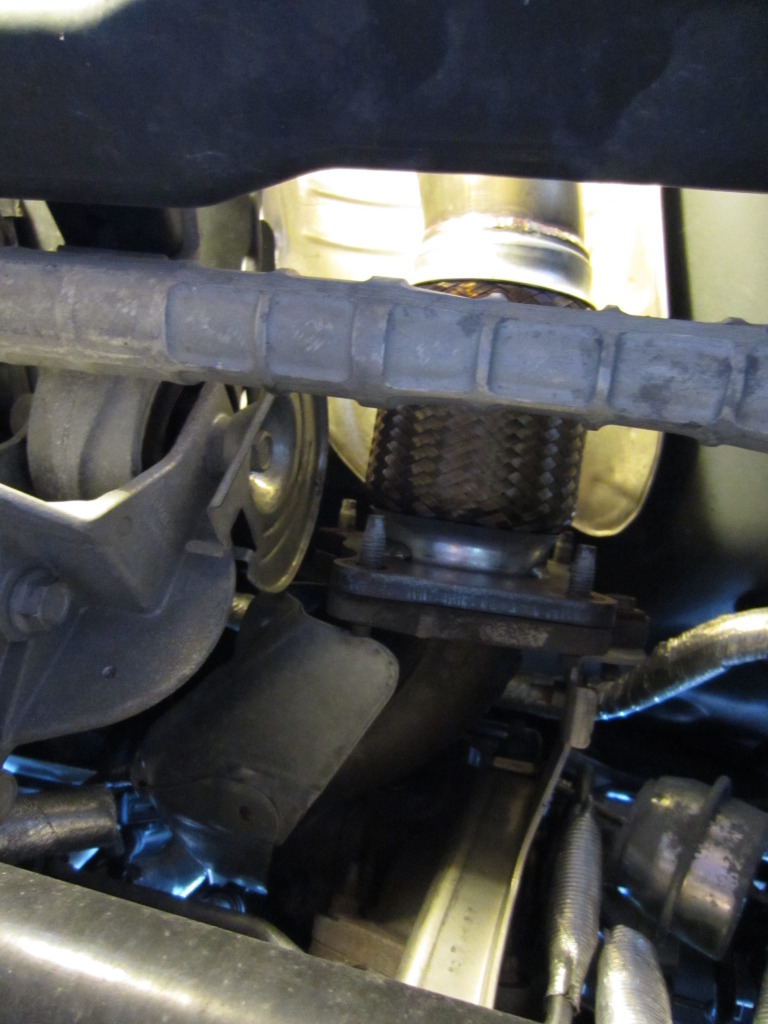
5. Remove rear transmission mount. This turbo is big. Extra clearance is needed to just get it behind the engine. Bolts are 18mm.
6. No one wants coolant falling on their face after removing the coolant lines so here is where to drain it. It’s the bolt pointed toward the very bottom of the water pump hosing. Take off the coolant overflow tank cap to help it come out faster. You can pick up a gallon of Dex cool just about anywhere. It’s red/orange in color.
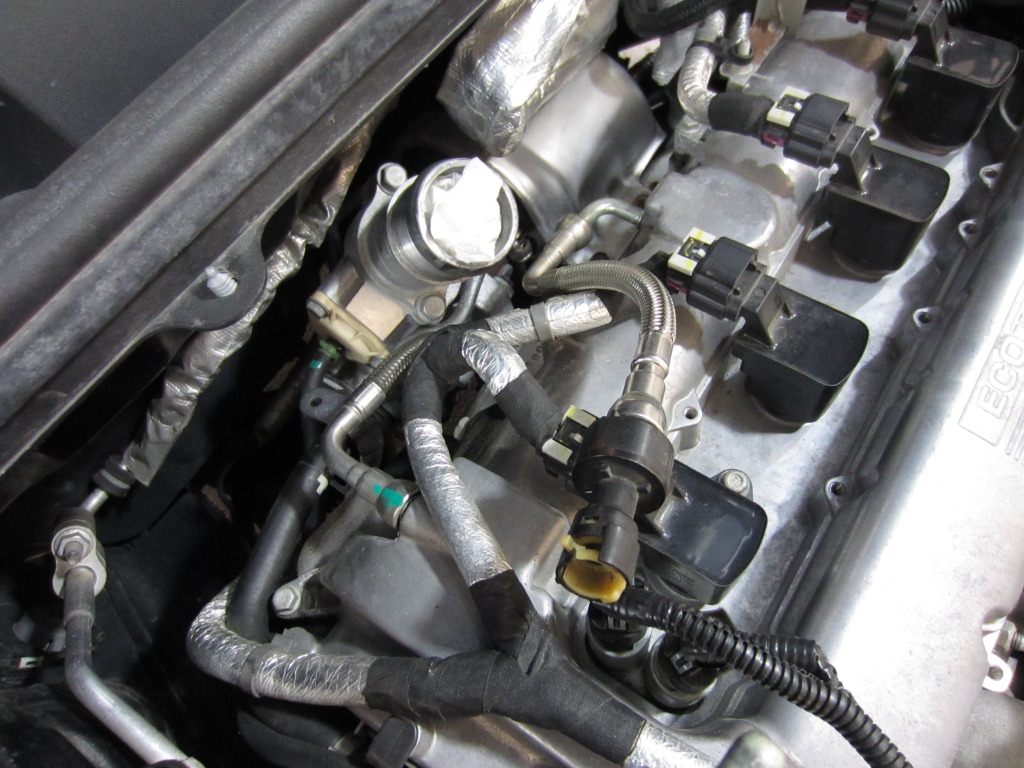
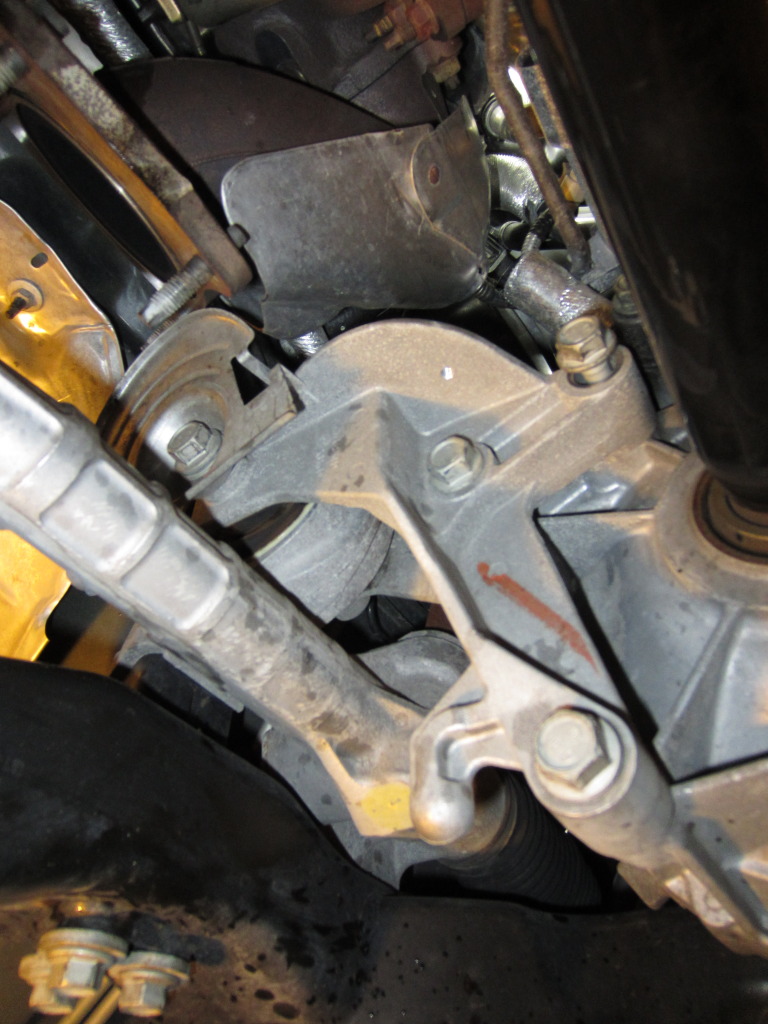
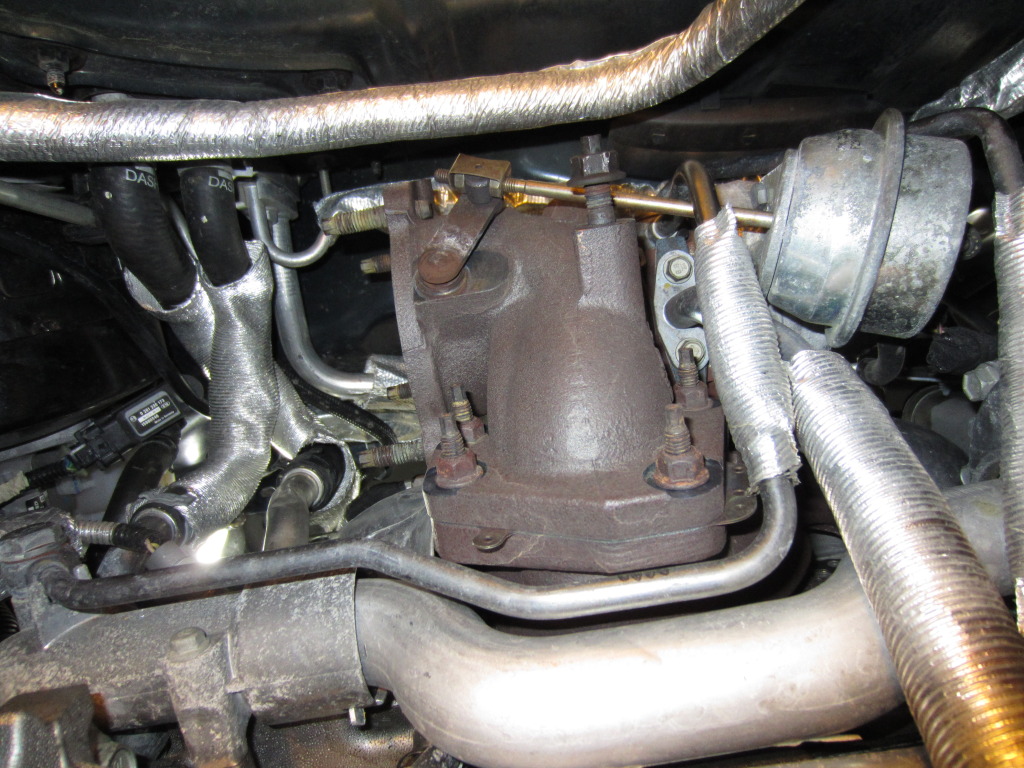
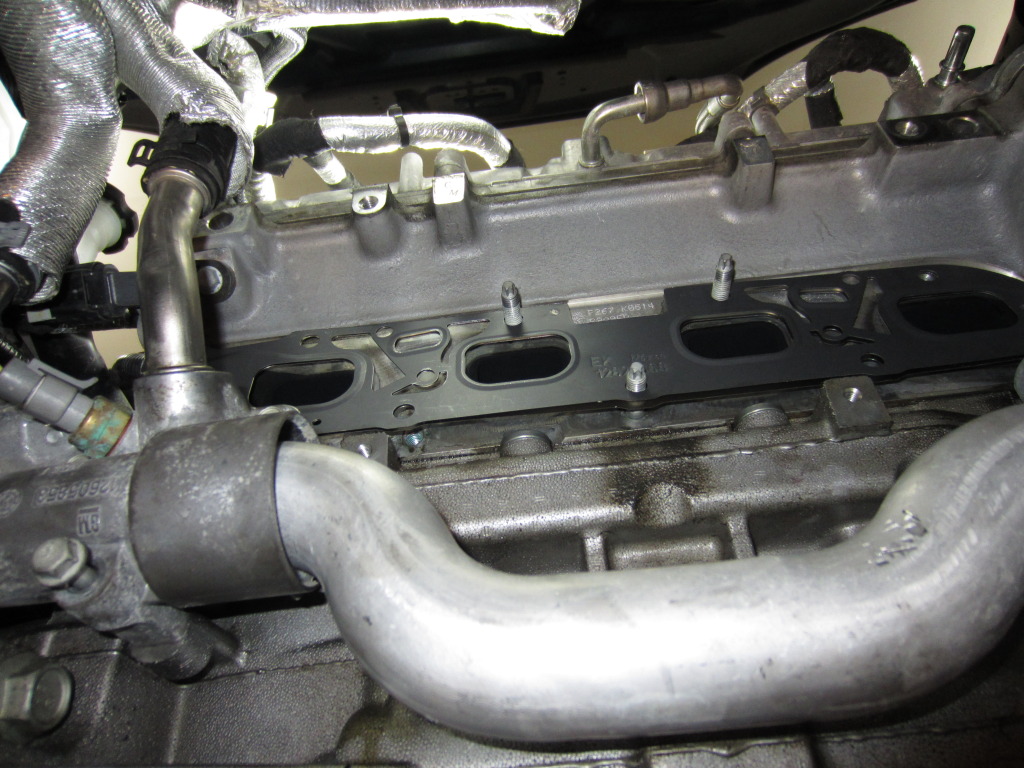
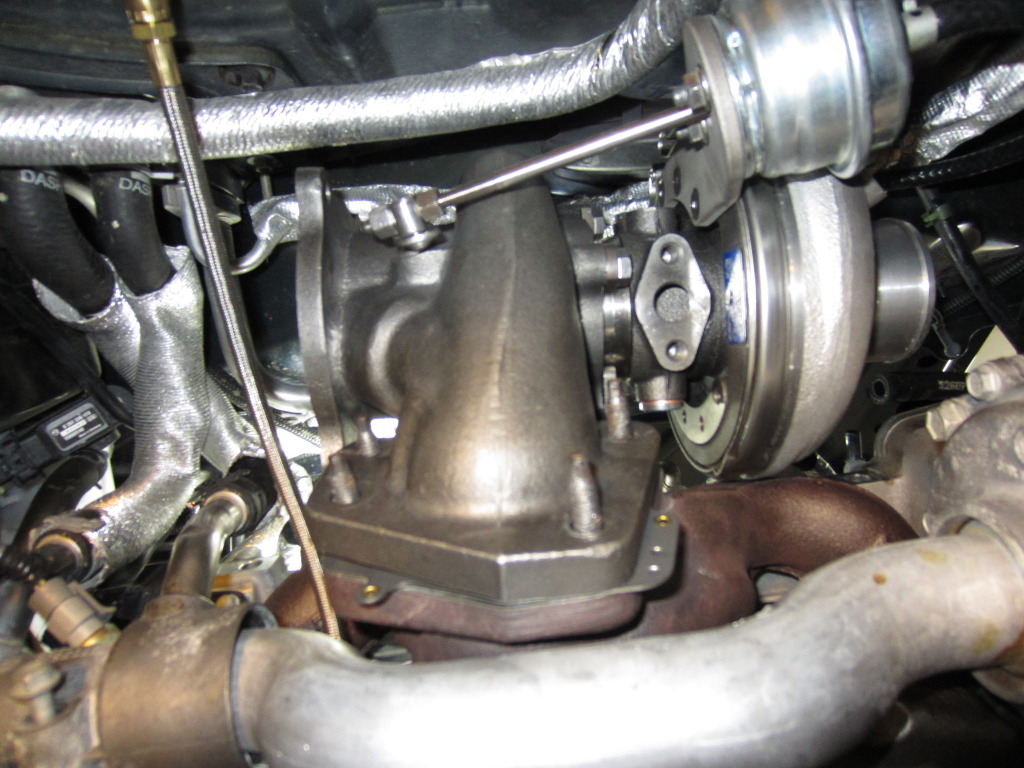
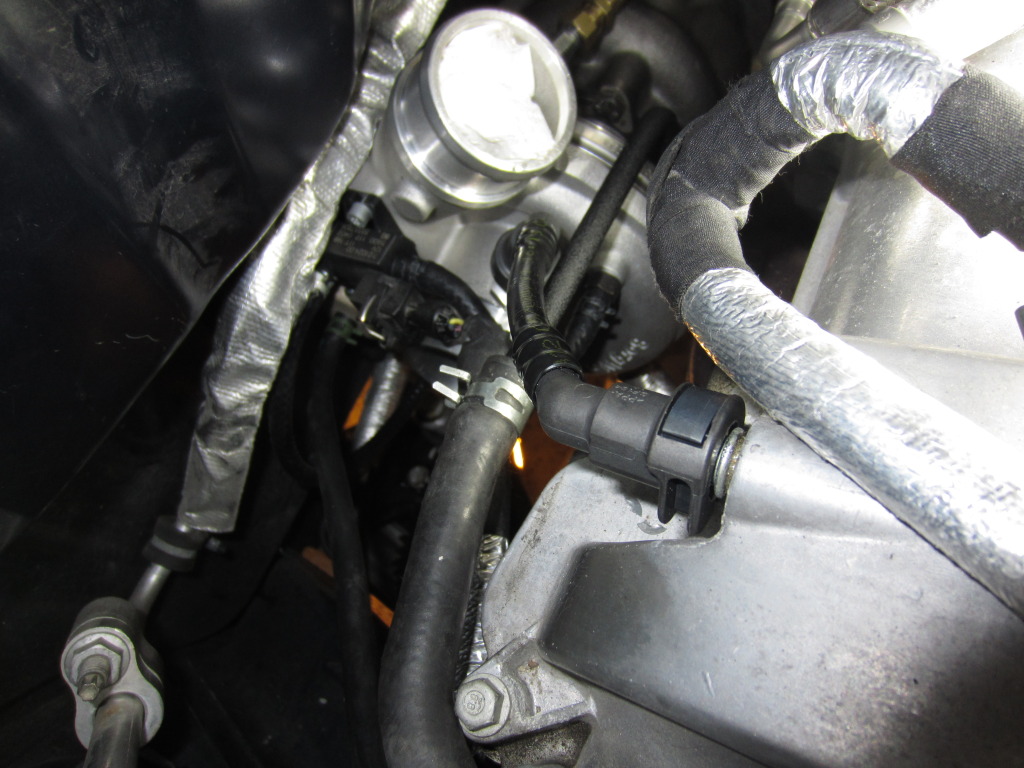
7. Unplug the primary o2 sensor shown here. On the bottom you’ll want to remove the turbo heat shields as well (10mm). Some of the bolts are hard to reach and you’ll want to blindly feel around for them to get a wrench on each one. Some are more easily accessed from the top and other’s the bottom. The very top heat shield cannot be taken out until you remove the o2 housing so just let it rest in there. The primary o2 sensor is 7/8” and I used a special o2 socket to break it free from the top. There is a guide somewhere on here for more specific instructions. You may also be able to leave the o2 sensor installed and just remove the whole 02 housing with it bolted in.
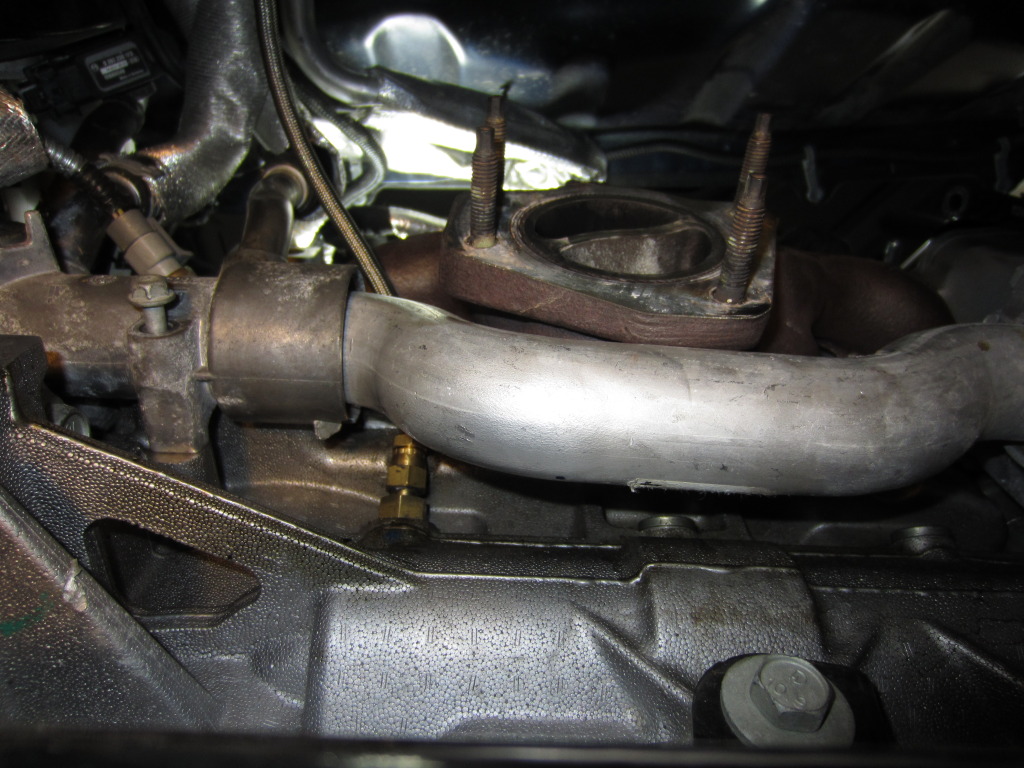
8. The o2 housing can be removed after the heat shields (the exhaust manifold heat shield will still be there). There are 15mm bolts and there are 4 of them. I found that 2 are reached more easily from the top and the other 2 from the bottom. Here is a picture of the o2 housing removed.
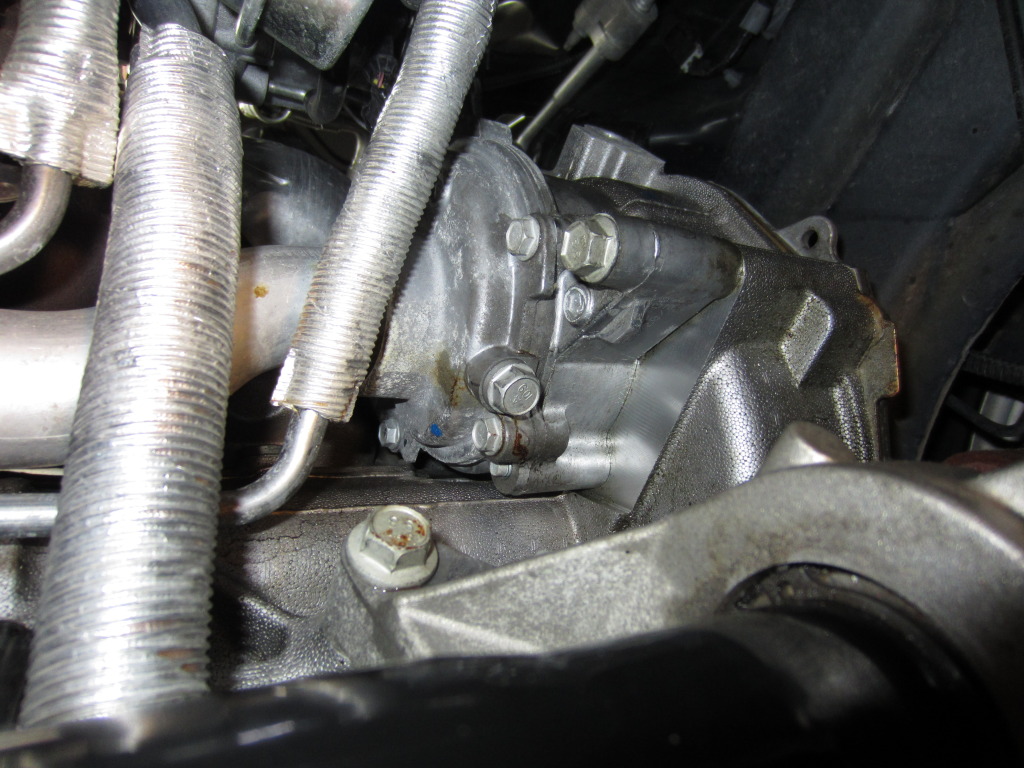
9. You can go in any order you want from there, but basically you are removing the oil feed/return lines and then the coolant feed/return lines. In my case, I started to remove the oil return line as shown (10mm bolts).
10. The oil feed line banjo bolt can be tricky to get to. I didn’t want to mess with removing the thermostat housing so I rotated the water pump tube outward with channel locks. Do it carefully and slowly and you won’t rip/damage the seals. It will leave enough space to get at the bolt with a 19mm wrench.
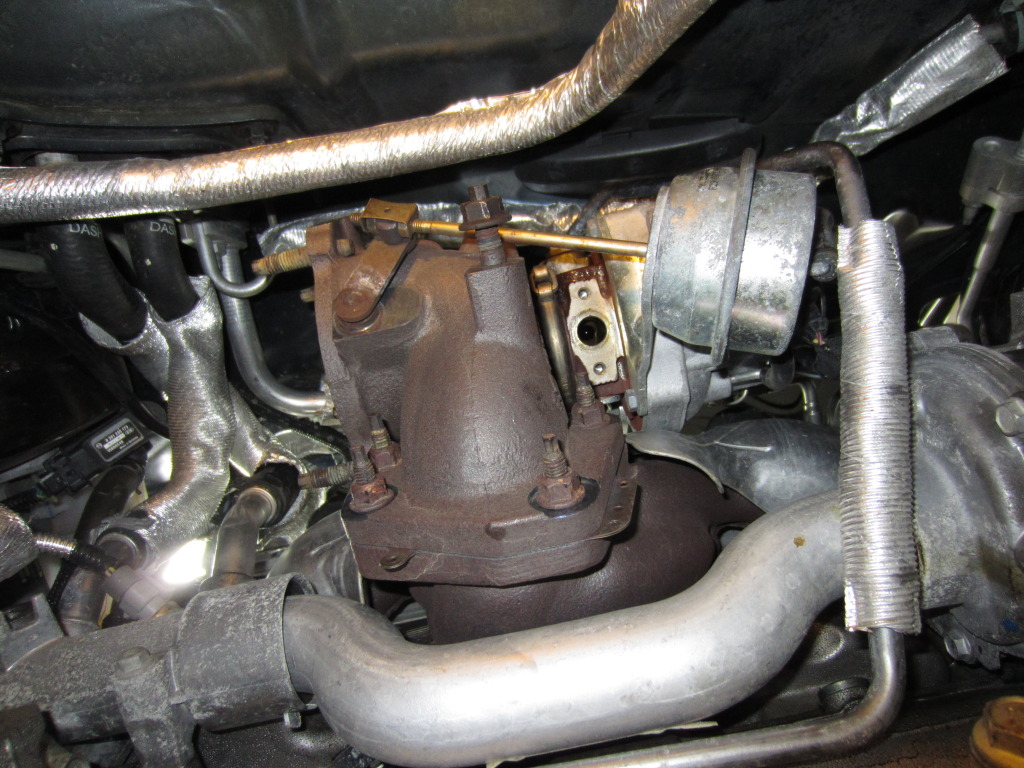
11. If you haven’t already, remove the plug and vacuum tube connections on the compressor side of the turbo. After removing the coolant and oil lines you should be able to remove the entire turbo from here. All of the banjo bolts are 19mm and aren’t too hard to get to minus the oil feed one explained above. The turbo exhaust housing bolts are 15mm and there are 4 of them.
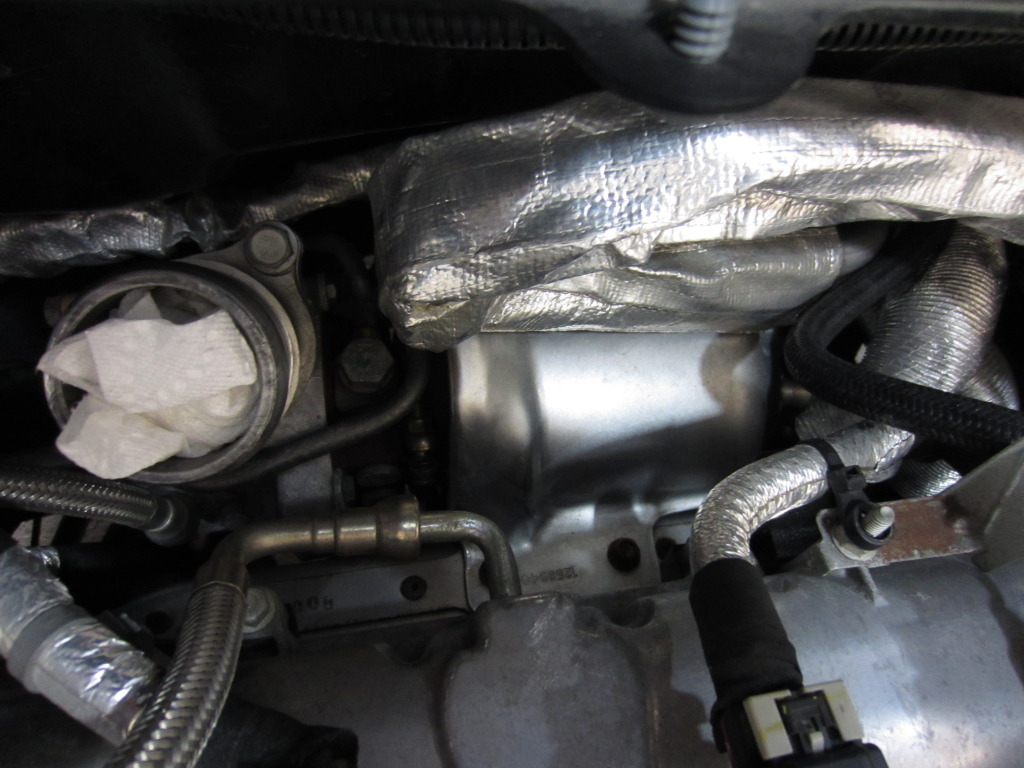
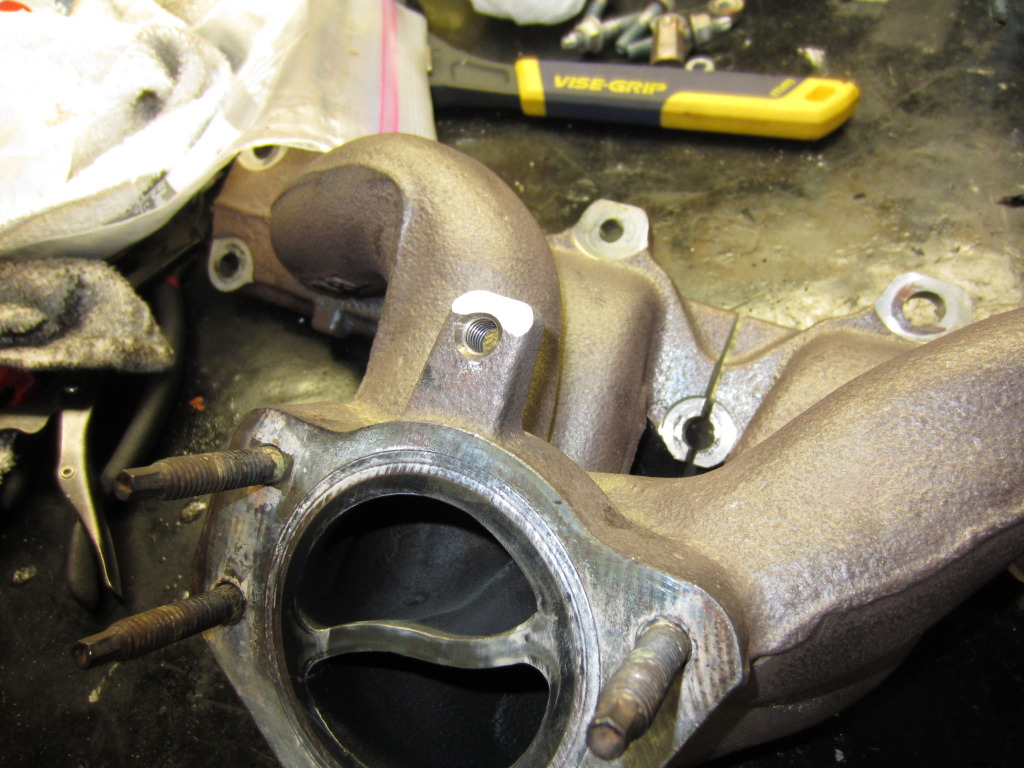
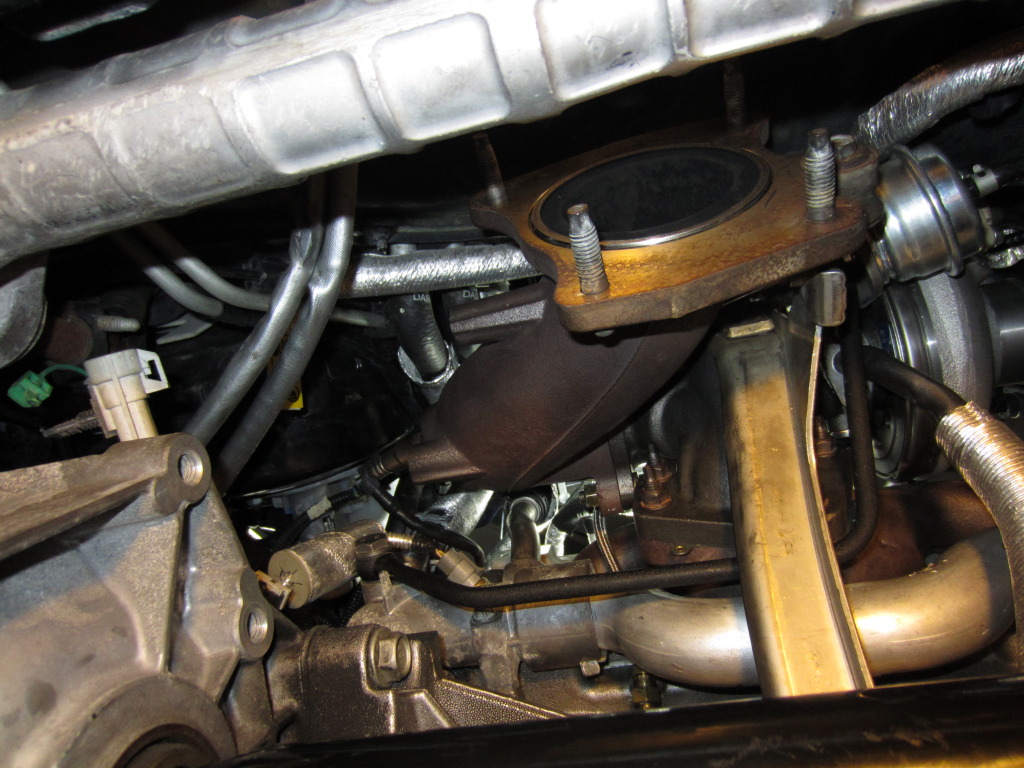
12. Remove the exhaust manifold heat shield and the entire manifold if you need to. I had a new gasket ready to go. The only way you’ll know if you need to remove the manifold is if the turbo doesn’t bolt down all the way. Mine was hitting part of the manifold which wouldn’t allow a tight seal between the 2 pieces.
13. You can see here I had to grind a small selection off the exhaust manifold to make the new turbo fit correctly. You may not have to grind off anything or you may have to grind more or in a different area. This is really a case by case basis and ZZP will probably get this casting issue worked out in the future, but for now a hand file will work if you don't have power tools. I used my bench grinder for this.
14. Before installing the new turbo I (obviously) put back the exhaust manifold (several 10mm and one 13mm bolt) and threaded in the oil feed line first. It’s the tightest area and I think it was easier to do this first. I put some gasket maker on the threads to ensure a tight fit. It probably doesn’t need to be done and was just for peace of mind for me. You can see in this picture I have the water pump tube rotated backward so I could fit my wrench in there.
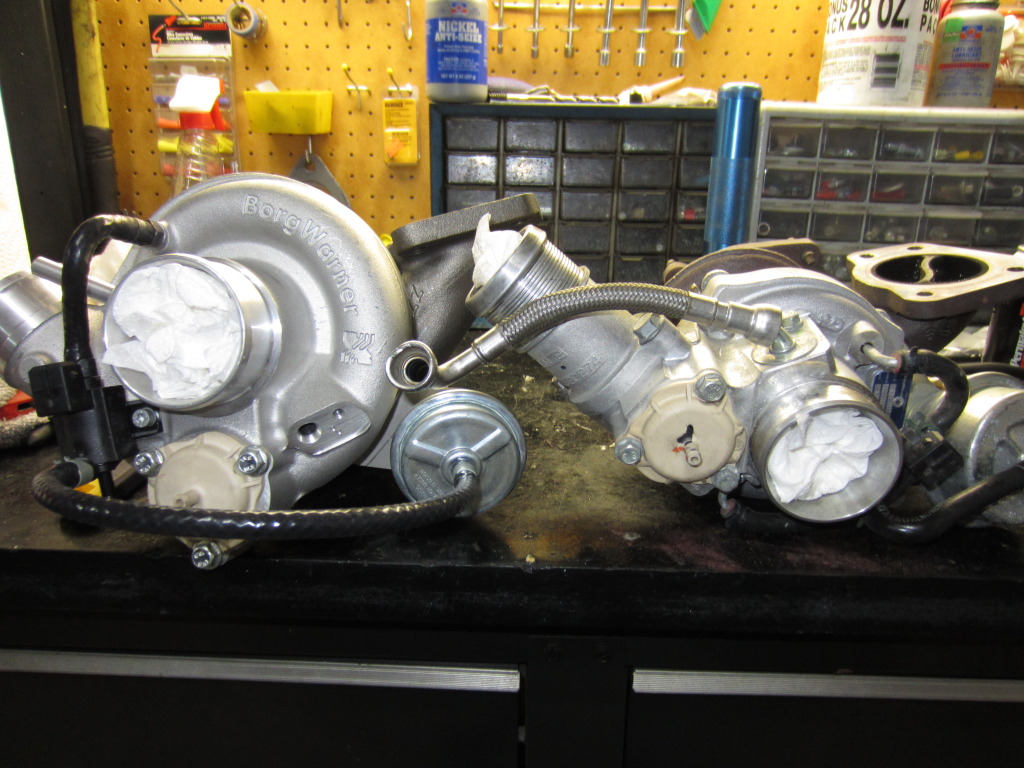
14 1/2. You can see in this picture a side by side comparison of the size. The compressor side is so large you’ll have literally millimeters of space between the firewall and exhaust manifold. You will now see why removing all the heat shields are required. I also recommend keeping all the holes in the turbo plugged until last minute. Unknowingly dropping something in there will ruin the turbo on startup and the engine too if you’re lucky enough to drop something into the compressor side.
15. It’s time to install the new turbo. You’ll want to lift and rotate it as necessary to get it mounted on the exhaust manifold. Beware of the AC line towards the firewall. You will have to bend it out of the way to get the turbo to fit. If you damage that AC line – getting a new line and recharge will be costly. Be careful.
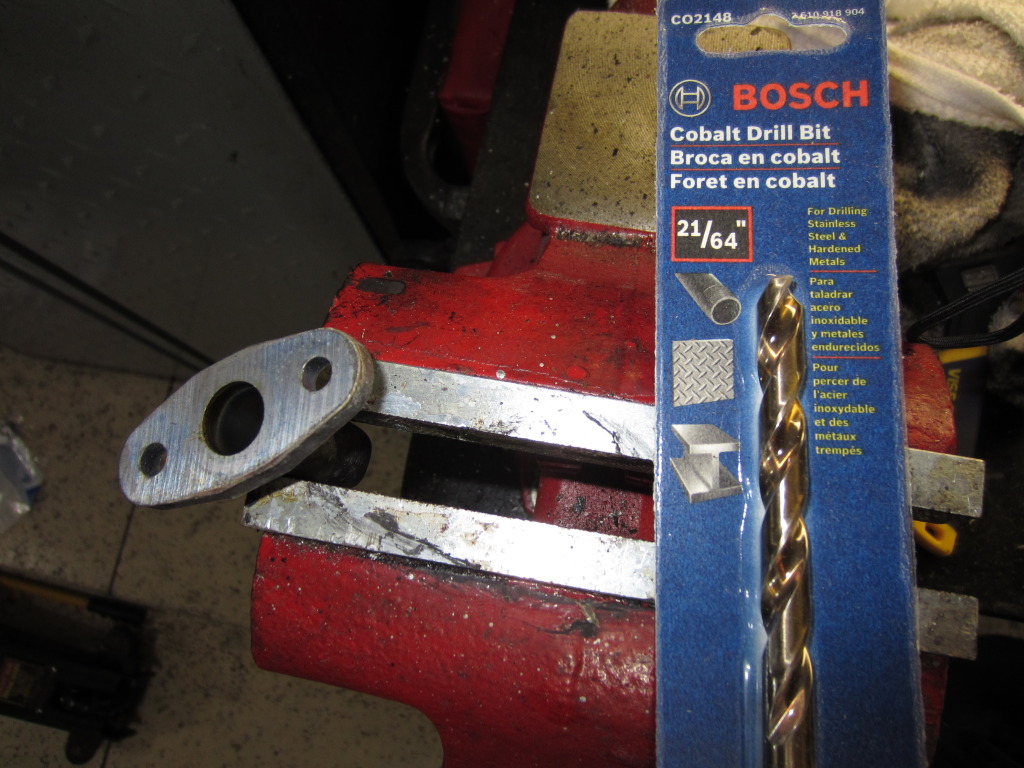
16. Before starting to install the new oil/coolant lines the oil return line will need to be modified to fit the new bolts that go into the turbo. You need a 21/64th drill bit. I had all sorts of drill bits, but this size isn’t exactly common so I had to buy one. Be sure to remove all metal shavings and clean out the tube with brake cleaner to ensure all metal is cleared from the tube. Metal shavings in the oil pan = bad.
17. Here is the oil return line installed. Exact opposite of removal just with the new bolts supplied with the turbo.
18. Here is the new coolant return line installed. Don’t forget to use the new gaskets if you ordered them. Remember banjo bolts are hollow. They do not need to be super tight or will snap off when torqueing. Then you will have a much larger project on your hands.
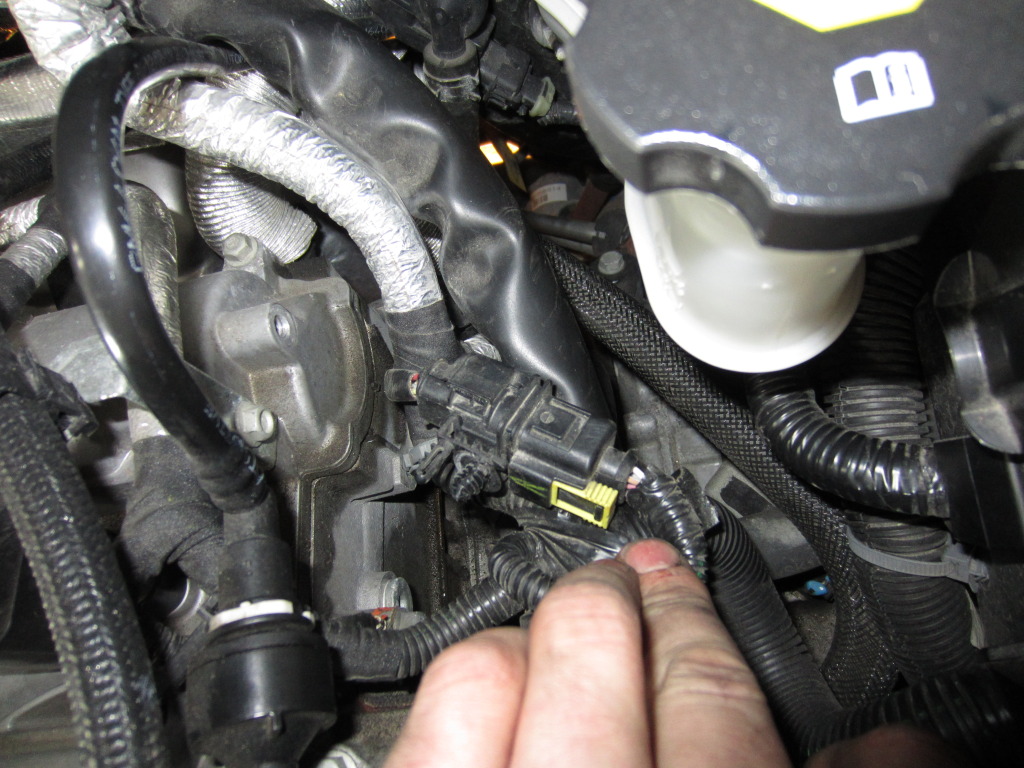
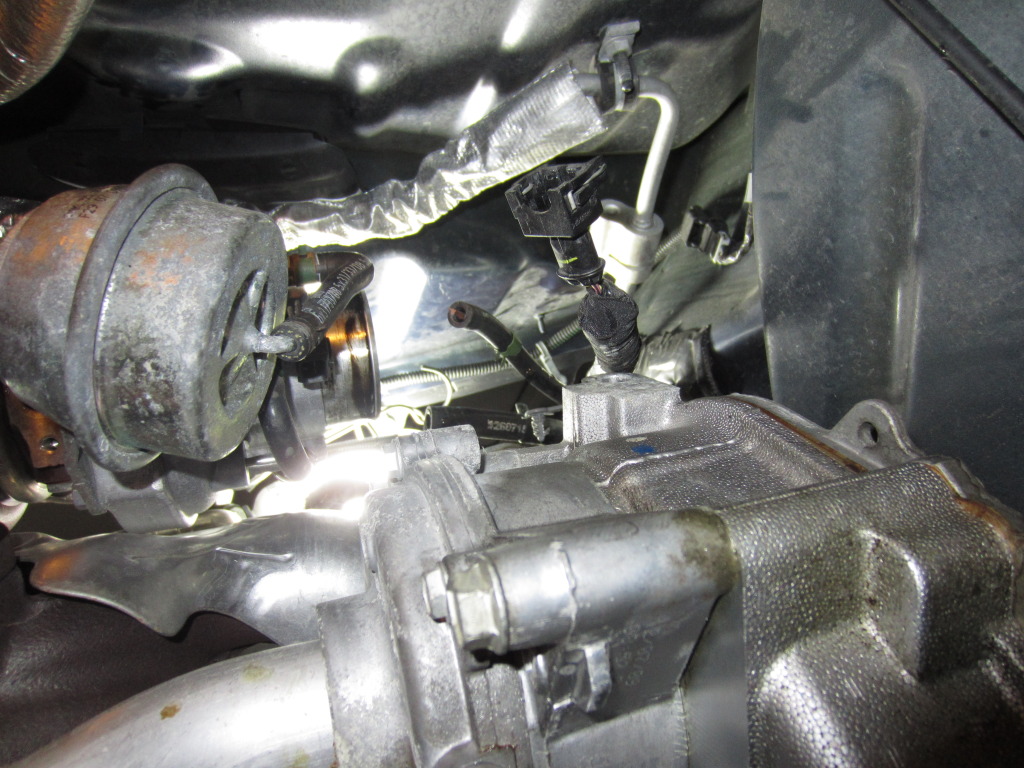
19. Here is a top shot of the coolant feed line, PCV line, and vacuum line hooked up. You can also see how I bent the AC line upward to clear the turbo compressor side.
20. When bolting back on the o2 housing you may need to position a wrench on the top and then thread the nut from the bottom. If you don’t have any friends like me, putting tape over the bolt head temporarily will do just fine to hold the wrench snuggly on while you tighten the nut from the bottom. I had a picture for this, but I'm limited to 25 pictures per post so I left this one out.
21. Here is a picture of after the o2 housing is installed with the new bolts supplied. I also screwed back in my o2 sensor at this point and connected it.
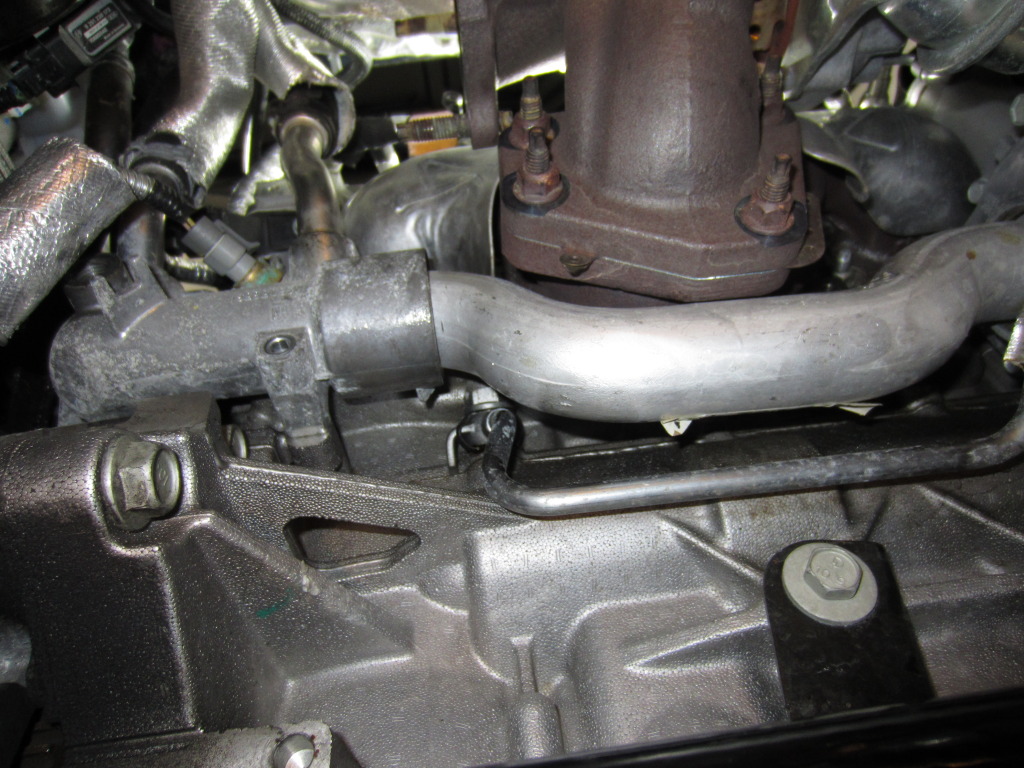
22. Here is where I didn't go in the best order. You can bolt the downpipe back on before you bolt the transmission mount back, but it's much more difficult to do so. Make sure you put the mount on first or the downpipe will be in the way of the long transmission bolts that thread through the mount. Don’t forget to put the secondary o2 sensor back as well.
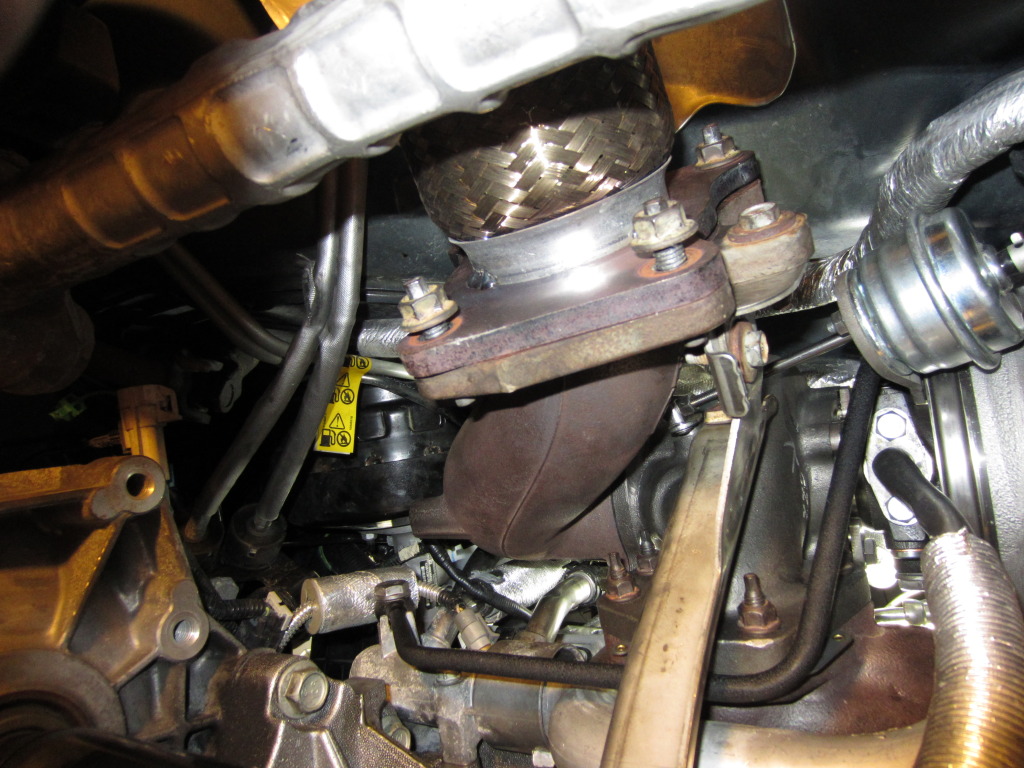
It’s important to note that I used nickel anti-seize for the exhaust housing and downpipe studs for easy future disassembly. Nickel anti-seize is not your regular formula in any auto parts store. It’s for high temperature conditions – like a turbocharger. Normal anti-seize will burn off so don’t bother with it. You can purchase nickel anti-seize here if your auto parts store sucks: (Permatex 77124 Nickel Anti-Seize Lubricant,8 oz. : Amazon.com : Automotive ).
23. You’re pretty much done on the bottom. I also changed my oil which I think is good habit after installing a new turbo. Don’t put the car back on the ground just yet though. Make sure you add new coolant and fire up the car to check for exhaust, coolant, or oil leaks.
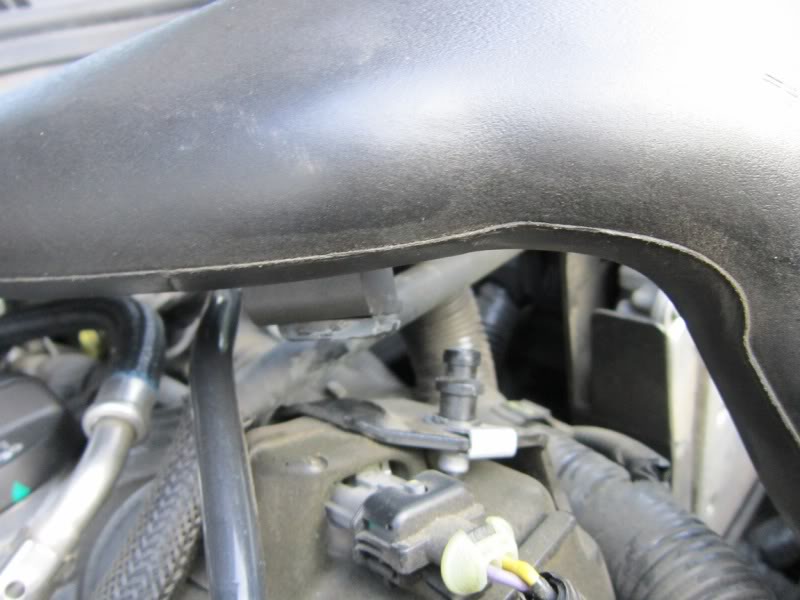
Some problems I ran into besides the exhaust manifold was my vacuum line off the turbo was a little short. I went out and spent $3 to get longer line. The stock one fit, but was a little too tight and I didn’t want to risk having it rub on anything. The second was my charge pipe. I have an upper Injen pipe and a lower ZZP pipe (ZZP was out of stock on the upper when I wanted to buy both of them). You can see here the pipe just doesn’t line up anymore. Keep this in mind if you have an upper charge pipe. Yours may not fit after the install.

I did fix this issue and was going to show how, but the forum limits me on the amount of pictures I can post.
I hope this guide was helpful to you. The ZFR is much louder than the stock K04 if you’re into that sort of thing. If no one was sure you had a turbo before, they will now.
I have an intake, exhaust, and intercooler setup. With this turbo, I made 397 WHP and 377 pounds of torque with 93 octane on 24 PSI. This is more power than a base C6 Corvette all while being about 300 pounds lighter. E85 fuel or a cam upgrade will net even more.
I’ve written a helpful how-to on installing ZZP’s ZFR turbo (A Borg Warner EFR 6758 - ZZPerformance - ZFR Turbo #ZZ-ZFR ). This will probably work for any turbocharger installation though as all the steps are the same. I took around 10-12 hours for everything which includes dinner and a trip to home depot for a make shift breaker bar. I was in no hurry and took my time. Expect bolts to be seized/rusted if you have a lot of miles on your car. You’ll see why it took me so long. This turbo wasn’t exactly direct bolt-on. Some minor modifications had to be made to make it work.
Let’s get started. I’ve broken down things into categories to help you understand what’s needed before you just jump into a turbo swap like this.
Experience:
Personally, I’ve only done a turbo install on my 92 Dodge Stealth so this is my second time doing something like this (well 3 if you count 1 for each turbo on the Stealth lol). I don’t think much automotive knowledge is required here, but you haven’t at least done your own exhaust, intake, or intercooler installs I’d stay away from this one.
Requirements:
You’re going to want/need all of the basic upgrades (intake, downpipe, intercooler, etc) before swapping this turbo in. Reason being it’s just not cost effective to choke the new turbo with narrow exhaust piping and such. Also, from a reliability stand point; you are not going to want plastic parts such as your stock intercooler and charge piping on this setup. A new clutch will also be something to consider based on how much torque you want to make.
Plan to get a new tune with this turbo as well. You’ll still be able to drive the car around after the install, but I wouldn’t put off getting a tune too far away on your schedule.
I bought new gaskets for my install. I don’t think there is a reason to be a cheap ass for $20 worth of gaskets on a $2000 turbo. Some of my banjo bolt gaskets/washers tore when loosening them so it’s a good idea to at least purchase those.
Coolant Banjo Washers - 12626102 (3 are needed)
Turbo Oil Return Gasket - 12589435
Turbo Mounting Gasket - 12618586
Exhaust manifold Gasket – 12622668 (if you have to take off your exhaust manifold)
Tools:
You need lots of them. I’m not going to go into detail here, but here is a picture of what I had pulled out of my box after install was done. Ratchet wrenches aren’t required, but make things much easier. Various ratchet extensions and swivels are needed to reach hard to get to nuts/bolts.
Also, organization goes a long way. Set aside nut or bolts in a specific area or screw them back in after taking off the part. Guessing which bolts go to where can be no fun.
Losing a ratchet and trying to find it during install can eat up even more time. You can easily see here which sockets I have out.
Procedure:
1. Remove your charge pipe and intake piping. Get it all out of the way. The PVC tube that goes from the turbo to the valve cover can be tapped out with a flat head screw driver and a hammer. Key word here - "tapped".
2. Remove the 2 top heat shield bolts seen here ( 10mm). All heat shields have to be removed for this turbo to fit.
3. Remove your downpipe. There are 4 15mm buts holing it in place. Also you will be losening the bolts for the bracket that supports the downpipe and o2 housing. You won't be able to fully remove this bracket until the o2 housing bolts are also loose.
4. Remove secondary o2 sensor from the pipe before completely removing it. Unplug the 02 sensor from the engine. The connector is near the rear transmission mount. There are 3 15mm bolts that connect the downpipe to the rear exhaust portion.
5. Remove rear transmission mount. This turbo is big. Extra clearance is needed to just get it behind the engine. Bolts are 18mm.
6. No one wants coolant falling on their face after removing the coolant lines so here is where to drain it. It’s the bolt pointed toward the very bottom of the water pump hosing. Take off the coolant overflow tank cap to help it come out faster. You can pick up a gallon of Dex cool just about anywhere. It’s red/orange in color.
7. Unplug the primary o2 sensor shown here. On the bottom you’ll want to remove the turbo heat shields as well (10mm). Some of the bolts are hard to reach and you’ll want to blindly feel around for them to get a wrench on each one. Some are more easily accessed from the top and other’s the bottom. The very top heat shield cannot be taken out until you remove the o2 housing so just let it rest in there. The primary o2 sensor is 7/8” and I used a special o2 socket to break it free from the top. There is a guide somewhere on here for more specific instructions. You may also be able to leave the o2 sensor installed and just remove the whole 02 housing with it bolted in.
8. The o2 housing can be removed after the heat shields (the exhaust manifold heat shield will still be there). There are 15mm bolts and there are 4 of them. I found that 2 are reached more easily from the top and the other 2 from the bottom. Here is a picture of the o2 housing removed.
9. You can go in any order you want from there, but basically you are removing the oil feed/return lines and then the coolant feed/return lines. In my case, I started to remove the oil return line as shown (10mm bolts).
10. The oil feed line banjo bolt can be tricky to get to. I didn’t want to mess with removing the thermostat housing so I rotated the water pump tube outward with channel locks. Do it carefully and slowly and you won’t rip/damage the seals. It will leave enough space to get at the bolt with a 19mm wrench.
11. If you haven’t already, remove the plug and vacuum tube connections on the compressor side of the turbo. After removing the coolant and oil lines you should be able to remove the entire turbo from here. All of the banjo bolts are 19mm and aren’t too hard to get to minus the oil feed one explained above. The turbo exhaust housing bolts are 15mm and there are 4 of them.
12. Remove the exhaust manifold heat shield and the entire manifold if you need to. I had a new gasket ready to go. The only way you’ll know if you need to remove the manifold is if the turbo doesn’t bolt down all the way. Mine was hitting part of the manifold which wouldn’t allow a tight seal between the 2 pieces.
13. You can see here I had to grind a small selection off the exhaust manifold to make the new turbo fit correctly. You may not have to grind off anything or you may have to grind more or in a different area. This is really a case by case basis and ZZP will probably get this casting issue worked out in the future, but for now a hand file will work if you don't have power tools. I used my bench grinder for this.
14. Before installing the new turbo I (obviously) put back the exhaust manifold (several 10mm and one 13mm bolt) and threaded in the oil feed line first. It’s the tightest area and I think it was easier to do this first. I put some gasket maker on the threads to ensure a tight fit. It probably doesn’t need to be done and was just for peace of mind for me. You can see in this picture I have the water pump tube rotated backward so I could fit my wrench in there.
14 1/2. You can see in this picture a side by side comparison of the size. The compressor side is so large you’ll have literally millimeters of space between the firewall and exhaust manifold. You will now see why removing all the heat shields are required. I also recommend keeping all the holes in the turbo plugged until last minute. Unknowingly dropping something in there will ruin the turbo on startup and the engine too if you’re lucky enough to drop something into the compressor side.
15. It’s time to install the new turbo. You’ll want to lift and rotate it as necessary to get it mounted on the exhaust manifold. Beware of the AC line towards the firewall. You will have to bend it out of the way to get the turbo to fit. If you damage that AC line – getting a new line and recharge will be costly. Be careful.
16. Before starting to install the new oil/coolant lines the oil return line will need to be modified to fit the new bolts that go into the turbo. You need a 21/64th drill bit. I had all sorts of drill bits, but this size isn’t exactly common so I had to buy one. Be sure to remove all metal shavings and clean out the tube with brake cleaner to ensure all metal is cleared from the tube. Metal shavings in the oil pan = bad.
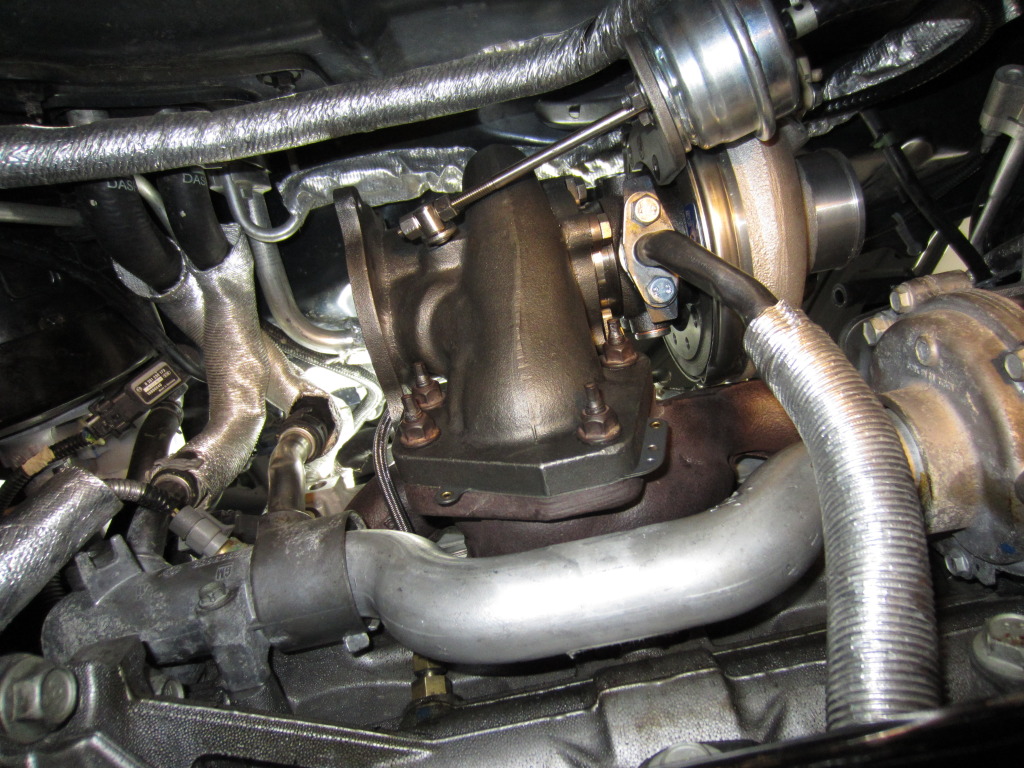
17. Here is the oil return line installed. Exact opposite of removal just with the new bolts supplied with the turbo.
18. Here is the new coolant return line installed. Don’t forget to use the new gaskets if you ordered them. Remember banjo bolts are hollow. They do not need to be super tight or will snap off when torqueing. Then you will have a much larger project on your hands.
19. Here is a top shot of the coolant feed line, PCV line, and vacuum line hooked up. You can also see how I bent the AC line upward to clear the turbo compressor side.
20. When bolting back on the o2 housing you may need to position a wrench on the top and then thread the nut from the bottom. If you don’t have any friends like me, putting tape over the bolt head temporarily will do just fine to hold the wrench snuggly on while you tighten the nut from the bottom. I had a picture for this, but I'm limited to 25 pictures per post so I left this one out.
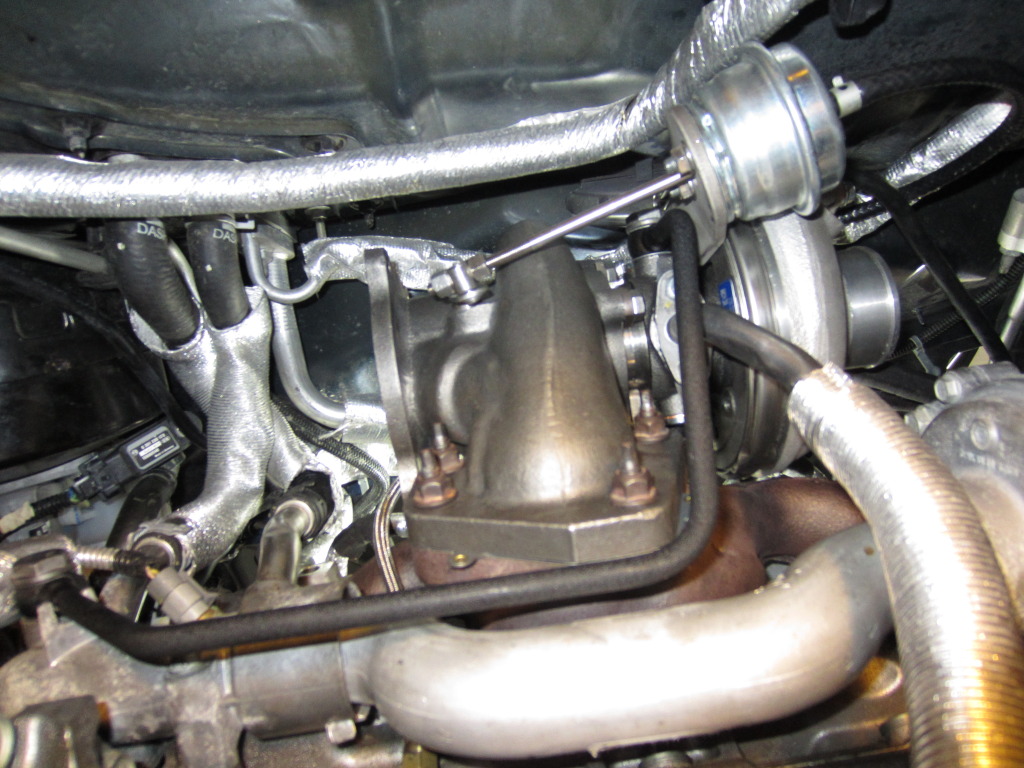
21. Here is a picture of after the o2 housing is installed with the new bolts supplied. I also screwed back in my o2 sensor at this point and connected it.
22. Here is where I didn't go in the best order. You can bolt the downpipe back on before you bolt the transmission mount back, but it's much more difficult to do so. Make sure you put the mount on first or the downpipe will be in the way of the long transmission bolts that thread through the mount. Don’t forget to put the secondary o2 sensor back as well.
It’s important to note that I used nickel anti-seize for the exhaust housing and downpipe studs for easy future disassembly. Nickel anti-seize is not your regular formula in any auto parts store. It’s for high temperature conditions – like a turbocharger. Normal anti-seize will burn off so don’t bother with it. You can purchase nickel anti-seize here if your auto parts store sucks: (Permatex 77124 Nickel Anti-Seize Lubricant,8 oz. : Amazon.com : Automotive ).
23. You’re pretty much done on the bottom. I also changed my oil which I think is good habit after installing a new turbo. Don’t put the car back on the ground just yet though. Make sure you add new coolant and fire up the car to check for exhaust, coolant, or oil leaks.
Some problems I ran into besides the exhaust manifold was my vacuum line off the turbo was a little short. I went out and spent $3 to get longer line. The stock one fit, but was a little too tight and I didn’t want to risk having it rub on anything. The second was my charge pipe. I have an upper Injen pipe and a lower ZZP pipe (ZZP was out of stock on the upper when I wanted to buy both of them). You can see here the pipe just doesn’t line up anymore. Keep this in mind if you have an upper charge pipe. Yours may not fit after the install.
I did fix this issue and was going to show how, but the forum limits me on the amount of pictures I can post.
I hope this guide was helpful to you. The ZFR is much louder than the stock K04 if you’re into that sort of thing. If no one was sure you had a turbo before, they will now.
I have an intake, exhaust, and intercooler setup. With this turbo, I made 397 WHP and 377 pounds of torque with 93 octane on 24 PSI. This is more power than a base C6 Corvette all while being about 300 pounds lighter. E85 fuel or a cam upgrade will net even more.
Last edited by Macgyver2484; 10-14-2012 at 02:33 AM.
 10-08-2012, 07:37 PM
#2
Senior Member
iTrader: (3)

Join Date: 07-24-11
Location: Bradenton, FL.
Posts: 2,983
Likes: 0
Received 0 Likes
on
0 Posts
wow, excellent post.
I cant believe how much work is involved, plus how much bigger the zfr is over stock..
There was some pretty tight spaces in there. i may need to reconsider the install myself because i dont think i will even be able to get my hands in there....lol
I cant believe how much work is involved, plus how much bigger the zfr is over stock..
There was some pretty tight spaces in there. i may need to reconsider the install myself because i dont think i will even be able to get my hands in there....lol
 10-08-2012, 08:43 PM
#4
Member

Join Date: 04-09-10
Location: south elgin, IL
Posts: 331
Likes: 0
Received 0 Likes
on
0 Posts
In the middle of my install. I have my k04 off just about to put my zfr on. Thought i would check css.net for something on the zfr. Found this and was very helpful. thank you for posting this. Well done.


 10-08-2012, 10:10 PM
#8
This is how I temporarily fixed the upper charge pipe problem. I ended up replacing this plastic piece with a short metal pipe, but you get the idea. I made little slits all over the pipe to add grip and prevent it from slipping off. Do not boost the car over 5-10 pounds with this setup. This will raise the pipe up enough to give you more room to run it over the valve cover. You will need extra clamps and an extra coupler to do this. Again this is only temporary. You’ll want to get ZZP’s upper charge pipe. I don’t know of any other brands that work right now. Maybe someone will chime in and let us know.


 10-09-2012, 07:12 AM
#14
Senior Member

Join Date: 05-13-09
Location: Davie, Fl
Posts: 2,954
Likes: 0
Received 0 Likes
on
0 Posts
Looks like u got one of the turbos that had some extra material on the turbine housing. Believe zzp said they would swap it out for u(there's a thread somewhere)
I thought the Turbo was supposed to come with a small piece of pipe to help mate the existing i/c pipes to the new Turbo?
I thought the Turbo was supposed to come with a small piece of pipe to help mate the existing i/c pipes to the new Turbo?
10-09-2012, 06:43 PM
#15
New Member

Join Date: 07-26-12
Location: Austin, TX
Posts: 13
Likes: 0
Received 0 Likes
on
0 Posts
Awesome guide!
I've got an Dejon upper charge pipe. Was a bit difficult to get it to reach the EFR, but I haven't had any issues with it and it's been a month or so with some pretty heavy boosting.
I've got an Dejon upper charge pipe. Was a bit difficult to get it to reach the EFR, but I haven't had any issues with it and it's been a month or so with some pretty heavy boosting.
Last edited by Sarah DixSon; 10-10-2012 at 04:30 PM.


