
CA heat exchanger


Thread Starter
New Member
Joined: 12-15-06
Posts: 11
Likes: 0
From: nowhere
I have a 06 stage 2 SS. I am about to order the CA front mount but first I have a few question. Any info would be greatly appreciated.
1. Is it direct mount to factory holes, or is drilling/fabing reqired?
2. Does it require additional tuning when the front mount is installed or will it run fine with the gm stage 2 tune?
3. Will i actually se lower 1/4 mile times with it or will it just make the car run more efficantly at the speeds it is already running?
Thanks in advance for your help


Banned
Joined: 06-28-06
Posts: 1,083
Likes: 0
From: Long Island, NY
IT comes with 2 L-brackets and all mounting hardware. You will need to drill 2 holes into the bumper brace to mount the L-brackets. As for tuning, no, its not that big a change. Just keeps the IAT2 temps down a lot better and it might help a bit, but not that much. Its a good precursor to doing some heavy boost mods.

Banned
Joined: 05-27-06
Posts: 13,079
Likes: 0
From: San Leandro, CA
Originally Posted by e to the x
IT comes with 2 L-brackets and all mounting hardware. You will need to drill 2 holes into the bumper brace to mount the L-brackets. As for tuning, no, its not that big a change. Just keeps the IAT2 temps down a lot better and it might help a bit, but not that much. Its a good precursor to doing some heavy boost mods.


I actually saw better gains from just the fron mount... I took mine off (for reasons some know about) to fit something else... and I have the dual pass right now.. I def saw cooler IAT2's with just the front mount and it cooled off faster (by the way I had the first one to test on my car) just look at my avitar

Senior Member
Joined: 06-16-05
Posts: 1,356
Likes: 0
From: Buffalo, NY
Originally Posted by 06blackg85ss
I actually saw better gains from just the fron mount... I took mine off (for reasons some know about) to fit something else... and I have the dual pass right now.. I def saw cooler IAT2's with just the front mount and it cooled off faster (by the way I had the first one to test on my car) just look at my avitar
i'm sure it's because u had more surface area to cool down the coolant with the heat exchanger.. plus while driving and it being up front u r forcing that cooler air through the heat exchanger and cooling it faster.. i would assume
Banned
Joined: 06-28-06
Posts: 1,083
Likes: 0
From: Long Island, NY
Originally Posted by CobaltSS422
i'm sure it's because u had more surface area to cool down the coolant with the heat exchanger.. plus while driving and it being up front u r forcing that cooler air through the heat exchanger and cooling it faster.. i would assume
Thread Starter
New Member
Joined: 12-15-06
Posts: 11
Likes: 0
From: nowhere
thanks everyone for your help. any other info on the product would be greatly appreciated. I ordered it today so i'm just trying to find out what to expect. Has anyone done a write up or a "how to" on the install of this front mount? I found the one about the cobra heat exchager but not one on the CA one.
thanks again
thanks again
Banned
Joined: 06-28-06
Posts: 1,083
Likes: 0
From: Long Island, NY
Originally Posted by ANOTHER SS
thanks everyone for your help. any other info on the product would be greatly appreciated. I ordered it today so i'm just trying to find out what to expect. Has anyone done a write up or a "how to" on the install of this front mount? I found the one about the cobra heat exchager but not one on the CA one.
thanks again
thanks again
I don't have any pictures for the install process but I have assisted in installing 2 of them. Its not very difficult at all as long as you have some common sense.
You will need to:
-Jack the car up and put it on jackstands, or on ramps (not really necessary but makes it a lot easier to get under to remove the hoses)
-remove your headlights, their mounting brackets and your front bumper. This will be the longest part because of all the connections to the fender well pieces, bumper brace and the 3 bastard bolts to the fenders.
-Disconnect the tube from the resevoir from the drivers side
-Go under the car and disconnect the tube that goes into the pump (the black circular thing) Make sure to have a catch pan or bucket under this tube to catch all the old coolant.
-Once the system is drained you will remove the assembly for the AC condensor, Stock H/E and the radiatior. the stock H/E is in the middle, which would be good reference for which hoses to follow when you need to disconnect them. you will need to remove a few bolts, 4-6 IIRC. You can then detach the assembly from the black plastic pieces and should be able to slide out the H/E from between the Rad and Condensor. You will slide it down. Having a 2nd person to help you here would be a good idea to help keep the Condensor and Radiator clear. Once the H/E is outta the way you can just reassemble teh Rad and Condensor.
-Now you will need to markt he bmper brace and drill your 2 holes. I suggest a small pilot hole first and then the full saized hole. not sure on what size bit ATM.
-Bolt the new H/e into place and then connect the hoses. Top hose from the H/E goes to the res and bottom goes to the pump.
-Now the important part. You need to flush the air out of the system. there is a bleeder valve on the bottom of the H/E but it won't help much because, duh air rises. You will need to fill the system as much as possible. you will pour it in the resevoir, letting it fill the system until you reach the max fill point of the res. You will then need to start your car and let the pump run the coolant through. Don't run it too long. Just for like 15-20 seconds and then repeat the process over and over again. You'll probably need to do it 5 or 6 times and then again after a day of driving as more air will find its way out.
-Now put your car back together!
Thread Starter
New Member
Joined: 12-15-06
Posts: 11
Likes: 0
From: nowhere
thanks e to the x. i am planning on leaving the stock HE on the car. the cobalt addiction site says it can be installed with or without removing the stock one. i want to be able to go back to stock easly if ever needed. If i am not removing the stock HE is it nessasary to remove the front bumper, on th C-A site it says it is not required fo the install
you don't have to but it makes it a hell of a lot easier.... I keep forgetting to put the how to up.. I"ll post it monday from work where I have the pics and such... buit its really self explanitory
Thread Starter
New Member
Joined: 12-15-06
Posts: 11
Likes: 0
From: nowhere
cool that would be great if you post the how to. i have limited knowledge when it comes to installing thing, usually take it to a shop. But i want to this one myself so having a guide to help would be awsome!

Thread Starter
New Member
Joined: 12-15-06
Posts: 11
Likes: 0
From: nowhere
Ok will do. Since i am not removing the stock H/E does it make more sense to run it in line with the C-A H/E. is that an easy thing to do. will i get better results if i do run it in line with the other instead of it just being there doing nothing?
Last edited by ANOTHER SS; Dec 17, 2006 at 03:00 AM.
yes you can run it in line... will give even more fluid capacity... but I havent done any testing yet with it so I can't say if it will help or not, but more fluid would usually help
and I had it connected to my dual pass setup
and I had it connected to my dual pass setup

Thread Starter
New Member
Joined: 12-15-06
Posts: 11
Likes: 0
From: nowhere
Originally Posted by lsjwannabe
why buy there kit when you can get the h/e for 170 on ebay like me and make your own m,ounts.
Ok sorry man I kinda work 70+ hrs a week.
First step: put the car up on jackstands and dieconnect hoses from the h/e (drain pain is in order here as dexcool is kinda slippery)
next step (makes it easier) remove headlight, headlight brackets (total of 6 10mm bolts), remove front bumper (bunch of 8mm screws arounf the bottom perimiter of bumper and in wheel wells) there are 4 pop clips on top above radiator, and 2 in the grill area under the license plate. plus there are 3 10mm bolts behind easch headlight in the corners of the bumper.. slide bumper off.
attach brackets to new h/e (if you want to remove the stock one there are a few 10mm bolts holding the rad, h/e, and ac condensor to the brackets you'll be able to slide the stock h/e out from the bottom of the car)
line up h/e and center it on the bumper support, mark where you want to drill your holes, drill 2 2/3 holes (might need a little bigger depending on what bolts you get)
attach -an lines to the new h/e.
route the hoses bottom one to pump outlet and top hose to the res, bolt h/e up, replace front bumper and headlights.
now for the fun part, bleeding the system, fill h/e slowly to the top of the res, start car and let run for about 5-10 secs, shut off, repeat precess til all air is purged from the system
Enjoy.
and if these instructions are too difficult to understand, please don't attempt this your self..
Here's some pics of what it should look like (don't mind the rest of the car, I was also replacing axles)
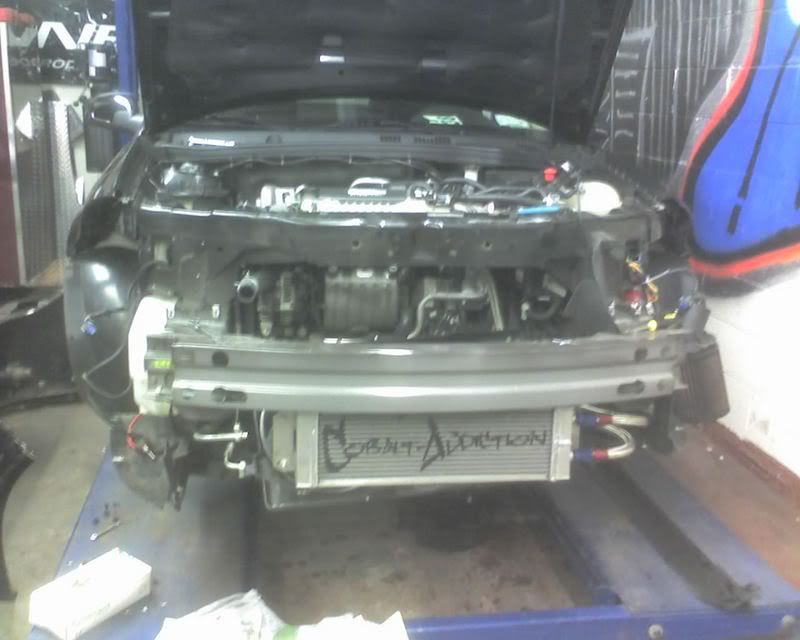
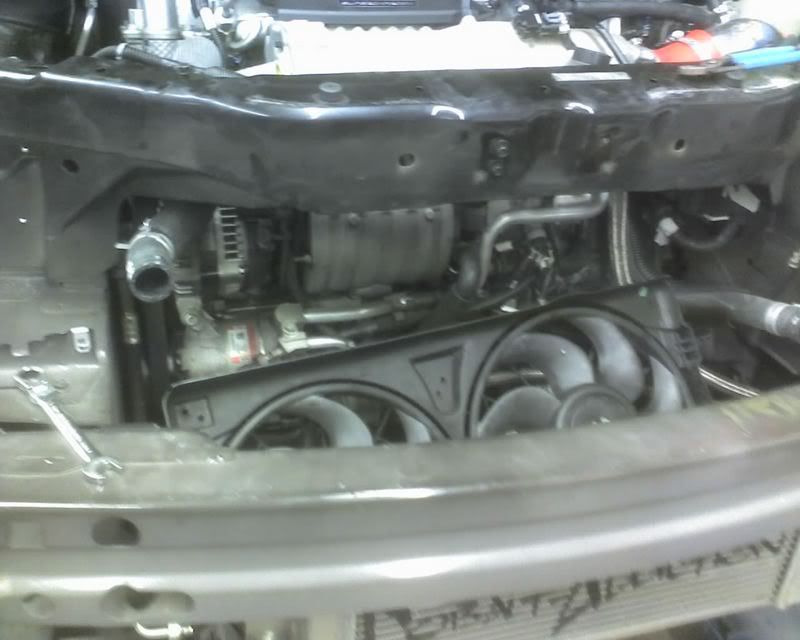
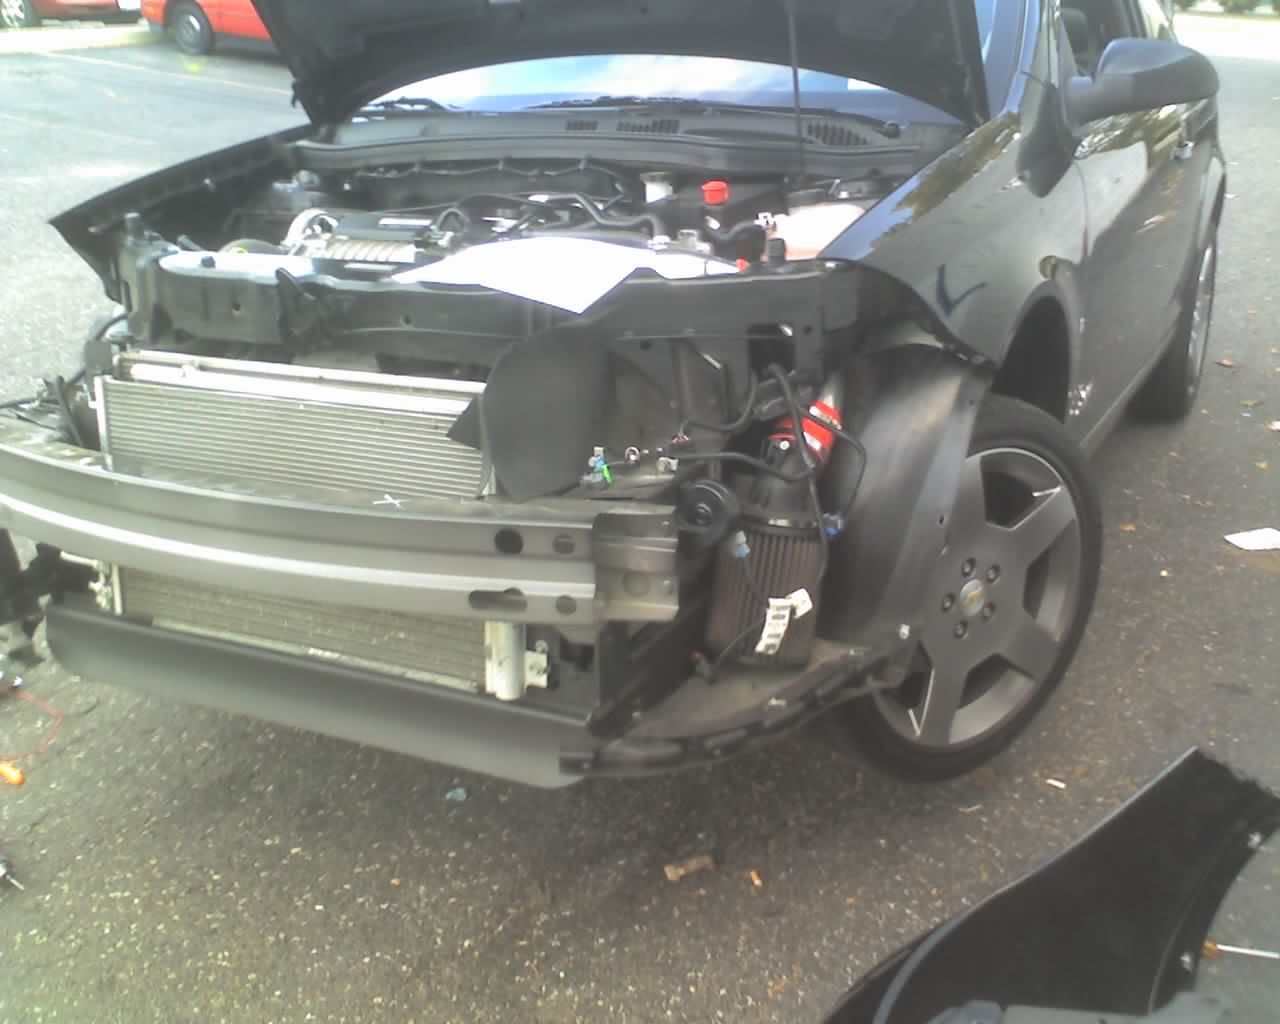
well thats all I have here at work.... but should give you a general idea, its a pretty straight forward install
First step: put the car up on jackstands and dieconnect hoses from the h/e (drain pain is in order here as dexcool is kinda slippery)
next step (makes it easier) remove headlight, headlight brackets (total of 6 10mm bolts), remove front bumper (bunch of 8mm screws arounf the bottom perimiter of bumper and in wheel wells) there are 4 pop clips on top above radiator, and 2 in the grill area under the license plate. plus there are 3 10mm bolts behind easch headlight in the corners of the bumper.. slide bumper off.
attach brackets to new h/e (if you want to remove the stock one there are a few 10mm bolts holding the rad, h/e, and ac condensor to the brackets you'll be able to slide the stock h/e out from the bottom of the car)
line up h/e and center it on the bumper support, mark where you want to drill your holes, drill 2 2/3 holes (might need a little bigger depending on what bolts you get)
attach -an lines to the new h/e.
route the hoses bottom one to pump outlet and top hose to the res, bolt h/e up, replace front bumper and headlights.
now for the fun part, bleeding the system, fill h/e slowly to the top of the res, start car and let run for about 5-10 secs, shut off, repeat precess til all air is purged from the system
Enjoy.
and if these instructions are too difficult to understand, please don't attempt this your self..
Here's some pics of what it should look like (don't mind the rest of the car, I was also replacing axles)
well thats all I have here at work.... but should give you a general idea, its a pretty straight forward install
