


Jackalope technical thread #1, Or tips for installing projectors and LED lights.

Thread Starter
Senior Member
Joined: 08-12-06
Posts: 12,764
Likes: 1
From: here
Jackalope technical thread #1, Or tips for installing projectors and LED lights.
This is the first in a series of technical threads by me since they appear to be the only thing people can't flame about. (note: tired of flaming)
In this thread I'll post a few of my findings when I installed the projectors that Snake sent me. (WOOT Thanks Snake!!!)
I came home from work to find this last week...

My cat Chessie had set up camp on my new projectors. Silly cat.
Opened the box and checked them out....

puuuuuuurrrfect. Thanks for standing gaurd Chessie!
Now here's where my how to will differ from the others, I feel no need to show you how to hook them up since that has been covered already. No need to show you how to aim them as thats been covered already. What I will show you is the few little things I found not previously covered to give you all a heads up and show you how I did the wiring so as not to have any problems re-installing the factory lights later.
Heres what I did for the wiring....

Rather then cut the wires and permently hook up the lights I did the next best thing, I installed plugs to the LED leads so they can be unhooked whenever I feel like putting my stock lights back in. There-by avoiding having to re-cut and re-splice anything. I can swap back and forth as many times as I like with zero problems!
Now I also noticed a small bit of plastic that is in the way, trim it off.


You can force them to fit, but why run the risk of breaking them when an small nip fixes the whole problem?
And because I MUST be different then everyone else I went with these...
 Rather then plain old light bulbs.
Now this is what the pre-modded plug looks like as the LED lights will not just plug right in due to how they are made...

NOTE the small tab, that must be removed for the LED lights to fit in.
After a quick pass on the belt sander this is what your looking to have...

Perfectly, completely flat and smooth. Now the LED can plug right in....

NOTE how the LED light base is made? See why those little plastic bumps must be removed?
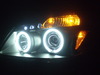
A few pics of the LED lights lit up from both angles, feel free to ask any questions....


LED installed in the light and lit up....

LED installed and off, notice no color at all! Makes for a very clean and clear looking light...

And the final product...


This thread was made possible by Scythe Snake and the gift of these projector headlights.
Fell free to ask any questions on this install.
In this thread I'll post a few of my findings when I installed the projectors that Snake sent me. (WOOT Thanks Snake!!!)
I came home from work to find this last week...
My cat Chessie had set up camp on my new projectors. Silly cat.
Opened the box and checked them out....
puuuuuuurrrfect. Thanks for standing gaurd Chessie!
Now here's where my how to will differ from the others, I feel no need to show you how to hook them up since that has been covered already. No need to show you how to aim them as thats been covered already. What I will show you is the few little things I found not previously covered to give you all a heads up and show you how I did the wiring so as not to have any problems re-installing the factory lights later.
Heres what I did for the wiring....
Rather then cut the wires and permently hook up the lights I did the next best thing, I installed plugs to the LED leads so they can be unhooked whenever I feel like putting my stock lights back in. There-by avoiding having to re-cut and re-splice anything. I can swap back and forth as many times as I like with zero problems!
Now I also noticed a small bit of plastic that is in the way, trim it off.
You can force them to fit, but why run the risk of breaking them when an small nip fixes the whole problem?
And because I MUST be different then everyone else I went with these...
Rather then plain old light bulbs.Now this is what the pre-modded plug looks like as the LED lights will not just plug right in due to how they are made...
NOTE the small tab, that must be removed for the LED lights to fit in.
After a quick pass on the belt sander this is what your looking to have...
Perfectly, completely flat and smooth. Now the LED can plug right in....
NOTE how the LED light base is made? See why those little plastic bumps must be removed?
A few pics of the LED lights lit up from both angles, feel free to ask any questions....
LED installed in the light and lit up....
LED installed and off, notice no color at all! Makes for a very clean and clear looking light...
And the final product...
This thread was made possible by Scythe Snake and the gift of these projector headlights.
Fell free to ask any questions on this install.





Thread Starter
Senior Member
Joined: 08-12-06
Posts: 12,764
Likes: 1
From: here
They can also be found here... http://www.hid-lights.com/
Damn digital camera's! Sorry for any blurriness.
Last edited by Jackalope; Aug 9, 2007 at 10:26 AM. Reason: Automerged Doublepost


Thread Starter
Senior Member
Joined: 08-12-06
Posts: 12,764
Likes: 1
From: here

Senior Member
Joined: 12-21-06
Posts: 2,449
Likes: 0
From: Aurora, Colorado
Thread Starter
Senior Member
Joined: 08-12-06
Posts: 12,764
Likes: 1
From: here
 Whhhhy thank you.
Take as many as you like. BTW I did the tail lights in LED's also. I'm saving that for another wright up as soon as I have someone to press the damn brake pedel so I can take pics.
Last edited by Jackalope; Aug 9, 2007 at 12:44 PM. Reason: Automerged Doublepost


Thread Starter
Senior Member
Joined: 08-12-06
Posts: 12,764
Likes: 1
From: here
If I'm off tonight I will try. Baaaaaaaaaaaad thunderstorms around tonight!
Last edited by Jackalope; Aug 9, 2007 at 02:04 PM. Reason: Automerged Doublepost

Senior Member
Joined: 05-10-07
Posts: 5,890
Likes: 1
From: West Babylon, NY
Looks awesome Jack.. nice write up. thats one sexy looking sedan. and definitely love the different looking LED's.
BTW great idea with the plugs so you dont have to keep splicing those wires. + if i can give it.
BTW great idea with the plugs so you dont have to keep splicing those wires. + if i can give it.
Thread Starter
Senior Member
Joined: 08-12-06
Posts: 12,764
Likes: 1
From: here

Original Hayden Fanatic
Platinum Member
Joined: 05-06-06
Posts: 33,169
Likes: 1
From: Dayton, O HI O
Nice, i really like the bulbs, i might have to "borrow" the idea, i did the same thing w/ the quick clips...
and the chrome projectors look awesome on the sport-red!!!
Get some HID's!!
and the chrome projectors look awesome on the sport-red!!!
Get some HID's!!
Last edited by REIGN SS; Aug 10, 2007 at 04:02 AM. Reason: Automerged Doublepost
Thread Starter
Senior Member
Joined: 08-12-06
Posts: 12,764
Likes: 1
From: here
 I know you were its all good bud!
Oh and if it looks good now wait till I get my billet grills and do my second "how to"
Last edited by Jackalope; Aug 10, 2007 at 06:15 AM. Reason: Automerged Doublepost