
05 Cobalt LS Xtreme makeover part 2!!


Thread Starter
Member
Joined: 10-25-06
Posts: 204
Likes: 0
From: British-Columbia
05 Cobalt LS Xtreme makeover part 2!!
For the original post go here:
https://www.cobaltss.net/forums/general-cobalt-68/05-cobalt-ls-extreme-makeover-56k%3Ddeath-not-faint-heart-38009/
So its been a long ass time, sorry to the fans of this post but a combination of a busy life and not enough time in a 24hr day ended in me not working on this car for a while. It sat outside for what like 3 months now> maybe longer. But wait theres progress!!!!! I worked on it today heres some pics of the acomplished work:


Pretty much all primed, that happened 3 months ago so i could kick it outside so they would have room in the shop while i was on vacation... needless to say since it was out of sight once i came back it was also out of mind lol.
Only damage remaining is this quarter:

As you can see a little rust from sitting, no biggy, some water got under the plastic.
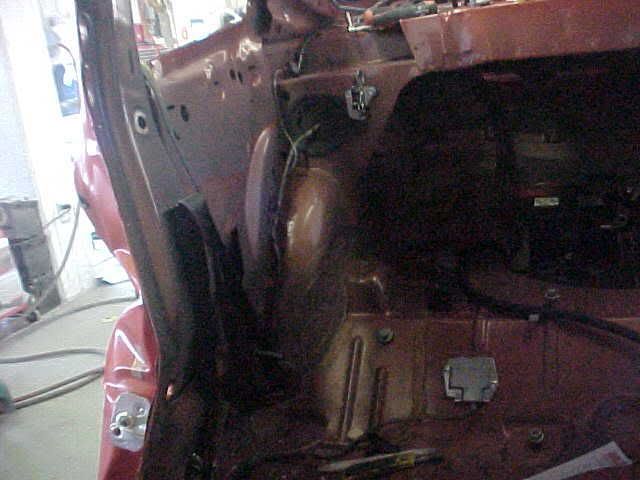
What i mainly did today is slap the whole interior back in, like 98.99 % check it out.... remember this?
It has now become this:

and this:

All thats left is the sill peice and the door trim, i will be painting the inner jams very soon, so i can fully assemble the interior. Also have to finish the quarter since thats all that lefte between me and this car.
Mainly been me procrastinating (dunno about spelling on that one) getting it done as i always do with everything in life. Unless i'm getting paid to do something i tend to start things and not finish them. Lack of motivation when theres no dough involved!!!!
Also would like to point out, the glass is NOT glued in. Because the flange still needs to be painted.
https://www.cobaltss.net/forums/general-cobalt-68/05-cobalt-ls-extreme-makeover-56k%3Ddeath-not-faint-heart-38009/
So its been a long ass time, sorry to the fans of this post but a combination of a busy life and not enough time in a 24hr day ended in me not working on this car for a while. It sat outside for what like 3 months now> maybe longer. But wait theres progress!!!!! I worked on it today heres some pics of the acomplished work:
Pretty much all primed, that happened 3 months ago so i could kick it outside so they would have room in the shop while i was on vacation... needless to say since it was out of sight once i came back it was also out of mind lol.
Only damage remaining is this quarter:
As you can see a little rust from sitting, no biggy, some water got under the plastic.
What i mainly did today is slap the whole interior back in, like 98.99 % check it out.... remember this?
It has now become this:
and this:
All thats left is the sill peice and the door trim, i will be painting the inner jams very soon, so i can fully assemble the interior. Also have to finish the quarter since thats all that lefte between me and this car.
Mainly been me procrastinating (dunno about spelling on that one) getting it done as i always do with everything in life. Unless i'm getting paid to do something i tend to start things and not finish them. Lack of motivation when theres no dough involved!!!!
Also would like to point out, the glass is NOT glued in. Because the flange still needs to be painted.


Thread Starter
Member
Joined: 10-25-06
Posts: 204
Likes: 0
From: British-Columbia
So i've been comming in stupid early and staying stupid late a lot lately. Also worked last saturday and sunday and all day today on the car. I managed to fix the quarter, check it out!


It came out very well after i clamed down and took my time with it. I was freaking out a little when i first tackled it because it was near the end of the day and it just wasnt working for me.
I'm now in the process of prepping it out for paint. the whole car is sanded down in 500 grit (will finish in 800) and just needs some spot priming. Everything has come off, decided to paint the whole thing, bumpers and all. Finished fixing the rear bumper it had some minor damage.


I had to fix that quarter because i managed to damage it while moving the car sideways on a jack, put a slight dent in it ><


how you like that masking paper eh? i dont really care what it looks like as long as it works. Plus it was a bargain. :P
So i'll be shooting some primer on it tomorrow morn (sat) and i think i'll finish sanding everything on sunday. Hopefully can get it painted sometime this comming week!
I know its been a long time comming but i'm finally seeing the light at the end of the tunel!

Thread Starter
Member
Joined: 10-25-06
Posts: 204
Likes: 0
From: British-Columbia
I'm thinking 2 weeks but that might be slightly hopeful, maybe more like 3 weeks. It needs to go for a structural, wheel alignment and government inspection once its all done. then the final detail and i'll be insuring it.
Thread Starter
Member
Joined: 10-25-06
Posts: 204
Likes: 0
From: British-Columbia

Thread Starter
Member
Joined: 10-25-06
Posts: 204
Likes: 0
From: British-Columbia
Senior Member
Joined: 03-30-06
Posts: 3,014
Likes: 0
From: Exit 29, NY
Nice man looks great. Its funny, the other day i was just wondering what happened to this project then i see this. I cant wait to see the final project. How many hours do u think u have into this project?
later
later
Thread Starter
Member
Joined: 10-25-06
Posts: 204
Likes: 0
From: British-Columbia
So far id say maybe 100ish. by the time i'm done 120 ish. I'm going in tomorrow to paint the inner door jam, inner door and trunk gutter . I did my spot priming this morn so it would be fully dry when i tackle it tomorrow. This will be 2 weeks in a row with no time off after this sunday. I guess 3 weeks without a day off by the time its over lol. We're swamped at the shop its slightly ridiculous yet i'm still finding myself working on my car 2-4 hours a day. Tomorrow i'm not leaving until the inners are orange. ;-)
Thread Starter
Member
Joined: 10-25-06
Posts: 204
Likes: 0
From: British-Columbia
Stuff like that is better left to the dealer to figure out. Its like making a convertible, theres just too much engeneering involved.

Thread Starter
Member
Joined: 10-25-06
Posts: 204
Likes: 0
From: British-Columbia
So its Sunday... went in to work today at 9 to see if i could sand and paint the inners and i did! check it out:
Heres a couple pics of it ready to go:


Then the next thing to do is mixing the base coat:

As you can see looking at the mixing cup theres several different colors at the bottom. Using the computer, when you punch in the color code you get information on which toners and how much of each you need in grams to mix the color. Add some reducer and once you mix it all up you get this:

The darker areas in the cup are the metalics floating around reflecting light in different ways. When you put the paint in the gun it atomizes it and helps to align the metalics so the color looks right.
Ok here we go...
Spray gun...check
Mask... check
Air line... check!!!

So i started spraying and realized that the color covers very very badly:


(pictures courtesy of my better half)
After 5-6 coats of base, maybe 7, i finally got coverage JUST as i ran out of paint, on the last stroke.
I then sprayed the clear coat and this is what it looks like now finished:


Shiny eh?
So there you go folks! Tomorrow morning i will be putting the trunk and the door back on and will begin final prep to paint the outside of the car. I hope i can get that done this coming week. So close yet so far away!!!!
Heres a couple pics of it ready to go:
Then the next thing to do is mixing the base coat:
As you can see looking at the mixing cup theres several different colors at the bottom. Using the computer, when you punch in the color code you get information on which toners and how much of each you need in grams to mix the color. Add some reducer and once you mix it all up you get this:
The darker areas in the cup are the metalics floating around reflecting light in different ways. When you put the paint in the gun it atomizes it and helps to align the metalics so the color looks right.
Ok here we go...
Spray gun...check
Mask... check
Air line... check!!!
So i started spraying and realized that the color covers very very badly:
(pictures courtesy of my better half)
After 5-6 coats of base, maybe 7, i finally got coverage JUST as i ran out of paint, on the last stroke.
I then sprayed the clear coat and this is what it looks like now finished:
Shiny eh?
So there you go folks! Tomorrow morning i will be putting the trunk and the door back on and will begin final prep to paint the outside of the car. I hope i can get that done this coming week. So close yet so far away!!!!


Thread Starter
Member
Joined: 10-25-06
Posts: 204
Likes: 0
From: British-Columbia


