
Cobalt number 2


Thread Starter
Member
Joined: 03-21-09
Posts: 355
Likes: 1
From: Ottawa
Cobalt number 2
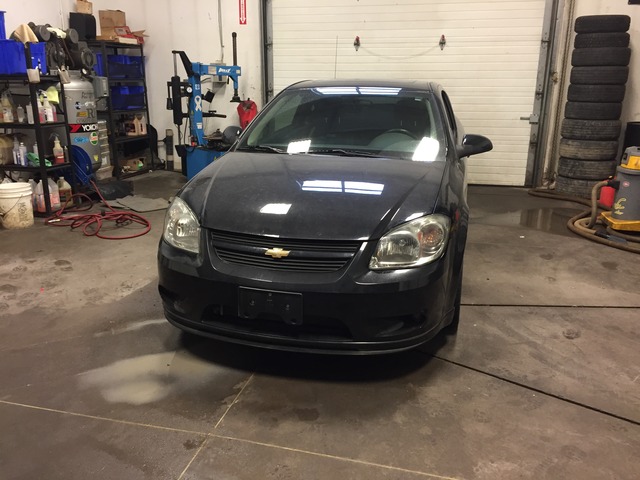
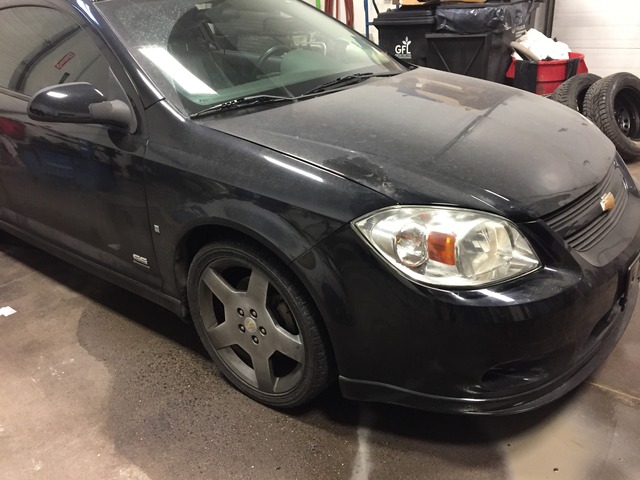
Well I bought an 06 LSJ before Christmas to use as a summer/track/autocross car.
A bit of background first: I used to have an 08 LT I had bought new in 08 and I had that car until 2014. It was decently modified and I had supercharged it in 2012 I think it was. I then had the bright idea to build the motor and go further...that ended poorly and I was so pissed about the money I wasted on it I put it back to stock and sold the car. I then bought a 2012 Regal GS 6MT in 2015 (it took me like 7 months to decided what I wanted lol). It's a great car and I've had it at the track a few times, and on my last trip to Calabogie I boiled the brake fluid and lost like 90% of my brakes so then I realized it wasn't smart to use an expensive car for stuff like that- so I found this 06 LSJ in town. Someone traded it in to a Toyota store so I picked it up. 06 LSJ with 104k on it (like 60k miles). The goal is to have a capable and reliable track/autocross toy.
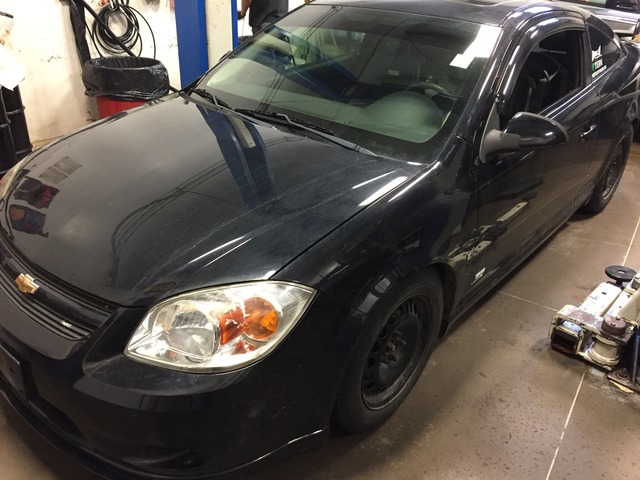
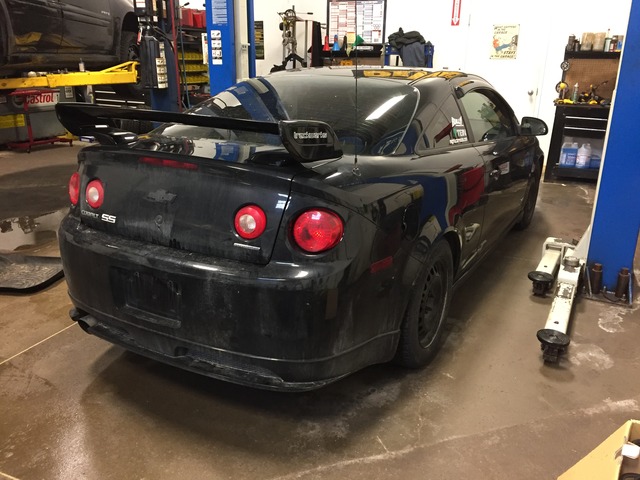
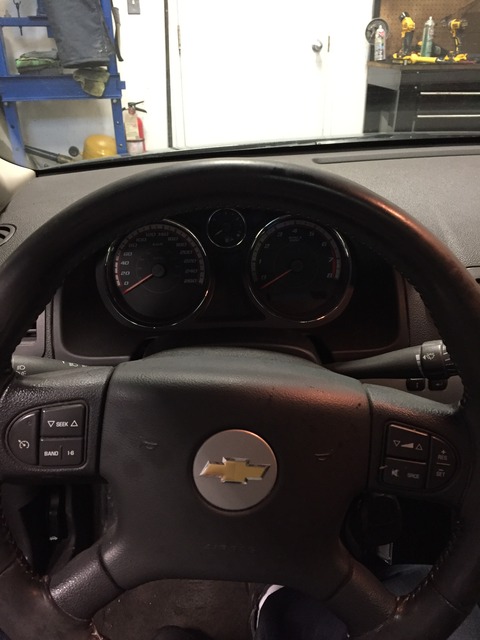
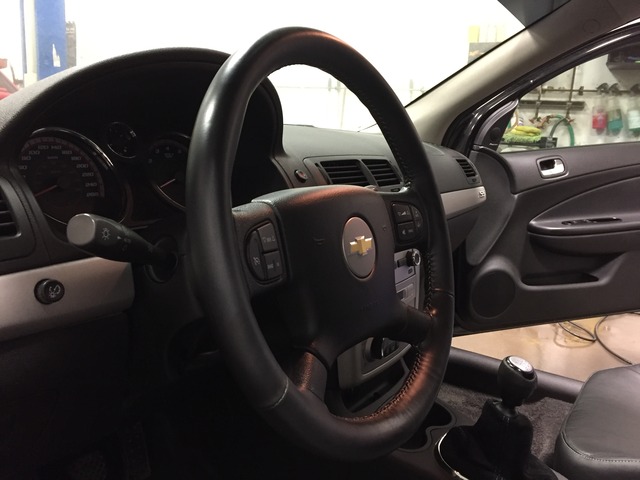
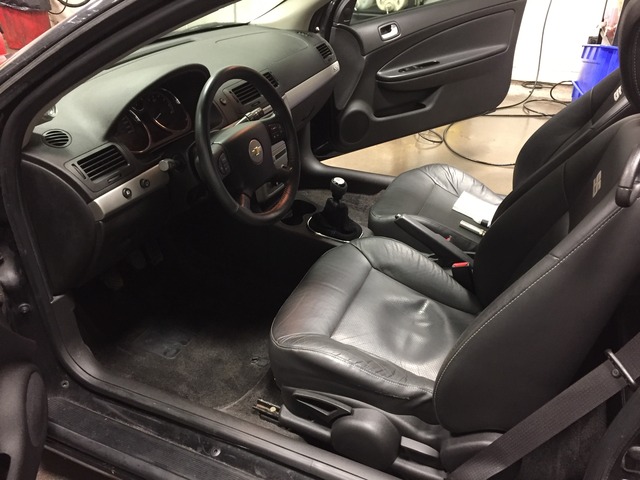
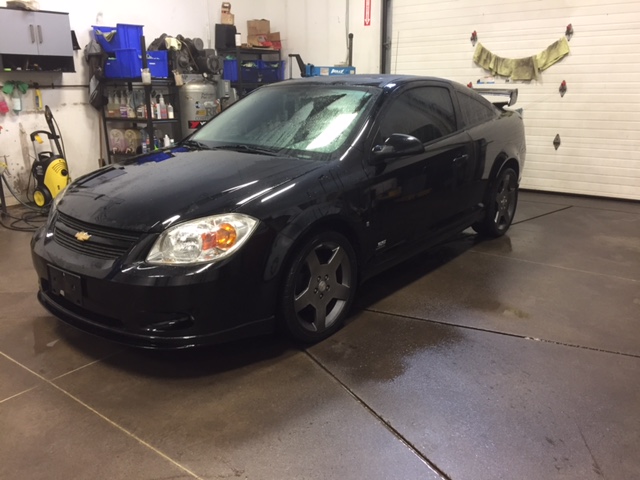
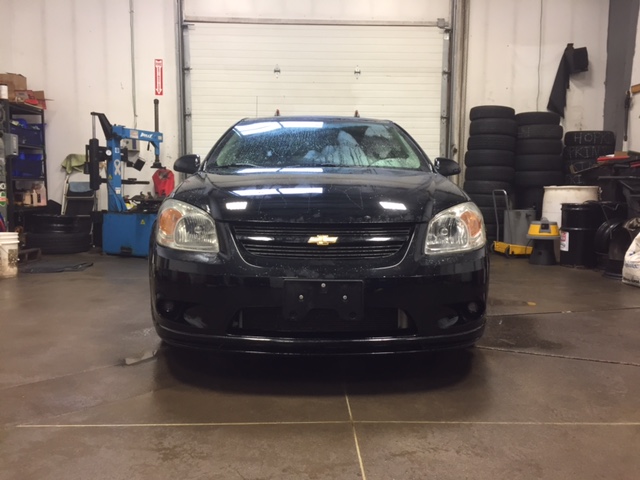
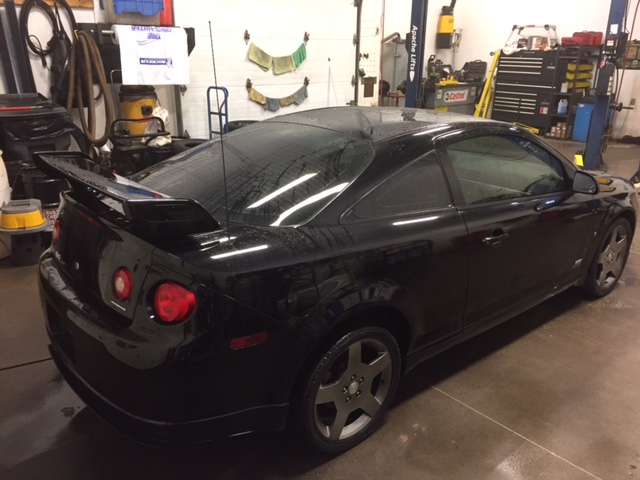
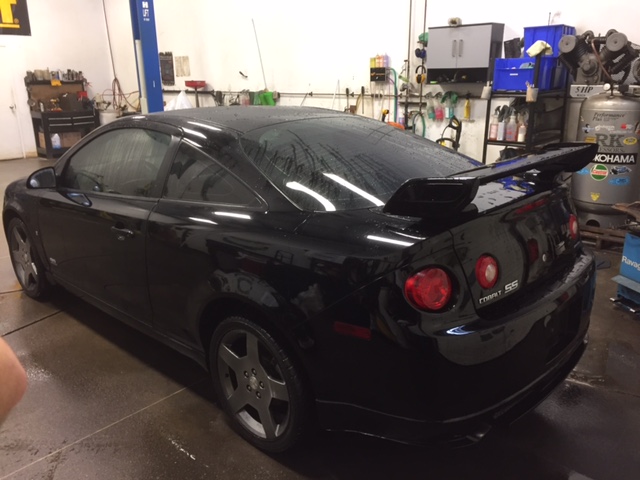
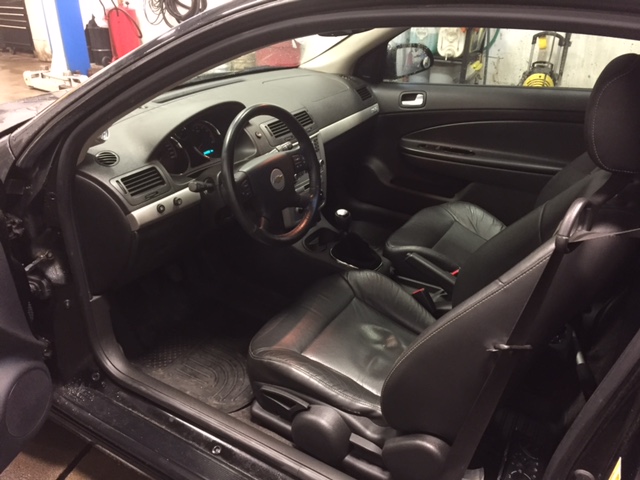
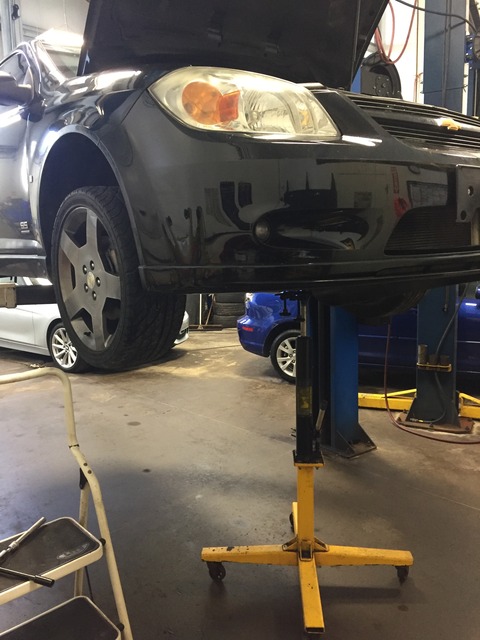
Here is the car when I got it back to my shop (I own a used car dealership with my bro so I have all the tools and hoists I need to make life very easy...or easier at least...)

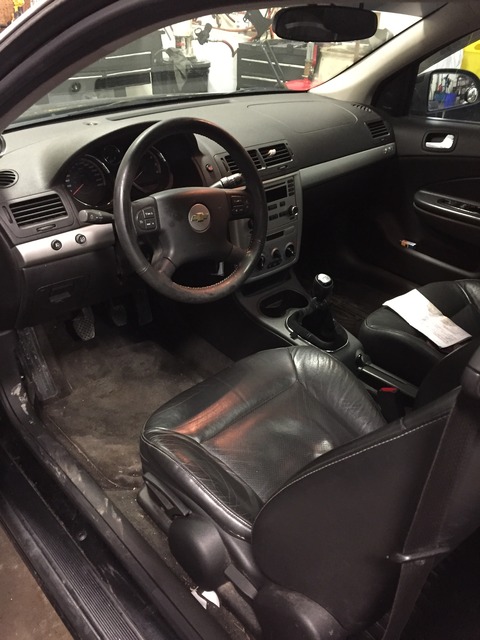
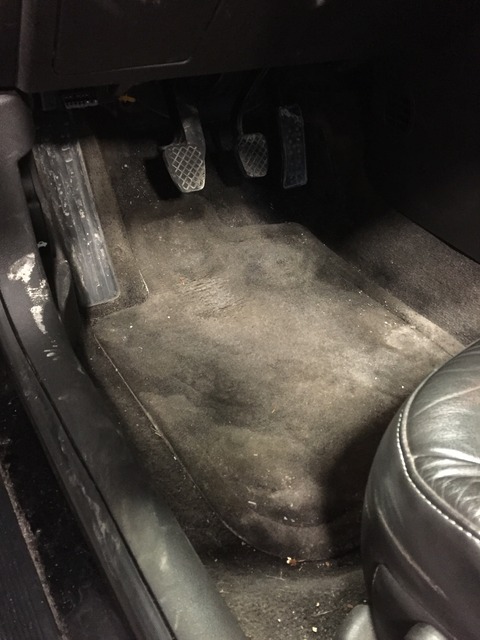
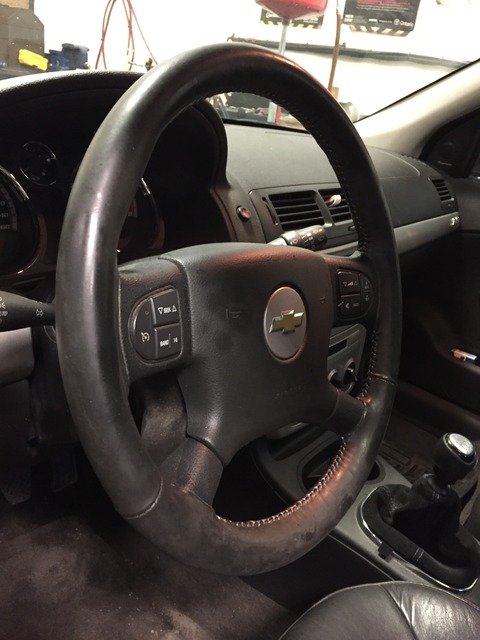
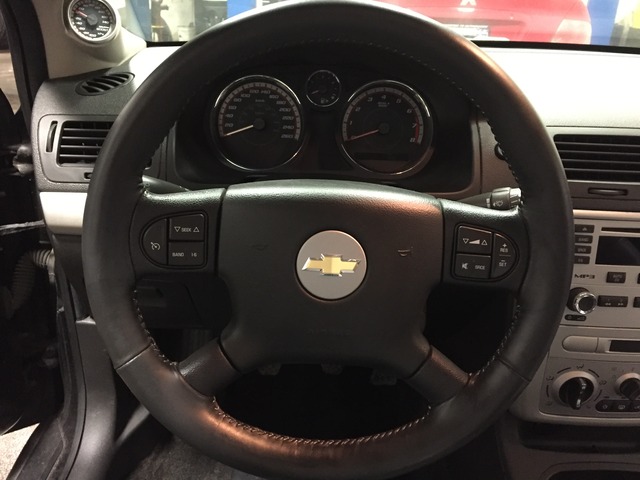
Had to wash my hands after I brought it back...look how dirty that wheel is...so gross
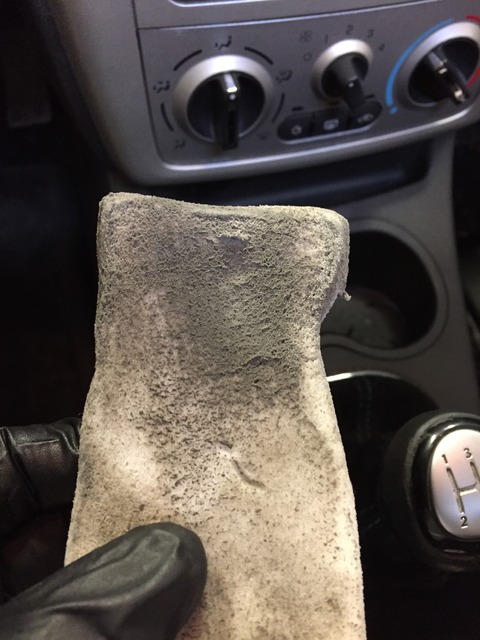
Using a magic eraser and cleaner on the leather on the wheel....rather nasty


I didn't do anything with the outside but I did have one of my guys wetsand and polish half the hood to see what kind of end result I can expect
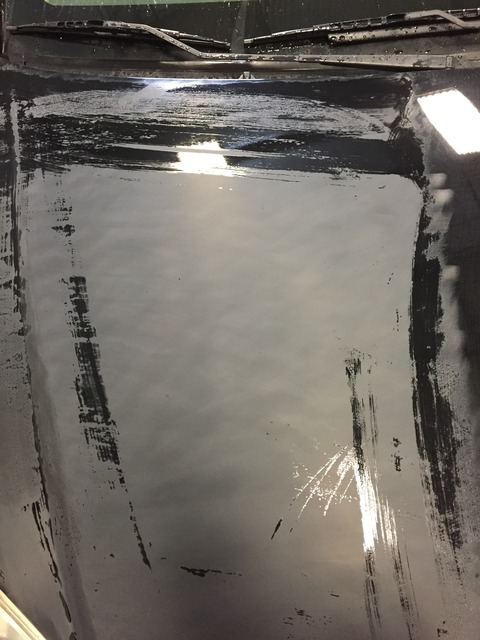
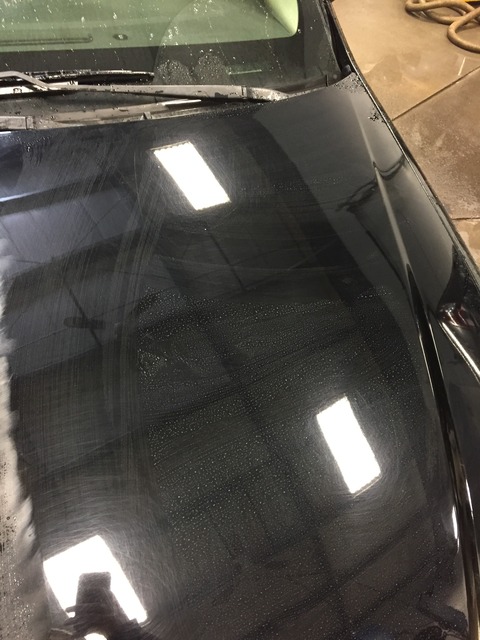
It's just too bad that there is rust on the hood and it will have to be replaced anyways...but there is more pressing stuff to do before that lol
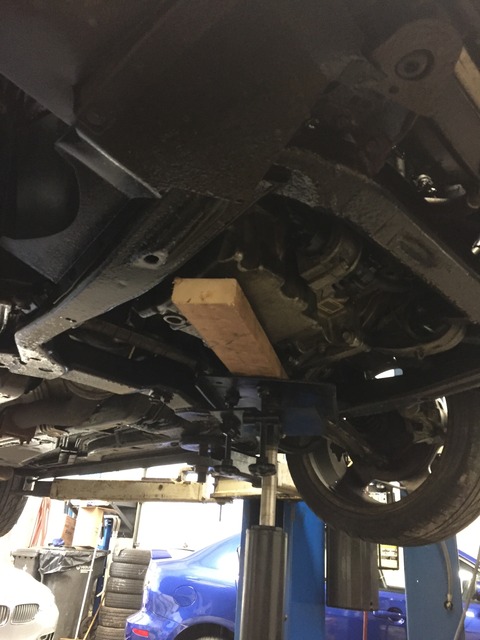
A few little surprises when I had it in the air the first time...
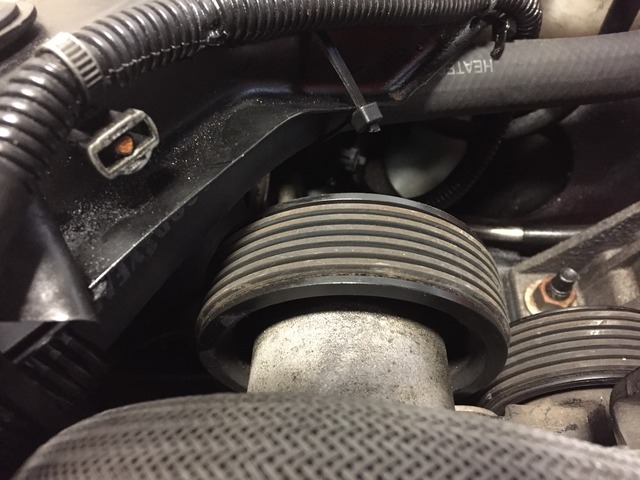
Heat exchanger pump bolt finger tight...awesome
The horn wasn't connected. Instead there were yellow wires spliced in that went nowhere...
So that was fixed. Also note the awesome airbox mod...
The red makes it go faster obviously...
So after all that I compiled a 'To-Do' list for all the jobs that needed to be done, as well as mods I want to do to make it better.
-Horn wiring cut
-Left headlamp wiring corroded
-Oil change
-Rear marker lights inop
-Fix wire loom along cowl
-Exterior buff/polish
-Remove stickers
-Reinstall stock springs
-Brake servicing
-Remove rear bowtie
-Remove vent visors
-Remove sunstrip
-Replace lug nuts
-Alignment
-Vibration on acceleration
-Right side wheel control burnt out
-HVAC control burnt out
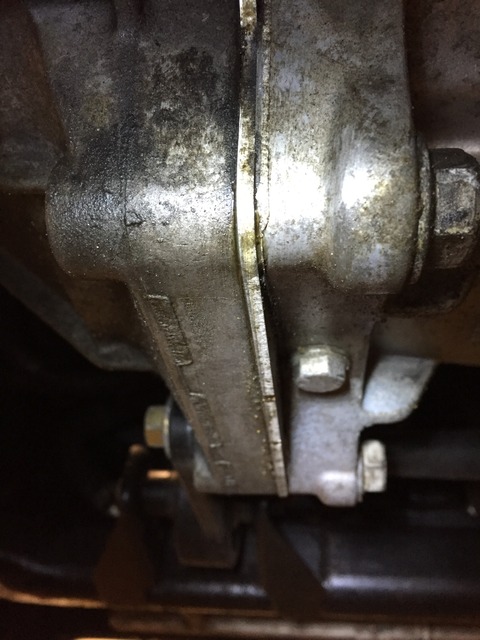
-Fix left front lower rad bracket - bent
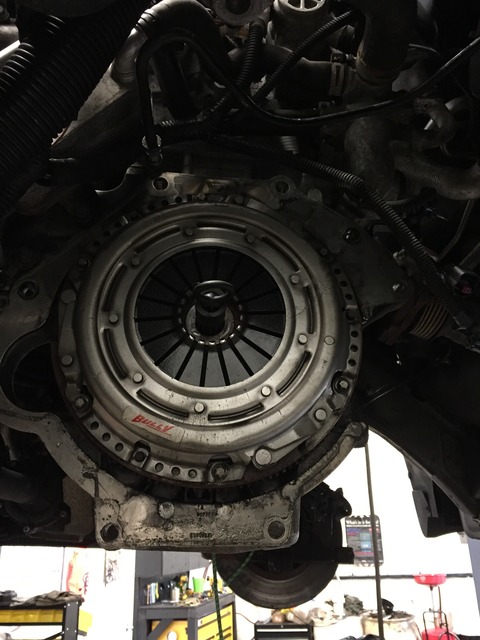
-Fix clutch
-Check operation of heat exchanger pump
-Change spark plugs
-Change cabin air filter
-Replace washer fluid cap
-Replace reverse light switch
-Replace fuse box lid
-Replace coil pack cover
-Replace injector cover
-Gravel guard driver inner door bottom
-Refinish driver door bottom
-Repair rocker panels
-spongy brakes
-Rust Check
-Fix sticky exterior door handles
-Remove overspray from door switches
-Replace tires
-Repair heat exchanger coolant leak
-Replace front shocks
-Replace rear shocks
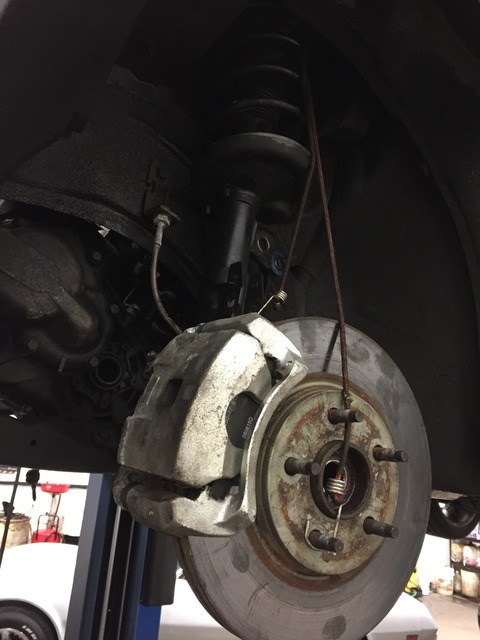
-Replace right rear caliper
-Replace left front caliper
-Replace right front caliper
-Replace front pads
-Replace rear pads
-Replace headlights
Mods (so far)
-Aeroforce Interceptor
-Dual cluster pod
-Option B coolant tank
-Dual Pass endplate
-Rotated trans mount
-Stainless brake lines
So ya a number of things that need attention. Overall though the car isn't too bad. I love driving it even though it's winter. It's hilarious. Brakes feel like ****, it rattles over bumps (rf shock is fried), it's got a sketchy clutch, but damn is it fun.
A bit of background first: I used to have an 08 LT I had bought new in 08 and I had that car until 2014. It was decently modified and I had supercharged it in 2012 I think it was. I then had the bright idea to build the motor and go further...that ended poorly and I was so pissed about the money I wasted on it I put it back to stock and sold the car. I then bought a 2012 Regal GS 6MT in 2015 (it took me like 7 months to decided what I wanted lol). It's a great car and I've had it at the track a few times, and on my last trip to Calabogie I boiled the brake fluid and lost like 90% of my brakes so then I realized it wasn't smart to use an expensive car for stuff like that- so I found this 06 LSJ in town. Someone traded it in to a Toyota store so I picked it up. 06 LSJ with 104k on it (like 60k miles). The goal is to have a capable and reliable track/autocross toy.
Here is the car when I got it back to my shop (I own a used car dealership with my bro so I have all the tools and hoists I need to make life very easy...or easier at least...)
Had to wash my hands after I brought it back...look how dirty that wheel is...so gross
Using a magic eraser and cleaner on the leather on the wheel....rather nasty
I didn't do anything with the outside but I did have one of my guys wetsand and polish half the hood to see what kind of end result I can expect
It's just too bad that there is rust on the hood and it will have to be replaced anyways...but there is more pressing stuff to do before that lol
A few little surprises when I had it in the air the first time...
Heat exchanger pump bolt finger tight...awesome
The horn wasn't connected. Instead there were yellow wires spliced in that went nowhere...
So that was fixed. Also note the awesome airbox mod...
The red makes it go faster obviously...
So after all that I compiled a 'To-Do' list for all the jobs that needed to be done, as well as mods I want to do to make it better.
-Horn wiring cut
-Left headlamp wiring corroded
-Oil change
-Rear marker lights inop
-Fix wire loom along cowl
-Exterior buff/polish
-Remove stickers
-Reinstall stock springs
-Brake servicing
-Remove rear bowtie
-Remove vent visors
-Remove sunstrip
-Replace lug nuts
-Alignment
-Vibration on acceleration
-Right side wheel control burnt out
-HVAC control burnt out
-Fix left front lower rad bracket - bent
-Fix clutch
-Check operation of heat exchanger pump
-Change spark plugs
-Change cabin air filter
-Replace washer fluid cap
-Replace reverse light switch
-Replace fuse box lid
-Replace coil pack cover
-Replace injector cover
-Gravel guard driver inner door bottom
-Refinish driver door bottom
-Repair rocker panels
-spongy brakes
-Rust Check
-Fix sticky exterior door handles
-Remove overspray from door switches
-Replace tires
-Repair heat exchanger coolant leak
-Replace front shocks
-Replace rear shocks
-Replace right rear caliper
-Replace left front caliper
-Replace right front caliper
-Replace front pads
-Replace rear pads
-Replace headlights
Mods (so far)
-Aeroforce Interceptor
-Dual cluster pod
-Option B coolant tank
-Dual Pass endplate
-Rotated trans mount
-Stainless brake lines
So ya a number of things that need attention. Overall though the car isn't too bad. I love driving it even though it's winter. It's hilarious. Brakes feel like ****, it rattles over bumps (rf shock is fried), it's got a sketchy clutch, but damn is it fun.
Thread Starter
Member
Joined: 03-21-09
Posts: 355
Likes: 1
From: Ottawa
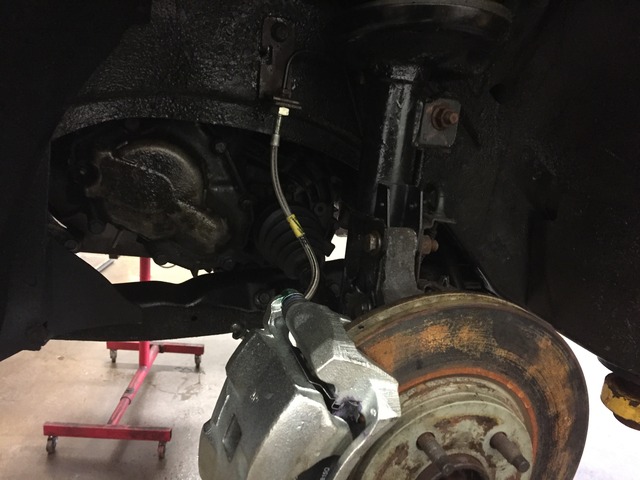
So around new years I had it out for a rip and I basically lost my clutch which was cool. Had to bleed it out and it's been ok...but I may still be looking at a leaking slave...hopefully not cause it's got a decent clutch in it.
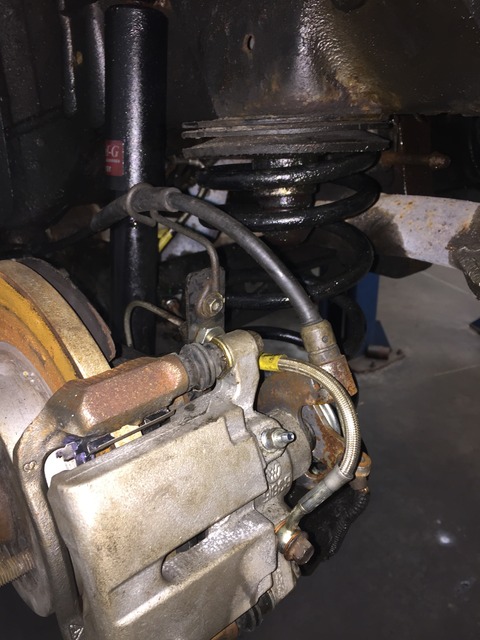
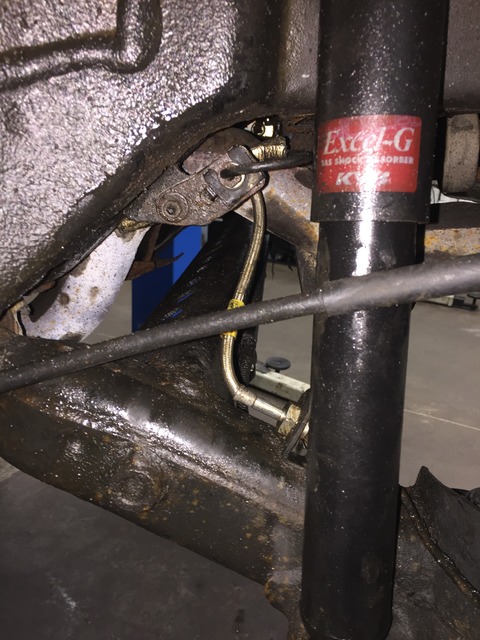
I also got a bunch of little things done like the various burnt out interior buttons and switches, the sticky exterior door handles (previous owner put a bunch of goop in there probably because they rattled when he played his sick beatzzzz), burnt out bulbs, put the summer rims on (sold the winters off it), put the stock springs back in (the Teins ride like ass)...which also revealed the right front strunt is done...cheap KYB excel garbage...will be getting FE5 LNF shocks closer to spring.
I also found out the left rear caliper was leaking, and the bleeder on the rest were completely seized (wouldn't budge with heat), and the rear pads were seized solid in the brackets and had a lovely taper to them.
So out with the old
Such lovely threads on there...not
Anyone who gets the Goodridge stainless lines....the supplied banjo bolts don't work lol
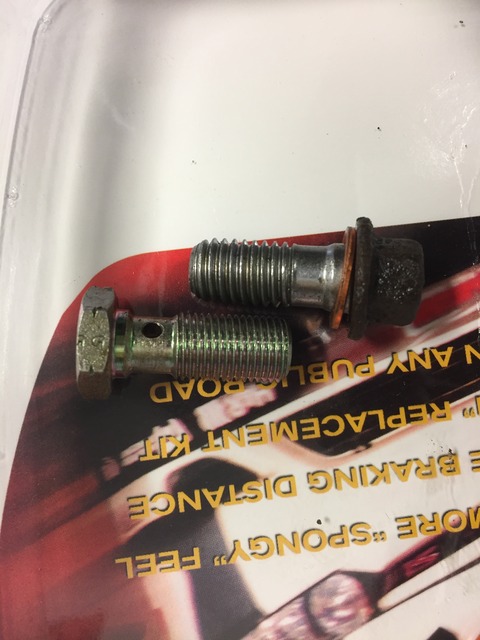
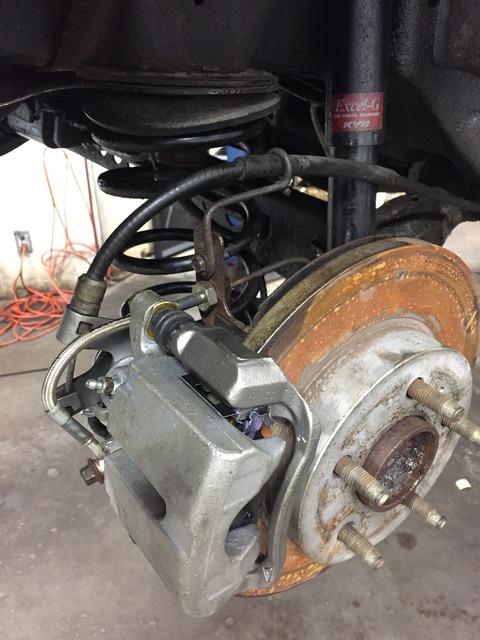
In with the new
Note how the nuts have to be like 100% tightened down compared to stock...
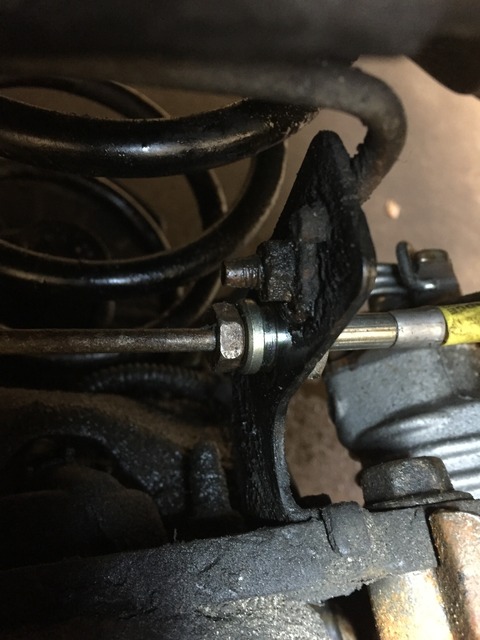
I also had to clearance this locating tab a little to allow some more room since the lines were making a pretty tight angle
Before
After
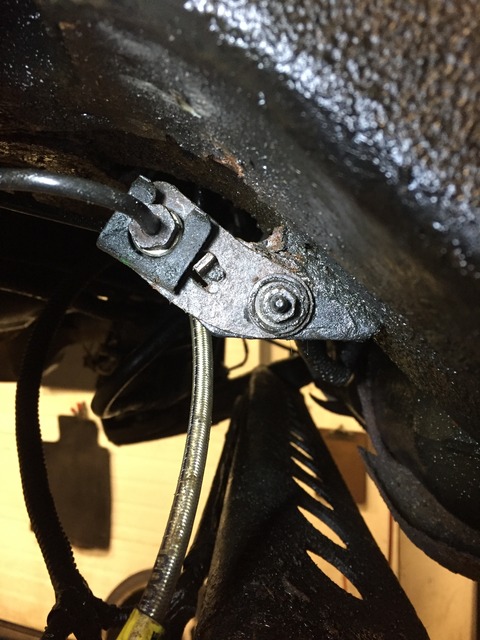
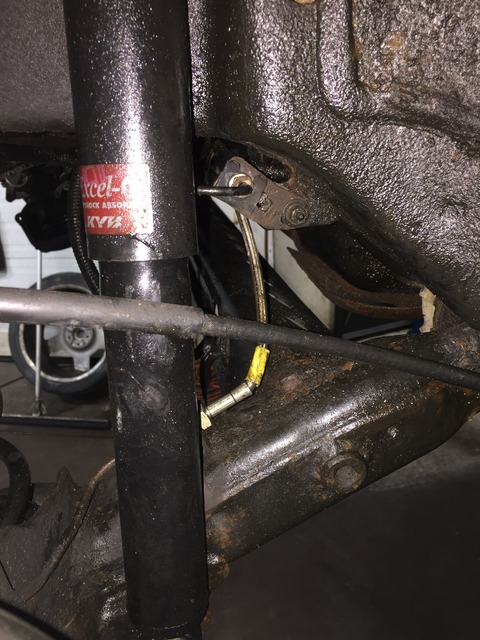
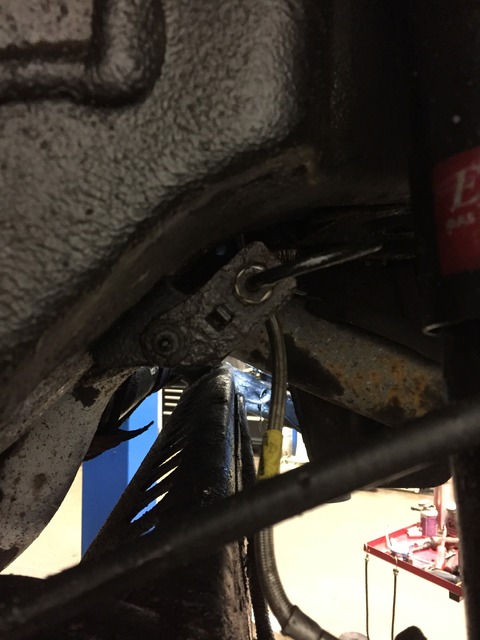
(it's not touching the hand brake cable bracket...just looks that way lol)
Easily the worst job I've ever done I think. Such a pain in the ass. I had also rust proofed the car several weeks prior as it gets stored outside at our offsite compound. I didn't know I'd be doing the lines so soon otherwise I'd have waited but oh well. Needed like 3 showers to get clean after lol
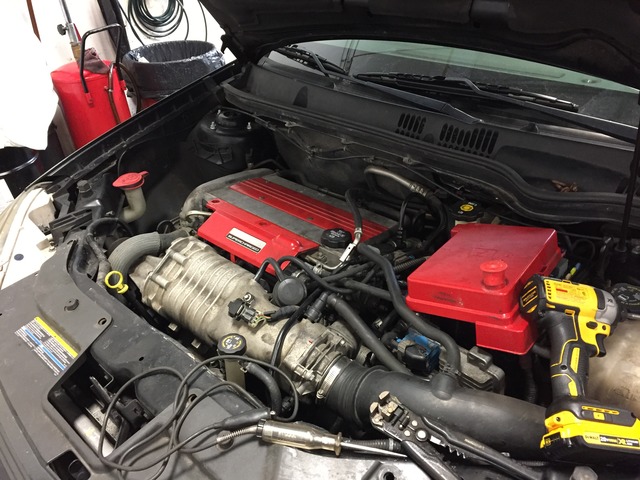
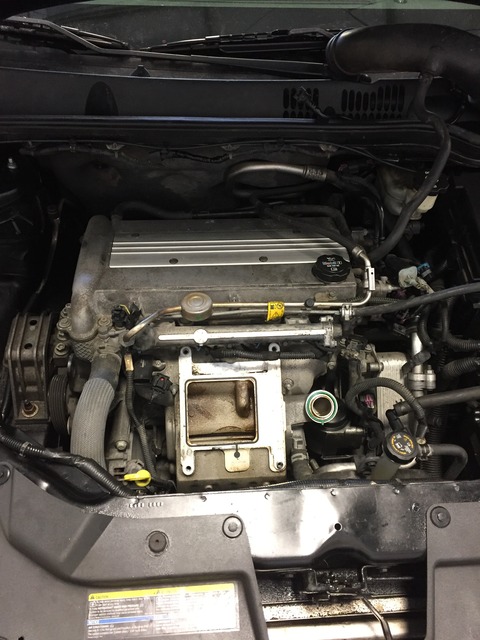
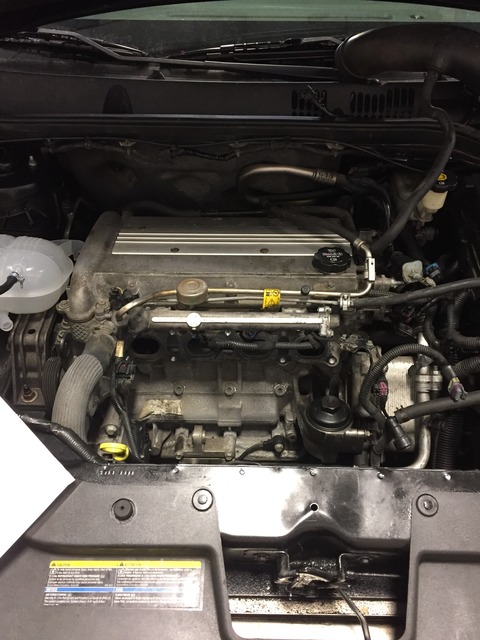
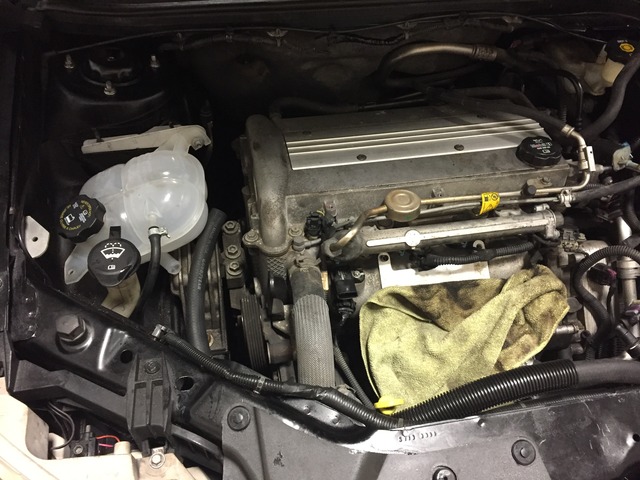
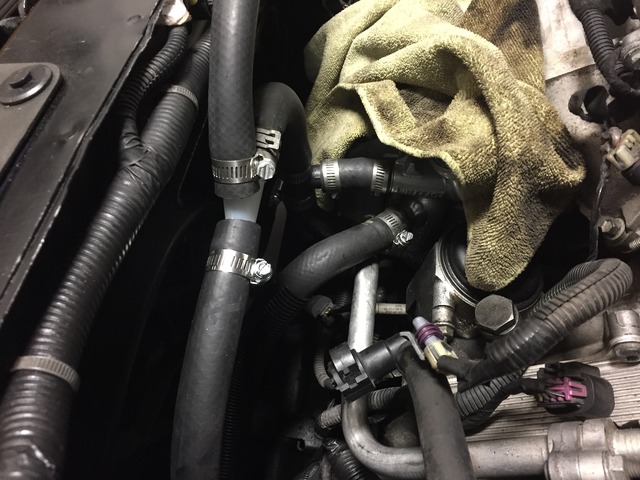
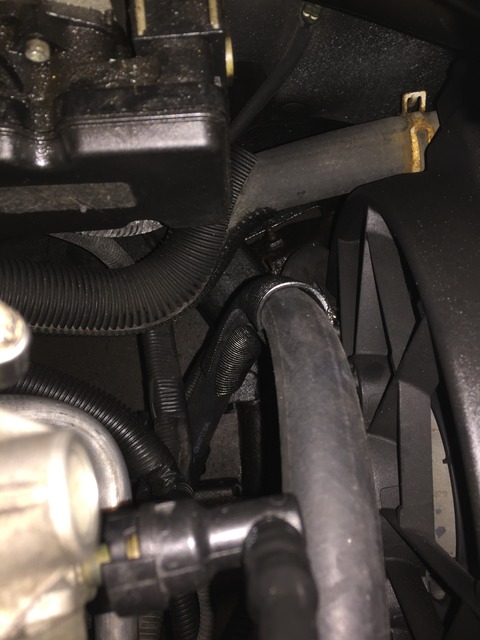
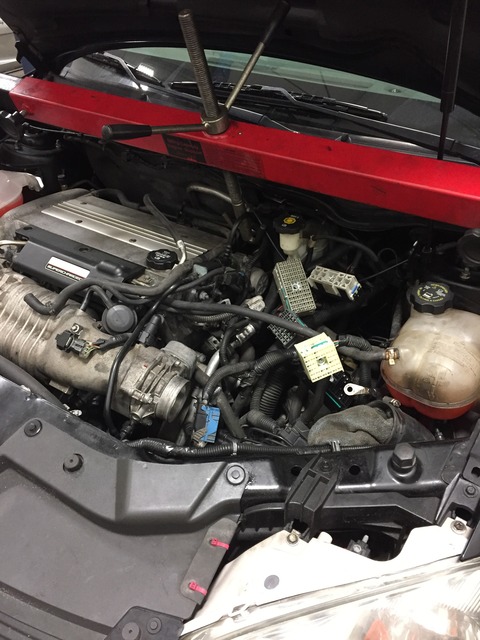
I also put the engine bay back to stock:
Before (washer cap already replaced, and I had tried grinding the paint off the coil cover but the surface got pooched)
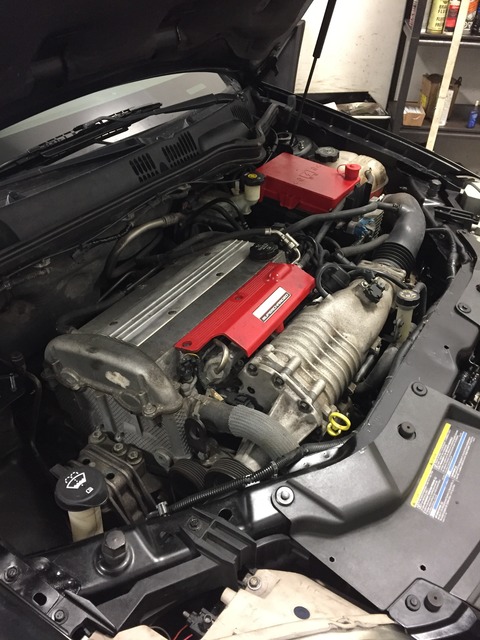
After
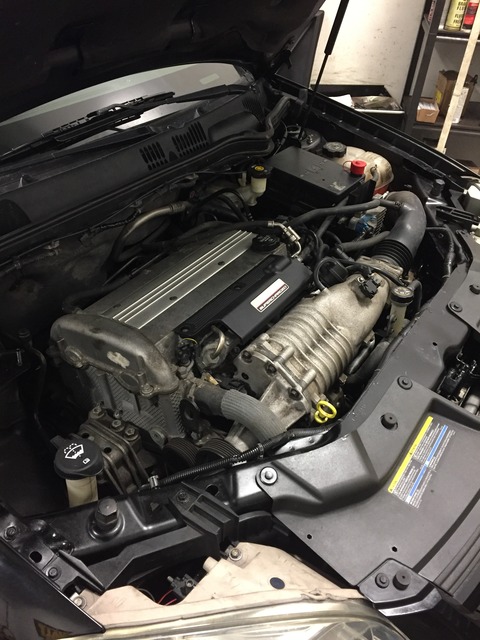
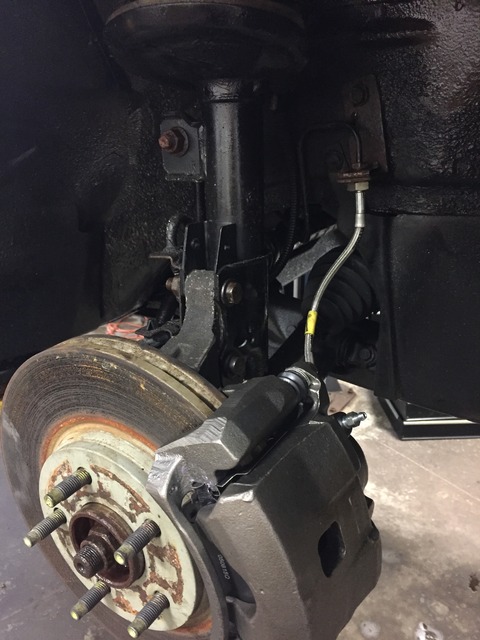
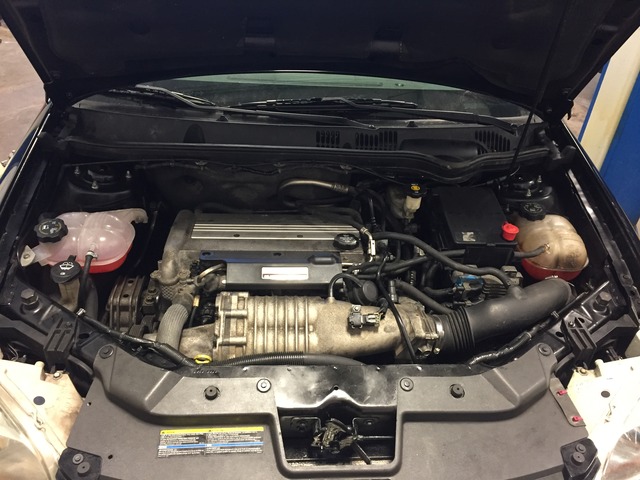
How it sits currently:
Note the two different lights. TYC replacement on left front and oem on right front...lol sums up this car just in that difference

I also got a bunch of little things done like the various burnt out interior buttons and switches, the sticky exterior door handles (previous owner put a bunch of goop in there probably because they rattled when he played his sick beatzzzz), burnt out bulbs, put the summer rims on (sold the winters off it), put the stock springs back in (the Teins ride like ass)...which also revealed the right front strunt is done...cheap KYB excel garbage...will be getting FE5 LNF shocks closer to spring.
I also found out the left rear caliper was leaking, and the bleeder on the rest were completely seized (wouldn't budge with heat), and the rear pads were seized solid in the brackets and had a lovely taper to them.
So out with the old
Such lovely threads on there...not
Anyone who gets the Goodridge stainless lines....the supplied banjo bolts don't work lol
In with the new
Note how the nuts have to be like 100% tightened down compared to stock...
I also had to clearance this locating tab a little to allow some more room since the lines were making a pretty tight angle
Before
After
(it's not touching the hand brake cable bracket...just looks that way lol)
Easily the worst job I've ever done I think. Such a pain in the ass. I had also rust proofed the car several weeks prior as it gets stored outside at our offsite compound. I didn't know I'd be doing the lines so soon otherwise I'd have waited but oh well. Needed like 3 showers to get clean after lol
I also put the engine bay back to stock:
Before (washer cap already replaced, and I had tried grinding the paint off the coil cover but the surface got pooched)
After
How it sits currently:
Note the two different lights. TYC replacement on left front and oem on right front...lol sums up this car just in that difference
Last edited by 2.2balt; Feb 19, 2017 at 11:05 AM.
Thread Starter
Member
Joined: 03-21-09
Posts: 355
Likes: 1
From: Ottawa
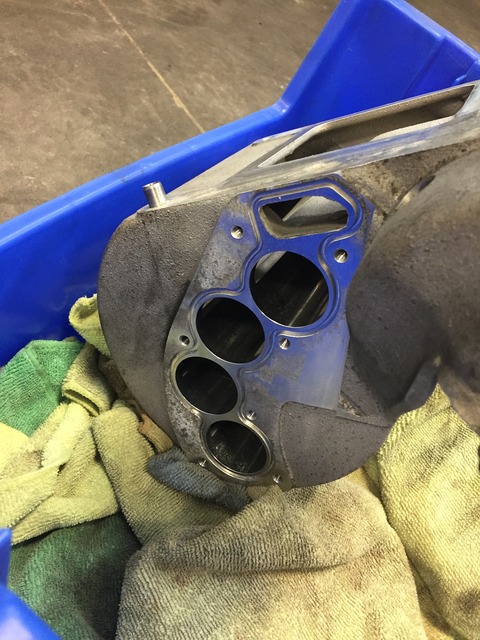
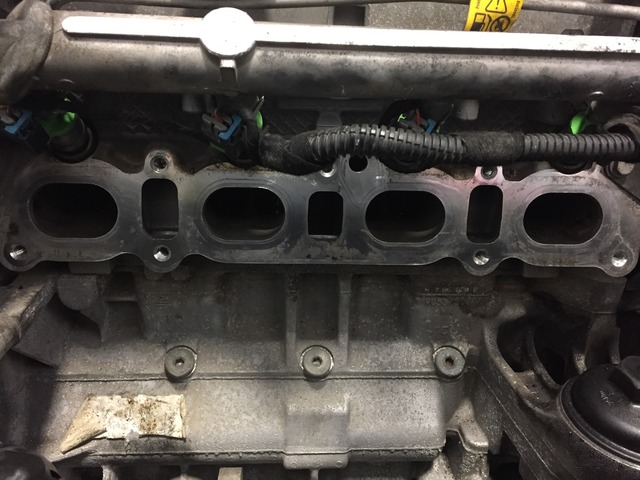
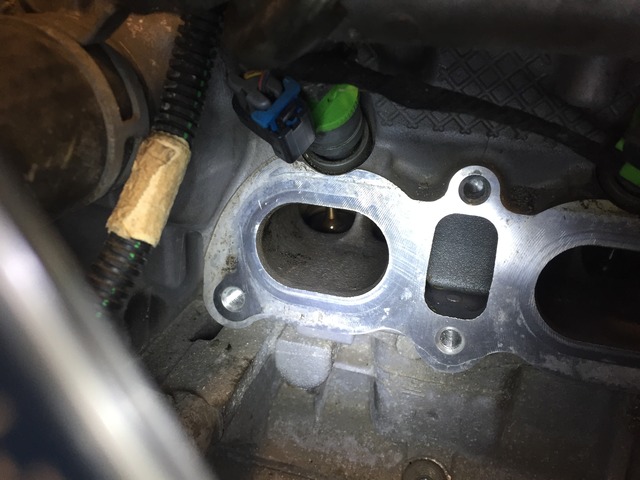
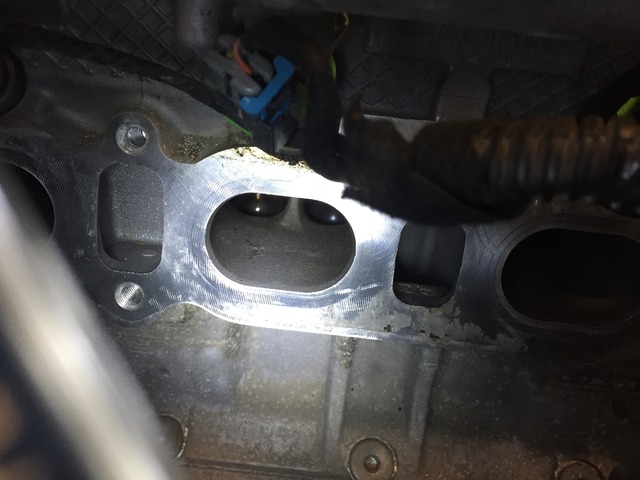
Yesterday I started the option b and dual pass install (got the whole kit from John at Powell Race Parts. He had already connector over half the hoses and such because John is a gentleman like that)
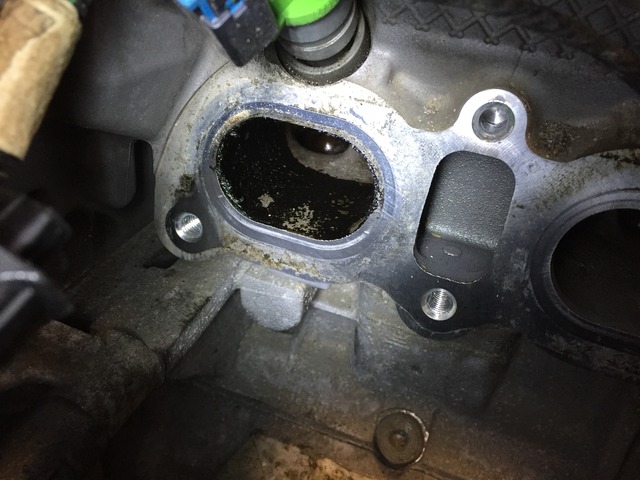
Forgot how much of a c u next tuesday that lower manifold 15mm bolt is lol
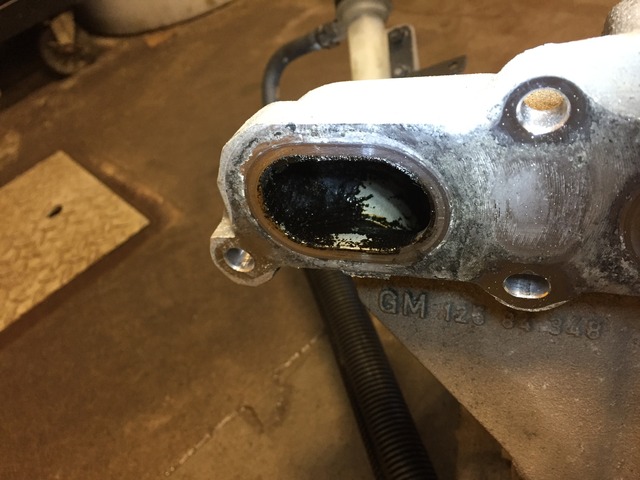
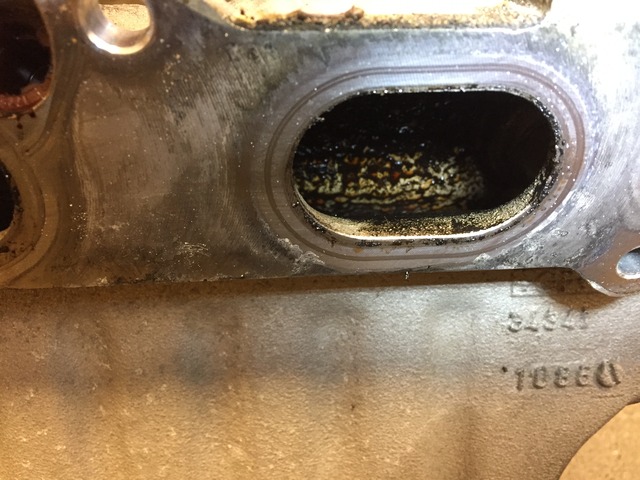
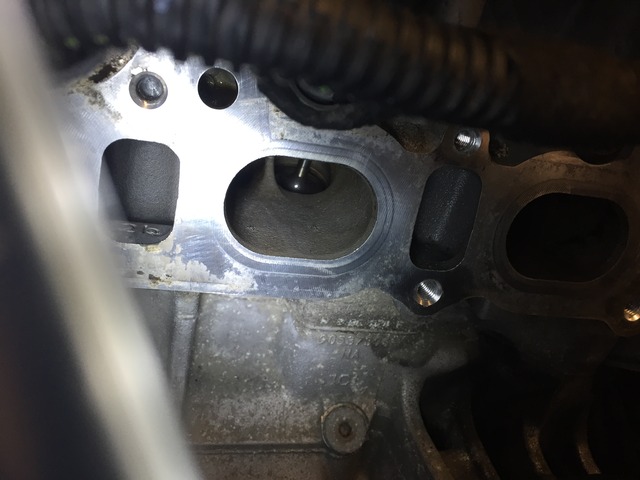
The lovely oily deposits in the runners...
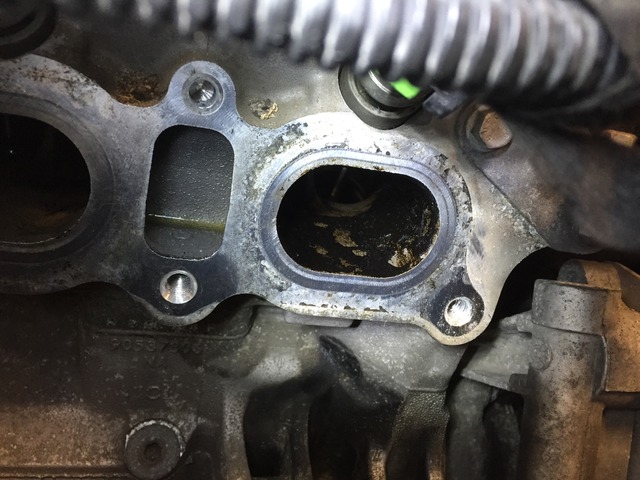
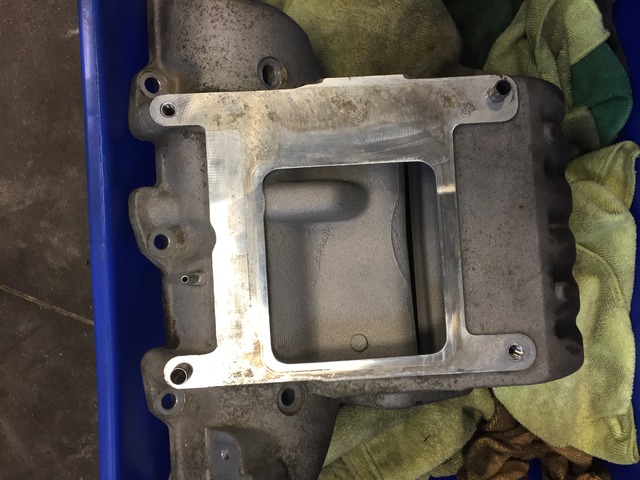
Only finished cleaning one of them
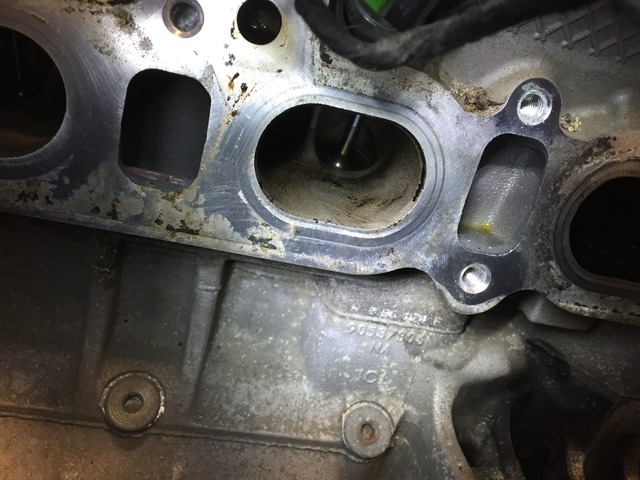
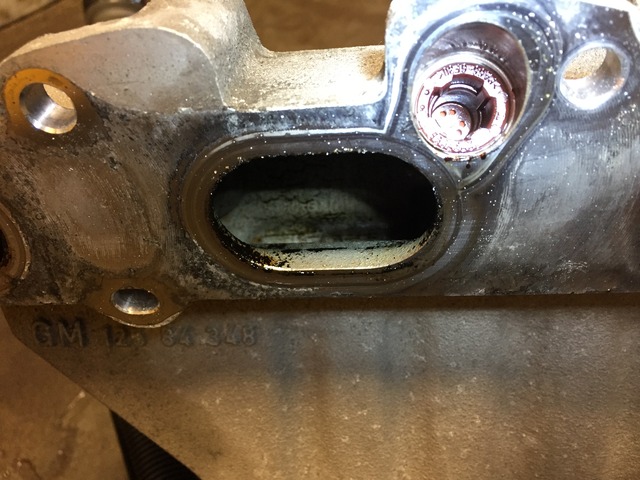
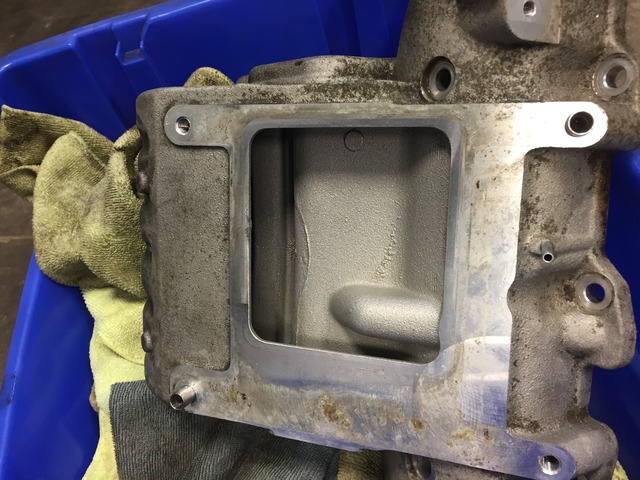
Intake manifold was more of the same
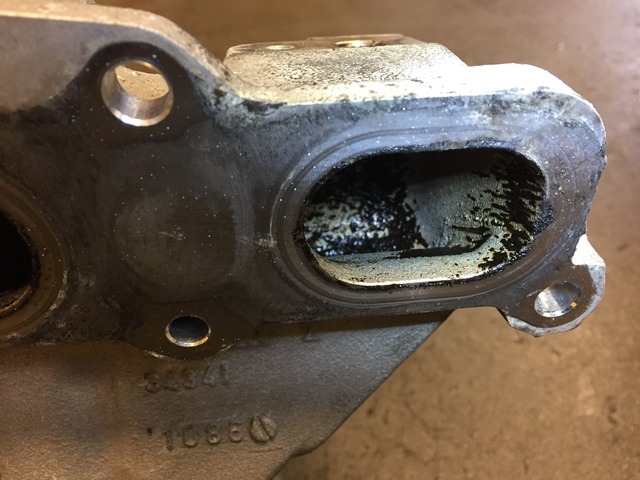
How it's sitting currently
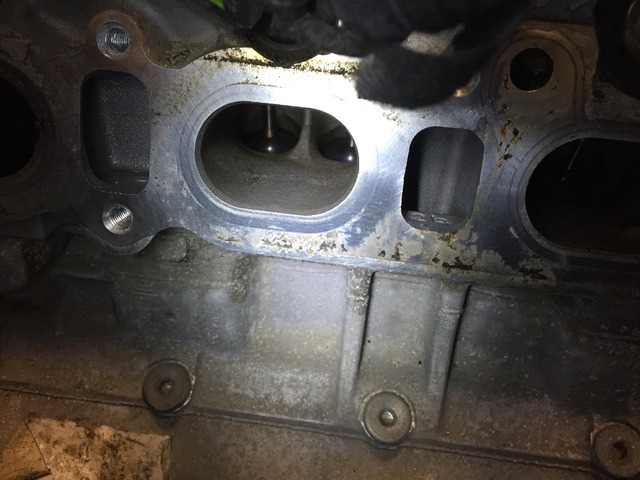
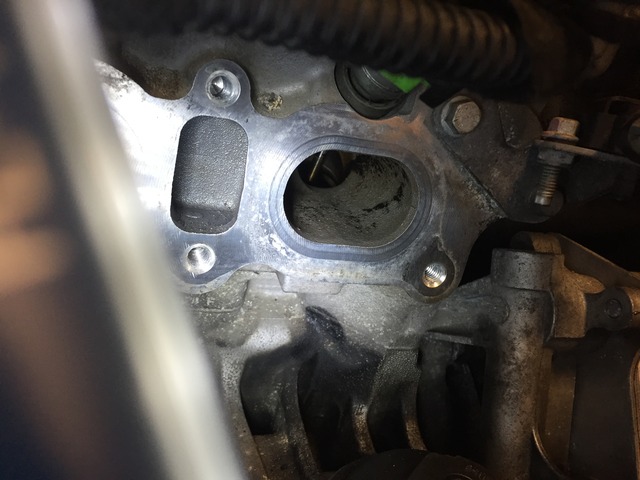
Intake manifold after thorough cleaning
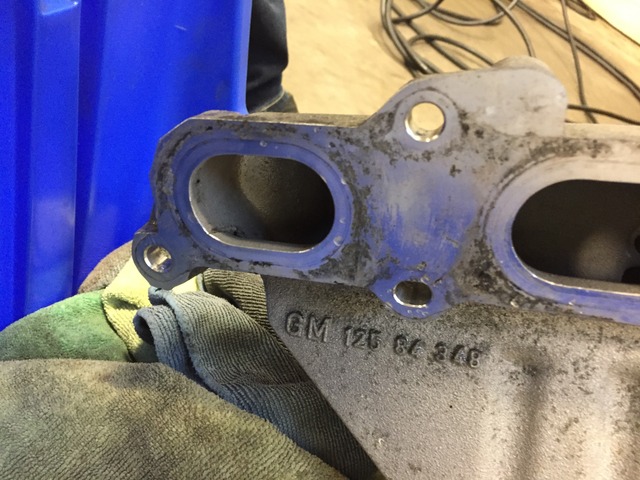
(gasket mating surfaces still need cleaning of course)
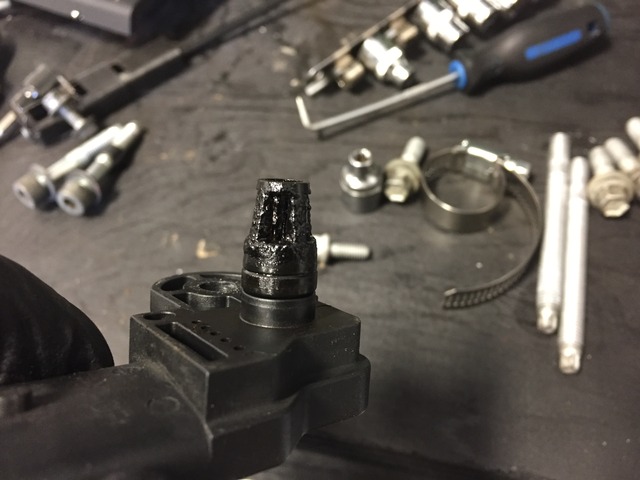
PCV valve after cleaning...was black and coated with sludge prior. Works mint now
Going in to work today to hopefully finish it off and to install Powell rotated mounts. Will have more pictures I'm sure.
Forgot how much of a c u next tuesday that lower manifold 15mm bolt is lol
The lovely oily deposits in the runners...
Only finished cleaning one of them
Intake manifold was more of the same
How it's sitting currently
Intake manifold after thorough cleaning
(gasket mating surfaces still need cleaning of course)
PCV valve after cleaning...was black and coated with sludge prior. Works mint now
Going in to work today to hopefully finish it off and to install Powell rotated mounts. Will have more pictures I'm sure.
Last edited by 2.2balt; Mar 5, 2017 at 08:29 PM.
Thread Starter
Member
Joined: 03-21-09
Posts: 355
Likes: 1
From: Ottawa
^Oh yea I know. The driver side is a TYC oe replacement for a standard car.
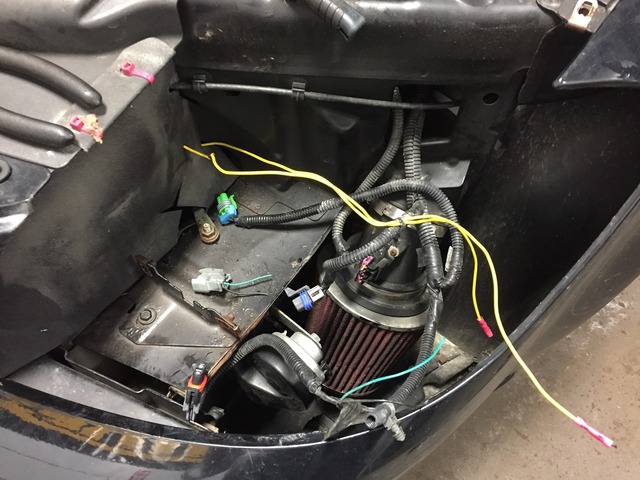
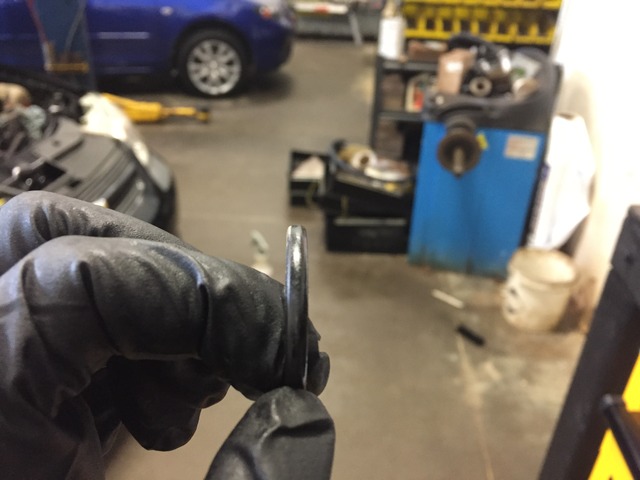
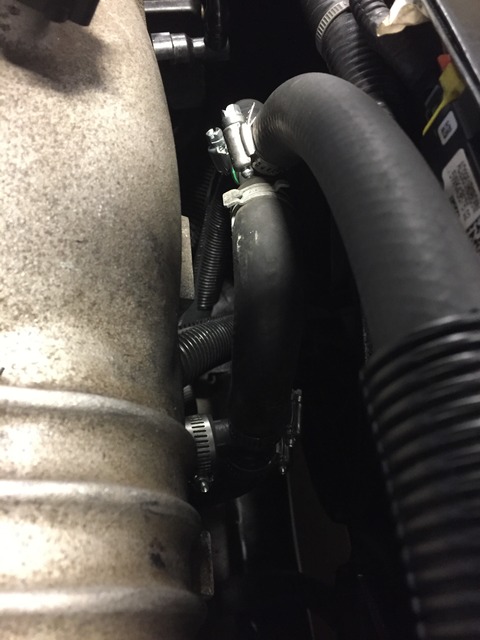
So I finished off the dual pass and option b install. As it turns out it was a good thing I decided to do this because the laminova core seals were toast and it was likely burning some coolant. The bottom core fell out of the manifold when I tilted it to the side to drain the rest of the coolant from the manifold...of which there wasn't actually any coolant left lol
Note the squarish look to the seals
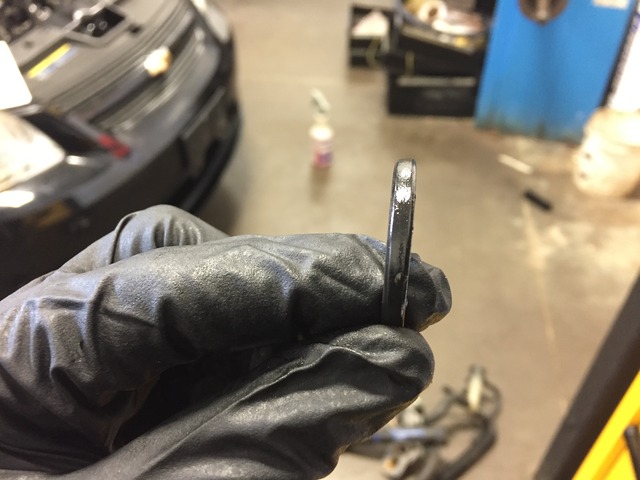
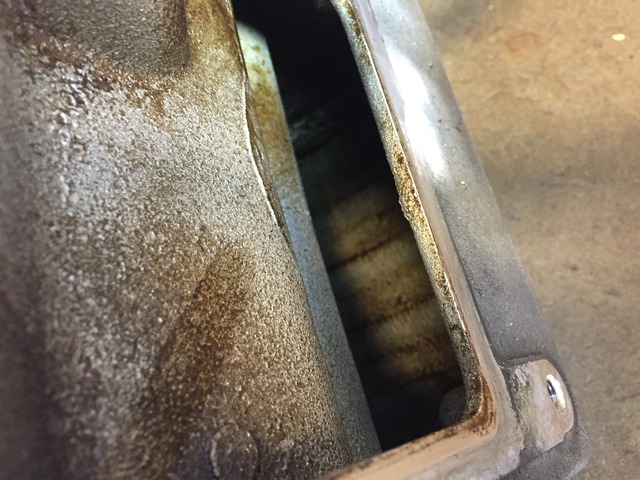
Another example of the crap in the manifold
The cores before
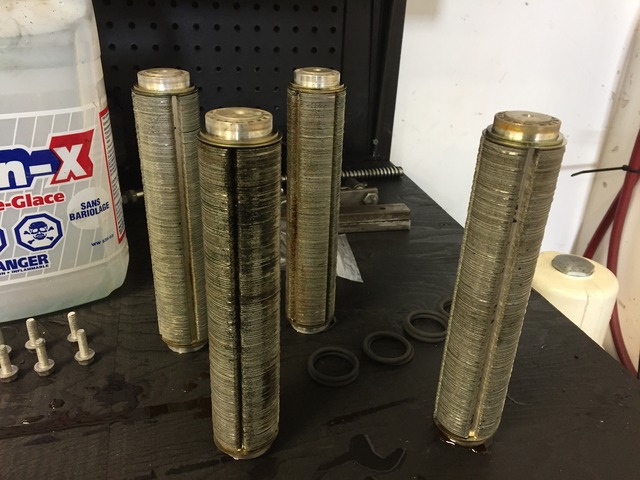
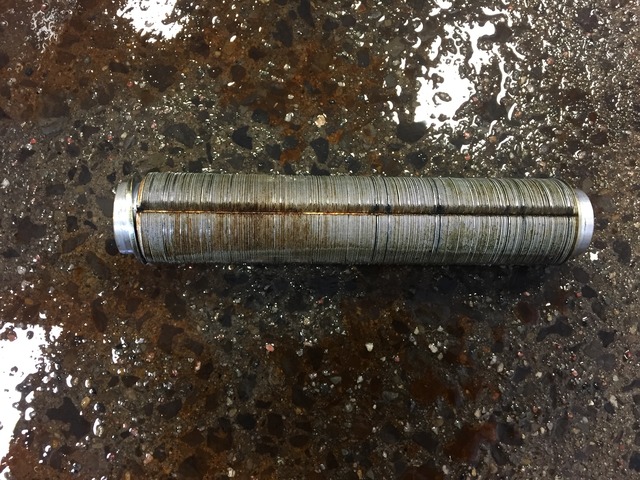
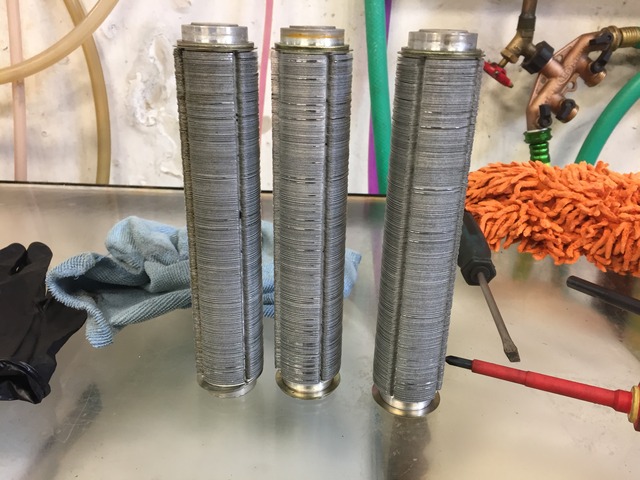
The cores after
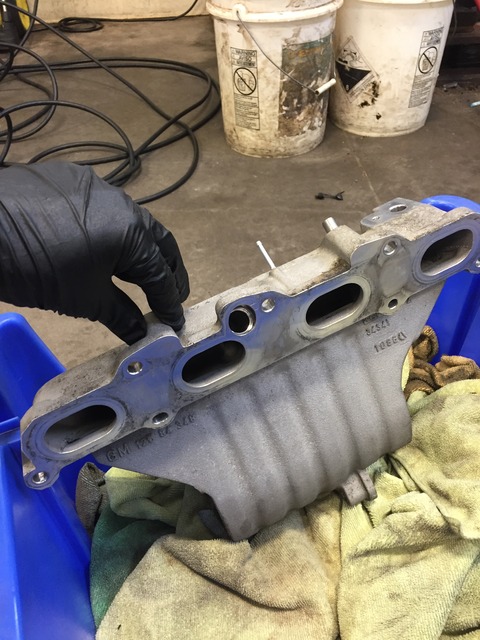
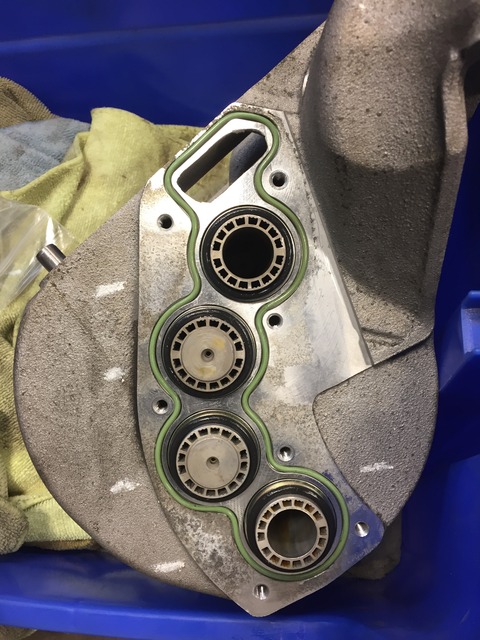
Some shots of the intake manifold and head after cleaning all the garbage out of them
Cleaned cores in
I found this worked well to remove a couple of the cores that were in there tight. You just have to be careful not to damage the ends of the cores. They're easy to mark up
The dual pass endplate I received from John and Gloria at Powell Race Parts. John shipped it like this with the hoses and clamps already in place because he's a gentleman like that
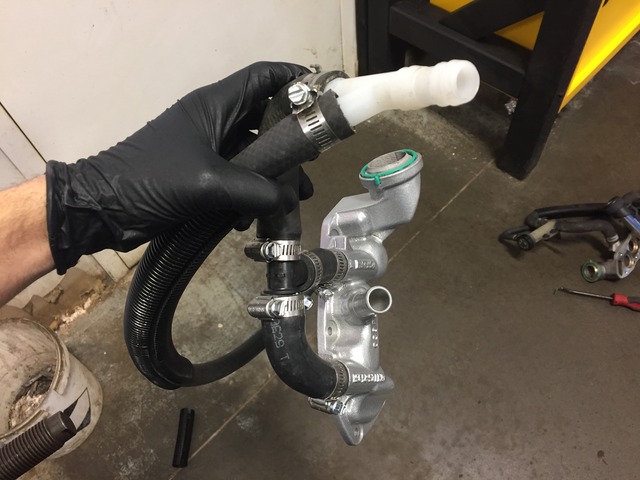
Getting the tank mounted
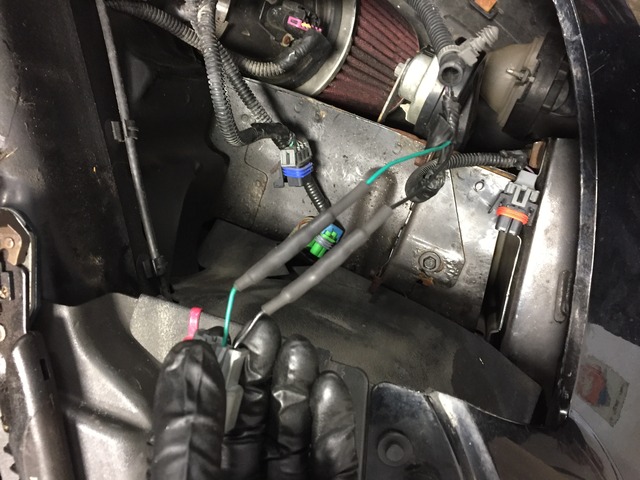
I then pressure tested it to check for leaks and tightened a few clamps and it was good to fill. I used some test leads going from the heat exchanger pump to a booster pack to purge the air (not pictured lol)
So I finished off the dual pass and option b install. As it turns out it was a good thing I decided to do this because the laminova core seals were toast and it was likely burning some coolant. The bottom core fell out of the manifold when I tilted it to the side to drain the rest of the coolant from the manifold...of which there wasn't actually any coolant left lol
Note the squarish look to the seals
Another example of the crap in the manifold
The cores before
The cores after
Some shots of the intake manifold and head after cleaning all the garbage out of them
Cleaned cores in
I found this worked well to remove a couple of the cores that were in there tight. You just have to be careful not to damage the ends of the cores. They're easy to mark up
The dual pass endplate I received from John and Gloria at Powell Race Parts. John shipped it like this with the hoses and clamps already in place because he's a gentleman like that
Getting the tank mounted
I then pressure tested it to check for leaks and tightened a few clamps and it was good to fill. I used some test leads going from the heat exchanger pump to a booster pack to purge the air (not pictured lol)
Thread Starter
Member
Joined: 03-21-09
Posts: 355
Likes: 1
From: Ottawa
Finished product
I then installed the rotated mounts from Powell. So happy to have the hoist and not have to be on the ground
Spacer installed
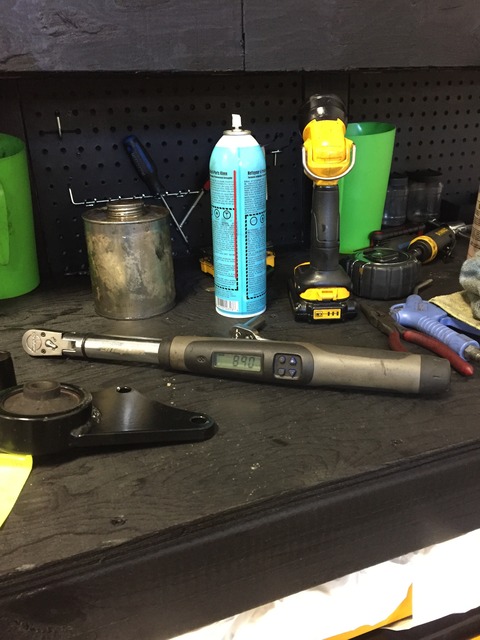
Best tool everrrrrrr
After road test
Road test that ended when I started losing my clutch again...fml
The fix for the clutch was to fully clear the line and slave of the old fluid. This is what was coming out
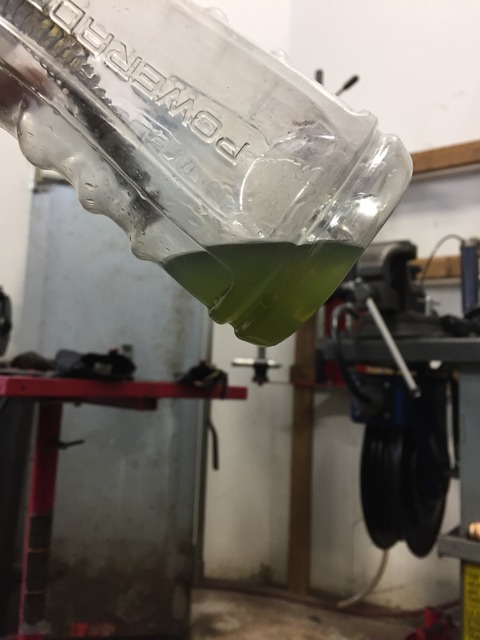
The ATE Typ200 DOT4 I put in when I did the stainless lines is a golden colour....obviously the fluid in the clutch system was super old and sketchy. Road tested it for a while today while being pretty hard on it and I still have a clutch to use so I'm going to say so far problem solved.
Next up is going to be some front stabilizer links and an alignment as it's clacking away baaaad (and the steering wheel is off centre which is bothering me a lot lol). Oh and I need to do fuel lines too since it's leaking a bit by the driver rear wheel...as most do lol
I then installed the rotated mounts from Powell. So happy to have the hoist and not have to be on the ground
Spacer installed
Best tool everrrrrrr
After road test
Road test that ended when I started losing my clutch again...fml
The fix for the clutch was to fully clear the line and slave of the old fluid. This is what was coming out
The ATE Typ200 DOT4 I put in when I did the stainless lines is a golden colour....obviously the fluid in the clutch system was super old and sketchy. Road tested it for a while today while being pretty hard on it and I still have a clutch to use so I'm going to say so far problem solved.
Next up is going to be some front stabilizer links and an alignment as it's clacking away baaaad (and the steering wheel is off centre which is bothering me a lot lol). Oh and I need to do fuel lines too since it's leaking a bit by the driver rear wheel...as most do lol


New Member
Joined: 11-21-16
Posts: 181
Likes: 37
From: Kitchener, ON
Certainly not wasting any time!
I just dropped off a core for the dual pass to John on the weekend.
What did you use to clean the laminova cores? I've got mine out and ready to go. I read somewhere that someone used CLR to clean them, but when I picked some up it said do not use on aluminum. Yours came out quite nice!
I just dropped off a core for the dual pass to John on the weekend.
What did you use to clean the laminova cores? I've got mine out and ready to go. I read somewhere that someone used CLR to clean them, but when I picked some up it said do not use on aluminum. Yours came out quite nice!
Thread Starter
Member
Joined: 03-21-09
Posts: 355
Likes: 1
From: Ottawa
I just used brake clean and a small stiff nylon bristle brush to agitate it a bit. Probably used a full can between the four of them. It was John's recommendation and it worked very well.
Thanks, that's the plan! What's the issue with the knuckles? I'm assuming the LNF knuckles would be an upgrade over the factory LSJ ones?I have to get it done fast because once April hits it's the beginning of our busy season at work and there wont be any free time to be had haha
I just used brake clean and a small stiff nylon bristle brush to agitate it a bit. Probably used a full can between the four of them. It was John's recommendation and it worked very well.
I just used brake clean and a small stiff nylon bristle brush to agitate it a bit. Probably used a full can between the four of them. It was John's recommendation and it worked very well.

Senior Member
Joined: 06-10-12
Posts: 2,880
Likes: 63
From: Manitoba, Canada
 Moderator

Thread Starter
Member
Joined: 03-21-09
Posts: 355
Likes: 1
From: Ottawa
So I've got a little update...nothing crazy.
Found a pair of decent condition 2008 G5 headlights for sale in town so I replaced the two mismatched ones. Looks much better now.
I also replaced the front end links due to some pretty nice rattling in the front end. Ended up finding that the previous owner put FE1/FE3 links in there. I'd say I was surprised but honestly I'm not. Another indicator that the previous owner was an idiot hack who should have left well enough alone.
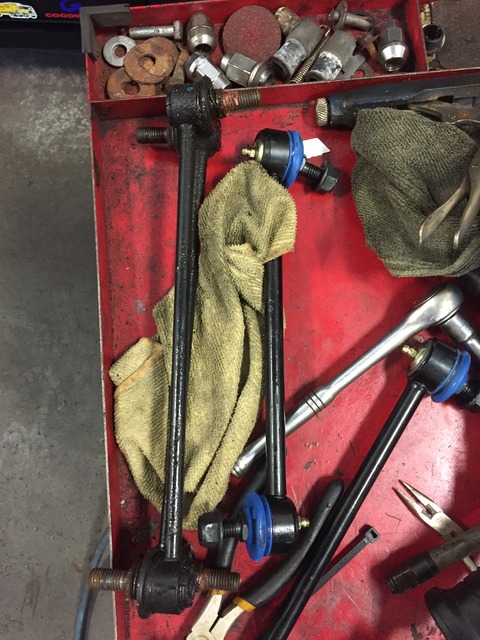
Went with AC Delco advantage replacements. Could have gone higher end, but my cost on them is a joke and they are warrantied for 5 years through my supplier so whatever I think they'll do just fine. Still have noise in front end though, which can only be the horrible KYB struts. Need to replace them, along with the bump stops which were cut, and the upper spring seats which are all bloated with rust. Going to order LNF struts and rear shocks this week.
Next project is replacing the leaking fuel lines. I'm sure it will be oodles of fun...
Found a pair of decent condition 2008 G5 headlights for sale in town so I replaced the two mismatched ones. Looks much better now.
I also replaced the front end links due to some pretty nice rattling in the front end. Ended up finding that the previous owner put FE1/FE3 links in there. I'd say I was surprised but honestly I'm not. Another indicator that the previous owner was an idiot hack who should have left well enough alone.
Went with AC Delco advantage replacements. Could have gone higher end, but my cost on them is a joke and they are warrantied for 5 years through my supplier so whatever I think they'll do just fine. Still have noise in front end though, which can only be the horrible KYB struts. Need to replace them, along with the bump stops which were cut, and the upper spring seats which are all bloated with rust. Going to order LNF struts and rear shocks this week.
Next project is replacing the leaking fuel lines. I'm sure it will be oodles of fun...


Thread Starter
Member
Joined: 03-21-09
Posts: 355
Likes: 1
From: Ottawa
Got some news on this one after a few weeks of gathering parts and fixing things.
First the stuff I don't have pictures of:
-replaced the fuel lines (or more accurately had one of my techs replace them as I was too busy). Used the kit from linestogo.com. Highly recommended. Nice fit. Easy enough to put in.
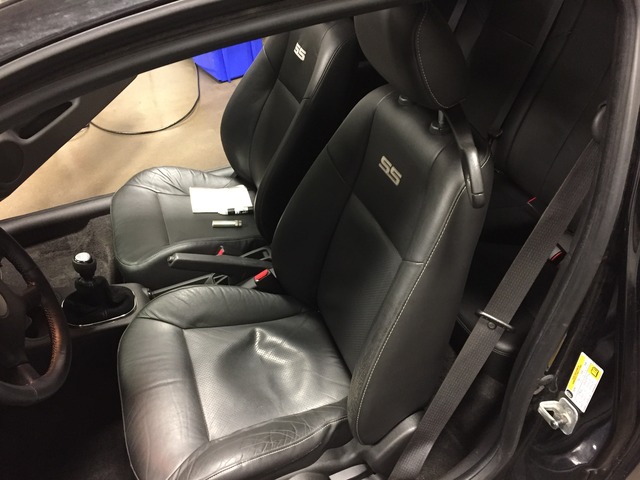
-picked up a pair of Recaros. Decent shape. Love these seats. Had a pair in my last Cobalt too.
-replaced my stabilizer bar bushings which didn't fix the rattle in the front end, which I had a feeling it wouldn't since there was no excessive play on the bar. It was more preventative maintenance.
-replaced the right front KYB strut which did cure the rattling. Ended up that the guy who had it before bought the struts and lower springs from a shop in town we deal with and the struts were still in warranty so it didn't cost anything (score!). Also replaced the upper spring mounts and bump stops as the mounts were getting rotted and the bump stops were cut. Ride super quiet now (not even like quiet for a Cobalt, but actually quiet lol)
-contrary to what is typically the case on these cars, the control arm bushings are fine. No rips or tears, and no excessive play. I'll likely upgrade to Powell bushings in the future but for now they're fine.
And now onto the bigger job. I had posted before about my clutch issues and bleeding it seemed to help. Well, after bleeding it even longer a second time I still lost the clutch one night so I opted to replace everything.
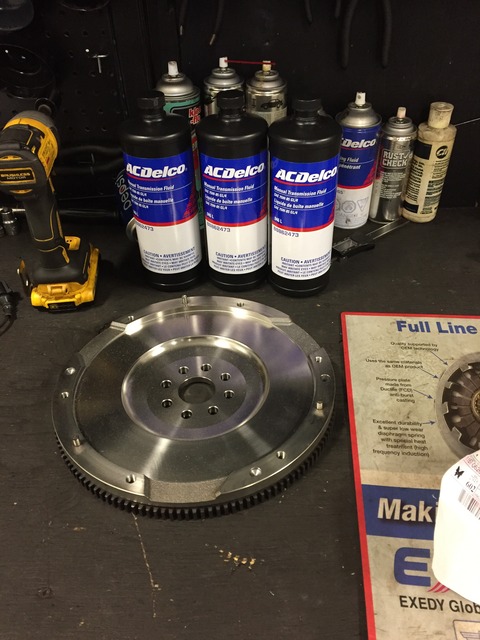
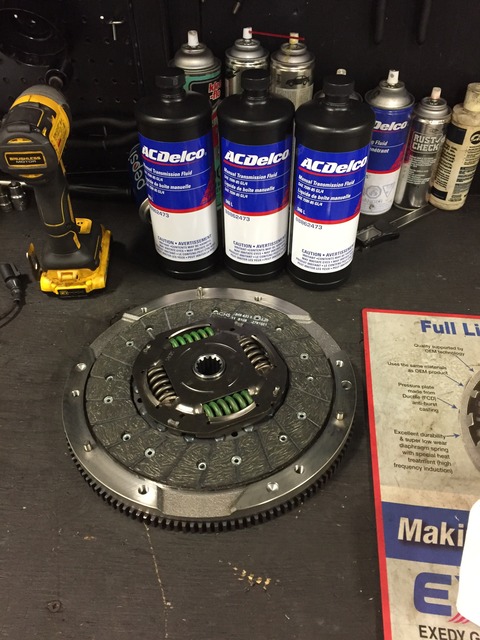
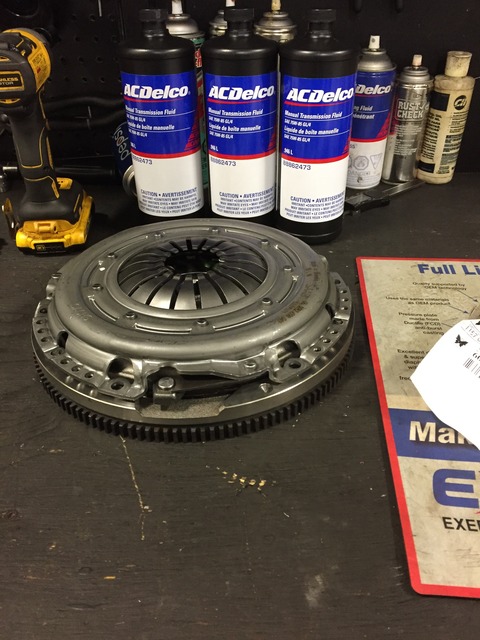
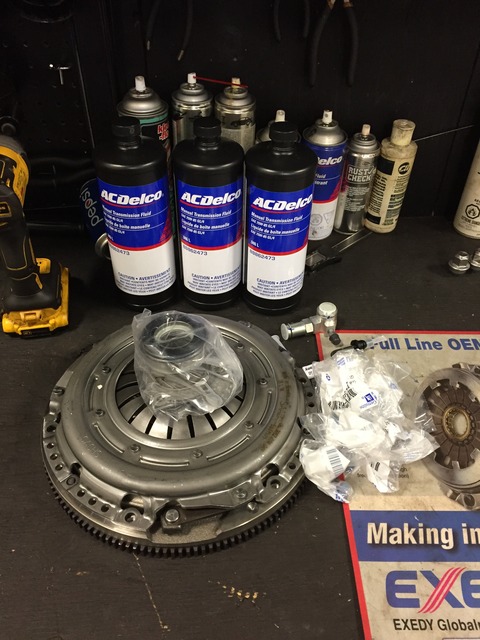
I picked up:
-GMPP clutch kit
-new oem flywheel
-new flywheel bolts
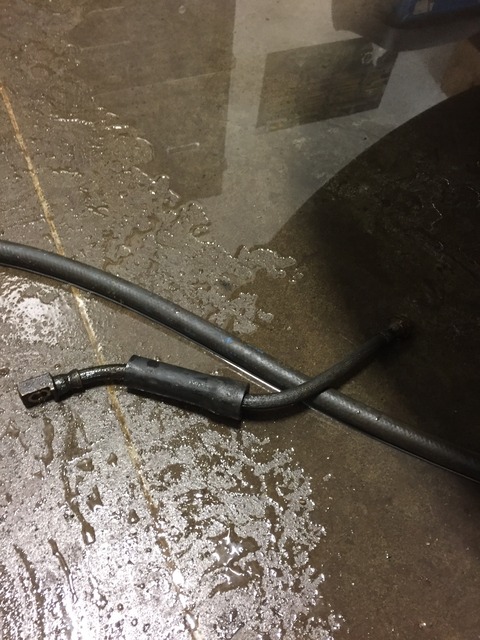
-new clutch hard line
-new elbow
-gm manual trans fluid (the proper stuff, not syncromesh generic they have)

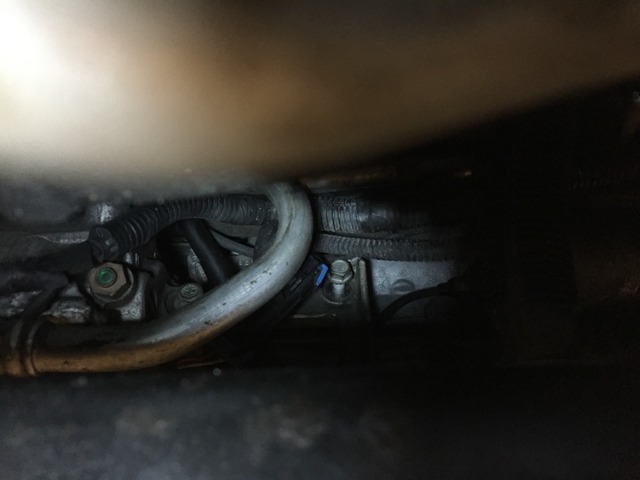
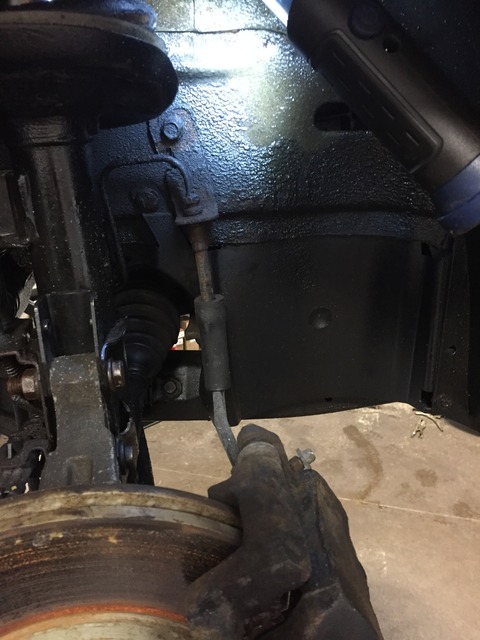
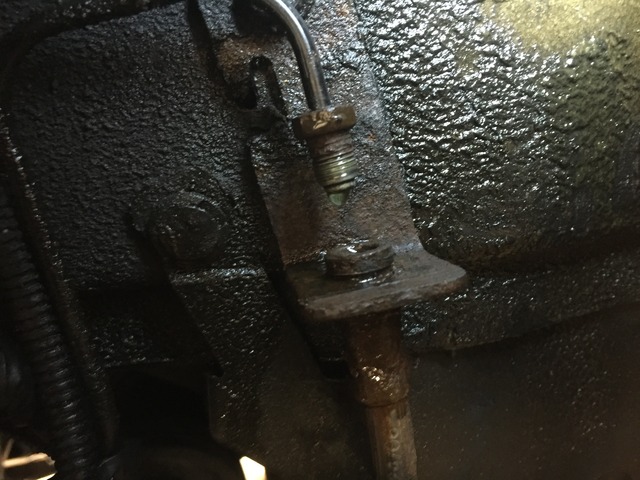
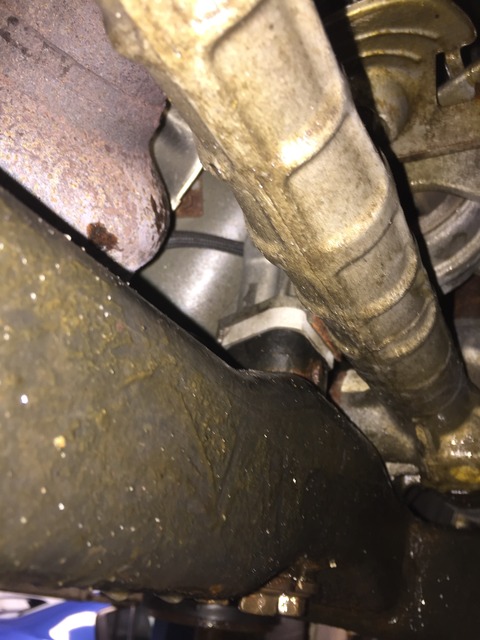
The offending leak (little hard to see in the pictures but it was a nice golden drip that was forming there (the ATE Typ200 is gold)
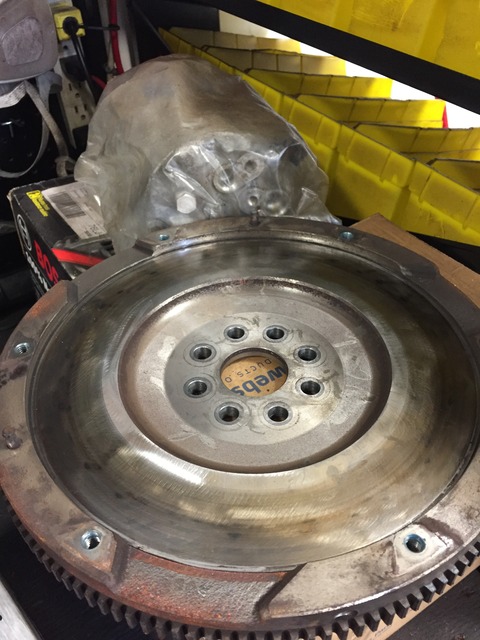
Clutch out. Rear main not leaking (score!)

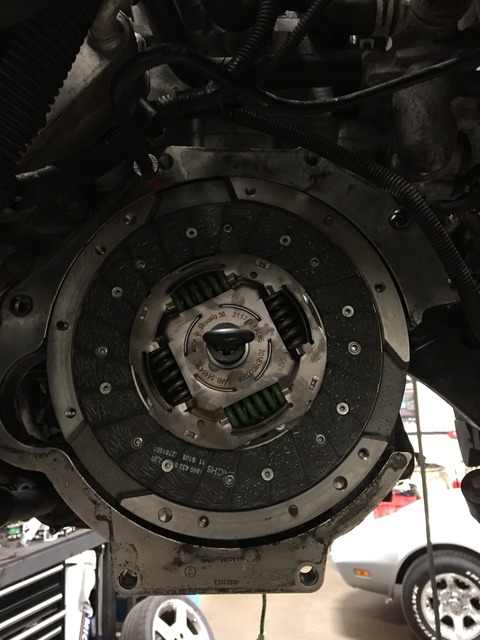
The clutch that was put in very recently by the previous owner (Bully stage 1)
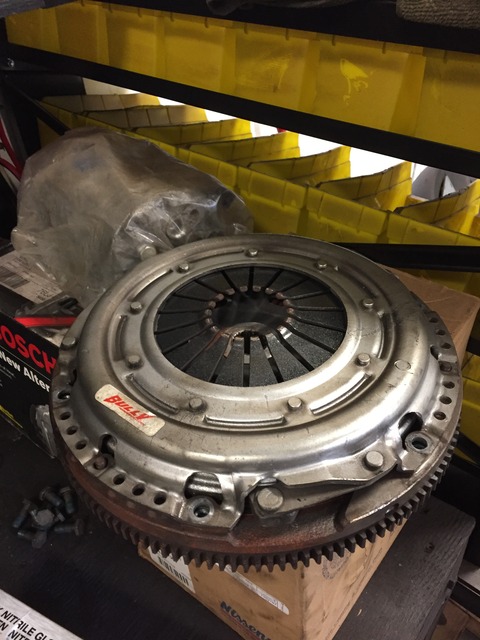
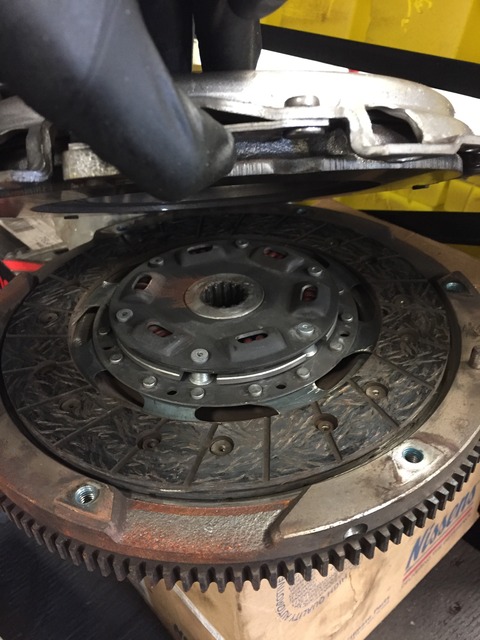
Old flywheel. Pretty sure someone machined it which is why the slave was leaking. The shop in town that supplies clutches for everyone always machines flywheels so previous owner likely had that done which caused the issues.
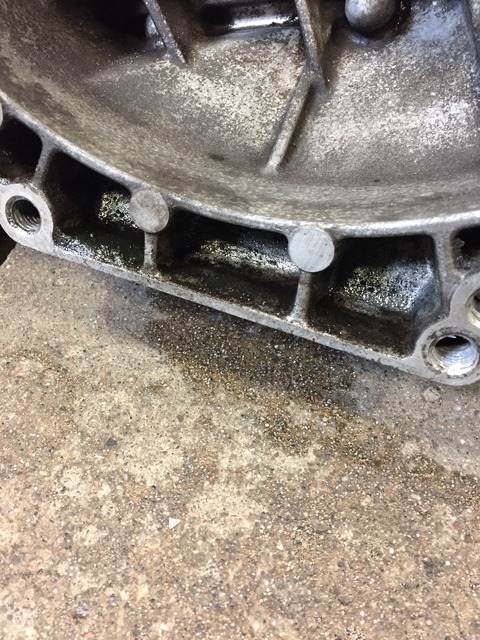
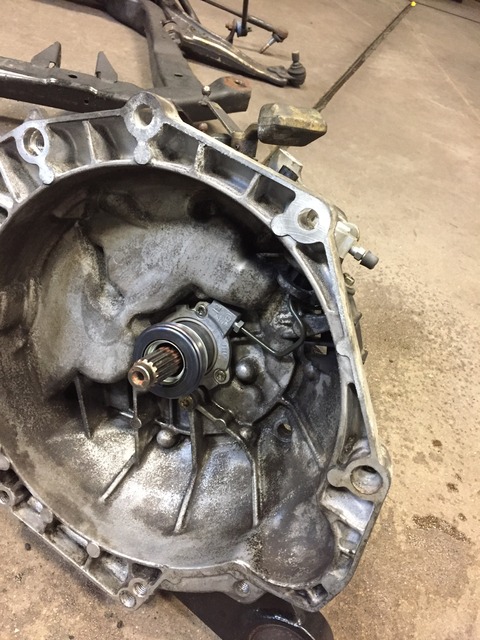
This doesn't look that bad but I took this picture after my buddy cleaned the inside of the bellhousing. It was worse
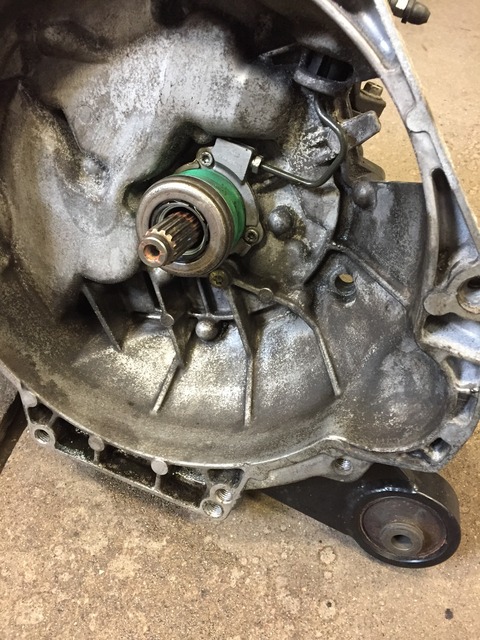
Some residue down here still. Whole thing was like that
First the stuff I don't have pictures of:
-replaced the fuel lines (or more accurately had one of my techs replace them as I was too busy). Used the kit from linestogo.com. Highly recommended. Nice fit. Easy enough to put in.
-picked up a pair of Recaros. Decent shape. Love these seats. Had a pair in my last Cobalt too.
-replaced my stabilizer bar bushings which didn't fix the rattle in the front end, which I had a feeling it wouldn't since there was no excessive play on the bar. It was more preventative maintenance.
-replaced the right front KYB strut which did cure the rattling. Ended up that the guy who had it before bought the struts and lower springs from a shop in town we deal with and the struts were still in warranty so it didn't cost anything (score!). Also replaced the upper spring mounts and bump stops as the mounts were getting rotted and the bump stops were cut. Ride super quiet now (not even like quiet for a Cobalt, but actually quiet lol)
-contrary to what is typically the case on these cars, the control arm bushings are fine. No rips or tears, and no excessive play. I'll likely upgrade to Powell bushings in the future but for now they're fine.
And now onto the bigger job. I had posted before about my clutch issues and bleeding it seemed to help. Well, after bleeding it even longer a second time I still lost the clutch one night so I opted to replace everything.
I picked up:
-GMPP clutch kit
-new oem flywheel
-new flywheel bolts
-new clutch hard line
-new elbow
-gm manual trans fluid (the proper stuff, not syncromesh generic they have)
The offending leak (little hard to see in the pictures but it was a nice golden drip that was forming there (the ATE Typ200 is gold)
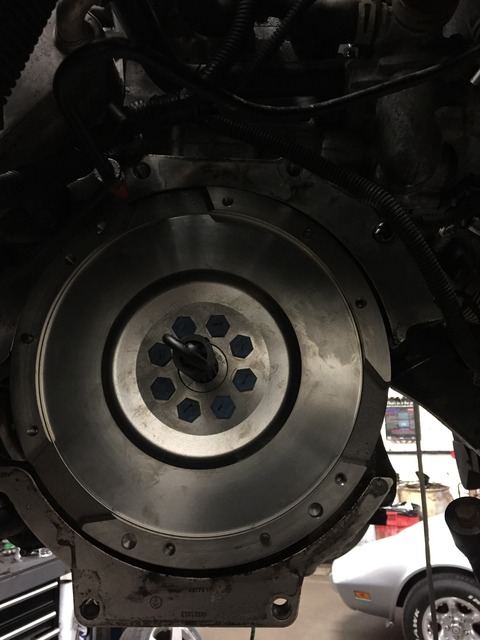
Clutch out. Rear main not leaking (score!)
The clutch that was put in very recently by the previous owner (Bully stage 1)
Old flywheel. Pretty sure someone machined it which is why the slave was leaking. The shop in town that supplies clutches for everyone always machines flywheels so previous owner likely had that done which caused the issues.
This doesn't look that bad but I took this picture after my buddy cleaned the inside of the bellhousing. It was worse
Some residue down here still. Whole thing was like that
Last edited by 2.2balt; May 7, 2017 at 08:59 PM.
Thread Starter
Member
Joined: 03-21-09
Posts: 355
Likes: 1
From: Ottawa
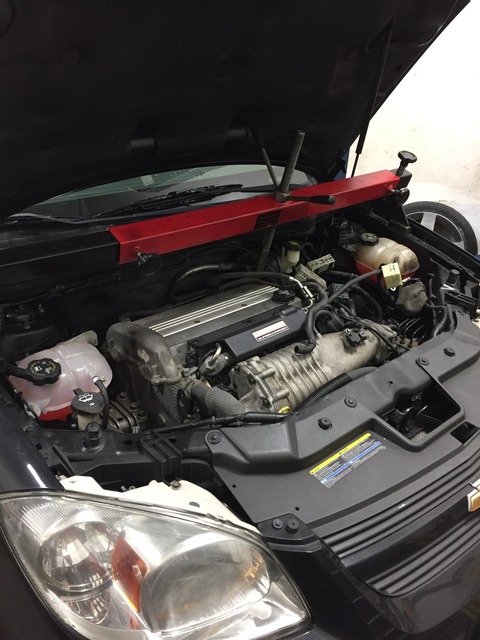
On to the reassembly!
The offset pattern of the flywheel bolts had me nervous when I first offered the flywheel up, but all was ok. And yes I know I have the alignment tool in there before the disc. I was rather tired during all of this so it may have taken me a minute to realize why the disc didn't fit lol
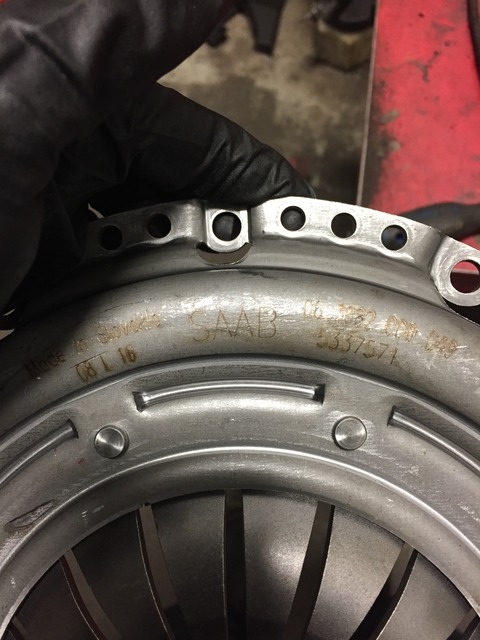
This makes more sense...
Lol Saab...
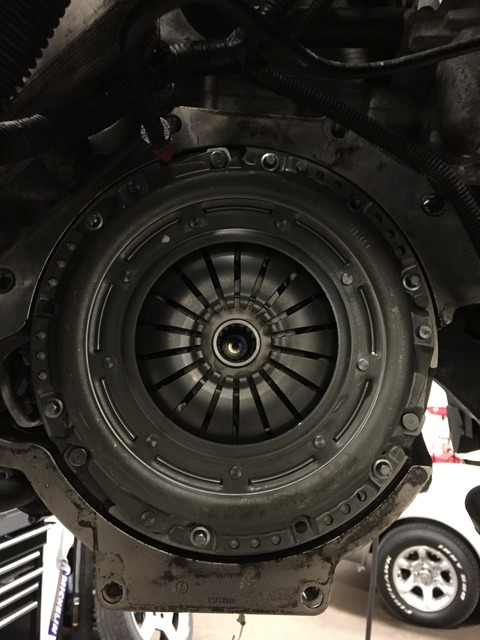
Back in!
Cradle in!
Car drives great now. Clutch is easier to use than the previous one, and so far so good for clutch feel. Still breaking it in and test driving but it's good.
I know the other clutch is fine and some people will likely be thinking "Why not just change the slave if it was leaking and leave everything else?". Well, I did all of this after work Saturday and Sunday afternoon. Having the car sit on the hoist into Monday was not an option (busy time of year and I need all my bays taking work in). The only way I could address this clutch problem was to have all the parts I would need ready to go in case they needed to be replaced. This meant having a new flywheel ready, new clutch kit with slave, new hard line, new elbow, and the required fluid, and anything else essential to getting the car moving and out of the shop. Sourcing these parts meant basically special ordering everything, and no returns- so if I was going to pull the transmission out I'd be replacing everything that is there with stuff I know to be good so I don't have to revisit this again.
The offset pattern of the flywheel bolts had me nervous when I first offered the flywheel up, but all was ok. And yes I know I have the alignment tool in there before the disc. I was rather tired during all of this so it may have taken me a minute to realize why the disc didn't fit lol
This makes more sense...
Lol Saab...
Back in!
Cradle in!
Car drives great now. Clutch is easier to use than the previous one, and so far so good for clutch feel. Still breaking it in and test driving but it's good.
I know the other clutch is fine and some people will likely be thinking "Why not just change the slave if it was leaking and leave everything else?". Well, I did all of this after work Saturday and Sunday afternoon. Having the car sit on the hoist into Monday was not an option (busy time of year and I need all my bays taking work in). The only way I could address this clutch problem was to have all the parts I would need ready to go in case they needed to be replaced. This meant having a new flywheel ready, new clutch kit with slave, new hard line, new elbow, and the required fluid, and anything else essential to getting the car moving and out of the shop. Sourcing these parts meant basically special ordering everything, and no returns- so if I was going to pull the transmission out I'd be replacing everything that is there with stuff I know to be good so I don't have to revisit this again.
Last edited by 2.2balt; May 7, 2017 at 09:01 PM.