
painted stock headunit


Thread Starter
Senior Member
Joined: 12-30-10
Posts: 584
Likes: 0
From: Lima, Ohio
painted stock headunit
Ok I did this cuz iv never seen anyone do this plus I hate the silver color. I had a aftermarket headunit( don't ask)lol. So now I have to use this one for the time being. Here's some pics let me know what you guys think.
Before
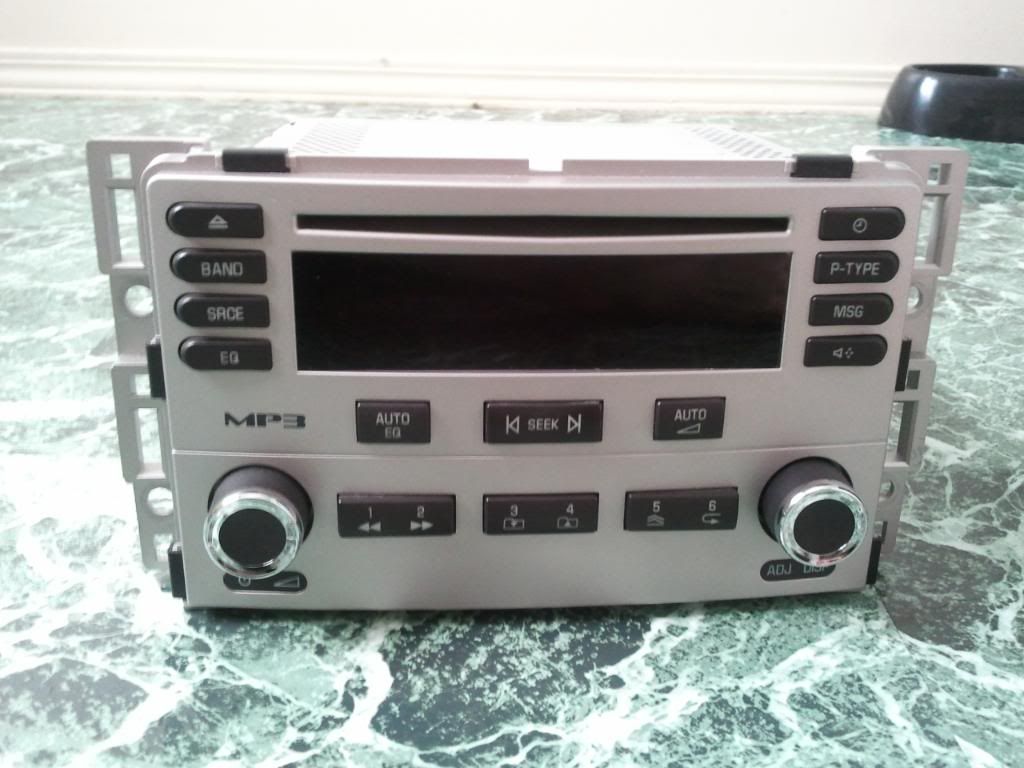
Prep

After...I still need to clean some of the paint that managed to get on the screen off

Sorry for the crappy pics and ill also post one when I get it installed
Before
Prep
After...I still need to clean some of the paint that managed to get on the screen off
Sorry for the crappy pics and ill also post one when I get it installed


Thread Starter
Senior Member
Joined: 12-30-10
Posts: 584
Likes: 0
From: Lima, Ohio


New Member
Joined: 07-12-08
Posts: 131
Likes: 0
From: Arkansas
The two spots that you had covered with tape at the bottom look like ****, but the rest is nice man. Just take an exact-o knife and clean those spots up for practice.
Nice job overall, just gotta fix that little bit.
Did you use multiple coats, or just one? Because it looks like you might have laid it all on thick at once haha. Multiple coats ftw.
Just constructive criticism man, we all had to start somewhere.
I mean look at my rims, they look like ****. At least you picked out badass ones, xD.
Thread Starter
Senior Member
Joined: 12-30-10
Posts: 584
Likes: 0
From: Lima, Ohio
The two spots that you had covered with tape at the bottom look like ****, but the rest is nice man. Just take an exact-o knife and clean those spots up for practice.
Nice job overall, just gotta fix that little bit.
Did you use multiple coats, or just one? Because it looks like you might have laid it all on thick at once haha. Multiple coats ftw.
Just constructive criticism man, we all had to start somewhere.
I mean look at my rims, they look like ****. At least you picked out badass ones, xD.
Nice job overall, just gotta fix that little bit.
Did you use multiple coats, or just one? Because it looks like you might have laid it all on thick at once haha. Multiple coats ftw.
Just constructive criticism man, we all had to start somewhere.
I mean look at my rims, they look like ****. At least you picked out badass ones, xD.

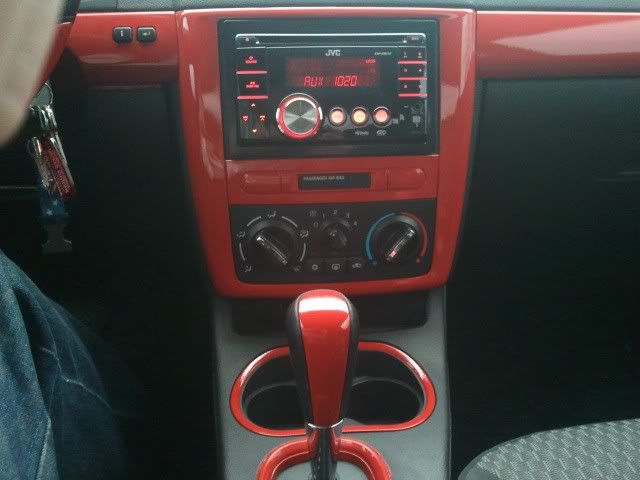
here's a pic of my dash trim looks pretty good I think

New Member
Joined: 08-13-11
Posts: 186
Likes: 0
From: Phoenix, Az


umm had 4 people in my car at school today and all have been in and out of it quite a bit and not a single one even knew it was painted until we got to talking about it lol. it looks factory which is what i was going for. I'll get a better pic sometime. that pic sucked!


Senior Member
Joined: 05-13-08
Posts: 1,909
Likes: 1
From: Strasburg, VA/ Blacksburg, VA
sanded down then cleaned. primered with rustoleum plastic primer then wet sanded that then cleaned again then used rustoleum acrylic enamel flat black. dries very smooth and very well then waited for the first few coats to dry wet sanded it to get it smooth again then laid another 2 coats all around to make sure i didn't miss anywhere. turned out great!
New Member
Joined: 08-13-11
Posts: 186
Likes: 0
From: Phoenix, Az
sanded down then cleaned. primered with rustoleum plastic primer then wet sanded that then cleaned again then used rustoleum acrylic enamel flat black. dries very smooth and very well then waited for the first few coats to dry wet sanded it to get it smooth again then laid another 2 coats all around to make sure i didn't miss anywhere. turned out great!
I've been wanting to do this for a while but haven't been motivated lol. N now I am
wet sanding? when u use a really high grit sand paper like 1000 grit 1500 grit 2000 grit. dip the sand paper into dish soapy water then get whatever it is you're sanding wet with the sand paper then smoothly sand it. it will do just a very light and smooth scuffing.