
Appearance: How To: 3rd Brake Light LED Conversion!

Thank you
The only problem I think might arise is the "bass" factor.
I'm worried about my subs shaking it loose.
I think I have a solution
The Impala light comes with a grey piece that would be equal to our crome housing. If you look at the pics of the blue balt on the prev. page its sitting infront of the case of water in one of the pics.
This piece has clips that hold the LED board in place. Since I don't want to hot glue gun the LED board down and I don't see the 2 way tape standing the test of time, I was going to use the dremel and cut just the insert part of the impala piece out and glue it into my crome housing the just clip the LED board in. IOn theory it should work but like any other DIY mod there is a 50/50 chance so...
I let you if it works
Senior Member
Joined: 05-10-05
Posts: 2,250
Likes: 0
From: Dekalb, IL

Back from the dead:
I called it the CMD light because my friends Curtis, Mike, and Dave came up with it. I thought I'd name it in their honor since they came up with it. All I did was duplicate what they did and post it on the internet.
Btw, to all those that think the light is crooked in the OP. I guarantee you it is not. It was just the crappy cell phone, and the fact that the car was parallel parked on a downward slope to the right. This light has withstood the test of time so far with no repair or modification needed after only using double-sided tape.

Member
Joined: 06-09-07
Posts: 328
Likes: 0
From: Pennsylvania
Just want to make sure.The only thing holding the led strip to the original chrome insert where the bulbs go is a few small strips of 3m tape at the point where the led strip touches it?Just did this mod and wanted to see if anyone has problems with it coming loose? Thanks


Oh well, what I did was this:
To keep it level, I just put the board up against the bottom of the chrome housing and taped along the bottom. Half the tape along the board, the other half onto the housing. It works for now
To keep it level, I just put the board up against the bottom of the chrome housing and taped along the bottom. Half the tape along the board, the other half onto the housing. It works for now


New Member
Joined: 08-15-10
Posts: 169
Likes: 0
From: Ft. Lauderdale
QUESTION...potentially noobish. On one of the websites selling these LED conversions they mention to leave a light bulb in so as to have the proper resistance for ... cruise control? How would that even be related? I don't image you would need resistors for the center brake light.
^^ You do NOT need resistors for the 3rd brake light. If your cruise control goes out after you do the conversion, just unhook the battery for 10 miuntes, then hook it back up.
Where do I go to see their how to? I put on search 15794273?...
I saw this over on .com and wanted to share it with everyone over here.
All credit goes to DOMIN8 GT, Curtis, Mike and Dave. They came up with it.
What do you guys think? Here is their How-To. LED Light Part #15794273

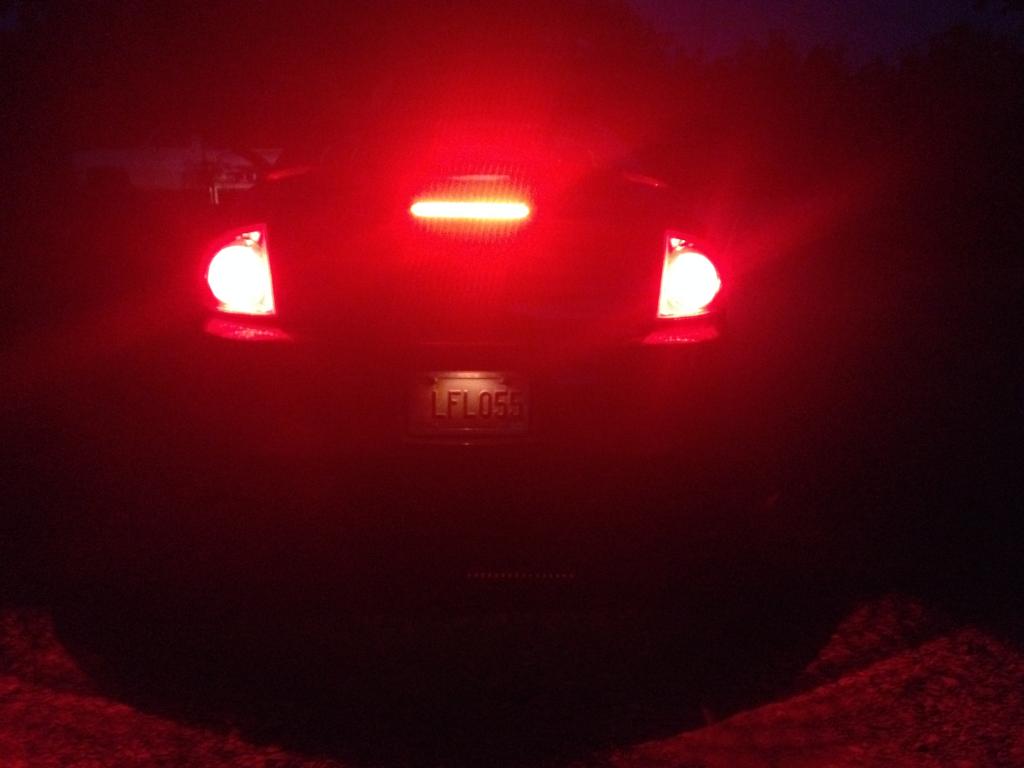
This mod is amazingly simple, and is fairly inexpensive. Less than $60 (supplier pricing) for me and takes about 30 minutes to do.
1) Go to Chevy dealer and get the 3rd brake light for the 2004 Chevy Impala. I'm sorry, I don't know the part number. This item lists for approx. $70-$75. Go home and disassemble this part. All you want is the piece that looks like a computer board with several led lights.
2) Remove trunk lid liner by removing the 7 plastic retaining caps.
3) Remove stock brake light by removing the 2 10mm nuts. When trying to pull the light out there is a retaining type of clip think on the right side, just push that to the left and pull light out. Unplug.
4) Disassemble Cobalt 3rd brake light. The part that you don't need is the black portion that contains the 3 bulbs.
5) Affix the Impala led board to the silver reflective housing some how. I used 2 sided tape, just like the same that is used to hold on badges and body molding since this is durable to heat. I did this by folding 2 strips about 3/4" long over the 2 creases that seperate the portions of reflective area in the silver housing and then one long strip on the back of the light board. I then centered the board in the housing and pressed firmly down to make it stick. If you do this, be careful to not break the board. Other people have superglued this in. Don't use gorilla glue. It won't work. Didn't for me.
6) To wire the board in correctly first pull the Cobalt plug through the housing and past the light board so that you can plug in the lights.
7) And here's where you need to be very careful to what you are doing. The plug is labeled with which side is "+" and which side is "-" by marking them "A" and "B". Since the Impala didn't have a plug on the board, just 2 colored wires with tabs in which you can insert into the Cobalt plug you will need to make sure You identify "A" and "B". The red wire goes in "A", the black wire goes in "B". I then used electrical tape and wrapped this up to prevent any problems here, though it really doesn't need it. Then push the plug with wires behind the light board.
8) Reattatch red brake lens to housing and reinsert entire light into trunk making sure the light is properly placed.
9) Then tighten down with 2 nuts that you removed earlier and replace trunk liner and reinsert plastic caps.
It's that simple. The Impala light is kept in stock, so no special ordering needed.
If you have any further questions, please feel free to ask.
Oh, one last thing. I have been asked to refer to this as the CMD light, not the led light. Curtis, Mike, and Dave of www.RockyMountainEcotec.net came up with this.
All credit goes to DOMIN8 GT, Curtis, Mike and Dave. They came up with it.
What do you guys think? Here is their How-To. LED Light Part #15794273
This mod is amazingly simple, and is fairly inexpensive. Less than $60 (supplier pricing) for me and takes about 30 minutes to do.
1) Go to Chevy dealer and get the 3rd brake light for the 2004 Chevy Impala. I'm sorry, I don't know the part number. This item lists for approx. $70-$75. Go home and disassemble this part. All you want is the piece that looks like a computer board with several led lights.
2) Remove trunk lid liner by removing the 7 plastic retaining caps.
3) Remove stock brake light by removing the 2 10mm nuts. When trying to pull the light out there is a retaining type of clip think on the right side, just push that to the left and pull light out. Unplug.
4) Disassemble Cobalt 3rd brake light. The part that you don't need is the black portion that contains the 3 bulbs.
5) Affix the Impala led board to the silver reflective housing some how. I used 2 sided tape, just like the same that is used to hold on badges and body molding since this is durable to heat. I did this by folding 2 strips about 3/4" long over the 2 creases that seperate the portions of reflective area in the silver housing and then one long strip on the back of the light board. I then centered the board in the housing and pressed firmly down to make it stick. If you do this, be careful to not break the board. Other people have superglued this in. Don't use gorilla glue. It won't work. Didn't for me.
6) To wire the board in correctly first pull the Cobalt plug through the housing and past the light board so that you can plug in the lights.
7) And here's where you need to be very careful to what you are doing. The plug is labeled with which side is "+" and which side is "-" by marking them "A" and "B". Since the Impala didn't have a plug on the board, just 2 colored wires with tabs in which you can insert into the Cobalt plug you will need to make sure You identify "A" and "B". The red wire goes in "A", the black wire goes in "B". I then used electrical tape and wrapped this up to prevent any problems here, though it really doesn't need it. Then push the plug with wires behind the light board.
8) Reattatch red brake lens to housing and reinsert entire light into trunk making sure the light is properly placed.
9) Then tighten down with 2 nuts that you removed earlier and replace trunk liner and reinsert plastic caps.
It's that simple. The Impala light is kept in stock, so no special ordering needed.
If you have any further questions, please feel free to ask.
Oh, one last thing. I have been asked to refer to this as the CMD light, not the led light. Curtis, Mike, and Dave of www.RockyMountainEcotec.net came up with this.

Senior Member
Joined: 03-12-11
Posts: 1,796
Likes: 7
From: TEXAS
Bumpity bump the old thread
Found my housing melted when I went to change a bulb so gonna be hitting the junk yards tomorrow. This thread says 04 impala or monte carlo does anyone know if that is the only year or was it used again or on another application?
Found my housing melted when I went to change a bulb so gonna be hitting the junk yards tomorrow. This thread says 04 impala or monte carlo does anyone know if that is the only year or was it used again or on another application?


What do you guys fancy an already done LED third brake light should sell for? I made 2 of them and I'm wondering what to ask. Love them though. They are as bright as my LED bulbs finally.


Last edited by Jesse; Oct 5, 2014 at 10:07 PM.


New Member
Joined: 03-12-14
Posts: 5
Likes: 0
From: omaha, ne
2cents
I have wanted to do this conversion for so long i am excited to be done finally! I got mine at a junk yard for $11. I spent more time than most of you guys i would imagine, but hopefully my extra efforts will pay off so i don't have to get back in there. I kept that grey piece that the board is attached to, so that the board would have ''back-support.'' This took a lot of sawing and cutting out everything EXCEPT the FLAT part the board snaps onto. That made it easier to glue it into the housing. I also flattened out the two points that come up in between the original 3 bulbs(to give the 2 surfaces more contact area in hopes that i won't have to pull it all out and start over the first time i close my trunk.) in response to someone asking about splicing: i just kept the ends and plugged into the pigtail, just make sure to put insulation around the ends, its obvious but i was dumb and blew my fuse when i accidentally touched the two wires together plugging them in. 