
Appearance: How to apply the cobaltSS.net window decals


Thread Starter
Member
Joined: 08-26-07
Posts: 237
Likes: 0
From: Cincinnati, Ohio
Though I have only applied decals this on time myself, I have known how to do so for a while. It pains me to see folks either apply them by eye, or peel and stick words letter by letter... I am sure many of you have seen the after effects, hopefully on someone else's vehicle. And rather than have those who don't know, guess; I would like to show the most easy yet idiot proof method I know of. As well as some little tidbits I found while applying my cobaltSS.net decals to the rear windows.
1) First off, try to start out with a rather clean car. The less crap on the car before hand is the less crap that may end up on your fingers and accidentally on the decal sticky side or the window just before application.
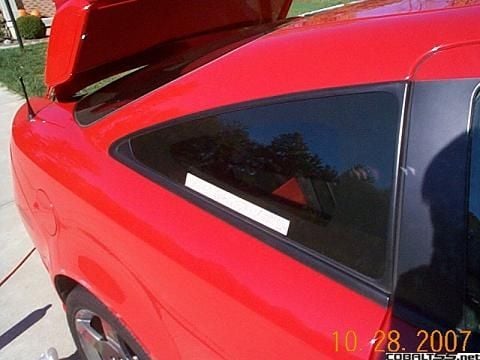
2) Measuring the placement will help to be sure both decals will be applied uniformaly. The best method I have found is to stick the edge of the measuring tape or ruler into the front bottom edge of the back window, where it is parallel with the bottom (not necessarily touching) and both corners touch the curve. From this position you may place the unpeeled decal under to find the desired placement and coresponding measurement. I liked to have the decal close to asthetic center (around 7in from the front edge for me) Apply masking tape on that measurement.
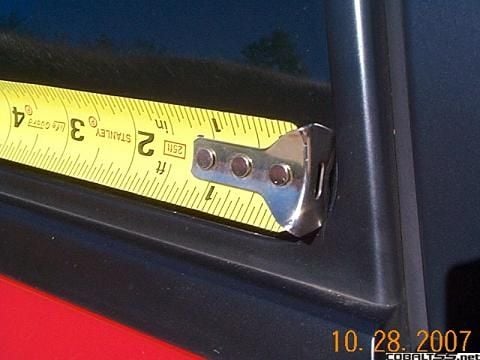
3) If you would not like the decal to appear sitting on the litteral bottom of the window; Apply some tape to the bottom edge, about 1/16" from the edge for me.
4) Place the unpeeled decal back on to verify the tape is parallel to the decal and straight enough. Be sure to clean the local area of the window with windex and alcohol once everything is good.
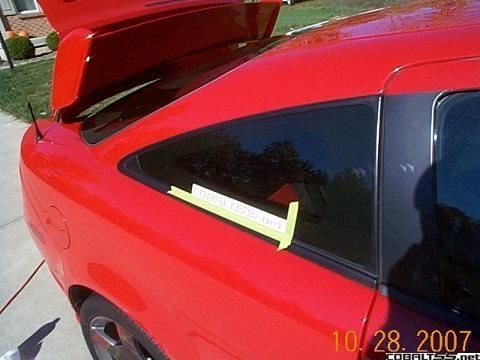
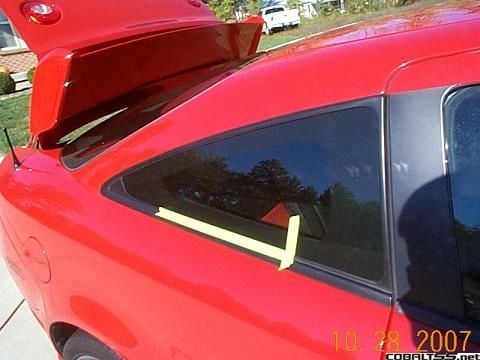
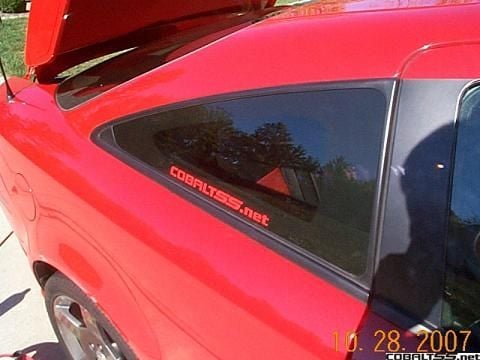
5) Peel the decal off the thick backing (keeping it stuck to the thin translucent tape) Then apply: Reference a corner on the edge of the verticle tape then with light tension allign the decal bottom edge with tha longer length of tape. Using the tip of your finger or the flat edge of a credit card apply preasure to the decal covering from the center out to each edge.
6) Remove the allignment tape, and make one final run across the decal before removing the covering.
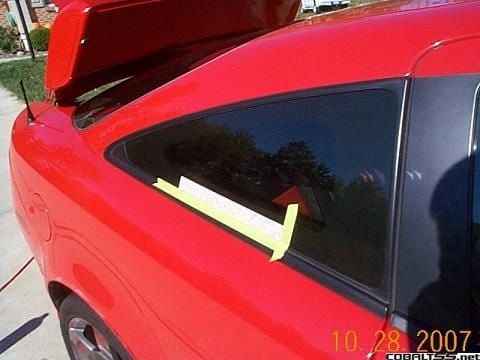
7) Carefully and slowly remove the decal covering. Begin from a corner and, using a finger, push/slide the tape at an angle across, over itself. Otherwise the decal will probably want to stay with the tape.

8) Done! well, hopefully. Check for bubbles in the decal and try to press any out towards the edge. Very large ones may need to be pricked with a needle to let out the air, but this should not be the case with such little letters.
I have heard to not apply decals in cool temperatures. I applied mine in 52F weather, just using a heat gun to warm the window and decals a bit. Also the side in the sun seemed probably over 100F.
1) First off, try to start out with a rather clean car. The less crap on the car before hand is the less crap that may end up on your fingers and accidentally on the decal sticky side or the window just before application.
2) Measuring the placement will help to be sure both decals will be applied uniformaly. The best method I have found is to stick the edge of the measuring tape or ruler into the front bottom edge of the back window, where it is parallel with the bottom (not necessarily touching) and both corners touch the curve. From this position you may place the unpeeled decal under to find the desired placement and coresponding measurement. I liked to have the decal close to asthetic center (around 7in from the front edge for me) Apply masking tape on that measurement.
3) If you would not like the decal to appear sitting on the litteral bottom of the window; Apply some tape to the bottom edge, about 1/16" from the edge for me.
4) Place the unpeeled decal back on to verify the tape is parallel to the decal and straight enough. Be sure to clean the local area of the window with windex and alcohol once everything is good.
5) Peel the decal off the thick backing (keeping it stuck to the thin translucent tape) Then apply: Reference a corner on the edge of the verticle tape then with light tension allign the decal bottom edge with tha longer length of tape. Using the tip of your finger or the flat edge of a credit card apply preasure to the decal covering from the center out to each edge.
6) Remove the allignment tape, and make one final run across the decal before removing the covering.
7) Carefully and slowly remove the decal covering. Begin from a corner and, using a finger, push/slide the tape at an angle across, over itself. Otherwise the decal will probably want to stay with the tape.
8) Done! well, hopefully. Check for bubbles in the decal and try to press any out towards the edge. Very large ones may need to be pricked with a needle to let out the air, but this should not be the case with such little letters.
I have heard to not apply decals in cool temperatures. I applied mine in 52F weather, just using a heat gun to warm the window and decals a bit. Also the side in the sun seemed probably over 100F.


Thread Starter
Member
Joined: 08-26-07
Posts: 237
Likes: 0
From: Cincinnati, Ohio
https://www.cobaltss.net/decals.php
The guy can only ship em out a few times a month. So don't get all mad if they don't come in 3 days.
The guy can only ship em out a few times a month. So don't get all mad if they don't come in 3 days.

Site Founder
Joined: 03-17-04
Posts: 7,650
Likes: 2
From: NE OH Near Cleveland

Thread Starter
Member
Joined: 08-26-07
Posts: 237
Likes: 0
From: Cincinnati, Ohio
Yes, razor blades or box cutter blades work best.
Just push it straight at the decal with the blade edge gliding along the window.
Also always good practice to start with a fresh blade and clean window to prevent scratches.
Just push it straight at the decal with the blade edge gliding along the window.
Also always good practice to start with a fresh blade and clean window to prevent scratches.


Member
Joined: 09-08-07
Posts: 226
Likes: 0
From: Montreal


Senior Member
Joined: 03-02-09
Posts: 817
Likes: 0
From: Tioga Center, NY
been over 2 months lol... just looked up the paypal transfer it went through the beginning of march... the guy told me he was going to ship them out like last week or something but i think it was just to shut me up haha lame