
Interior: How to Easy inner door handle re-assembly

Thread Starter
Member
Joined: 12-02-09
Posts: 296
Likes: 0
From: Toronto
How to Easy inner door handle re-assembly
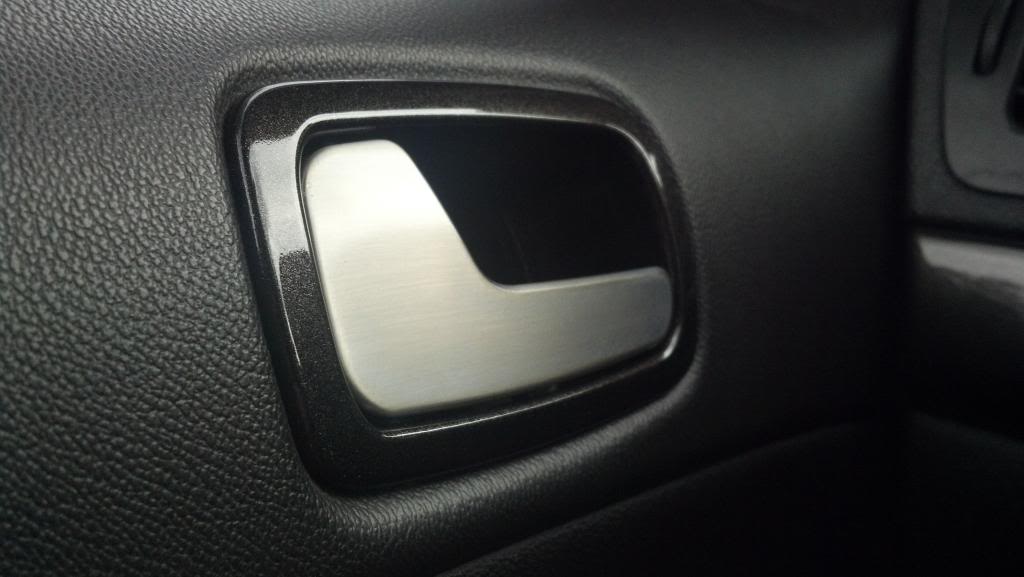
While replacing a peeling chrome door pull handle I decided to paint the charcoal plastic part the same as my dash trim.
Taking the door pulls apart was easy, putting them back together not so much. At least for me I had a hard time so I figured out a way to do it with a couple home-made tools.
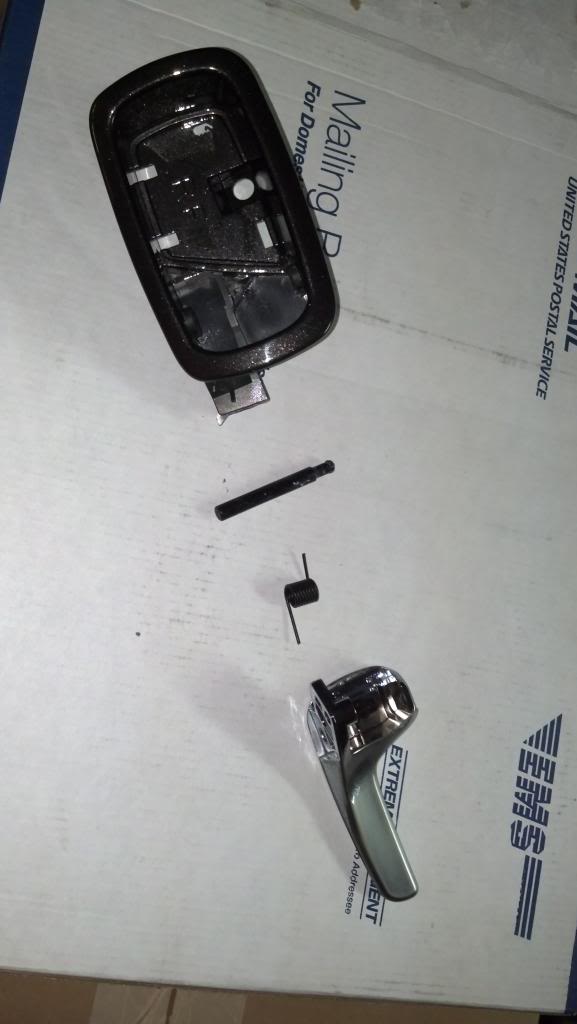
For easy reference I am going to name the parts that make up the door pull assembly. These may not be the names GM calls them but at least I'll be consistent in my instructions.
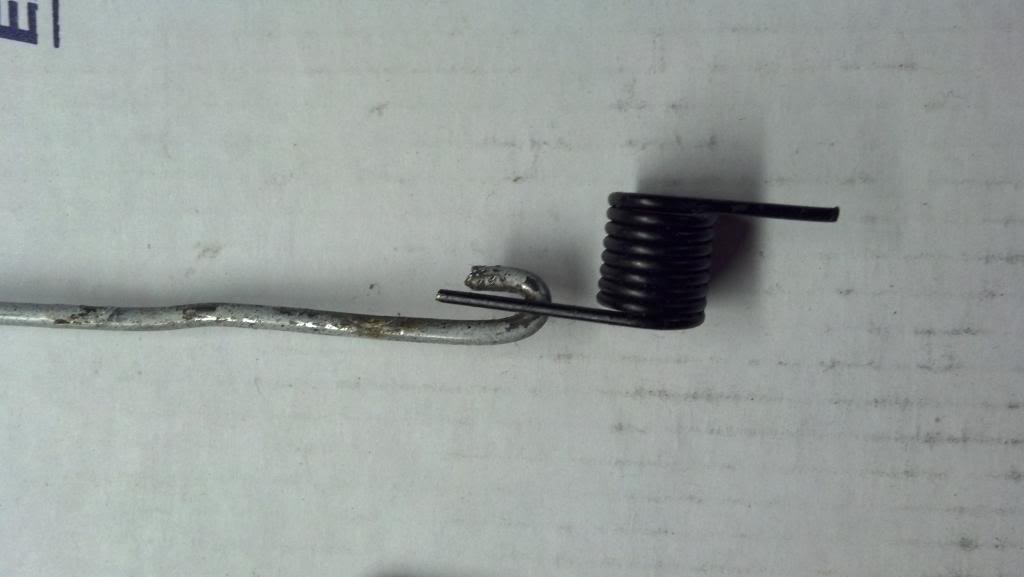
The large charcoal piece which holds all the other pieces and fits into the door panel I am going to refer to as the "base". The chrome thingy I am going to call a "handle". There is also a plastic "pin" which holds the handle in the base, note how it only fits one way with the split end locking into the smaller hole in the base. And finally, there is a "spring" which returns the handle to the unpulled position when you let go. Note how the spring has two lengths of "tangs". The long tang of the spring fits into a space in the base, you can even see a little step in the corner where it sits when everything is assembled. It is important where the tangs go and also notice that the left and right door pulls have different springs.
The only thing I will say about taking the pulls apart is to squeeze the split end of the pin with pliers and at the same time use another tool like a small allen key to push the split end into the base. Also, be careful once the pin is out as the spring in the handle will try to escape! Good luck finding it if you forget.
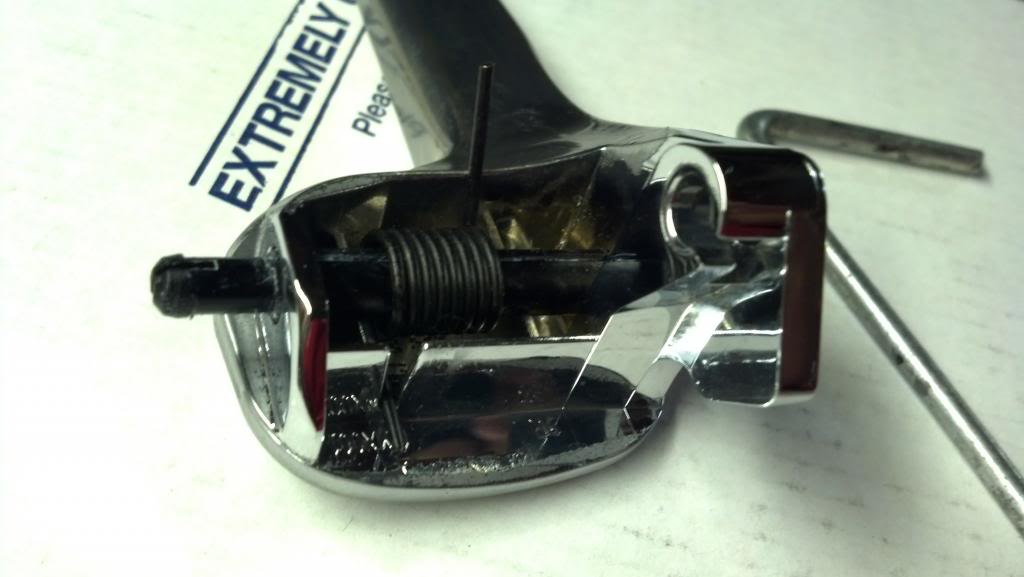
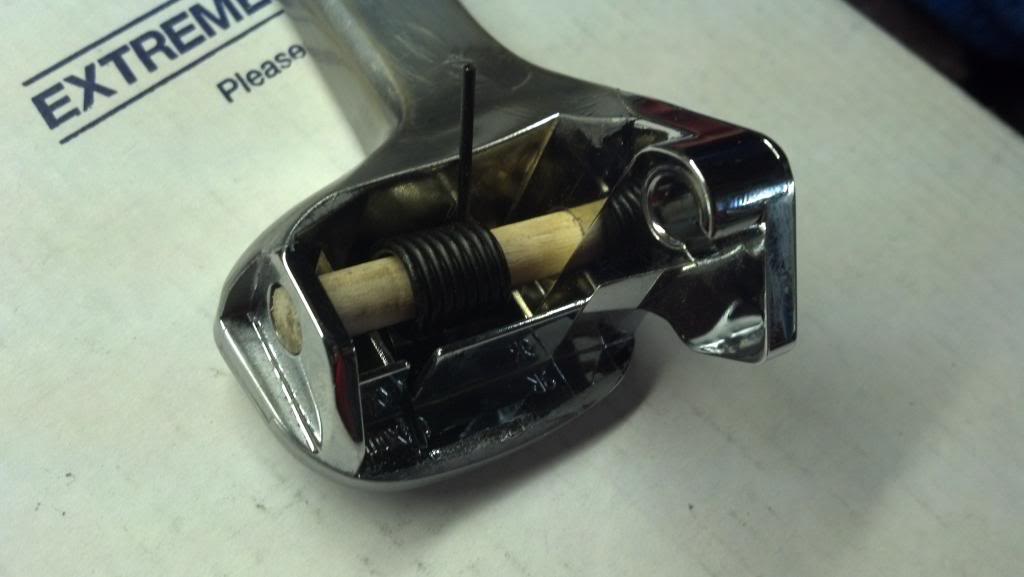
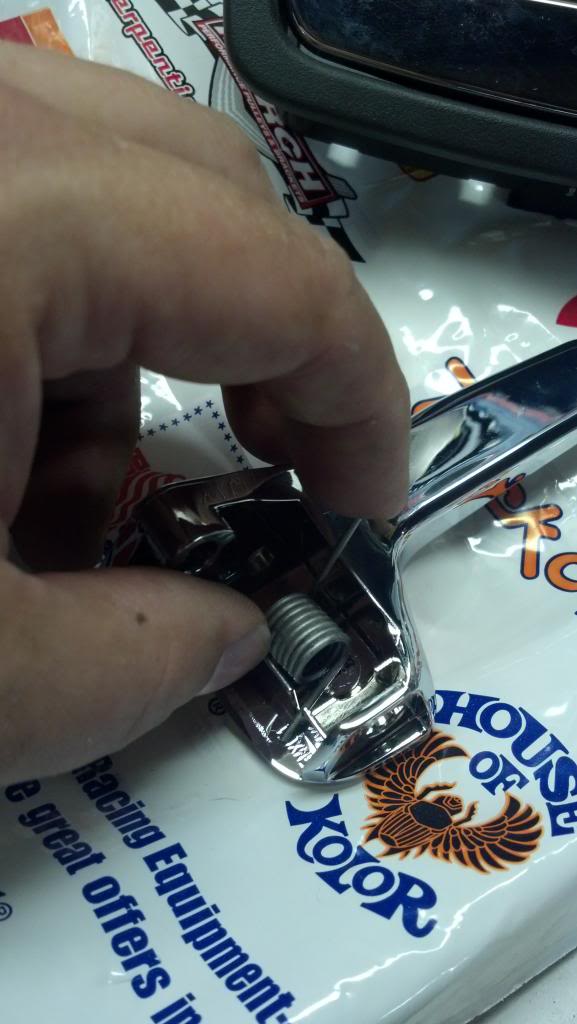
Here is the trick I used to put all the pieces back together: I found a piece of wooden dowel that fit through the holes in the door handle and cut it just long enough so it would not stick out. This way the handle can fit into the base with the dowel installed. The spring is what makes it hard to re-install the handle. You need to wind the spring to make it seat the tangs in the right spot but it is hard to keep it in place. If you don't the spring will turn and you will have to start all over again. The dowel keeps the spring in place and from turning.
Assemble the spring onto the dowel as you push it into place in the handle. Make sure the spring tang sits in the notch in the handle.
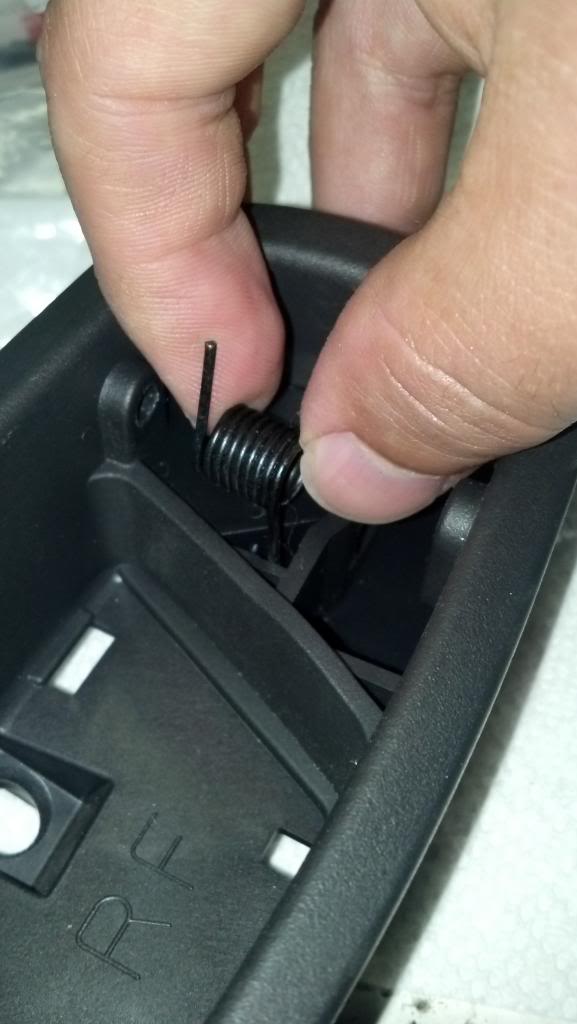
In order to get the other spring tang to sit in the right spot of the base as I assembled everything I used a hook I made from a coat hanger. Insert the hook into the base through an opening near where the cable attaches. Grab the long spring tang with the hook and guide it into position in the base as you install the handle.
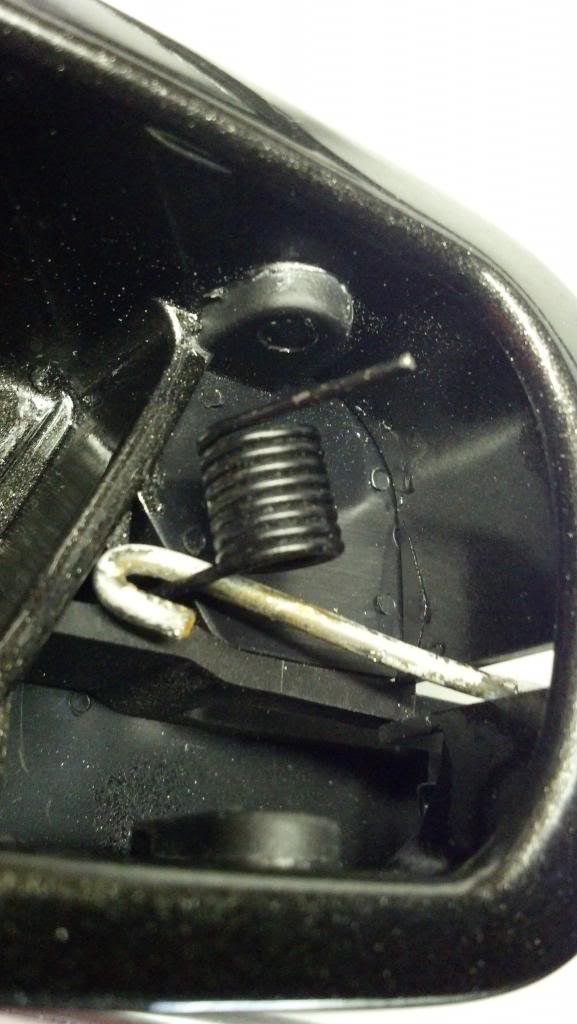
Fit the handle into the base, make sure to hold it down or it will fly out! You can remove the hook but it might be easier to leave it in since you can use it to help hold the spring as you put the pin in. I removed the hook but ended up using a small screwdriver to help hold the spring anyways.
If your dowel has a small enough diameter you can avoid an extra step I had to do. Because my dowel was too big to fit through the small hole in the base where the split part of the pin locks, I had to do two steps to install the pin. First I had to push out the dowel with a piece of coat hanger, then insert the actual pin into the assembly following the coat hanger as I pulled it out. This was a little tricky since the spring is trying to escape the whole time and you need to keep it on either the dowel or the coat hanger or the pin ALL the time! If you have a small diameter piece of dowel you can avoid the coat hanger step and just use the pin to push out the dowel throught the small hole in the base.
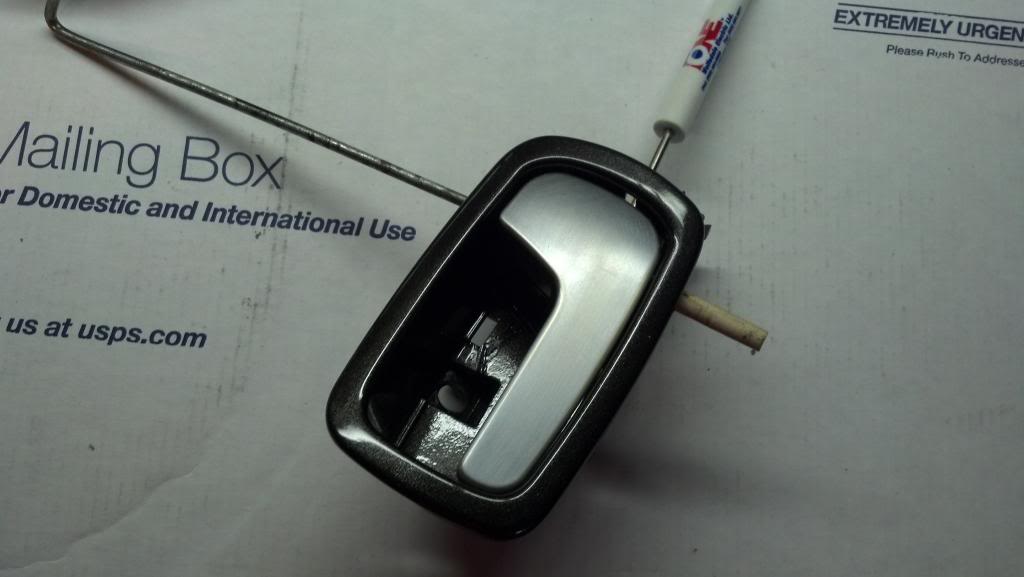
If everything went well you are done and have a functional handle again!
Taking the door pulls apart was easy, putting them back together not so much. At least for me I had a hard time so I figured out a way to do it with a couple home-made tools.
For easy reference I am going to name the parts that make up the door pull assembly. These may not be the names GM calls them but at least I'll be consistent in my instructions.
The large charcoal piece which holds all the other pieces and fits into the door panel I am going to refer to as the "base". The chrome thingy I am going to call a "handle".


The only thing I will say about taking the pulls apart is to squeeze the split end of the pin with pliers and at the same time use another tool like a small allen key to push the split end into the base. Also, be careful once the pin is out as the spring in the handle will try to escape! Good luck finding it if you forget.

Here is the trick I used to put all the pieces back together: I found a piece of wooden dowel that fit through the holes in the door handle and cut it just long enough so it would not stick out. This way the handle can fit into the base with the dowel installed. The spring is what makes it hard to re-install the handle. You need to wind the spring to make it seat the tangs in the right spot but it is hard to keep it in place. If you don't the spring will turn and you will have to start all over again. The dowel keeps the spring in place and from turning.
Assemble the spring onto the dowel as you push it into place in the handle. Make sure the spring tang sits in the notch in the handle.


In order to get the other spring tang to sit in the right spot of the base as I assembled everything I used a hook I made from a coat hanger. Insert the hook into the base through an opening near where the cable attaches. Grab the long spring tang with the hook and guide it into position in the base as you install the handle.


Fit the handle into the base, make sure to hold it down or it will fly out! You can remove the hook but it might be easier to leave it in since you can use it to help hold the spring as you put the pin in. I removed the hook but ended up using a small screwdriver to help hold the spring anyways.
If your dowel has a small enough diameter you can avoid an extra step I had to do. Because my dowel was too big to fit through the small hole in the base where the split part of the pin locks, I had to do two steps to install the pin. First I had to push out the dowel with a piece of coat hanger, then insert the actual pin into the assembly following the coat hanger as I pulled it out. This was a little tricky since the spring is trying to escape the whole time and you need to keep it on either the dowel or the coat hanger or the pin ALL the time! If you have a small diameter piece of dowel you can avoid the coat hanger step and just use the pin to push out the dowel throught the small hole in the base.

If everything went well you are done and have a functional handle again!


Thread
Thread Starter
Forum
Replies
Last Post