
Appearance: how-to fog light on your SS bumper on your base Balt

Thread Starter
Senior Member
Joined: 03-21-06
Posts: 2,124
Likes: 0
From: Orlando, Florida
how-to fog light on your SS bumper on your base Balt
Ok this is my first howto,
If you want fog lights you have two choices: a) go to the dealer and pay $195 each b) you can go to eBay get a set of replacement fog lights and go to your local performance shop, buy some cable and do it yourself.
I decided option B, here is the process:
1) Buy your set of replacement fogs from eBay or anywhere you want
2) Wait for them to arrive

3) Go to your local performance shop (Pep Boys)and buy your materials

4) Now let’s get busy, start by taking out the headlights,
5) If you want you can jack up the car so there is working room down there
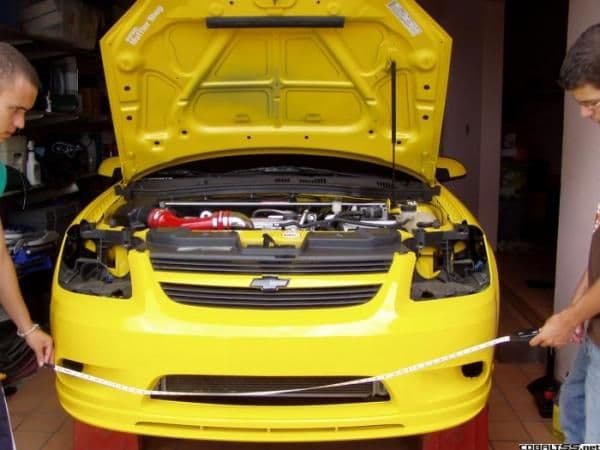
6) Measure from passenger side fog, to driver side fog, and from driver side fog to fuse box. It should be about 10ft of cable. Buy more so you don’t run short. I bought 20ft

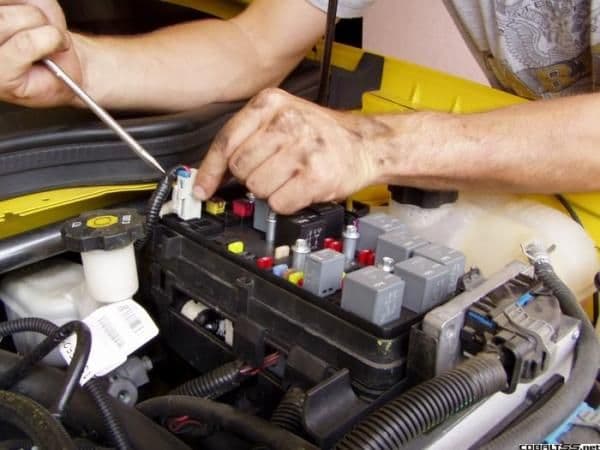
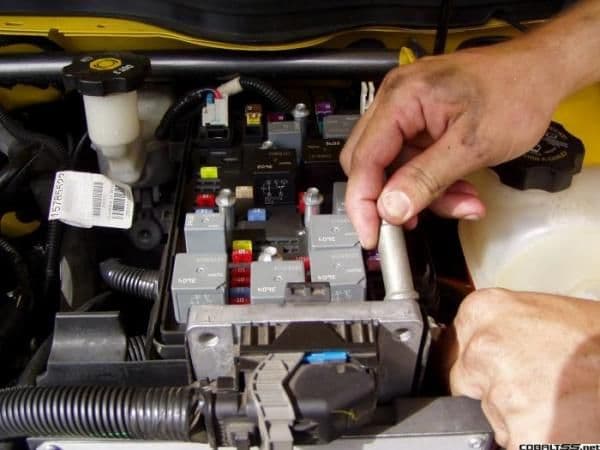
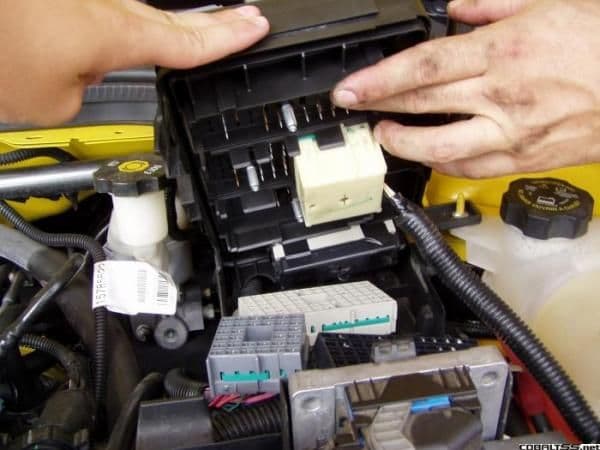
7) Now open the fuse box and locate the parking light fuse, (15A) , you will need to take apart the fuse box,

8) Unscrew the 4 bolts on top of the fuse box. At the bottom right side of the fuse box, there is a "positive pole" that just screws off. After all this, go back to the top of the fuse box and take out the right back plug. Ok now take all the plugs that are under the fuse box, so that you can reach the dark grey plug, thats were the parking light cable is at. In that big dark grey you will need to find a brown cable, thats the parking light cable, you need to strip a part of the cable so that you can tap the connection with the positive cable that comes from your fogs.
9) After you take care of the positive cable, now you can find a ground for the fogs,, I use a bolt that you see where the headlight is suppose to be

10) After you have all these cable take care of, now you put your fogs in,, it real simple just push them in from behind with the bolt facing up, (it has a bolt so that you can adjust it if needed)
11) Now connect the positive and negative cables to the fog light bulbs (H11) and your almost done

12) Now protect all your cables, and tug them in somewhere safe, I put them over the radiator grill hole. They are safe there.
13) Now just put everything back together and your Done,, go into the night and enjoy your fogs.

Hope this helps/ and a special thanx to Angel (el_angelito) and Gabriel (Gabi) for helping today
Any extra question just ask.
Belto.
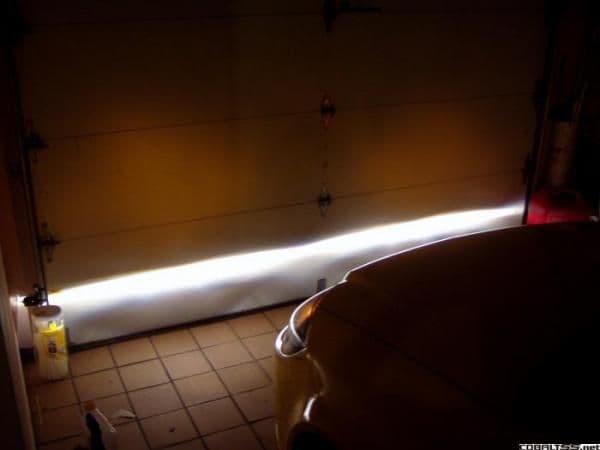
later I will post some pics of them at night
If you want fog lights you have two choices: a) go to the dealer and pay $195 each b) you can go to eBay get a set of replacement fog lights and go to your local performance shop, buy some cable and do it yourself.
I decided option B, here is the process:
1) Buy your set of replacement fogs from eBay or anywhere you want
2) Wait for them to arrive
3) Go to your local performance shop (Pep Boys)and buy your materials
4) Now let’s get busy, start by taking out the headlights,
5) If you want you can jack up the car so there is working room down there
6) Measure from passenger side fog, to driver side fog, and from driver side fog to fuse box. It should be about 10ft of cable. Buy more so you don’t run short. I bought 20ft
7) Now open the fuse box and locate the parking light fuse, (15A) , you will need to take apart the fuse box,
8) Unscrew the 4 bolts on top of the fuse box. At the bottom right side of the fuse box, there is a "positive pole" that just screws off. After all this, go back to the top of the fuse box and take out the right back plug. Ok now take all the plugs that are under the fuse box, so that you can reach the dark grey plug, thats were the parking light cable is at. In that big dark grey you will need to find a brown cable, thats the parking light cable, you need to strip a part of the cable so that you can tap the connection with the positive cable that comes from your fogs.
9) After you take care of the positive cable, now you can find a ground for the fogs,, I use a bolt that you see where the headlight is suppose to be
10) After you have all these cable take care of, now you put your fogs in,, it real simple just push them in from behind with the bolt facing up, (it has a bolt so that you can adjust it if needed)
11) Now connect the positive and negative cables to the fog light bulbs (H11) and your almost done
12) Now protect all your cables, and tug them in somewhere safe, I put them over the radiator grill hole. They are safe there.
13) Now just put everything back together and your Done,, go into the night and enjoy your fogs.
Hope this helps/ and a special thanx to Angel (el_angelito) and Gabriel (Gabi) for helping today
Any extra question just ask.
Belto.
later I will post some pics of them at night
Last edited by Belto; Jul 29, 2007 at 09:49 PM. Reason: Automerged Doublepost


8) Unscrew all the bolts of the top of the box, and also the positive pole in there so you can take off the positive cable,, take off the right back plug, after this turn over the box and you will need to take all the covers off so you can take the dark grey cover so that you can find the parking light cable,(which is brown) / after all these scrape the wire so that you can connect the positive cable that will go to the fogs
Can you re-write that in English with periods and make sense? that step is sooooo confusing.
Can you re-write that in English with periods and make sense? that step is sooooo confusing.
Senior Member
Joined: 06-27-06
Posts: 1,189
Likes: 0
From: Hatboro, PA
I bought the foglight option dash piece on my LT without foglights. Is there any way I can wire it up with these for a completely stock look?
The dash piece actually has a socket inside the dash already there for it. I plugged it in and it apparently works, as it lights up and everything.
The dash piece actually has a socket inside the dash already there for it. I plugged it in and it apparently works, as it lights up and everything.
Thread Starter
Senior Member
Joined: 03-21-06
Posts: 2,124
Likes: 0
From: Orlando, Florida
I bought the foglight option dash piece on my LT without foglights. Is there any way I can wire it up with these for a completely stock look?
The dash piece actually has a socket inside the dash already there for it. I plugged it in and it apparently works, as it lights up and everything.
The dash piece actually has a socket inside the dash already there for it. I plugged it in and it apparently works, as it lights up and everything.
8) Unscrew all the bolts of the top of the box, and also the positive pole in there so you can take off the positive cable,, take off the right back plug, after this turn over the box and you will need to take all the covers off so you can take the dark grey cover so that you can find the parking light cable,(which is brown) / after all these scrape the wire so that you can connect the positive cable that will go to the fogs
Can you re-write that in English with periods and make sense? that step is sooooo confusing.
Can you re-write that in English with periods and make sense? that step is sooooo confusing.
8) Unscrew the 4 bolts on top of the fuse box. At the bottom right side of the fuse box, there is a "positive pole" that just screws off. After all this, go back to the top of the fuse box and take out the right back plug. Ok now take all the plugs that are under the fuse box, so that you can reach the dark grey plug, thats were the parking light cable is at. In that big dark grey you will need to find a brown cable, thats the parking light cable, you need to strip a part of the cable so that you can tap the connection with the positive cable that comes from your fogs.
tell me if this makes sense so that I can edit it up there ^^^
Last edited by Belto; Jul 29, 2007 at 09:28 PM. Reason: Automerged Doublepost
so im guessing when i put my highs on, they will not shut off. its illegal to have them on with highs. damn. guess ill be wiring them to a switch instead of the parking light wire
Thread Starter
Senior Member
Joined: 03-21-06
Posts: 2,124
Likes: 0
From: Orlando, Florida
yes they will come on with the high beams, if you don't want problems with the law , I would suggest a switch so that you can turn it on and off as you please. I did this, this way bc I hardly use the High beams.

haha  ive been wanting to do this as ive noticed behind my light trim i have the wires for the fog switch and was told call cobalts fogs or not are pre wired but i couldnt find the wires for the life of me. your how-to makes me want to do this as i have a ss/sc bumper without fogs :P i think you've answered all my questions
  now buy some of my parts haha
now buy some of my parts haha