
Electrical: How To: install gauges in your 2.2/2.4 to a switched source

Thread Starter
Senior Member
Joined: 03-07-06
Posts: 7,224
Likes: 1
From: west virginia
How To: install gauges in your 2.2/2.4 to a switched source
ok first of all im not responsible to any changes you make in your electrical system. whatever you do is up to you.
what youl need: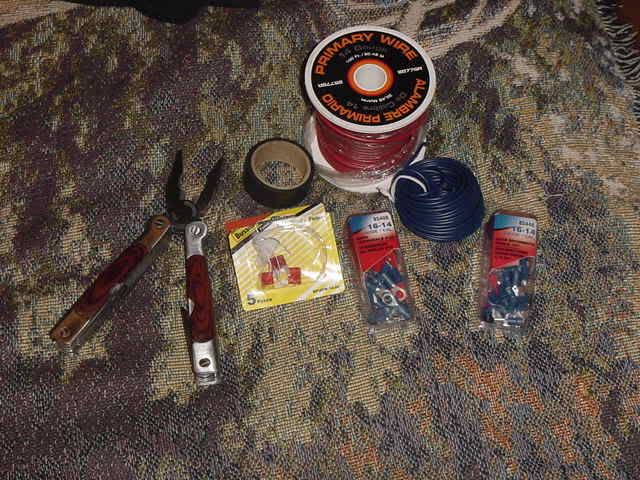
pliers w/splicers, 14 gauge power wire, 18 gauge or higher ground wire(i choose 20 gauge), add a fuse connector, 2-10A fuses,quick disconnects(depending on the gauge), and whatever gauge ring terminals your ground wire is.
1. First unhook your battery(NEG first POS last)
2. Next remove the two side panels on your front console:
passenger side: (note: the driver side is the same way)
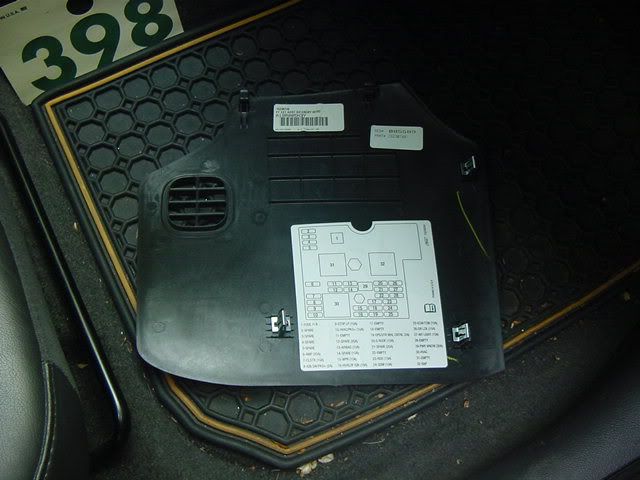
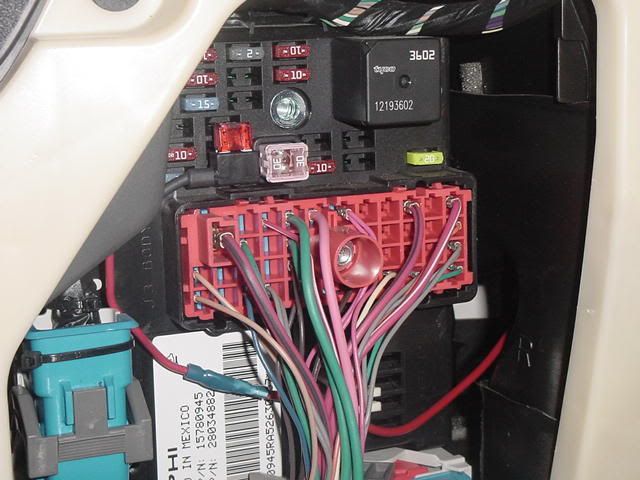
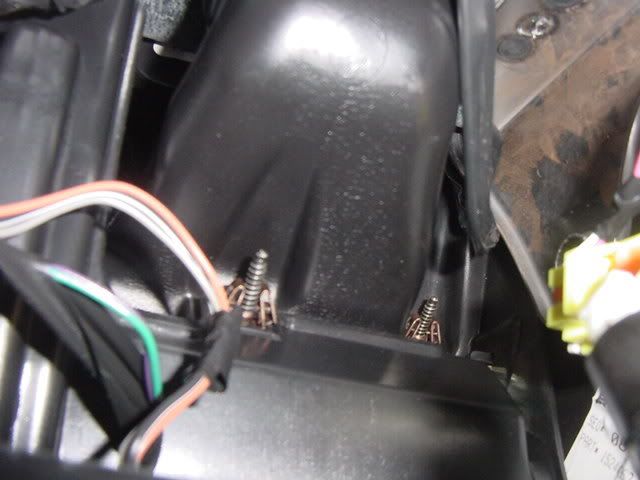
3 .Once youve done that, go ahead and get your add a fuse,14g power wire+ the 10A fuses ready. splice the power wire and stick it into the crimp on the add a fuse. after that, push the two 10A fuses into the add a fuse(they will be very tough going in but trust me they will). Now locate the stock sunroof fuse(light blue 15A-theres a white fuse puller in the bottom of the fuse panel), and remove it. You can see in the pic below where it is and how i routed the wire around the fuse panel. (also note the fuse diagram on the panel you removed is no help and is actually upside down.) once youve done all that you can do whatever you want with the blue fuse you removed-you wont be needing it anymore.
4. After youve got the add a fuse ready to go, route the wire left around the wiring block and then down and back to the right under that clusterfuck of wires. then take it through your center console to the drivers side, securing it however you like to make sure no wires rub. (allow enough wire to go to wherever you are putting your gauges. Then just eave it hang as we will come back to it in a minute.
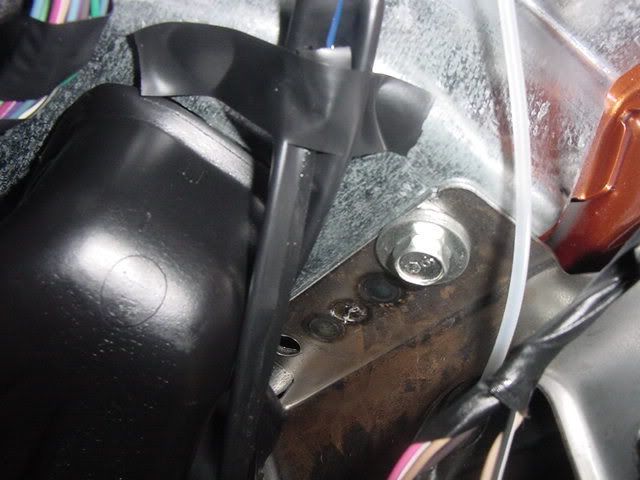
5. Now get your ground wire(once again i used 20 gauge and it works great) and splice the end and put a ring connector on it. Now there is a grounding pillar right on the drivers side with a small bolt on it as you can see here:
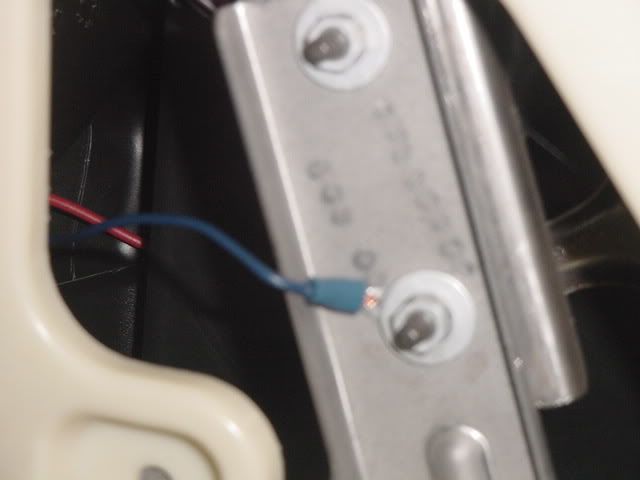
just loosed the middle nut and put the ring connector under it and then tighten it back down. after that route it behind the panneling towards the motor to meet up with the power wire.
6. Heres wher you need to determine where you going to put your gauges. If you have a gauge pillar, go ahead and remove the stock one by popping the airbag circle out and use a socket to remove the old screw. If your putting them in front of the speedo/tach cluster or on the steering wheel cover youl need to get creative when you route your wires.
NOTE: I installed mine in the gauge pod on the pillar so thats where well head. You can still follow the gauge wire-up portion just not the routing portion of this if you choose to mount your gauges elsewhere.
7. Next, remove the small cubbyhole that slides down where the trunk release is. ( i didnt get a pic of this) All you have to do is pop the top right side out and then the left and it will come right off.
8. Picking up from where you left your ground/power wires were, route them across the driver foot compartment just above the paneling and up behind the cubbyhole area you just removed. (WARNING: there are some sharp factory edged metal areas in this area so be extra careful with your wires-i wrapped mine in wire tape to be safe).
9. I was having a hard time getting a picture of this because the camera was too big but ill do my best to talk you through it. With the stock A-pillar removed and looking up through the cubbyhole area you can see light. This is where your going to take your wires. Get them up through the hole however you like. And yes it looks very small but i guarantee you you can fit just about any amount of wiring through there. After that, make sure all your wires running up are secured and cant short out or get picnched by the cubbyhole drawer....
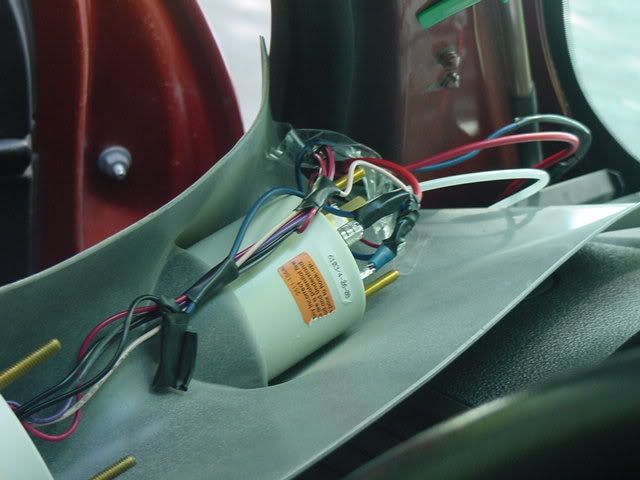
heres some various pictures of running the wires:
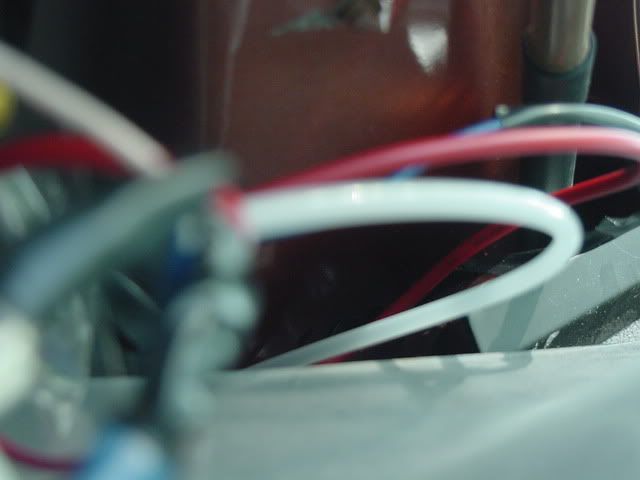
my nightmare:
10. OK, now youve got your power/ground wires right in reach, you have to figure out which wires on your gauges are what. I did an autometer mech. boost and full sweep oil pressure.
Autometer mechanical boost:
1. Get two quick connects and splice your ground/power wires and crimp the connects onto them. make sure you get the right connects as i got the wrong ones and had to get creative. slide them onto the designated wire connects (they will be marked GRND and 12V on the back of the gauge).
2. Now take some thread tape and wrap it around the the fitting on the back of the boost gauge. screw the provided fitting onto that and stick the nylon tubing into the end of the fitting you screwed on. Then route the tube down the way you brought your wires up. pull out the first rubber grommet in your firewall right behind the gas pedal, cut a hoel in it, stick the line through it, cut a hole in the second grommet leading to the engine bay, and then stick it through that as well. be sure to put the grommet back in since it keeps water out.
3. When you route your tubing, keep it away from the engine. Im not sure if it will melt or not but im not going to give it a chance.
4. Then find the vacuum line directly under your throttle body(big as ****). youl need a tee, one thats converts ?(i had a 5/8 and it was a hair too small) into a regular vacuum line size. splice the stock line the heads toward the drivers side, put the tee in, and reinstall the lines. then stick the provided rubber fitting onto the tee port and put the other end of the nylon tubing into that. (WARNING: done crimp your boost line as it wont let the gauge read properly-insure there are no kinks at all in the line
heres my shitty job since i couldnt find the right size tee. ended up using a 5/8 tee and worm clamps...hehe:
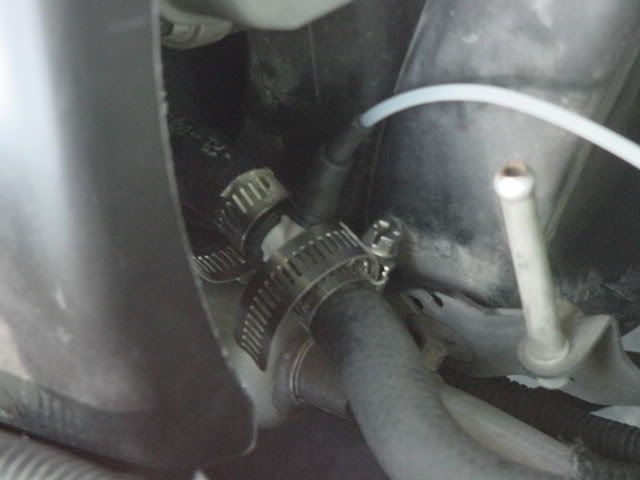
btw you may have to remove the intake portion that is over the throttle body to do this...i did since i was afro engineering it(no offense) but if you do do this make sure you dont break your head breather line:

lol you can see it in the pic.
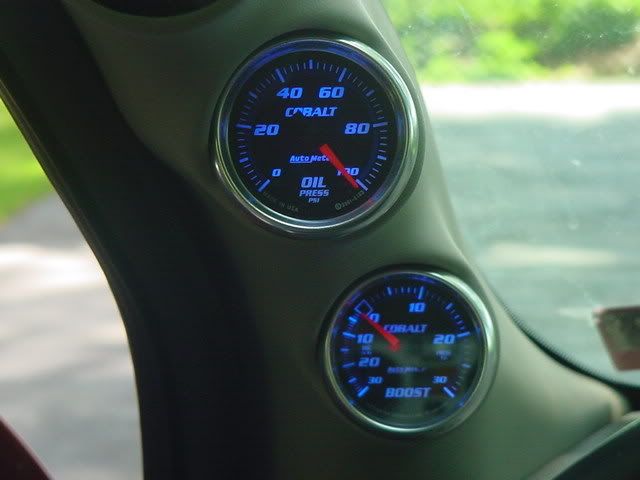
heres mine all finished up:

after everything is done, remount your gauge pod, reinstall your paneling, cuss some, reinstall your battery cable(neg first pos last dont wanna get fried!!!) and put your key in the ignition and enjoy!! (ill update this when i get the oil gauge finished
a big thanks to tsunam1 for taking the time to explain this to me.
ps...this is my first how too be easy on me
what youl need:
pliers w/splicers, 14 gauge power wire, 18 gauge or higher ground wire(i choose 20 gauge), add a fuse connector, 2-10A fuses,quick disconnects(depending on the gauge), and whatever gauge ring terminals your ground wire is.
1. First unhook your battery(NEG first POS last)
2. Next remove the two side panels on your front console:
passenger side: (note: the driver side is the same way)
3 .Once youve done that, go ahead and get your add a fuse,14g power wire+ the 10A fuses ready. splice the power wire and stick it into the crimp on the add a fuse. after that, push the two 10A fuses into the add a fuse(they will be very tough going in but trust me they will). Now locate the stock sunroof fuse(light blue 15A-theres a white fuse puller in the bottom of the fuse panel), and remove it. You can see in the pic below where it is and how i routed the wire around the fuse panel. (also note the fuse diagram on the panel you removed is no help and is actually upside down.) once youve done all that you can do whatever you want with the blue fuse you removed-you wont be needing it anymore.
4. After youve got the add a fuse ready to go, route the wire left around the wiring block and then down and back to the right under that clusterfuck of wires. then take it through your center console to the drivers side, securing it however you like to make sure no wires rub. (allow enough wire to go to wherever you are putting your gauges. Then just eave it hang as we will come back to it in a minute.
5. Now get your ground wire(once again i used 20 gauge and it works great) and splice the end and put a ring connector on it. Now there is a grounding pillar right on the drivers side with a small bolt on it as you can see here:
just loosed the middle nut and put the ring connector under it and then tighten it back down. after that route it behind the panneling towards the motor to meet up with the power wire.
6. Heres wher you need to determine where you going to put your gauges. If you have a gauge pillar, go ahead and remove the stock one by popping the airbag circle out and use a socket to remove the old screw. If your putting them in front of the speedo/tach cluster or on the steering wheel cover youl need to get creative when you route your wires.
NOTE: I installed mine in the gauge pod on the pillar so thats where well head. You can still follow the gauge wire-up portion just not the routing portion of this if you choose to mount your gauges elsewhere.
7. Next, remove the small cubbyhole that slides down where the trunk release is. ( i didnt get a pic of this) All you have to do is pop the top right side out and then the left and it will come right off.
8. Picking up from where you left your ground/power wires were, route them across the driver foot compartment just above the paneling and up behind the cubbyhole area you just removed. (WARNING: there are some sharp factory edged metal areas in this area so be extra careful with your wires-i wrapped mine in wire tape to be safe).
9. I was having a hard time getting a picture of this because the camera was too big but ill do my best to talk you through it. With the stock A-pillar removed and looking up through the cubbyhole area you can see light. This is where your going to take your wires. Get them up through the hole however you like. And yes it looks very small but i guarantee you you can fit just about any amount of wiring through there. After that, make sure all your wires running up are secured and cant short out or get picnched by the cubbyhole drawer....
heres some various pictures of running the wires:
my nightmare:
10. OK, now youve got your power/ground wires right in reach, you have to figure out which wires on your gauges are what. I did an autometer mech. boost and full sweep oil pressure.
Autometer mechanical boost:
1. Get two quick connects and splice your ground/power wires and crimp the connects onto them. make sure you get the right connects as i got the wrong ones and had to get creative. slide them onto the designated wire connects (they will be marked GRND and 12V on the back of the gauge).
2. Now take some thread tape and wrap it around the the fitting on the back of the boost gauge. screw the provided fitting onto that and stick the nylon tubing into the end of the fitting you screwed on. Then route the tube down the way you brought your wires up. pull out the first rubber grommet in your firewall right behind the gas pedal, cut a hoel in it, stick the line through it, cut a hole in the second grommet leading to the engine bay, and then stick it through that as well. be sure to put the grommet back in since it keeps water out.
3. When you route your tubing, keep it away from the engine. Im not sure if it will melt or not but im not going to give it a chance.
4. Then find the vacuum line directly under your throttle body(big as ****). youl need a tee, one thats converts ?(i had a 5/8 and it was a hair too small) into a regular vacuum line size. splice the stock line the heads toward the drivers side, put the tee in, and reinstall the lines. then stick the provided rubber fitting onto the tee port and put the other end of the nylon tubing into that. (WARNING: done crimp your boost line as it wont let the gauge read properly-insure there are no kinks at all in the line
heres my shitty job since i couldnt find the right size tee. ended up using a 5/8 tee and worm clamps...hehe:
btw you may have to remove the intake portion that is over the throttle body to do this...i did since i was afro engineering it(no offense) but if you do do this make sure you dont break your
head breather line:lol you can see it in the pic.
heres mine all finished up:
after everything is done, remount your gauge pod, reinstall your paneling, cuss some, reinstall your battery cable(neg first pos last dont wanna get fried!!!) and put your key in the ignition and enjoy!! (ill update this when i get the oil gauge finished
a big thanks to tsunam1 for taking the time to explain this to me.
ps...this is my first how too be easy on me
do the 2.4's not have the nipple under the throttle body for you to get a boost signal from? i know my 2.2 intake mani has one, all i had to do was atach a hose to that and run it to my sending unit)i have a lectrical gauge), and when i finish the build just tee it off, one to the unit and one to the BOV...hmmm
Thread Starter
Senior Member
Joined: 03-07-06
Posts: 7,224
Likes: 1
From: west virginia
do the 2.4's not have the nipple under the throttle body for you to get a boost signal from? i know my 2.2 intake mani has one, all i had to do was atach a hose to that and run it to my sending unit)i have a lectrical gauge), and when i finish the build just tee it off, one to the unit and one to the BOV...hmmm
Senior Member
Joined: 05-21-06
Posts: 5,577
Likes: 3
From: Gainesville, FL
do the 2.4's not have the nipple under the throttle body for you to get a boost signal from? i know my 2.2 intake mani has one, all i had to do was atach a hose to that and run it to my sending unit)i have a lectrical gauge), and when i finish the build just tee it off, one to the unit and one to the BOV...hmmm
on second look, i'm guessing he wanted cobalt series gauges and they don't make a van gauge.
Thread Starter
Senior Member
Joined: 03-07-06
Posts: 7,224
Likes: 1
From: west virginia
i have heard autometer makes them....not sure though...zzp and cobalt addiction makes them
Last edited by mike25; Jun 13, 2008 at 02:06 AM. Reason: Automerged Doublepost

Senior Member
Joined: 06-29-07
Posts: 619
Likes: 0
From: Toronto, Ontario
i have heard autometer makes them....not sure though...zzp and cobalt addiction makes them
/endthreadjack
Thread Starter
Senior Member
Joined: 03-07-06
Posts: 7,224
Likes: 1
From: west virginia
lol you have no idea where yours is from? I'm just trying to figure out who I should buy one from, I'll probably go through CA since zzp doesn't make a dual gauge, only a triple. Autometer doesn't factory match em either from what I've seen. Anyways, thanks for the help
/endthreadjack
/endthreadjack
Senior Member
Joined: 05-21-06
Posts: 5,577
Likes: 3
From: Gainesville, FL
lol you have no idea where yours is from? I'm just trying to figure out who I should buy one from, I'll probably go through CA since zzp doesn't make a dual gauge, only a triple. Autometer doesn't factory match em either from what I've seen. Anyways, thanks for the help
/endthreadjack
/endthreadjack

Senior Member
Joined: 06-19-08
Posts: 525
Likes: 0
From: Belfry, KY
I'm guessing but the reason you put a boost gauge on there is because you have a turbo tucked in beside the firewall.. But is looks like your still using the stock airbox and intake tube..
hey but on another note.. what would happen it someone put a boost gauge on a N/A car??.. would it read in the vacuum all the time?
hey but on another note.. what would happen it someone put a boost gauge on a N/A car??.. would it read in the vacuum all the time?
Thread Starter
Senior Member
Joined: 03-07-06
Posts: 7,224
Likes: 1
From: west virginia
I'm guessing but the reason you put a boost gauge on there is because you have a turbo tucked in beside the firewall.. But is looks like your still using the stock airbox and intake tube..
hey but on another note.. what would happen it someone put a boost gauge on a N/A car??.. would it read in the vacuum all the time?
hey but on another note.. what would happen it someone put a boost gauge on a N/A car??.. would it read in the vacuum all the time?
if you look at his avatar you will see he's working on his build, hell go to the advanced modifiication section and you can see his build thread, thats why he has a boost gauge, he's taking care of the install while he has time, so whent he final comes aound it will be done with

OO OOO OOO I got a comment.
When you reconnect your battery, you do it opposite the way you disconnect it.
IE when disconnecting its negative off then positive off when reconnecting its positive on first negative on last. If you put the positive on last you can get fried
When you reconnect your battery, you do it opposite the way you disconnect it.
IE when disconnecting its negative off then positive off when reconnecting its positive on first negative on last. If you put the positive on last you can get fried