
Appearance: how to: paint ya ya ya grill


Thread Starter
Member
Joined: 03-29-06
Posts: 225
Likes: 0
From: charlotte, NC
how to: paint ya ya ya grill
ok guys, here it is, what youve all been waiting for and what everyone is prolly gonna do in the next week or so.
first thing is first....supplies and tools
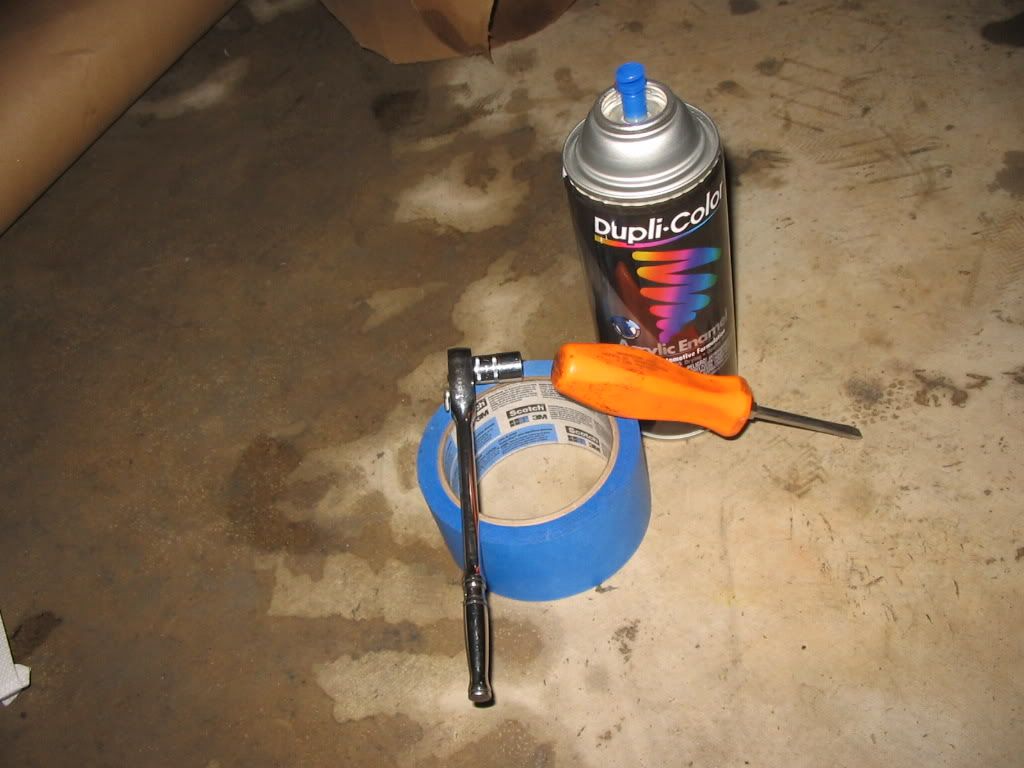
youll need a 1/4 inch ratchet or 3/8 inch ratchet, (i perfer 1/4 in. cuz its good for tight spots) and a 10 MM socket (a 10mm wrench will work too itll just take a lil more time)
painters tape (blue)...you can get it at advanced or autozone
any GLOSS ENAMEL black spray paint...(i perfer dupli-color, but the reason i say GLOSS ENAMEL is because it tends to be shinnier than lacquer paints so to me it looks more factory like)...paint is also retrievable at any advance or autozone
and newspaper for masking off the headlights and bumper areas.
ok now that youve got all your supplies lets begin
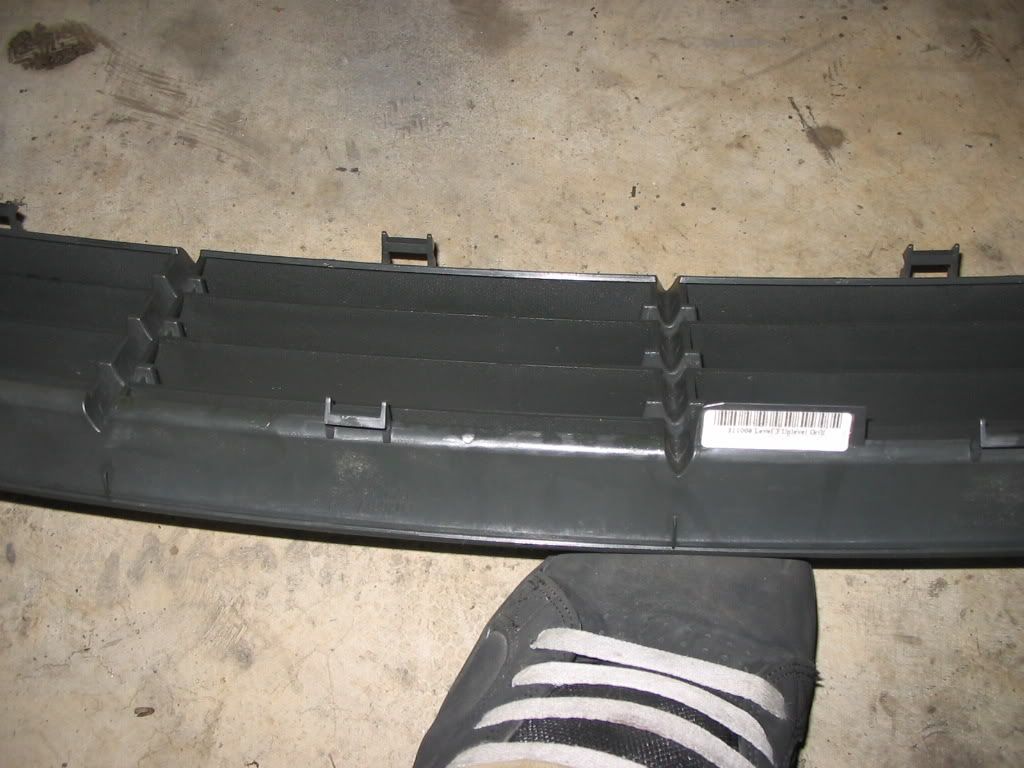
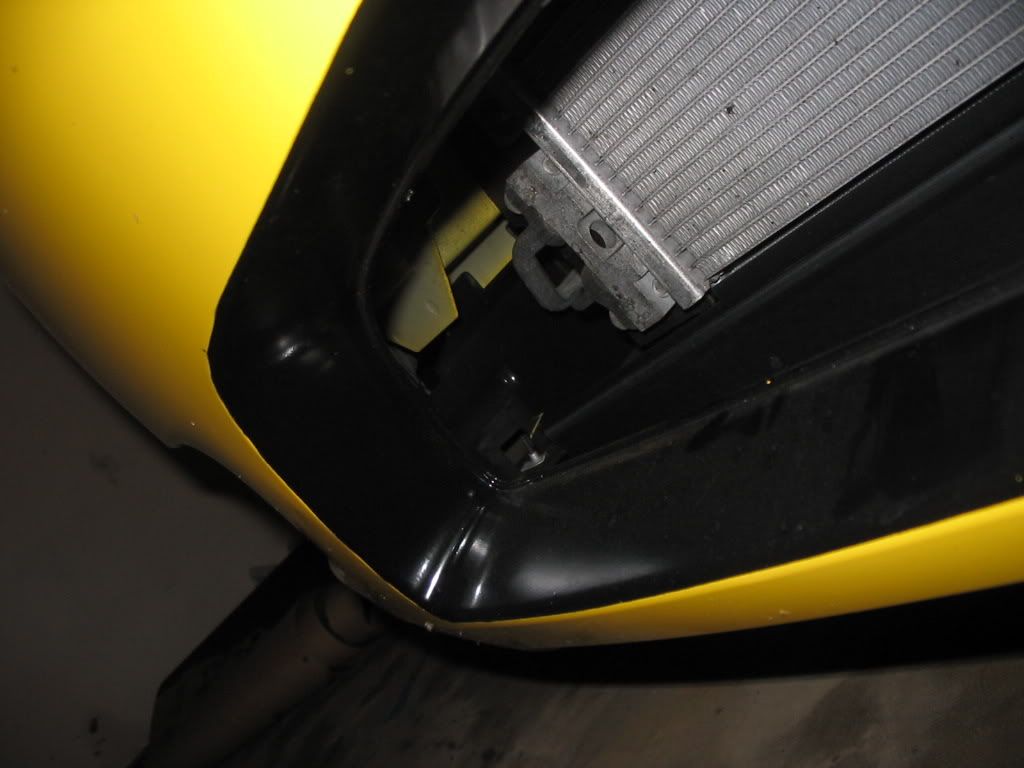
1. youll have to get under the car for this one...youre gonna have to remove the lower grill...its just snapped in place with some plastic snaps as shown in the picture below. start from one side working the top and the bottom and move to the other side. the grill will come out through the front.
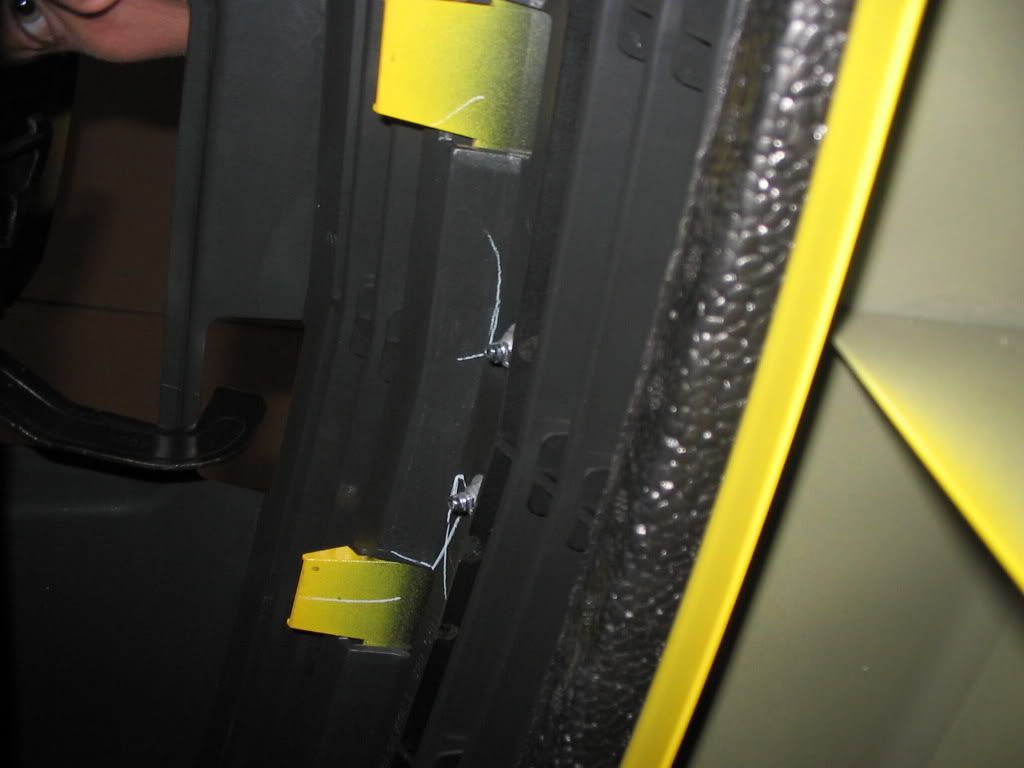
2. you can now gain access to the two tiny nuts holding the chevy bowtie to the crossbar. see pic for location of nuts. this is where the 1/4in. ratchet comes in handy, using the 10mm socket (or wrench) remove the nuts. (remember: righty tighty, lefty loosy) so if shes left handed leave her alone.....bwahahaha...sorry guys...back on topic.
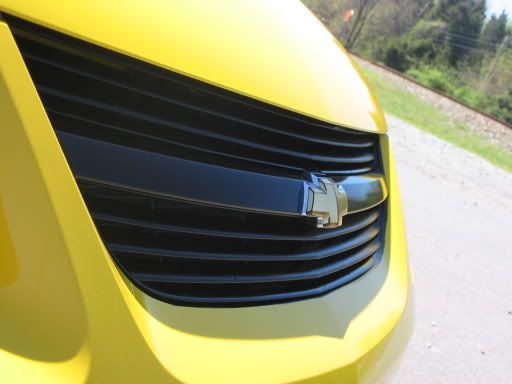
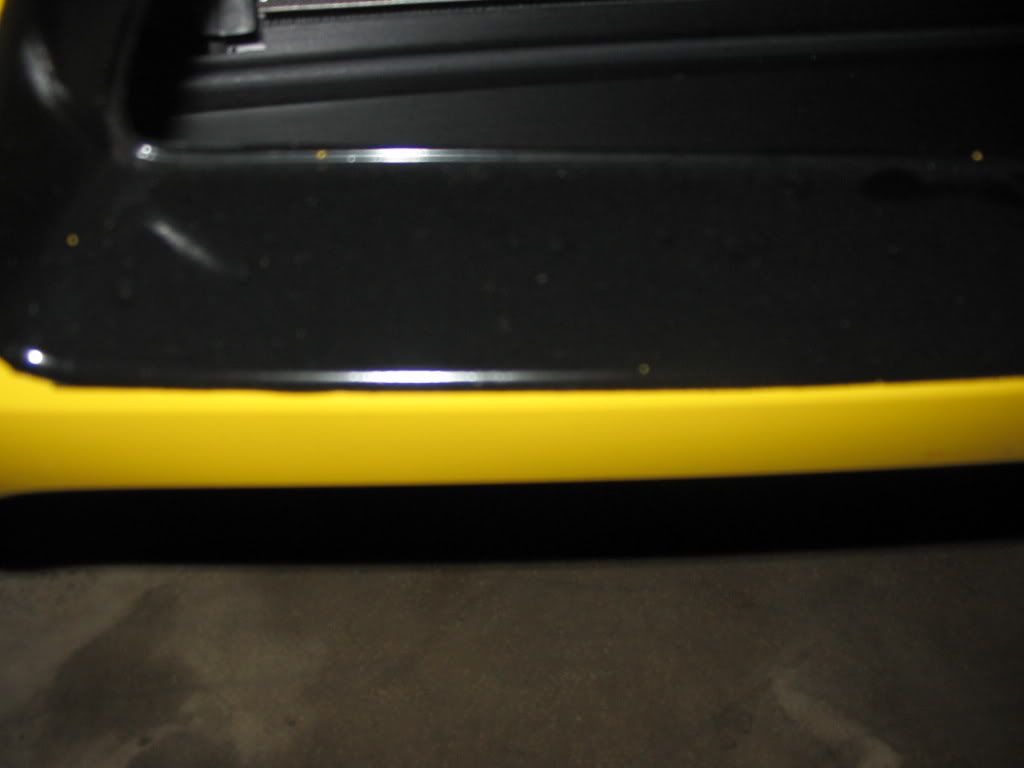
3. once the bowtie is removed open the hood and be sure to get a GOOD THOUROUGH cleaning of the grill areas to be painted...it is critical that its clean (which it should be anyways cuz you need to be takin care of your car) for the paint to stick properly. once cleaned take a really good look at where you want your paint lines to start. heres some close ups of mine to look at.
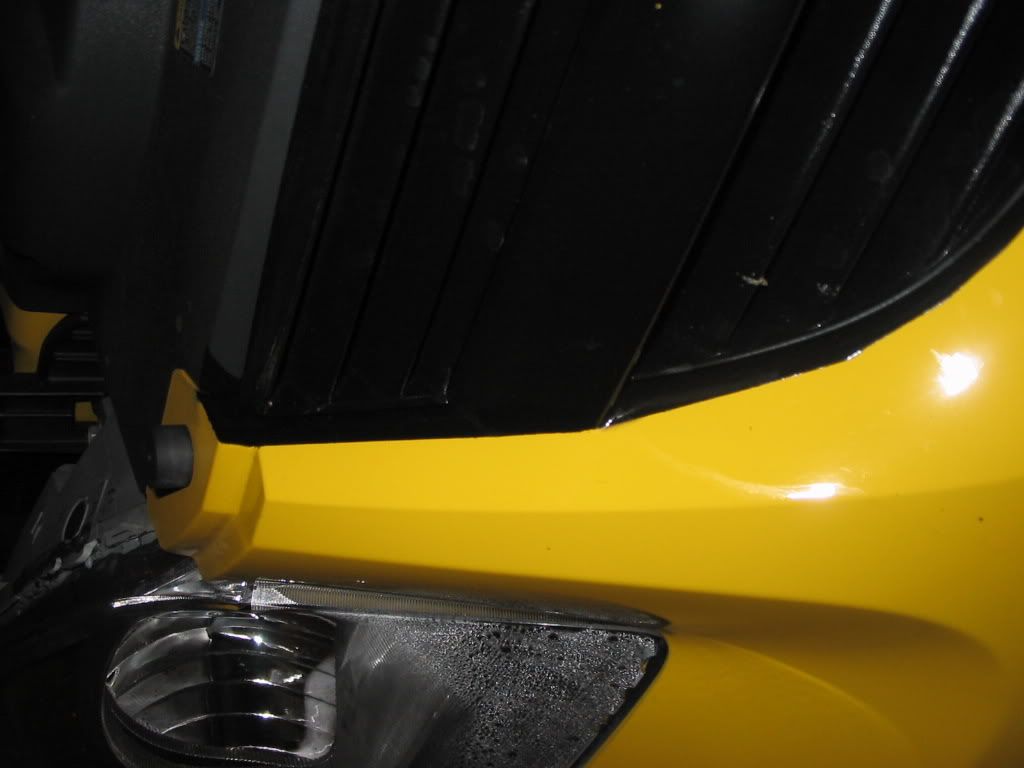
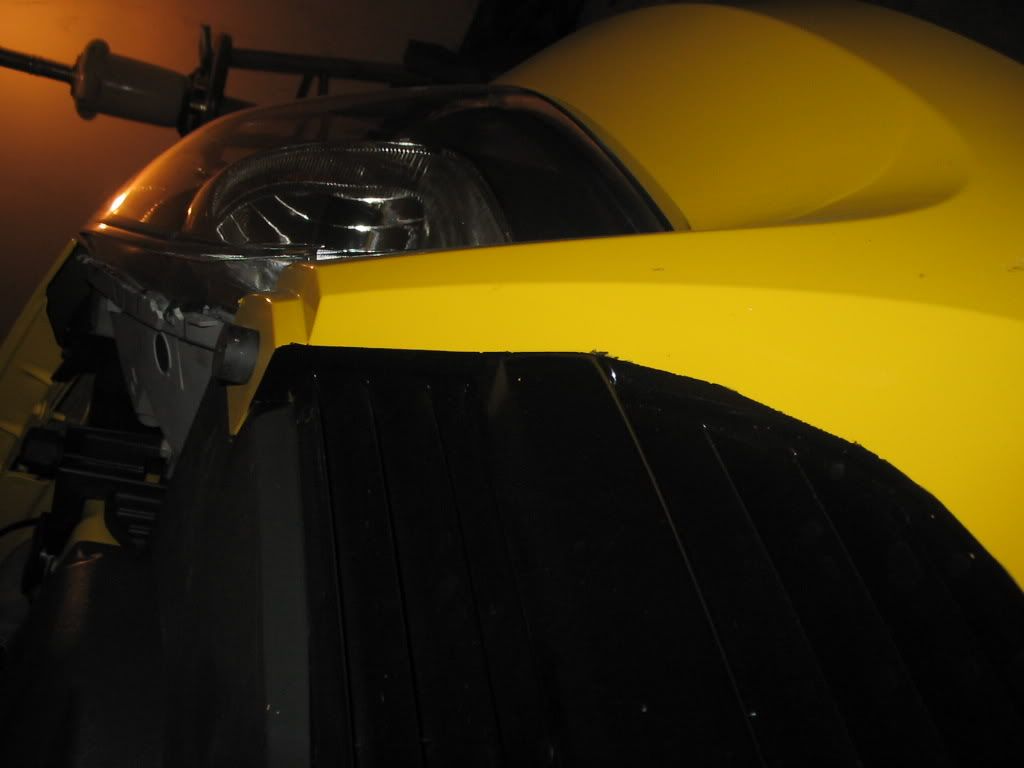
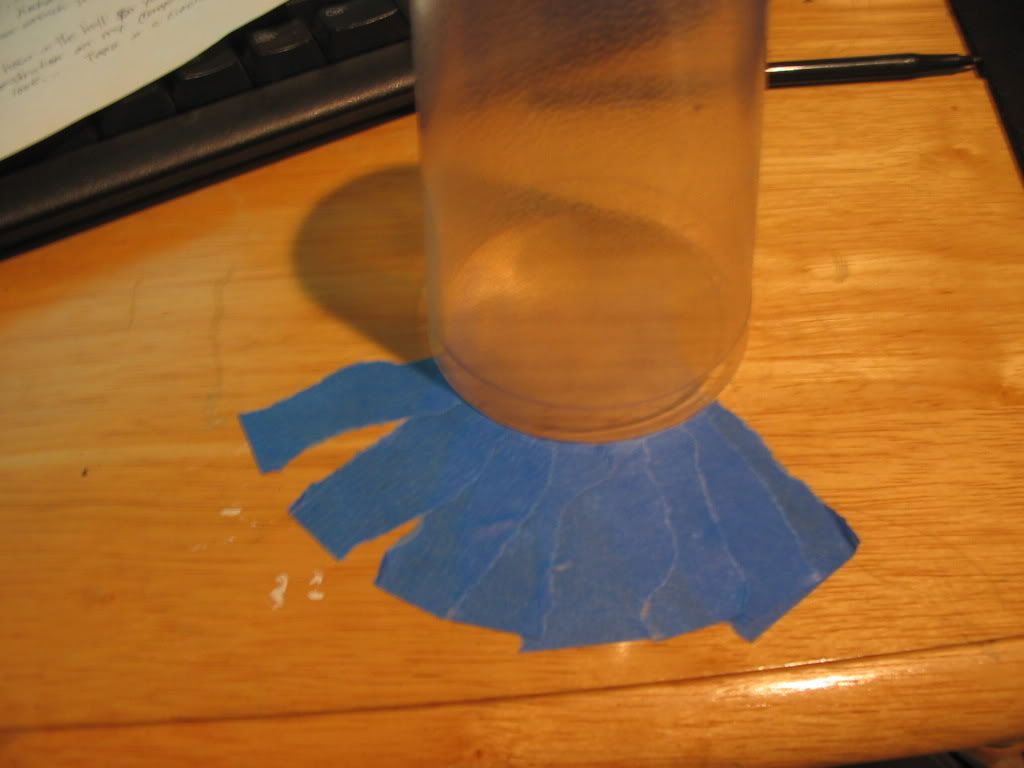
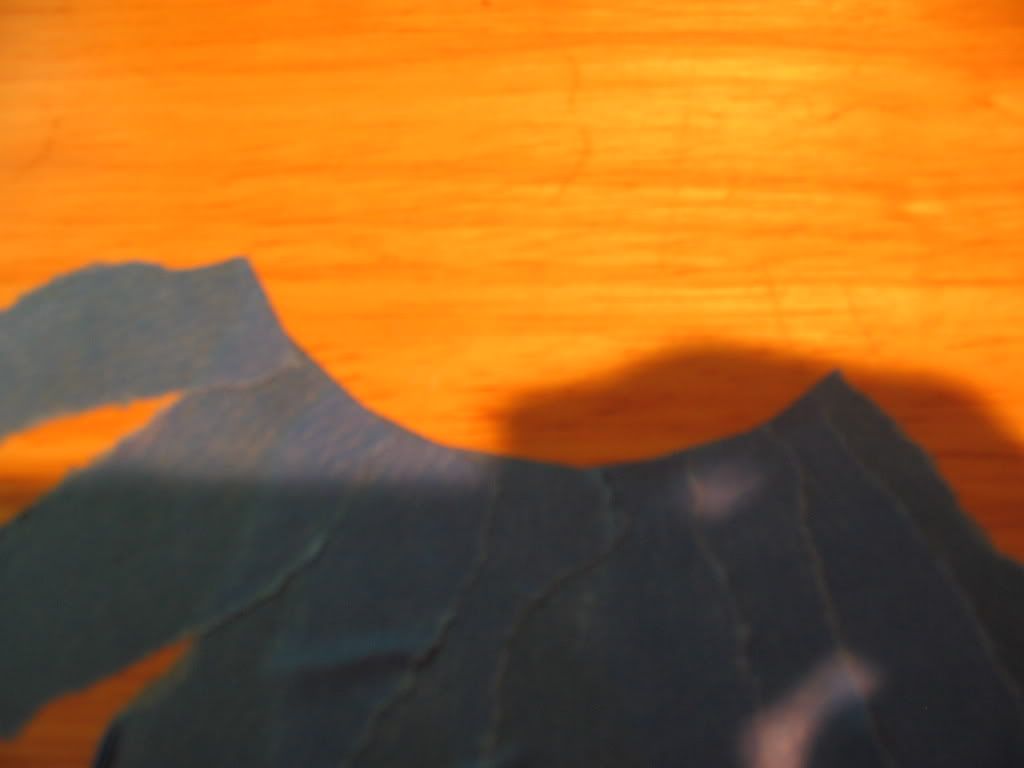
btw im fixing the moisture headlight thingy...only happens when i go to autobell to get her washed..so ill have to wash her myself from now on. but anyways...the tricky part.....masking off those lines with tape....so everyone can pretty much tape in straight lines...but this is gonna take mad paitience and if you really want your car to come out good you had better take your sweet ass time and DO IT RIGHT!...so check out the tricky part...taping on curves...what you have to do is use a bunch of tiny pieces of tape and slowly curve around....i did a lil demonstration on my computer desk around a cup to show u it CAN be done.
before you start painting be sure that all your tape edges are making contact with the bumper so u dont get any leaks...do so by running your finger nail along the edges.
dont forget to mask off those headlights and bumper areas with tape and newspaper or ull be soo pissed you did this....and the only thing you could do is get some paint thinner and use it lightly and very fast without rubbing too hard or youll take off your paint.
hope this how to was as helpful as possible...and if you have any...ANY questions feel free to PM me all questions...be sure to ask me BEFORE YOU START so you can avoid any problems
happy painting guys
now on to the lower grill for those of you who also wanted to do this aswell as the upper part.
since youve already got the lower grill removed its gonna be alot easier...to do this one...except it has shaper corners to tape around.
i taped of the lower grill at the outer edge of the lip so the black kinda comes out of the grill sides a lil. check out the pics.
ull have to use the taping in curve technique again...but its gonna take alot more paitence if you want this to come out good....again after taping it off be sure to lay down that newspaper and tape to mask off those areas of the bumper you dont want to paint.
again I hope this how to was as helpful as possible...and if you have any...ANY questions feel free to PM me all questions...be sure to ask me BEFORE YOU START so you can avoid any problems
Last edited by TommyP; May 23, 2012 at 01:30 PM.


New Member
Joined: 11-18-05
Posts: 62
Likes: 0
From: home
just a tip on the curved masking. Start off with some 1/4 blue fine line tape from 3M, it's nice and flexable so you can go around curves cleanly. Once you lay down the fine line tape, then use the wider blue masking tape and overlap slightly onto the fine line tape.
Make sense???
Make sense???


Thread Starter
Member
Joined: 03-29-06
Posts: 225
Likes: 0
From: charlotte, NC
Originally Posted by Chevypowered
no picture of the whole front end?? get some.
check this thread out for full frontal pics and more... this is the reason behind the generating of the how to ... https://www.cobaltss.net/forums/featured-car-showcase-74/painted-stock-17s-17201/

Junior Member
Joined: 03-27-06
Posts: 404
Likes: 0
From: michigan
those pics arent the best. Soon enough youll have little yellow spots on it from the stone chips, Id take it in and get it done by a professional, probably would only cost 300 bucks or so and wouldnt chip or look crappy.
Thread Starter
Member
Joined: 03-29-06
Posts: 225
Likes: 0
From: charlotte, NC
someone needs to invent a delete post on here so u can delete things that **** u off...sorry dude..maybe if my car payment wasnt 485 a month and insurance wasnt 298 a month...and my rent was actually split even with my roommate and i wasnt paying 465 when he pays 365 and then my cell bill at 60 bones and both my credit cards...some of us arent living with our parents..(not sayin you are at home with your parents)...and living for free out here in this tough place called the REAL WORLD.

Thread Starter
Member
Joined: 03-29-06
Posts: 225
Likes: 0
From: charlotte, NC
Originally Posted by wikkymaster
wow i love that, looks like a new project for my car did you paint the plastic piece to the grill also? or just the bar
Thread Starter
Member
Joined: 03-29-06
Posts: 225
Likes: 0
From: charlotte, NC
Originally Posted by SS SChgd
The front bowtie is held on by screws/ bolts? Is there any sticky stuff on it too? I think I'm trading mine out for a Old style Blue one.
Senior Member
Joined: 03-03-06
Posts: 2,183
Likes: 0
From: Chicago
whoever was worried about spraypaint....i've used dupli-color on lots of things on my car, rims, bowties, etc. (I love DIY's!).....doesnt look cheap at all, my gunmetal looks exactly like the rims you would spend $k's on....and chipping doesnt happen at all....so...yea....this is an awesome DIY...nice job 
Thread Starter
Member
Joined: 03-29-06
Posts: 225
Likes: 0
From: charlotte, NC
Originally Posted by NSChiCobalt
whoever was worried about spraypaint....i've used dupli-color on lots of things on my car, rims, bowties, etc. (I love DIY's!).....doesnt look cheap at all, my gunmetal looks exactly like the rims you would spend $k's on....and chipping doesnt happen at all....so...yea....this is an awesome DIY...nice job
thanky thanky!

Thread Starter
Member
Joined: 03-29-06
Posts: 225
Likes: 0
From: charlotte, NC
Originally Posted by CobaltDude81
reminds me of that grill song.... smile for me daddy... let me see your grill. your grill. hahaha


