
Electrical: How To: PLX D100 Wideband and Sensor Module

Thread Starter
Bannned
Joined: 09-08-07
Posts: 8,743
Likes: 0
From: Kaneohe, HI
How To: PLX D100 Wideband and Sensor Module
this is going to take a while to explain. hopefully i do it right. theres alot of pictures and 2 vids. so bare with me please.
What you need:
7mm socket with driver
8" zip ties
tiny zip ties
drill with drill bit (forgot what size, sorry)
wire cutters and strippers
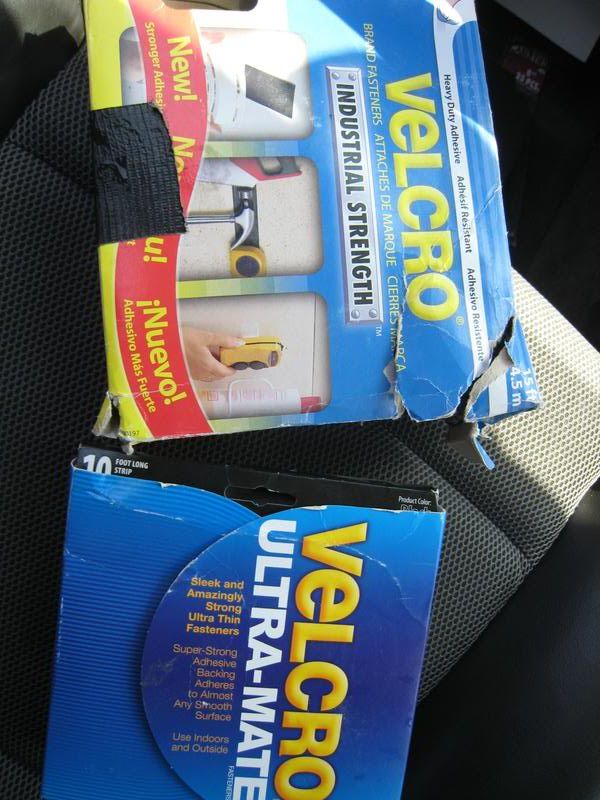
double sided heavy duty velcro tape
wires, one red and black (optional) 10' is good enough
philips head screw driver
box cutter
i will explain what to do first, then go to the pics for a play by play on how to do it.
Ok, first thigs first. Go under your hood and disconnect your battey post and remove your wires (2). now the first thing you want to do is get your wideband sensor hooked up. There is a hole right behind the brake and clutch that you can run wires through. There should already be a wire running through here. Simply pull the rubber cap out that is blocking the hole and push your sensor through here. try and push at least a foot and a half through.
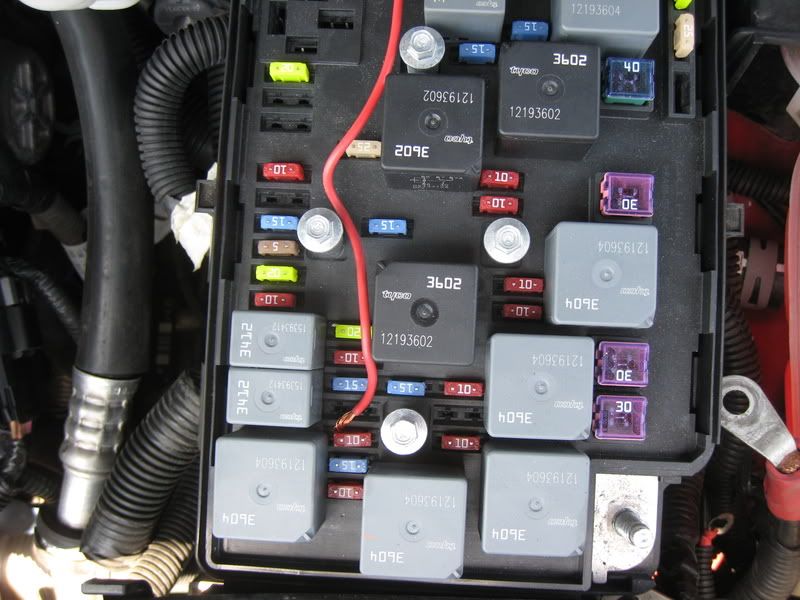
I have a water/met kit, so for power i just tapped my meth power wire. but if you dont want to do that, you can plug that power wire into your fuse box. They supply the power wires but its easier if you get your own and do it this way. After your done running power and grounding your wire, you need to feed it through the same hole as your sensor, after the car has been lifted.
Raise your car up on a jack, 4 point, or drive on... who cares. im assuming that you already have your bung in place and ready for the sensor. Take the wire that you just pulled through and connect it to the sensor. Mount the harness to your car and zip tie the loose wire.
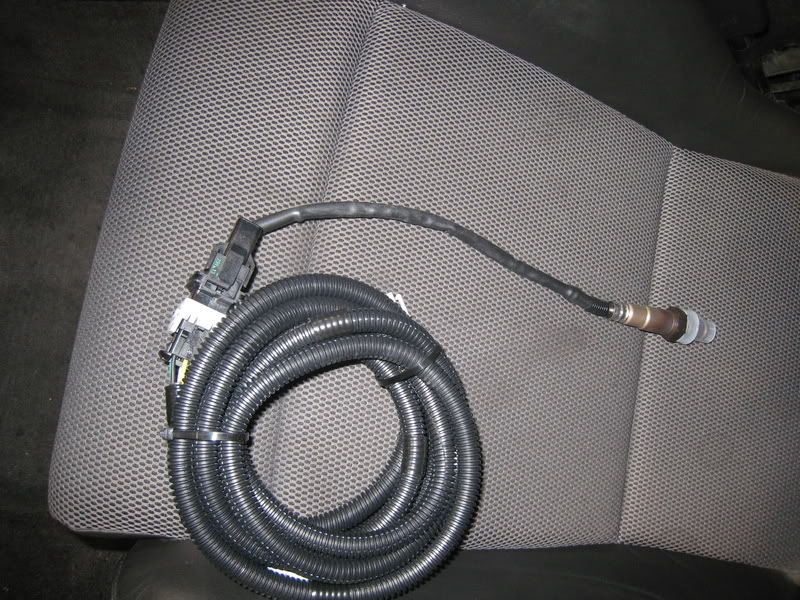
here is the sensor with harness
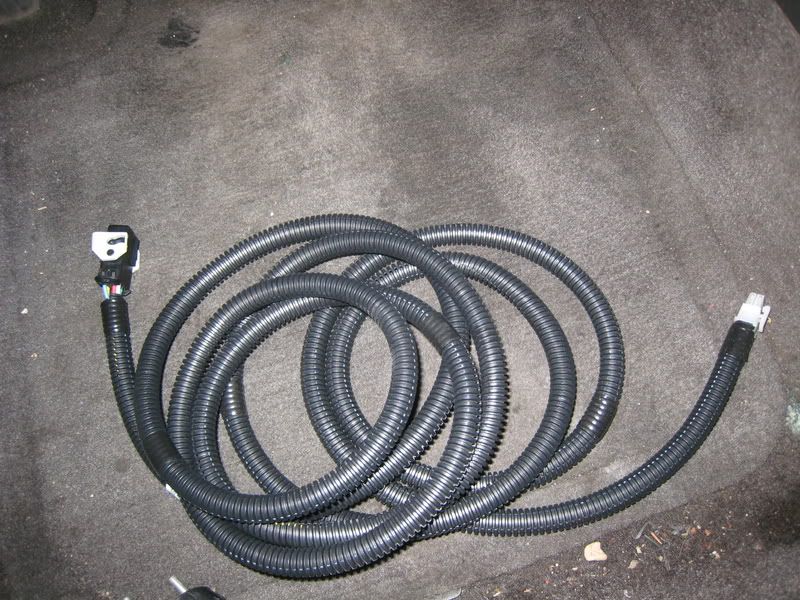
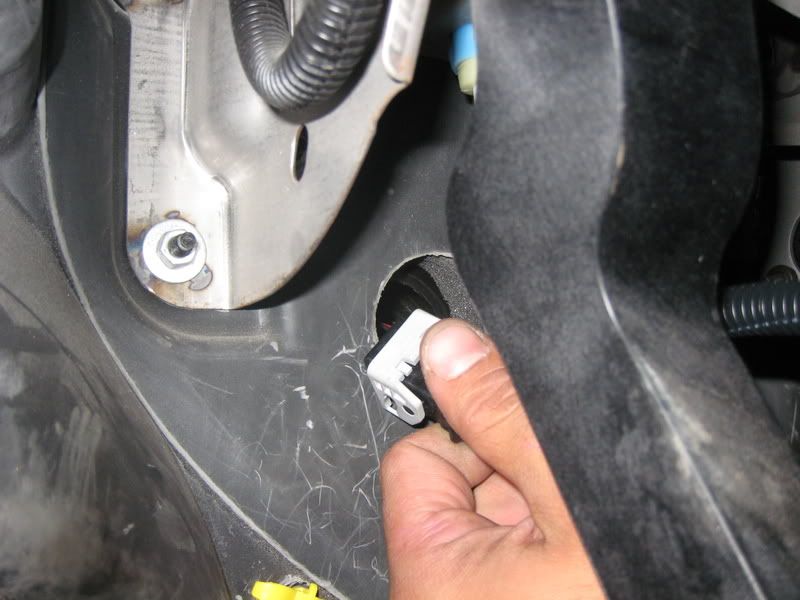
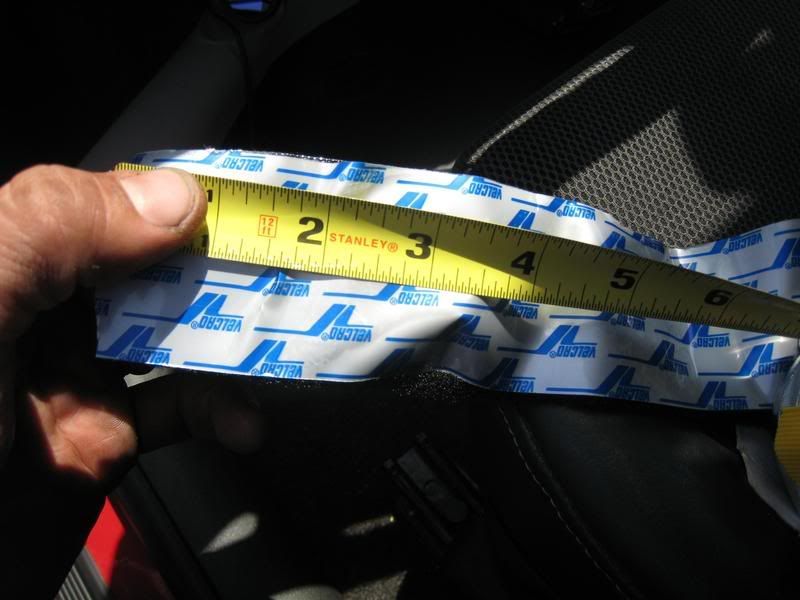
here is just the harness that you will be feeding through the hole behind your brake and clutch
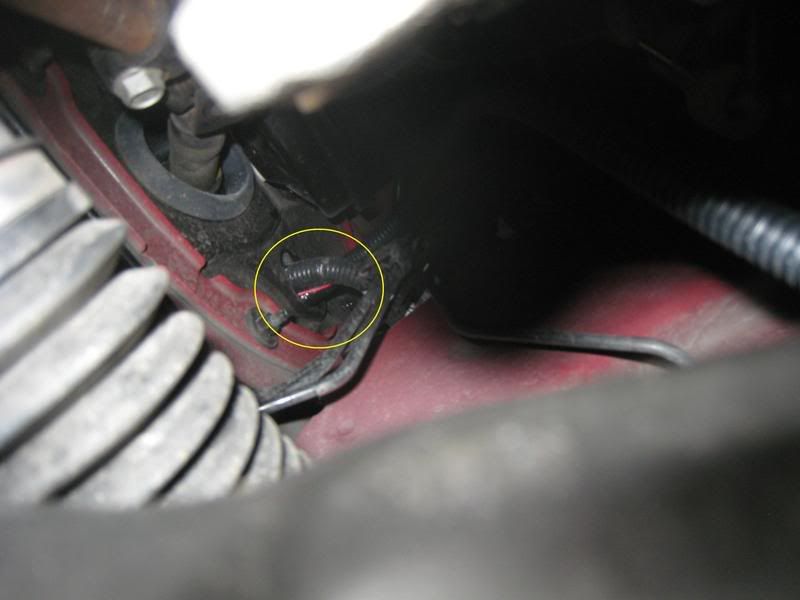
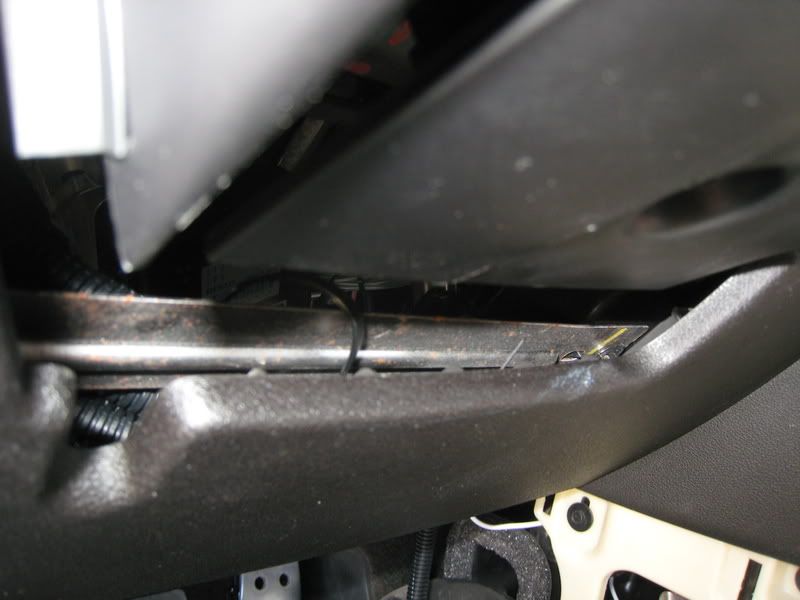
here is what you will be feeding the wire harness through, its circled in yellow. 2 =clutch. 3=brake
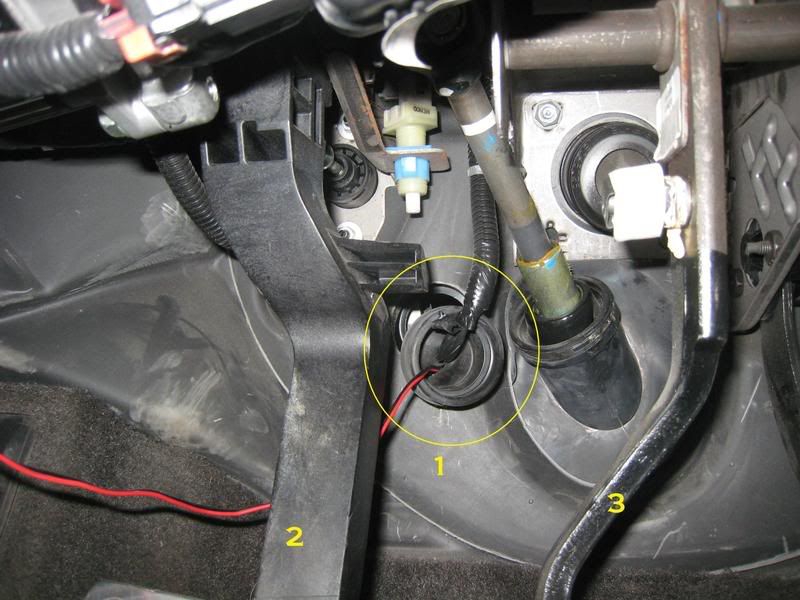
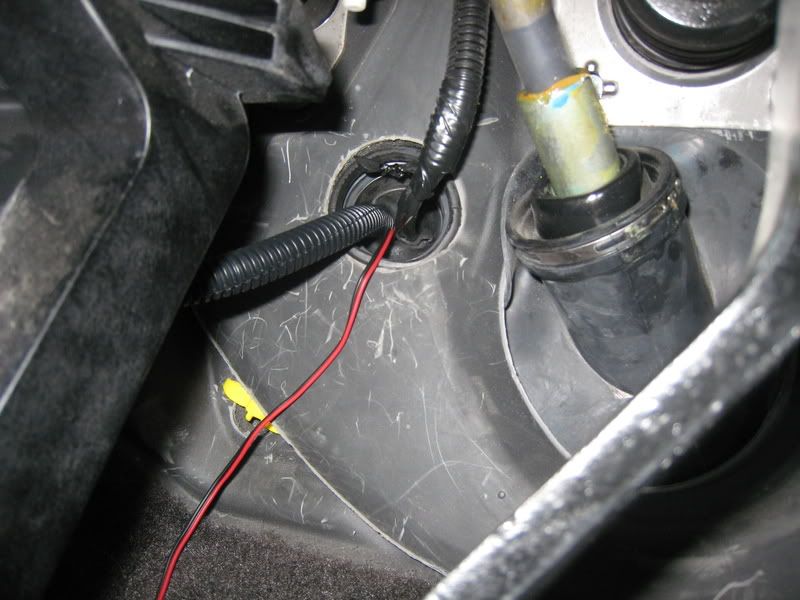
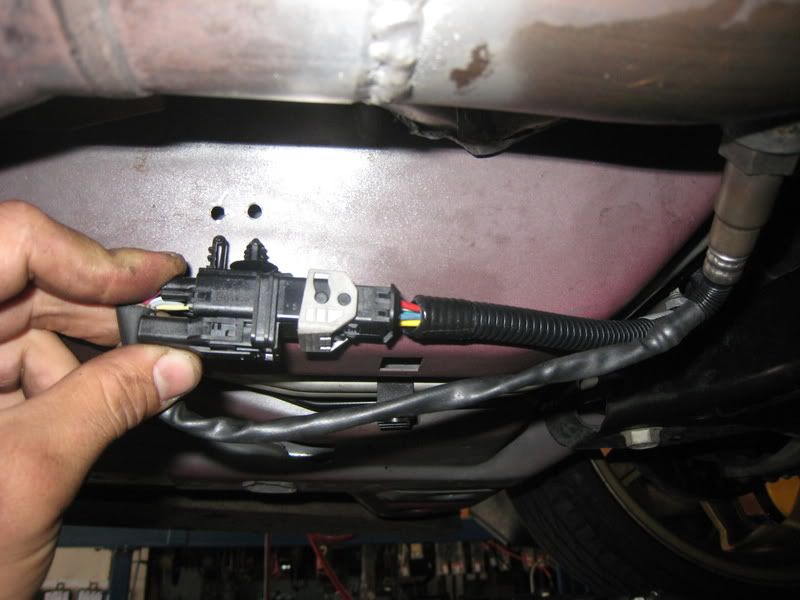
pull out the cap and pull the wire through as shown. notice the red and black wire coming through? That is my power and ground. we will get to that later.
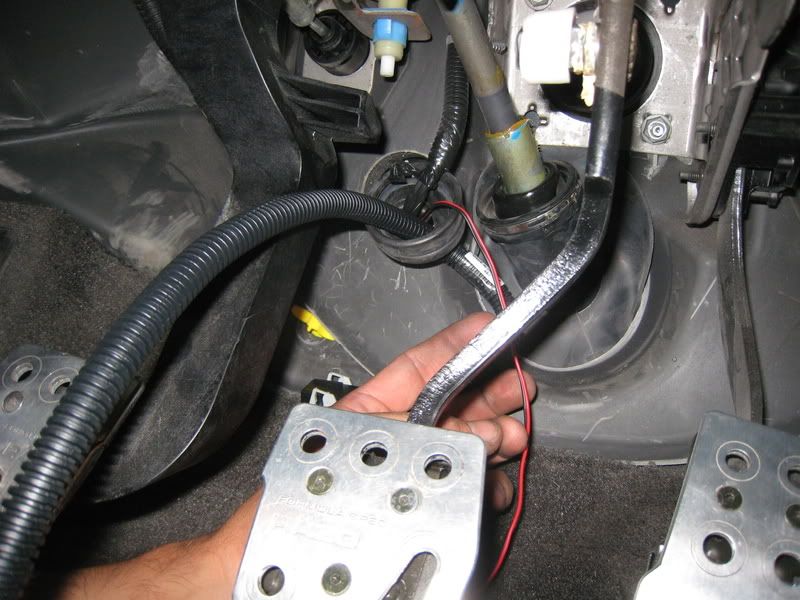
after its through the cap, push the sensor through the hole
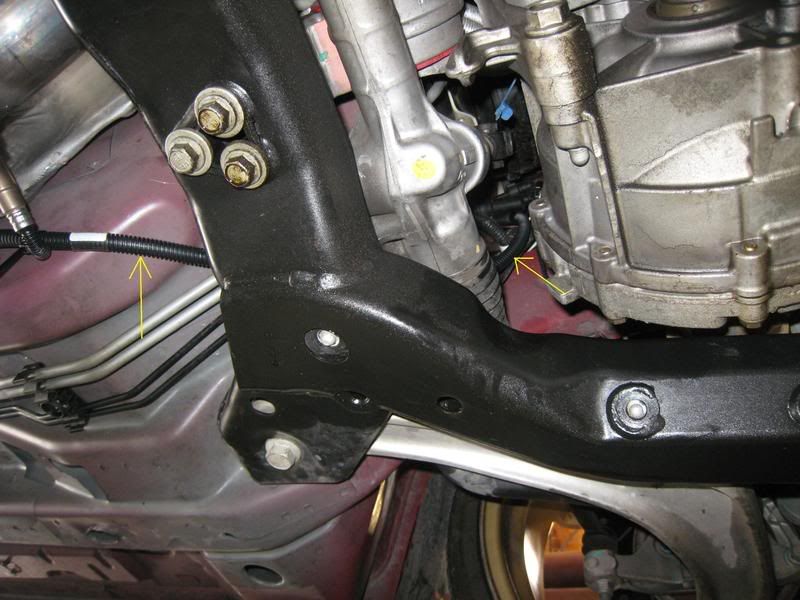
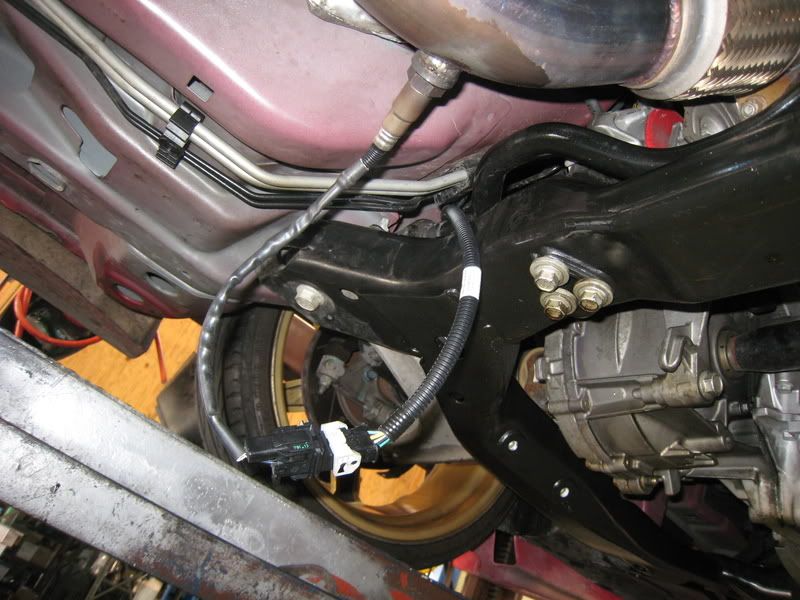
now that its through, lift your vehicle and you should see it as your look behind your engine.
Grab the end and pull it through. loop it through your car as shown below. Now connect the harness to the sensor
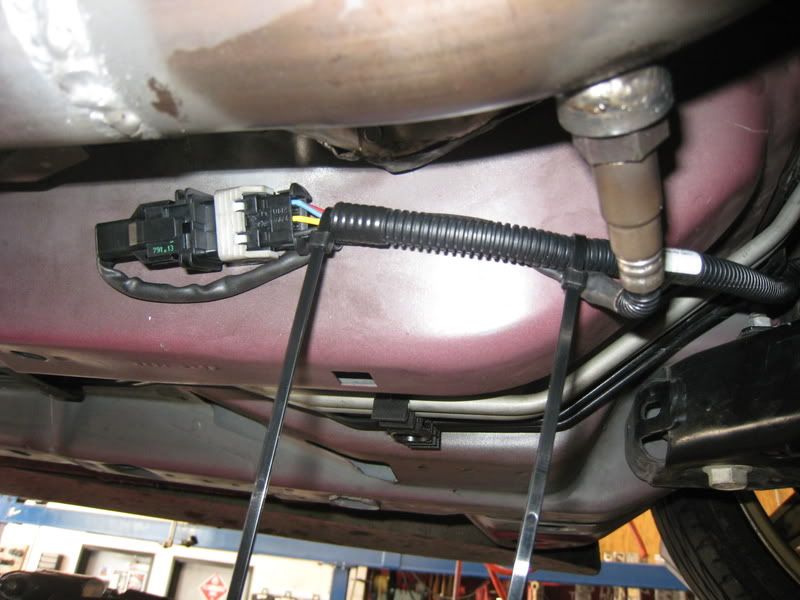
Now your going to mount your harness using that drill. drill 2 holes spaced apart the same as on the harness.
Push it in and it secures by itself. Zip tie the extra slack and your done from under the car!
here is the power and ground wires. Power is tapped into pump power and ground is bolted up to strut bolts.
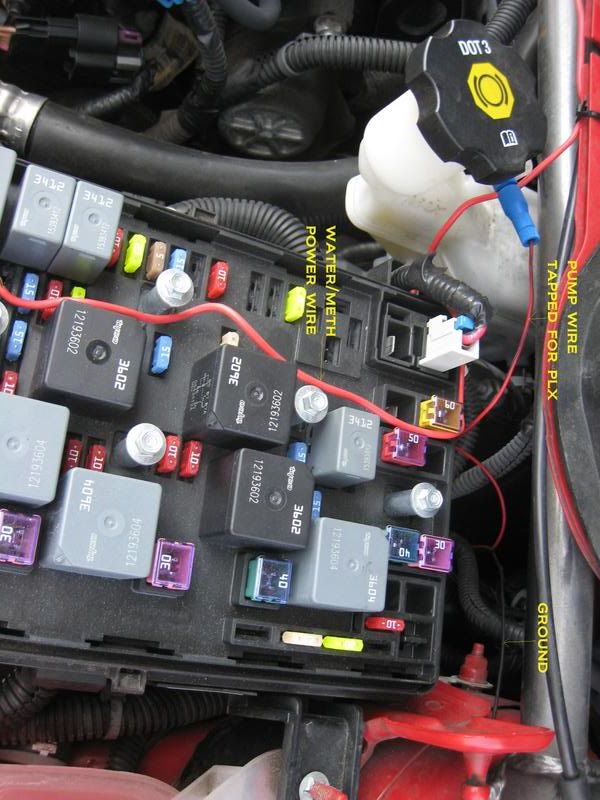
Here is my source of power
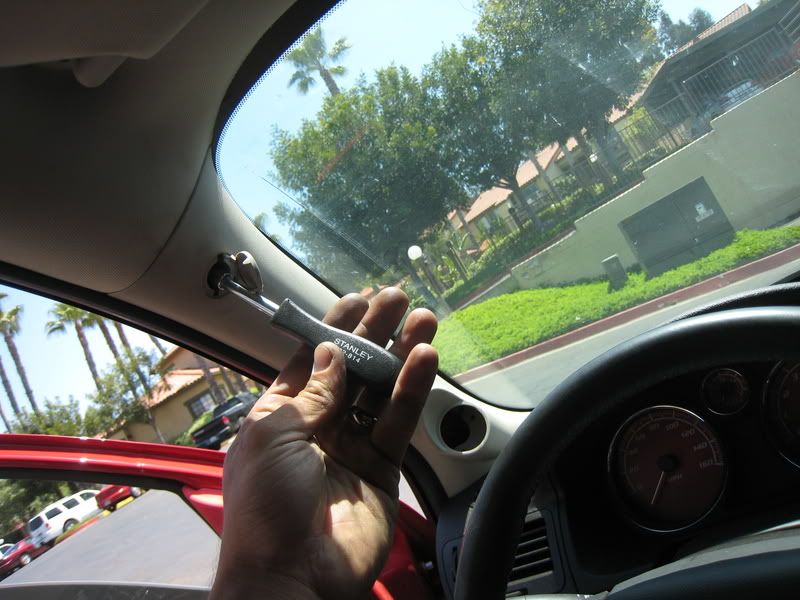
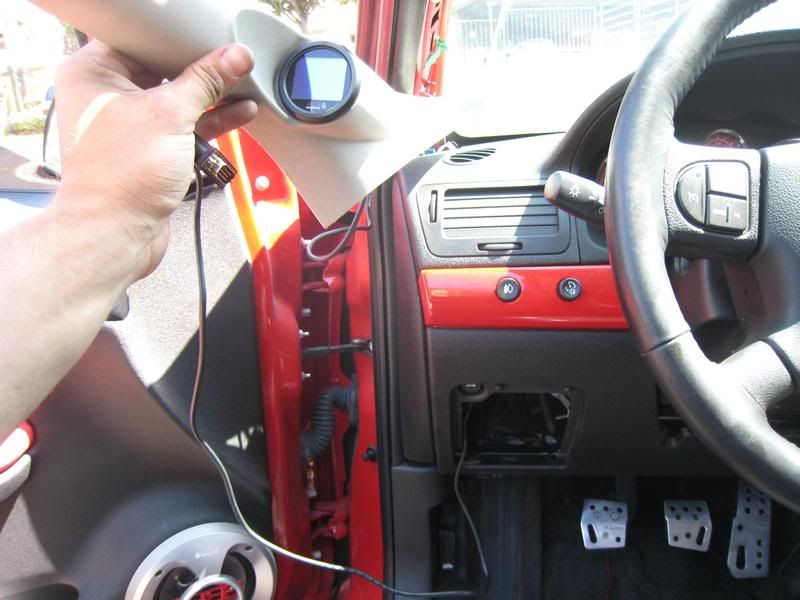
Now take your pillar off by popping the circle tab off at the top. Take your 7mm socket and driver and remove the bolt. Pull the pillar out and up to remove. Remove your wideband or whatever you have in the empty hole to make room for your new gauge. Insert your PLX gauge and run your vga (end of gauge wire) through, pull it out from under the dash. Mount your your pillar back up. Your done
here.
Use the 7mm here
You can see the gauge mounted and the cord is pulled through. Do not pull the cord through the weed keep as shown.
Now the only free wires you should have so far is: the sensor, power, ground, and the gauge vga cord. correct? good.
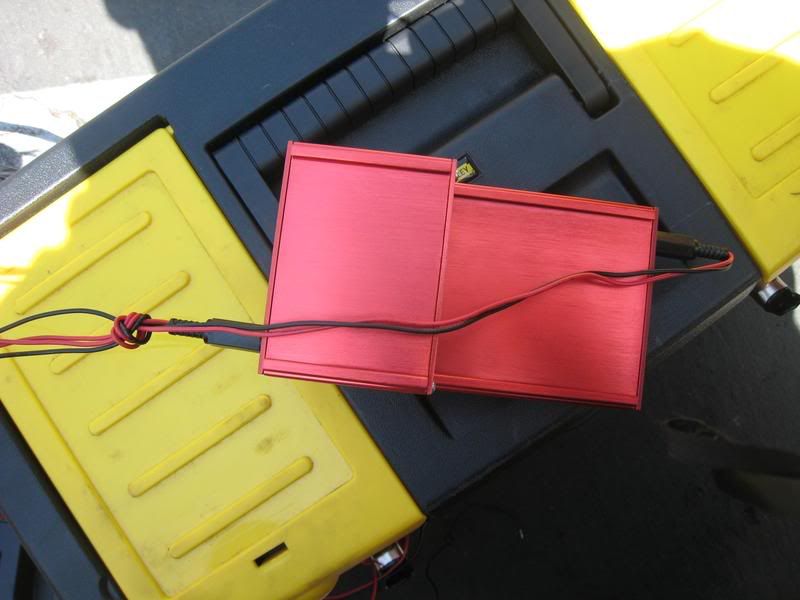
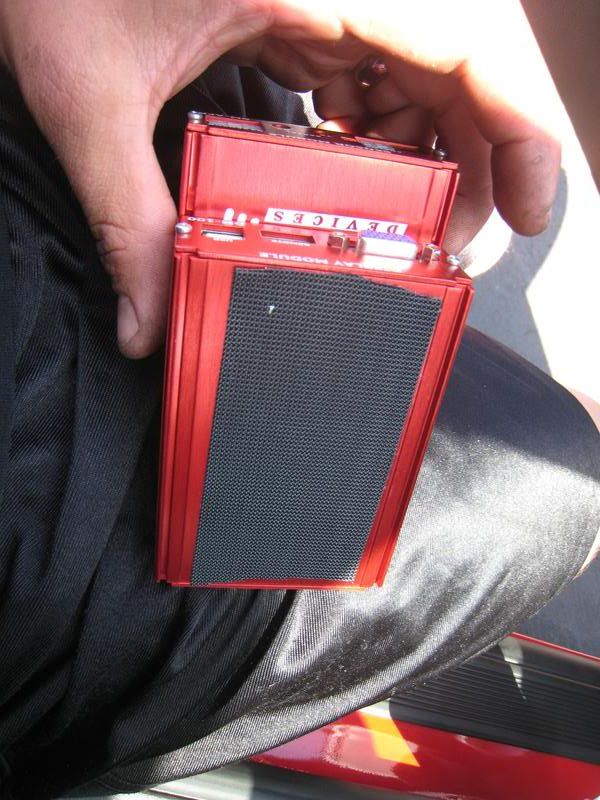
Now, your kit comes with 2 modules. a sensor and a display modual. Lets hook these things up. They are meant to connect with one another. They have little sliding posts on the tops and bottom to mount more modules. Mount these together (mine wouldn't go on as i planned them too) Now take your transmit (TX) and your receive (RX) cable (looks like a headphone plug on both sides) and plug these into the modules. When your done with that, hook up your power to both your modules.
Ok, connect them by taking the face off and sliding it on. Mine was a bitch to slide on. Do what you can. Put the face back on when your finished.
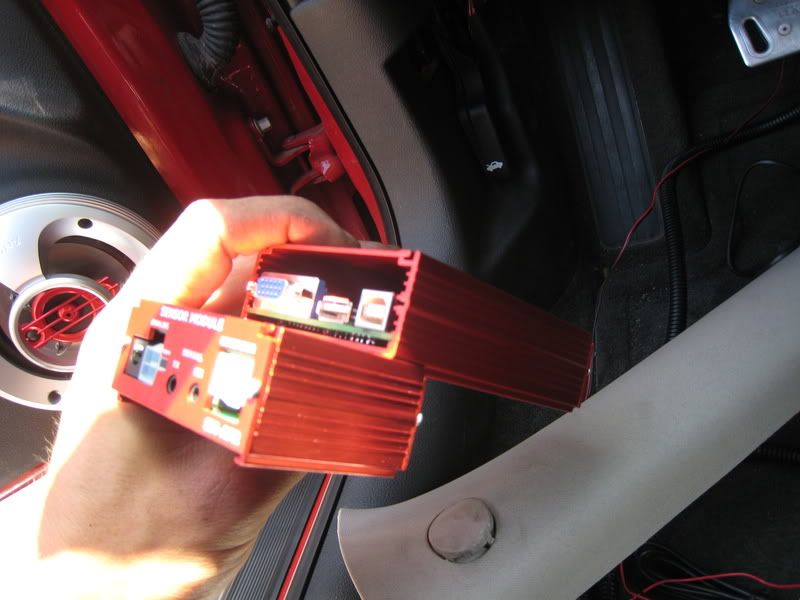
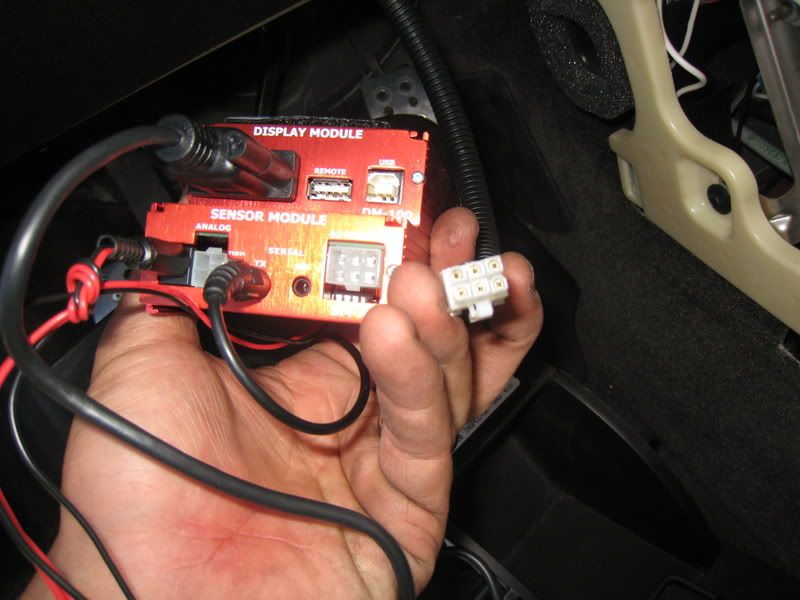
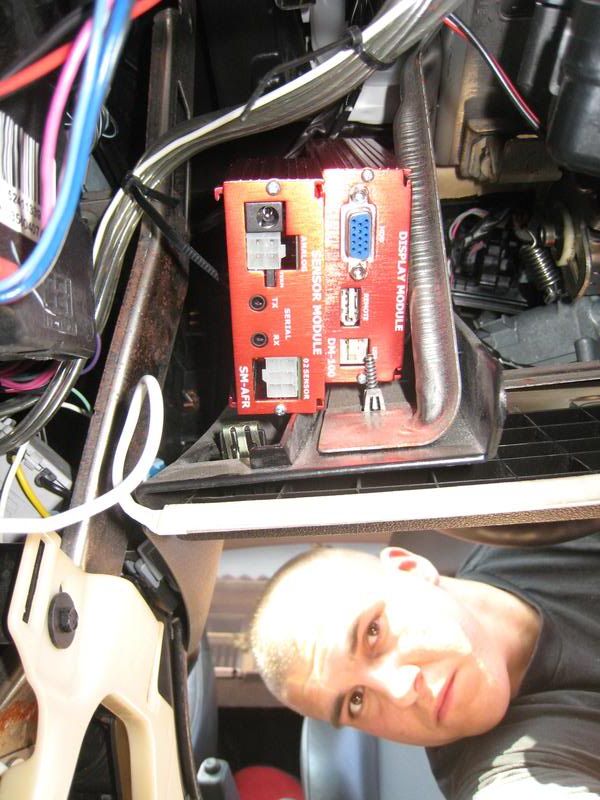
Here is where the tx and rx wires will plug into. You are going to transmit from the Sensor serial port and the display module sensor port will receive. Take your power plugs and plug them into the power ports as labeled.
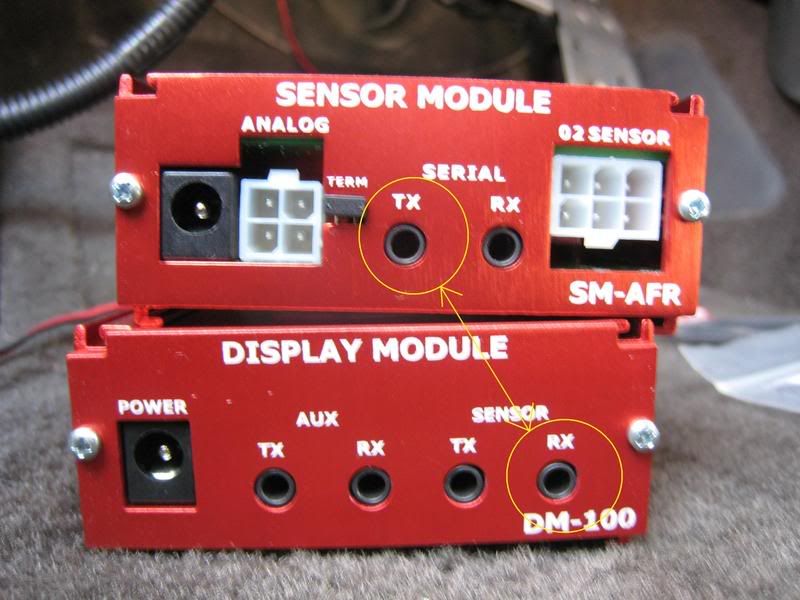
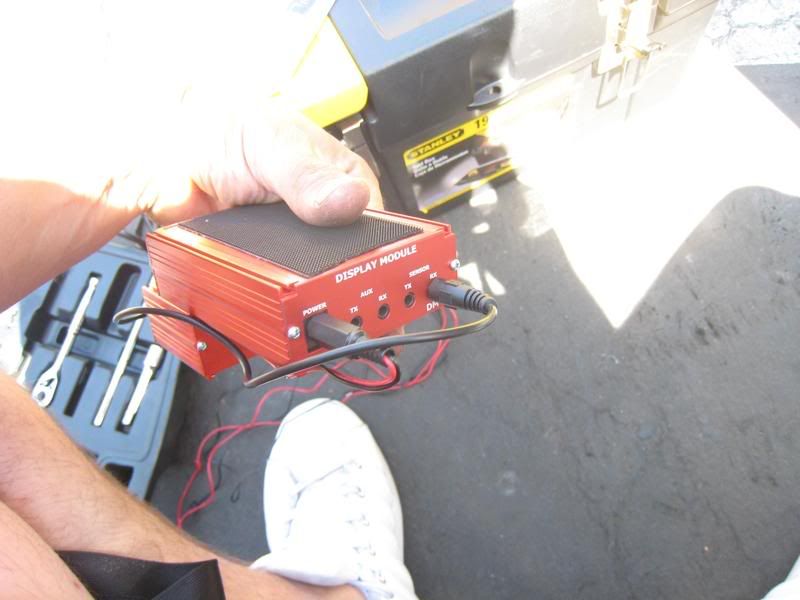
here it is transmitting and power plugged in place
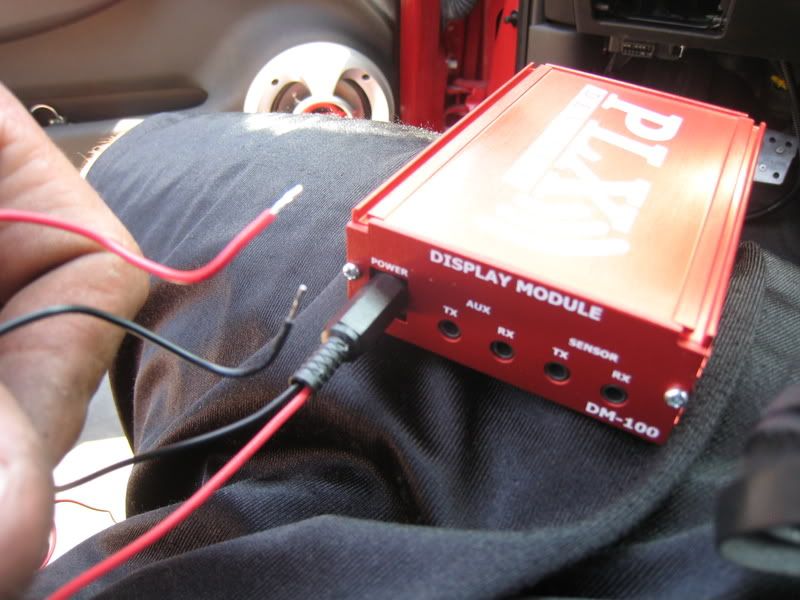
here is the other side receiving and the other power cord connected.
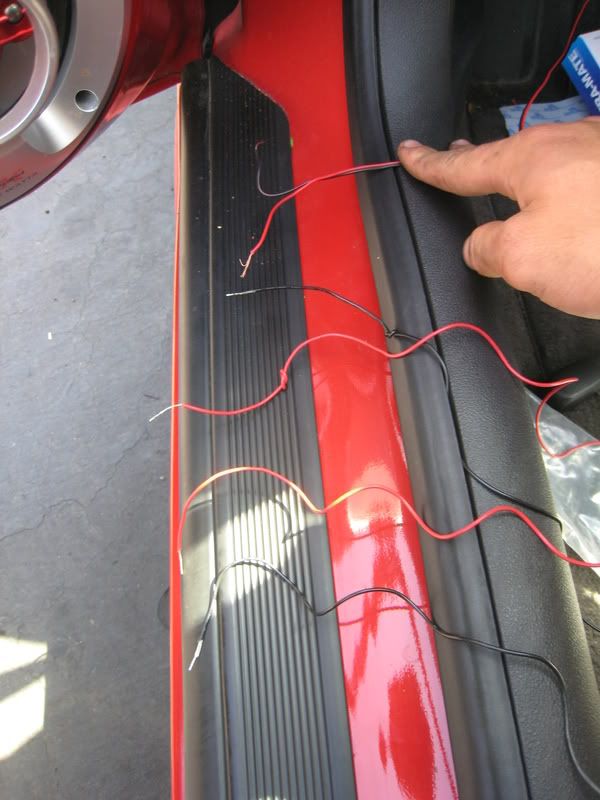
Here's what i did. i took both Power wires from the modules and tied them in a simple loop knot to keep them together. i took the shorter wires from my display module and tied little knots at the end to know which wires were which. After that I took those 4 wires (2power and 2ground) and stripped them. I also did this with the power and ground that i ran through the firewall earlier. Now take the 3 red wires and twist them together, use a connector screw cap or some black tap to hold them. Do the same with the ground wires.
here is a close up of the power connected and the wires at the end
As you can see, i tied them in knot
You can see my display wires that have knots in them. They are just there so i know which wire goes where.
From left to right: sensor power and ground, display power and ground, main power and ground. connect each color and tape or cap off.
What you need:
7mm socket with driver
8" zip ties
tiny zip ties
drill with drill bit (forgot what size, sorry)
wire cutters and strippers
double sided heavy duty velcro tape
wires, one red and black (optional) 10' is good enough
philips head screw driver
box cutter
i will explain what to do first, then go to the pics for a play by play on how to do it.
Ok, first thigs first. Go under your hood and disconnect your battey post and remove your wires (2). now the first thing you want to do is get your wideband sensor hooked up. There is a hole right behind the brake and clutch that you can run wires through. There should already be a wire running through here. Simply pull the rubber cap out that is blocking the hole and push your sensor through here. try and push at least a foot and a half through.
I have a water/met kit, so for power i just tapped my meth power wire. but if you dont want to do that, you can plug that power wire into your fuse box. They supply the power wires but its easier if you get your own and do it this way. After your done running power and grounding your wire, you need to feed it through the same hole as your sensor, after the car has been lifted.
Raise your car up on a jack, 4 point, or drive on... who cares. im assuming that you already have your bung in place and ready for the sensor. Take the wire that you just pulled through and connect it to the sensor. Mount the harness to your car and zip tie the loose wire.
here is the sensor with harness
here is just the harness that you will be feeding through the hole behind your brake and clutch
here is what you will be feeding the wire harness through, its circled in yellow. 2 =clutch. 3=brake
pull out the cap and pull the wire through as shown. notice the red and black wire coming through? That is my power and ground. we will get to that later.
after its through the cap, push the sensor through the hole
now that its through, lift your vehicle and you should see it as your look behind your engine.
Grab the end and pull it through. loop it through your car as shown below. Now connect the harness to the sensor
Now your going to mount your harness using that drill. drill 2 holes spaced apart the same as on the harness.
Push it in and it secures by itself. Zip tie the extra slack and your done from under the car!
here is the power and ground wires. Power is tapped into pump power and ground is bolted up to strut bolts.
Here is my source of power
Now take your pillar off by popping the circle tab off at the top. Take your 7mm socket and driver and remove the bolt. Pull the pillar out and up to remove. Remove your wideband or whatever you have in the empty hole to make room for your new gauge. Insert your PLX gauge and run your vga (end of gauge wire) through, pull it out from under the dash. Mount your your pillar back up. Your done
here.
Use the 7mm here
You can see the gauge mounted and the cord is pulled through. Do not pull the cord through the weed keep as shown.
Now the only free wires you should have so far is: the sensor, power, ground, and the gauge vga cord. correct? good.
Now, your kit comes with 2 modules. a sensor and a display modual. Lets hook these things up. They are meant to connect with one another. They have little sliding posts on the tops and bottom to mount more modules. Mount these together (mine wouldn't go on as i planned them too) Now take your transmit (TX) and your receive (RX) cable (looks like a headphone plug on both sides) and plug these into the modules. When your done with that, hook up your power to both your modules.
Ok, connect them by taking the face off and sliding it on. Mine was a bitch to slide on. Do what you can. Put the face back on when your finished.
Here is where the tx and rx wires will plug into. You are going to transmit from the Sensor serial port and the display module sensor port will receive. Take your power plugs and plug them into the power ports as labeled.
here it is transmitting and power plugged in place
here is the other side receiving and the other power cord connected.
Here's what i did. i took both Power wires from the modules and tied them in a simple loop knot to keep them together. i took the shorter wires from my display module and tied little knots at the end to know which wires were which. After that I took those 4 wires (2power and 2ground) and stripped them. I also did this with the power and ground that i ran through the firewall earlier. Now take the 3 red wires and twist them together, use a connector screw cap or some black tap to hold them. Do the same with the ground wires.
here is a close up of the power connected and the wires at the end
As you can see, i tied them in knot
You can see my display wires that have knots in them. They are just there so i know which wire goes where.
From left to right: sensor power and ground, display power and ground, main power and ground. connect each color and tape or cap off.
Thread Starter
Bannned
Joined: 09-08-07
Posts: 8,743
Likes: 0
From: Kaneohe, HI
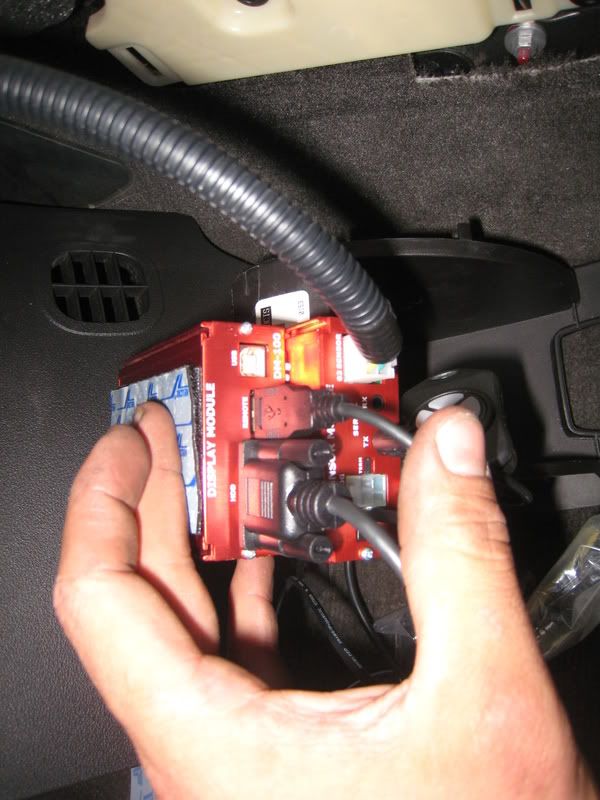
Next we are going to connect the VGA to the display modual and the Wideband sensor to the sensor module. Just follow the label and its easy to know what goes where.
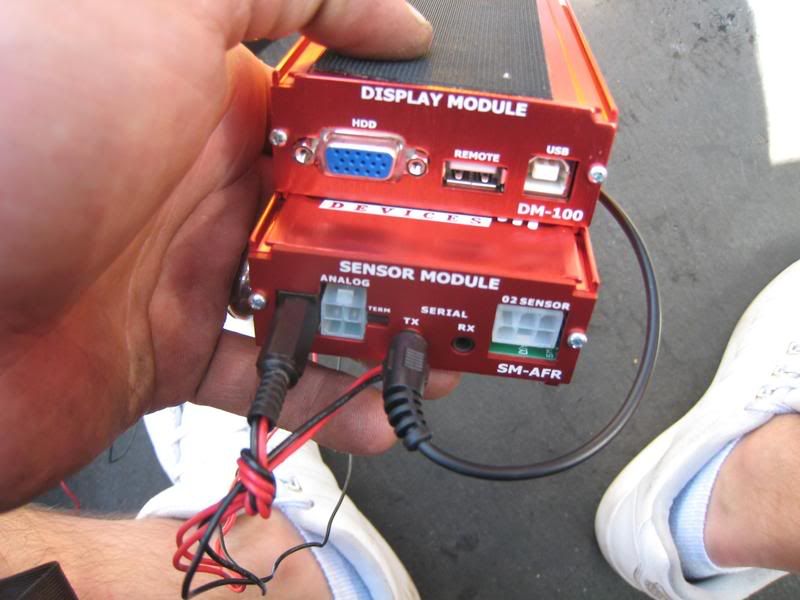
Take your VGA and connnect it to the port labeled HDD. Then take your widband sensor as shown and plug it into the port labeled 02 sensor. simple right.
Here are both the VGA and sensor plugged in.
Ok, were almost done, i promise.
The next thing we are going to do is connect the remote and the usb a to usb b.
This is your remote with a usb a end on it.
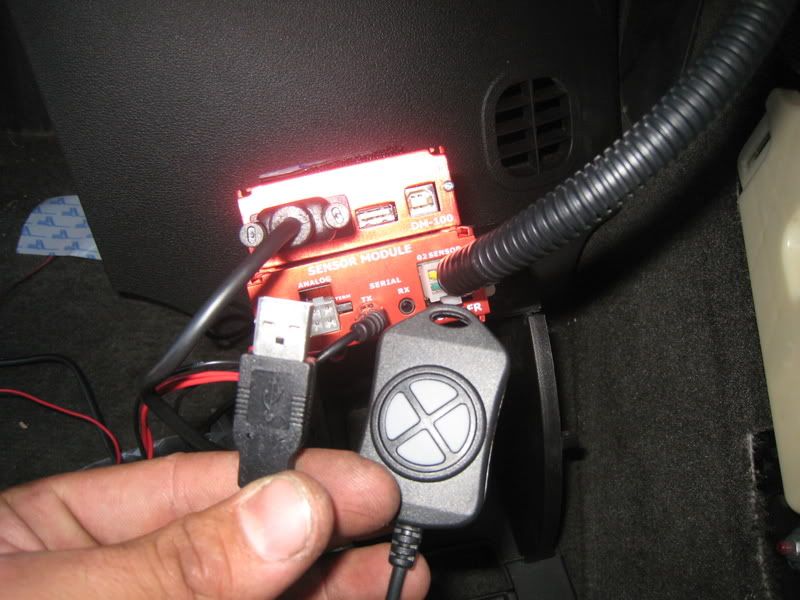
Simply plug it into your display module right next to your VGA cord.
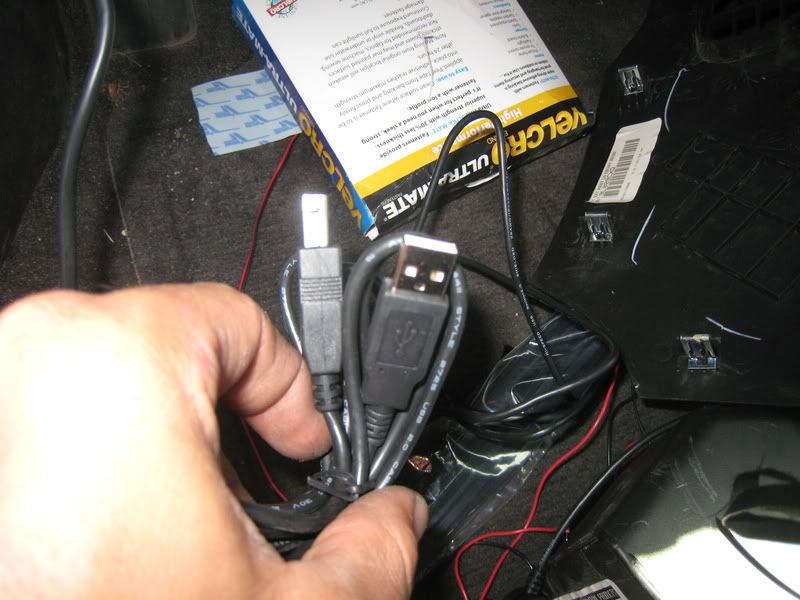
Now take your usb a to usb b cord and plug the usb b end to the display module next the remote port as shown.

If you haven't done so already by looking at the pictures, take that double sided velcro tape and put a 4" strip on the back of the display module. like so.
Guess what???!!!! your done! now we have to mount the system, tie up the wires using the zip ties and see if it works
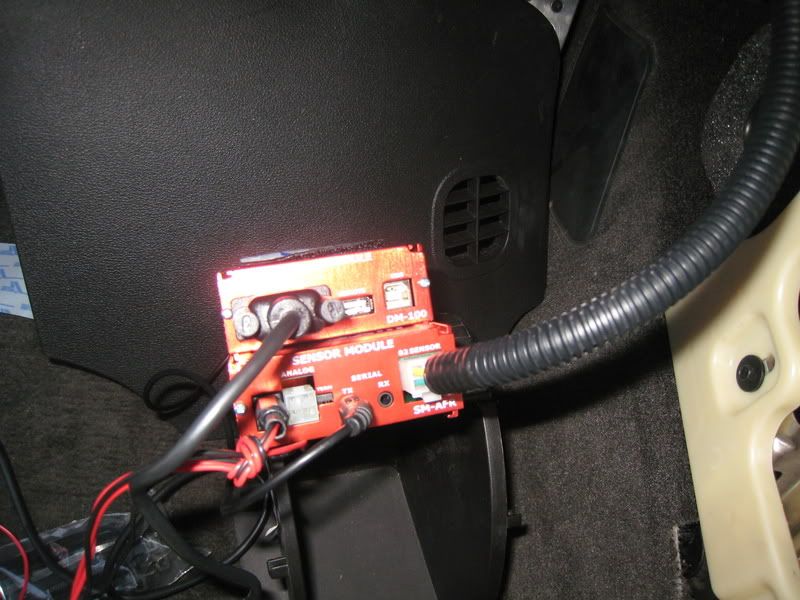
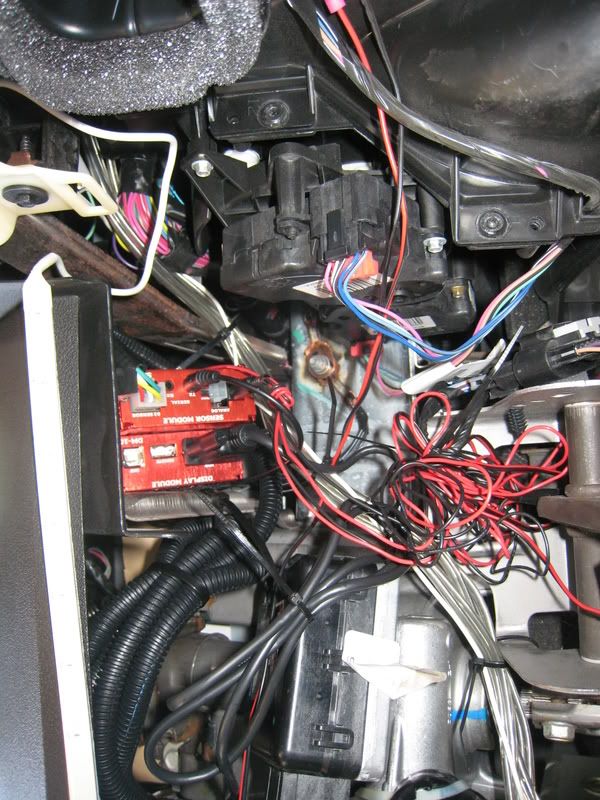
I mounted this system under the dash, under the steering wheel off to the right. if you stick your head underneath there you will see a little cubby hole to your now left. Throw the other side of that velcro to the module, peel off the sticky tab and mount your system back in here. Then start taking all that excess wire and zip tie the hell out of it. there is a little bar that runs under the steering wheel that you can see if your look under the steering wheel and just above the dash.
Here it is mounted in the cubby hole.
Here is the sensor wire zip tied
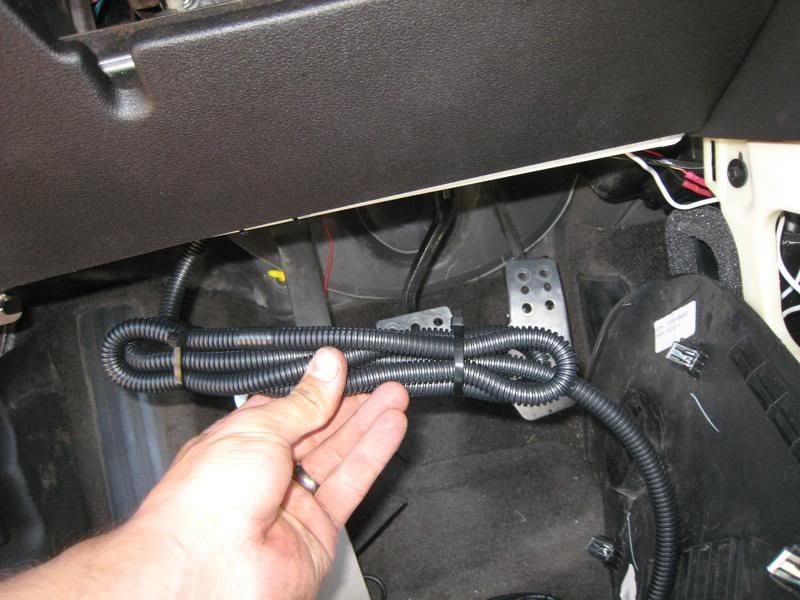
i used the big zip ties to mount it to the bar i was talking about here
After it was all zip tied, here is what it looked like
Next take the remote and the computer connect wire (usb a to usb b) and get ready to mount these. This par is all preference.
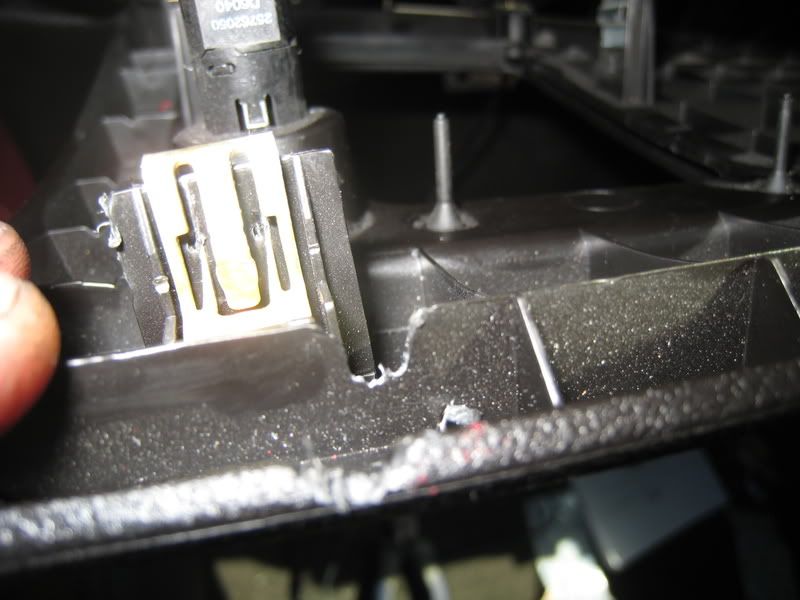
For my remote, i peeled back the dash below my dash light dimmer and pulled the remote through here. I took my box cutter and cut a "U" so my wire could fit through and the dash would sit flush. I took some more velcro and cut it and applied it to the back of the remote.
The dash is cut with box cutter
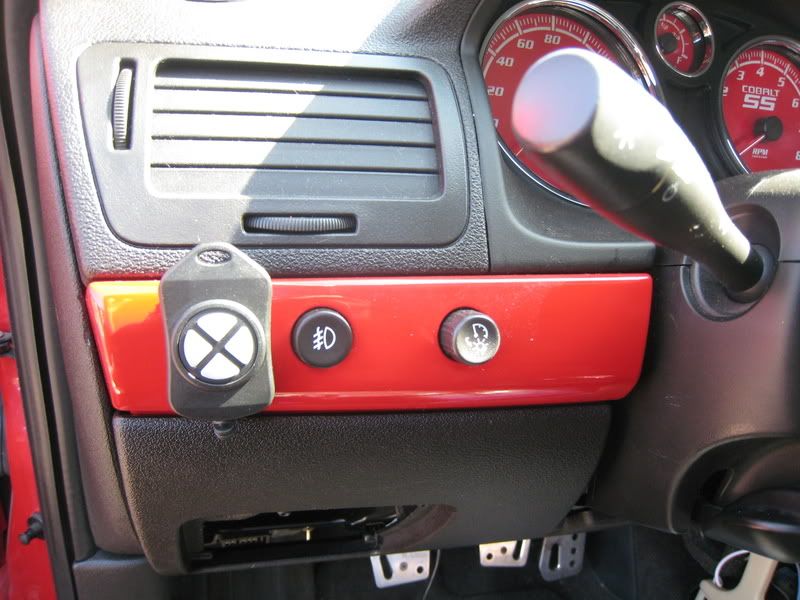
The remote is mounted with velcro. I can easily push the buttons when my arm is on the arm rest.
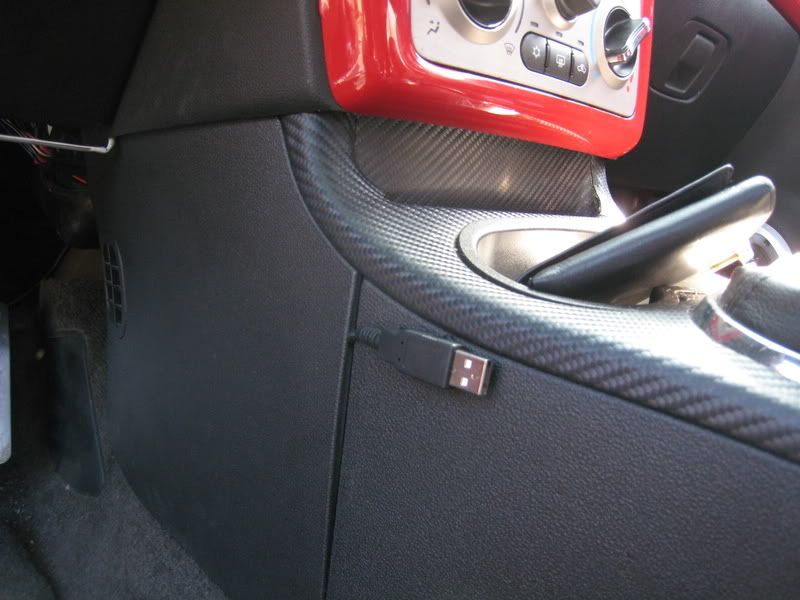
Now take your computer connect wire and run it behind the little removable door by the gas pedal and cup holder. Cut another "U" to run this wire through. Once again use velcro to mount. I went out and bought a usb connection tonight. It has a female to male end and I just leave it in my car in case I need to bring the laptop out there to upload stuff to my gauge.
Computer connect is mounted and ready for extention.
Heres a couple of vids that might help out as well
 PLX Devices Wideband installed
 plx working
And your done!!! Have fun!!! CobaltSS.Net FTW!!!!
Take your VGA and connnect it to the port labeled HDD. Then take your widband sensor as shown and plug it into the port labeled 02 sensor. simple right.
Here are both the VGA and sensor plugged in.
Ok, were almost done, i promise.
The next thing we are going to do is connect the remote and the usb a to usb b.
This is your remote with a usb a end on it.
Simply plug it into your display module right next to your VGA cord.
Now take your usb a to usb b cord and plug the usb b end to the display module next the remote port as shown.
If you haven't done so already by looking at the pictures, take that double sided velcro tape and put a 4" strip on the back of the display module. like so.
Guess what???!!!! your done! now we have to mount the system, tie up the wires using the zip ties and see if it works
I mounted this system under the dash, under the steering wheel off to the right. if you stick your head underneath there you will see a little cubby hole to your now left. Throw the other side of that velcro to the module, peel off the sticky tab and mount your system back in here. Then start taking all that excess wire and zip tie the hell out of it. there is a little bar that runs under the steering wheel that you can see if your look under the steering wheel and just above the dash.
Here it is mounted in the cubby hole.
Here is the sensor wire zip tied
i used the big zip ties to mount it to the bar i was talking about here
After it was all zip tied, here is what it looked like
Next take the remote and the computer connect wire (usb a to usb b) and get ready to mount these. This par is all preference.
For my remote, i peeled back the dash below my dash light dimmer and pulled the remote through here. I took my box cutter and cut a "U" so my wire could fit through and the dash would sit flush. I took some more velcro and cut it and applied it to the back of the remote.
The dash is cut with box cutter
The remote is mounted with velcro. I can easily push the buttons when my arm is on the arm rest.
Now take your computer connect wire and run it behind the little removable door by the gas pedal and cup holder. Cut another "U" to run this wire through. Once again use velcro to mount. I went out and bought a usb connection tonight. It has a female to male end and I just leave it in my car in case I need to bring the laptop out there to upload stuff to my gauge.
Computer connect is mounted and ready for extention.
Heres a couple of vids that might help out as well
PLX Devices Wideband installedplx workingAnd your done!!! Have fun!!! CobaltSS.Net FTW!!!!

Senior Member
Joined: 06-06-06
Posts: 753
Likes: 0
From: Oakland, Ca
plx definatly kicks ass as far as functionality and looks. I've had my dm-5 since they hit the market, and my dm-100 for about 2 months. however, im not sure i would suggest this for everyone...
first, don't waste your time with the dm-5 if you go this route, go single/dual dm100s. the dm-5 looks like crap and can be hard to see in daylight. and night driving it can be distracting since you cant adjust the contrast/brightness.
things i like about the dm100:
1. depending on the colors you use, the guage is very clear durring the day
2. color selection, gauge display customizations <-- very cool, makes it easy to get exactly the perfect contrasts for day/night
3. i tend to keep it on the 4 sensors display, very cool to see afr, etg, vac/boost, oil presure on one display. this was my main reasoning behind getting the dm100
4. plx is two blocks away from my work, so i get goodies quickly
things i dont like:
1. installation into the autometer 2 or 3 pod a-pillar pod will require alot of hacking on the pod. The face of the DM100 and DM-5 is wider than most guages (the guage itself is still 52mm the shroud around the face isnt). It willnot fit without alot of modification/shaving of either the pod or the gauge.
2. accuracy of the sm-afr has been questioned a few times. and there is defiantly noticeable lag while scanning.
3. cost
Senior Member
Joined: 09-05-07
Posts: 10,662
Likes: 0
From: Sasebo Japan
plx definatly kicks ass as far as functionality and looks. I've had my dm-5 since they hit the market, and my dm-100 for about 2 months. however, im not sure i would suggest this for everyone...
first, don't waste your time with the dm-5 if you go this route, go single/dual dm100s. the dm-5 looks like crap and can be hard to see in daylight. and night driving it can be distracting since you cant adjust the contrast/brightness.
things i like about the dm100:
1. depending on the colors you use, the guage is very clear durring the day
2. color selection, gauge display customizations <-- very cool, makes it easy to get exactly the perfect contrasts for day/night
3. i tend to keep it on the 4 sensors display, very cool to see afr, etg, vac/boost, oil presure on one display. this was my main reasoning behind getting the dm100
4. plx is two blocks away from my work, so i get goodies quickly
things i dont like:
1. installation into the autometer 2 or 3 pod a-pillar pod will require alot of hacking on the pod. The face of the DM100 and DM-5 is wider than most guages (the guage itself is still 52mm the shroud around the face isnt). It willnot fit without alot of modification/shaving of either the pod or the gauge.
2. accuracy of the sm-afr has been questioned a few times. and there is defiantly noticeable lag while scanning.
3. cost
first, don't waste your time with the dm-5 if you go this route, go single/dual dm100s. the dm-5 looks like crap and can be hard to see in daylight. and night driving it can be distracting since you cant adjust the contrast/brightness.
things i like about the dm100:
1. depending on the colors you use, the guage is very clear durring the day
2. color selection, gauge display customizations <-- very cool, makes it easy to get exactly the perfect contrasts for day/night
3. i tend to keep it on the 4 sensors display, very cool to see afr, etg, vac/boost, oil presure on one display. this was my main reasoning behind getting the dm100
4. plx is two blocks away from my work, so i get goodies quickly
things i dont like:
1. installation into the autometer 2 or 3 pod a-pillar pod will require alot of hacking on the pod. The face of the DM100 and DM-5 is wider than most guages (the guage itself is still 52mm the shroud around the face isnt). It willnot fit without alot of modification/shaving of either the pod or the gauge.
2. accuracy of the sm-afr has been questioned a few times. and there is defiantly noticeable lag while scanning.
3. cost
Senior Member
Joined: 06-06-06
Posts: 753
Likes: 0
From: Oakland, Ca
with the autometer 2 or 3 pod you will need to modify the areas of the pod that bend or curve around the shroud of the faceplate. you didnt experience this because you used the stock ss/sc pod.
if you compare the size of the face of the guage to other guages you'll see what i mean... both the dm-5 and dm100 are this way...
Last edited by bigworm; Apr 26, 2008 at 04:25 AM. Reason: Automerged Doublepost
Thread Starter
Bannned
Joined: 09-08-07
Posts: 8,743
Likes: 0
From: Kaneohe, HI
i have the sm-afr from 2006 sema... i know they changed the O2 senser, when i replace my bad sensor he had to check which i had, didnt think to ask about the change...
with the autometer 2 or 3 pod you will need to modify the areas of the pod that bend or curve around the shroud of the faceplate. you didnt experience this because you used the stock ss/sc pod.
if you compare the size of the face of the guage to other guages you'll see what i mean... both the dm-5 and dm100 are this way...
Heres the email i got from THmotorsports
"...because they are doing inventory and just got new updated DM-100's in. These have better pixel resolution and some firmware updates in terms of refresh rate, screen toggle."


Senior Member
Joined: 04-01-07
Posts: 522
Likes: 0
From: reading,pa
i used this how to to just hook my aem wideband up but im getting p0137 code and it looks like you used your rear 02 sensor...i used the same as well and my rear o2 sensor is deleted in hptuners and ive been running with no cat for like 3 years now and i hook up the wideband and i threw codes..any help?