
Interior: How to: recover door inserts w/ new materials

Thread Starter
Senior Member
Joined: 07-15-06
Posts: 3,765
Likes: 0
From: Pocomoke City, MD
How to: recover door inserts w/ new materials
or what ever material you want for that matter.
first off use this link to take the door panels off.
How to remove and install door speakers - Cobalt SS Network
materials needed:
1 or 2 cans of body shop spray heavy duty headliner and carpet adhesive
at least 1 or 1.5 yards of material you want to use
something to cut material with
hot glue gun
super glue
Step 1.
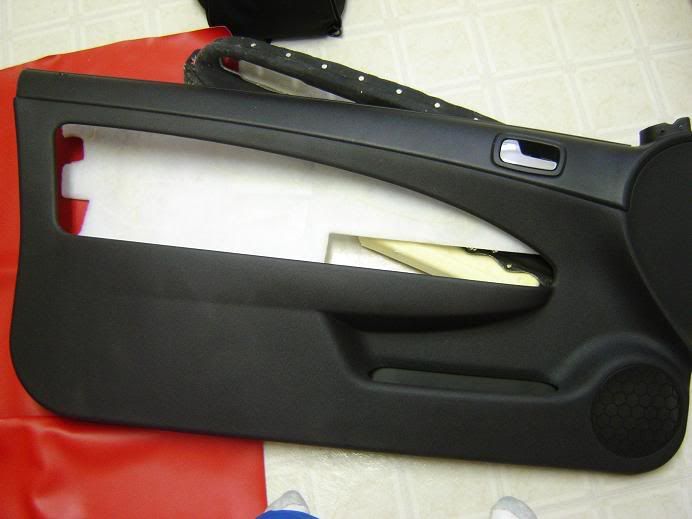
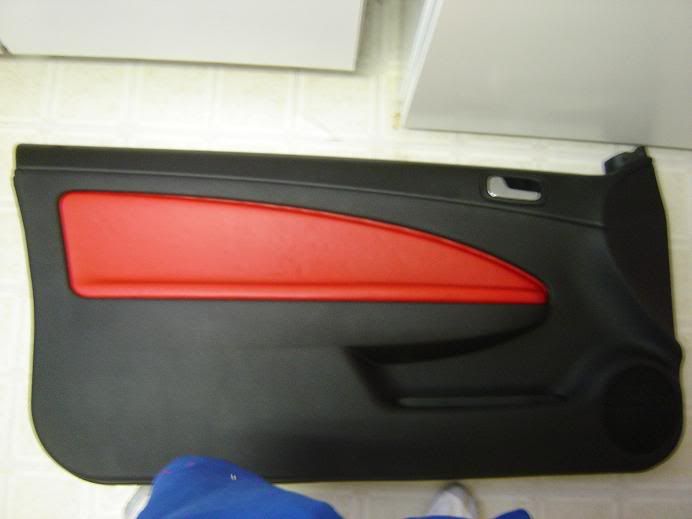
flip the door panel over and scrap off the melted rivits that hold the insert in place, notice the inserts are made of carbon fiber.
Step 2
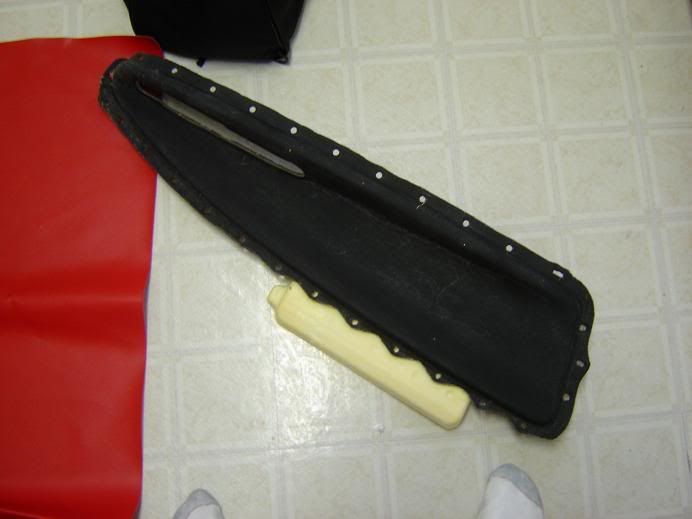
remove the insert from door panel
Step 3
Cut the material to size for the door insert, not exact size you will need slack for stretching and trimming
Step 4
spray adhesive 1 coat on the door insert over the material on the insert, spray 1 coat on the back side of material you are appling. Let dry for 5 min, repeat this step for as many coats as you want. I used 2 thick coats. Let dry for 5-10 min.
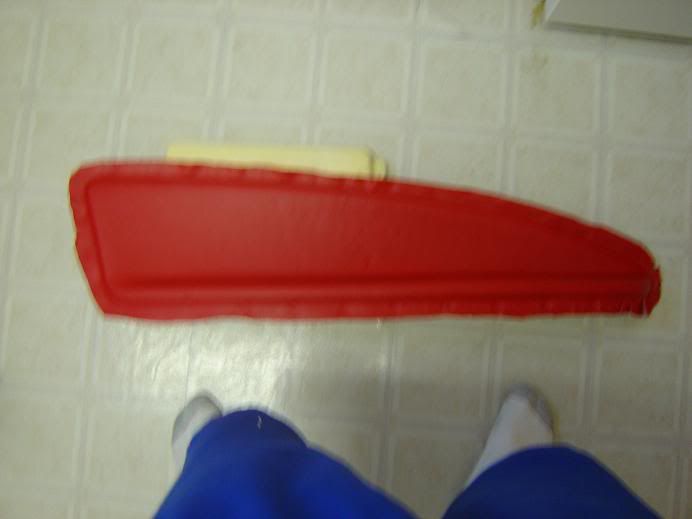
Step 5
Start appling the material starting with the bottom edge of the insert and work your way to the top from rear to forward of insert.
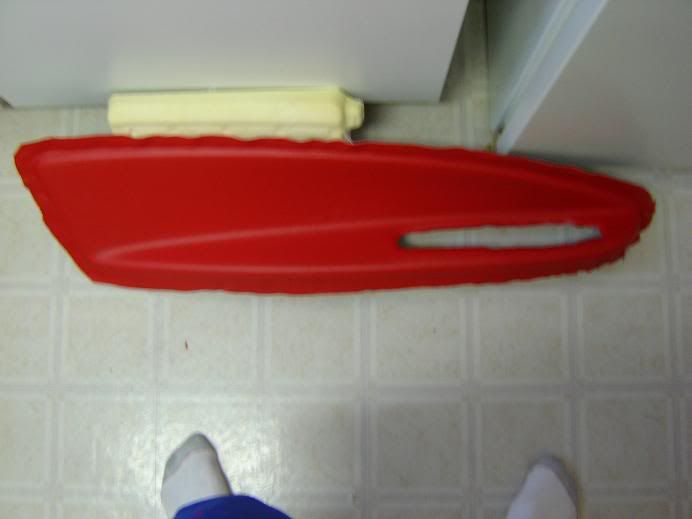
Step 6
after appling material, cut out the hole for the window/lock controls
Step 7
place the insert back into the door panel, you may need help for this. clean up the rough edges of the studs that are left over. place super glue on the studs. press fit the insert back on. you will have to hold the insert in place in multiple places and this is where i had help. after superglue is holding, place hot glue over the holes onthe studs of insert.
Step 8
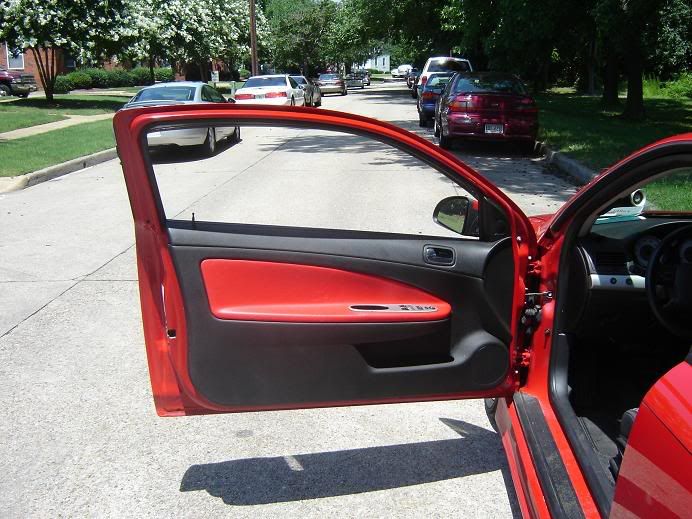
Place door panel back on and you are done
ive done this to many of my old cars, my favorate was the black velvot w/ red satin flames on my door panels, w/ black velvot with large red satin flames on the overhead. All plastic in the car was fiberglassed and painted red. Looked really good till i blew the motor up.
first off use this link to take the door panels off.
How to remove and install door speakers - Cobalt SS Network
materials needed:
1 or 2 cans of body shop spray heavy duty headliner and carpet adhesive
at least 1 or 1.5 yards of material you want to use
something to cut material with
hot glue gun
super glue
Step 1.
flip the door panel over and scrap off the melted rivits that hold the insert in place, notice the inserts are made of carbon fiber.
Step 2
remove the insert from door panel
Step 3
Cut the material to size for the door insert, not exact size you will need slack for stretching and trimming
Step 4
spray adhesive 1 coat on the door insert over the material on the insert, spray 1 coat on the back side of material you are appling. Let dry for 5 min, repeat this step for as many coats as you want. I used 2 thick coats. Let dry for 5-10 min.
Step 5
Start appling the material starting with the bottom edge of the insert and work your way to the top from rear to forward of insert.
Step 6
after appling material, cut out the hole for the window/lock controls
Step 7
place the insert back into the door panel, you may need help for this. clean up the rough edges of the studs that are left over. place super glue on the studs. press fit the insert back on. you will have to hold the insert in place in multiple places and this is where i had help. after superglue is holding, place hot glue over the holes onthe studs of insert.
Step 8
Place door panel back on and you are done
ive done this to many of my old cars, my favorate was the black velvot w/ red satin flames on my door panels, w/ black velvot with large red satin flames on the overhead. All plastic in the car was fiberglassed and painted red. Looked really good till i blew the motor up.
Last edited by TommyP; May 17, 2012 at 09:30 PM.


Senior Member
Joined: 06-24-05
Posts: 1,173
Likes: 0
From: Southern Illinois
WOW Looks like mine.  That's pretty freaking sick! I think it's be sweet with some suade (sp?) in there. And t oaccent it, get the inserts in the seats done in suade as well. HMMMM......
BTW: Make sure not to trim the material to short near the handle, otherwise you'll end up like us SS/SC owners
BTW: Make sure not to trim the material to short near the handle, otherwise you'll end up like us SS/SC owners

Thread Starter
Senior Member
Joined: 07-15-06
Posts: 3,765
Likes: 0
From: Pocomoke City, MD
Originally Posted by 05BlackCobaltSS
WOW Looks like mine. That's pretty freaking sick! I think it's be sweet with some suade (sp?) in there. And t oaccent it, get the inserts in the seats done in suade as well. HMMMM......
BTW: Make sure not to trim the material to short near the handle, otherwise you'll end up like us SS/SC owners
BTW: Make sure not to trim the material to short near the handle, otherwise you'll end up like us SS/SC owners
Thread Starter
Senior Member
Joined: 07-15-06
Posts: 3,765
Likes: 0
From: Pocomoke City, MD
Originally Posted by 05BlackCobaltSS
I just read that the insert is Carbon Fiber?? That would also be sweet just to have those CF.

Senior Member
Joined: 03-09-06
Posts: 2,425
Likes: 0
From: "The Valley"-California
LOOKS great!!! I'll have to upgrade to suade when I'm brave enough to attempt that. Was it hard to contour to the insert or didn't it fit pretty well? What's the difficulty rating you think?
Thread Starter
Senior Member
Joined: 07-15-06
Posts: 3,765
Likes: 0
From: Pocomoke City, MD
Originally Posted by humanpiston
dude.... what are the brand names of the stuff that you used?
the spray glue is permatex
Thread Starter
Senior Member
Joined: 07-15-06
Posts: 3,765
Likes: 0
From: Pocomoke City, MD
Originally Posted by player_1
looks awesome.
great right up and idea for those people who wanted the inserts and the Recaros
great right up and idea for those people who wanted the inserts and the Recaros
New Member
Joined: 06-29-05
Posts: 167
Likes: 0
From: Illinois
I appreciate this post more and more after today...
I posted my lil rant on ***************..long and short of it... I went to an auto upholstery place to see how much they would charge to do this...
$225 PER DOOR PANEL!?!?! INSANE!!!
Big props again to the originator of this post... Pimp on... Pimp Strong
 $YM$
$YM$
I posted my lil rant on ***************..long and short of it... I went to an auto upholstery place to see how much they would charge to do this...
$225 PER DOOR PANEL!?!?! INSANE!!!
Big props again to the originator of this post... Pimp on... Pimp Strong
$YM$
New Member
Joined: 06-29-05
Posts: 167
Likes: 0
From: Illinois
Okay so I'm gonna tackle this on Tuesday... one last question for anyone who's done this... what's the easiest way to scrape off the plastic rivets? I don't want to waste too much time doing that and getting frustrated... Props
$YM$
$YM$
New Member
Joined: 06-29-05
Posts: 167
Likes: 0
From: Illinois
Props for the info... Now the only thing I'm a lil nervous about is the window sail where the tweeter pod is... I don't wanna just yank and break something... We'll see how it goes I guess... any other helpful tips?
