
Interior: How-To: Remove window switch bezels and paint them Lots of PICS

Thread Starter
Senior Member
Joined: 07-29-07
Posts: 509
Likes: 0
From: Gallatin,tn
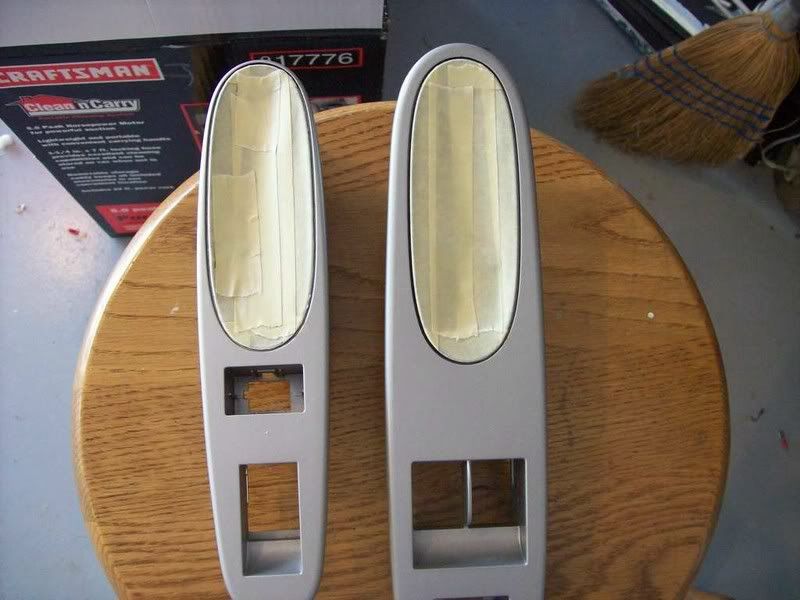
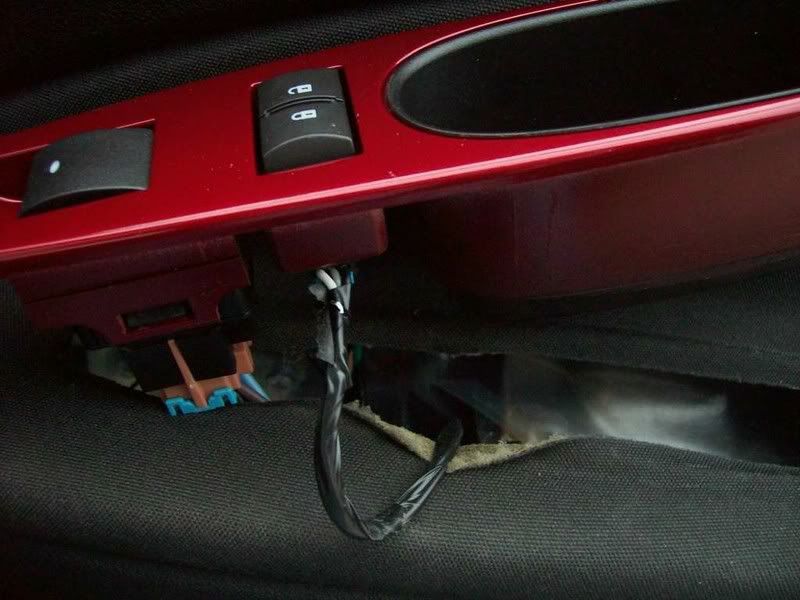
For starters, Pop the cover inside that little pocket with a screwdriver, then remove the 2 phillips head screws
Pull up and back to get the bezel out
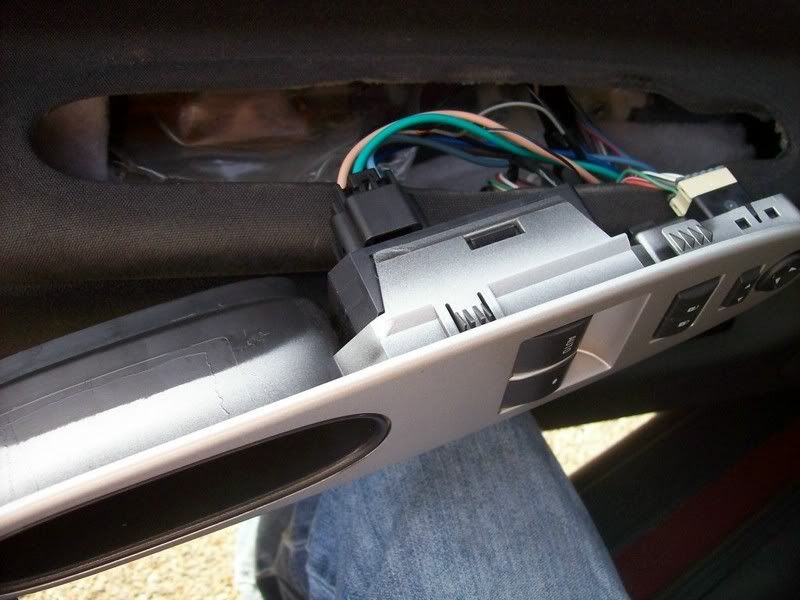
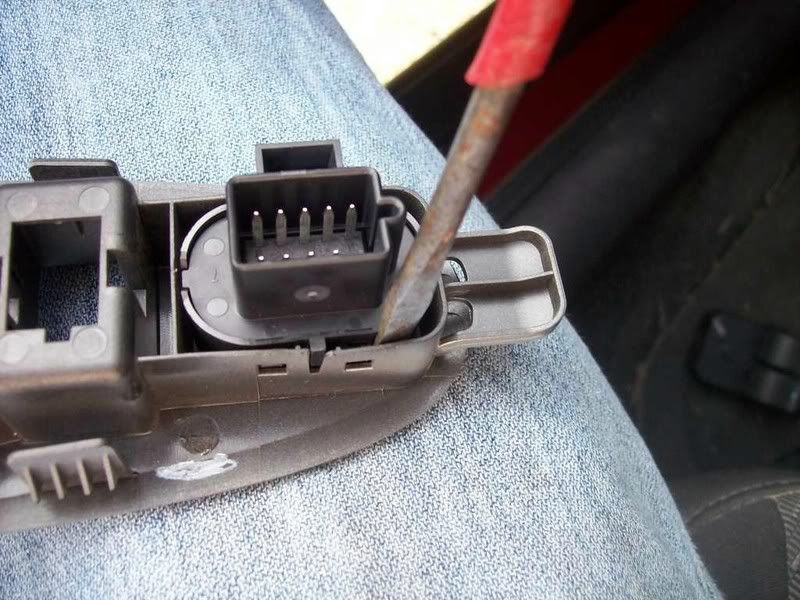
To unplug the window switch push down on the tab and pull the plug out
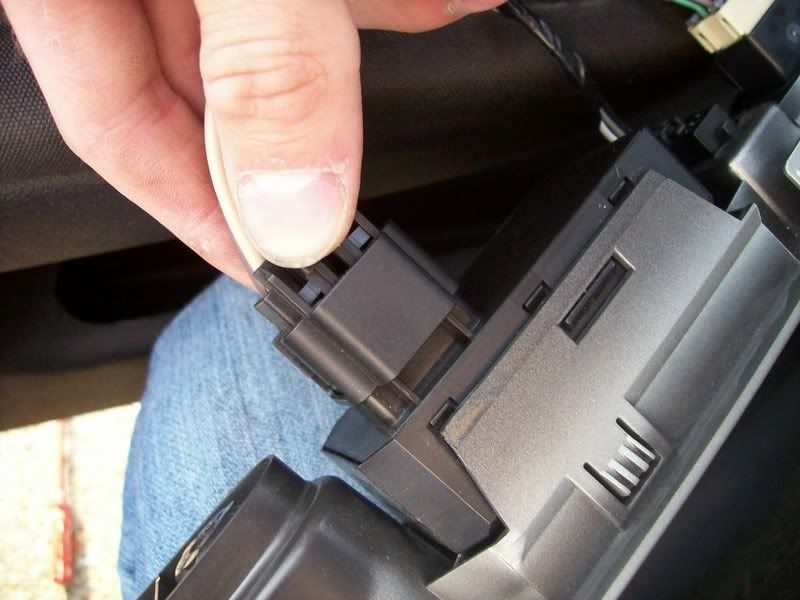
To unplug the door lock switch push down on this tab with a screwdriver and push it back

Same for the mirror switch as well just push the tab down and push the plug back to release
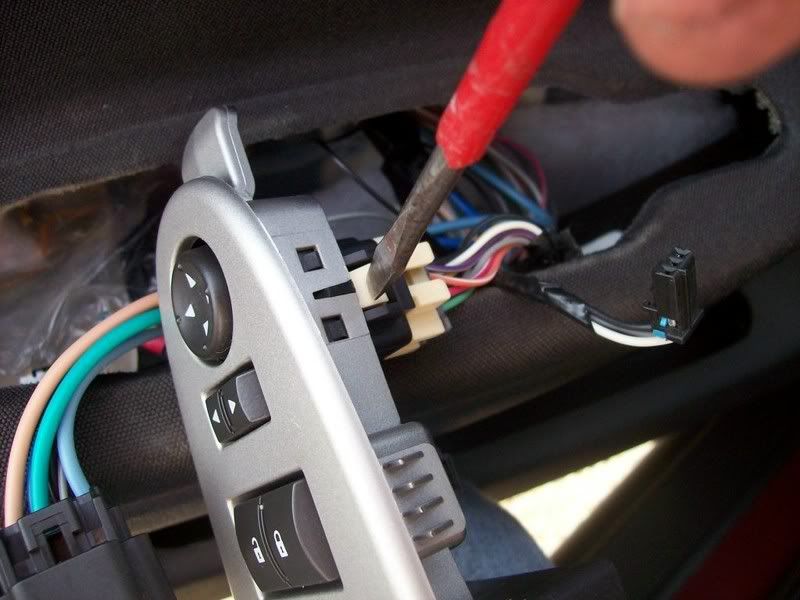
To remove the window switch Pry apart the plastic from the tabs to unlock it and pull it out
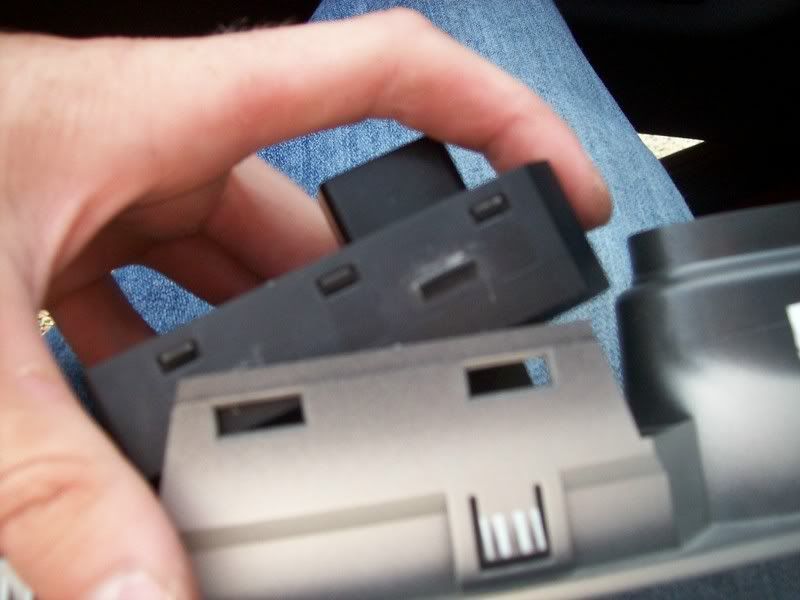
To remove door lock switch push in this tab and one on the other side to release
For the window switch pry apart the plastic again to release it
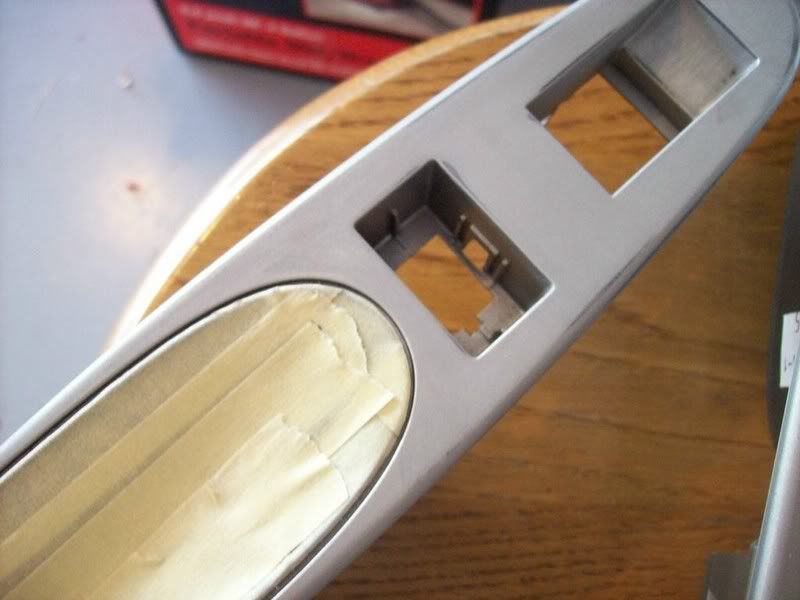
Easiest way i've found to tape it off is run a piece of tape flat across the edge you want done


With ur fingernail, mark the edge all the way around
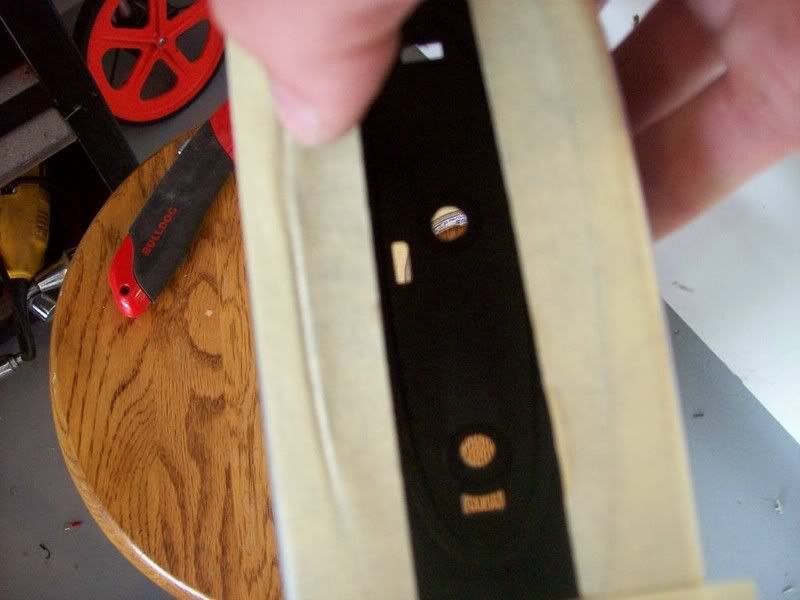
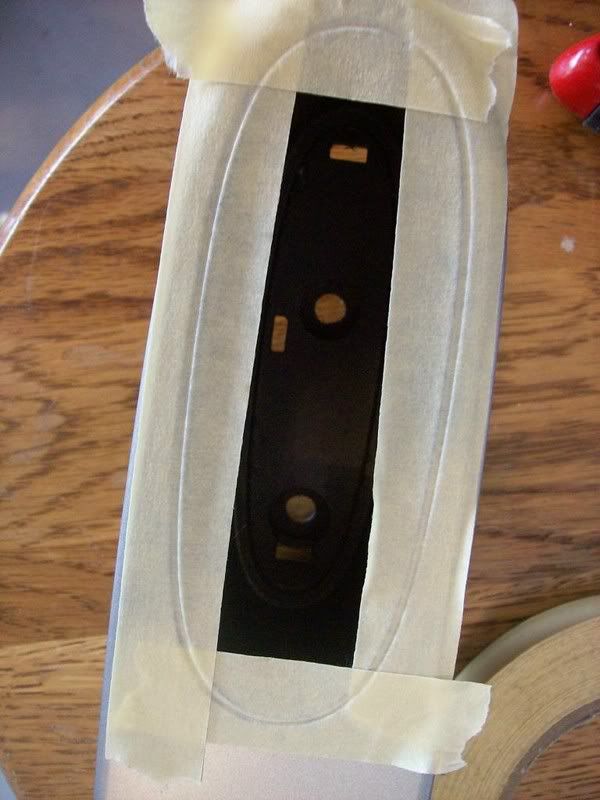
Now just cut along that edge carefully
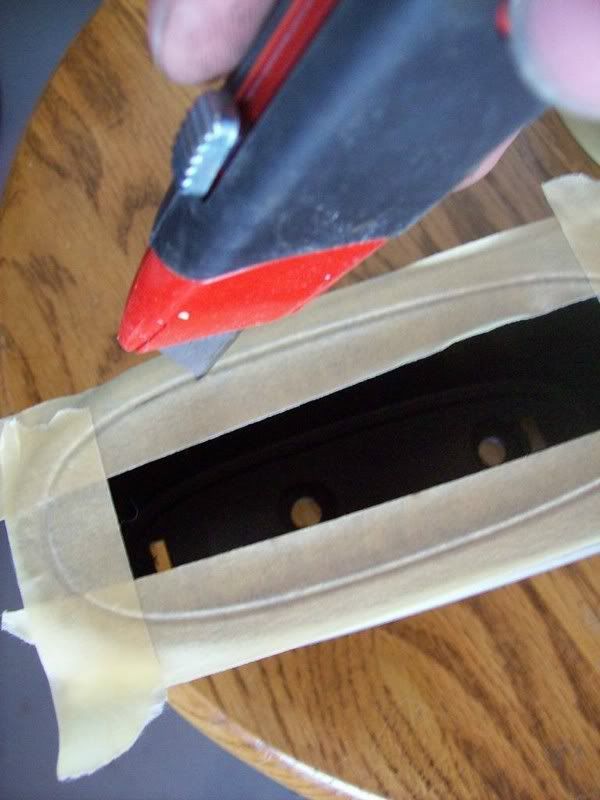
Peel back the tape
Ready to be sanded, I used 400 grit but it'd probably be better to use 600 to get it perfectly smooth
After it is sanded
Now it is ready for some primer
I usually like to just mist it on at first to get it kind of sticky then i go back and put a full coat on
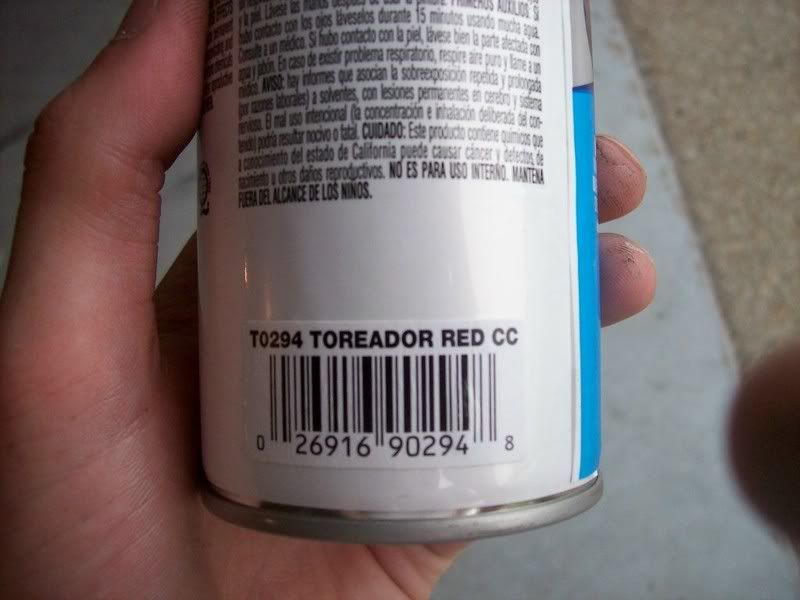
For those that have sport red tint coat this is the color I have used on all my pieces and it is a very close match it is from Duplicolor Truck, Van, and SUV spray..pick it up at just about any parts store
After 2 or 3 coats of primer with around 10 minutes between coats you can now add your base color
After the 2nd coat...and this is what happens when you rush lol orange peel and trash FTL
!
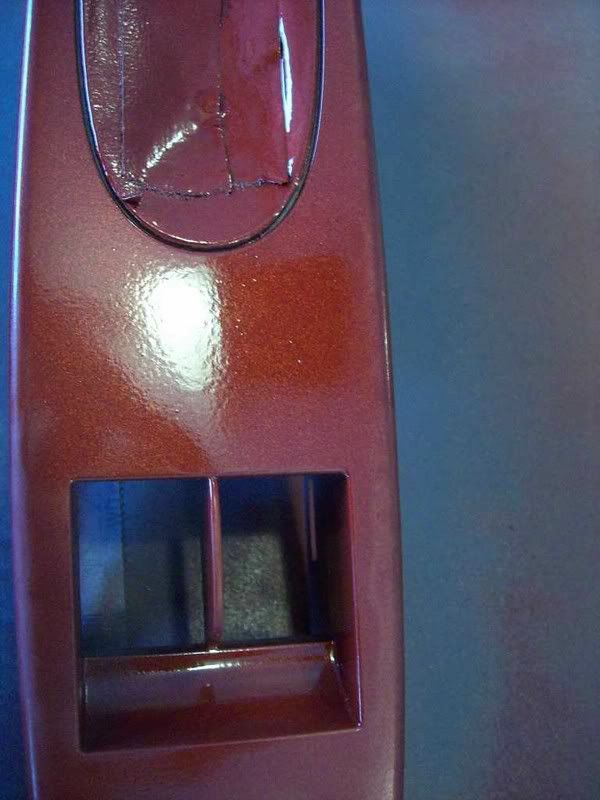
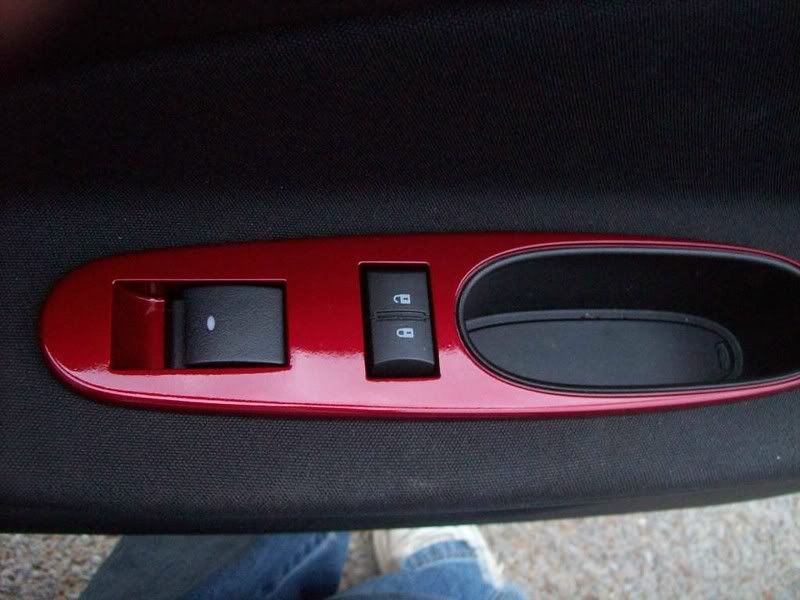
After 3 coats of base and 3 coats of clear i was able to hide the orange peel a little more and this is how it turned out
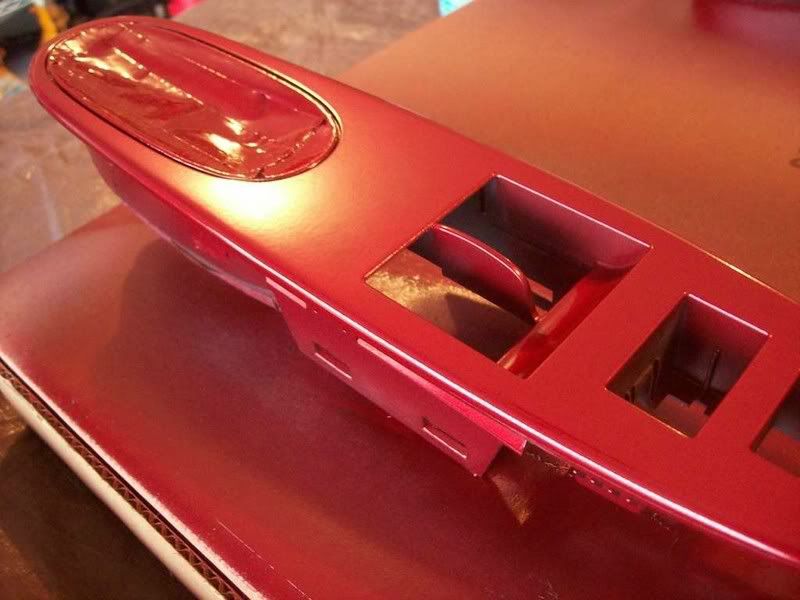
Now for purposes of this thread I used a low heat hair dryer to dry it a little quicker but it is still pretty soft so be careful! This is only about an hour after i 1st took the bezels out so it was definitely a quick job so just take your time, remember to let it get tacky between coats and then when your done it'd be good to let it sit for a few hours before even trying to handle it.
Snap all the switches back in and plug it all back up
Put the screws in and snap the cover back on and you're done! Enjoy
Pull up and back to get the bezel out
To unplug the window switch push down on the tab and pull the plug out
To unplug the door lock switch push down on this tab with a screwdriver and push it back
Same for the mirror switch as well just push the tab down and push the plug back to release
To remove the window switch Pry apart the plastic from the tabs to unlock it and pull it out
To remove door lock switch push in this tab and one on the other side to release
For the window switch pry apart the plastic again to release it
Easiest way i've found to tape it off is run a piece of tape flat across the edge you want done
With ur fingernail, mark the edge all the way around
Now just cut along that edge carefully
Peel back the tape
Ready to be sanded, I used 400 grit but it'd probably be better to use 600 to get it perfectly smooth
After it is sanded
Now it is ready for some primer
I usually like to just mist it on at first to get it kind of sticky then i go back and put a full coat on
For those that have sport red tint coat this is the color I have used on all my pieces and it is a very close match it is from Duplicolor Truck, Van, and SUV spray..pick it up at just about any parts store
After 2 or 3 coats of primer with around 10 minutes between coats you can now add your base color
After the 2nd coat...and this is what happens when you rush lol orange peel and trash FTL
!
After 3 coats of base and 3 coats of clear i was able to hide the orange peel a little more and this is how it turned out
Now for purposes of this thread I used a low heat hair dryer to dry it a little quicker but it is still pretty soft so be careful! This is only about an hour after i 1st took the bezels out so it was definitely a quick job so just take your time, remember to let it get tacky between coats and then when your done it'd be good to let it sit for a few hours before even trying to handle it.
Snap all the switches back in and plug it all back up
Put the screws in and snap the cover back on and you're done! Enjoy
Last edited by TommyP; Oct 3, 2012 at 12:37 PM.


Banned
Joined: 05-11-07
Posts: 2,608
Likes: 0
From: Atlanta
I was going to do the same "how-to" however i was too lazy.
An easier way to keep paint out of those black accent pieces is put vasoline or some other petroleum and cover it liberally. I dont stock vasoline so i used some vicks vapor rub.
Paint the whole thing, then when its dry wipe the petroleum crap off with a paper towel and its perfect. Your way is good too tho.
Thread Starter
Senior Member
Joined: 07-29-07
Posts: 509
Likes: 0
From: Gallatin,tn
mine looks the same as yours and i have the steering wheel bezels done too and im working on the center console as we speak lettin primer dry...that was a bitch getting that smooth lol i'll put pics when im done
Very nice how-to, and that color looks great done to match like that. If I did mine to color-match, it would look too ricey. There isn't any other yellow in my car either. Anyone find a nice replacement for the factory nickel color paint?
Yeah, but my interior is all stock, I'm not going for looks at all, I just want to paint it with something that won't wear out as quick. I used to work for GM, so I replaced them under warranty about every 6 months, but since then they have gotten pretty nasty, lots of black plastic showing on my side.


those were a real pain in th ass for me...i practically broke off the little tabs that help you open it. just keep pushing on it with a small flat head screwdriver until you can get that one end to pop up.
Thread Starter
Senior Member
Joined: 07-29-07
Posts: 509
Likes: 0
From: Gallatin,tn
Yea i broke the tabs on mine haha just take your time with it and keep prying it up it might be good to get 2 small screwdrivers one to push in on that tab and another to pry it up
yeah, thats what i did, one to get it up alittle bit, then the 2nd to get underneith it from the side. i've still got my tabs, but they are cracked almost all the way through and just about ready to fall off lol.
Thread Starter
Senior Member
Joined: 07-29-07
Posts: 509
Likes: 0
From: Gallatin,tn
mine completely broke i'll have to figure sumthin out to keep it in place, maybe double sided tape? I don't want to glue it or anything incase i have to take them back out. I mean i dont have trouble with it moving around in there, but when i vacuum the car out i take a small detail brush and get down in there and vaccum it up at the same time and it always wants to take that piece haha
mine completely broke i'll have to figure sumthin out to keep it in place, maybe double sided tape? I don't want to glue it or anything incase i have to take them back out. I mean i dont have trouble with it moving around in there, but when i vacuum the car out i take a small detail brush and get down in there and vaccum it up at the same time and it always wants to take that piece haha
Thread Starter
Senior Member
Joined: 07-29-07
Posts: 509
Likes: 0
From: Gallatin,tn
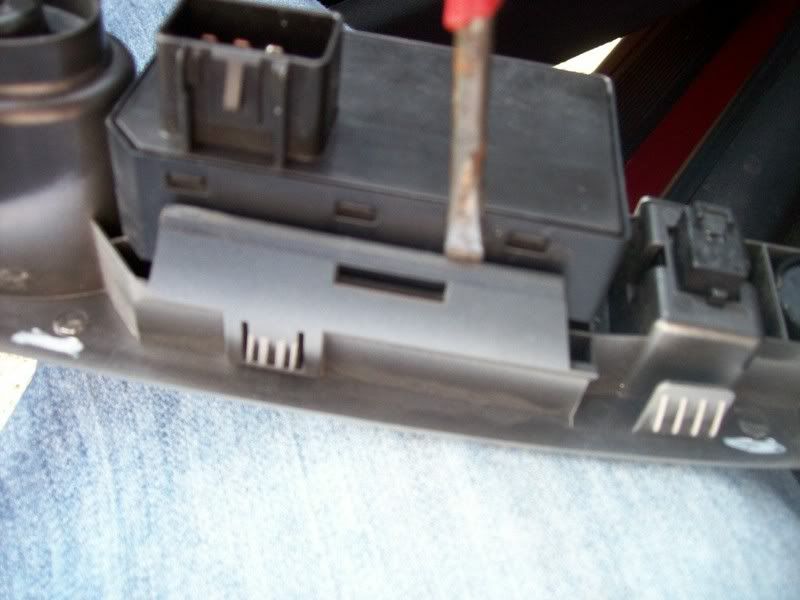
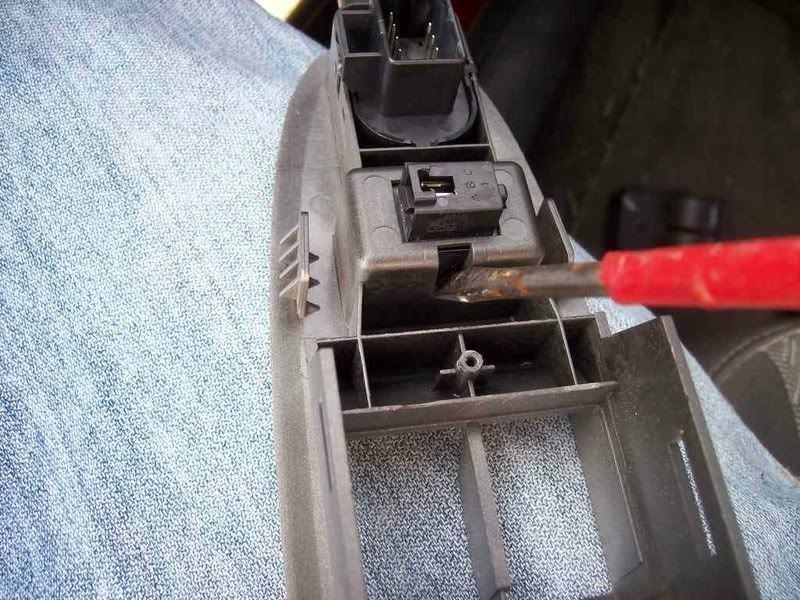
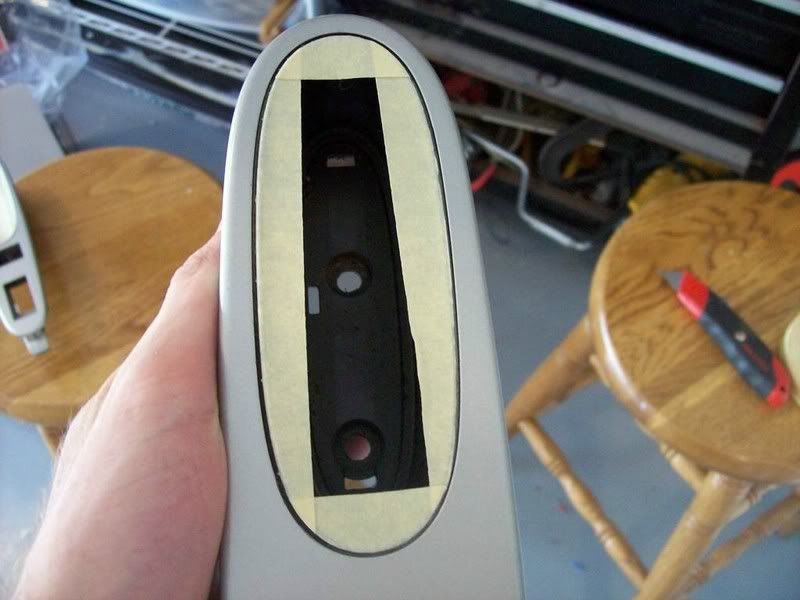
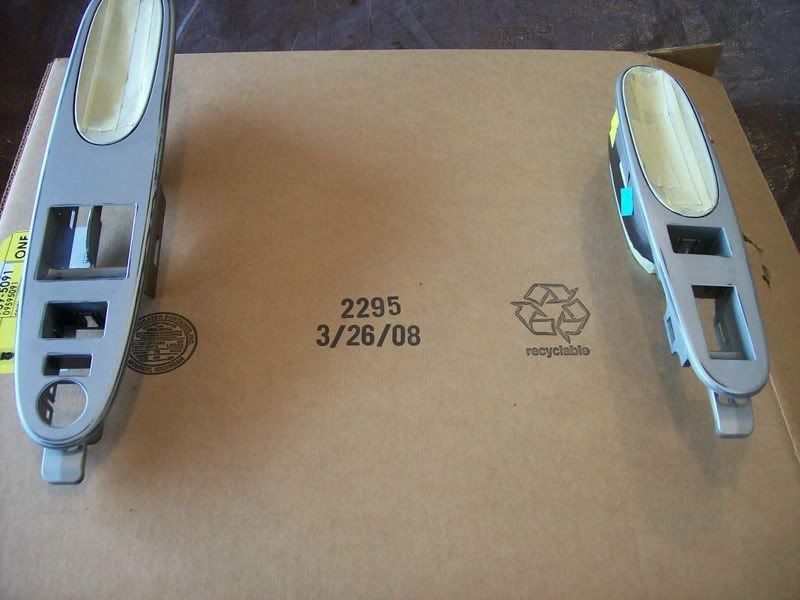
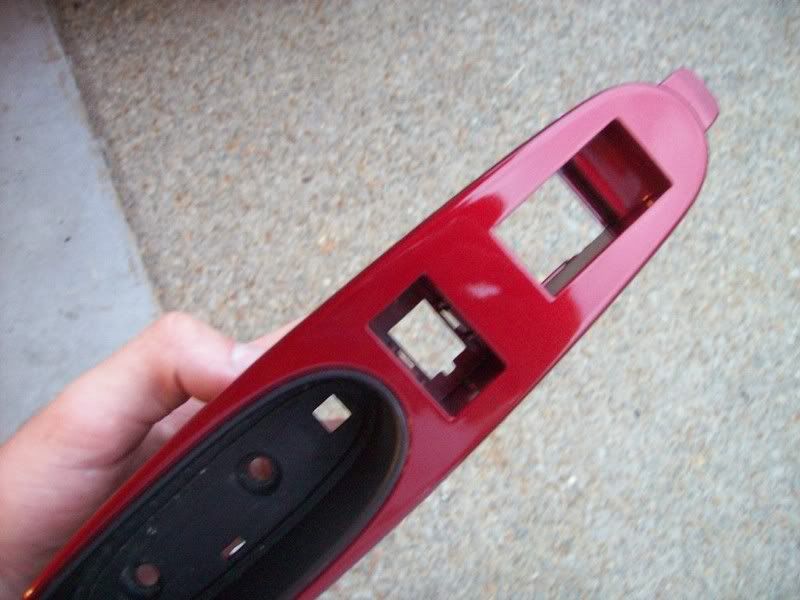
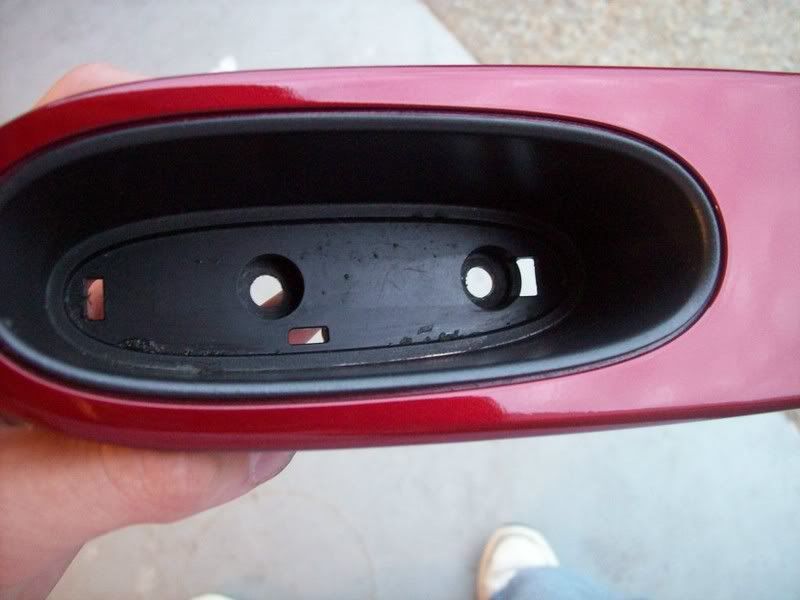
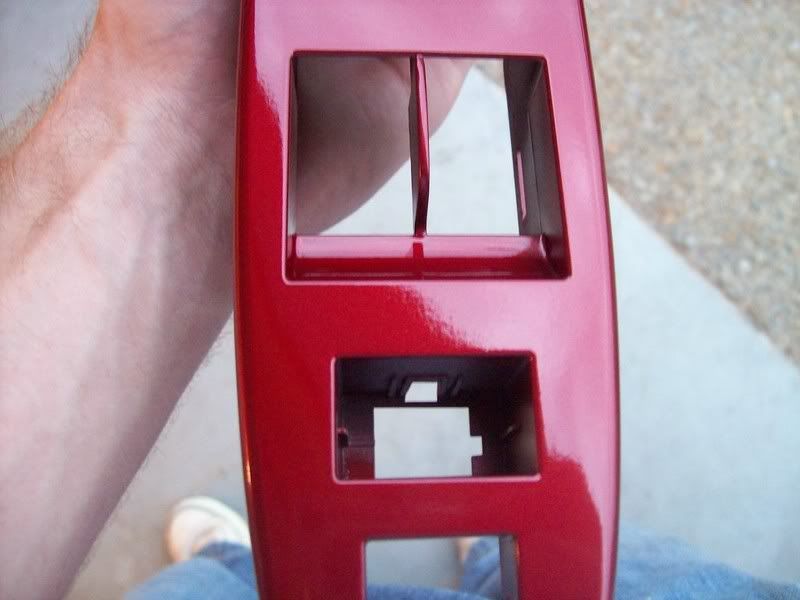
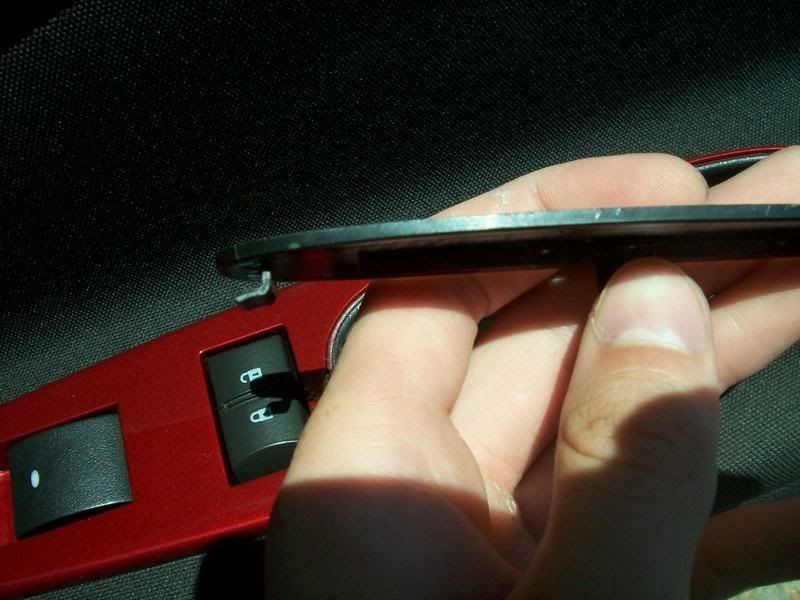
xplayer325 heres a couple pics of that piece out to kind of show you where you need to go with it i know its kinda hard to tell whats holding it from coming out when you have it in.
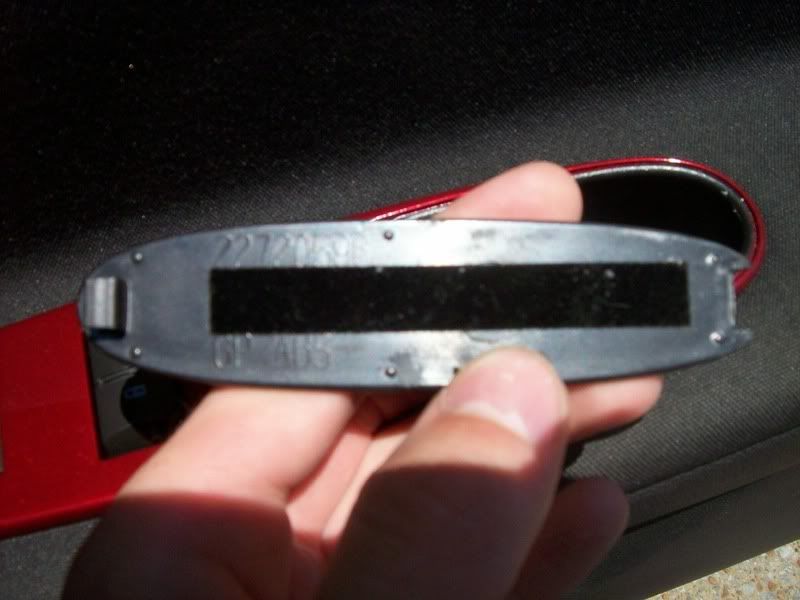
The right side is where you are sticking the screwdriver in to push that tab just for reference as to which side is which. You can see the tab thats holding it up on the left side. This is the passenger side piece so of course it'd be opposite on the driver.
The right side is where you are sticking the screwdriver in to push that tab just for reference as to which side is which. You can see the tab thats holding it up on the left side. This is the passenger side piece so of course it'd be opposite on the driver.

Senior Member

Joined: 07-20-06
Posts: 1,262
Likes: 0
From: Norman Oklahoma
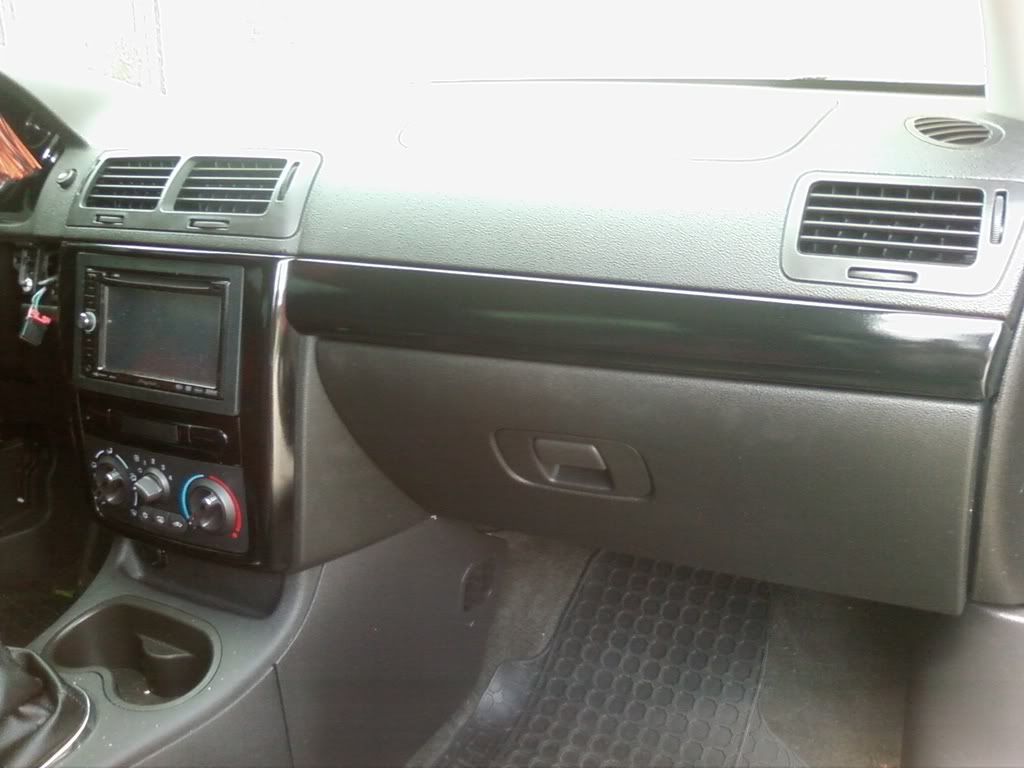
I finally got around to doing my stuff too and it is looking amazing so far. Here is what i got so far with my ls ac controls! it a camera phone pic so sorry if its not too greta lookin
Senior Member
Joined: 07-20-06
Posts: 1,262
Likes: 0
From: Norman Oklahoma
ya it will only cost you about 1300 installed lol. It is really nice tho. well worth it .... and its just straight badass!

Last edited by MBMCustoms; Jun 19, 2008 at 04:00 PM. Reason: Automerged Doublepost