Interior: how to: take apart your inner door handles
 10-20-2007, 03:37 PM
#1
Senior Member
Thread Starter
how to: take apart your inner door handles
Okay, gentlemen... here is the story..
after enough bitching the dealers replaced my inner door handles with new ones as the paint was coming off... so, i decided that i didn't want to do THIS again, so... i wanted to clear coat them.

painting plastics has been done to death here and other places, i just wanted to show how easy it was to take them apart.
First... pry up the little cap inside and access the two screws.
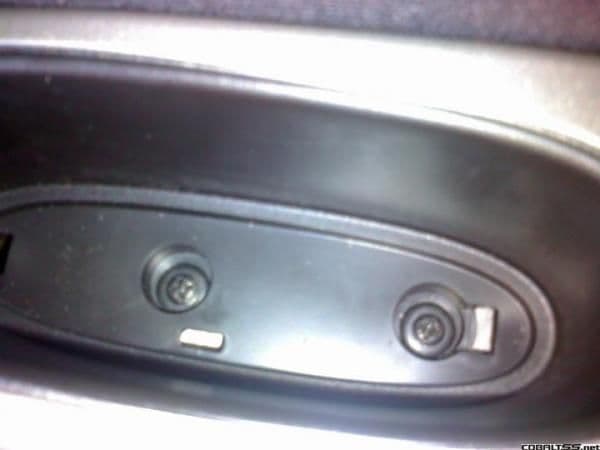
that's not too bad, cept getting that cap out is kind of a pain.
Second, pull up on the rear part of the bezel. the front has a tab that keeps it from coming up first.
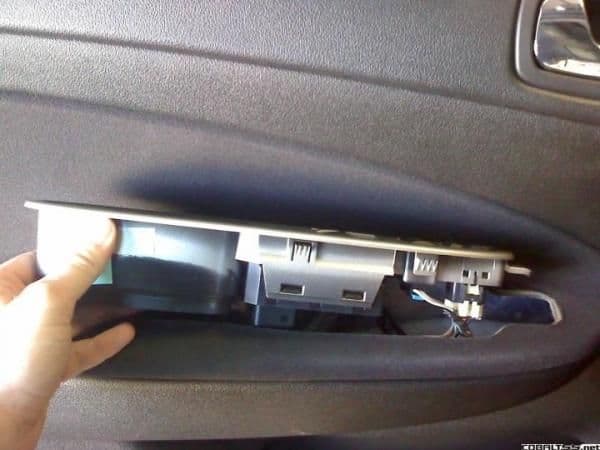
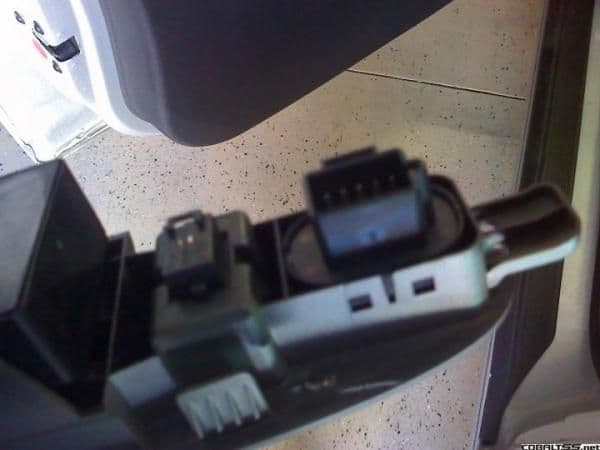
Third, disconnect all of the little wires. the switches themselves are also only held in with tabs, so just ease them out.
Lastly, either repaint, or clearcoat it (like i did)

now, when the bomb drops and the world ends, all that will be left are the roaches and my handles.
after enough bitching the dealers replaced my inner door handles with new ones as the paint was coming off... so, i decided that i didn't want to do THIS again, so... i wanted to clear coat them.
painting plastics has been done to death here and other places, i just wanted to show how easy it was to take them apart.
First... pry up the little cap inside and access the two screws.
that's not too bad, cept getting that cap out is kind of a pain.
Second, pull up on the rear part of the bezel. the front has a tab that keeps it from coming up first.
Third, disconnect all of the little wires. the switches themselves are also only held in with tabs, so just ease them out.
Lastly, either repaint, or clearcoat it (like i did)
now, when the bomb drops and the world ends, all that will be left are the roaches and my handles.
 10-22-2007, 02:02 PM
#2
Senior Member

Join Date: 05-24-07
Location: Calgary, Alberta, Canada
Posts: 703
Likes: 0
Received 0 Likes
on
0 Posts
This was such a pain in the ass when I painted my interior trim... for others attempting to take these out keep a can of superglue nearby cause I know for me I broke the little plastic flaps and had to superglue em back on... either way can be a real pain in the ass ^_^
10-22-2007, 02:56 PM
#3
Senior Member
Join Date: 03-09-06
Location: Orlando, FL
Posts: 6,431
Likes: 0
Received 0 Likes
on
0 Posts
Nice write up, when I put all mine back together when I painted mine red I didn't have the side mirror selector all the way in so I have to take it back off....
High5, no rep so gotta compinsate.
High5, no rep so gotta compinsate.
 11-04-2007, 02:12 AM
#7
Senior Member

actually i just had both of mine replaced and the whole thing is called the door trim cup and the little plastic panels that cover the 2 screws are classified in gm parts as a plug i kid you not.
11-04-2007, 07:15 PM
#8
Senior Member
Thread Starter
you're exactly right.... but i figured this would be easier for people to find.

 11-10-2007, 03:49 PM
#13
Senior Member
thats what i wanted to do to mine as i wanted to have where the yellow is blue and then paint the door cup black but i got to either do a custom insert or find a door panel with the blue insert already
11-10-2007, 07:03 PM
#15
Senior Member
ya i know gm was on crack when they did that one. and its covered under warranty if im not mistaken but i would rather do it myself and have it not happen again then keep getting them replaced
11-12-2007, 11:26 PM
#18
Junior Member

Clear coat? No, do not use clear! Here is the reason why: when clear scratches, it scratches white. This means that all the little scratches will apear. I used Rustoleum enamel plaint that was high gloss. If it gets scratched, it will not be noticable! Plus it will not react to the paint of the handles. This mean very minimal sanding.
11-13-2007, 01:07 AM
#19
Senior Member
ya i bought the duplicolor engine enamel clear. im gonna test it out on a few things that are not in any way, shape or form related to my car and see how it comes out. if worse comes to worse i'll just get my works body shop to clear them.

 03-15-2008, 06:42 PM
#23
Senior Member

Join Date: 10-28-06
Location: United States
Posts: 1,216
Likes: 0
Received 0 Likes
on
0 Posts


 11-03-2008, 01:01 PM
#25
New Member

Join Date: 05-02-06
Location: Canada
Posts: 38
Likes: 0
Received 0 Likes
on
0 Posts
Door Speaker
Does anyone here know how to remove the door panel so the speaker can be replaced? I have been looking in the internet but can't find anyone with a straight-forward answer.
-Danny
-Danny