
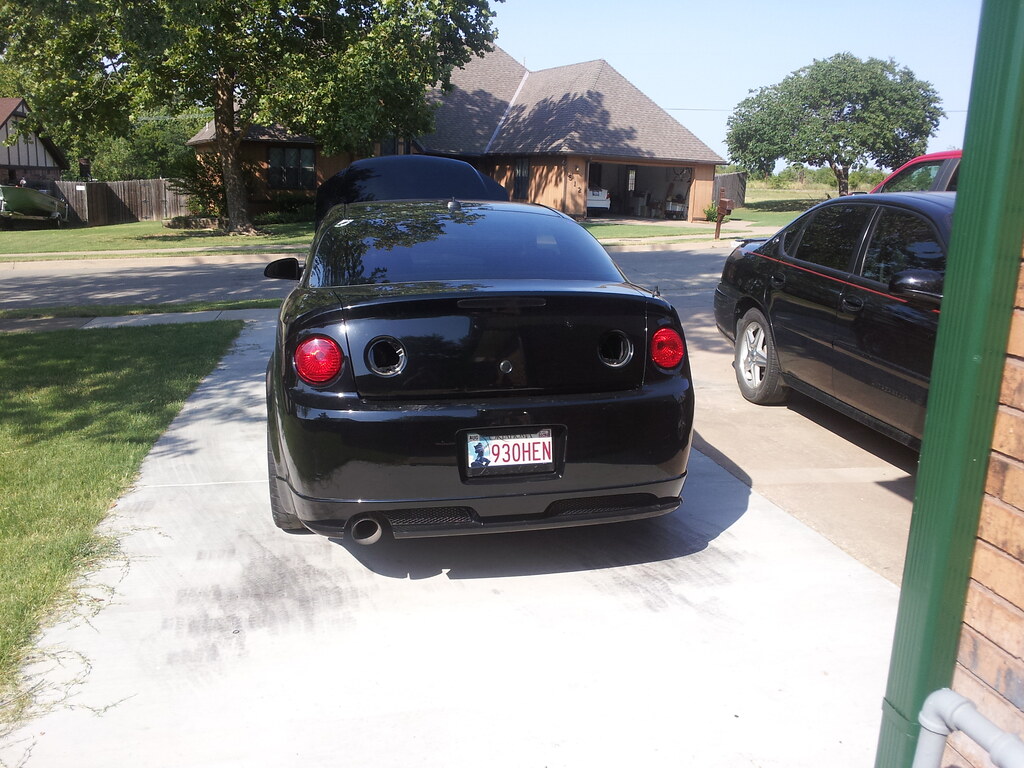
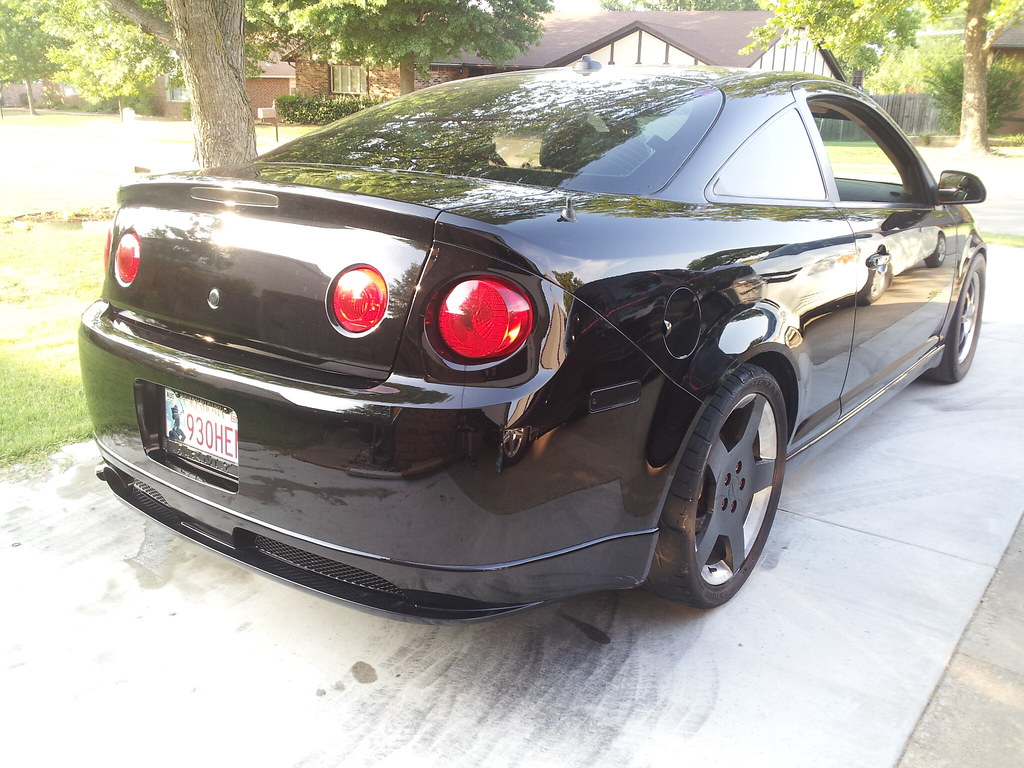
Appearance: Reverse light delete/All red lights

Thread Starter

Joined: 05-04-08
Posts: 36,934
Likes: 2
From: The 405
Reverse light delete/All red lights
Have a black car, or other dark color, with painted side markers and/or 3rd brake light? Hate how the white reverse lights break up the rear end?? Well do i have the solution for you!!!! For thirty-six easy payments of $199.95+SH, you too can get rid of the terrible looking reverse lights! Don't have $7,100 to spend on tail lights? No problem!!! Here's how to do it yourself....
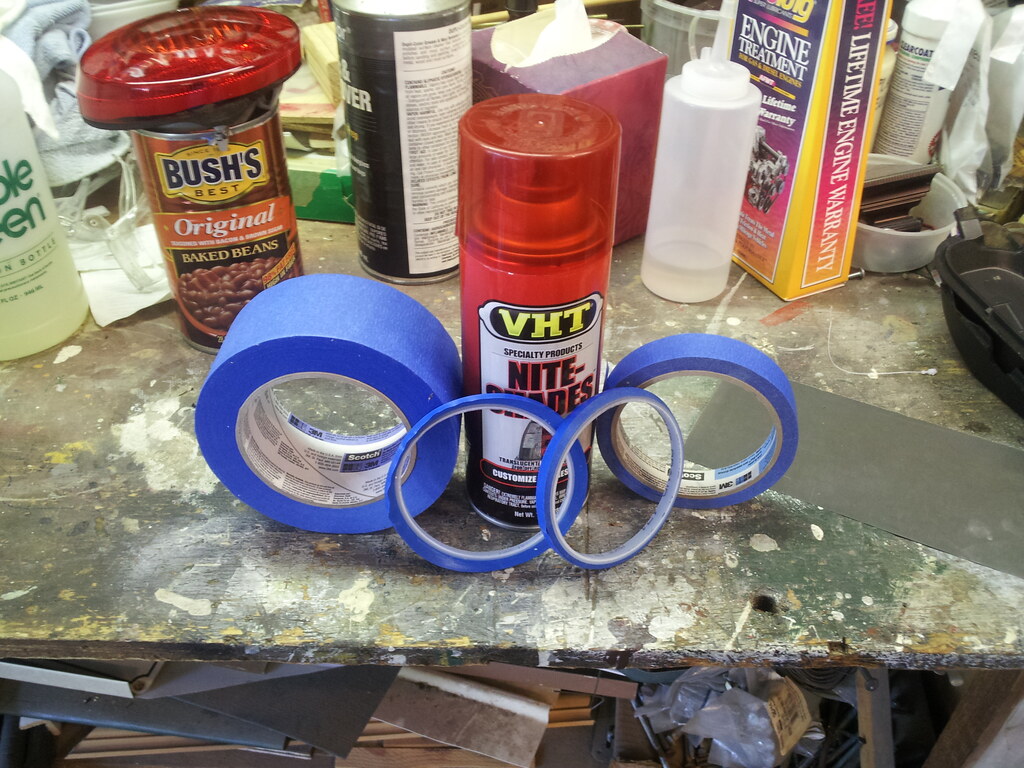
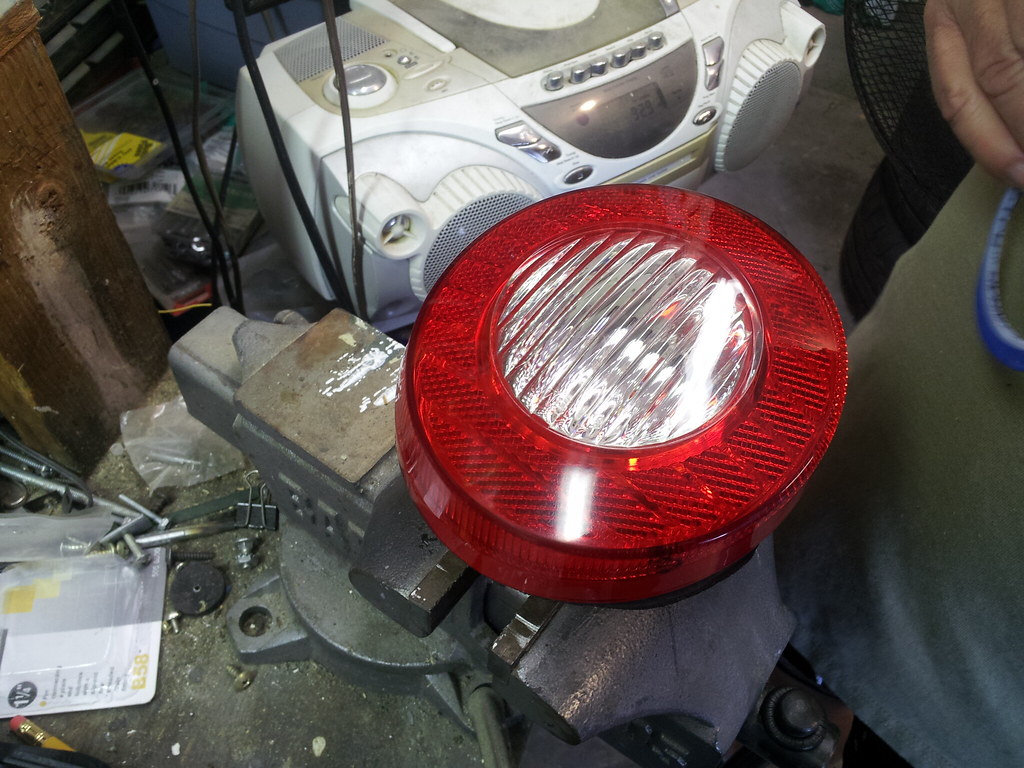
All you need is a set of ugly inner tail lights.
7/16" deep socket+ratchet
Small flat head screw driver
Scotch blue regular painters tape wide and thin
Scotch blue fine line painters tap wide and thin
Dupont degreaser or any cleaning agent
VHT translucent red paint, one can is more than enough
Aaaaand last but not least, patience. taping is the most time consuming, yet most important, part of the job.
Step 1.
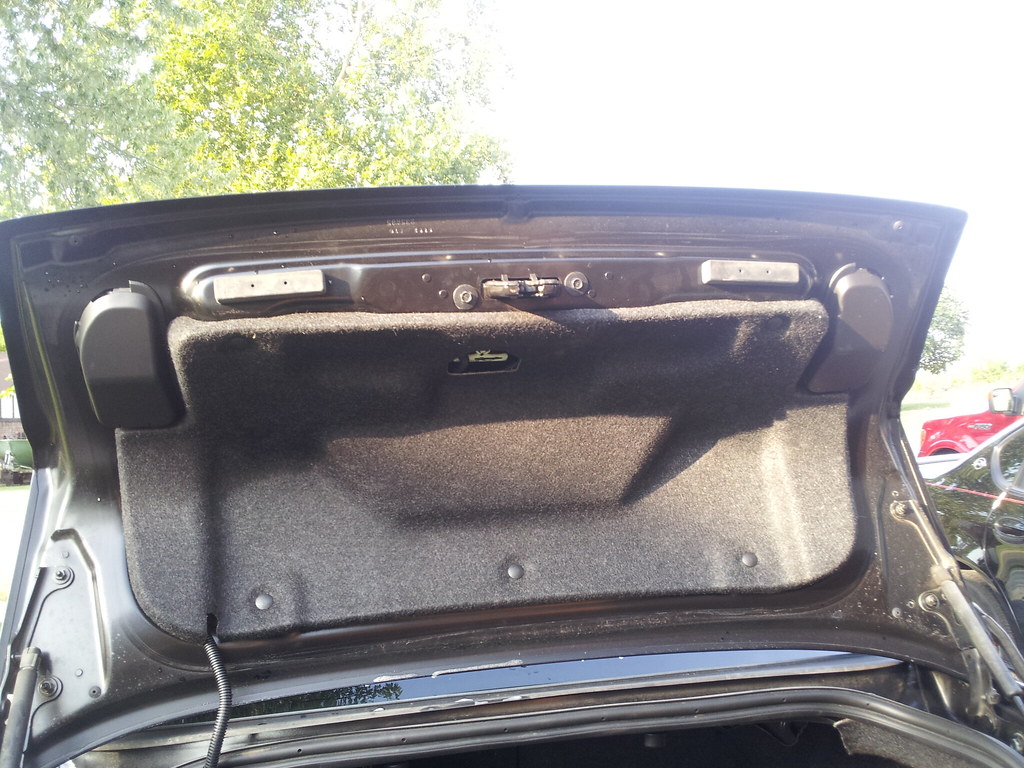
Remove plastic covers from tail lights. If you're lucky enough to have a cobalt assembled correctly you will have one if not both covers. When the trunk is opened there is one push tab at the bottom of each cover, push in and pull out and down and it will slide right out.
Step 2.
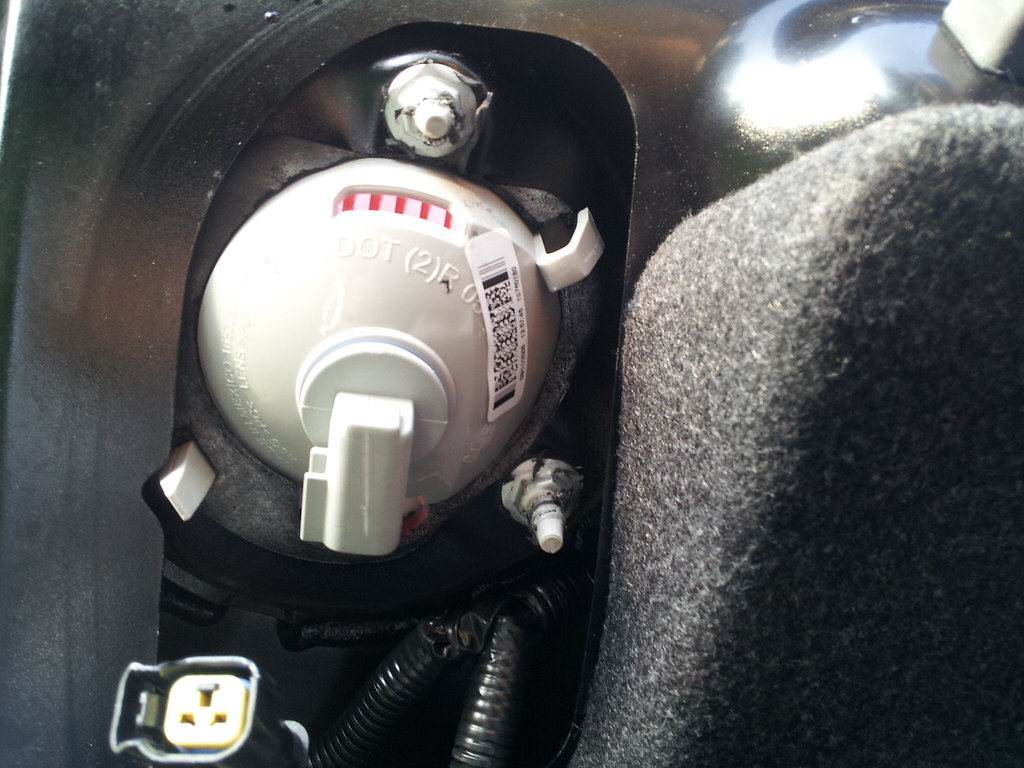
Disconnect the electrical socket from the lights. Use the 7/16" socket to undo both nuts from the light. Then using the flat head screw driver push in on the tabs and the light will pop out.

Step 3.
Clean the whole lens thoroughly with the degreaser then rub dry with a cloth(NOT A PAPER TOWEL).
Step 4.
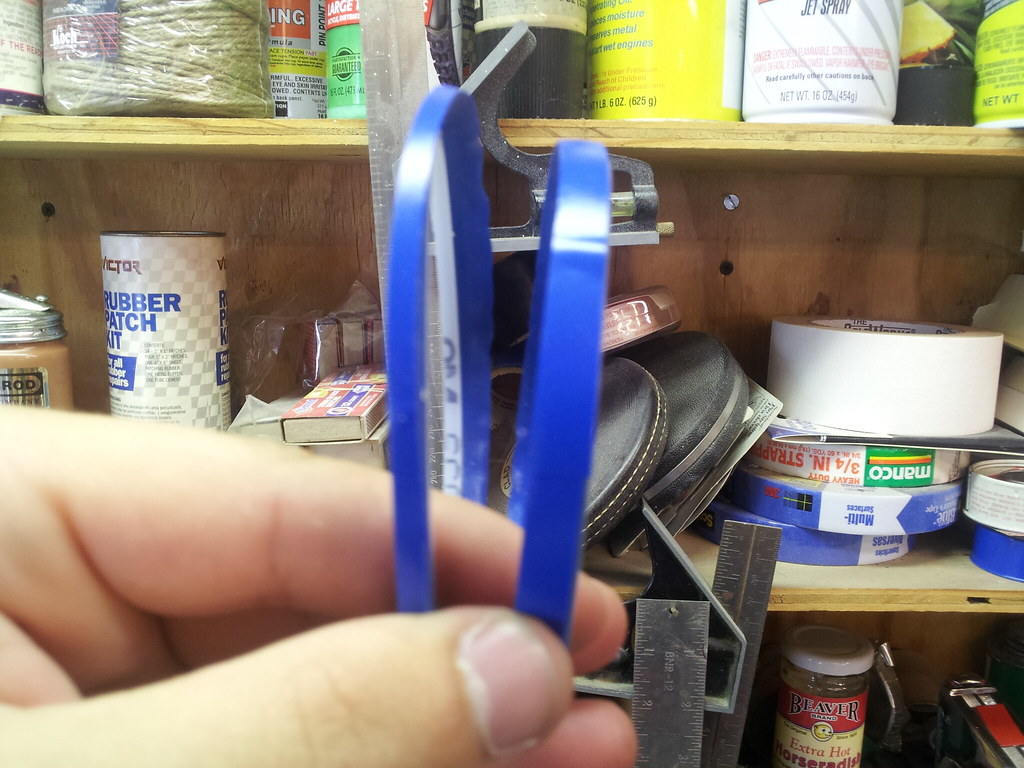
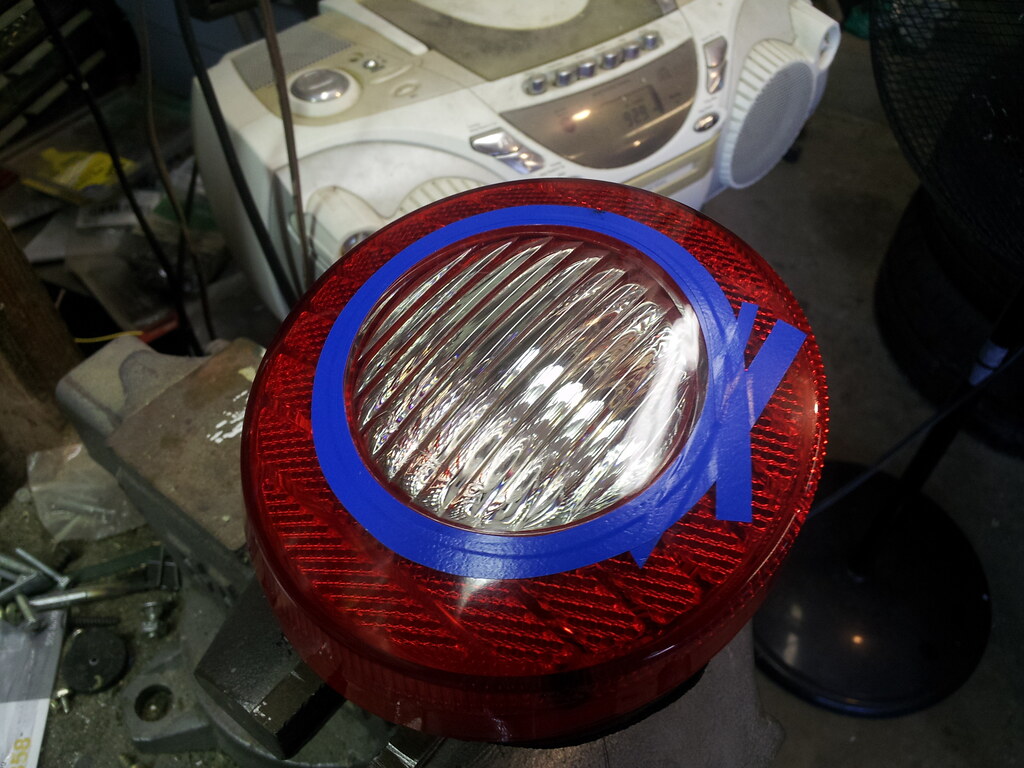
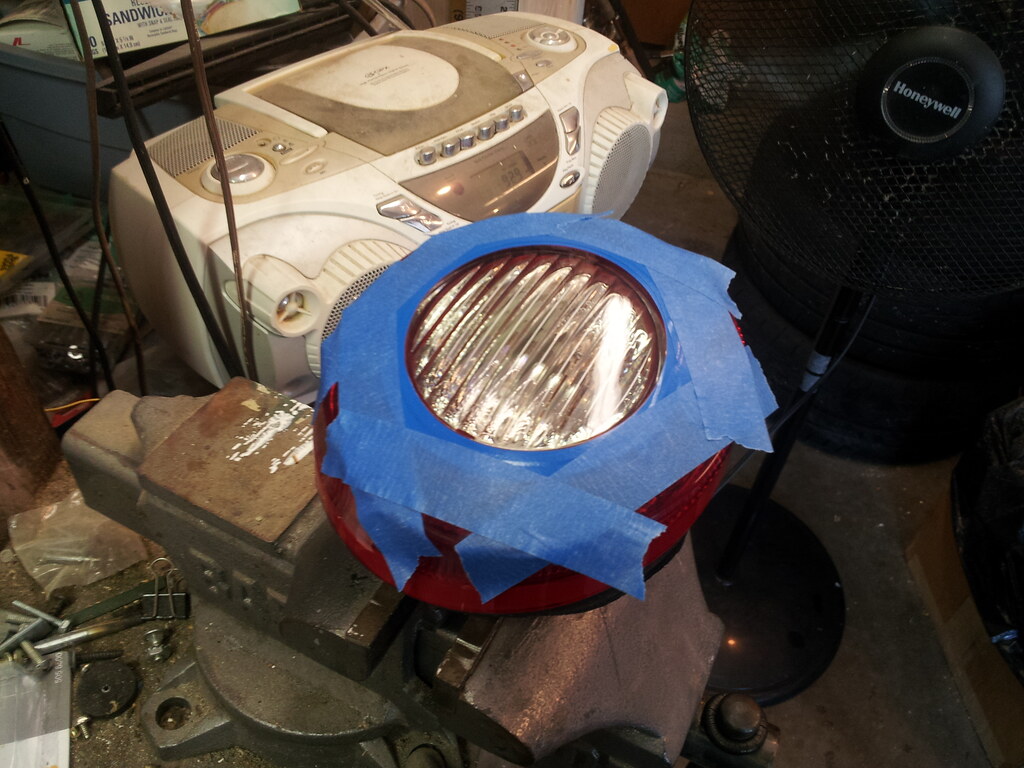
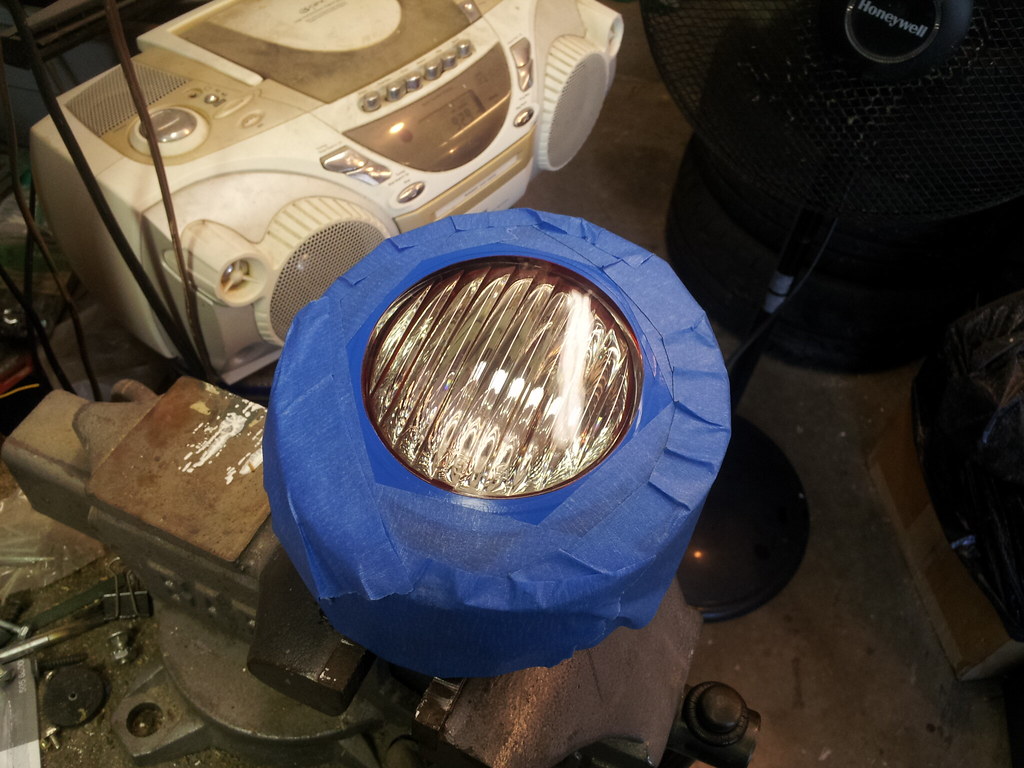
Using the scotch blue fine painters tape, tape off around the clear part of the lens. When i did this i tried to leave a very, very fine amount, like a fingernails thickness, of red showing so i knew that when i layed down the paint i wouldn't have any clear spots showing.(the picture with the first pass of thin blue makes it look like i left a lot of red showing, thats just the spooty little lens messing with your eyes making you see things. After using the thin tape, switch to the wider tape and then finally the regular scotch blue.

Step 5.
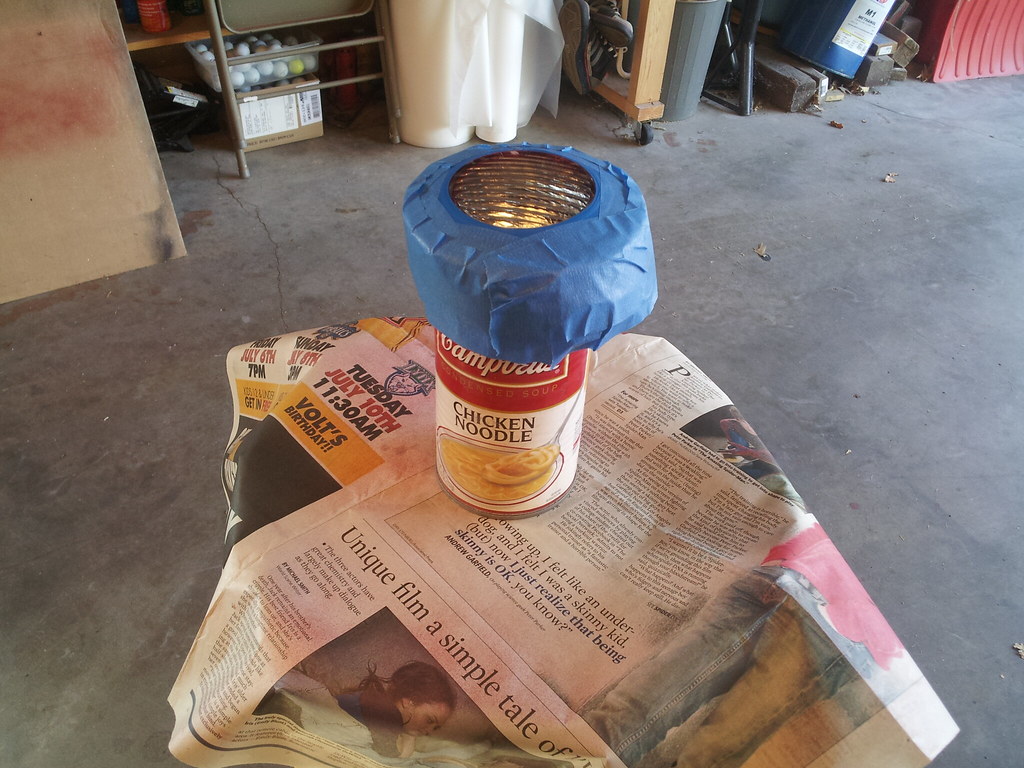
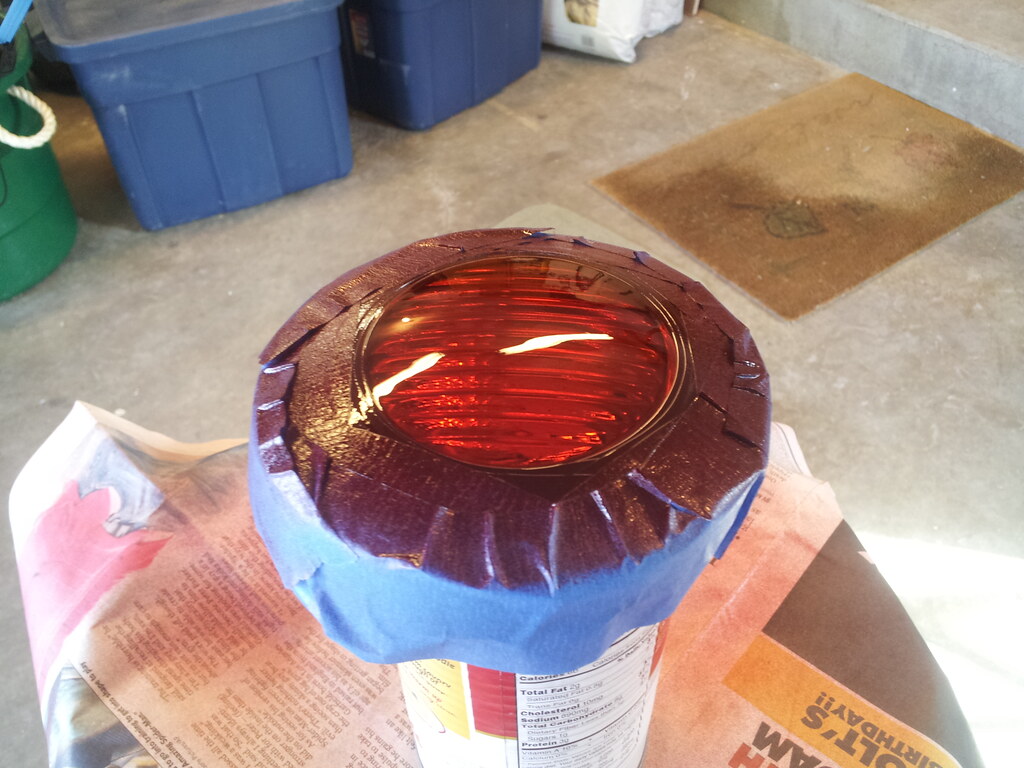
Once masked off, clean the lens one final time. DO NOT touch the surface after this. After its air dried, lay down your paint. IT DOESN'T TAKE MUCH. I only made 4 passes total. Right to left, left to right, then 90* from those right to left and left to right again. Thats all you need. Any more and it will be too dark and not match the rest of the lens. After a few minutes of drying time unmask the lens and place it to dry.
Step 6.
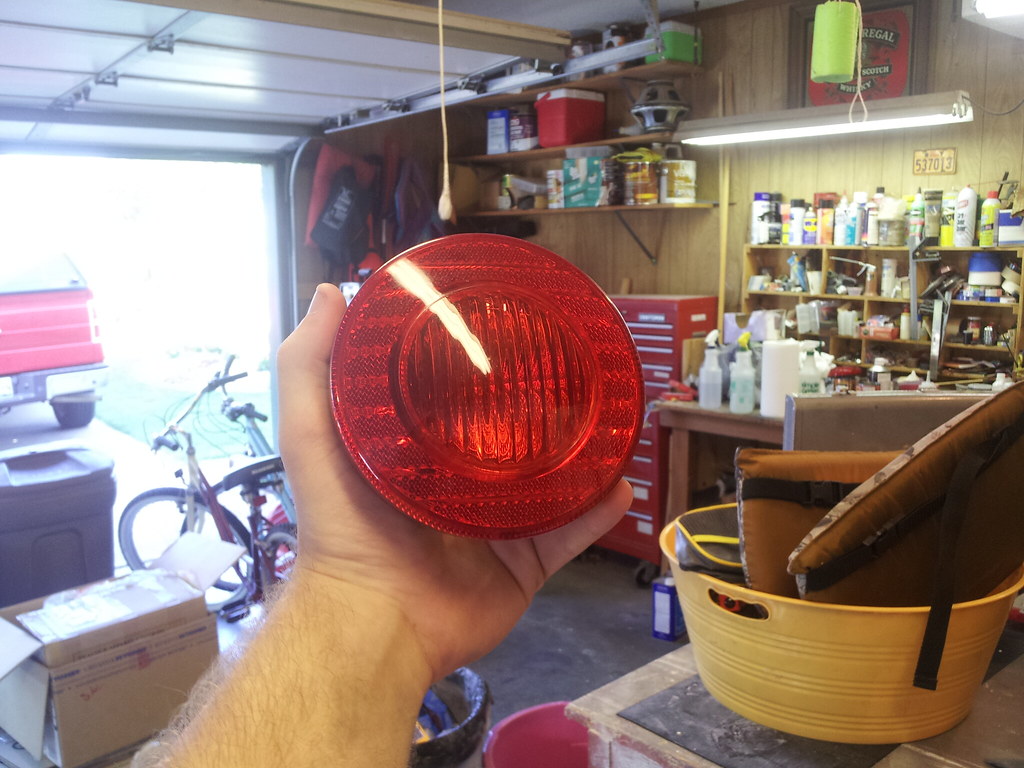
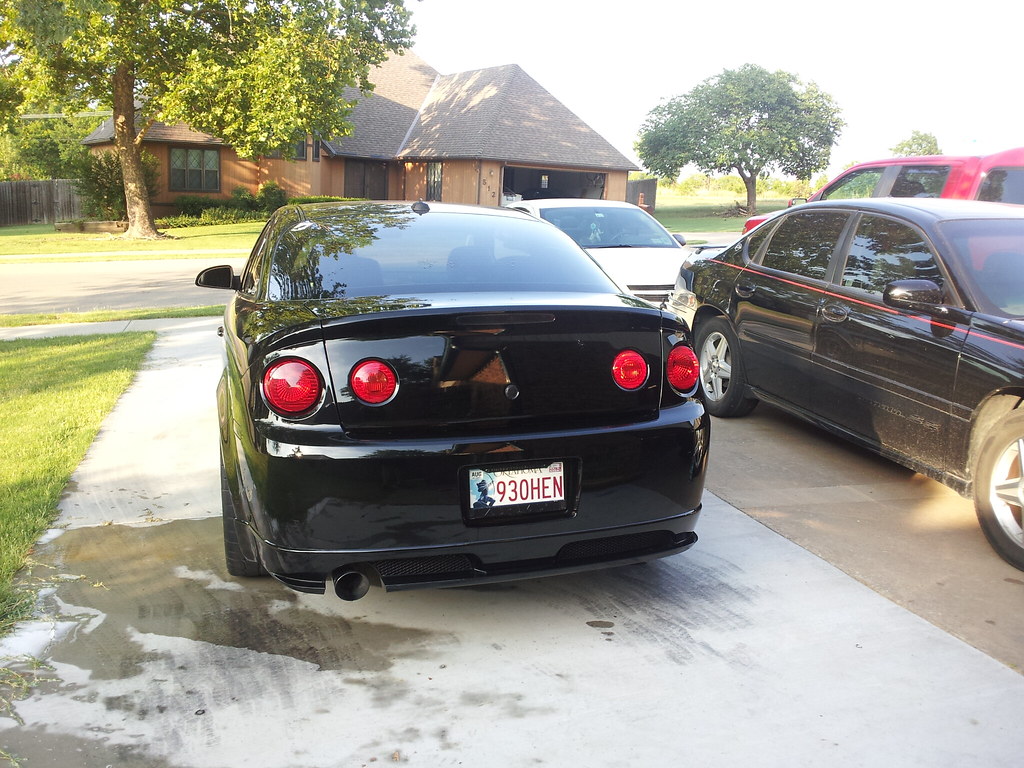
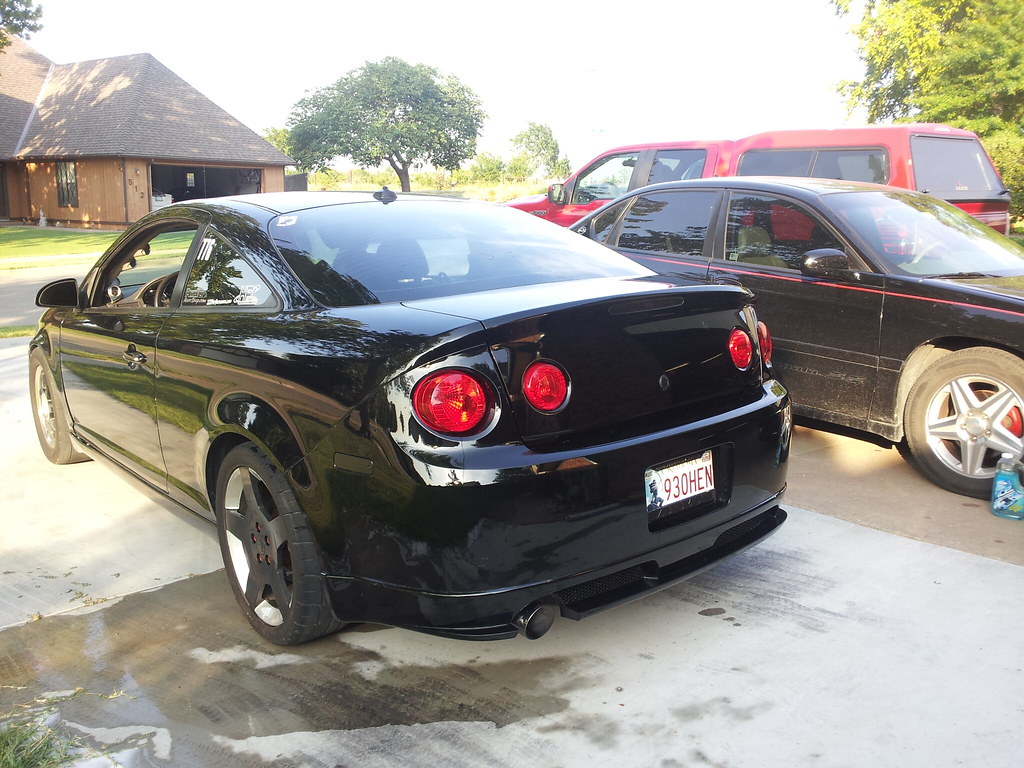
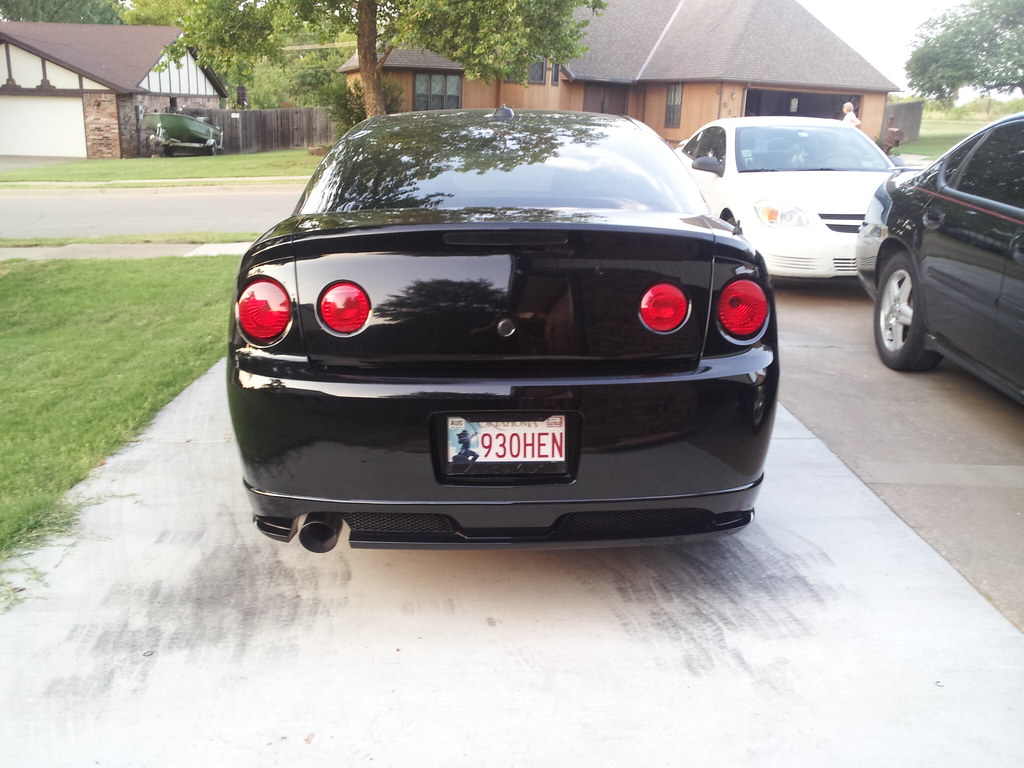
Once cured, ~24hrs. Install and enjoy your new matching tail lights that are illegal but look cool as hell. If you're like me and hardly drive your car in the first place let alone at night, you will benefit quite a bit. If you're that guy thats taking his girl "to the park" late at night, just be careful backing up into those out of sight hard to see places.

All you need is a set of ugly inner tail lights.
7/16" deep socket+ratchet
Small flat head screw driver
Scotch blue regular painters tape wide and thin
Scotch blue fine line painters tap wide and thin
Dupont degreaser or any cleaning agent
VHT translucent red paint, one can is more than enough
Aaaaand last but not least, patience. taping is the most time consuming, yet most important, part of the job.
Step 1.
Remove plastic covers from tail lights. If you're lucky enough to have a cobalt assembled correctly you will have one if not both covers. When the trunk is opened there is one push tab at the bottom of each cover, push in and pull out and down and it will slide right out.
Step 2.
Disconnect the electrical socket from the lights. Use the 7/16" socket to undo both nuts from the light. Then using the flat head screw driver push in on the tabs and the light will pop out.
Step 3.
Clean the whole lens thoroughly with the degreaser then rub dry with a cloth(NOT A PAPER TOWEL).
Step 4.
Using the scotch blue fine painters tape, tape off around the clear part of the lens. When i did this i tried to leave a very, very fine amount, like a fingernails thickness, of red showing so i knew that when i layed down the paint i wouldn't have any clear spots showing.(the picture with the first pass of thin blue makes it look like i left a lot of red showing, thats just the spooty little lens messing with your eyes making you see things. After using the thin tape, switch to the wider tape and then finally the regular scotch blue.
Step 5.
Once masked off, clean the lens one final time. DO NOT touch the surface after this. After its air dried, lay down your paint. IT DOESN'T TAKE MUCH. I only made 4 passes total. Right to left, left to right, then 90* from those right to left and left to right again. Thats all you need. Any more and it will be too dark and not match the rest of the lens. After a few minutes of drying time unmask the lens and place it to dry.
Step 6.
Once cured, ~24hrs. Install and enjoy your new matching tail lights that are illegal but look cool as hell. If you're like me and hardly drive your car in the first place let alone at night, you will benefit quite a bit. If you're that guy thats taking his girl "to the park" late at night, just be careful backing up into those out of sight hard to see places.
Last edited by EXsoccer1921; Jul 6, 2012 at 09:34 PM.


Thread Starter
Joined: 05-04-08
Posts: 36,934
Likes: 2
From: The 405
thanks guys. Joey i have a little write up in the drag section about the basics, bracket racing, and street tires. but my car is not up to par yet with chris's. still need to get a trans and slicks then 10s will happen. but maybe he can write one on all out driving. ryan can write one about building a car. matt can write one about how many turbos and transmissions he's had. and i'll write one on how to burn out lol.
thanks guys. Joey i have a little write up in the drag section about the basics, bracket racing, and street tires. but my car is not up to par yet with chris's. still need to get a trans and slicks then 10s will happen. but maybe he can write one on all out driving. ryan can write one about building a car. matt can write one about how many turbos and transmissions he's had. and i'll write one on how to burn out lol.
Thread Starter
Joined: 05-04-08
Posts: 36,934
Likes: 2
From: The 405
thats where i'm at. i don't have an adjustable launch control on this tune so i need to wire the wotbox back up. my nittos are shot to **** and feel like a street tire after a burnout, even on 19-20psi i can't go more than 50% in first without spinning. and i'm on a factory open diff 4.05 so no way in hell am i gonna nls it. it will go 11s tomorrow night though, damn sure of it.
thats where i'm at. i don't have an adjustable launch control on this tune so i need to wire the wotbox back up. my nittos are shot to **** and feel like a street tire after a burnout, even on 19-20psi i can't go more than 50% in first without spinning. and i'm on a factory open diff 4.05 so no way in hell am i gonna nls it. it will go 11s tomorrow night though, damn sure of it.
Thread Starter
Joined: 05-04-08
Posts: 36,934
Likes: 2
From: The 405
neither did i till today lol. and just yesterday i was looking at the rear thinking "man, **** would look mint if i didn't have the white reverse lights". and sure enough when i'm at oreillys today getting some prolong oil treatment i just for ***** and giggles wandered around browsing and came across it. thought hell why not!?


Thread Starter
Joined: 05-04-08
Posts: 36,934
Likes: 2
From: The 405