
Appearance: RK Sport Front Lip (detailed)

Thread Starter
I'm old school
Joined: 02-16-05
Posts: 6,905
Likes: 3
From: Nashville
RK Sport Front Lip (detailed)
I first had my RK Sport kit professionally installed by a local body shop. They did a fine job, but the front lip set a bit low, and it constantly grounded out causing me to remove it before it got destroyed. I have finally gotten around to reinstalling it and would like to share the tips and tricks.
This installation goes far beyond the RKS instructions.
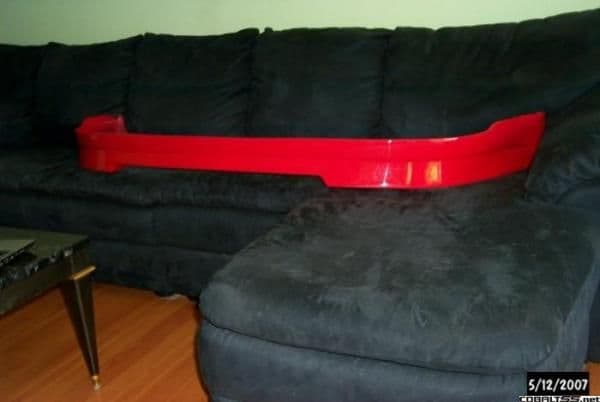
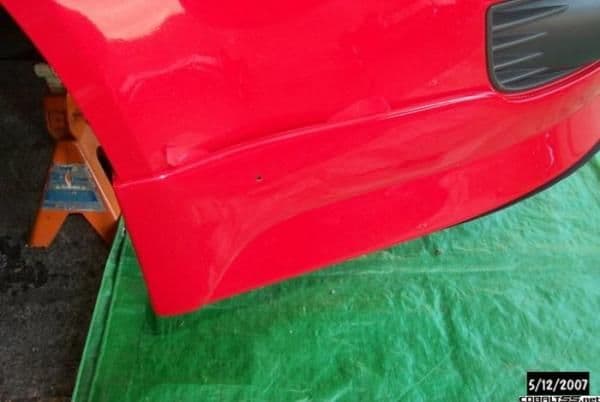
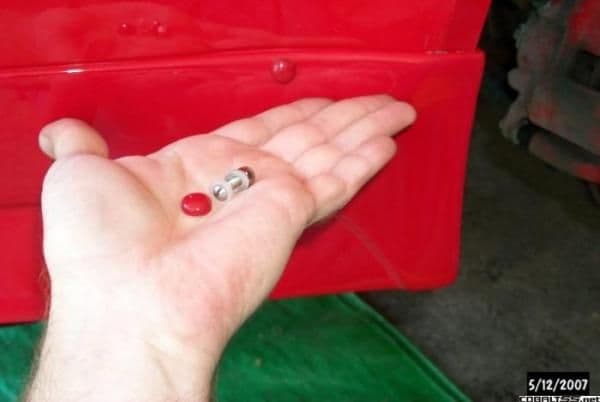
Here's the part.
I had it refinished by the same body shop as before to repair the earlier damage. Here is my first tip. Fabricated some simple skid plates from sheet metal aluminum.
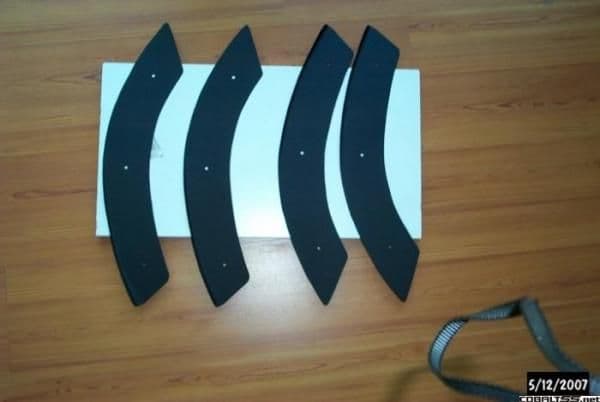
I installed them using stainless hardware. This location is where the part will ground out if unprotected.

I then prepared the mounting tape. This is fairly easy. Be sure to have a clean surface and keep a straight line.
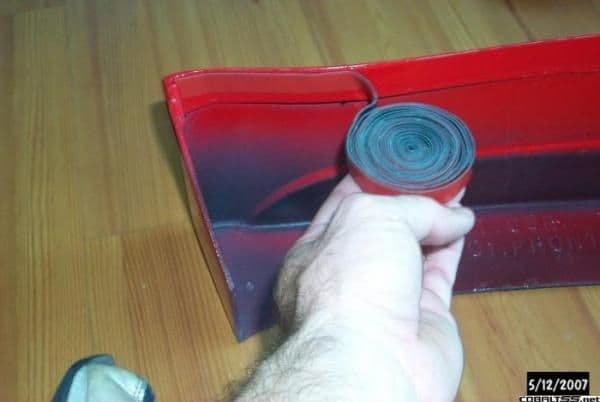
When you get to the curve, don't worry too much about the tape bunching up. The tape itself is very flexible. It's just the backing that bunches up, and that comes off anyway.

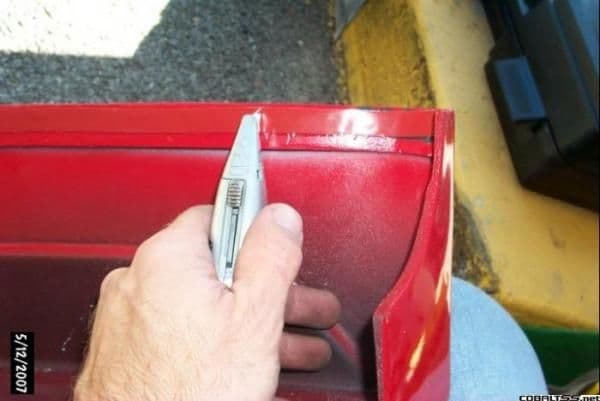
Now, here is another trick that will help later. Cut a line right where shown through the tape on both sides.
Okay. Now Jack the front of the car and take off the front wheels and wheel wells. Again, this is something the RKS instructions don't have you normally do. Remove all the well hardware. Here is a typical push-pin.
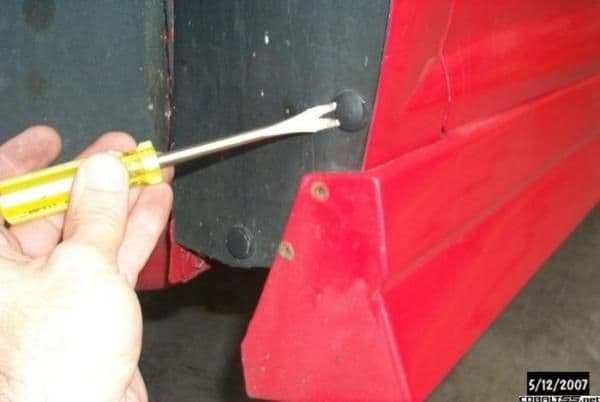
If you break any of these, replace them. Don't be tempted to just leave them out during reinstallation. Once the hardware is removed, the well comes out by lifting it off the folded metal of the fender. Grab the back of the well and pull it toward the engine. Its comes off easily.
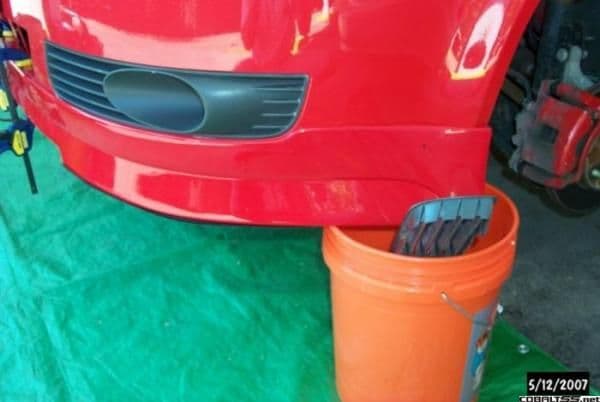
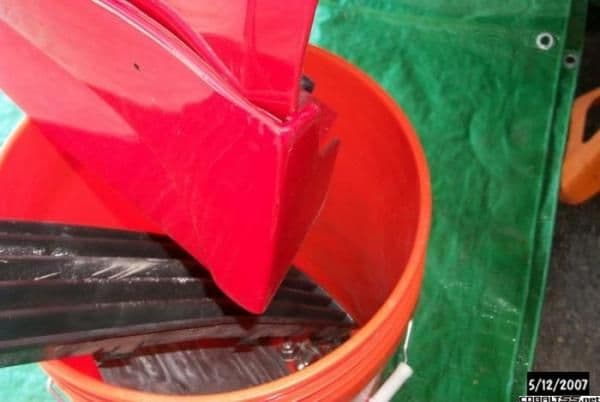
Now position the lip. Having a helper is handy. Or, do what I did here. Hold the lip on the front by using some clamps through the radiator hole. I removed the grill for this step. Hold up one end with a bucket.
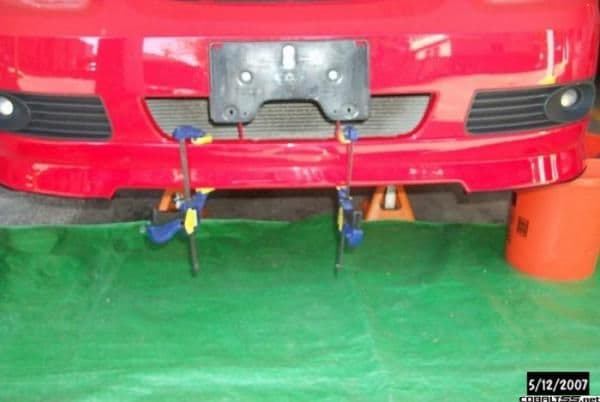
With one end loosely on the wheel fender...
...start working on the other. First, pull the mounting tape back off just a bit where you cut through it earlier, so it hangs out the top like this:
This installation goes far beyond the RKS instructions.
Here's the part.
I had it refinished by the same body shop as before to repair the earlier damage. Here is my first tip. Fabricated some simple skid plates from sheet metal aluminum.
I installed them using stainless hardware. This location is where the part will ground out if unprotected.
I then prepared the mounting tape. This is fairly easy. Be sure to have a clean surface and keep a straight line.
When you get to the curve, don't worry too much about the tape bunching up. The tape itself is very flexible. It's just the backing that bunches up, and that comes off anyway.
Now, here is another trick that will help later. Cut a line right where shown through the tape on both sides.
Okay. Now Jack the front of the car and take off the front wheels and wheel wells. Again, this is something the RKS instructions don't have you normally do. Remove all the well hardware. Here is a typical push-pin.
If you break any of these, replace them. Don't be tempted to just leave them out during reinstallation. Once the hardware is removed, the well comes out by lifting it off the folded metal of the fender. Grab the back of the well and pull it toward the engine. Its comes off easily.
Now position the lip. Having a helper is handy. Or, do what I did here. Hold the lip on the front by using some clamps through the radiator hole. I removed the grill for this step. Hold up one end with a bucket.
With one end loosely on the wheel fender...
...start working on the other. First, pull the mounting tape back off just a bit where you cut through it earlier, so it hangs out the top like this:
Last edited by TommyP; Oct 3, 2012 at 10:20 AM.
Thread Starter
I'm old school
Joined: 02-16-05
Posts: 6,905
Likes: 3
From: Nashville
This is where is gets hard. The RKS lip has a flaw in its design (more later). It's a little bit too small. So getting the lip on the fender takes some muscle. Don't be afraid, you won't break anything. Just pull like crazy. When you first get it in place, it will look like this:
That's bad. You want to look like this:

There is a small channel molded into the side of the lip that grabs the fender. You will know what I'm talking about if you actually have the lip to look at. Don't let the lip fall off the front of the car while doing this. You may be tempted to try it that way, then lift the lip up into place. This will peel off your mounting tape, and that's bad.
Once the lip is EXACTLY where you want it, start peeling off that tape. This is a one time shot, so don't screw this part up. Pull it straight back against itself, not up. This is bad:

This is good:
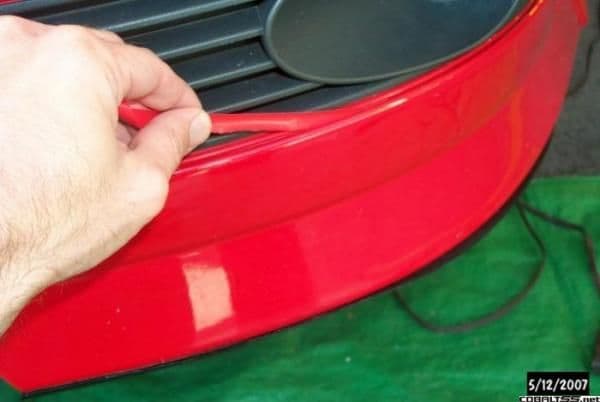
As you pull, have your free hand underneath between the facia and the lip to pull the two apart a little bit so you can peel the backing easier. If the backing starts to stretch like its going to break, STOP. Don't break it or you've got trouble. If you do, you can use the loose tape from the other fender to try and start again.
Okay, according to RK Sport, you are now done. According to the real world, your not. Here is that flaw I was talking about. The lip is a little short, so it makes the lip stretch to fit on. That pulls it away from the concave contour of the facia, like this:
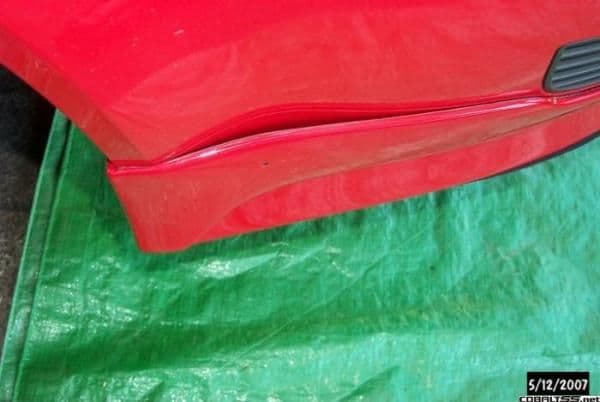
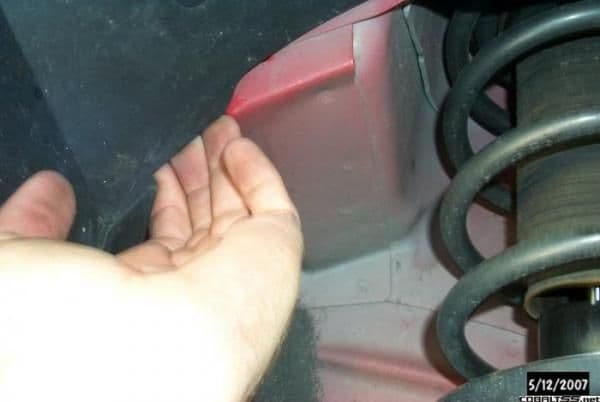
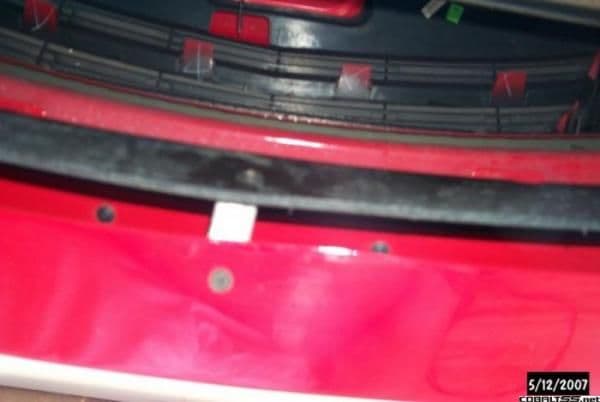
You can't C-clamp it because the mounting tape simply doesn't have the holding power to keep it in place. It will just tear itself loose. So I took the extra step of actually screwing it in at this location. This is why you removed the wheel wells. Drill a hole right where the gap is largest and right through the mounting tape. Keep it as high as you can.

I used some simple stainless hardware and a cosmetic screw cap that I painted to match. It works perfectly.
Lastly, install a small bracket right in the center of the lip to the stock air dam. This will help keep it stable.
The finished installation:

That's bad. You want to look like this:
There is a small channel molded into the side of the lip that grabs the fender. You will know what I'm talking about if you actually have the lip to look at. Don't let the lip fall off the front of the car while doing this. You may be tempted to try it that way, then lift the lip up into place. This will peel off your mounting tape, and that's bad.
Once the lip is EXACTLY where you want it, start peeling off that tape. This is a one time shot, so don't screw this part up. Pull it straight back against itself, not up. This is bad:
This is good:
As you pull, have your free hand underneath between the facia and the lip to pull the two apart a little bit so you can peel the backing easier. If the backing starts to stretch like its going to break, STOP. Don't break it or you've got trouble. If you do, you can use the loose tape from the other fender to try and start again.
Okay, according to RK Sport, you are now done. According to the real world, your not. Here is that flaw I was talking about. The lip is a little short, so it makes the lip stretch to fit on. That pulls it away from the concave contour of the facia, like this:
You can't C-clamp it because the mounting tape simply doesn't have the holding power to keep it in place. It will just tear itself loose. So I took the extra step of actually screwing it in at this location. This is why you removed the wheel wells. Drill a hole right where the gap is largest and right through the mounting tape. Keep it as high as you can.
I used some simple stainless hardware and a cosmetic screw cap that I painted to match. It works perfectly.
Lastly, install a small bracket right in the center of the lip to the stock air dam. This will help keep it stable.
The finished installation:
Last edited by Halfcent; May 13, 2007 at 01:54 AM.


Senior Member
Joined: 03-30-06
Posts: 3,014
Likes: 0
From: Exit 29, NY
Nice write up but one future issue I see is the lip rubing on the fender, rubbing the paint off causing the bare metal to be exposed and then rusting. Anyways great job and nice how-to.
later
EDIT.... Im an idiot..... and I need more sleep... LOL...
later
EDIT.... Im an idiot..... and I need more sleep... LOL...
Last edited by RollOver360; May 13, 2007 at 09:59 AM.

New Member
Joined: 09-13-06
Posts: 22
Likes: 0
From: ottawa
umm, what metal exactly?? the lip is attached to a PLASTIC bumper. last time i checked, PLASTIC doesn;t rust
Senior Member
Joined: 03-30-06
Posts: 3,014
Likes: 0
From: Exit 29, NY

Thread Starter
I'm old school
Joined: 02-16-05
Posts: 6,905
Likes: 3
From: Nashville
No rubbing. In fact when installed, the lip comes off the car as part of the facia. So if you ever have to remove the facia for some work (like, maybe, installing an intercooler?) the whole thing comes off as one part.
Senior Member
Joined: 05-10-07
Posts: 5,890
Likes: 1
From: West Babylon, NY
Hey know this is a few months old, but i got a couple questions. Why 4 skid plates? Did you double stack them? and about how wide is the lip? How is that center bracket set up? I can't quite get a feel for it from that camera angle.
Thanks.
Thanks.
Senior Member
Joined: 11-01-06
Posts: 2,802
Likes: 0
From: Mechanicsburg, PA
i have the RK Sport G5 side skirts and they are a little short like ur bumper lip. i had to really use some elbow grease to get em on just right. but they look good in the end im very happy with em..this how to is sweet to. very easy to follow.

Thread Starter
I'm old school
Joined: 02-16-05
Posts: 6,905
Likes: 3
From: Nashville
How wide? Well, it's the same width as the front of the car. Am I misunderstanding?
The center bracket is just a simple hand bent piece of aluminum bar stock right in the middle of the lip. It connects the nose of the lip to the front of the stock air damn, just to keep everything square.
Senior Member
Joined: 05-10-07
Posts: 5,890
Likes: 1
From: West Babylon, NY
The plates where made out of thin gauge aluminum, which is all I had available to me at the time. Yes, they are stacked. I knew that just one would bend like tin foil after the first time I grounded out, so I did two. I am very glad I did. I actually plan to replace them with some .050 or larger gauge sheet aluminum as soon as I can find some.
How wide? Well, it's the same width as the front of the car. Am I misunderstanding?
The center bracket is just a simple hand bent piece of aluminum bar stock right in the middle of the lip. It connects the nose of the lip to the front of the stock air damn, just to keep everything square.
How wide? Well, it's the same width as the front of the car. Am I misunderstanding?
The center bracket is just a simple hand bent piece of aluminum bar stock right in the middle of the lip. It connects the nose of the lip to the front of the stock air damn, just to keep everything square.
Thread Starter
I'm old school
Joined: 02-16-05
Posts: 6,905
Likes: 3
From: Nashville
Ah, ok. How "Low" is it? Well, the bottom of the front, notched section of the lip sits at the exact same height as the lower air damn. But it is ofcourse further forward. The corners of the lip where it wraps around to the wheels is another inch lower.
Senior Member
Joined: 05-10-07
Posts: 5,890
Likes: 1
From: West Babylon, NY
Gotcha, and that extra inch is the reason for the skid plates. Did you fab those yourself? was it tough? It looks like there is a lip on there. Sorry for all the questions.. I am just really interested in this kit and I want to do it right.


Senior Member
Joined: 11-15-05
Posts: 2,693
Likes: 0
From: Newton Highlands, Massachusetts
cobalts are dipped in a special zinc coating that prevents rust, porshe uses the same thing. it may just be on SS/SC's though.