PICS 3 gauge pod painted BLACK
 08-29-2009, 05:27 PM
#1
Senior Member
Thread Starter
Join Date: 05-27-06
Location: Sumter, SC
Posts: 2,921
Likes: 0
Received 0 Likes
on
0 Posts
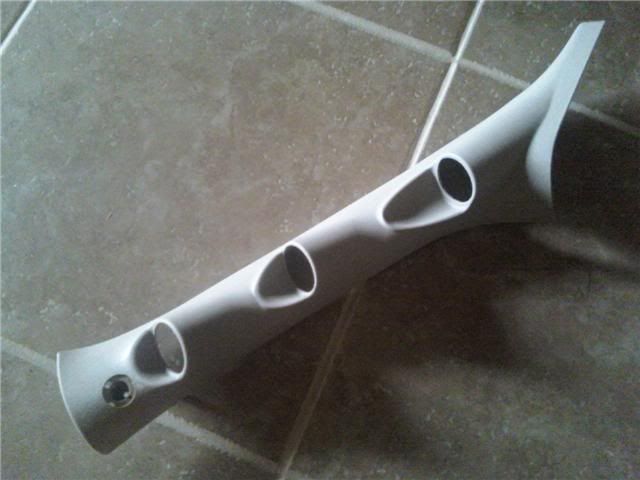
PICS A pillar ZZP 3-gauge pod, painted BLACK
INSTALL with gauges(ordered 29 Aug) soon so keep checking back!
Supplies I used:
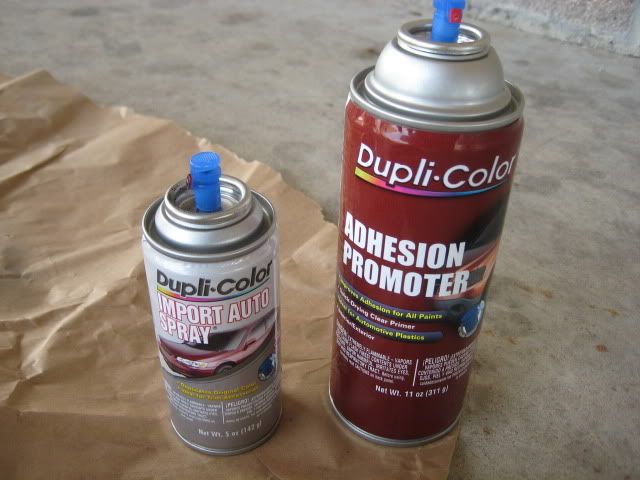
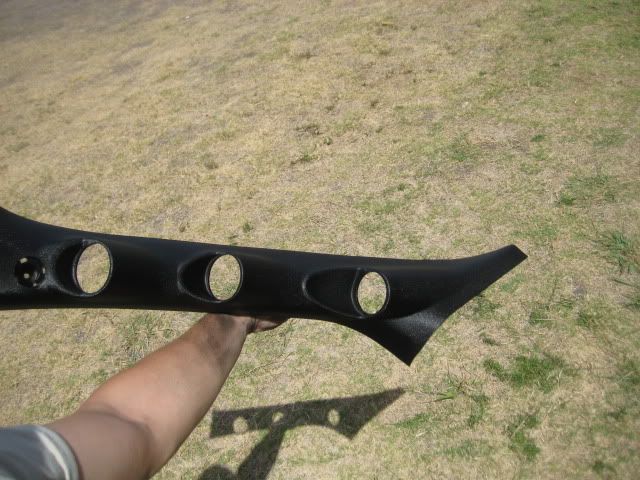
NEW gauge pod from ZZP: (Perfect matching texture!) Stock look:
Already ordered the gauges and will be in this order:
BOTTOM: (as it sits in the car....same as stock)
Mechanical Boost
MIDDLE:
Digital Wideband
TOP:
Electrical oil pressure
Passenger side:
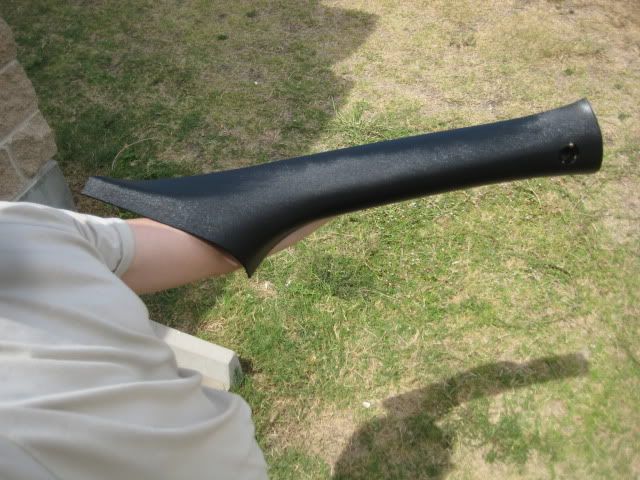
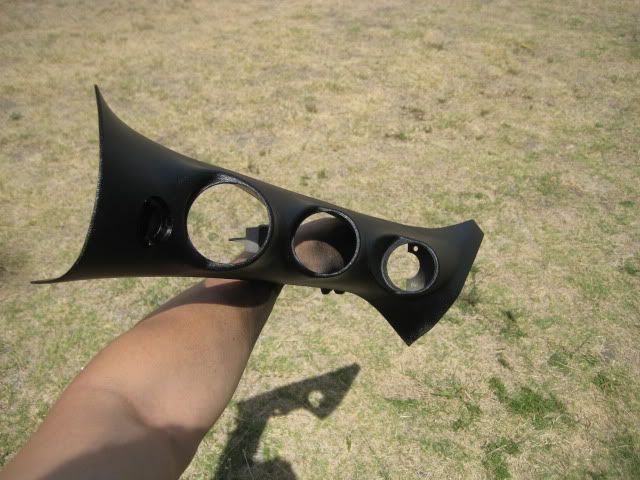
After 3 coats adhesive and 3 coats of black:
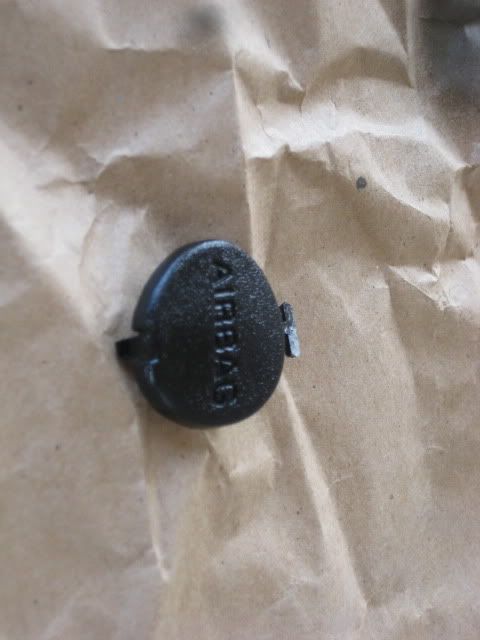
Dont forget the caps!:
Will do 2 clear coats tomorrow to protect and gloss up a little!
Check back in a week for final install of A pillars into the car with gauges done! :P
Supplies I used:
NEW gauge pod from ZZP: (Perfect matching texture!) Stock look:
Already ordered the gauges and will be in this order:
BOTTOM: (as it sits in the car....same as stock)
Mechanical Boost
MIDDLE:
Digital Wideband
TOP:
Electrical oil pressure
Passenger side:
After 3 coats adhesive and 3 coats of black:
Dont forget the caps!:
Will do 2 clear coats tomorrow to protect and gloss up a little!
Check back in a week for final install of A pillars into the car with gauges done! :P
Last edited by SUKXOST; 08-30-2009 at 04:53 PM. Reason: Automerged Doublepost
 08-29-2009, 05:49 PM
#3
Senior Member
Thread Starter
Join Date: 05-27-06
Location: Sumter, SC
Posts: 2,921
Likes: 0
Received 0 Likes
on
0 Posts
Clearcoat was a good idea but I was planning to do that anyways, just not 4 coats like you did on 98% of your ****** interior! LOL jk jk
08-29-2009, 05:56 PM
#4
Senior Member
Join Date: 08-20-08
Location: El Paso Texas
Posts: 1,415
Likes: 0
Received 0 Likes
on
0 Posts
lol hey its all temporary until i get 100% of my interior ripped out and proffesionally painted black and red.... then i will have to worry bout bitches scuffin up my **** with their heels and purses and ****. lmfao!!!
you should do that long vent piece too... it will look better, think about it, your pillars are gonna be nice and shiny black, and then that defrost vent piece is gonna be a darkish gray, it wont match up at all.. so i would paint that piece up too...
you should do that long vent piece too... it will look better, think about it, your pillars are gonna be nice and shiny black, and then that defrost vent piece is gonna be a darkish gray, it wont match up at all.. so i would paint that piece up too...
Last edited by badbaltguy; 08-29-2009 at 05:56 PM. Reason: Automerged Doublepost
08-29-2009, 05:57 PM
#5
Senior Member
Thread Starter
Join Date: 05-27-06
Location: Sumter, SC
Posts: 2,921
Likes: 0
Received 0 Likes
on
0 Posts
You need to worry about getting your headliner cut up from thier high heels! NAAAHHH MEEEEAANNNN! LOL
Last edited by SUKXOST; 08-29-2009 at 07:34 PM. Reason: spelling
08-29-2009, 07:35 PM
#7
Senior Member
Thread Starter
Join Date: 05-27-06
Location: Sumter, SC
Posts: 2,921
Likes: 0
Received 0 Likes
on
0 Posts
 08-29-2009, 08:11 PM
#10
Senior Member
Thread Starter
Join Date: 05-27-06
Location: Sumter, SC
Posts: 2,921
Likes: 0
Received 0 Likes
on
0 Posts
2 cool points for each of you!
I'm sure there are tons of guys with it done so I know I'm far from the 1st......but I've not really SEEN many on here so I thought I'd show mine as it progresses from stock and into the car.
08-29-2009, 09:08 PM
#11
Senior Member
Join Date: 08-20-08
Location: El Paso Texas
Posts: 1,415
Likes: 0
Received 0 Likes
on
0 Posts
well from what i seen in another thread is spray painting is -50 cool points. whoever said that needs to be slapped. if you do it right, like so ^^^^^^ it turns out great.
08-29-2009, 09:16 PM
#12
Senior Member
Thread Starter
Join Date: 05-27-06
Location: Sumter, SC
Posts: 2,921
Likes: 0
Received 0 Likes
on
0 Posts
I took a REAL close look at it after it all dried up and it came out flawless! So happy with it. Can't wait to clear coat, wire the gauges and finish install! Gonna look sick! I'll posts pics asap for anyone who cares.
08-29-2009, 09:18 PM
#13
Senior Member
Join Date: 08-20-08
Location: El Paso Texas
Posts: 1,415
Likes: 0
Received 0 Likes
on
0 Posts
i care. post pics, and hear me out when i say this,, be VERY careful when putting them back in... and paint that vent piece too so it matches up with the pillars..
08-29-2009, 09:23 PM
#15
Senior Member
Thread Starter
Join Date: 05-27-06
Location: Sumter, SC
Posts: 2,921
Likes: 0
Received 0 Likes
on
0 Posts
I'll take a look at that other piece too. Thanks for the advice about being careful because I was just gonna set the A pillars on the dash......put the seat back; lean back.....and start kickin the **** out of them until they somehow popped into place.
 08-29-2009, 09:36 PM
#17
Senior Member
Join Date: 08-20-08
Location: El Paso Texas
Posts: 1,415
Likes: 0
Received 0 Likes
on
0 Posts
lol i dont know if you was bein sarcastic about kicking them into place, but what i had to do is just set the bottoms in first, and kinda push away that big long vent piece so it didnt scratch my pillars.
08-29-2009, 10:46 PM
#19
Senior Member
Thread Starter
Join Date: 05-27-06
Location: Sumter, SC
Posts: 2,921
Likes: 0
Received 0 Likes
on
0 Posts
Same ****** light brown yeah 
HA Thought I was pretty obvious that I was kidding. *** 
Most definately...only had time to do the two today and only had enough paint to barely get those 2 pieces done!
Most definately...only had time to do the two today and only had enough paint to barely get those 2 pieces done!
08-29-2009, 10:49 PM
#20
Senior Member
iTrader: (16)
Join Date: 06-17-09
Location: Holland, MI
Posts: 2,433
Likes: 0
Received 0 Likes
on
0 Posts
Import Auto Spray?
Shame on you. Not that this didn't work out, but anyone looking to keep a factory look SEM makes great interior paint, it adheres, and lays down beautifully once cured.
Shame on you. Not that this didn't work out, but anyone looking to keep a factory look SEM makes great interior paint, it adheres, and lays down beautifully once cured.
08-29-2009, 11:52 PM
#21
Senior Member
Thread Starter
Join Date: 05-27-06
Location: Sumter, SC
Posts: 2,921
Likes: 0
Received 0 Likes
on
0 Posts
^^^ lol Yeah....was all they had......looked for another one just to not buy that "import" **** but the only other brand they had was a flat black. oh well. turned out well. HA
 08-30-2009, 01:23 AM
#23
Senior Member
Thread Starter
Join Date: 05-27-06
Location: Sumter, SC
Posts: 2,921
Likes: 0
Received 0 Likes
on
0 Posts
bump.....edited OP with new pre-painted pic of new 3 gauge pod and fixed some text
Last edited by SUKXOST; 08-30-2009 at 01:39 AM. Reason: SPELLING
08-30-2009, 02:35 PM
#24
Senior Member
Join Date: 02-21-09
Location: Bechtelsville, PA
Posts: 623
Likes: 0
Received 0 Likes
on
0 Posts
I was thinking about doing mine black too but, **** it's so god damn hot in my car now as it is with the black on black interior.
your **** looks good i'll have to check it out next weekend.
your **** looks good i'll have to check it out next weekend.
08-30-2009, 05:04 PM
#25
Senior Member
Thread Starter
Join Date: 05-27-06
Location: Sumter, SC
Posts: 2,921
Likes: 0
Received 0 Likes
on
0 Posts
As far as the black.....won't make a big difference and I just couldn't wrap my mind around them being white with all the black and gray interior. Once I get the gauges in I'll take a look at them in the pod and see if painting the ring of each gauge white would look good.
Like mine was with the stocker but now with the new 3 pod being black it might look good, or might look like rotten *******. Time will tell