
LNF Valve Gunk..


Here is what I said at the outset when I developed this last year:
Powell raceparts ; the next mod:Advanced PCV control.
Its a PCV revision to attempt fixing the DI coking problem
There will be two versions; one for LNF Cobalts and one for LSJ. The mounting brackets and hose lengths will be different. LNF and LSJ, (HHR and Kappa installs available now July 2013). The install has a choice of tapping into the existing pcv hose, or removing it and installing a different fitting in the LNF or LSJ rocker cover.
BUY IT BUT DONT FORGET US...
One thing about this, the way we sell it will be different from the way most vendors sell things. Not to drive everyone crazy about it, simply understand that I want you to keep track and feedback to us, how your car is now, and how it is after time with the PCV upgrade you got from Powell raceshop. It kinda makes our customers a sort of a development test fleet. The engineering in this mod is sound, the ideas have good science, logically it should work, and the execution is well made, not cheap.
But we need to see how it works, as we have only limited experience that says "yup it looks like its working." Normally if I were working for a manufacturer, it would go in a durability test fleet that works 24/7 on a specific driving cycle routine , to get long term view of what is going on in a field test.
So for the road race track and aftermarket turbos, another part required to complete the puzzle.

Senior Member
Joined: 09-16-09
Posts: 750
Likes: 29
From: south west of GTA
the stock system has check valves in the inlet manifold and the fresh air intake for the PCV. It has no drain back.
My drain back upgrade has no issues on the street.
For reference, Wangspeed on the street fills a non drain back seperator in a month or so. It takes 20 laps on the track to fill 500 ml capacity.
thats the issue. crankcase blowby in extreme race track conditions. I hope I have explained it clearly and correctly.
To improve on this or to generate more vacuum, can we not hook up a 12v electric vacuum pump to your pcv to generate the 10-20 in HG? However, the draw back is it could be expensive and it tends to be a little noisy as well from what I'd read on the web? Summit has one that automatically turns on and shuts off at certain parameters.
I am thinking of doing a second fitting at a different location and different size fitting on my turbo inlet housing to improve on generating vacuum to the canister. It makes me wonder if putting the fitting directly over the wheels will improve vacuum like where my initial fitting were located if you remember? Hmmm.....If all else fail, a 12v vacuum pump would be the ultimate setup?
Just from the observation stand point, I cover my intake with my hands over the intake to restrict flow to the turbo but I did create more vacuum from the fitting. As expected...that's not good either as I am chocking the turbo and rob performance..The ZZP aftermarket intake is flowing too well and with their huge K&N....
Last edited by blrt; Jul 17, 2013 at 08:24 PM.
Senior Member
Joined: 09-16-09
Posts: 750
Likes: 29
From: south west of GTA
Did you notice much oil in the intake manifold just curious?
i just pulled my IM today because I had to replace my injector seals and figured I'd post up pictures of my valves and what I've used in terms of maintenance for reference for others
Bought the car with 40k on it and unknown previous maintenance records
Mobil1 synthetic changed every 3000 miles
seafoamed every 6000 miles
I drive the car like a raped ape most of the time, so its never really babied around except while cruising on the hwy
ran on stock tune from 40-50k miles. HPtuned on 93 from 50-58k miles, HPtuned on E47 from 58k-current 61k miles
f
overall, after seeing some of the posts in here I was expecting to see much worse.. that said, I still know mine arent great. Regardless, I just needed the car running so I didnt do anything to them for now. I will be cleaning them this fall once the car has a bit of downtime where I can just take my time with it and clean them right.
Senior Member
Joined: 09-16-09
Posts: 750
Likes: 29
From: south west of GTA
Since this is a valve coking, pcv discussion, this may be related to this topic...
You all may have seen my TTR manifold thread and John was kind enough to point out the issue with it blocking the front pcv port.
I am pleased that I have finally had this setup the way I wanted it. My objective is to remove or keep the oil out of the intake manifold while have the front pcv working properly.
From what I'd learned from the TTR manifold, I was able to adapt this concept to the stock intake manifold. Though I have not mounted back on the car, I don't see why this couldn't work..
1) You need to make a housing for the stock check valve.
2) Tapped 2 npt hole on the outside of the intake
3) Tapped one hole in the check valve housing and use a 1/8" pipe plug to prevent the oil from entering the manifold..


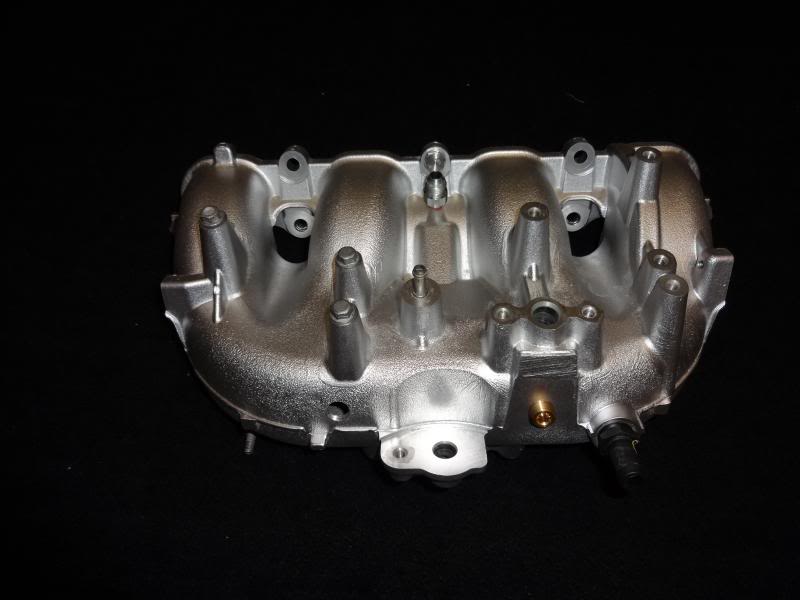

It works well with my aftermarket intake manifold since I had this done/tuned 10 days ago. I am filling my air oil separator/catch can with oil..

You all may have seen my TTR manifold thread and John was kind enough to point out the issue with it blocking the front pcv port.
I am pleased that I have finally had this setup the way I wanted it. My objective is to remove or keep the oil out of the intake manifold while have the front pcv working properly.
From what I'd learned from the TTR manifold, I was able to adapt this concept to the stock intake manifold. Though I have not mounted back on the car, I don't see why this couldn't work..
1) You need to make a housing for the stock check valve.
2) Tapped 2 npt hole on the outside of the intake
3) Tapped one hole in the check valve housing and use a 1/8" pipe plug to prevent the oil from entering the manifold..


It works well with my aftermarket intake manifold since I had this done/tuned 10 days ago. I am filling my air oil separator/catch can with oil..


par for the course. This has not gotten to the inlet manifold yet, but its on the way. and thats all there is to it, and on going issue. root cause is there, root solution is to seperate it. done and done.
Last edited by Powell Race Parts; Jul 21, 2013 at 08:13 PM.

if you can get in and not get raped for the costs, all the BMW dealers should have the BMW wlanit blast machine to do the work. I can do it, but it makes such a mess I am not geared up to do it yet. Maybe later in November. Its not like I have a team of super techs working doing stuff. Its just me, Gloria and four different machinists and fabricators work making our stuff.

I know it's not that easy, but I really wish someone would do a write up with pictures. At least show how the hpfp is unhooked. I really want to do this, but I'm just not quite confident enough. I know it's not that bad.

Senior Member
Joined: 04-15-07
Posts: 1,627
Likes: 2
From: Canada , Nova Scotia , Sack Town Baby !!
This was exactly my concern as well when this thread first started. I already have a new intake mani gasket ready to go and all the stuff required to do the job. But I havnt started it in fear of needing a new seal for the hpfp or a line if I disconect it at the wrong place. It actually i'm sure is fairly easy. However there is a fair amount attached to the intake mani and it looks like it would actually a bit of time to get it removed.

the hpfp is disconnected with a 17mm wrench on the fuel line. this is not under a tremendus amount of pressure.
then remove the bolts and slide it out
there is a roller rocker in there that needs to be handled with care
then remove the bolts and slide it out
there is a roller rocker in there that needs to be handled with care
Last edited by JapEatr; Oct 30, 2013 at 12:32 PM. Reason: Automerged Doublepost
Senior Member
Joined: 04-15-07
Posts: 1,627
Likes: 2
From: Canada , Nova Scotia , Sack Town Baby !!
A picture is worth 1000 words !!
Senior Member
Joined: 12-19-10
Posts: 780
Likes: 0
From: Coquitlam
I was gonna do a "how to" on this but after messing up and kind of just "winging it," I abandoned the idea.
After looking at several threads, here's how I did it. It may be kind of ghetto but it got the job done. Total cost is less than $100.00 and can be done in a day.
I used:
- Media sprayer
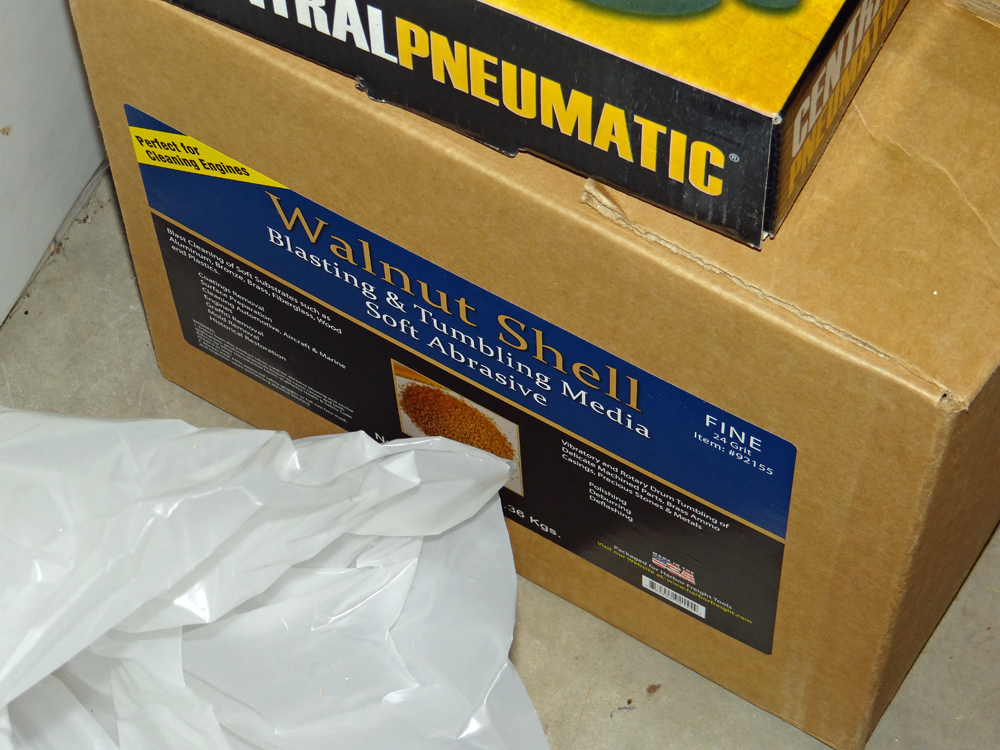
- Walnut shell media
- Air compressor
- Plastic covering
- Masking/painter's tape
- Razor
- New IM gasket
- Shop vac
- Air spray nozzle (You can use the media sprayer without the bag on, but one of those with the long metal tube works best)
- Goggles
- Area where you can make noise and a mess
- Good ventilation and a face mask... really fine dust. REALLY bad for lungs/allergies.
- Universal gun cleaning kit
- Seafoam or your valve cleaning solvent of choice
This is like $13.00 at Harbor Freight.
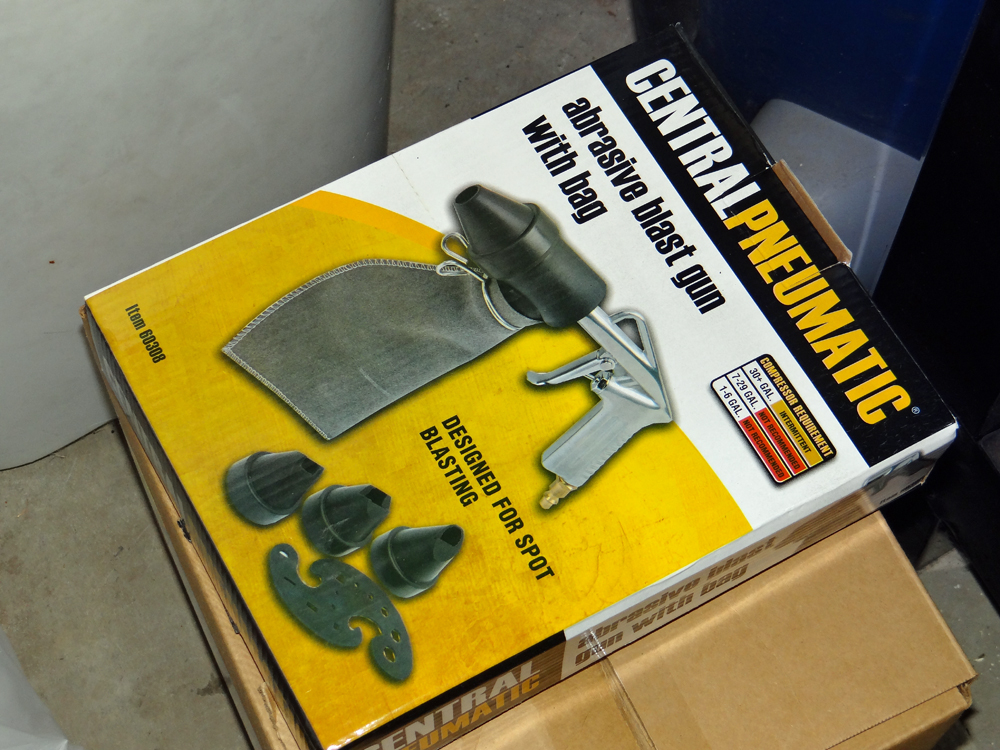
The media is like $20.00 at Harbor Freight. You can get a 25% off coupon out of the back of any car magazine and get this box for around $15.00.
Remove the IM. It's pretty self explanatory. You undo a couple of harnesses and remove a few bolts. You don't have to remove the HPFP. You can just loosen the appropriate bolts, push things out of the way a tiny bit and then gently get it out.
Take note of which valves are open and closed. Don't mess with the one that's open.
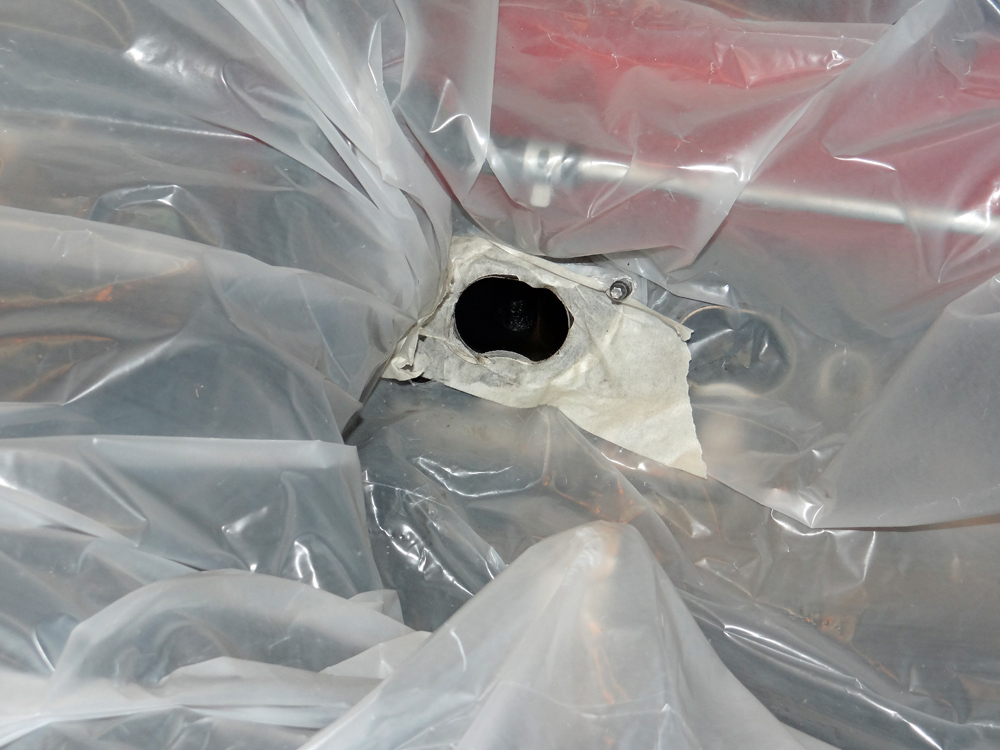
I got a package of eight cheap disposable plastic drop cloths for around $5.00 at Lowe's. Lay it all over the engine. Cut a hole a little bigger than the intake holes in the plastic. Then use some wide masking/painter's tape and put it over the intake hole. You can get a roll of this tape that's about 2 inches wide for about $2.00. Then take a razorblade and cut out the tape covering the intake hole.
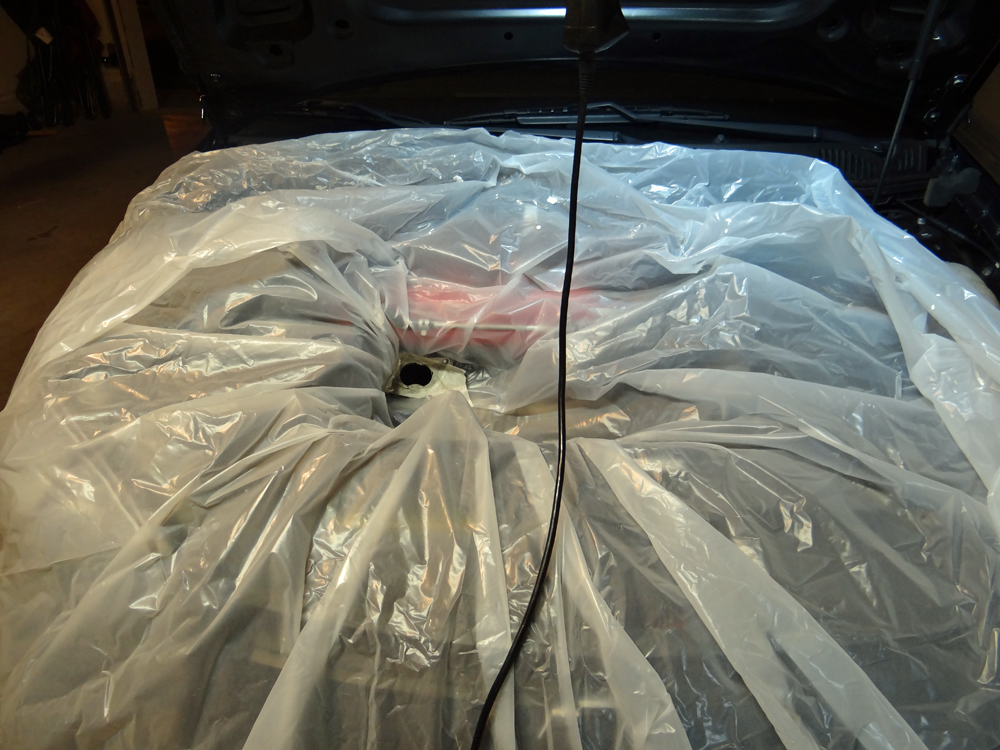
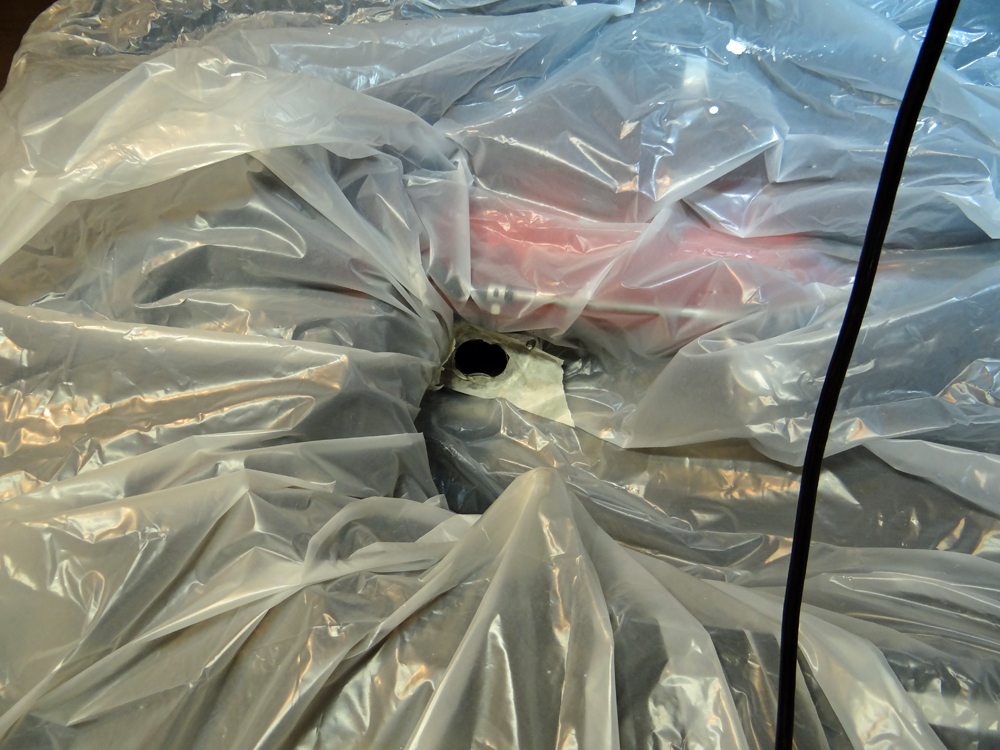
Hook the sprayer to an air compressor. I used a 10 gal. compressor with the valve set at 120psi. Put some media in the bag, put on the goggles, protect your respiratory system, get some good lighting and go to town. You can make sort of a pit with the plastic where the IM was to catch most of the media that flies out.
With a little practice, you'll soon figure out how to control how much media goes into the intake tube on the sprayer by moving the bag with one hand and aiming the sprayer with the other. Unless you have a big badass compressor, the shells are going to sort of pile around the top of the valve.
The valve tunnels are kind of like two circles merged into a sideways figure 8. You can put a shop vac hose in one side and spray compressed air or media in the other side and make less of a mess.
After you've got all the carbon blasted off the closed valves, close the last one and do it. I think you can do this by turning the key on and off really really fast. You may want to unplug the harness to the HPFP. Maybe if anyone reads this they can explain how to close the last open valves so you can clean it. (The reason I don't know how or didn't do this is below)
When you spray the valves, there may be some gunk left on the back side of the shaft that you can't see. To get to this, I sprayed some Seafoam in there. Use a tiny bit at first and make sure it's not draining into the cylinder. Leave it there a few hours or overnight. You can scrub the back sides of the shafts with a small brass brush. I used some stuff from a gun cleaning kit. Don't use steel. Don't bend the brass brush because then bristles might fall out. Then cram a bunch of rags or shop towels in there until it's dry. Then spray the bejesus out of everything. Make sure it's all clean before putting on the new gasket and putting your IM back on.
Be sure to go to the torque specs sticky somewhere on here and torque each bolt to spec. On some parts of the car it's not that big of a deal, but when it comes to the engine you should do it to spec.
Here's what you don't want to do:
When I did mine, I actually messed up. I thought cylinder #4 was the one that was open. It wasn't until I got a good amount of the carbon off cylinder #3's valves that I noticed they were open and #4 was closed. At that moment I realized there was likely some media and possibly some carbon bits in the piston. Bad news. If this happens you should probably pull the head.
I wanted the easy way out. I used the shop vac and long tipped air sprayer to get everything out. My wife's a NICU nurse so I got some stuff from her. To make sure the cylinder was clean, I used a #5 fr NG (feeding) tube and coated it with AllCare temporary adhesive and put it inside the cylinder and wiggled it around. Once I could no longer get even the smallest bit of media on the tube, I called it good. This isn't really stuff everyone has access to. It's used on premature babies that weigh ounces, not pounds. I suppose you could use a scope if this happens to make sure it's clean.
After looking at several threads, here's how I did it. It may be kind of ghetto but it got the job done. Total cost is less than $100.00 and can be done in a day.
I used:
- Media sprayer
- Walnut shell media
- Air compressor
- Plastic covering
- Masking/painter's tape
- Razor
- New IM gasket
- Shop vac
- Air spray nozzle (You can use the media sprayer without the bag on, but one of those with the long metal tube works best)
- Goggles
- Area where you can make noise and a mess
- Good ventilation and a face mask... really fine dust. REALLY bad for lungs/allergies.
- Universal gun cleaning kit
- Seafoam or your valve cleaning solvent of choice
This is like $13.00 at Harbor Freight.
The media is like $20.00 at Harbor Freight. You can get a 25% off coupon out of the back of any car magazine and get this box for around $15.00.
Remove the IM. It's pretty self explanatory. You undo a couple of harnesses and remove a few bolts. You don't have to remove the HPFP. You can just loosen the appropriate bolts, push things out of the way a tiny bit and then gently get it out.
Take note of which valves are open and closed. Don't mess with the one that's open.
I got a package of eight cheap disposable plastic drop cloths for around $5.00 at Lowe's. Lay it all over the engine. Cut a hole a little bigger than the intake holes in the plastic. Then use some wide masking/painter's tape and put it over the intake hole. You can get a roll of this tape that's about 2 inches wide for about $2.00. Then take a razorblade and cut out the tape covering the intake hole.
Hook the sprayer to an air compressor. I used a 10 gal. compressor with the valve set at 120psi. Put some media in the bag, put on the goggles, protect your respiratory system, get some good lighting and go to town. You can make sort of a pit with the plastic where the IM was to catch most of the media that flies out.
With a little practice, you'll soon figure out how to control how much media goes into the intake tube on the sprayer by moving the bag with one hand and aiming the sprayer with the other. Unless you have a big badass compressor, the shells are going to sort of pile around the top of the valve.
The valve tunnels are kind of like two circles merged into a sideways figure 8. You can put a shop vac hose in one side and spray compressed air or media in the other side and make less of a mess.
After you've got all the carbon blasted off the closed valves, close the last one and do it. I think you can do this by turning the key on and off really really fast. You may want to unplug the harness to the HPFP. Maybe if anyone reads this they can explain how to close the last open valves so you can clean it. (The reason I don't know how or didn't do this is below)
When you spray the valves, there may be some gunk left on the back side of the shaft that you can't see. To get to this, I sprayed some Seafoam in there. Use a tiny bit at first and make sure it's not draining into the cylinder. Leave it there a few hours or overnight. You can scrub the back sides of the shafts with a small brass brush. I used some stuff from a gun cleaning kit. Don't use steel. Don't bend the brass brush because then bristles might fall out. Then cram a bunch of rags or shop towels in there until it's dry. Then spray the bejesus out of everything. Make sure it's all clean before putting on the new gasket and putting your IM back on.
Be sure to go to the torque specs sticky somewhere on here and torque each bolt to spec. On some parts of the car it's not that big of a deal, but when it comes to the engine you should do it to spec.
Here's what you don't want to do:
When I did mine, I actually messed up. I thought cylinder #4 was the one that was open. It wasn't until I got a good amount of the carbon off cylinder #3's valves that I noticed they were open and #4 was closed. At that moment I realized there was likely some media and possibly some carbon bits in the piston. Bad news. If this happens you should probably pull the head.
I wanted the easy way out. I used the shop vac and long tipped air sprayer to get everything out. My wife's a NICU nurse so I got some stuff from her. To make sure the cylinder was clean, I used a #5 fr NG (feeding) tube and coated it with AllCare temporary adhesive and put it inside the cylinder and wiggled it around. Once I could no longer get even the smallest bit of media on the tube, I called it good. This isn't really stuff everyone has access to. It's used on premature babies that weigh ounces, not pounds. I suppose you could use a scope if this happens to make sure it's clean.
Last edited by casionerd; Oct 30, 2013 at 11:44 PM.

New Member
Joined: 02-13-12
Posts: 98
Likes: 0
From: NY

