
AEM Uego Review


Thread Starter
Member
Joined: 01-24-11
Posts: 199
Likes: 0
From: Chattanooga
AEM Uego Review
Two words. Too easy. I was looking for a wideband that wouldn't give me all kinds of extra boxes and wires and a way to mount it where it wouldn't look all sorts of jacked up.
Install was a cinch. I emailed good old Kenny, yep, that Kenny at Cobalt Addiction and asked him if he still had any steering column gauge pods left. He said he had one, and after hearing so much bad press about him I figured it was worth asking how fast would he ship it if I paid right then. He said he'd ship it, right then. So I bought it, and the next day, I had it. Shocked me.
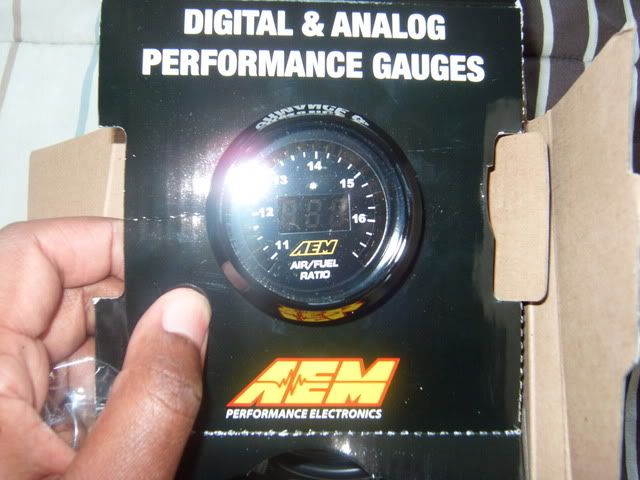
Not much too say on the gauge other than it works and AEM is uber great. The original bezel for the gauge interfered with the steering wheel when I turned it because it stuck out about 1-2mm too much. It really had me down. I called them (I'm weird like that) and got Travis and asked him if they had a different bezel that would fit the UEGO that was thinner. He put me on hold for like 10 minutes, and came back and said yes. Turns out the Analog gauge bezel is a little thinner. He then had me email him my address only, and shipped me both a black and silver bezel for freebie, freebie, freebie Gauge was only 199 shipped. Can't beat it.
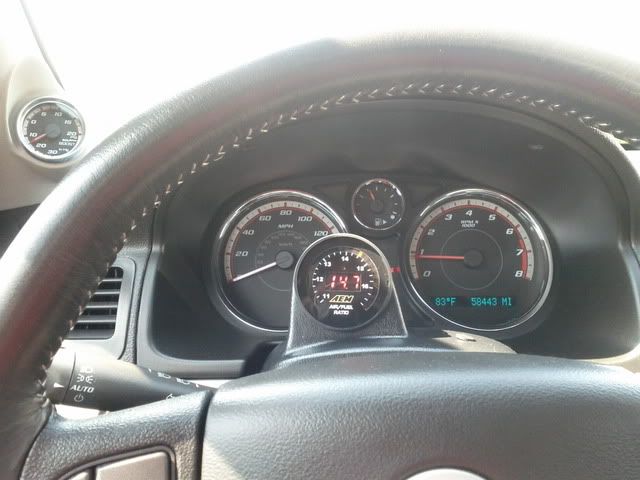
Oh yessums. Now it fits like a champ.
Pics below

Before I had the proper bezel
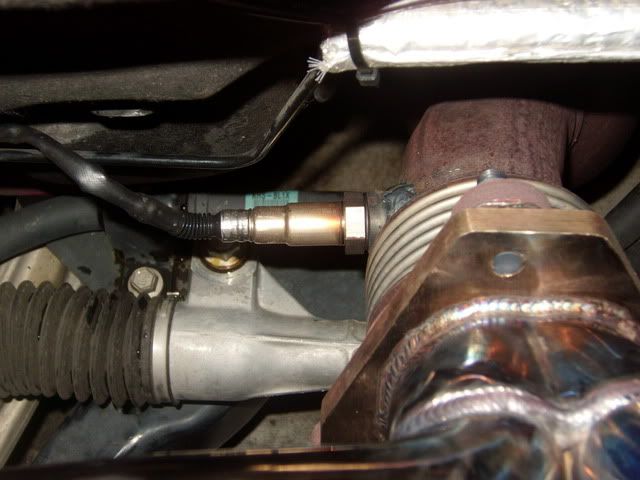
O2 sensor added
Install was a cinch. I emailed good old Kenny, yep, that Kenny at Cobalt Addiction and asked him if he still had any steering column gauge pods left. He said he had one, and after hearing so much bad press about him I figured it was worth asking how fast would he ship it if I paid right then. He said he'd ship it, right then. So I bought it, and the next day, I had it. Shocked me.
Not much too say on the gauge other than it works and AEM is uber great. The original bezel for the gauge interfered with the steering wheel when I turned it because it stuck out about 1-2mm too much. It really had me down. I called them (I'm weird like that) and got Travis and asked him if they had a different bezel that would fit the UEGO that was thinner. He put me on hold for like 10 minutes, and came back and said yes. Turns out the Analog gauge bezel is a little thinner. He then had me email him my address only, and shipped me both a black and silver bezel for freebie, freebie, freebie
Gauge was only 199 shipped. Can't beat it.Oh yessums. Now it fits like a champ.
Pics below
Before I had the proper bezel
O2 sensor added
Last edited by D_Rob; May 3, 2011 at 11:08 PM.

New Member
Joined: 11-29-10
Posts: 172
Likes: 0
From: ohio
what wires did you tap into so you could get power into your gauge? im trying to figure that out my self. i want my gauge on the steering wheel too, just like yours. do you have any more pictures you can send to me of the install? thank you so much. this would help so much!!
Thread Starter
Member
Joined: 01-24-11
Posts: 199
Likes: 0
From: Chattanooga
what wires did you tap into so you could get power into your gauge? im trying to figure that out my self. i want my gauge on the steering wheel too, just like yours. do you have any more pictures you can send to me of the install? thank you so much. this would help so much!!


Senior Member
Joined: 02-17-06
Posts: 1,517
Likes: 0
From: Louisville, KY
Yeah, the AEM is super easy to install. The only thing that I had happen that wasn't too great was with the 5v output. If it is routed close to a 12v source, (like the fuse block in the passenger side kick panel), it will back feed a signal to the gauge causing a stationary read out. It makes it look like the gauge is stuck on 14.8 / 14.9. Moved the 5v away from the fuse block and all worked well. (After I bought a new O2 thinking that it had gone bad) at least I have an extra O2 now. 
New Member
Joined: 11-29-10
Posts: 172
Likes: 0
From: ohio
Thread Starter
Member
Joined: 01-24-11
Posts: 199
Likes: 0
From: Chattanooga
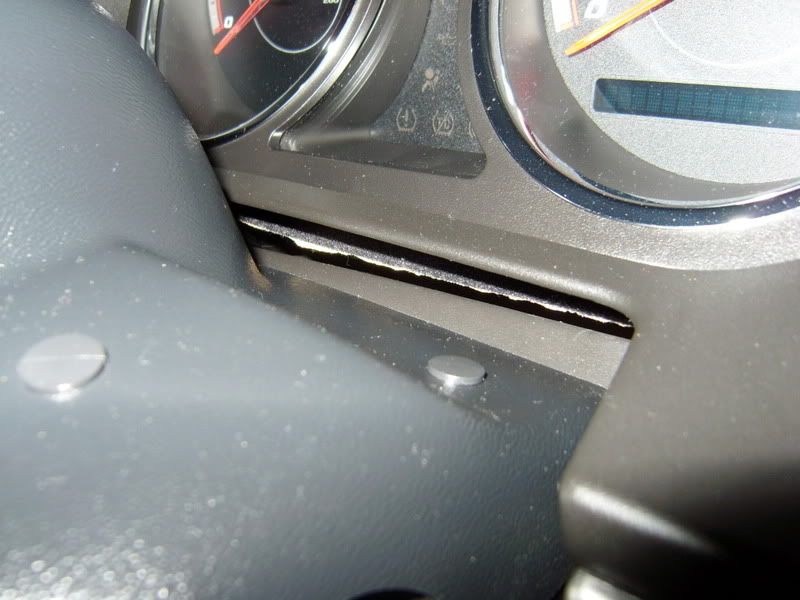
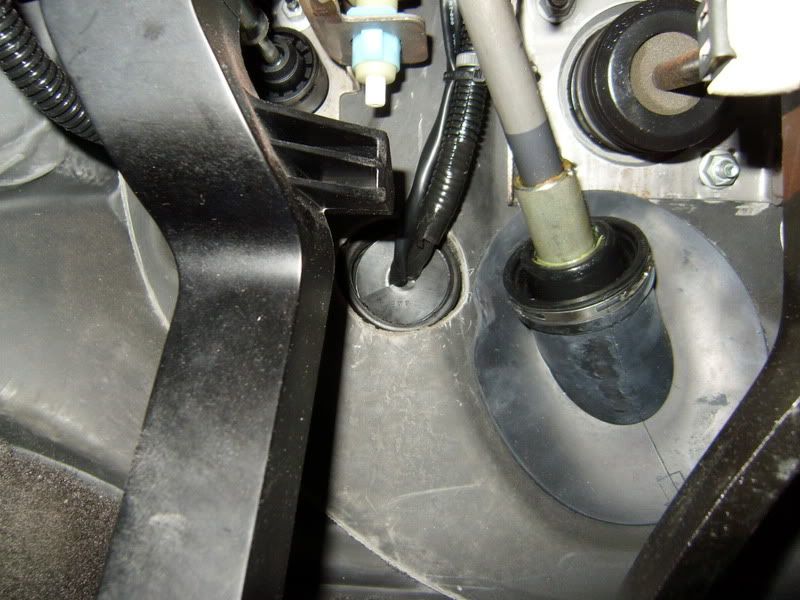
This is at the top of the steering column right behind the pillar pod. Just drop the tilt on the wheel and you'll end up running the wires through here.
You will run the "harness a" that goes to the o2 sensor from the engine bay, into the car by pulling this rubber plug, and cutting it to make the hole wider.
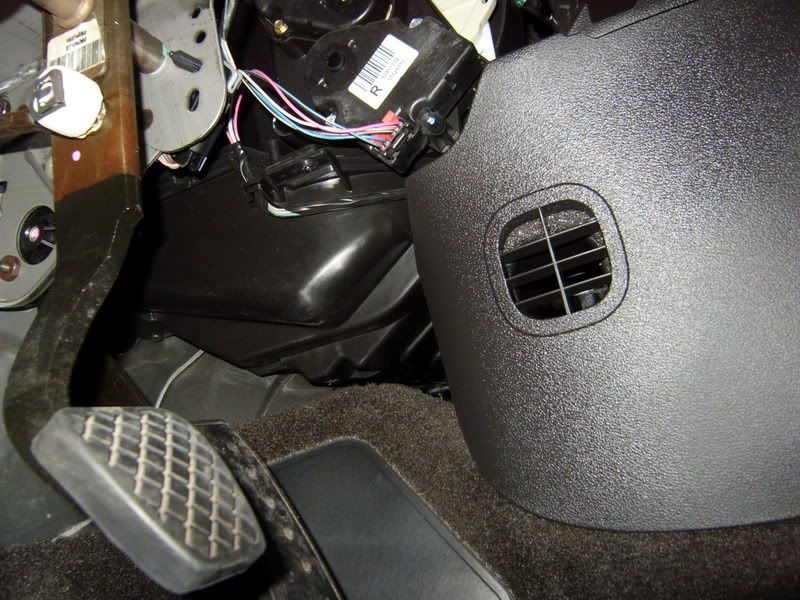
You will run "harness b" from up top by the steering column where the gauge will go, over through the rear of the hvac unit being careful not to bind it or position it on anything that could wear through it over time. I removed this panel (looks identical to the one on the other side) and loosened a 10mm nut that secures the frame of the center console (you can't miss it theres like 3 of them there), I then stripped extra bare wire on the ground lead from "harness b" and wrapped it around the unpainted stud, and tightened the nut back down to ground out the gauge.
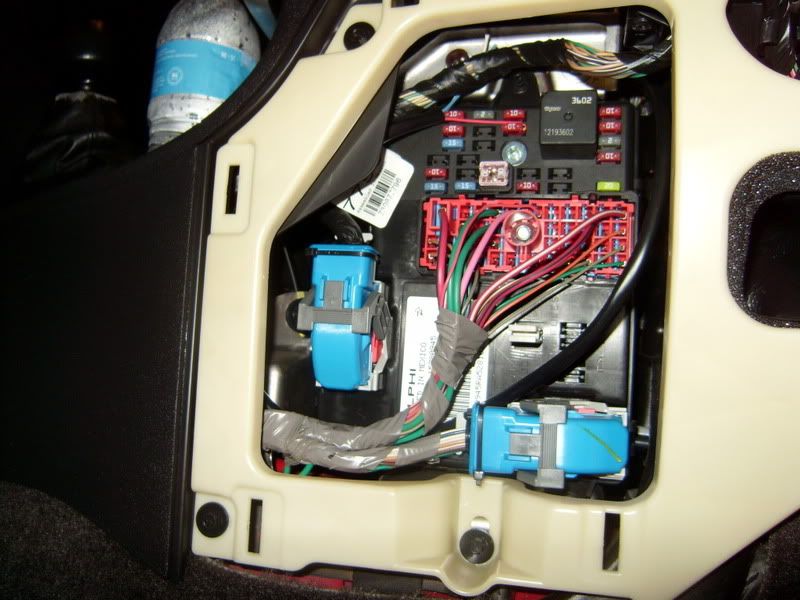
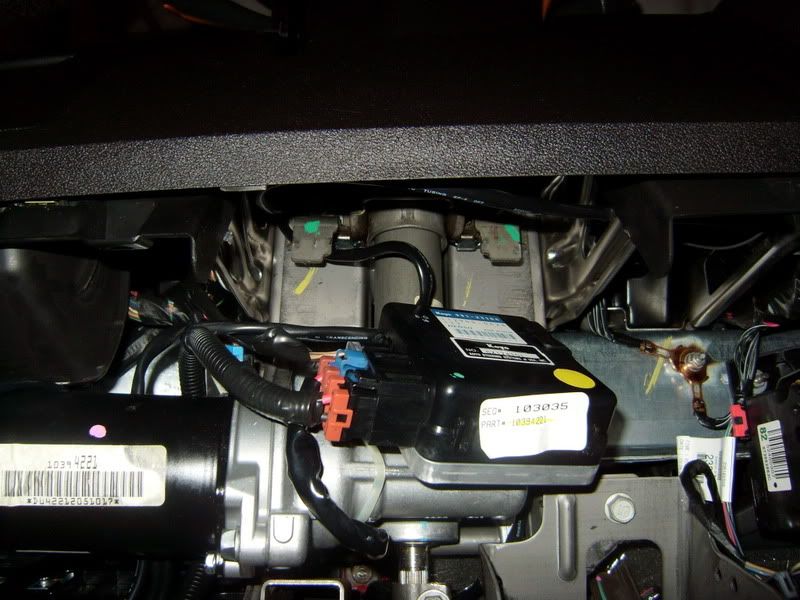
This is the other side (passenger floorboard) of the center hvac console. Behind it is the fuse box. If you look you will see where I circled around all the fuses with the harness to leave some slackin it in case I ever need it for some reason. I also cut the exposed leads off of the 2 wires that you don't need to use without a AEM EMS or some other stand alone engine management to prevent arc's and I pushed them up out of the way. The fuse I used is the ONLY fuse that is 12v in "Run" only and is still a 10 fuse. Use this one (you will see the red wire reaching out and wrapping around the red fuse in the picture below, that's the 12v lead for the gauge).
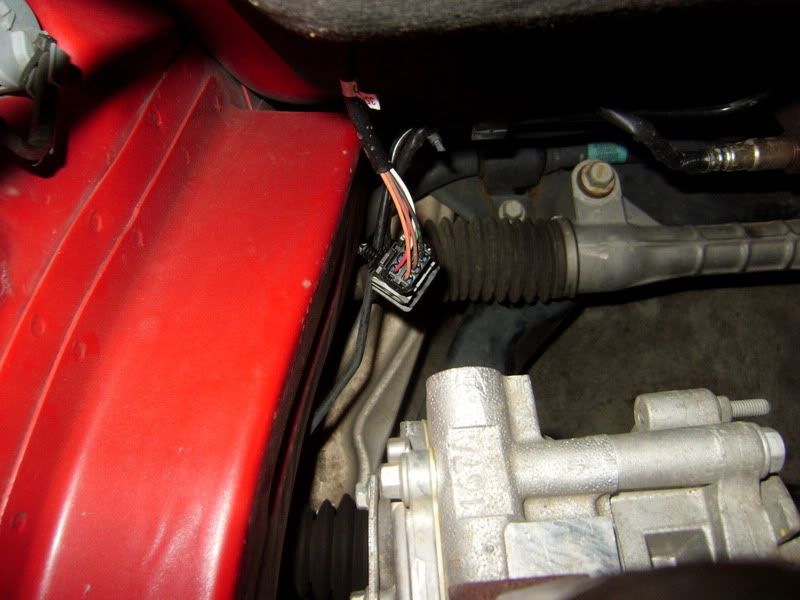
For "harness a" that goes to the wide band I loosley positioned it until I put the downpipe back in and installed the o2 sensor, the when i connected the o2 sensor with the harness I removed the slack from the engine bay and zip tied the harness to that bent line you see here.
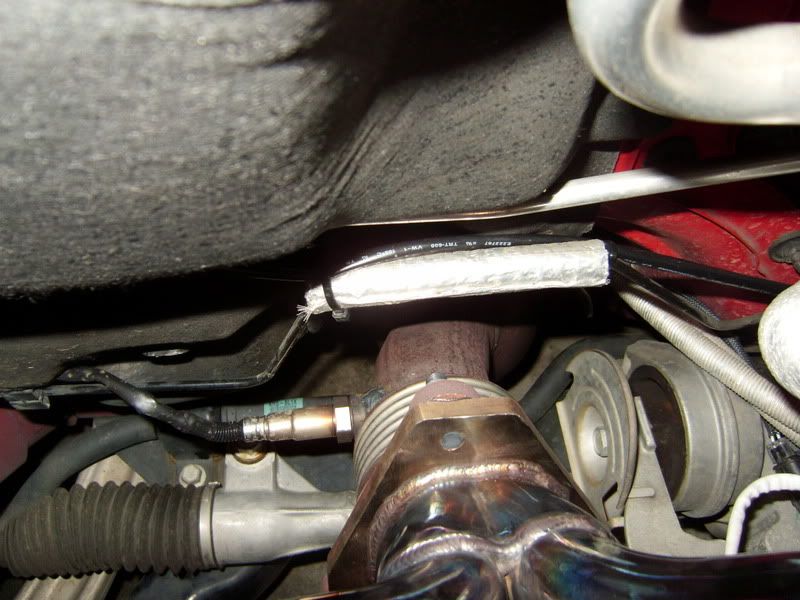
I used as few zip ties as possible and positioned the connector for the harness and o2 sensor somewhere accessible from the top for easy replacement where I wouldn't have to lift the car or cut more than one zip tie.
Then, I went in the car and took up the slack under the dash, MAKING SURE to avoid all steering components, thats a biggie. I also had to avoid the change bucket (at first if I opened it it didn't close flush because the harness was near it). Thats it!
I hope it help man lol. I pretty much did a how to for you ha ha. Let me know if you have any questions.
New Member
Joined: 11-29-10
Posts: 172
Likes: 0
From: ohio
hey man!!! thanks a ton. i just printed this off at scool. lol. my teacher is like whats all this. lol. this will be a great help. i get mine tomorrow but prolly cant install it till monday cause of prom. thank you so much

Thread
Thread Starter
Forum
Replies
Last Post