


Option B help needed. Picture inside.


Thread Starter
Senior Member
iTrader: (1)
Joined: 05-22-08
Posts: 3,460
Likes: 3
From: New Lenox, Illinois
Option B help needed. Picture inside.
First off, I do not have dual pass.
The line on the bottom of the tank that goes to the "T" where the stock filler neck was, is shooting bubbles back into the tank.
The bleeder line does work, and it does have the .040 orifice in it. Also, there are no kinks at all.
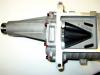
What gives? Or is that normal? Here is a picture.

The line on the bottom of the tank that goes to the "T" where the stock filler neck was, is shooting bubbles back into the tank.
The bleeder line does work, and it does have the .040 orifice in it. Also, there are no kinks at all.
What gives? Or is that normal? Here is a picture.

Joined: 12-30-07
Posts: 14,079
Likes: 197
From: NEPA
I have my 3/4" line tucked below the rad support. I did this to make the tank the highest point in the cooling system to help with the bleeding process.
Try lifting the tank up with the car running and the cap off to help "jump start" the bleeding process. I have always done this, and it has always worked for me.
I don't have the dual pass endplate either. I will have one after this weekend though

Try lifting the tank up with the car running and the cap off to help "jump start" the bleeding process. I have always done this, and it has always worked for me.
I don't have the dual pass endplate either. I will have one after this weekend though
Thread Starter
Senior Member
iTrader: (1)
Joined: 05-22-08
Posts: 3,460
Likes: 3
From: New Lenox, Illinois
I have my 3/4" line tucked below the rad support. I did this to make the tank the highest point in the cooling system to help with the bleeding process.
Try lifting the tank up with the car running and the cap off to help "jump start" the bleeding process. I have always done this, and it has always worked for me.
I don't have the dual pass endplate either. I will have one after this weekend though
Try lifting the tank up with the car running and the cap off to help "jump start" the bleeding process. I have always done this, and it has always worked for me.
I don't have the dual pass endplate either. I will have one after this weekend though
I did lift it up with the cap off for about 1 minute. Seems less and less bubbles from the line..
Will it still work given my routing?
Joined: 12-30-07
Posts: 14,079
Likes: 197
From: NEPA
It should still work the way you have it. I just wanted to make sure the tank was the highest portion of the cooling system so it bleed the air better.

I had some wierd issues getting my system to bleed too, but using one of these babies instead of a T solved my problems. I have dual pass but this should still apply to you.
Seachoice 3 Way 3/4" Y Fitting - Pipe-Hose Adapters by Discount Marine Supplies

The system bled very very quickly. I had the pump running on an external 12v input and it was sucking down coolant just about as fast as I could pour it. The system was fully bled in about 5 minutes.
My theory is that the directional nature of the Y fitting promotes flow from the tank down into the rest of the system without the turbulence at the T.
See, doesn't that look like the coolant gets to where it needs to go much easier?

Ideally I would have used something like this:

but could not find it anywhere.
Seachoice 3 Way 3/4" Y Fitting - Pipe-Hose Adapters by Discount Marine Supplies
The system bled very very quickly. I had the pump running on an external 12v input and it was sucking down coolant just about as fast as I could pour it. The system was fully bled in about 5 minutes.
My theory is that the directional nature of the Y fitting promotes flow from the tank down into the rest of the system without the turbulence at the T.
See, doesn't that look like the coolant gets to where it needs to go much easier?
Ideally I would have used something like this:
but could not find it anywhere.


Thread Starter
Senior Member
iTrader: (1)
Joined: 05-22-08
Posts: 3,460
Likes: 3
From: New Lenox, Illinois
I did not go under the headlight housing. That is next to impossible (i tried). I turned the T-fitting down facing towards the front of the car. This lays the 3/4" line down lower, and allows you to tuck it under and along the rad support. Look closely at my photo. You will see what I mean.
It should still work the way you have it. I just wanted to make sure the tank was the highest portion of the cooling system so it bleed the air better.
It should still work the way you have it. I just wanted to make sure the tank was the highest portion of the cooling system so it bleed the air better.
Joined: 12-30-07
Posts: 14,079
Likes: 197
From: NEPA
Tied it up & back with zip ties. (you can see them in the photo)
I'm also on a slightly smaller pulley than you, but I have plenty of space between the 3/4" hose and pulley so you should be fine as well.
I'm also on a slightly smaller pulley than you, but I have plenty of space between the 3/4" hose and pulley so you should be fine as well.


Down the washer fluid opening, up under the headlight bracket, over the radiator shroud. No kinks. Nothing but net.
I changed it up since this pic though. Now the hose runs directly from the resivoir, hugs the frame, passes dangerously close to the belt, and meets the Y. It is zip tied in place and will not budge when force is applied. Pics coming up..
Joined: 12-30-07
Posts: 14,079
Likes: 197
From: NEPA
Down the washer fluid opening, up under the headlight bracket, over the radiator shroud. No kinks. Nothing but net.
I changed it up since this pic though. Now the hose runs directly from the resivoir, hugs the frame, passes dangerously close to the belt, and meets the Y. It is zip tied in place and will not budge when force is applied. Pics coming up..
It wasnt a nice direct route like I wanted. I guess that's what I mean by next to impossible. It's doable, just isnt a nice easy run of hose. The TVS def posses a challenge for running the lines for the Opt. B tank though.
Joined: 12-30-07
Posts: 14,079
Likes: 197
From: NEPA


OH SWEET VICTORY... :P
Ok. Heres pics of the current setup:
That looks like a sharp turn where it is tucked up against the frame, but it is actually gradual bend with no kinking. The shadows kinda play tricks there. There is a zip tie around the hose, then another zip tie looped into the that one, and fed up through the holes in the frame. The zip tie then runs under the headlight bracket a bit. Still need to figure out a cleaner way of doing it.


Ok. Heres pics of the current setup:
That looks like a sharp turn where it is tucked up against the frame, but it is actually gradual bend with no kinking. The shadows kinda play tricks there. There is a zip tie around the hose, then another zip tie looped into the that one, and fed up through the holes in the frame. The zip tie then runs under the headlight bracket a bit. Still need to figure out a cleaner way of doing it.
Last edited by Pyros777; Oct 5, 2011 at 03:17 PM.

Thread Starter
Senior Member
iTrader: (1)
Joined: 05-22-08
Posts: 3,460
Likes: 3
From: New Lenox, Illinois
Nope, none that I saw. I'd have to check again later, it was just pushing bubbles from the bottom line back to the tank.
I'll pick a Y up tonight and put it on tomorrow after work maybe that'll help.
So if no froth, but still bubbles then what? Just air in there? Should the level drop in the tank?
I'll pick a Y up tonight and put it on tomorrow after work maybe that'll help.
So if no froth, but still bubbles then what? Just air in there? Should the level drop in the tank?
Joined: 12-30-07
Posts: 14,079
Likes: 197
From: NEPA
Hey if you are still having issues with your Opt. B feel free to PM me.
I have a method of filling the coolant that I have always used, and has always worked.
I have a method of filling the coolant that I have always used, and has always worked.