2.2L L61 Performance Tech 16 valve 145 hp EcoTec with 155 lb-ft of torque

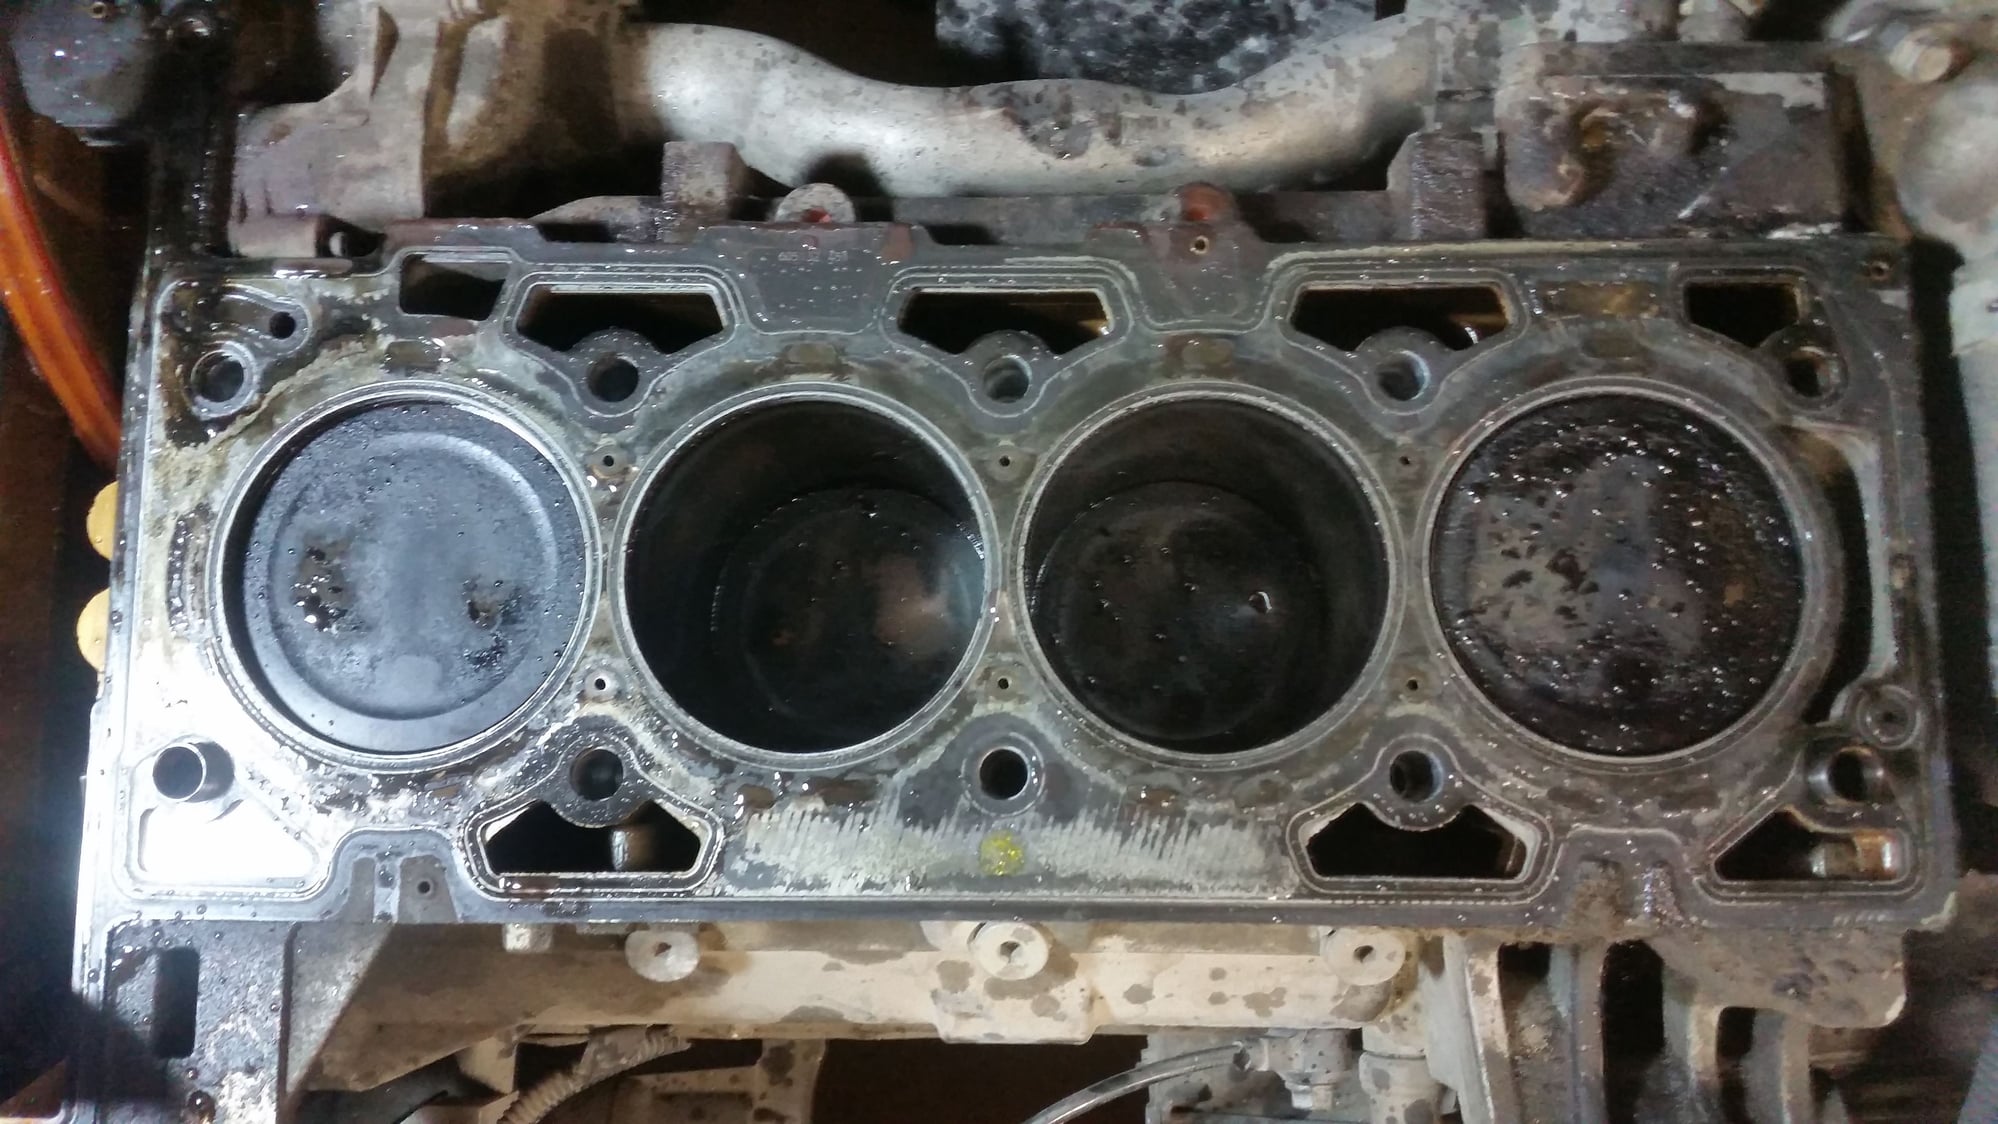
Getting ready to remove the head

Thread Tools
 
Search this Thread
 
Old 02-22-2016, 07:58 PM
  #1  
Senior Member
Thread Starter
iTrader: (1)
 
jdbaugh1's Avatar
 
Join Date: 02-03-16
Location: Kansas
Posts: 6,433
Received 357 Likes on 318 Posts
Getting ready to remove the head


There are a couple of things in the build book I wanted to ask about.

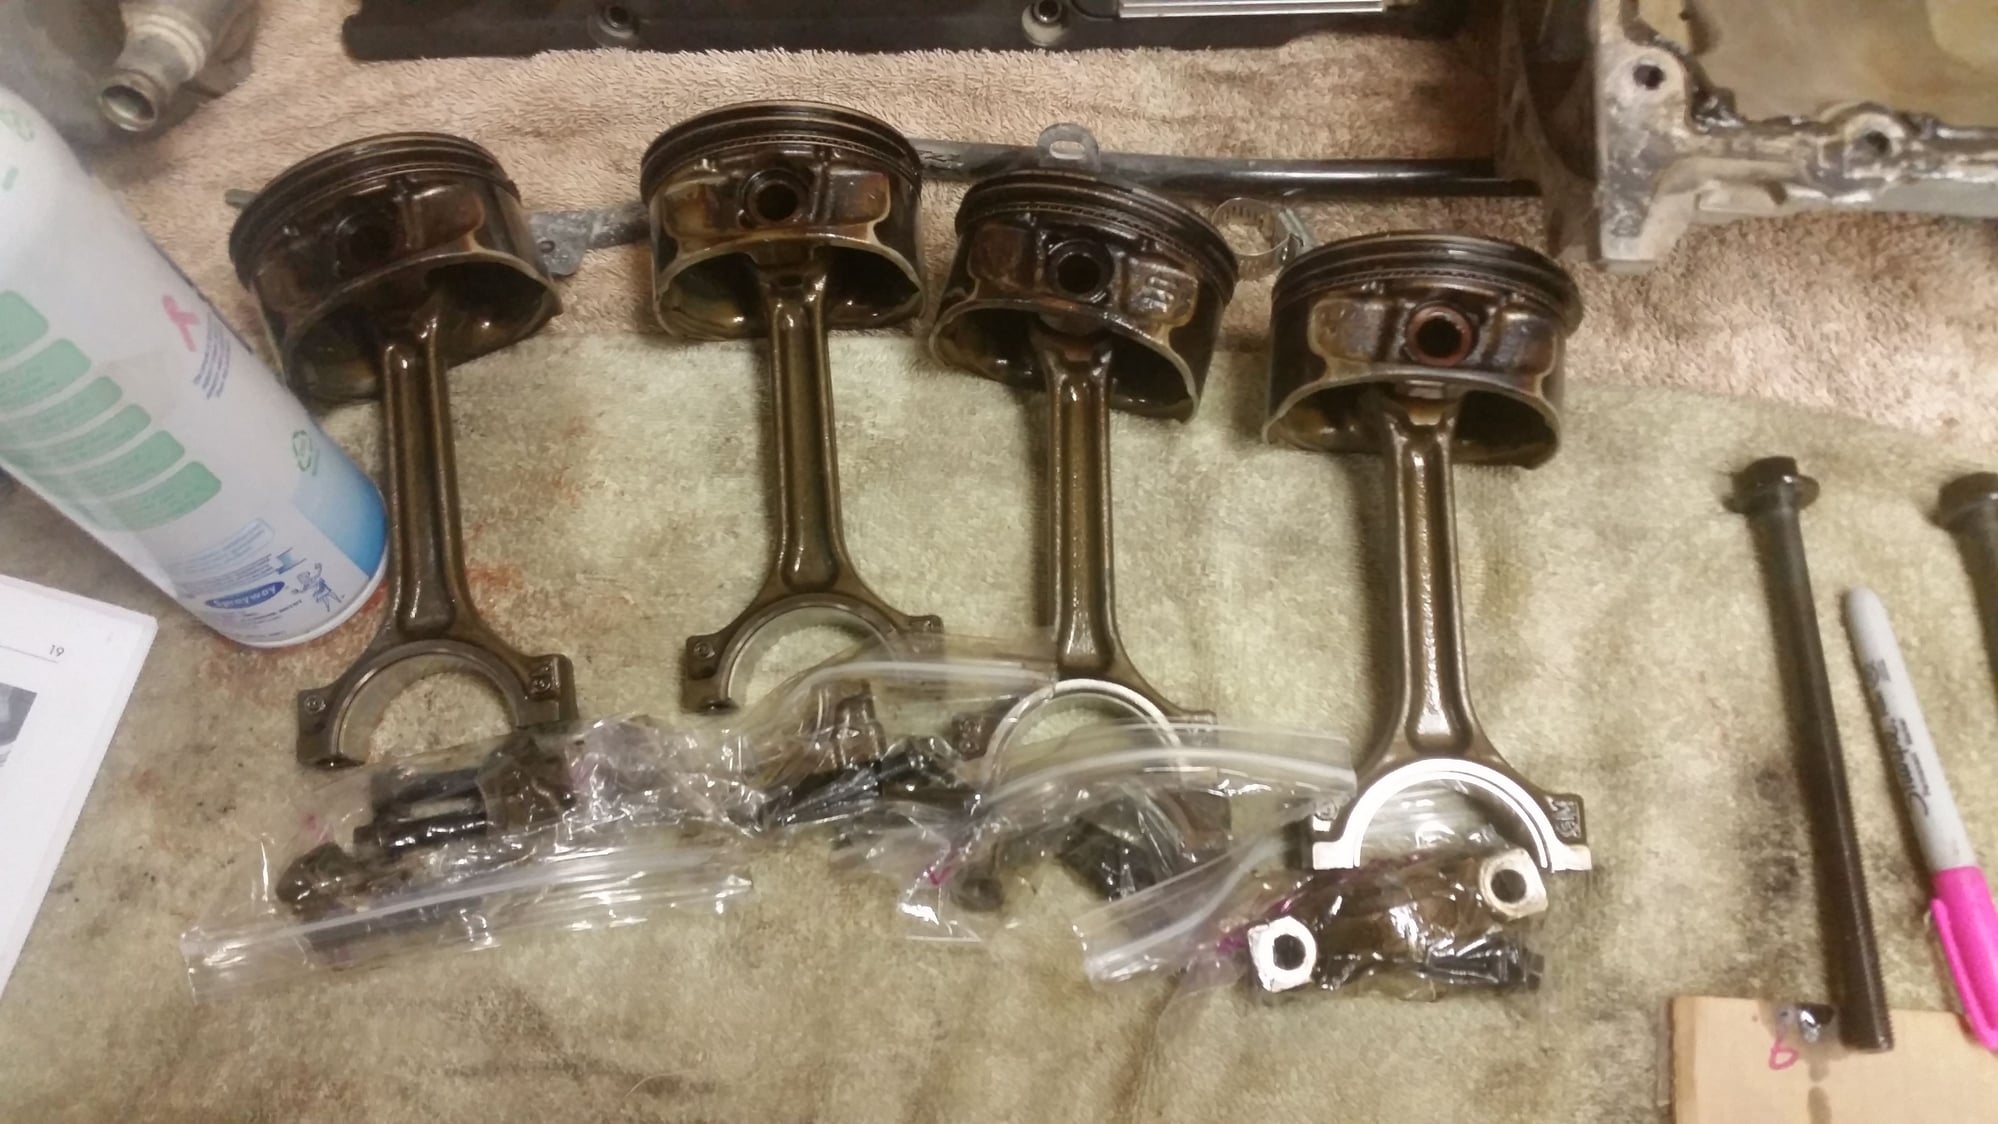
The build book suggest reusing the old piston rings. Is it better instead to lightly hone and use new rings?

Is there a good way to clean the valve train/timing chain before reassembly?

The build book also suggest using the old rod bearings.

Anything special to consider when installing valve springs?

Thanks.
Old 02-22-2016, 08:09 PM
  #2  
Senior Member
Thread Starter
iTrader: (1)
 
jdbaugh1's Avatar
 
Join Date: 02-03-16
Location: Kansas
Posts: 6,433
Received 357 Likes on 318 Posts
Old 02-22-2016, 09:13 PM
  #3  
Senior Member
Thread Starter
iTrader: (1)
 
jdbaugh1's Avatar
 
Join Date: 02-03-16
Location: Kansas
Posts: 6,433
Received 357 Likes on 318 Posts
Old 02-22-2016, 11:19 PM
  #4  
Senior Member
 
rocco11189's Avatar
 
Join Date: 04-24-06
Location: Rhode Island
Posts: 1,267
Likes: 0
Received 3 Likes on 3 Posts
Was it hard to remove the head?
Old 02-22-2016, 11:24 PM
  #5  
Senior Member
Thread Starter
iTrader: (1)
 
jdbaugh1's Avatar
 
Join Date: 02-03-16
Location: Kansas
Posts: 6,433
Received 357 Likes on 318 Posts
Originally Posted by rocco11189
Was it hard to remove the head?
Nope just followed the instructions in the gm build book.
Old 02-22-2016, 11:48 PM
  #6  
Senior Member
iTrader: (4)
 
Jesse's Avatar
 
Join Date: 09-07-11
Location: Las Cruces, NM
Posts: 3,256
Received 117 Likes on 107 Posts
Just be sure to lap your valves. And biggest piece of advice, don't lose the valve locks. It's easy to do lol. I lost half of mine.
Old 02-23-2016, 01:07 AM
  #7  
Senior Member
iTrader: (10)
 
ItalianJoe1's Avatar
 
Join Date: 11-01-05
Location: Miami, FL
Posts: 12,485
Likes: 0
Received 60 Likes on 60 Posts
Parts replacement is contingent on what you are doing... why is the head coming off?

I'd suggest leaving the rings unless you are gonna have the block properly honed. The factory finish is very good, and unless there's scoring or damage, you probably won't improve the seal with new rings and a handheld refinishing.
Old 02-23-2016, 08:02 AM
  #8  
Senior Member
Thread Starter
iTrader: (1)
 
jdbaugh1's Avatar
 
Join Date: 02-03-16
Location: Kansas
Posts: 6,433
Received 357 Likes on 318 Posts
Originally Posted by ItalianJoe1
Parts replacement is contingent on what you are doing... why is the head coming off?

I'd suggest leaving the rings unless you are gonna have the block properly honed. The factory finish is very good, and unless there's scoring or damage, you probably won't improve the seal with new rings and a handheld refinishing.
The head is off because I am following the build book and am putting the pistons in from the top. While the head is off I am going to also swap valve springs.

What's your opinion on the rod to crank bushings?
Old 02-23-2016, 10:00 AM
  #9  
Senior Member
Thread Starter
iTrader: (1)
 
jdbaugh1's Avatar
 
Join Date: 02-03-16
Location: Kansas
Posts: 6,433
Received 357 Likes on 318 Posts
Anyone know what type of rings that come with the Wiseco pistons from TTR? I am trying to select the appropriate grit to deglaze the cylinder walls with. I plan on using a flex hone brush and right now I am thinking 240 or 320 grit. Anyone with experience know what grit to use for sure? The abrasive type is silicone carbide.

Edit: I might just reuse the old rings. Is there really anything wrong with that? What about the old rod to crank bearings?

Last edited by jdbaugh1; 02-23-2016 at 10:17 AM.
Old 02-23-2016, 11:36 AM
  #10  
Senior Member
iTrader: (10)
 
ItalianJoe1's Avatar
 
Join Date: 11-01-05
Location: Miami, FL
Posts: 12,485
Likes: 0
Received 60 Likes on 60 Posts
I would for sure re-use the old bearings.
Old 02-23-2016, 02:23 PM
  #11  
Senior Member
Thread Starter
iTrader: (1)
 
jdbaugh1's Avatar
 
Join Date: 02-03-16
Location: Kansas
Posts: 6,433
Received 357 Likes on 318 Posts
Originally Posted by ItalianJoe1
I would for sure re-use the old bearings.
What is the reason for this? Is it better because they are already broken in? Are there disadvantages to using new ones?

This engine has 95,000 miles on it and I have always used Mobile 1.
Old 02-23-2016, 03:48 PM
  #12  
Moderator
Platinum Member
Moderator
iTrader: (1)
 
Slowbalt2000's Avatar
 
Join Date: 05-15-11
Location: Livonia, MI
Posts: 27,413
Received 584 Likes on 519 Posts
As long as there is no damage to them go ahead and reuse them
Old 02-23-2016, 06:30 PM
  #13  
Senior Member
Thread Starter
iTrader: (1)
 
jdbaugh1's Avatar
 
Join Date: 02-03-16
Location: Kansas
Posts: 6,433
Received 357 Likes on 318 Posts


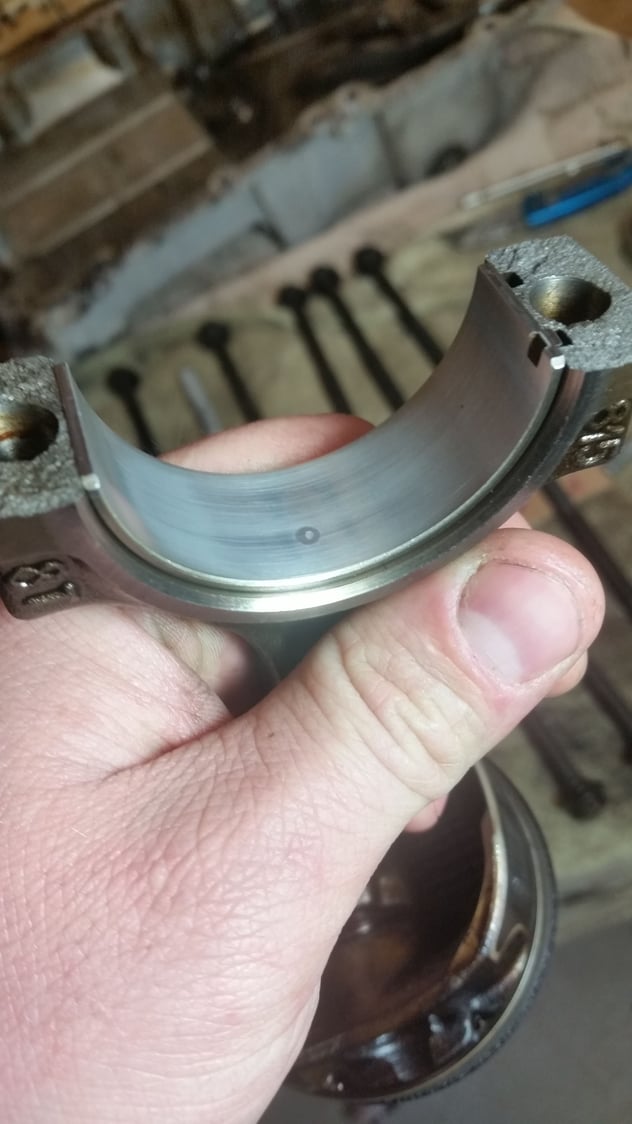
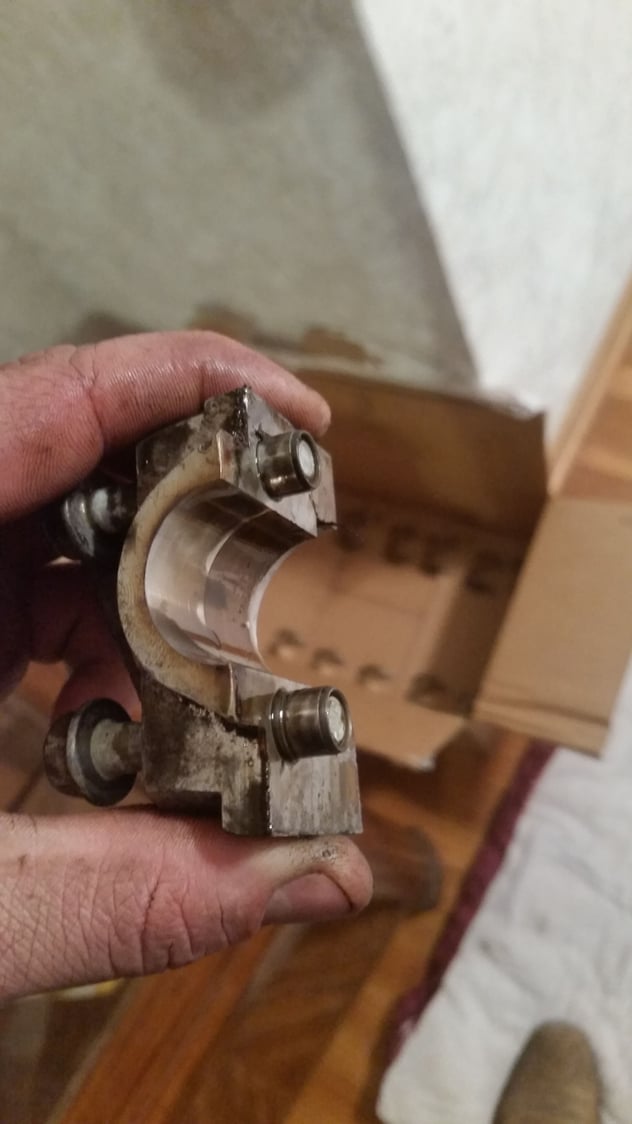
This is the worst spot I could find on the bearings. One other has a spot like this except much smaller and less pronounced.
Old 02-23-2016, 07:33 PM
  #14  
Senior Member
iTrader: (4)
 
Jesse's Avatar
 
Join Date: 09-07-11
Location: Las Cruces, NM
Posts: 3,256
Received 117 Likes on 107 Posts
You should measure piston-to-valve clearance so I don't have to fret wondering if my milled/ported head will have major problems.
Old 02-23-2016, 07:57 PM
  #15  
Senior Member
Thread Starter
iTrader: (1)
 
jdbaugh1's Avatar
 
Join Date: 02-03-16
Location: Kansas
Posts: 6,433
Received 357 Likes on 318 Posts
Originally Posted by Jesse
You should measure piston-to-valve clearance so I don't have to fret wondering if my milled/ported head will have major problems.
Why does getting your head ported/milled affect piston-to-valve clearance?

I'll try to get you some measurements if you need them.
Old 02-23-2016, 08:10 PM
  #16  
Senior Member
iTrader: (4)
 
Jesse's Avatar
 
Join Date: 09-07-11
Location: Las Cruces, NM
Posts: 3,256
Received 117 Likes on 107 Posts
Because it reduces the distance between the combustion chamber/valve seats and the piston. I've had a couple people offer but it's usually too much trouble for them since it requires reinstalling everything with clay and then turning the engine by hand. I'm sure I'll find out eventually.
Old 02-23-2016, 08:53 PM
  #17  
New Member
iTrader: (1)
 
rrob5382's Avatar
 
Join Date: 04-22-14
Location: MI
Posts: 92
Likes: 0
Received 0 Likes on 0 Posts
Originally Posted by Jesse
Because it reduces the distance between the combustion chamber/valve seats and the piston. I've had a couple people offer but it's usually too much trouble for them since it requires reinstalling everything with clay and then turning the engine by hand. I'm sure I'll find out eventually.
I would if I had a timing chain to put back on haha, wouldn't take much to throw my block back together quick for measurements
Old 02-23-2016, 08:57 PM
  #18  
Senior Member
iTrader: (4)
 
Jesse's Avatar
 
Join Date: 09-07-11
Location: Las Cruces, NM
Posts: 3,256
Received 117 Likes on 107 Posts
Originally Posted by rrob5382
I would if I had a timing chain to put back on haha, wouldn't take much to throw my block back together quick for measurements
Daaaamn. If you do definitely let me know!
Old 02-23-2016, 09:29 PM
  #19  
New Member
iTrader: (1)
 
rrob5382's Avatar
 
Join Date: 04-22-14
Location: MI
Posts: 92
Likes: 0
Received 0 Likes on 0 Posts
Only problem is I was in a bit of a rush to tear it down and inspect the block before I had to go to work, chain was old and worn out anyways and everything is getting replaced so I just cut it with bolt cutters...
Got everything off and completely stripped down to nothing in under a half hour though haha
Old 02-24-2016, 02:39 PM
  #20  
Senior Member
Thread Starter
iTrader: (1)
 
jdbaugh1's Avatar
 
Join Date: 02-03-16
Location: Kansas
Posts: 6,433
Received 357 Likes on 318 Posts
Anybody have a thought about that spot that is shown in the picture of the rod bearing?
Old 02-24-2016, 07:42 PM
  #21  
Senior Member
Thread Starter
iTrader: (1)
 
jdbaugh1's Avatar
 
Join Date: 02-03-16
Location: Kansas
Posts: 6,433
Received 357 Likes on 318 Posts


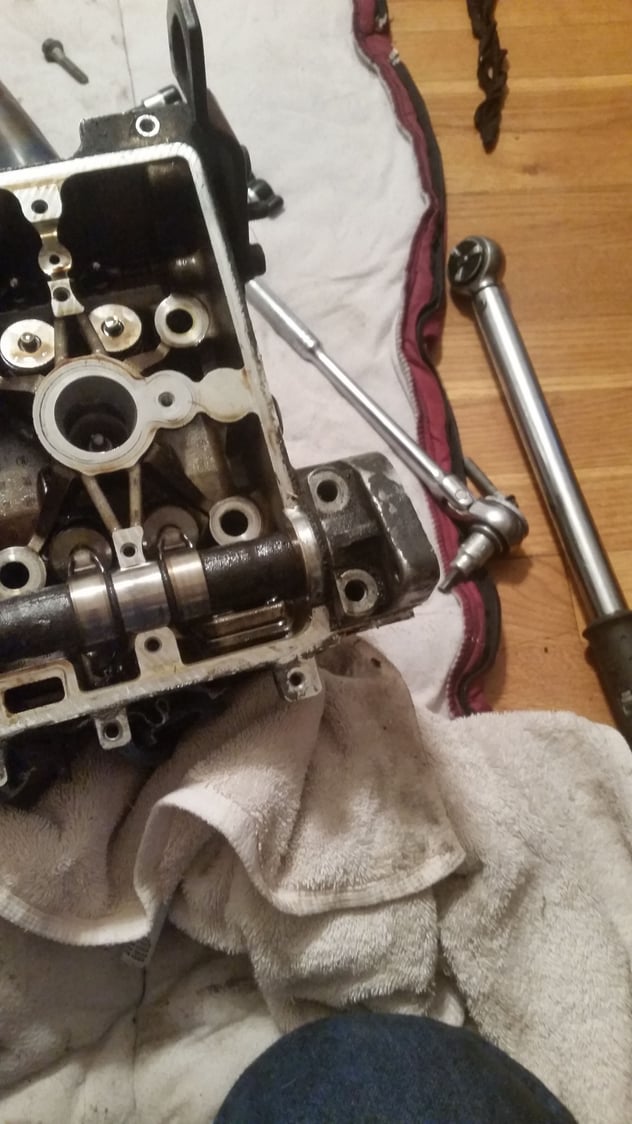
I can't get this end off and am worrying about screwing something up. Is there something holding it on that I don't know about?
Old 02-24-2016, 08:01 PM
  #22  
Senior Member
Thread Starter
iTrader: (1)
 
jdbaugh1's Avatar
 
Join Date: 02-03-16
Location: Kansas
Posts: 6,433
Received 357 Likes on 318 Posts


These nubs made it a b
Old 02-24-2016, 08:14 PM
  #23  
Senior Member
Thread Starter
iTrader: (1)
 
jdbaugh1's Avatar
 
Join Date: 02-03-16
Location: Kansas
Posts: 6,433
Received 357 Likes on 318 Posts
Btw, anyone know of a fairly priced tool for compressing valve springs in these things? The one I bought doesn't quit fit.
Old 02-24-2016, 10:31 PM
  #24  
Senior Member
iTrader: (10)
 
ItalianJoe1's Avatar
 
Join Date: 11-01-05
Location: Miami, FL
Posts: 12,485
Likes: 0
Received 60 Likes on 60 Posts
Haven't done an ecotec head myself yet, but I bought the kent moore tool designed for them, it's pretty nice.

I bought a cheap motorcycle valve compressor kit to use on my toyota head, as most normal ones i had were too large. The kit was about $40 on ebay and had a bunch of small size ends that would be perfect for small automotive valve applications.
Old 02-25-2016, 09:53 AM
  #25  
Senior Member
Thread Starter
iTrader: (1)
 
jdbaugh1's Avatar
 
Join Date: 02-03-16
Location: Kansas
Posts: 6,433
Received 357 Likes on 318 Posts

Amazon.com: CTA Tools 2235 Overhead Valve Spring Compressor Kit: Home Improvement Amazon.com: CTA Tools 2235 Overhead Valve Spring Compressor Kit: Home Improvement

Found this one and in the comments section at least 2 people have used these with 2.2L ecotecs so if should work pretty nicely. Not cheap, but cheaper than the Kent-moore specialty tool. Just an FYI in case any other dummies want to try this at home.


Quick Reply: Getting ready to remove the head


All times are GMT -4. The time now is 08:45 AM.