My experience installing zzp stage 3 turbo kit.
 06-14-2013, 09:30 PM
#1
Senior Member
Thread Starter

My experience installing zzp stage 3 turbo kit.
Just thought I'd share instructions for installing ZZP's stage 3 turbo kit.
Well this is not really a how to, and not sure if I'm allowed to, so here we go.
I'd like to THANK, Luke (Toolman) for reformating these
instructions to be easier on your eyes.
Thanks Again, Luke !
This is just my experience installing a zzp stage 3 turbo kit.
I am going to give the instructions that came with the kit and I will add any thing good
or bad about the install.
I installed this on a 2007 G5 GT 2.4L AUTOMATIC in MAY 2010.
This kit is designed to run at 11psi on stock engine.
The waste gate is set to 6psi and you turn it up from there
with a manual boost controler. This kit will do more boost than 11psi, but
I believe the stock fuel system can only support 12psi, I may be wrong,
but taking chances by turning it up past 11 while stock.
The kit came with a HPT tune that was rich WOT,
it was like 10.0-1 AFR, but I'm sure they don't want to
be responsible for poping your motor.
Hence: why they say it needs to be dyno tuned.
I will say that this sure wakes my car up.
I wasn't looking to make mad power,
just a little bit more fun and I found it.
ZZP 2.4 Turbo Kit Instructions included with my kit.
Note: These instructions are intended for installers with previous turbo installation
experience. Some procedures will not be described in full detail. If you run into any
installation issues or have trouble comprehending any of the procedures, please contact
ZZPerformance or a qualified auto shop/technician to help you through the process.
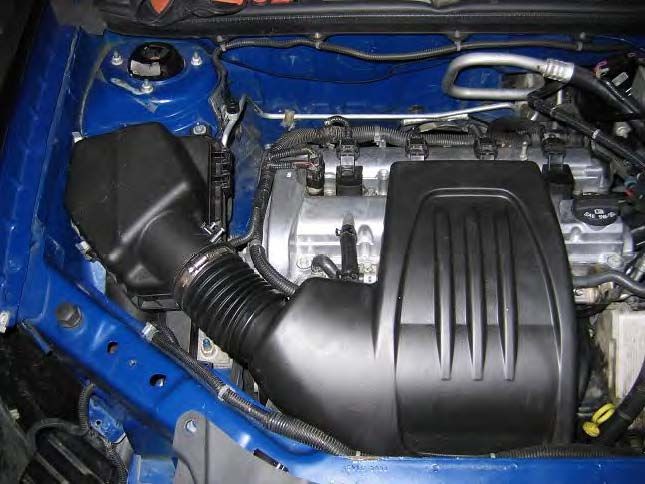
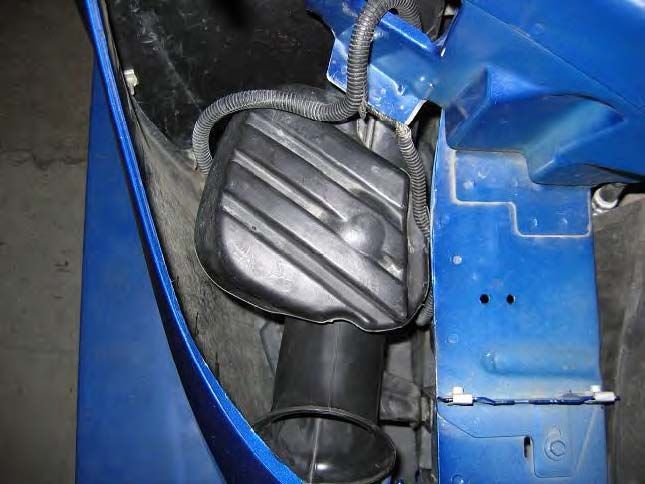
1. Getting started: Remove the airbox ducting shown here.
2. Remove the MAF sensor from the airbox.
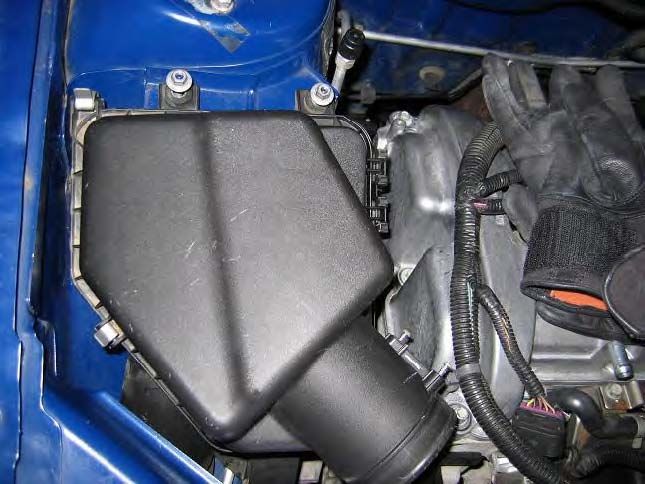
3. Remove the airbox lid and air filter.
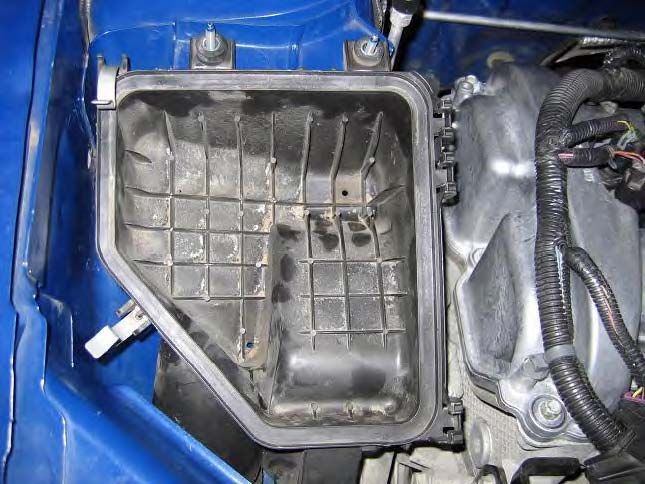
4. Remove the lower half of the airbox.
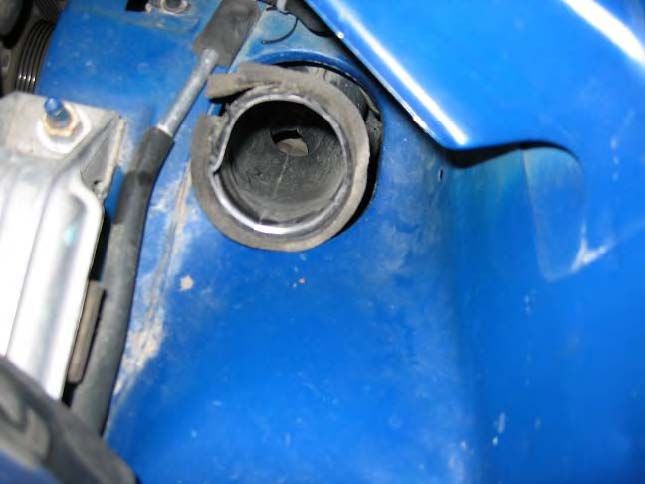
5. Remove the passenger side headlight to access and remove the lower airbox ducting.
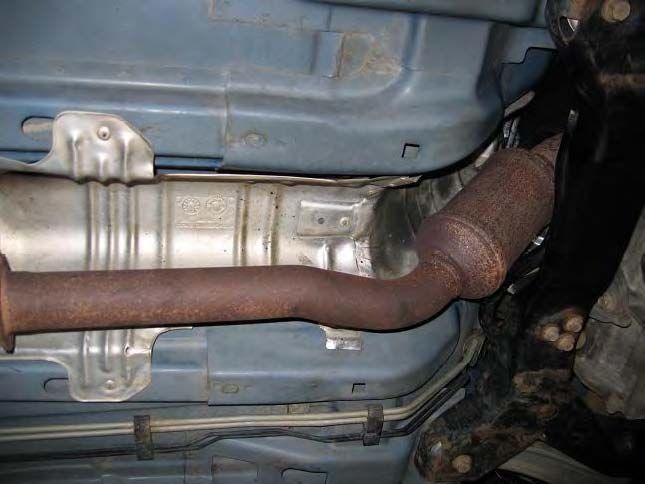
6. Remove the factory downpipe from the exhaust manifold and catback.
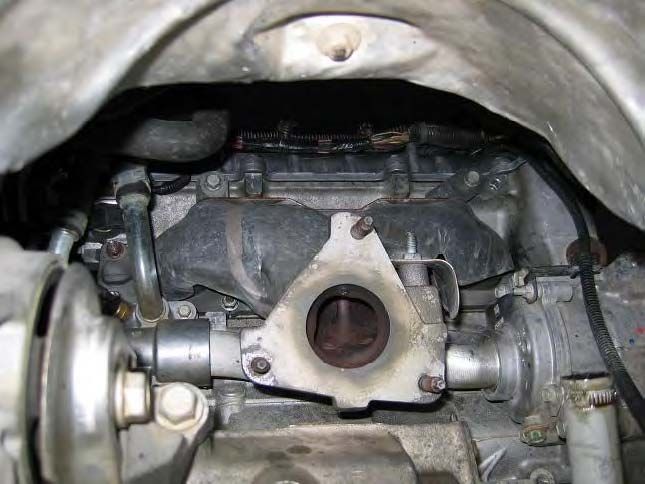
7. Remove the exhaust manifold from the engine.
8. Install the turbo oil feed fitting in the port shown below.
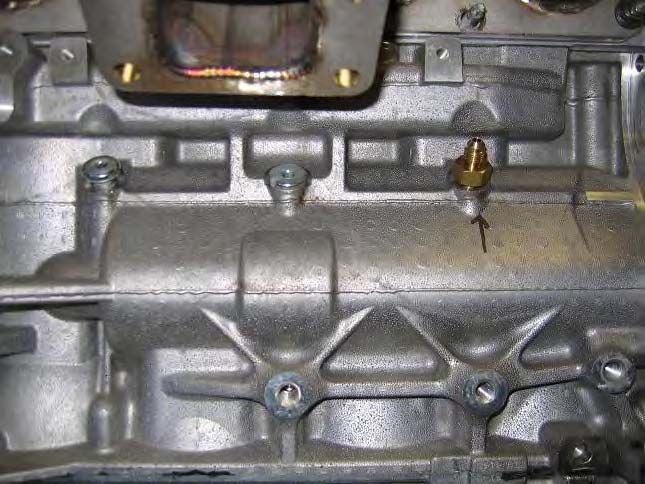
I read about a lot of people stripping out this allen headed plug.
I found out its 6mm and didn't strip it out.
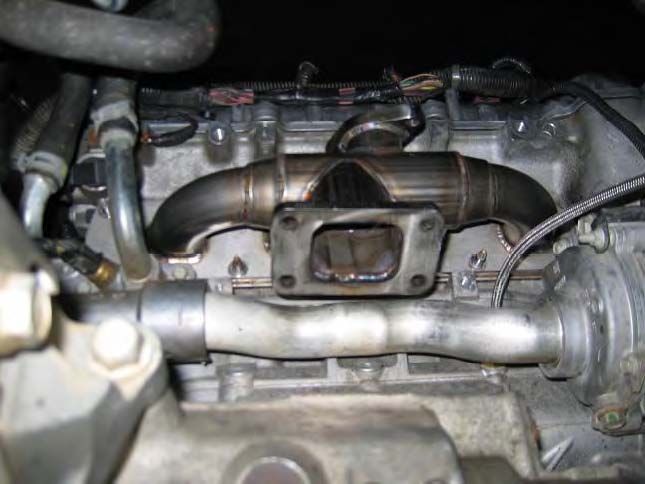
9. Install the turbo manifold at this time.
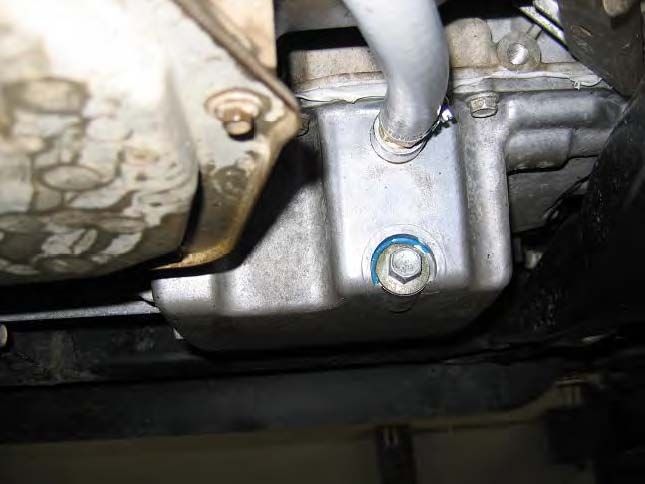
10. Remove the oil pan and install the new turbo oil pan or weld the aluminum bung into the oil pan.
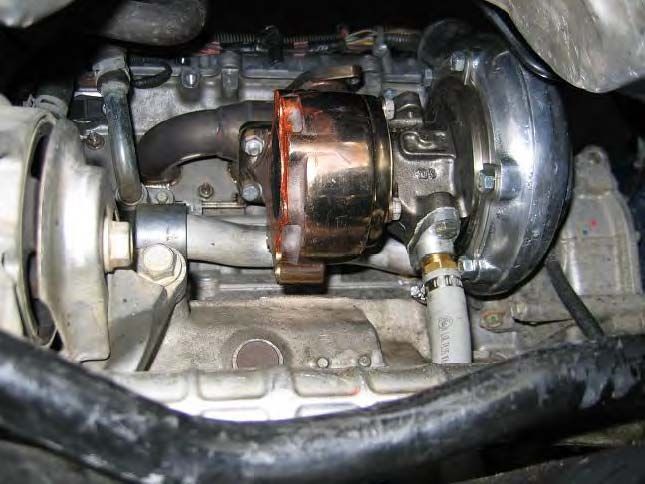
11. Install the turbocharger to the turbo manifold.
If you get the recirculated wastegate (dumps back into exhaust) you
need to put the downpipe up and wire it out of the way BEFORE you
install the turbo, or you will be doing it twice. I did. lol
Because it WILL NOT FIT after the turbo is installed.
Notice instructions make no mention of this. ??????
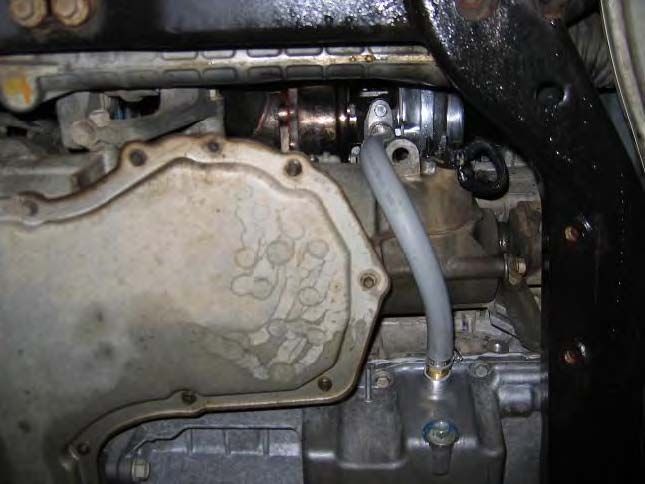
12. Install the oil drain hose as shown.
13. Install the 5-bolt turbo downpipe and Primary O2 sensor.
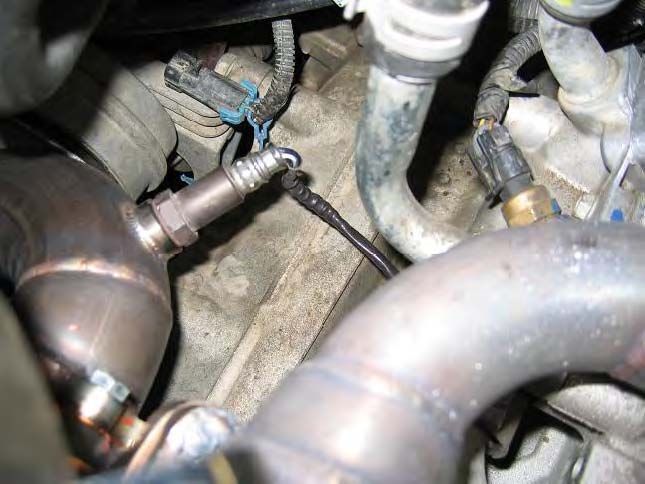
My downpipe has only 2 bolts, updated turbo flanges.
much better, than bolt together.
14. Recirculated wastegate dump tube shown below.
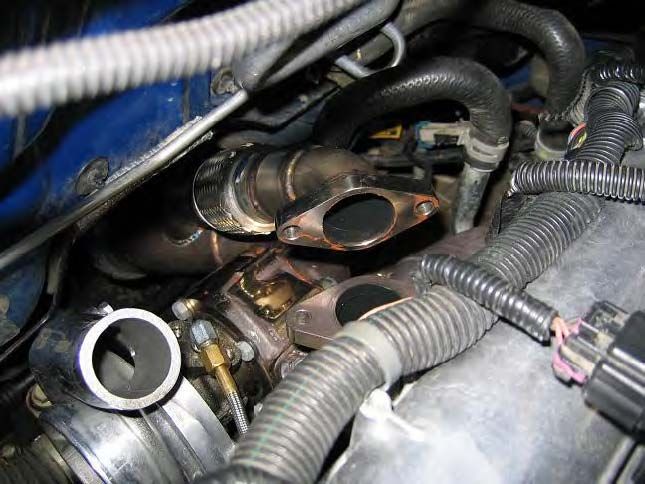
This is old style flanges, not what comes in my kit.
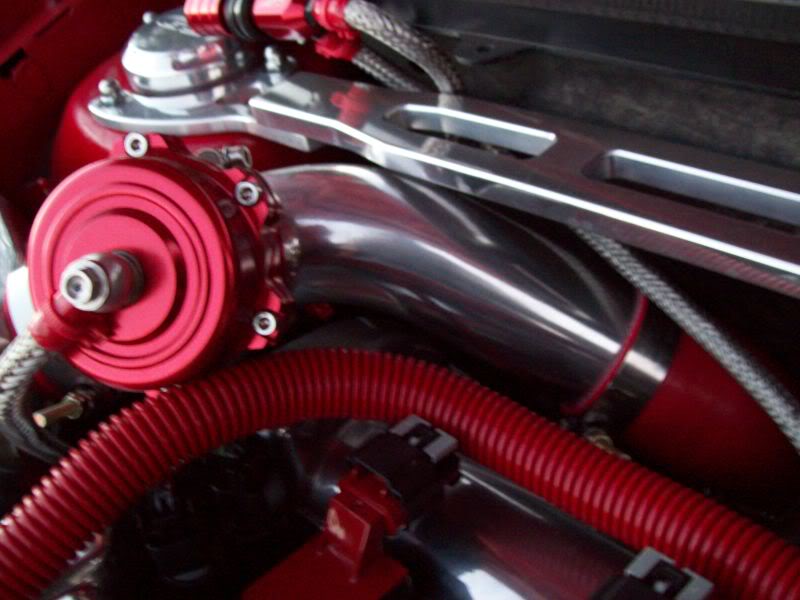
15. Install the wastegate at this time.
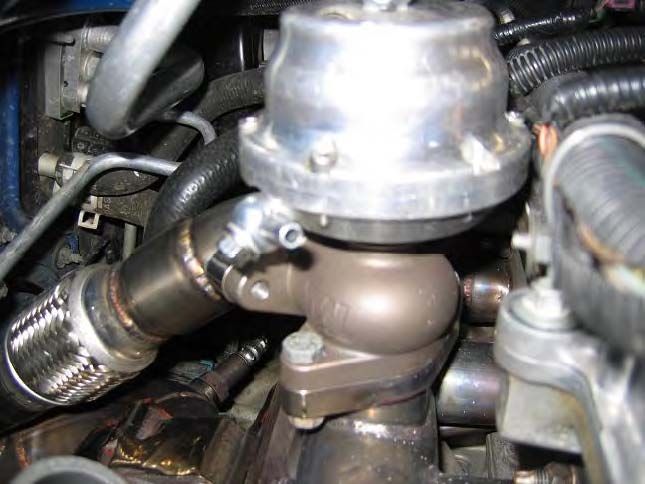
Again old style wastegate.
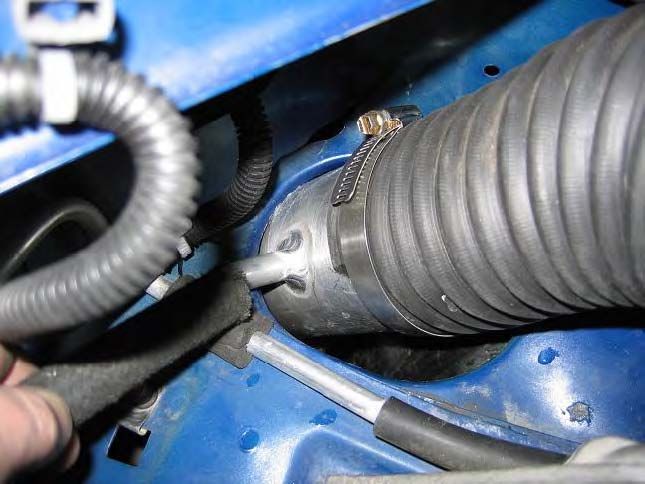
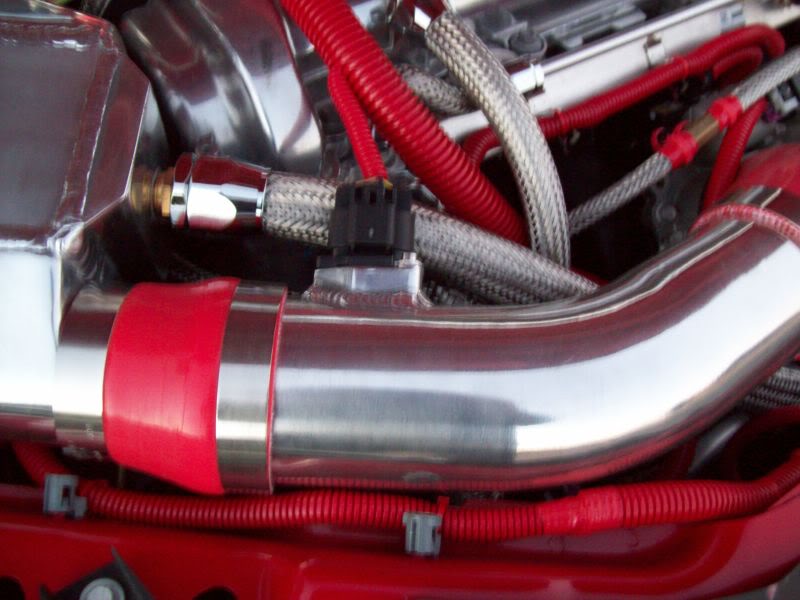
16. Install the turbo inlet coupler and discharge coupler as shown below.
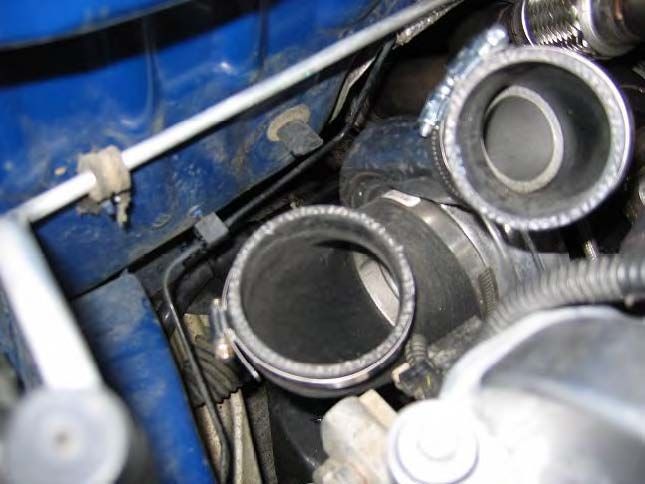
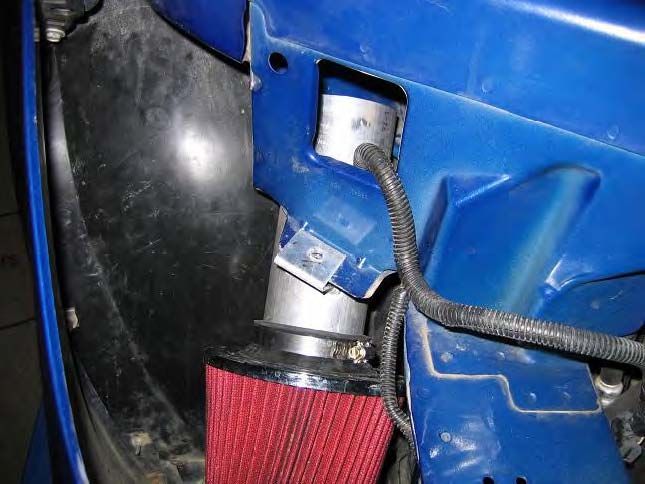
17. Install the air filter tube in the fender-well as shown below.
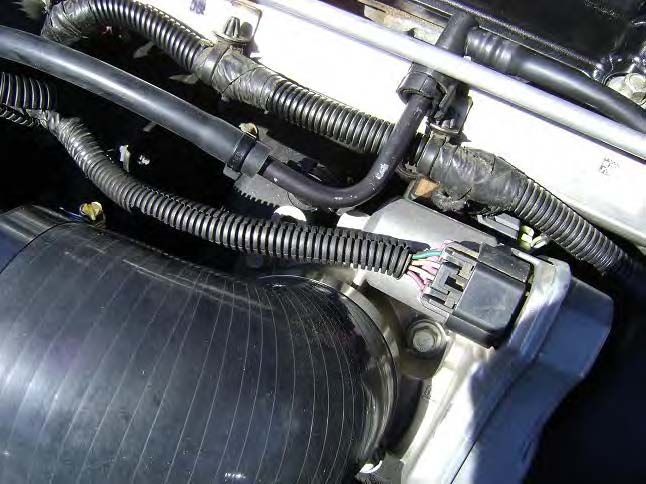
18. Vent hose from the valve cover connects to the new intake tube.
This is where the v/c hose goes to.
19. Connect the vacuum T to the intake, evap hose, and vacuum hose.
I also didn't use the T they supplied,
looked like crap after install.
20. Non-intercooled charge tubing, intake tubing, and bypass valve configuration.
Where is the pics for the kit I bought with the intercooler ?
21. Typical boost controller mounting with additional line added for boost gauge:
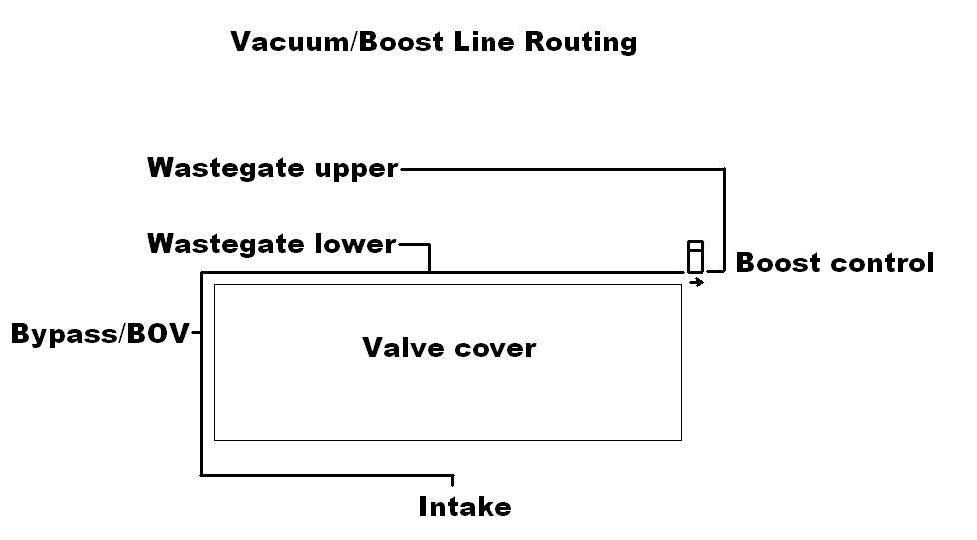
Routing depends on the type of manual boost controler you have.
Mine is a Hallman Pro and only uses a hose to the side port and the
top port is open to the atmosphire.
Well this is not really a how to, and not sure if I'm allowed to, so here we go.
I'd like to THANK, Luke (Toolman) for reformating these
instructions to be easier on your eyes.
Thanks Again, Luke !
This is just my experience installing a zzp stage 3 turbo kit.
I am going to give the instructions that came with the kit and I will add any thing good
or bad about the install.
I installed this on a 2007 G5 GT 2.4L AUTOMATIC in MAY 2010.
This kit is designed to run at 11psi on stock engine.
The waste gate is set to 6psi and you turn it up from there
with a manual boost controler. This kit will do more boost than 11psi, but
I believe the stock fuel system can only support 12psi, I may be wrong,
but taking chances by turning it up past 11 while stock.
The kit came with a HPT tune that was rich WOT,
it was like 10.0-1 AFR, but I'm sure they don't want to
be responsible for poping your motor.
Hence: why they say it needs to be dyno tuned.
I will say that this sure wakes my car up.
I wasn't looking to make mad power,
just a little bit more fun and I found it.
ZZP 2.4 Turbo Kit Instructions included with my kit.
Note: These instructions are intended for installers with previous turbo installation
experience. Some procedures will not be described in full detail. If you run into any
installation issues or have trouble comprehending any of the procedures, please contact
ZZPerformance or a qualified auto shop/technician to help you through the process.
1. Getting started: Remove the airbox ducting shown here.

2. Remove the MAF sensor from the airbox.

3. Remove the airbox lid and air filter.

4. Remove the lower half of the airbox.

5. Remove the passenger side headlight to access and remove the lower airbox ducting.

6. Remove the factory downpipe from the exhaust manifold and catback.

7. Remove the exhaust manifold from the engine.

8. Install the turbo oil feed fitting in the port shown below.

I read about a lot of people stripping out this allen headed plug.
I found out its 6mm and didn't strip it out.
9. Install the turbo manifold at this time.

10. Remove the oil pan and install the new turbo oil pan or weld the aluminum bung into the oil pan.

11. Install the turbocharger to the turbo manifold.

If you get the recirculated wastegate (dumps back into exhaust) you
need to put the downpipe up and wire it out of the way BEFORE you
install the turbo, or you will be doing it twice. I did. lol
Because it WILL NOT FIT after the turbo is installed.
Notice instructions make no mention of this. ??????
12. Install the oil drain hose as shown.

13. Install the 5-bolt turbo downpipe and Primary O2 sensor.

My downpipe has only 2 bolts, updated turbo flanges.
much better, than bolt together.
14. Recirculated wastegate dump tube shown below.

This is old style flanges, not what comes in my kit.
15. Install the wastegate at this time.

Again old style wastegate.
16. Install the turbo inlet coupler and discharge coupler as shown below.

17. Install the air filter tube in the fender-well as shown below.

18. Vent hose from the valve cover connects to the new intake tube.

This is where the v/c hose goes to.
19. Connect the vacuum T to the intake, evap hose, and vacuum hose.

I also didn't use the T they supplied,
looked like crap after install.
20. Non-intercooled charge tubing, intake tubing, and bypass valve configuration.

Where is the pics for the kit I bought with the intercooler ?
21. Typical boost controller mounting with additional line added for boost gauge:

Routing depends on the type of manual boost controler you have.
Mine is a Hallman Pro and only uses a hose to the side port and the
top port is open to the atmosphire.
 06-14-2013, 09:31 PM
#2
Senior Member
Thread Starter
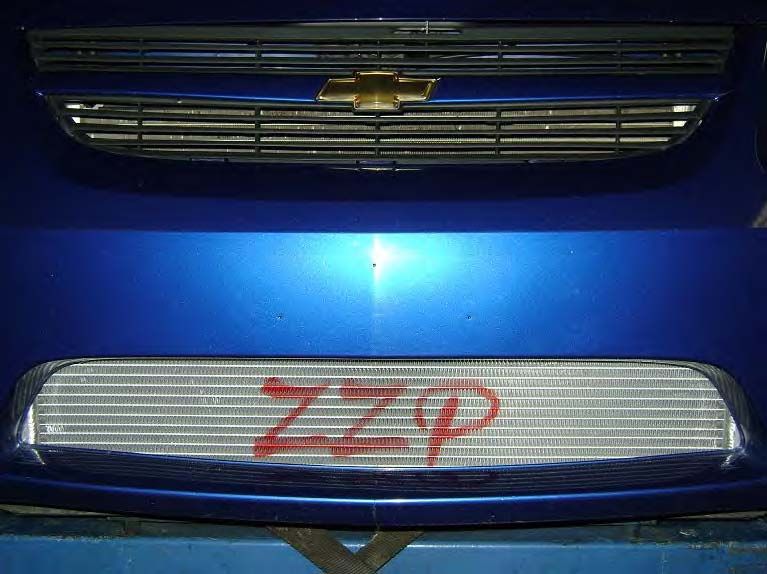
Intercooler Installation
1. With the front bumper skin removed, install the front heat exchanger. The outer tabs slide
in behind the bumper support bolts and fasten with two additional nuts. The inner tabs bolt to
existing holes on the bottom of the bumper support. Wait until you are re-installing the bumper skin before installing the inner bolts.
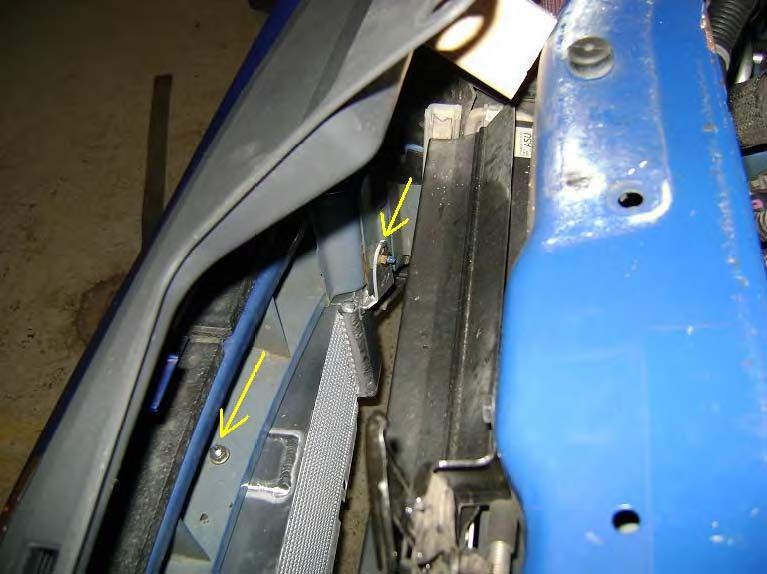
I did this first thing a weekend before the install.
After I installed the intercooler and pump as instructed to do, I found out
the bumper will hit the cooler and needed to be ground down on the
back side to make clearence. In 4 places I needed to grind back about 1/4"
was my guess. Wrong answer, bumper still won't fit.
So I removed the coooler and reworked the brackets by expanding the top
holes and bending the side brackets to a different angle. By doing this I was
able to move the cooler back closer to the radiator. Just perfect and That
1/4' that I ground off is the exact amount of clearance I have now. Perfect.
2. Pump mounting in driver side fender-well is shown below.
The intercooler pump pictured and the one in my kit are not the same.
My pump is much larger and would not fit where they wanted it. I got it close to there and then the hoses wouldn't fit right, the bumper wouldn't fit, nor the splash shield on the bottom. Re worked a different bracket and angle. Fits but had to buy different hose to finish this part of the install.
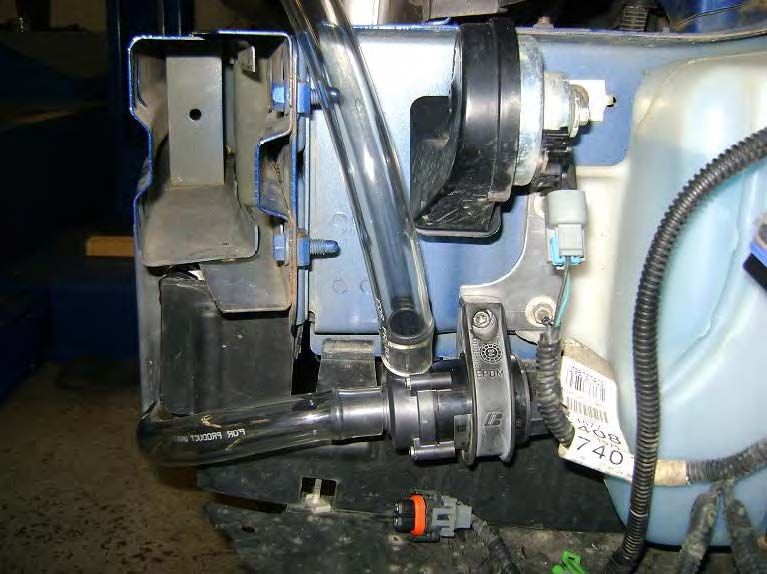
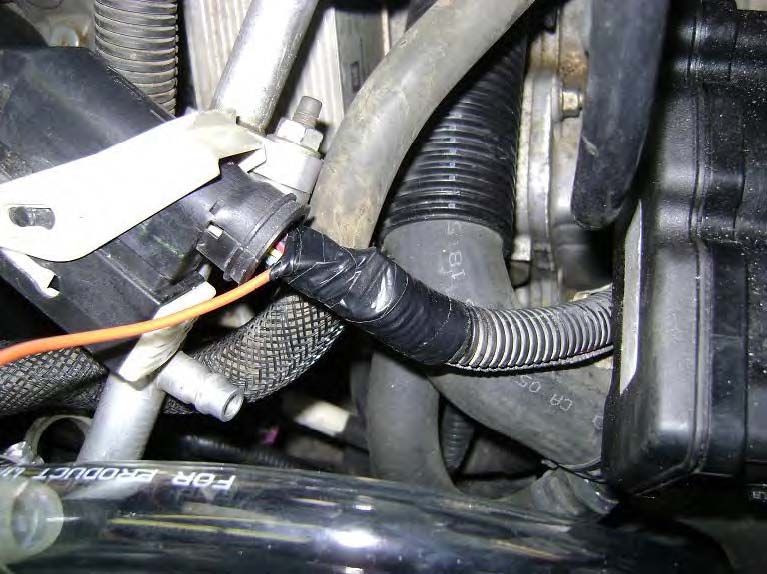
3. Hose routing and filler T are shown below.

Because my pump was much longer I had to put a 90 degree
bent hose where they show the clear hose, without the bend
it only wanted to kink the hose. This was my fix.

4. Switched power to the pump can be obtained by connecting to the pink wire in the ABS harness.
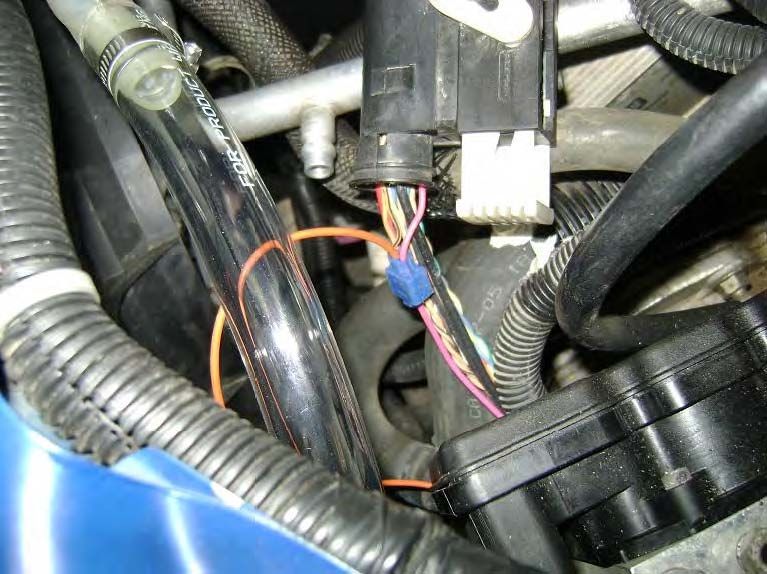
I don't hack into factory wiring harness. I ran a wire to the fuse box
and used an add-a-fuse circuit.
5. Tape up the wires to avoid connection issues.
lol
6. Power and ground wires connected to the intercooler pump are shown below.
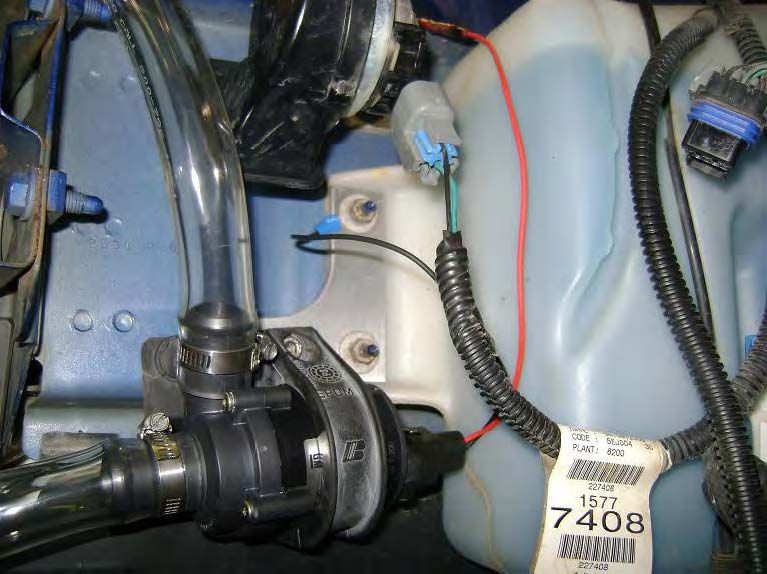
7. Run the fill T up and next to the coolant bottle.
They used the clear hose by the pump and black hose
for your fill tube. I wanted to know if the coolant was full,
so I used the clear hose for my fill tube.
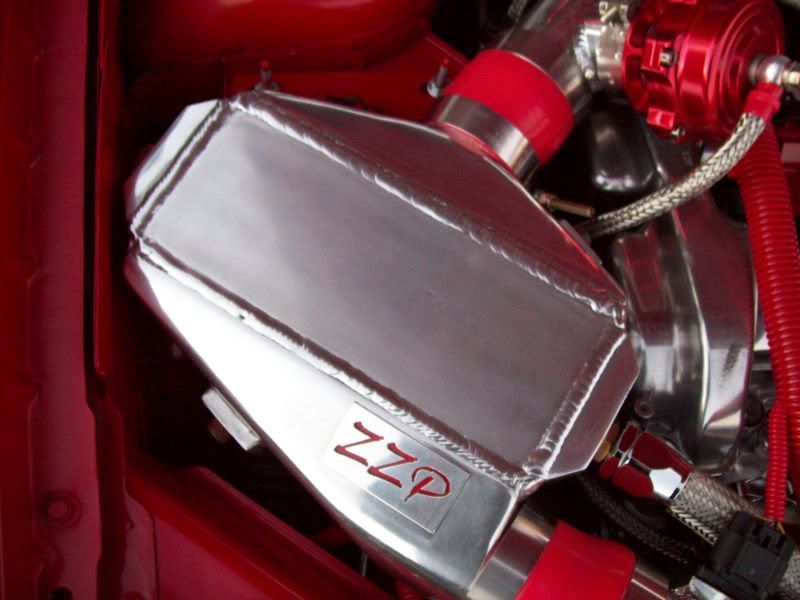
8. Mount the intercooler, charge tubes, and blow off valve. Connect the intercooler hoses.
9. Fill the intercooler system with a water/anti-freeze mix. Turn the key on to run the pump while
bleeding the air out of the system. It may take several minutes for most of the air to bleed out of
the system. Occasionally check the water level in the fill tube and add water as necessary.
10. Reinstall the bumper skin.
Took about half an hour to finally bleed all the air out of the
intercooler and heat exchanger, poor system, but at least you
don't have to do this often. I also added some purple ice to
help with the cooling a little bit.
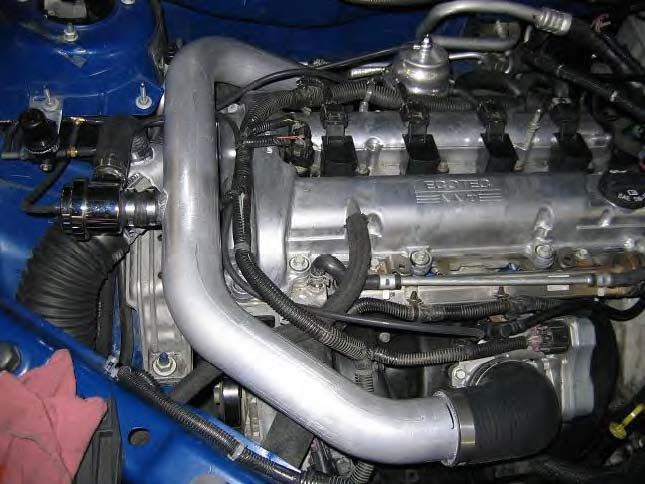
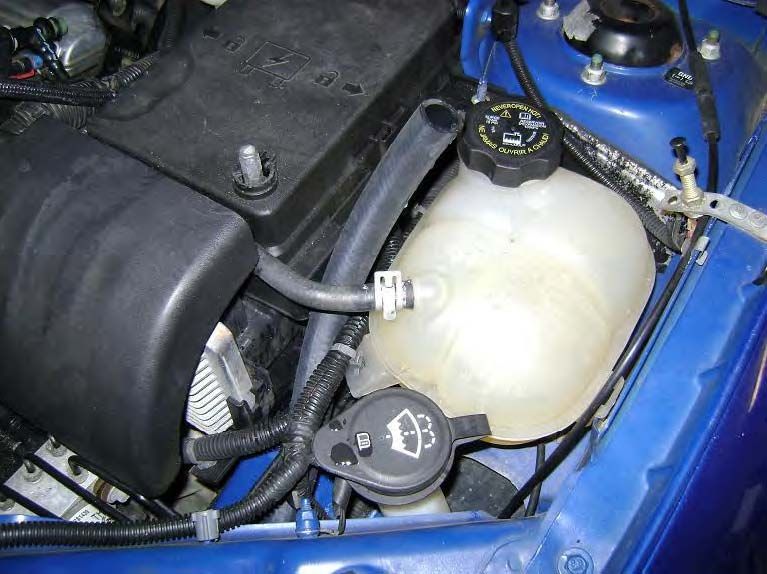
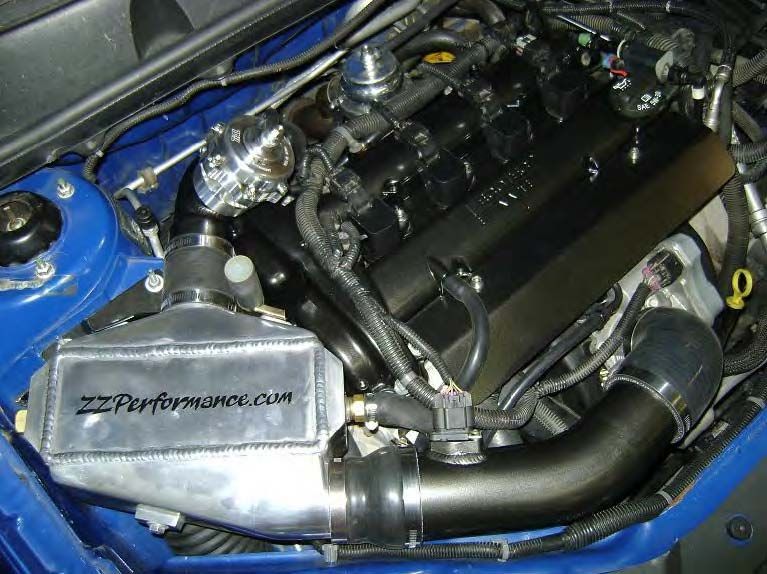
I expected to see "THE END"
These are just some pics to show how tight it is in there.
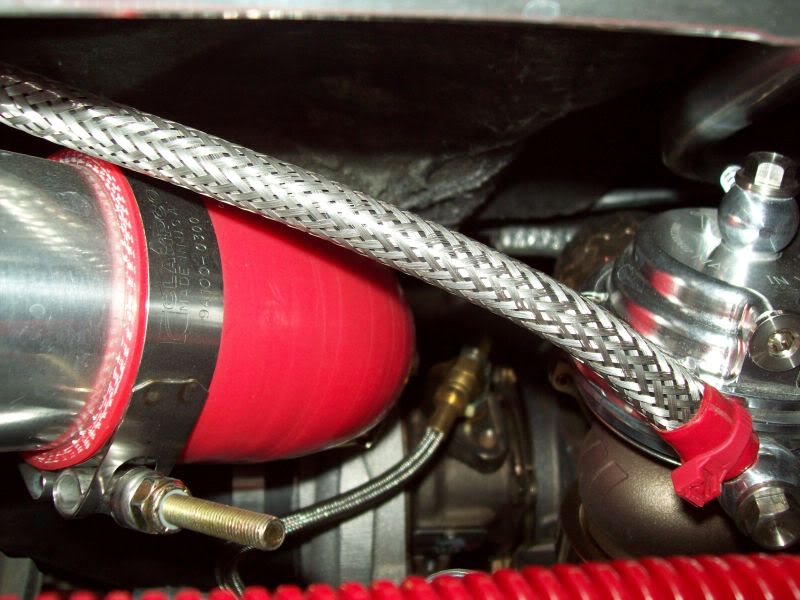
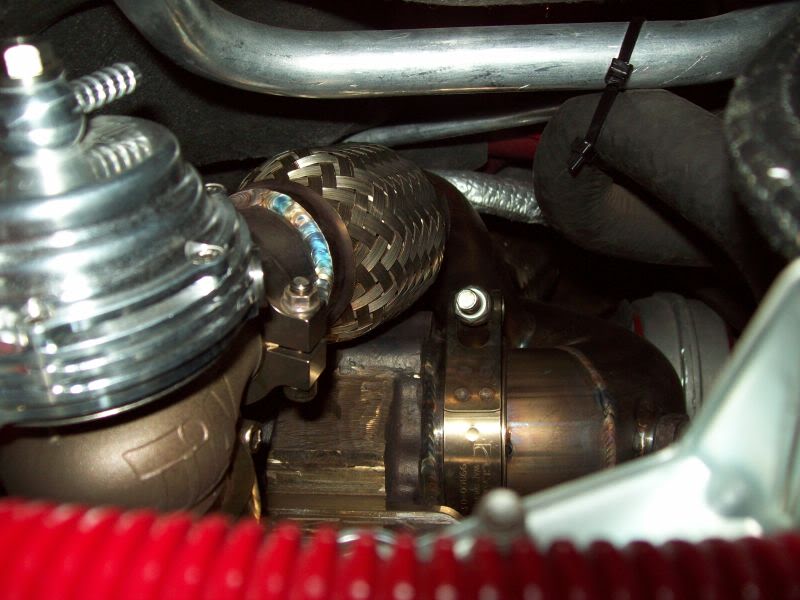
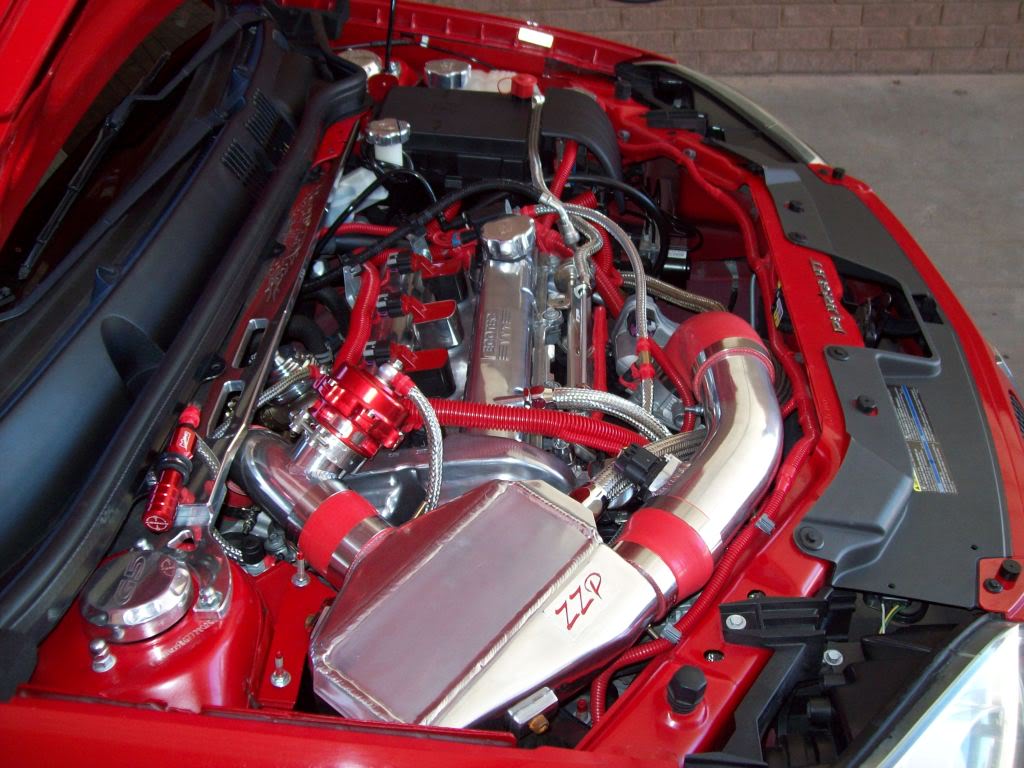
All in all I would buy this kit again from ZZP.
Pretty easy install if you have any mechanical and problem solving skills, as I did mine in my driveway !
If you're thinking about doing it all I can say is DO IT !
1. With the front bumper skin removed, install the front heat exchanger. The outer tabs slide
in behind the bumper support bolts and fasten with two additional nuts. The inner tabs bolt to
existing holes on the bottom of the bumper support. Wait until you are re-installing the bumper skin before installing the inner bolts.

I did this first thing a weekend before the install.
After I installed the intercooler and pump as instructed to do, I found out
the bumper will hit the cooler and needed to be ground down on the
back side to make clearence. In 4 places I needed to grind back about 1/4"
was my guess. Wrong answer, bumper still won't fit.
So I removed the coooler and reworked the brackets by expanding the top
holes and bending the side brackets to a different angle. By doing this I was
able to move the cooler back closer to the radiator. Just perfect and That
1/4' that I ground off is the exact amount of clearance I have now. Perfect.
2. Pump mounting in driver side fender-well is shown below.

The intercooler pump pictured and the one in my kit are not the same.
My pump is much larger and would not fit where they wanted it. I got it close to there and then the hoses wouldn't fit right, the bumper wouldn't fit, nor the splash shield on the bottom. Re worked a different bracket and angle. Fits but had to buy different hose to finish this part of the install.
3. Hose routing and filler T are shown below.

Because my pump was much longer I had to put a 90 degree
bent hose where they show the clear hose, without the bend
it only wanted to kink the hose. This was my fix.

4. Switched power to the pump can be obtained by connecting to the pink wire in the ABS harness.

I don't hack into factory wiring harness. I ran a wire to the fuse box
and used an add-a-fuse circuit.
5. Tape up the wires to avoid connection issues.

lol
6. Power and ground wires connected to the intercooler pump are shown below.

7. Run the fill T up and next to the coolant bottle.

They used the clear hose by the pump and black hose
for your fill tube. I wanted to know if the coolant was full,
so I used the clear hose for my fill tube.
8. Mount the intercooler, charge tubes, and blow off valve. Connect the intercooler hoses.

9. Fill the intercooler system with a water/anti-freeze mix. Turn the key on to run the pump while
bleeding the air out of the system. It may take several minutes for most of the air to bleed out of
the system. Occasionally check the water level in the fill tube and add water as necessary.
10. Reinstall the bumper skin.

Took about half an hour to finally bleed all the air out of the
intercooler and heat exchanger, poor system, but at least you
don't have to do this often. I also added some purple ice to
help with the cooling a little bit.
I expected to see "THE END"
These are just some pics to show how tight it is in there.


All in all I would buy this kit again from ZZP.
Pretty easy install if you have any mechanical and problem solving skills, as I did mine in my driveway !
If you're thinking about doing it all I can say is DO IT !


 06-14-2013, 11:14 PM
#6
Senior Member
Thread Starter
The air to air wasn't available when I purchased my kit.
I'd also like to say (since I hear so much about bad CS @ ZZP)
that Matt flat out TOOK CARE of me !
For months before I purchased, he answered my e-mails one right after another
even on weekends and when he didn't know, he would find out. (he usually knew)
I ordered a "special request" kit from them and Matt and Ryan came through for me.
So I'd just like to say Matt has Outstanding Customer Service !
Thanks Matt
 06-15-2013, 07:15 AM
#8
Senior Member
Thread Starter
We don't have IAT2 on the LE5's, our IAT sensor is in the MAF.
IAT's under boost jump up 30-40 degrees or so,
it's not so good at the strip, no air movement across cooler while sitting,
need lots of ice.
IAT's under boost jump up 30-40 degrees or so,
it's not so good at the strip, no air movement across cooler while sitting,
need lots of ice.
06-15-2013, 08:35 AM
#9
Member
iTrader: (1)

Join Date: 06-02-12
Location: TX
Posts: 283
Likes: 0
Received 0 Likes
on
0 Posts
Just turn your car off while in line with the hood open.....and push the car to the start line Everyone does that here at my local track.
Lines get long....so everyone is just pushing there car towards the start line.
Anyways nice looking kit....im glad to see a bolt on turbo kit for the non-turbo factory ecos. Kit looks BEAST!
Everyone does that here at my local track. Lines get long....so everyone is just pushing there car towards the start line.
Anyways nice looking kit....im glad to see a bolt on turbo kit for the non-turbo factory ecos. Kit looks BEAST!
 06-15-2013, 11:05 AM
#12
Member

Join Date: 07-23-10
Location: NS
Posts: 287
Likes: 0
Received 0 Likes
on
0 Posts
Cherry GT deserves a Paypal beer! Thanks for helpin the community! Clever write up!
+1 would read again
More turbo ecotecs!
*sloshes beer and makes waste gate dump noise*
PPPPPSSSSSSSSHHHHH!!!
+1 would read again
More turbo ecotecs!
*sloshes beer and makes waste gate dump noise*
PPPPPSSSSSSSSHHHHH!!!
06-15-2013, 01:07 PM
#13
Platinum Member

Join Date: 09-18-11
Location: pittsburgh
Posts: 532
Likes: 0
Received 0 Likes
on
0 Posts
already got 42's lol zzp said they are good to 270hp area, and everyone ive talked to with boosted 2.2's that are runnin 42's making 260whp with alot more injector to go, and talked to vince at trifecta he said the same, the 42's will be perfect for my power goals, wish i coulda got 60's but i got a steal on 42's
06-15-2013, 02:42 PM
#14
Senior Member
Thread Starter
I found it kinda entertaining that the instructions never talk about installing injectors
(not that its needed) but I guess these are for stage one and apparently you don't need injectors, lol.
So send out these instructions for all kits ???
(not that its needed) but I guess these are for stage one and apparently you don't need injectors, lol.
So send out these instructions for all kits ???
06-15-2013, 04:00 PM
#16
Member
Join Date: 07-23-10
Location: NS
Posts: 287
Likes: 0
Received 0 Likes
on
0 Posts
I was scratching my head @ the pics until mind rot posted his air 2 air pics. I was like "mine doesn't look like that!"
@ ZZP CS
The email exchange was fine between zzp and me, but they fucked up on my kit and kept giving me the run around on getting the proper parts to me there mistake added 3-4 weeks onto the build. They also lowered the price of the stage 3 kit by $500 shortly after I bought mine, and promised me a voucher/coupon- but never delivered on it
The parts are great, but man I got pwned on the customer service front, out $500 and damn near a month of the car just sitting on a hoist.
@ ZZP CS
The email exchange was fine between zzp and me, but they fucked up on my kit and kept giving me the run around on getting the proper parts to me
The parts are great, but man I got pwned on the customer service front, out $500 and damn near a month of the car just sitting on a hoist.

 06-16-2013, 06:51 AM
#19
Platinum Member
Join Date: 09-18-11
Location: pittsburgh
Posts: 532
Likes: 0
Received 0 Likes
on
0 Posts
06-16-2013, 08:27 AM
#20
Senior Member
iTrader: (1)
Join Date: 02-16-09
Location: Fredericksburg, VA
Posts: 3,207
Likes: 0
Received 0 Likes
on
0 Posts
My FMIC is as big as a pig. Had to do some minor trimming of the bumper and wheel well plastics to get a comfortable fit. Also guys... go with 60's. You'll have more headroom in the future. One day you'll realise single digit psi gets boring 
06-16-2013, 08:52 AM
#21
Member
Join Date: 07-23-10
Location: NS
Posts: 287
Likes: 0
Received 0 Likes
on
0 Posts
Ouch man! Your bruising my jaw slappin that 12 psi LE5 dick around :P
 06-16-2013, 09:53 AM
#25
Member
Join Date: 07-23-10
Location: NS
Posts: 287
Likes: 0
Received 0 Likes
on
0 Posts
But.,.but... You could only pay $100 a month !!!!
I went the saving for months route, my daddy beat it into to me to never incur debt/buy things on payment plan. Buy everything outright ! It's cheaper. And you "own" it sooner
Why I LOL @ some local guys who have an EVO/STI/V8s. They couldn't afford a 40,000 car, they can only afford the payments on one.