


The Official "Major Project" Thread!


Thread Starter
Senior Member
Joined: 07-11-05
Posts: 2,533
Likes: 0
From: Houston
The Official "Major Project" Thread!
Alright guys, if anyone has a major project in the works for any vehicle, here is your chance to post up anything and everything related to it (pics, progress journals, information on install, problems you've run into, etc.).
Since I have random posts here and there in regards to my motor swap I figured it would be a better idea just to have it all centralized in one area so anyone who is curious can take a look.
Here is my Major Project:
A 6.0L LQ4 motor swap into a 2006 regular cab short bed Silverado. The current motor is a 5.3L LM7 producing 295hp and 335lbs of torque according to GM. I decided to this swap because:
• Performance parts for the Gen III LS motors are relatively affordable
• There are several setups available giving the opportunity to be creative
• The LQ4 provides the strength, durability and potential needed to make reliable horespower and torque to get a 4,500lb brick moving
• Most importantly this is an opportunity for me to learn a TON on the given subject
Here are the current parts I’ve purchased to do the swap:
2005 LQ4 Shortblock w/ approx. 5,000 miles. It has been honed and re-ringed. I do not plan on using any forged internals as the stock pieces can easily handle 500rwhp, which I do not plan on exceeding anytime soon.


After a lot of research and phone calling I decided on a custom ground Comp 224/224 .581/.581 115LSA. It was ground on a wide lobe separation angle because I wanted a broad powerband that would provide both an excellent mid-high end with out sacrificing any noticeable low-end torque. Only 10ft lbs (approximately) will be sacrificed for an estimated 70+hp with some aggressive tuning in the higher RPM’s. Of course, all these numbers are subjective until it is dynoed, but these are all numbers projected by companies known through out the LS1 community. I’ve also purchased Comp 918 springs to handle the lift and hardened pushrods for durability.


To compliment the cam I’ve gone with a Yank 3000 Truck Thruster torque converter. The stall typically is between 2,800 rpms and 3,200 rpms but most I’ve personally seen are around 2,900 rpms when brake stalling and near 3,000 rpms when flashing the stall. This should get me up into peak power quickly and also diminish the huge RPM drop when shifting.


In addition to those parts I have also purchased a 2nd gear corvette servo to attempt to extend the life of the currently un-modified 4L60-E and an LS2 timing set because they are much more beefier than the current parts on the block. Those parts are not pictured at the moment.
For the heads I have the stock 317 castings, but I just purchased some Z06 243 castings that will be milled .020 and slightly ported on the intake side. Estimated compression ratio will be 10.2:1. More info and pics will be posted when these arrive. The intake manifold will be the stock truck intake for now.
Parts I need to purchase to complete the swap:
• Gaskets, misc. bolts
• ARP rod bolts
• ARP head bolts
• (maybe) plastigauge
This weekend we will start the actual motor build. Installing the cam, and heads if the parts come in on time. Stay tuned for updates…
Since I have random posts here and there in regards to my motor swap I figured it would be a better idea just to have it all centralized in one area so anyone who is curious can take a look.
Here is my Major Project:
A 6.0L LQ4 motor swap into a 2006 regular cab short bed Silverado. The current motor is a 5.3L LM7 producing 295hp and 335lbs of torque according to GM. I decided to this swap because:
• Performance parts for the Gen III LS motors are relatively affordable
• There are several setups available giving the opportunity to be creative
• The LQ4 provides the strength, durability and potential needed to make reliable horespower and torque to get a 4,500lb brick moving
• Most importantly this is an opportunity for me to learn a TON on the given subject
Here are the current parts I’ve purchased to do the swap:
2005 LQ4 Shortblock w/ approx. 5,000 miles. It has been honed and re-ringed. I do not plan on using any forged internals as the stock pieces can easily handle 500rwhp, which I do not plan on exceeding anytime soon.
After a lot of research and phone calling I decided on a custom ground Comp 224/224 .581/.581 115LSA. It was ground on a wide lobe separation angle because I wanted a broad powerband that would provide both an excellent mid-high end with out sacrificing any noticeable low-end torque. Only 10ft lbs (approximately) will be sacrificed for an estimated 70+hp with some aggressive tuning in the higher RPM’s. Of course, all these numbers are subjective until it is dynoed, but these are all numbers projected by companies known through out the LS1 community. I’ve also purchased Comp 918 springs to handle the lift and hardened pushrods for durability.
To compliment the cam I’ve gone with a Yank 3000 Truck Thruster torque converter. The stall typically is between 2,800 rpms and 3,200 rpms but most I’ve personally seen are around 2,900 rpms when brake stalling and near 3,000 rpms when flashing the stall. This should get me up into peak power quickly and also diminish the huge RPM drop when shifting.
In addition to those parts I have also purchased a 2nd gear corvette servo to attempt to extend the life of the currently un-modified 4L60-E and an LS2 timing set because they are much more beefier than the current parts on the block. Those parts are not pictured at the moment.
For the heads I have the stock 317 castings, but I just purchased some Z06 243 castings that will be milled .020 and slightly ported on the intake side. Estimated compression ratio will be 10.2:1. More info and pics will be posted when these arrive. The intake manifold will be the stock truck intake for now.
Parts I need to purchase to complete the swap:
• Gaskets, misc. bolts
• ARP rod bolts
• ARP head bolts
• (maybe) plastigauge
This weekend we will start the actual motor build. Installing the cam, and heads if the parts come in on time. Stay tuned for updates…
Last edited by Tofu; Mar 14, 2007 at 01:46 AM. Reason: Automerged Doublepost


Senior Member
Joined: 09-02-05
Posts: 641
Likes: 0
From: Lacey, WA
No pics but I'm rebuilding my LSJ. Ported head, 1mm Larger Ferrea valves, Ferrea dual coil springs, diamond pistons 10:1, most likely custom crower rods, crower custom cam grind, Bates neutral balance shafts, ported blower, Cometic head gasket, Golden Eagle head studs. The head is ported, I'm just waiting on flow #'s, my cams to come in, And I have to get some expensive ass custom rods made. Until then I'll be riding my bike everywhere I'm not sure what pulley I'm going to use or how high I'm going to rev it yet.
I'm not sure what pulley I'm going to use or how high I'm going to rev it yet.

Senior Member
Joined: 03-05-07
Posts: 2,765
Likes: 0
From: Willoughby, Ohio
i m turning my stock balt into a monster....ill keep ya updated
i m turning my stock balt into a monster....ill keep ya updated
i m turning my stock balt into a monster....ill keep ya updated
Last edited by LScoupeTUNER; Mar 14, 2007 at 09:11 PM. Reason: Automerged Doublepost

Senior Member
Joined: 10-16-06
Posts: 602
Likes: 1
From: wyoming
no pics yet,
1. all door panels covered in suede
2. headliner in suede
3. rear deck in suede
4. trunk carpet into suede
5. airbags
6. stage 3
7. front grill
8. led underglow
9. custom carbon fiber dash
10. carbon fiber trunk lid
11. carbon fiber hood
12. custom airbrushed paint job
thats it for the summer
1. all door panels covered in suede
2. headliner in suede
3. rear deck in suede
4. trunk carpet into suede
5. airbags
6. stage 3
7. front grill
8. led underglow
9. custom carbon fiber dash
10. carbon fiber trunk lid
11. carbon fiber hood
12. custom airbrushed paint job
thats it for the summer

Senior Member
Joined: 02-23-07
Posts: 1,120
Likes: 0
From: Orange, CA
LTcoupetuner - what are your plans for your 2.2L so far?
As for my major project, I'm at the start of a 1969 428 HO rebuild. Block came out of a Bonneville. Original horsepower was 390, I'm looking at more like 550-600hp with 600-700 torque. It'll go in my 69 GTO.
There be a 428 HO 390hp set of heads. Code 62 baby!

Engine is a YK 428

Its already got 4 bolt mains drilled and tapped!!

As for my major project, I'm at the start of a 1969 428 HO rebuild. Block came out of a Bonneville. Original horsepower was 390, I'm looking at more like 550-600hp with 600-700 torque.
It'll go in my 69 GTO. There be a 428 HO 390hp set of heads. Code 62 baby!
Engine is a YK 428
Its already got 4 bolt mains drilled and tapped!!

Senior Member
Joined: 06-11-06
Posts: 536
Likes: 0
From: Chesterfield, MI
Well, a few of us are going to modify the front end of my SS/SC to accomodate an LS1 and RWD.
Just kidding of course. However, I'm hoping to have the following done by the end of summer. And I do have an SS/SC, an '06 Rally Yellow one with 20% on the back three windows:
If the above two go through (and we'll find out within the next week or so), I'll also be getting:
Also, I'm hoping to do the following to my interior:
Wish me some luck and hopefully I'll be able to find time/money (and luck to get badmunky's rims/tires) to get all of this done soon!
Just kidding of course. However, I'm hoping to have the following done by the end of summer. And I do have an SS/SC, an '06 Rally Yellow one with 20% on the back three windows:
- Black ATL Sonix rims (badmunky's hopefully)
- G-Force KDW2 tires (also badmunky's hopefully)
If the above two go through (and we'll find out within the next week or so), I'll also be getting:
- Yellow brake calipers with "carbon fiber" vinyl that spells out "Cobalt" (from ebay)
- Drilled/slotted rotors
Also, I'm hoping to do the following to my interior:
- Black microsuede across upper dashboard (everything above silver trim)
- Black microsuede across upper door panels (from the design cutline up)
- Sand/fill/paint lower portions of dash and door panels (everything below the silver trim hopefully)
Wish me some luck and hopefully I'll be able to find time/money (and luck to get badmunky's rims/tires) to get all of this done soon!

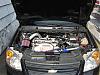
Starting in few weeks.. Goin turbo
Specs still are on paper, so definate on the turbo yet.
but sitting in my room
Diamond 9.5:1 pistons
cometic head gasket
ARP head studs
ARP main studs
neutral balance shafts
my head is out getting CNC'd w/ 1mm oversized valves, full valvetrain, (head wasn't sent out by me so I don't what's going on with it, but is being done by the same guy that did whitfields cobalt) custom ground cams are getting done too..
should hopefully be back together and running in a month or so.
Probably gonna use the Bully stage IV clutch for now to try and handle the power, probably upgrade to the 6-speed conversion in the fall.
Specs still are on paper, so definate on the turbo yet.
but sitting in my room
Diamond 9.5:1 pistons
cometic head gasket
ARP head studs
ARP main studs
neutral balance shafts
my head is out getting CNC'd w/ 1mm oversized valves, full valvetrain, (head wasn't sent out by me so I don't what's going on with it, but is being done by the same guy that did whitfields cobalt) custom ground cams are getting done too..
should hopefully be back together and running in a month or so.
Probably gonna use the Bully stage IV clutch for now to try and handle the power, probably upgrade to the 6-speed conversion in the fall.
Senior Member
Joined: 02-23-07
Posts: 1,120
Likes: 0
From: Orange, CA

Tofu: Did something happen to the old engine, what i'm trying to ask is there a reason why you are doing a swap on a truck that is so new? Also, why not increase push the limit of pump gas and go 10.5:1 (and if you use aluminum heads you might be able to get more I believe, please correct me if im wrong)
Archie: What kind of compression or setup do you plan on running to achieve those hp numbers?
Archie: What kind of compression or setup do you plan on running to achieve those hp numbers?
Senior Member
Joined: 02-23-07
Posts: 1,120
Likes: 0
From: Orange, CA

Senior Member
Joined: 11-11-05
Posts: 9,438
Likes: 0
From: Oceanside, Ca
Damn, my mods seem insignificant
exedy clutch
drilled/slotted brake rotors
dual pass end plate with optional reservior
cat-less downpipe
LC-1 with XD-16 gauge
dual pod bezel around instrument panel
ported supercharger/throttle body
a little later, after school
92mm pistons
sleeved
neutral balance shafts
Ti valve train
ARP studs
cometic head gasket
Evo 270 custom cam grind
performance crank and rods
port and polished
exedy clutch
drilled/slotted brake rotors
dual pass end plate with optional reservior
cat-less downpipe
LC-1 with XD-16 gauge
dual pod bezel around instrument panel
ported supercharger/throttle body
a little later, after school
92mm pistons
sleeved
neutral balance shafts
Ti valve train
ARP studs
cometic head gasket
Evo 270 custom cam grind
performance crank and rods
port and polished
Last edited by Doc; Mar 16, 2007 at 12:08 AM.

Senior Member
Joined: 12-19-05
Posts: 9,704
Likes: 0
From: Raleigh, NC
Well its not my car but for my buddy!
Custom built B20 Vtech (Frankenstein Swap)
B20 block from a CR-V sleeved, new pistons, rods, rings, crank.
B16 head from a 99 si 3 angle valve job, polished and ported, ferrera valves, skunk 2 stage 3 cams, titanium retainers, triple valve springs.
Golden Eagle Head Studs, ARP bolts and studs for everything else.
HKS FMIC and all piping
Turbonetics T-60(or 61)
Full roll cage
And pretty much anything else you can do to a 1991 Honda Civic Hatch to handle about 500 hp or more!!!
Will pop up some pics once the car gets out of paint, and the block gets back from Cali getting sleeved!
Custom built B20 Vtech (Frankenstein Swap)
B20 block from a CR-V sleeved, new pistons, rods, rings, crank.
B16 head from a 99 si 3 angle valve job, polished and ported, ferrera valves, skunk 2 stage 3 cams, titanium retainers, triple valve springs.
Golden Eagle Head Studs, ARP bolts and studs for everything else.
HKS FMIC and all piping
Turbonetics T-60(or 61)
Full roll cage
And pretty much anything else you can do to a 1991 Honda Civic Hatch to handle about 500 hp or more!!!
Will pop up some pics once the car gets out of paint, and the block gets back from Cali getting sleeved!
Thread Starter
Senior Member
Joined: 07-11-05
Posts: 2,533
Likes: 0
From: Houston

Tofu: Did something happen to the old engine, what i'm trying to ask is there a reason why you are doing a swap on a truck that is so new? Also, why not increase push the limit of pump gas and go 10.5:1 (and if you use aluminum heads you might be able to get more I believe, please correct me if im wrong)
Nothing is wrong with the engine in there now, just swapping for more cubes really. I'll be keeping the 5.3l just in case I decide to do something different down the road...she only has 10k miles.
 The 243 (Z06) heads will be milled .020" so along with the smaller CC and mill work it should put me a little past 10.5:1 compression. But we'll see for sure once the motor is built. It's an LQ4 block so it has slightly dished pistons vs. the flat tops on the LQ9.
Last edited by Tofu; Mar 16, 2007 at 12:43 AM. Reason: Automerged Doublepost

New Member
Joined: 03-06-07
Posts: 103
Likes: 0
From: Wisconsin
Plastigauge is not the correct way to gauge clearance in the bottom end. It should strictly be used as a reference. The correct way to clearance the bottom end, it to install the bearings, and then use a telescopic gauge and a micrometer to determine the ID of the bearing shell (with full torque placed on the bolts..this is for both rod/main bearings). Then you take your micrometer and get the OD of the journal on the crankshaft for that bearing...ID-OD= Oil clearance for that bearing.
As for my major project.
This write-up will not go into detail on how to blueprint an engine. It is extremely important that you take the time to varify all clearances within your engine. This includes, main bearing oil clearances, rod bearing oil clearances, crankshaft end play, piston ring end gap, and piston side clearances among others. There are numerous books written on how to blueprint an engine. Amazlingly one is called exactly that "How To Blueprint an Engine."
The key to building any bottom end is starting with the right parts for your expected power goals. Be realistic when choosing your parts. The factory crankshaft has been proven to with stand 900 wheel horsepower. As a matter of a fact, Electromotive is the only group to have ever broken a factory crankshaft, and that was on a 1000 horsepower IMSA car.
The rest of the rotating assembly has been used on applications making well over 500 wheel horsepower. The NA 9.0:1 compression pistons have been tested to this level as well.
Stock pistons on pre-W series engines are 7.8:1, while later W series turbo engines are 8.3:1.
For this build, I will be using the factory 8:3.1 compression pistons, factory connecting rods (with some modifications), and the factory crank. Nissan main and rod bearings will be used, along with a Nissan engine gasket set, and factory rod and main bolts. No studs will be used in this engine. This setup has been used in this same engine/vehicle, to make 550WHP on 28PSI of boost, and had a NOS direct port nitrous system jetted for 180 horsepower on top of that.
The reason for this rebuild, is not caused because of component failure, but simply a tear down and rebuild to verify bottom engine condition after tripling the factory output.
Let the build begin:
This is the rotating assembly that I will be using minus pistons. Notice that the crank has been polished. This ensures a smooth surface, and even wear on the new bearings. The con. rods have had the small end rebushed with bronze bushings as the W-series engines use full floating piston pins.

Onto the mods made to the connecting rods that I mentioned earlier. Since the factory connecting rods are forged, there will be forging lines on the beams of the rods. If you look closely at my rods, you'll see that this forging line has been ground down. The beams have also been lightly polished. This removes any stress risers from the connecting rod, as well as reduces windage losses.
Piston and connecting rod assemblies. The entire bottome end was balanced to within .5 gram on every cylinder. This ensures even loading on the crankshaft, and allows the engine to safely rev higher. When balanced, the flywheel was also balanced. The harmonic balancer and crankpulley is 0 balanced from the factory and does not need to be balanced with the rest of the rotating assembly.

Where the magic happens. There are 8.3:1 compression factory W-series pistons. After checking my measurements, I came out with a 8.45:1 compression ratio.

After assembling the pistons onto the rods (which may require the use of an oven, as the piston pins are full floating at 160 degrees), then crankshaft can be set in place using new bearings. Nissan bearings are used for this build. Thanks to nissans dedication to racing, this engine comes with a 1 peice main girdle. While it technically is a 2 bolt main engine, the sturdiness of this cast 1 peice girdle, exceeds the needs of even the highest prepped race engines. Electromotive used the stock crank girdle on their 1000horsepower Imsa engines. Thats good enough for me.

You will notice that the oil pump pickup tube is bolted in place. Why am i pointing this out you ask? Well its strictly a lead in to my next point, which is tear down and inspect your factory oil pump. I found all clearances within my factory pump to be within spec, so I simply cleaned and reassembled the pump. I would disassemble and inspect the pump even if I purchased a new pump. Oil is the blood of your engine. Its not something to mess around with.

Once the crankshaft is installed, the piston and rod assemblies can be installed. When installing, be careful not to out any scratches in the cylinder walls. The proper finish is required to get the rings to seat properly, and a nick or scratch in the cylinder wall could have negative effects on rings sealing. Also, use care to avoid the rod journal with the rod bolts. Again, damage here could be destructive. This picture shows plasti-guage being used to verify bearing clearance. This is just for verification and not actual measurement.

After all 6 pistons are in, bolt up the oil pump and prepare to move on to the next step of assembling the long block.

As for my major project.
This write-up will not go into detail on how to blueprint an engine. It is extremely important that you take the time to varify all clearances within your engine. This includes, main bearing oil clearances, rod bearing oil clearances, crankshaft end play, piston ring end gap, and piston side clearances among others. There are numerous books written on how to blueprint an engine. Amazlingly one is called exactly that "How To Blueprint an Engine."
The key to building any bottom end is starting with the right parts for your expected power goals. Be realistic when choosing your parts. The factory crankshaft has been proven to with stand 900 wheel horsepower. As a matter of a fact, Electromotive is the only group to have ever broken a factory crankshaft, and that was on a 1000 horsepower IMSA car.
The rest of the rotating assembly has been used on applications making well over 500 wheel horsepower. The NA 9.0:1 compression pistons have been tested to this level as well.
Stock pistons on pre-W series engines are 7.8:1, while later W series turbo engines are 8.3:1.
For this build, I will be using the factory 8:3.1 compression pistons, factory connecting rods (with some modifications), and the factory crank. Nissan main and rod bearings will be used, along with a Nissan engine gasket set, and factory rod and main bolts. No studs will be used in this engine. This setup has been used in this same engine/vehicle, to make 550WHP on 28PSI of boost, and had a NOS direct port nitrous system jetted for 180 horsepower on top of that.
The reason for this rebuild, is not caused because of component failure, but simply a tear down and rebuild to verify bottom engine condition after tripling the factory output.
Let the build begin:
This is the rotating assembly that I will be using minus pistons. Notice that the crank has been polished. This ensures a smooth surface, and even wear on the new bearings. The con. rods have had the small end rebushed with bronze bushings as the W-series engines use full floating piston pins.
Onto the mods made to the connecting rods that I mentioned earlier. Since the factory connecting rods are forged, there will be forging lines on the beams of the rods. If you look closely at my rods, you'll see that this forging line has been ground down. The beams have also been lightly polished. This removes any stress risers from the connecting rod, as well as reduces windage losses.
Piston and connecting rod assemblies. The entire bottome end was balanced to within .5 gram on every cylinder. This ensures even loading on the crankshaft, and allows the engine to safely rev higher. When balanced, the flywheel was also balanced. The harmonic balancer and crankpulley is 0 balanced from the factory and does not need to be balanced with the rest of the rotating assembly.
Where the magic happens. There are 8.3:1 compression factory W-series pistons. After checking my measurements, I came out with a 8.45:1 compression ratio.
After assembling the pistons onto the rods (which may require the use of an oven, as the piston pins are full floating at 160 degrees), then crankshaft can be set in place using new bearings. Nissan bearings are used for this build. Thanks to nissans dedication to racing, this engine comes with a 1 peice main girdle. While it technically is a 2 bolt main engine, the sturdiness of this cast 1 peice girdle, exceeds the needs of even the highest prepped race engines. Electromotive used the stock crank girdle on their 1000horsepower Imsa engines. Thats good enough for me.
You will notice that the oil pump pickup tube is bolted in place. Why am i pointing this out you ask? Well its strictly a lead in to my next point, which is tear down and inspect your factory oil pump. I found all clearances within my factory pump to be within spec, so I simply cleaned and reassembled the pump. I would disassemble and inspect the pump even if I purchased a new pump. Oil is the blood of your engine. Its not something to mess around with.
Once the crankshaft is installed, the piston and rod assemblies can be installed. When installing, be careful not to out any scratches in the cylinder walls. The proper finish is required to get the rings to seat properly, and a nick or scratch in the cylinder wall could have negative effects on rings sealing. Also, use care to avoid the rod journal with the rod bolts. Again, damage here could be destructive. This picture shows plasti-guage being used to verify bearing clearance. This is just for verification and not actual measurement.
After all 6 pistons are in, bolt up the oil pump and prepare to move on to the next step of assembling the long block.
Thread Starter
Senior Member
Joined: 07-11-05
Posts: 2,533
Likes: 0
From: Houston
***UPDATE***
I sold my Comp Cam today, I'm going with a new setup for the Z06 heads.
A custom ground Thunder Racing camshaft:
228/226 .588/.570 111 + 0 are the specs.
I'll post some pics when it gets here.
I sold my Comp Cam today, I'm going with a new setup for the Z06 heads.
A custom ground Thunder Racing camshaft:
228/226 .588/.570 111 + 0 are the specs.
I'll post some pics when it gets here.

Senior Member
Joined: 10-08-05
Posts: 5,295
Likes: 0
From: AZ
The Z06 heads should be awesome on the that motor. If I remember correctly the original Silverado SS concept was a 6.0L with LS6 heads. Performance was much more impressive than what actually made it to the market.
Senior Member
Joined: 04-03-06
Posts: 7,570
Likes: 0
From: Mesa, AZ
Well this sucks because I didn't want to be posting in this thread for a while, but in light of recent events I've been forced into an early build so...
Ferria big bore Ti valves
Ferria valve springs
Cometic head gasket
Golden Eagle head studs
Massivly Ported head
Custom grind cams
Neutral balence shafts
Forged 8.5:1 pistons
Whipple W75AX @ 30 psi or so
Some fuel system mods and thats about it. Should be just a little faster than it is now
Ferria big bore Ti valves
Ferria valve springs
Cometic head gasket
Golden Eagle head studs
Massivly Ported head
Custom grind cams
Neutral balence shafts
Forged 8.5:1 pistons
Whipple W75AX @ 30 psi or so
Some fuel system mods and thats about it. Should be just a little faster than it is now
I am gonna use Eagle's Forged 467ci kit, forged pistons, h-beam rods, forged crank. Yeah cubic inches are one thing, but Pontiac Horsepower and torque is in the heads. I am either gonna rebuild the 428 heads with Ferrea Race valves, 2.19, 1.77 titanium, and an extreme port and polish for 300cfm. Or I will just swap those with the KRE Aluminum D-Port 85cc cnc ported to 310cfm at 28" with 2.11, 1.66 titanium ferrea race valves. Probably the latter to keep down on engine weight. I am doing the 85 cc chambers to allow 9.75 street pump CR. I will also have crank scraper, 8qrt moroso oil pan, and a 80# melling oil pump. Valve train will be complete Comp roller, with a custom cam of around 240/246 duration @.050" and 530/550 lift with 1.65 roller rockers, and double Roller timing chain. For cooling. Becool alum radiator, with dual electric fans that flow 1500cfm, electric water pump, 165 thermostat, and a high power alternator. For the intake, I'm gonna port match the edelbrock dual carb intake with a set 600cfm thunder series carbs(dual inlet). A pro-charger might be added after all of that for a 800hp 900tq motor.
hey archie check into butler performance i got with them about porting my iron heads for my 70 goat i did most of the work then sent them to them for finish work with a 273 gear in the rear my goat ran 11.90s in the 1/4


