
Building a dual pod cluster


Building a dual pod cluster
So Im pretty sure I'm gonna make one for my upcoming supercharger build. I've looked at all the pics of ones people have made and checked out the how-to, but Im wondering from people who have done it, how hard is it? It doesnt really seem too hard to make but are there any pointers I should have before going into it?
Im also gonna use this thread as a build thread for this as well. So let the comments/hints/tips/tricks flow and I'll keep yall updated as I work on this.
Im also gonna use this thread as a build thread for this as well. So let the comments/hints/tips/tricks flow and I'll keep yall updated as I work on this.


Thats kinda what I was figuring. I've got my dremel with a bunch of good cutting attachments. Today Im going to be buying some finer grit sandpaper then what I have, the epoxy, and some filler. Is there any filler that works better then others?
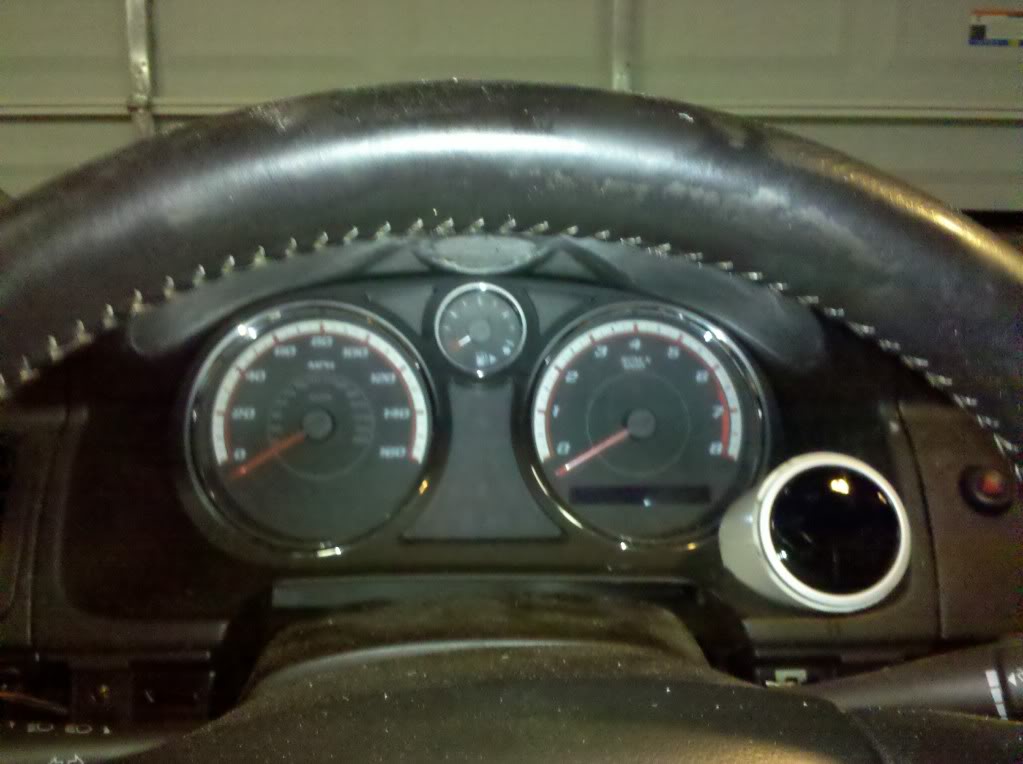
I've got my donor pod and Im just gonna use my stock cluster bezel instead of having to buy a new one.
I've got my donor pod and Im just gonna use my stock cluster bezel instead of having to buy a new one.

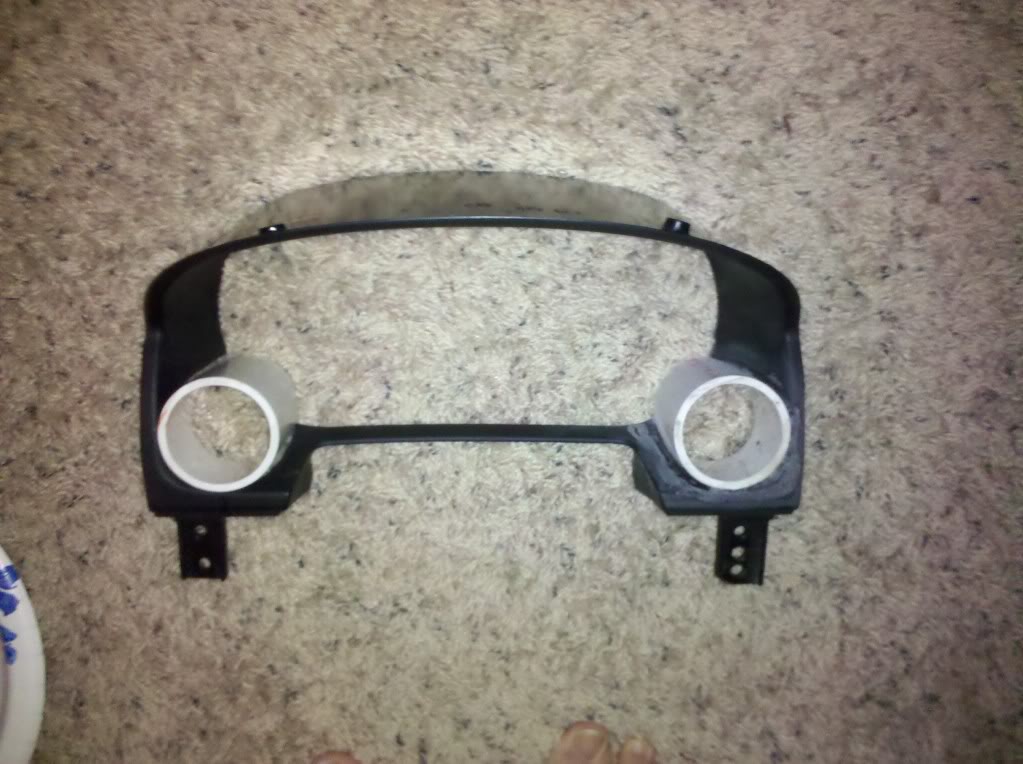
I didnt do step by step pics. Once I got started I just kept on trucking til I was done. But here is my finished product. Its not the greatest but it'll work for me.

 Moderator

Senior Member
Joined: 11-21-08
Posts: 1,985
Likes: 0
From: PA
Buyhids used to, i'd assume since it's still on their website they do lol Custom Gauge Pods
Holy ****! $260 for one of these if you buy from them?! Damn maybe I should sell them cause that's one he'll of a mark up as oppose to what I paid to make mine. Lol
yeah, but what people are asking and are willing to pay are two different things. To make one of these right and flawless takes a while and not really worth the money imo.
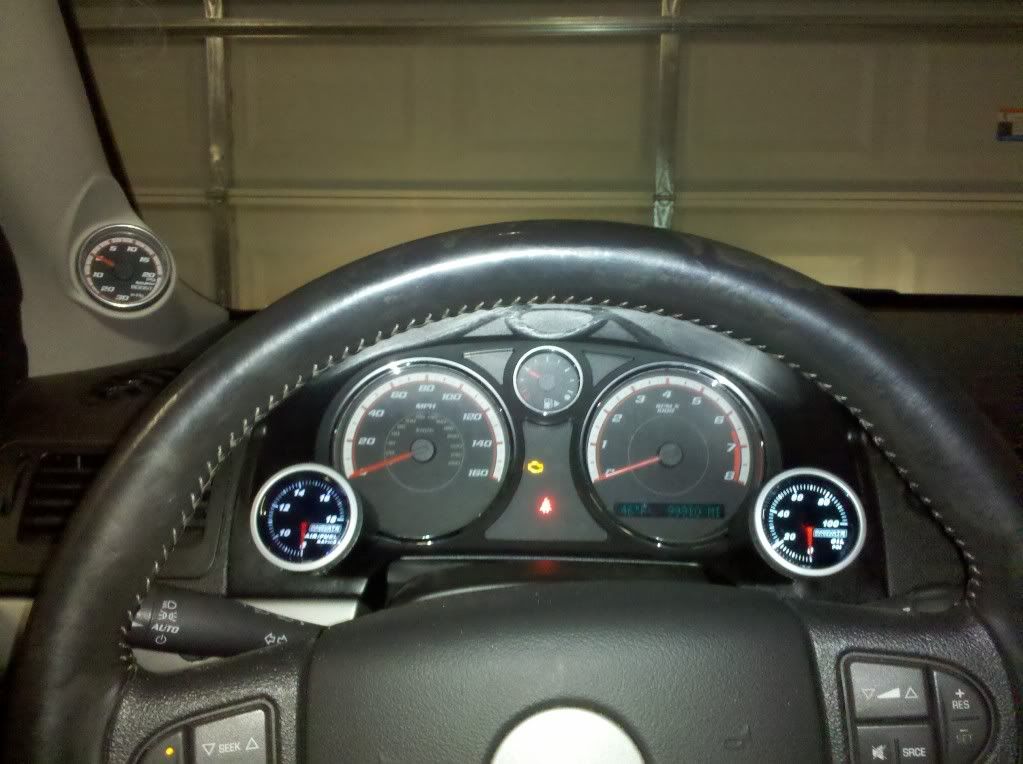
Oh I agree. Mine is definitely not flawless. But I ended up paying about $50 for mine and I didnt really want an A-pillar, so I got what I wanted for less then what I would have paid for something I didnt really want. I should have used a flexible bumper epoxy to fill in the pits and such, but I just used a glazing putty instead. Heres how it looks in the car with just one of the gauges installed. The other pod is gonna be used for my wideband.

Senior Member
Joined: 11-21-08
Posts: 1,985
Likes: 0
From: PA
 ...it looks pretty good! there's a couple places i can see that would drive me nuts, but probably only because i'm crazy about stuff like that lol
Well I think once both gauges are in, some of the imperfections will be hidden and less visible. I figure, as with most things in my car, after a while I'll get bored and will redo it or something.

Well I would need the bezel and the cash to buy the donor pods and epoxy. On mine I just used one of the universal dual pod things you can buy at AutoZone. Ive not tried it with PVC and with the pods I used, I dont even have to use the mounting brackets that they come with because the gauges are basically press fit in.
Hahaha. Oh, Im sorry that you think it looks completely terrible. I guess I should have asked your opinion before I made it on how it should look. Oh yeah, thats right, I dont care what you think.

I posted up a picture breakdown in my SC thread from when I made mine:
https://www.cobaltss.net/forums/2-2l...thread-281267/
https://www.cobaltss.net/forums/2-2l...thread-281267/

Thread
Thread Starter
Forum
Replies
Last Post