


my gauge bezel

Thread Starter
Senior Member
Joined: 08-28-05
Posts: 4,368
Likes: 0
From: Socal
my gauge bezel
FINISHED....well its finally finished and i also built a new box so tell me what u guys think
it still needs some more work but i just wanted to share


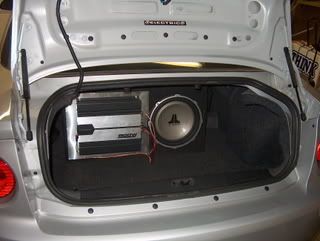
it still needs some more work but i just wanted to share
Last edited by cblt12; Dec 7, 2006 at 09:57 PM.


Senior Member
Joined: 07-03-05
Posts: 4,272
Likes: 0
From: South Bend , Indiana
Lookin good so far man . A little more blending and youll have it . What are you gonna paint the bezel with ? Dupont has a interior match for GM's ebony color ...fyi ...any automotive paint supply store should have Duponts catalog of OEM interior paints and color codes catagorized by model year .
Good luck on the finished product .
Good luck on the finished product .




Senior Member
Joined: 07-01-06
Posts: 5,263
Likes: 0
From: Virginia
how did u measure out how big the gauge whole would be and how did u get it to hold?? I mean you prolly took the gauge off or something and marked it somehow but yah explain in a little detail how you did it so i can experiment off your critique
Thread Starter
Senior Member
Joined: 08-28-05
Posts: 4,368
Likes: 0
From: Socal
ok dont laugh... lol...
1. i cut off the outter ring of the cap to some spray adhesive (it was just like a spray can cap but thinner) and wrapped it around the gauge.
2. i marked and cut the plastic just a little bigger than the gauge, because i knew primer and paint would collect, and just put a piece of duct tape to hold it
3. then the scariest part of the entire project... i cut a hole in the bezel wide enough for the plastic piece to rest nicely and low enough.
4. i took some electrical tape and put a long strip from the bottom of the bezel, over the plastic, and onto the right side... i kept repeating this until i gout a solid shape that i liked.
5. throw some bondo on there... just get it all covered and reasonably smooth... sand and reapply bondo as many times as you need to in order to get it smooth...
6. primer... i used about 4 coats of filler primer to fill any small imperfections and then 5 coats of sandable primer... with pleanty of sanding in between
7. paint... i used dupli color flat black and i think it matchest perftectly
1. i cut off the outter ring of the cap to some spray adhesive (it was just like a spray can cap but thinner) and wrapped it around the gauge.
2. i marked and cut the plastic just a little bigger than the gauge, because i knew primer and paint would collect, and just put a piece of duct tape to hold it
3. then the scariest part of the entire project... i cut a hole in the bezel wide enough for the plastic piece to rest nicely and low enough.
4. i took some electrical tape and put a long strip from the bottom of the bezel, over the plastic, and onto the right side... i kept repeating this until i gout a solid shape that i liked.
5. throw some bondo on there... just get it all covered and reasonably smooth... sand and reapply bondo as many times as you need to in order to get it smooth...
6. primer... i used about 4 coats of filler primer to fill any small imperfections and then 5 coats of sandable primer... with pleanty of sanding in between
7. paint... i used dupli color flat black and i think it matchest perftectly

Senior Member
Joined: 07-01-06
Posts: 5,263
Likes: 0
From: Virginia
ok so u got me kinda confused...i see where your coming from where you got the right size of the guage, and then you cut the plastic piece but i dont get exactly how you got the bondo to come out like that... kinda hard to say but yah explain the bondo procedure more sorry man but i really wanna do this
i appreciate it though
i appreciate it though
Thread Starter
Senior Member
Joined: 08-28-05
Posts: 4,368
Likes: 0
From: Socal
well you need to strech tape across and all around the plastic and to the bezel... when you are done taping it should pretty much be the shape that it will be when finished (i actually was just taping the whole thing for ***** and giggles to see what it would look like because i had never worked with bondo and did not know that i would just be able to use the tape as a base)... you will need quite a bit of tape and just use a razor blade to cut off the excess once you have put enough layers of bondo that it fills strong
it is very hard to try to explain and i wish that i would have taken more pics during the process but i didnt.
it is very hard to try to explain and i wish that i would have taken more pics during the process but i didnt.
 ....
....

Thread
Thread Starter
Forum
Replies
Last Post
Sl0wbaltSS
2.0L LNF Performance Tech
18
Nov 21, 2018 11:11 PM
z28addiction
Wanted - What to buy - All categories
0
Sep 28, 2015 12:03 AM