
Retrofit; How do I fix this gap?


Thread Starter
Senior Member
iTrader: (7)
Joined: 04-06-10
Posts: 3,702
Likes: 0
From: 6000ft on a Mountain in Colorado!
Retrofit; How do I fix this gap?
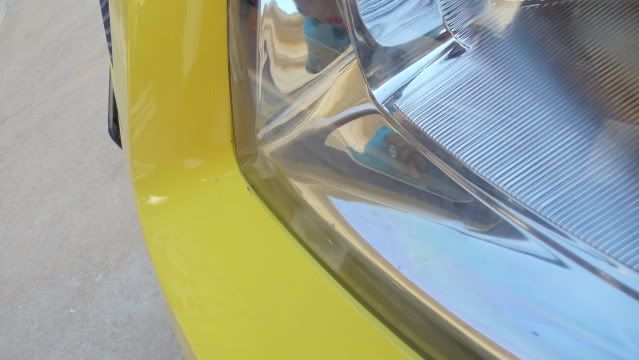
Hey so I've been enjoying the sweet life of HIDs and the nice looks of retrofits. However I have this gap and this gap is on my mind constantly. I went back in, disassembled everything and tried to put everything back the way I thought was best, but I couldn't figure it out.
I lowered the black bracket a tad and then lowered the headlight position on the bracket, but it would cause me to have the gap on top of the headlight and i felt a gap up there is uglier than below so I put it back low.
Any help would be appreciated. Thanks for the help.
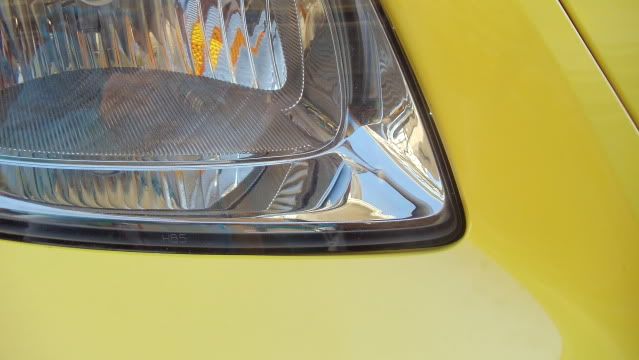
Take a look at the pictures of my gap below the headlights.


Thanks for the help
I lowered the black bracket a tad and then lowered the headlight position on the bracket, but it would cause me to have the gap on top of the headlight and i felt a gap up there is uglier than below so I put it back low.
Any help would be appreciated. Thanks for the help.
Take a look at the pictures of my gap below the headlights.
Thanks for the help
its trial and error...remove the head light and its ABS bracket, and under that adjust the metal bracket in the needed direction...then if there still is a gap, elongate the mounting holes on the abs bracket to move it forward and back...and finally if that doesn't work add washers to the headlights screws that mount to the bracket to shim it/and or elongate the headlight tabs as well....I did ALL of this to mine took a hour each side, but there is Zero gap.
Before

After
Before
After
Last edited by 07BoostedG5; Apr 26, 2011 at 09:34 PM. Reason: added pics
Thread Starter
Senior Member
iTrader: (7)
Joined: 04-06-10
Posts: 3,702
Likes: 0
From: 6000ft on a Mountain in Colorado!
well it seems as if my bumper is too low. I just can't figure out how to adjust the black bracket and headlights.
Also what's this abs bracket you speak of
Also what's this abs bracket you speak of
the black bracket where the headlight sits....
Your bumper is not low its just how the bumper sits....people shim the impact foam under the grill to get rid of the bumper-hood gap....But I tried this too and there is no way people are shimming this spot without buckling the fender/bumper area.
like I said start at the last bracket the actual metal one on the frame that the black bracket sits on...its a custom fix no 2 are the same, just shim w/ washers and elongate the mounting tabs where needed...I was going to make a how to but after getting into the job I put the camera aside since it was such a tedious process, if you were local I would offer to adjust it for you!
to push the gap down on your headlights where the bumper meets, I would start by seeing if washers under the top black mounting bracket would help
so remove the top screws that hold the light to the bracket and put washers under the bracket....so between the black bracket and the body, start with one washer and add as needed.
Nice retros btw
Thread Starter
Senior Member
iTrader: (7)
Joined: 04-06-10
Posts: 3,702
Likes: 0
From: 6000ft on a Mountain in Colorado!
Thanks dude, I love them. A bit pricey for the plug and play system, but well worth it IMO, no risk involved. All warrantied etc. So if I get moisture in them, I'll be sending them back lol. So far it's been pretty rainy so nothing yet.
Okay once it stops raining I'll try it again. To bad it's a simple task with a lot of adjusting. Makes the easy plug and play work last hours.
Here's some more angles if that helps.


Okay once it stops raining I'll try it again. To bad it's a simple task with a lot of adjusting. Makes the easy plug and play work last hours.
Here's some more angles if that helps.


Thread
Thread Starter
Forum
Replies
Last Post