Footballs and other setups for track


Footballs and other setups for track
When I go home to ohio in july i plan on going to the track. Ill be running the 17' M&H slicks but im wondering what i should do for suspension. Im only lowered on springs and i was going to put the footballs in the springs and was wondering how do i do this and also what else i should do to get the best traction at the track. Thanks alot

Senior Member
Joined: 05-19-09
Posts: 536
Likes: 0
From: Honolulu Hawaii
When I go home to ohio in july i plan on going to the track. Ill be running the 17' M&H slicks but im wondering what i should do for suspension. Im only lowered on springs and i was going to put the footballs in the springs and was wondering how do i do this and also what else i should do to get the best traction at the track. Thanks alot
I have yet to try this but I think I will soon. You take to I believe Junior size footballs and deflate them stick them inside the rear springs and then pump them up to your desired firmness. be careful not to overinflate i would think they could pop. Hope this helps.

Air Lift 1000 Part # 60776
Solves two problems:
1. If your tires are rubbing the inner part of your fenders only under heavy load and large dips/bumps, the Air Lift 1000 will stop this. They will act as a cushion between the bump stops. The ride is unaffected and feels improved IMO.
2. Keeps your rear end from dipping under launches. This is especially helpful at the drag strip. When used in this fashion, these are often referred to as "Drag Bags."
I imagine two footballs would be at least $10.00 each. The Air Lift 1000 kit is around $90.00 shipped. So for an extra $70.00 or so you can get a quality system that will last indefinitely. These bags are made to withstand a lot more pressure than a Cobalt rear end.
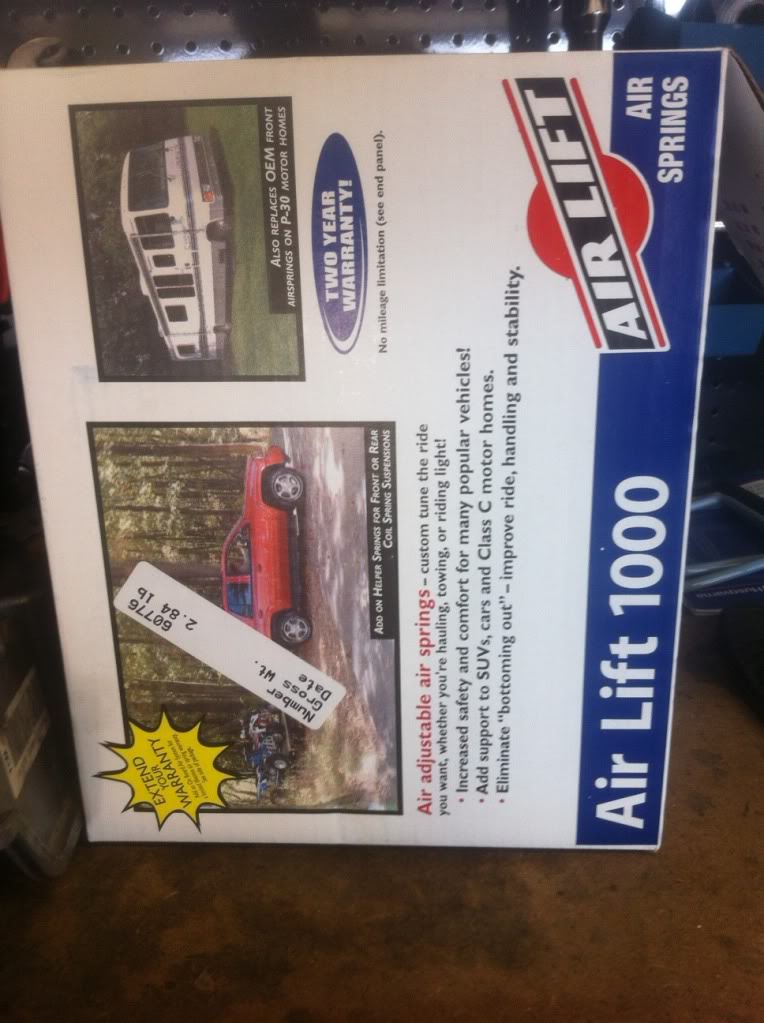
Here's the box:
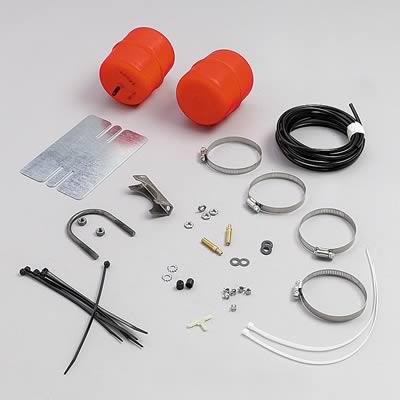
Here's a pic of what comes in the box:
Install is easy. You don't have to remove springs, tires or anything.
1. Just jack up the back end. (After securing the front wheels and using jack stands and so forth)
2. The air bags have little valves with plastic caps on them. Take the caps off, squeeze the bag and fold it in half and then put the cap back on. Then you have a deflated bag that you can shove between the springs.
3. Shove them in so the valve is out of sight, facing the front of the car.
4. Then you take the hose and attach it to the air bags. The air hose is held on to each connection by friction and squeeze clamps. Be sure to put the clamp on the hose before putting it over a connection, otherwise you're gonna have to pull it off again.
5. Run the hose wherever you want using zip ties every now and then along the way to keep the hose where you want it. The only things you really need to look out for is staying away from the exhaust, making sure there is enough slack for full travel of the axle and staying away from any moving/pinching parts.
6. Run the hoses to the "T" and connect them. Then from the "T" run a hose to wherever you want your valve stem to be for airing up the bags. Some people put it by the gas cap behind the fuel door or in the spare tire wheel well next to the battery vent hose or make it stick out the bumper, etc. I found a nice piece of metal attached to the spare tire well and just drilled through it. You can't see it unless you're down low but it's easily accessable for a tire pump or air gauge.
Because air can go from one bag to another, you don't have to worry about one side being stiffer than the other or one rear tire being higher than the other. When using them during DD, I run them at about 11 PSI. Haven't used them at the strip but I imagine 20-25 PSI should do it. You can adjust the PSI with a bicycle tire pump. If you go above 15 or so PSI you can actually raise the back of your car. The kit actually comes with the parts to run the bags seperately under different PSIs but for our cars, I can't think of a situation where it would be useful.
I was gonna submit a "how to" on these but then found there was already one. (https://www.cobaltss.net/forums/how-...install-92259/) In that install thread it says to cut bump stops.
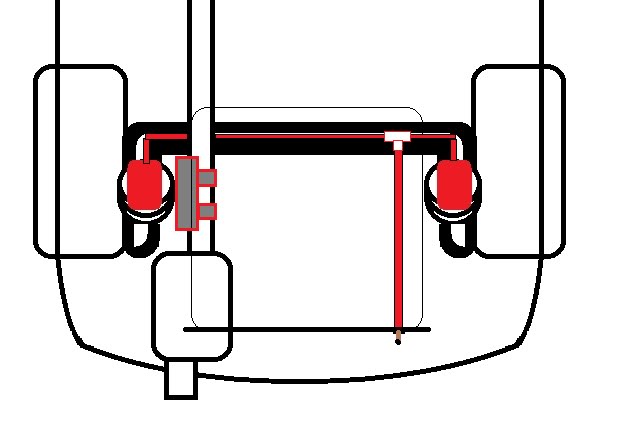
I ran the hose along the OEM swaybar and put the bags in Pedders springs. I'm sure they'll work on any springs unless they're super short. Here is a diagram I threw together of the install:
Here is the passenger side under 11 PSI. Notice how the bag acts as sort of a cushion between the bump stops:
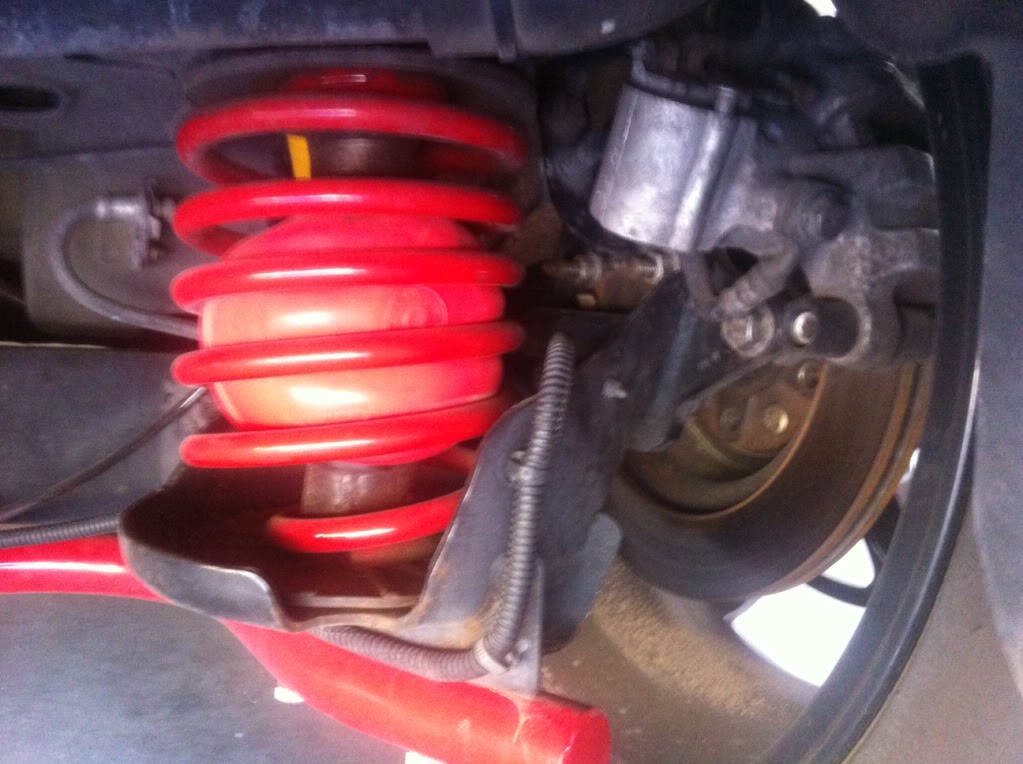
Here is the passenger side where the hose exits the bag:
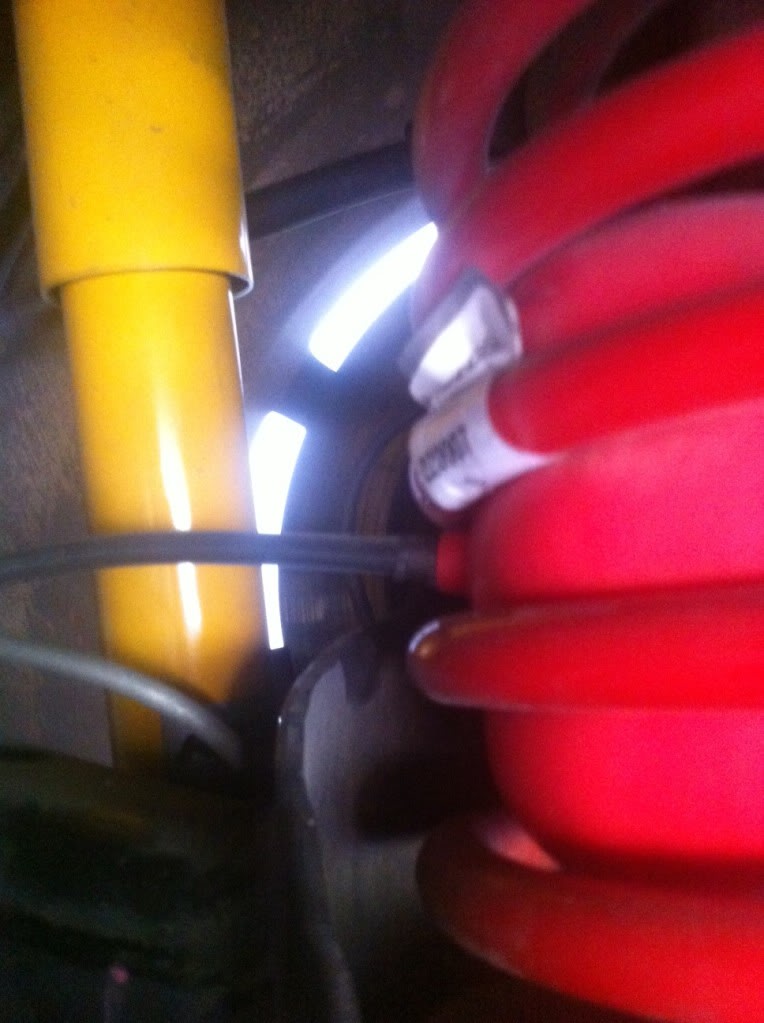
Here is the driver's side bag with the heat shield that protects it:
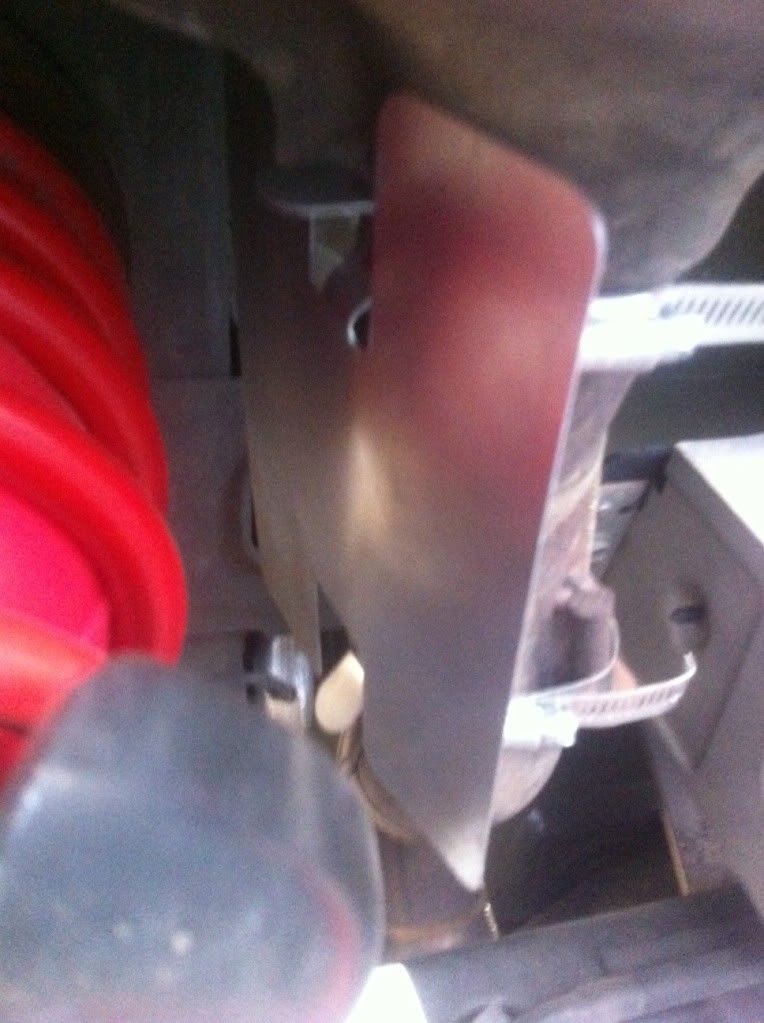
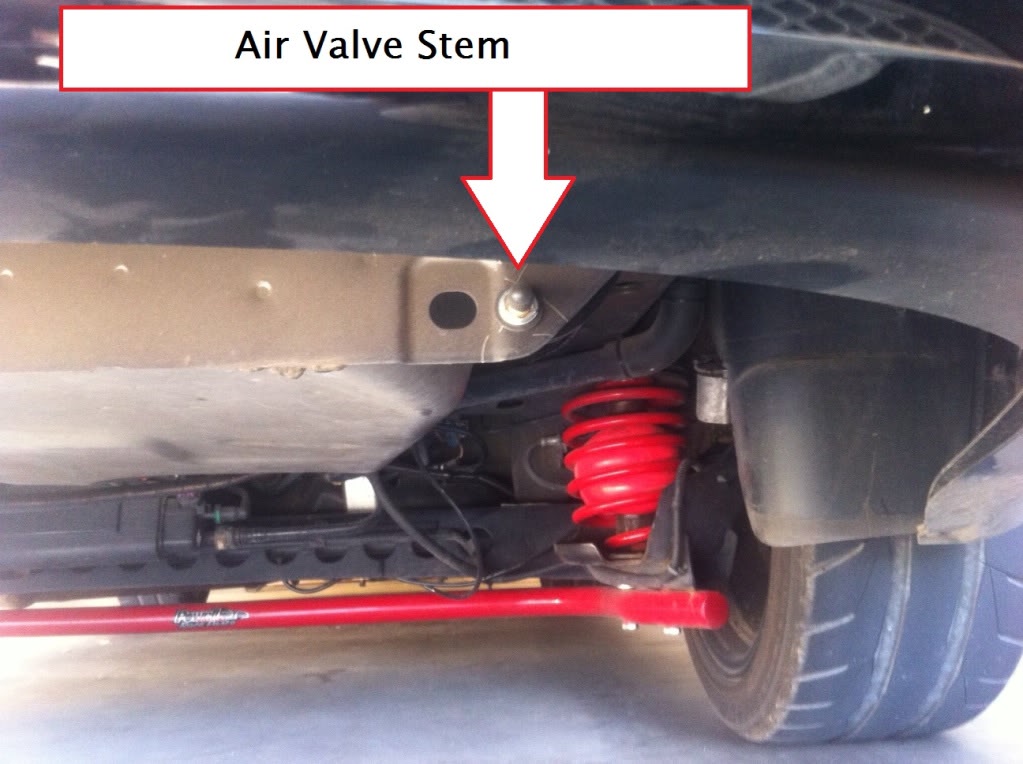
Here is the air valve:
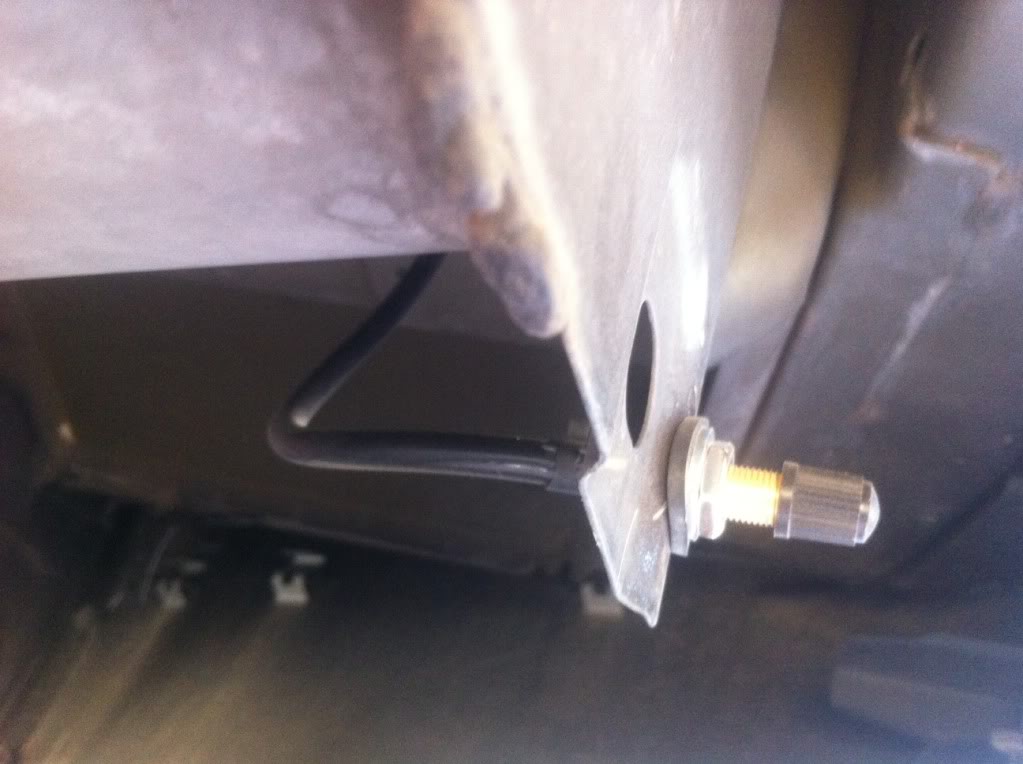
Valve location from the back:
I love the kit so far, at least for DD. It's been on a few weeks. It took some playing around with air pressure to get it right. Haven't tried it at the track yet but I'm sure it will work the same as the football trick. I didn't cut any bump stops. I've driven them with 25 PSI, five people in the car and at 70 mph over highway dips that I used to rub on with four people in the car.
Solves two problems:
1. If your tires are rubbing the inner part of your fenders only under heavy load and large dips/bumps, the Air Lift 1000 will stop this. They will act as a cushion between the bump stops. The ride is unaffected and feels improved IMO.
2. Keeps your rear end from dipping under launches. This is especially helpful at the drag strip. When used in this fashion, these are often referred to as "Drag Bags."
I imagine two footballs would be at least $10.00 each. The Air Lift 1000 kit is around $90.00 shipped. So for an extra $70.00 or so you can get a quality system that will last indefinitely. These bags are made to withstand a lot more pressure than a Cobalt rear end.
Here's the box:
Here's a pic of what comes in the box:
Install is easy. You don't have to remove springs, tires or anything.
1. Just jack up the back end. (After securing the front wheels and using jack stands and so forth)
2. The air bags have little valves with plastic caps on them. Take the caps off, squeeze the bag and fold it in half and then put the cap back on. Then you have a deflated bag that you can shove between the springs.
3. Shove them in so the valve is out of sight, facing the front of the car.
4. Then you take the hose and attach it to the air bags. The air hose is held on to each connection by friction and squeeze clamps. Be sure to put the clamp on the hose before putting it over a connection, otherwise you're gonna have to pull it off again.
5. Run the hose wherever you want using zip ties every now and then along the way to keep the hose where you want it. The only things you really need to look out for is staying away from the exhaust, making sure there is enough slack for full travel of the axle and staying away from any moving/pinching parts.
6. Run the hoses to the "T" and connect them. Then from the "T" run a hose to wherever you want your valve stem to be for airing up the bags. Some people put it by the gas cap behind the fuel door or in the spare tire wheel well next to the battery vent hose or make it stick out the bumper, etc. I found a nice piece of metal attached to the spare tire well and just drilled through it. You can't see it unless you're down low but it's easily accessable for a tire pump or air gauge.
Because air can go from one bag to another, you don't have to worry about one side being stiffer than the other or one rear tire being higher than the other. When using them during DD, I run them at about 11 PSI. Haven't used them at the strip but I imagine 20-25 PSI should do it. You can adjust the PSI with a bicycle tire pump. If you go above 15 or so PSI you can actually raise the back of your car. The kit actually comes with the parts to run the bags seperately under different PSIs but for our cars, I can't think of a situation where it would be useful.
I was gonna submit a "how to" on these but then found there was already one. (https://www.cobaltss.net/forums/how-...install-92259/) In that install thread it says to cut bump stops.
I ran the hose along the OEM swaybar and put the bags in Pedders springs. I'm sure they'll work on any springs unless they're super short. Here is a diagram I threw together of the install:
Here is the passenger side under 11 PSI. Notice how the bag acts as sort of a cushion between the bump stops:
Here is the passenger side where the hose exits the bag:
Here is the driver's side bag with the heat shield that protects it:
Here is the air valve:
Valve location from the back:
I love the kit so far, at least for DD. It's been on a few weeks. It took some playing around with air pressure to get it right. Haven't tried it at the track yet but I'm sure it will work the same as the football trick. I didn't cut any bump stops. I've driven them with 25 PSI, five people in the car and at 70 mph over highway dips that I used to rub on with four people in the car.
Last edited by casionerd; Jun 24, 2012 at 10:45 PM.

Senior Member
Joined: 05-19-09
Posts: 536
Likes: 0
From: Honolulu Hawaii
Air Lift 1000 Part # 60776
Solves two problems:
1. If your tires are rubbing the inner part of your fenders only under heavy load and large dips/bumps, the Air Lift 1000 will stop this. They will act as a cushion between the bump stops. The ride is unaffected and feels improved IMO.
2. Keeps your rear end from dipping under launches. This is especially helpful at the drag strip. When used in this fashion, these are often referred to as "Drag Bags."
I imagine two footballs would be at least $10.00 each. The Air Lift 1000 kit is around $90.00 shipped. So for an extra $70.00 or so you can get a quality system that will last indefinitely. These bags are made to withstand a lot more pressure than a Cobalt rear end.
Here's the box:

Here's a pic of what comes in the box:

Install is easy. You don't have to remove springs, tires or anything.
1. Just jack up the back end. (After securing the front wheels and using jack stands and so forth)
2. The air bags have little valves with plastic caps on them. Take the caps off, squeeze the bag and fold it in half and then put the cap back on. Then you have a deflated bag that you can shove between the springs.
3. Shove them in so the valve is out of sight, facing the front of the car.
4. Then you take the hose and attach it to the air bags. The air hose is held on to each connection by friction and squeeze clamps. Be sure to put the clamp on the hose before putting it over a connection, otherwise you're gonna have to pull it off again.
5. Run the hose wherever you want using zip ties every now and then along the way to keep the hose where you want it. The only things you really need to look out for is staying away from the exhaust, making sure there is enough slack for full travel of the axle and staying away from any moving/pinching parts.
6. Run the hoses to the "T" and connect them. Then from the "T" run a hose to wherever you want your valve stem to be for airing up the bags. Some people put it by the gas cap behind the fuel door or in the spare tire wheel well next to the battery vent hose or make it stick out the bumper, etc. I found a nice piece of metal attached to the spare tire well and just drilled through it. You can't see it unless you're down low but it's easily accessable for a tire pump or air gauge.
Because air can go from one bag to another, you don't have to worry about one side being stiffer than the other or one rear tire being higher than the other. When using them during DD, I run them at about 11 PSI. Haven't used them at the strip but I imagine 20-25 PSI should do it. You can adjust the PSI with a bicycle tire pump. If you go above 15 or so PSI you can actually raise the back of your car. The kit actually comes with the parts to run the bags seperately under different PSIs but for our cars, I can't think of a situation where it would be useful.
I was gonna submit a "how to" on these but then found there was already one. (https://www.cobaltss.net/forums/how-...install-92259/) In that install thread it says to cut bump stops.
I ran the hose along the OEM swaybar and put the bags in Pedders springs. I'm sure they'll work on any springs unless they're super short. Here is a diagram I threw together of the install:

Here is the passenger side under 11 PSI. Notice how the bag acts as sort of a cushion between the bump stops:

Here is the passenger side where the hose exits the bag:

Here is the driver's side bag with the heat shield that protects it:

Here is the air valve:

Valve location from the back:

I love the kit so far, at least for DD. It's been on a few weeks. It took some playing around with air pressure to get it right. Haven't tried it at the track yet but I'm sure it will work the same as the football trick. I didn't cut any bump stops. I've driven them with 25 PSI, five people in the car and at 70 mph over highway dips that I used to rub on with four people in the car.
Solves two problems:
1. If your tires are rubbing the inner part of your fenders only under heavy load and large dips/bumps, the Air Lift 1000 will stop this. They will act as a cushion between the bump stops. The ride is unaffected and feels improved IMO.
2. Keeps your rear end from dipping under launches. This is especially helpful at the drag strip. When used in this fashion, these are often referred to as "Drag Bags."
I imagine two footballs would be at least $10.00 each. The Air Lift 1000 kit is around $90.00 shipped. So for an extra $70.00 or so you can get a quality system that will last indefinitely. These bags are made to withstand a lot more pressure than a Cobalt rear end.
Here's the box:
Here's a pic of what comes in the box:
Install is easy. You don't have to remove springs, tires or anything.
1. Just jack up the back end. (After securing the front wheels and using jack stands and so forth)
2. The air bags have little valves with plastic caps on them. Take the caps off, squeeze the bag and fold it in half and then put the cap back on. Then you have a deflated bag that you can shove between the springs.
3. Shove them in so the valve is out of sight, facing the front of the car.
4. Then you take the hose and attach it to the air bags. The air hose is held on to each connection by friction and squeeze clamps. Be sure to put the clamp on the hose before putting it over a connection, otherwise you're gonna have to pull it off again.
5. Run the hose wherever you want using zip ties every now and then along the way to keep the hose where you want it. The only things you really need to look out for is staying away from the exhaust, making sure there is enough slack for full travel of the axle and staying away from any moving/pinching parts.
6. Run the hoses to the "T" and connect them. Then from the "T" run a hose to wherever you want your valve stem to be for airing up the bags. Some people put it by the gas cap behind the fuel door or in the spare tire wheel well next to the battery vent hose or make it stick out the bumper, etc. I found a nice piece of metal attached to the spare tire well and just drilled through it. You can't see it unless you're down low but it's easily accessable for a tire pump or air gauge.
Because air can go from one bag to another, you don't have to worry about one side being stiffer than the other or one rear tire being higher than the other. When using them during DD, I run them at about 11 PSI. Haven't used them at the strip but I imagine 20-25 PSI should do it. You can adjust the PSI with a bicycle tire pump. If you go above 15 or so PSI you can actually raise the back of your car. The kit actually comes with the parts to run the bags seperately under different PSIs but for our cars, I can't think of a situation where it would be useful.
I was gonna submit a "how to" on these but then found there was already one. (https://www.cobaltss.net/forums/how-...install-92259/) In that install thread it says to cut bump stops.
I ran the hose along the OEM swaybar and put the bags in Pedders springs. I'm sure they'll work on any springs unless they're super short. Here is a diagram I threw together of the install:
Here is the passenger side under 11 PSI. Notice how the bag acts as sort of a cushion between the bump stops:
Here is the passenger side where the hose exits the bag:
Here is the driver's side bag with the heat shield that protects it:
Here is the air valve:
Valve location from the back:
I love the kit so far, at least for DD. It's been on a few weeks. It took some playing around with air pressure to get it right. Haven't tried it at the track yet but I'm sure it will work the same as the football trick. I didn't cut any bump stops. I've driven them with 25 PSI, five people in the car and at 70 mph over highway dips that I used to rub on with four people in the car.
that is freakin awesome I think im sold!!


Footballs will work for the strip. I don't think you would want to drive around with them in there all the time though. If you're just wanting to stiffen up the rear end at the track or you live your life 1/4 mile at a time, use the footballs.
If you want something that you can use during daily driving to prevent bottoming out and you want to be able to adjust the PSI for the strip or daily driving and you want a cleaner look I'd suggest the airbags.
If the rear coilover springs have about the same room inside as the stockers there shouldn't be a problem using either solution. If the space is smaller or there's something rougher than a bump stop on the inside to rub against whatever you throw in there... you're just SOL. LOL.
If you want something that you can use during daily driving to prevent bottoming out and you want to be able to adjust the PSI for the strip or daily driving and you want a cleaner look I'd suggest the airbags.
If the rear coilover springs have about the same room inside as the stockers there shouldn't be a problem using either solution. If the space is smaller or there's something rougher than a bump stop on the inside to rub against whatever you throw in there... you're just SOL. LOL.
You pump them up and then air them down. Mine have been in there for two years no issues.
Crank them coils all the way hard in the back and soft up front and your good. Thats the best way to actually go about it.
Crank them coils all the way hard in the back and soft up front and your good. Thats the best way to actually go about it.
Last edited by cmiller8006; Jun 26, 2012 at 04:23 PM. Reason: Automerged Doublepost


When I go home to ohio in july i plan on going to the track. Ill be running the 17' M&H slicks but im wondering what i should do for suspension. Im only lowered on springs and i was going to put the footballs in the springs and was wondering how do i do this and also what else i should do to get the best traction at the track. Thanks alot
I was, just didn't have time. They are out now. Kind of a bitch to pull out. Deflate and jack car up then wiggle out. Not bad but I'm on pedders so a little lower