
Appearance: How-to: BPS OEM Adapter

Thread Starter
Senior Member
iTrader: (5)
Joined: 09-09-10
Posts: 1,622
Likes: 0
From: Waterloo, Iowa
How-to: BPS OEM Adapter
Quick 'How-to' for installing BPS' new OEM shift knob adapter.
Tools needed:
Screw driver or interior panel tool x2
T25 Torx bit
Ratchet
Rubber mallet(Maybe)
Pliers or 7mm box end wrench
1. Begin by removing the cap on the OEM shift knob. Use a screw driver or panel tool to gently pry under one side and work your way around until it pops free.
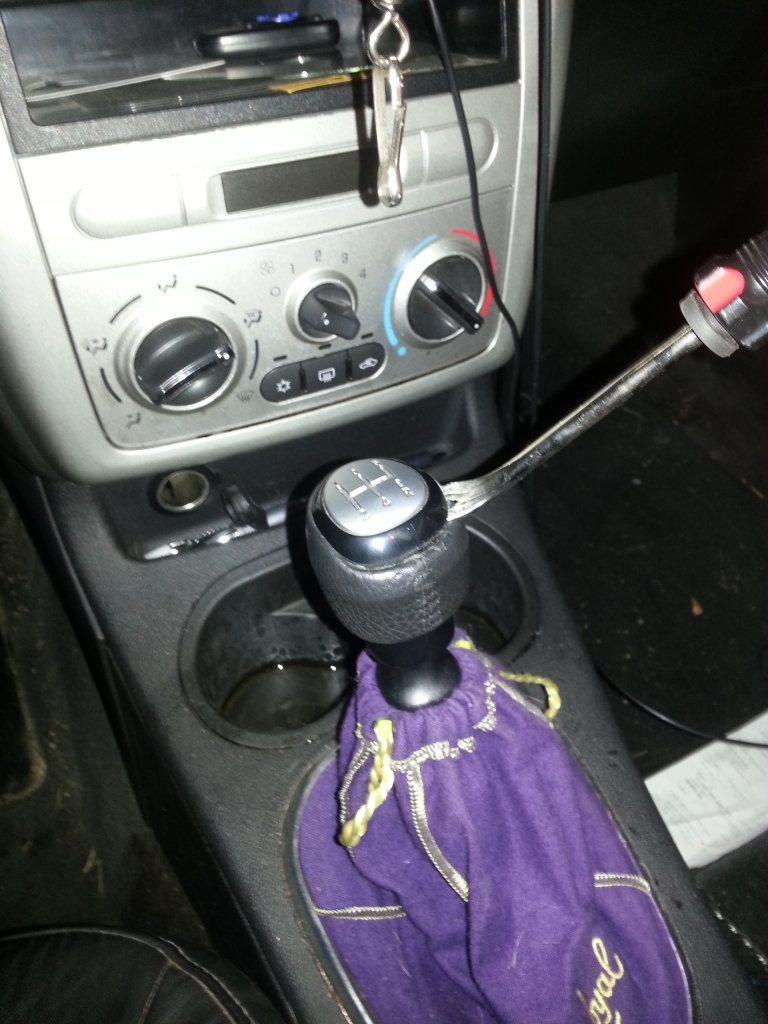
2. Next remove the T25 Torx screw.
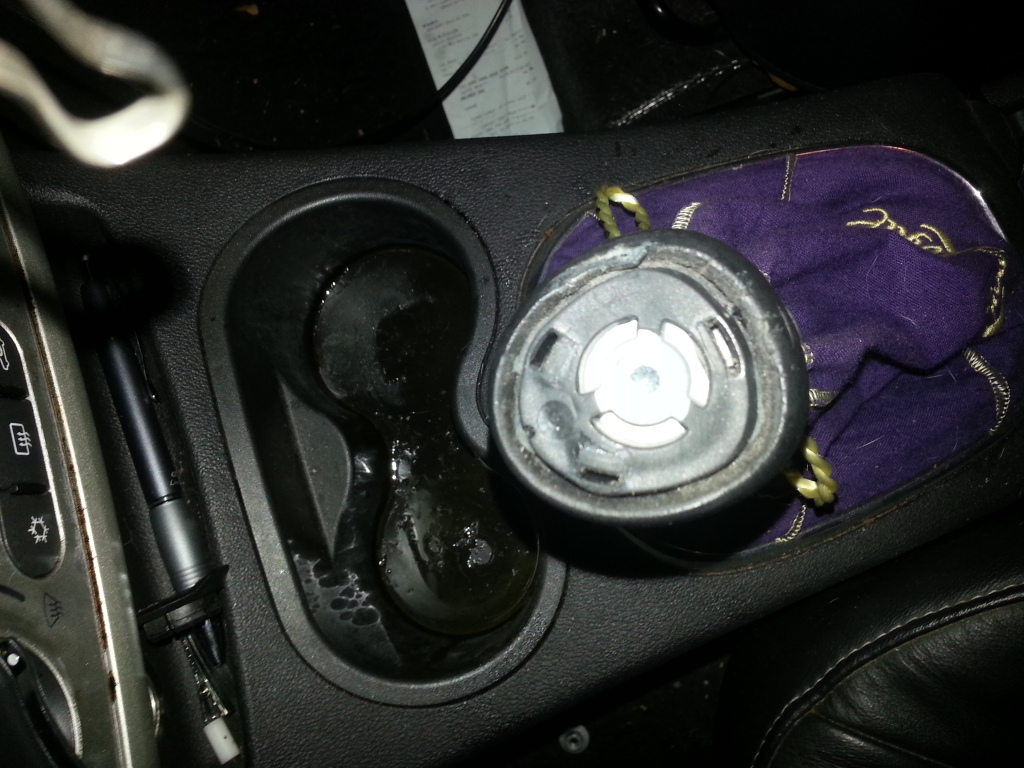
3. Remove the shift knob. Some people have no issues just pulling theirs off but mine was quite stuck. So I put a screw driver in 2 sides of it and gently pried up. If you pry too hard you can damage the reverse lock out cosmetically.
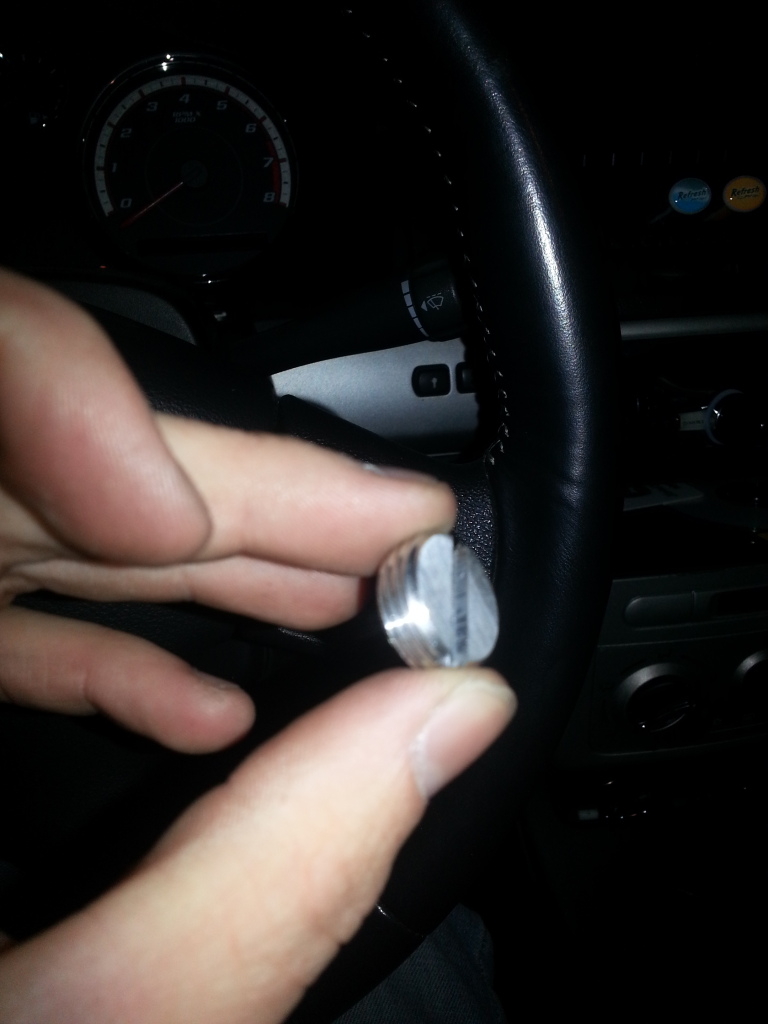
4. Install the BPS adapter.
The shifter itself is splined to keep the OEM knob from turning and BPS has been kind enough to return the favor by adding a spline to the inside of the adapter.
They include a bolt with a nut n washer for coaxing this baby on. I unfortunately didn't have the proper wrench to use it. I'll tell you how to do it the proper way and the Jeremy Clarkson way
The proper way is to thread the provided nut onto the bolt. Thread the bolt into the top of the shifter all the way. Then tighten the nut with wrench or pliers until the adapter is seated all the way down. This could take a bit of time. Remove bolt and add to can of bolts you may need again someday.
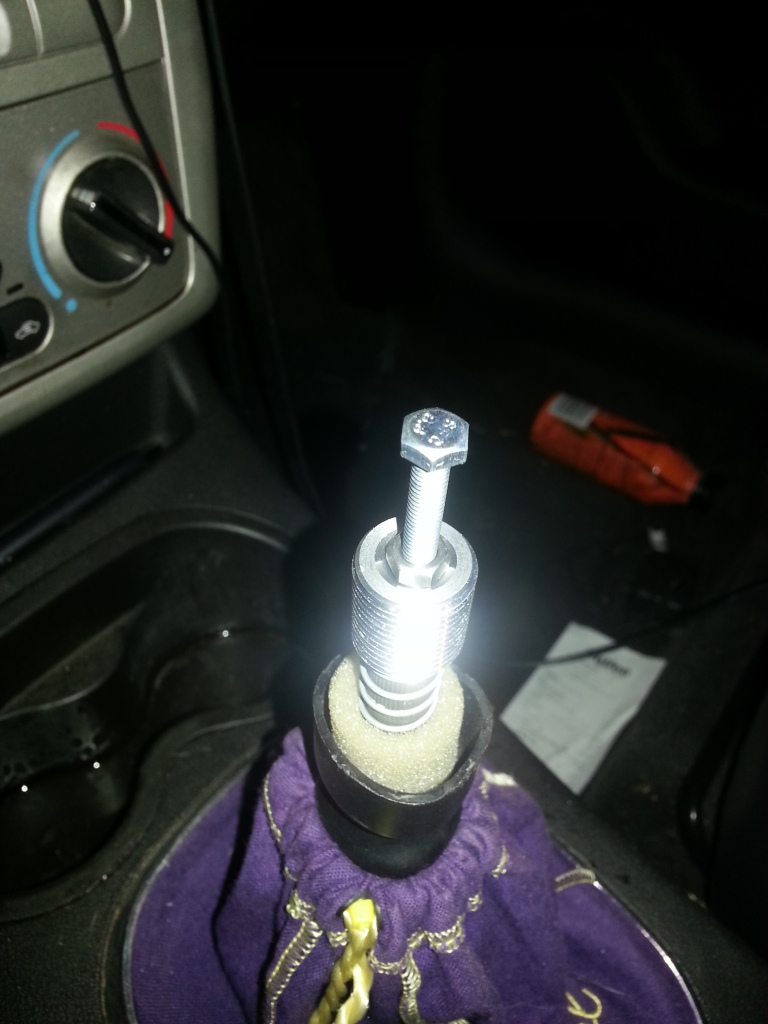
The Jeremy Clarkson way is to just smash it with the rubber mallet until its seated. It's quick and easy but too much smashy smashy could break things.
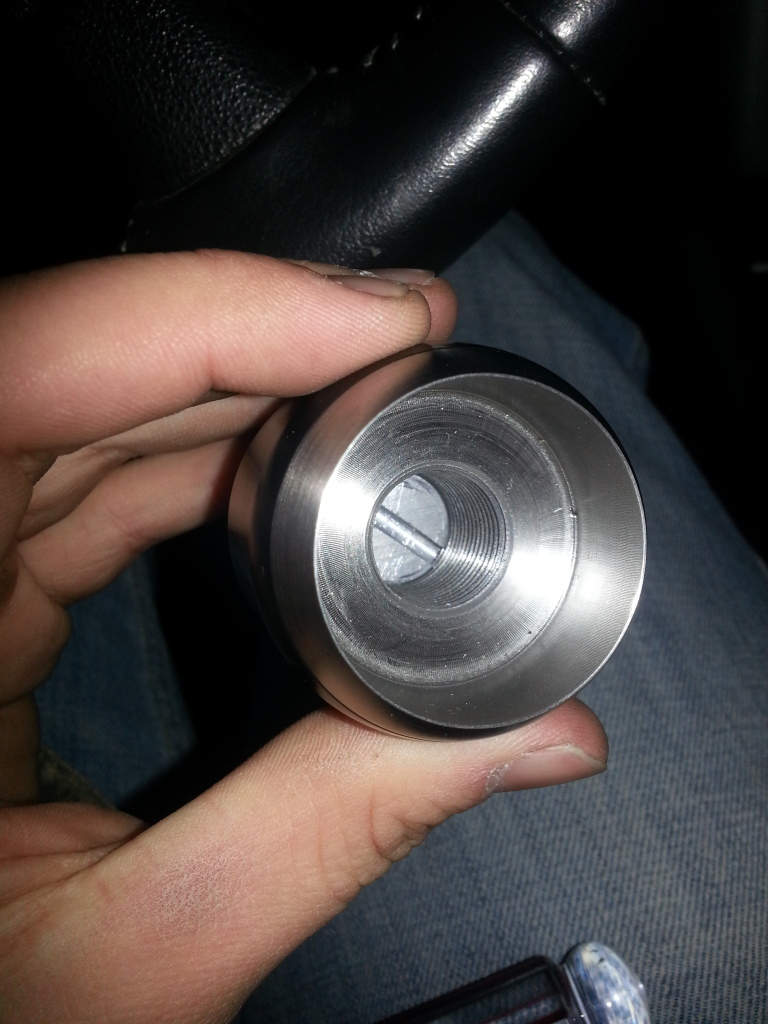
5. Thread in either provided cap screw or reuse the OEM Torx cap screw. (poor photo, sorry phone picts)
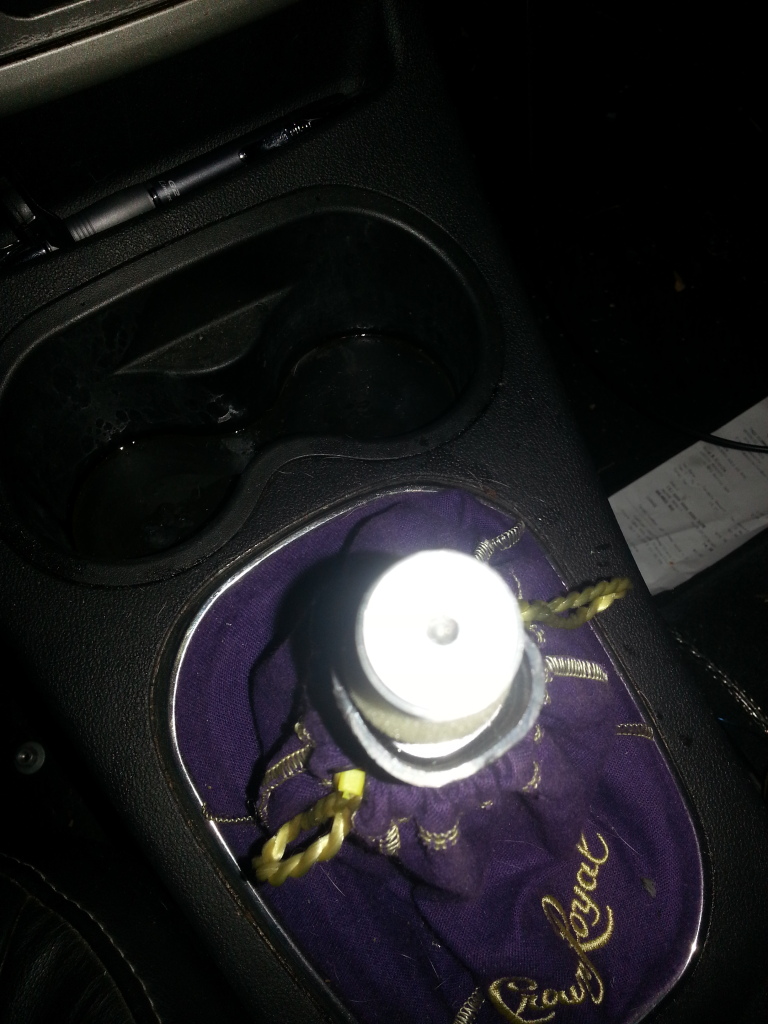
6. Thread adjustment spacer into shift knob. This is used so you can adjust the knob to align the shift pattern correctly. Unless this doesnt matter to you then you can just tighten it all the way to into the knob and slap the knob on. (Reverse lock out doesn't lift high enough if you just tighten it all the way.)
7. Thread the knob on and see how it the pattern lines up. It may take a few tries to get it where you want it. Remember how far off the pattern alignment was as that's how far you must tighten or loosen the adjustment spacer.
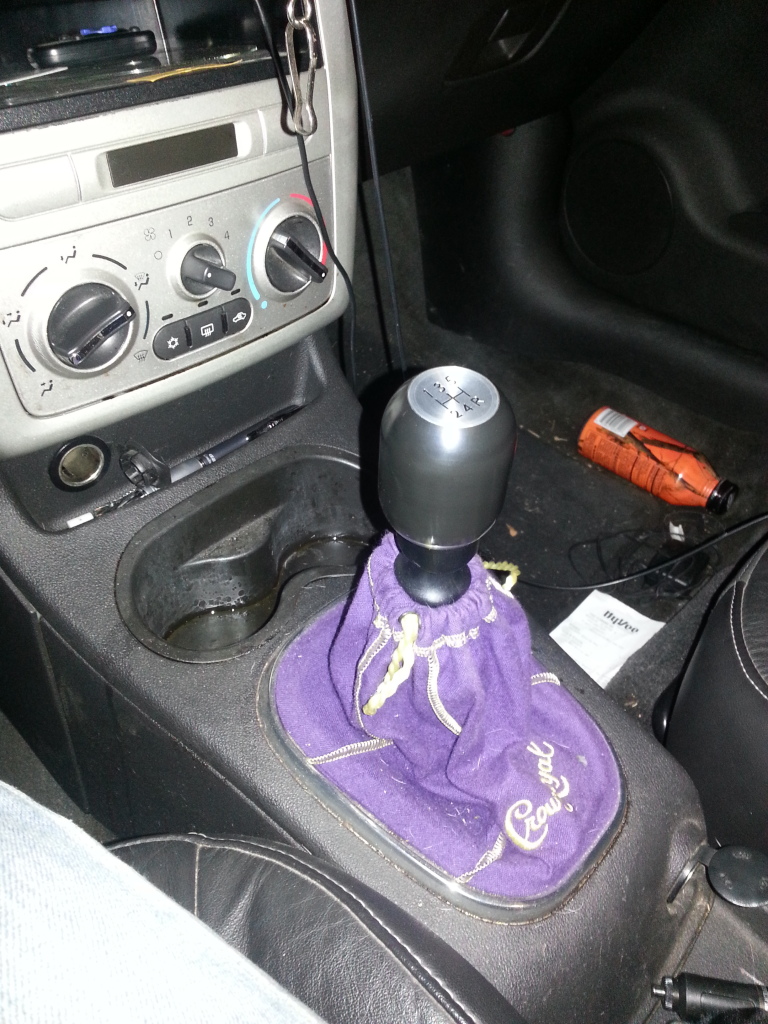
8. Enjoy also ignore my dirty car...
Tools needed:
Screw driver or interior panel tool x2
T25 Torx bit
Ratchet
Rubber mallet(Maybe)
Pliers or 7mm box end wrench
1. Begin by removing the cap on the OEM shift knob. Use a screw driver or panel tool to gently pry under one side and work your way around until it pops free.

2. Next remove the T25 Torx screw.

3. Remove the shift knob. Some people have no issues just pulling theirs off but mine was quite stuck. So I put a screw driver in 2 sides of it and gently pried up. If you pry too hard you can damage the reverse lock out cosmetically.
4. Install the BPS adapter.
The shifter itself is splined to keep the OEM knob from turning and BPS has been kind enough to return the favor by adding a spline to the inside of the adapter.
They include a bolt with a nut n washer for coaxing this baby on. I unfortunately didn't have the proper wrench to use it. I'll tell you how to do it the proper way and the Jeremy Clarkson way
The proper way is to thread the provided nut onto the bolt. Thread the bolt into the top of the shifter all the way. Then tighten the nut with wrench or pliers until the adapter is seated all the way down. This could take a bit of time. Remove bolt and add to can of bolts you may need again someday.

The Jeremy Clarkson way is to just smash it with the rubber mallet until its seated. It's quick and easy but too much smashy smashy could break things.
5. Thread in either provided cap screw or reuse the OEM Torx cap screw. (poor photo, sorry phone picts)

6. Thread adjustment spacer into shift knob. This is used so you can adjust the knob to align the shift pattern correctly. Unless this doesnt matter to you then you can just tighten it all the way to into the knob and slap the knob on. (Reverse lock out doesn't lift high enough if you just tighten it all the way.)


7. Thread the knob on and see how it the pattern lines up. It may take a few tries to get it where you want it. Remember how far off the pattern alignment was as that's how far you must tighten or loosen the adjustment spacer.
8. Enjoy
also ignore my dirty car...

Nice write up. Glad I saw this. Ordered a knob awhile ago ASSuming since there sts was designed for the stock knob, there knob would fit the stock shifter. It didn't. Emailed them earlier and got one on the way to me Monday. Thanks for this thread. And a huge thanks to bps for there awesome customer service. Bps rocks!!!


Thread
Thread Starter
Forum
Replies
Last Post
SS_2009_TC
Wanted - What to buy - All categories
0
Sep 11, 2015 05:41 PM