
Interior: How To: Cover A and C Pillars


Thread Starter
Senior Member
Joined: 06-11-06
Posts: 536
Likes: 0
From: Chesterfield, MI
How To: Cover A and C Pillars
Alright, this is my first how-to, so please excuse anything I miss!
To start, I�m going to throw this disclaimer in: anything that gets ruined, goes wrong, or does not work out for you is your fault, and cobaltss.net and I claim no responsibility. Please read the entire how-to prior to attempting anything.
Also, my car is NOT equipped with airbags in the A-Pillars, so take the necessary extra precautions if yours is. I do not recommend working on yours if you have these airbags installed and don�t know what you�re doing.
That being stated, let�s get down to work�
Supplies:
The first thing you�re going to have to do is remove your pillars. Let�s start in back with the C-Pillars. They�re being held in by two clips and the �plug� in the top of the pillar doesn�t matter; there�s nothing behind it to really worry about. I pried my fingers in behind the headliner and pulled inward to pop off the first, and put my hands down as low as I could and pulled in the same direction to pop off the bottom clip.
To remove the A-Pillars, use a small screwdriver or nail file to pop the little tab out. Use a screwdriver and remove the screw in there. Once that�s out, grab the pillar from the top and pull straight toward the middle of the instrument panel and pop off the two clips holding it in.
And now they�re removed!


With the pillars being removed, you need to get them clean. Before washing though, you can remove the felt tape and stickers on the back side of your pillars. The felt is in there to prevent rattles, but if you use a soft material, that should do the same job as the felt strips. To wash, you can use rubbing alcohol or soap and water; I cleaned them with dish soap and warm water. Be sure to wash the front and back of all the pillars.
NOTE: Now that we�re at this point, I suggest that you only work on one pillar at a time. Until one pillar is fully wrapped, do not go onto the next pillar because each one of the following steps need to be done in a timely manner.
Also, if you have an SS/SC or gauge pod pillar please do this pillar last as it requires some practice prior and is a royal pain in the ass!
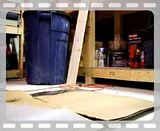
After they�re fully dry you may cut the material for your part. Just make sure you�ve got a piece of material cut that is going to completely cut the surface. Don�t be afraid of wasting material here because I�d rather waste material than not have enough for the part you�re doing.
Here is the microsuede I used next to my C-Pillar (notice how much larger my piece of fabric is):

Next, I suggest �flaming� the surface with your little propane tank. Do one piece at a time and don�t do the next piece until you�re done fully gluing and wrapping the first. Start it up and get a flame, not too hot not too cold. Go over the surface back and forth and be sure not to stay in one spot for too long. Constantly move the torch around the surface. What this does is stimulates the chemicals in the plastic and lets the glue adhere better to the plastic. Watch this video:
Here�s a picture of my A-Pillar once I was finished flaming it. Notice the difference in colors. Had I been using a better setting on my camera, it should�ve looked shiny:

Yours should look shiny, too. Make sure you do all of the front side and about one inch around the edge of the back side for when you wrap the material around the edge later.
Now let that cool down so that it�s close to room temperature. Once that�s done, you�re ready for glue. Here�s the stuff that I used:

This glue recommended a medium coat, so I sprayed a medium coat on both the fabric and on the pillar, then another light coat on both to make sure I didn�t miss a spot (and hopefully it�ll hold even better). I let it sit about 30 seconds or so and got to work. Here�s a picture of the glue on the material; it should look speckled:

Now we�re ready for the more tedious part, wrapping it. Take your time (but not too much) and don�t get frustrated! Start on one side and work your way across the part, smoothing the fabric down to the plastic with your fingers pushing out any wrinkles. Don�t be afraid to pull the material back to get out a wrinkle, just make sure you don�t wait too long! To help keep wrinkles out, pull on the material to keep it tight as you flatten it to the surface.
Here is where you should be at now:


Now cut off the extra material about one inch from the edge of the plastic. Don�t skimp though because this will make sure your material holds onto and around the edge!
Once you cut off the excess material, you�ll want to cut slits into the fabric to make it easier wrapping around the edge. Cut a few slits wherever there is a curve to the plastic or any type of feature that will get in the way of your fabric. Also, cut a V-shape out of the corners to help wrap those.


Now we�re going to spray the glue around the edge. Make sure you cover both the plastic and the material with about the same amount as before. Let that sit about 30-60 seconds and get ready to wrap. Again, be sure to pull the material tight and smooth it down along the edge first, working your way to the end of the fabric. When working around the corners, wrap one side of the corner and the other side of the corner should overlap the fabric you just flattened down.
Also, I wrapped the material right onto the tabs of the C-Pillar. I haven�t tried to put it back into the car to see if it�ll fit, but if not, it�s easy to remove with a razor blade.


Now just let it sit and dry. As long as you sprayed more than enough glue, this should hold. I�m just hoping the heat doesn�t kill the bond in the summertime�
In the end, here�s what I�ve got:


NOTE: When you do your gauge pillar, make sure the gauge is removed. Then use a sharpie or something to marker in around the edge of the gauge opening just in case. This is how mine looked:
http://img206.imageshack.us/img206/1...arpied1em8.jpg
http://img207.imageshack.us/img207/4...arpied2iv0.jpg
When you wrap, be sure to start at the TOP of the pillar and work your way down. Leave the gauge area loose until you�re done flattening the rest of the pillar. Then cut a slit not far from where the gauge should be, and flatten that area down. You�ve been warned: this will be a complete pain in the ass. I had to pull my material back and re-glue multiple times, so be easy on it! Here�s the slit I cut (notice the terrible wrap-job done on it at this point):
http://img184.imageshack.us/img184/8...orcutouoj6.jpg
When I was done, I had a wrinkle on the top corner that I couldn�t get out and some material missing. This is how I fixed the missing material part:
http://img257.imageshack.us/img257/3...coverupjv1.jpg
But it was worth it in the end:
http://img504.imageshack.us/img504/1...nished1gb5.jpg
http://photos-b.ak.facebook.com/phot...19009_8599.jpg
http://photos-c.ak.facebook.com/phot...19010_8874.jpg
GOOD LUCK AND HAPPY MODDING!
To start, I�m going to throw this disclaimer in: anything that gets ruined, goes wrong, or does not work out for you is your fault, and cobaltss.net and I claim no responsibility. Please read the entire how-to prior to attempting anything.
Also, my car is NOT equipped with airbags in the A-Pillars, so take the necessary extra precautions if yours is. I do not recommend working on yours if you have these airbags installed and don�t know what you�re doing.
That being stated, let�s get down to work�
Supplies:
- About 1-2 yards of material (your choice; I got microsuede from JoAnn Fabric)
- Spray-on glue (bought for a few dollars at your local hardware store)
- Scissors / Razor blade
- Screwdriver
- Propane tank / lighter
The first thing you�re going to have to do is remove your pillars. Let�s start in back with the C-Pillars. They�re being held in by two clips and the �plug� in the top of the pillar doesn�t matter; there�s nothing behind it to really worry about. I pried my fingers in behind the headliner and pulled inward to pop off the first, and put my hands down as low as I could and pulled in the same direction to pop off the bottom clip.
To remove the A-Pillars, use a small screwdriver or nail file to pop the little tab out. Use a screwdriver and remove the screw in there. Once that�s out, grab the pillar from the top and pull straight toward the middle of the instrument panel and pop off the two clips holding it in.
And now they�re removed!
With the pillars being removed, you need to get them clean. Before washing though, you can remove the felt tape and stickers on the back side of your pillars. The felt is in there to prevent rattles, but if you use a soft material, that should do the same job as the felt strips. To wash, you can use rubbing alcohol or soap and water; I cleaned them with dish soap and warm water. Be sure to wash the front and back of all the pillars.
NOTE: Now that we�re at this point, I suggest that you only work on one pillar at a time. Until one pillar is fully wrapped, do not go onto the next pillar because each one of the following steps need to be done in a timely manner.
Also, if you have an SS/SC or gauge pod pillar please do this pillar last as it requires some practice prior and is a royal pain in the ass!
After they�re fully dry you may cut the material for your part. Just make sure you�ve got a piece of material cut that is going to completely cut the surface. Don�t be afraid of wasting material here because I�d rather waste material than not have enough for the part you�re doing.
Here is the microsuede I used next to my C-Pillar (notice how much larger my piece of fabric is):
Next, I suggest �flaming� the surface with your little propane tank. Do one piece at a time and don�t do the next piece until you�re done fully gluing and wrapping the first. Start it up and get a flame, not too hot not too cold. Go over the surface back and forth and be sure not to stay in one spot for too long. Constantly move the torch around the surface. What this does is stimulates the chemicals in the plastic and lets the glue adhere better to the plastic. Watch this video:
Here�s a picture of my A-Pillar once I was finished flaming it. Notice the difference in colors. Had I been using a better setting on my camera, it should�ve looked shiny:
Yours should look shiny, too. Make sure you do all of the front side and about one inch around the edge of the back side for when you wrap the material around the edge later.
Now let that cool down so that it�s close to room temperature. Once that�s done, you�re ready for glue. Here�s the stuff that I used:
This glue recommended a medium coat, so I sprayed a medium coat on both the fabric and on the pillar, then another light coat on both to make sure I didn�t miss a spot (and hopefully it�ll hold even better). I let it sit about 30 seconds or so and got to work. Here�s a picture of the glue on the material; it should look speckled:
Now we�re ready for the more tedious part, wrapping it. Take your time (but not too much) and don�t get frustrated! Start on one side and work your way across the part, smoothing the fabric down to the plastic with your fingers pushing out any wrinkles. Don�t be afraid to pull the material back to get out a wrinkle, just make sure you don�t wait too long! To help keep wrinkles out, pull on the material to keep it tight as you flatten it to the surface.
Here is where you should be at now:
Now cut off the extra material about one inch from the edge of the plastic. Don�t skimp though because this will make sure your material holds onto and around the edge!
Once you cut off the excess material, you�ll want to cut slits into the fabric to make it easier wrapping around the edge. Cut a few slits wherever there is a curve to the plastic or any type of feature that will get in the way of your fabric. Also, cut a V-shape out of the corners to help wrap those.
Now we�re going to spray the glue around the edge. Make sure you cover both the plastic and the material with about the same amount as before. Let that sit about 30-60 seconds and get ready to wrap. Again, be sure to pull the material tight and smooth it down along the edge first, working your way to the end of the fabric. When working around the corners, wrap one side of the corner and the other side of the corner should overlap the fabric you just flattened down.
Also, I wrapped the material right onto the tabs of the C-Pillar. I haven�t tried to put it back into the car to see if it�ll fit, but if not, it�s easy to remove with a razor blade.
Now just let it sit and dry. As long as you sprayed more than enough glue, this should hold. I�m just hoping the heat doesn�t kill the bond in the summertime�
In the end, here�s what I�ve got:
NOTE: When you do your gauge pillar, make sure the gauge is removed. Then use a sharpie or something to marker in around the edge of the gauge opening just in case. This is how mine looked:
http://img206.imageshack.us/img206/1...arpied1em8.jpg
http://img207.imageshack.us/img207/4...arpied2iv0.jpg
When you wrap, be sure to start at the TOP of the pillar and work your way down. Leave the gauge area loose until you�re done flattening the rest of the pillar. Then cut a slit not far from where the gauge should be, and flatten that area down. You�ve been warned: this will be a complete pain in the ass. I had to pull my material back and re-glue multiple times, so be easy on it! Here�s the slit I cut (notice the terrible wrap-job done on it at this point):
http://img184.imageshack.us/img184/8...orcutouoj6.jpg
When I was done, I had a wrinkle on the top corner that I couldn�t get out and some material missing. This is how I fixed the missing material part:
http://img257.imageshack.us/img257/3...coverupjv1.jpg
But it was worth it in the end:
http://img504.imageshack.us/img504/1...nished1gb5.jpg
http://photos-b.ak.facebook.com/phot...19009_8599.jpg
http://photos-c.ak.facebook.com/phot...19010_8874.jpg
GOOD LUCK AND HAPPY MODDING!
Last edited by TommyP; Oct 3, 2012 at 10:11 AM.


Thread
Thread Starter
Forum
Replies
Last Post