
Electrical: How to install an Auto Meter Voltmeter


Thread Starter
Senior Member
iTrader: (2)
Joined: 07-10-08
Posts: 1,708
Likes: 3
From: Washington Township, MI
How to install an Auto Meter Voltmeter
Hey guys, this how-to deals specifically with installing on a non-SS/SC Cobalt, but I'm sure you could use the wiring part for that.
Parts needed:
-Screwdriver (with Flat head and T-15 bits)
-Hacksaw and/or file
-Electrical Tape
-Wire Eyelet (for grounding)
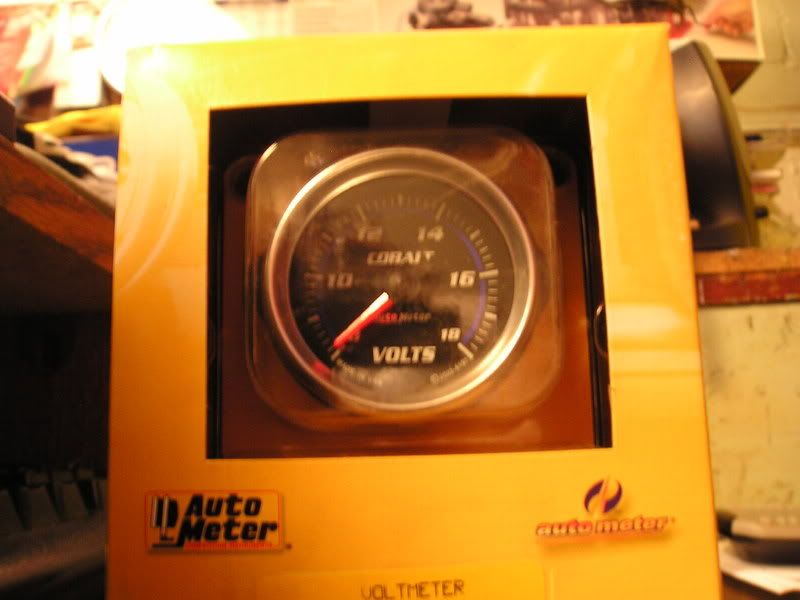
-Auto Meter Voltmeter Gauge
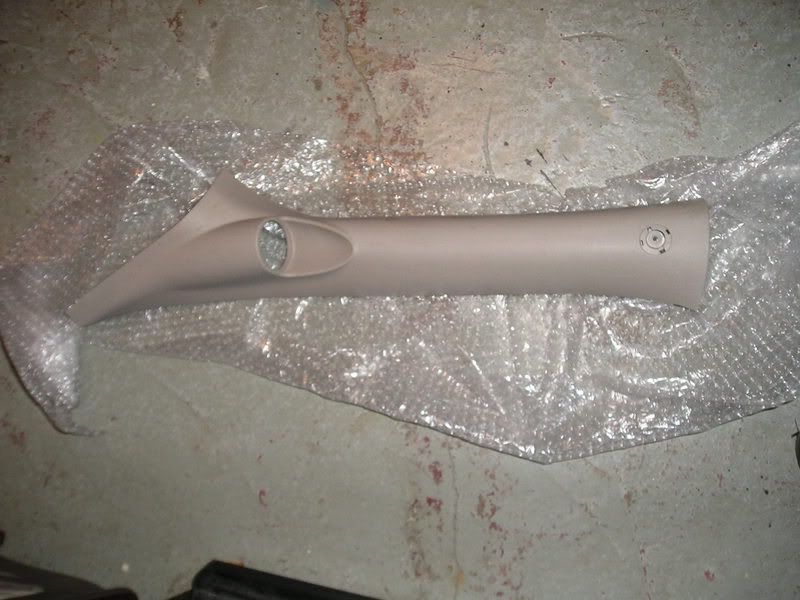
-SS/SC A-Pillar (With Gauge Pod)
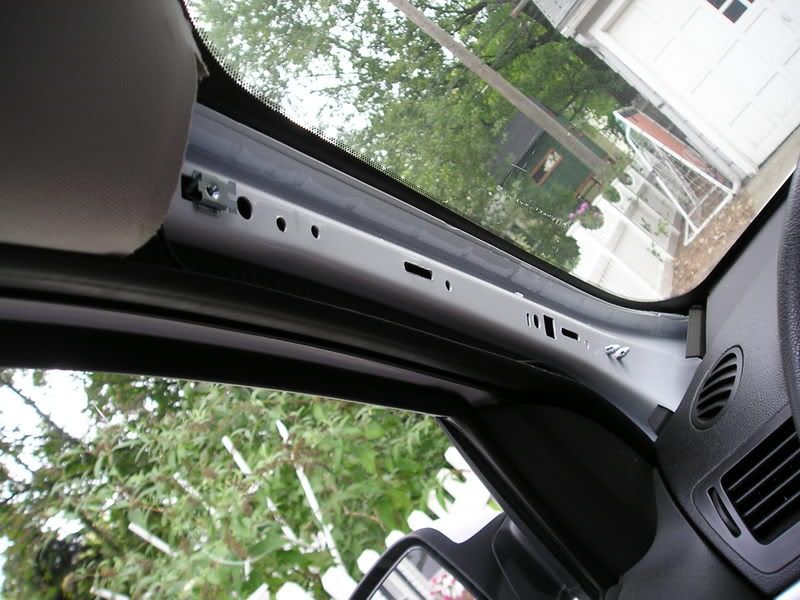
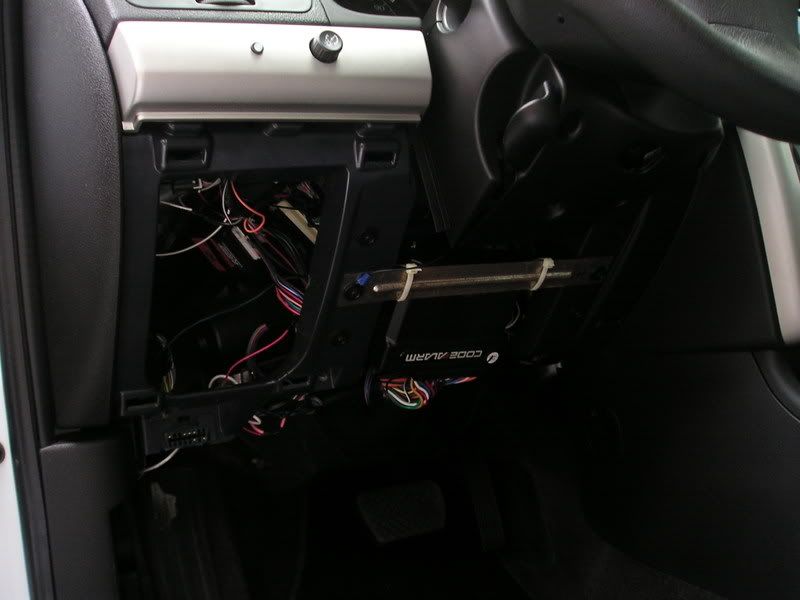
1. Remove your old A-pillar.
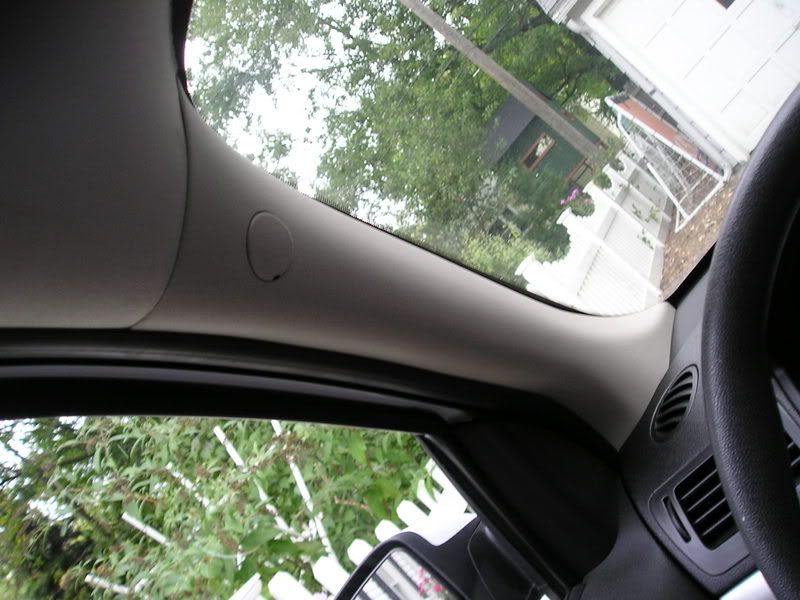
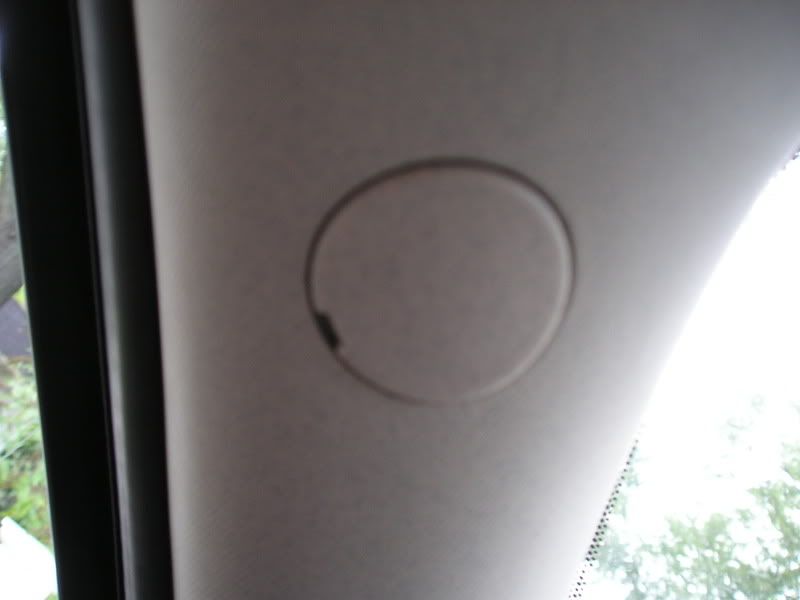
Begin by gently removing the screw cover in the top of the A-pillar
Then you can use your T-15 bit and remove the screw. Pull the A-pillar off (It has two metal clips near the bottom and the middle, as well as a plastic pin near the top)
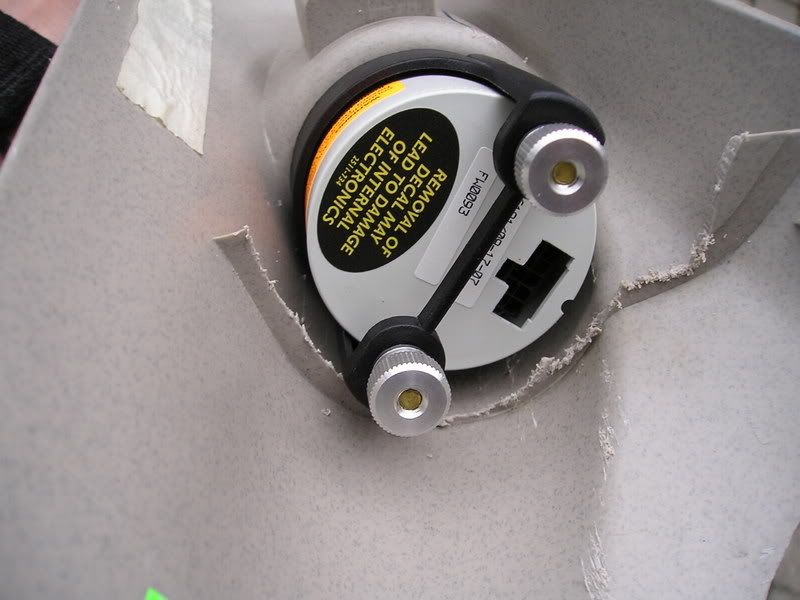
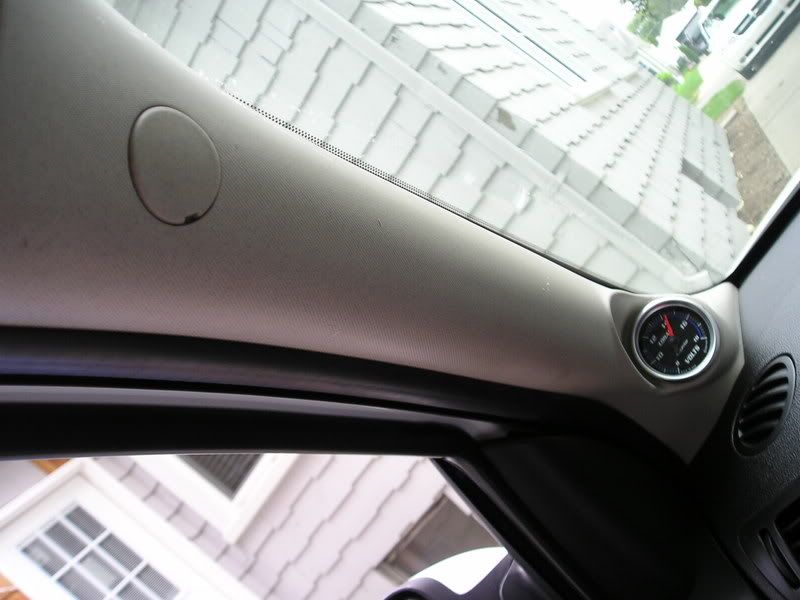
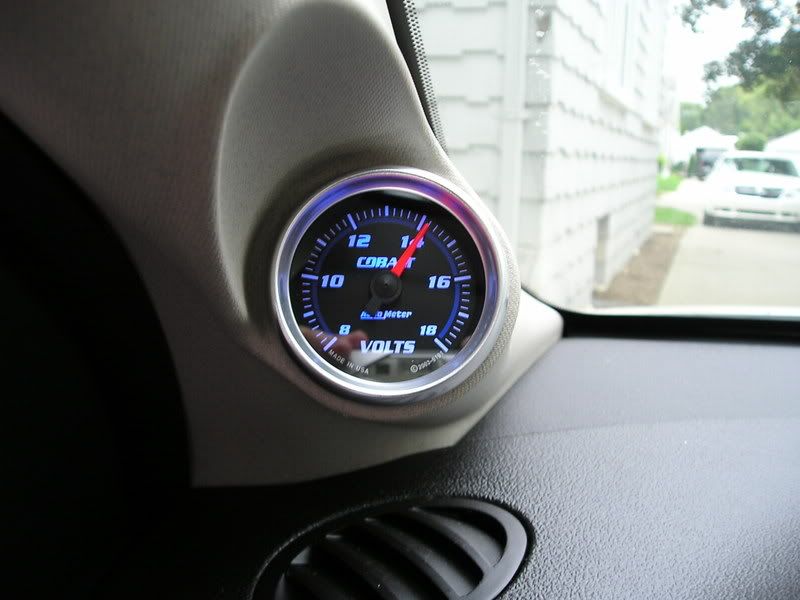
2. Prep the new A-pillar and mount the gauge.
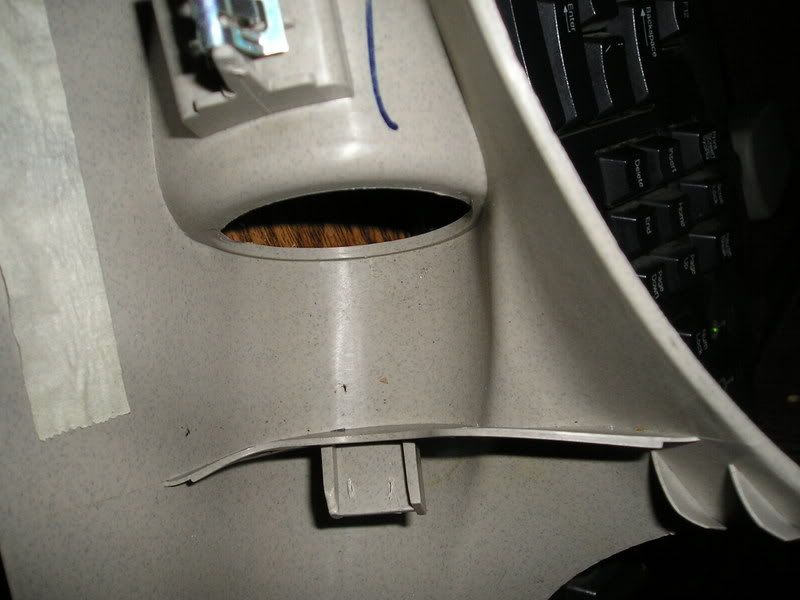
You'll want to remove the factory mounting brace for the boost gauge (which we're not using). You could leave it in there, as it is an Auto Meter gauge from the factory - however, your voltmeter will be rotated 90 degrees from how it should be. .
.
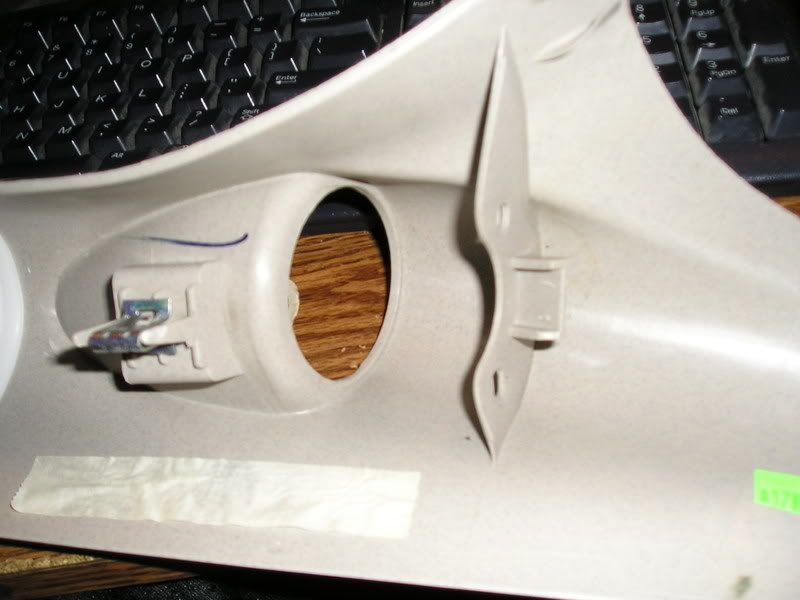
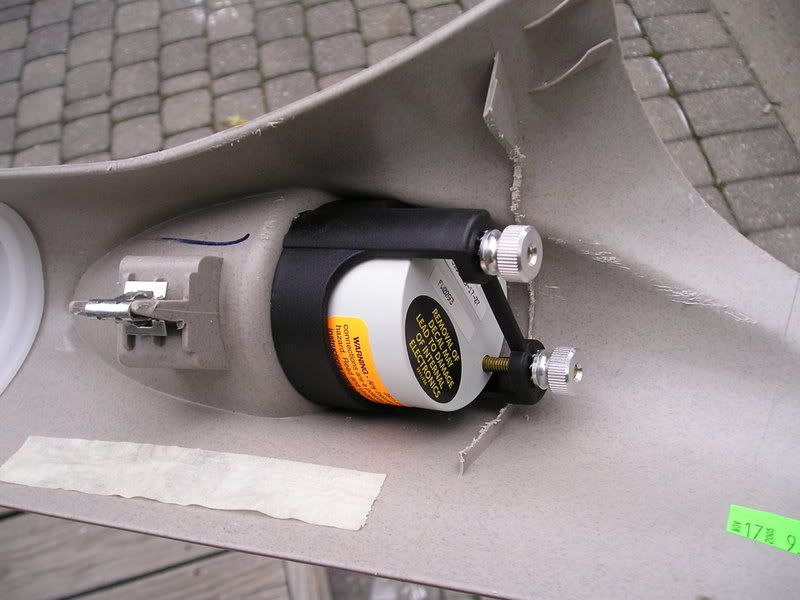
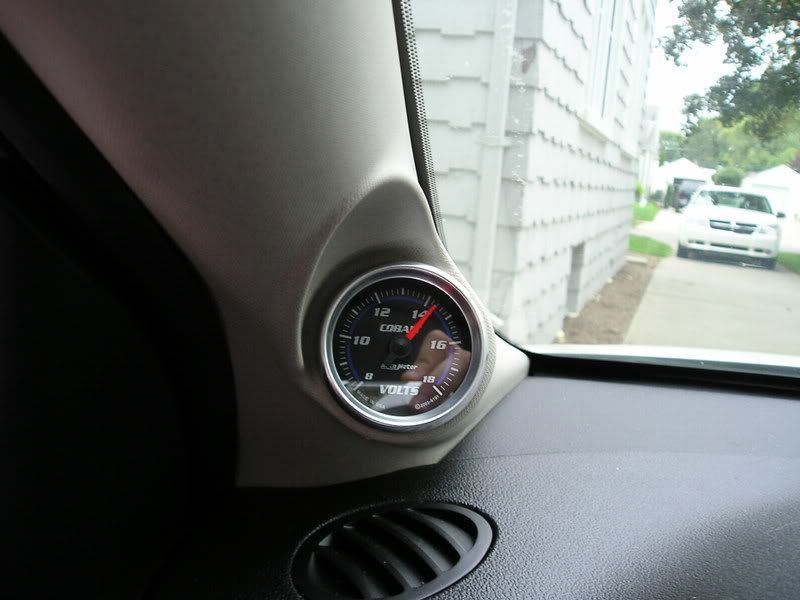
Place the black mounting bracket (included with the gauge) behind the gauge hole, and then slide your gauge into place (it should be a snug fit). Don't worry if the mounting bracket doesn't come right up to the back of the gauge housing of the a-pillar.
Now, using the supplied lock-washers (star-washers) and nuts, fasten the gauge to the mounting bracket. As you get the nuts tighter and tighter, you'll notice it sucks the mounting bracket to the back of the a-pillar gauge opening.
3. Wiring up the Voltmeter.
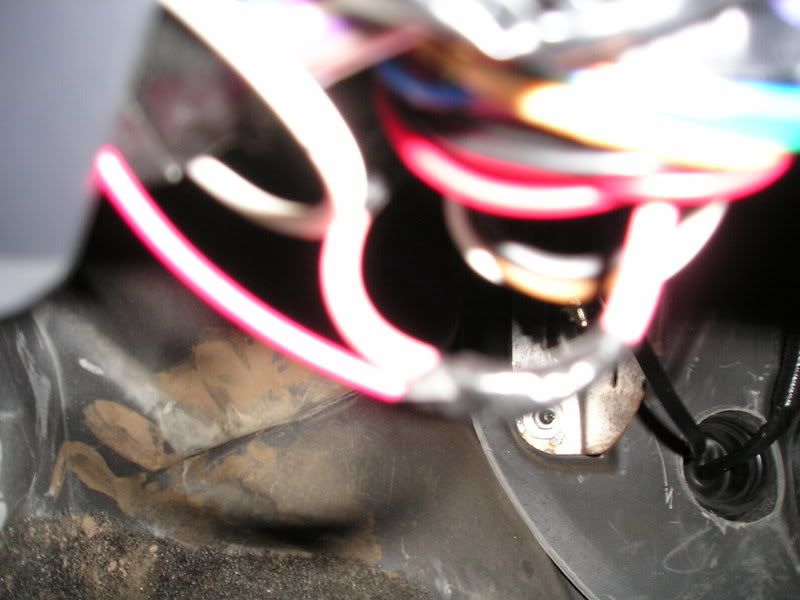
This Auto Meter gauge includes three connections, off the harness: Ground, 12V Switched and 12V Dash Lighting. Crimp and eyelet onto the end of the ground wire, and put it between the bolt and the metal brace under the steering column.
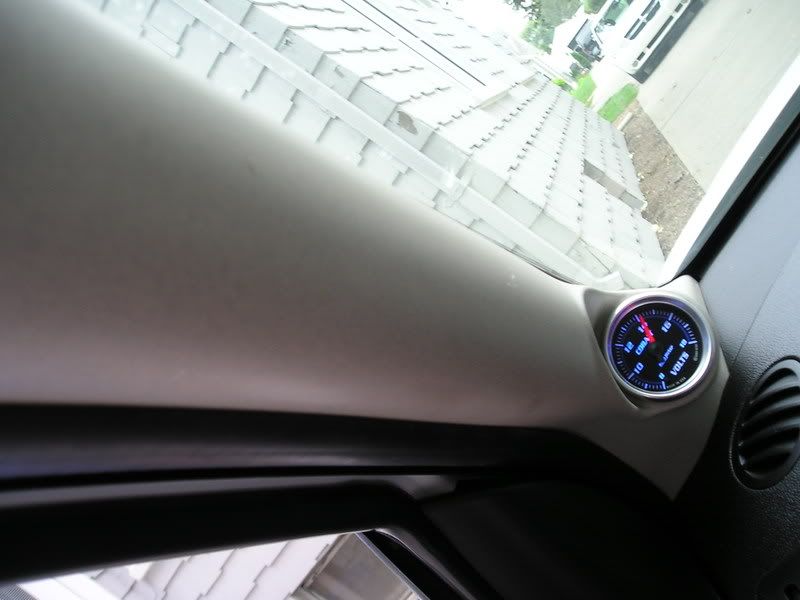
Find the dimmer harness - and then the gray wire. This is the 12V dash lighting wire connected to the dimmer switch, and will allow the gauge to follow the gauge cluster in how it lights up (if it's light out, it won't light up, if it's not it will - you can even dim the light). Connect the white wire from the harness to the gray dimmer wire. (Just cut the gray wire in half and twist the white wire to one end, and then splice the two ends back together).
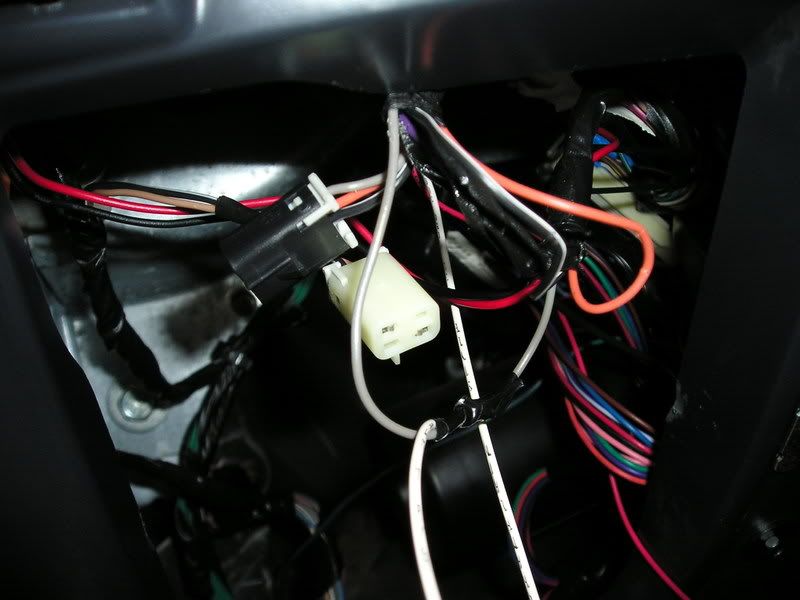
Finally, find a wire that is 12V switched - that meaning, it only receives power when the ignition is turned on. I just used a switched wire I have going to my alarm. A test light proves to be very handy here. Note: You can hook it up to ignition-switched fuses in the fuse box, under the hood.
4. Finishing up.
Reassemble your dash and mount your new a-pillar (connect the harness to the gauge at this point). The two metal clips go in the slots, and the plastic pin goes into it's hole below the screw hole. Drive the screw in, and push the cover back into place.
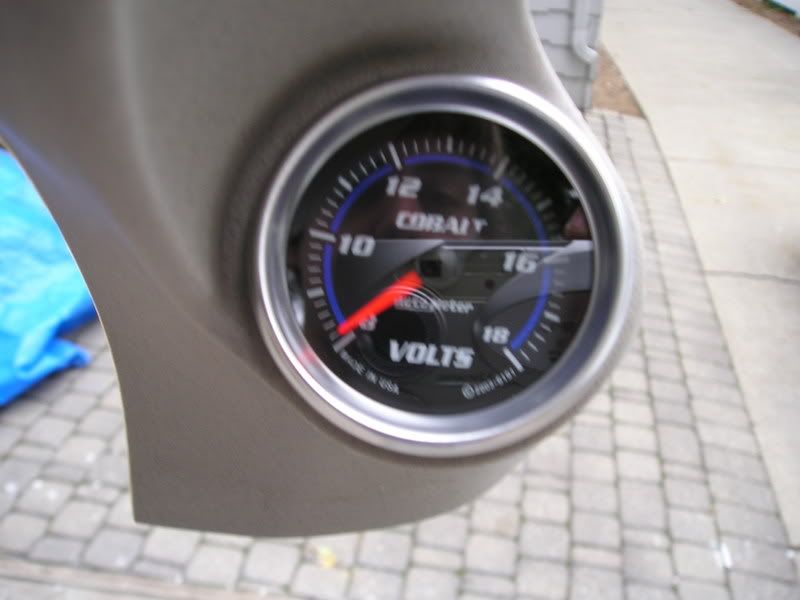
5. Turn the car on, everything should work!
Now, if it's not dark out, just manually turn on the lights so the dash lights will come on - so should the gauge's.
Enjoy knowing voltage!
Feel free to ask any questions.
Parts needed:
-Screwdriver (with Flat head and T-15 bits)
-Hacksaw and/or file
-Electrical Tape
-Wire Eyelet (for grounding)
-Auto Meter Voltmeter Gauge
-SS/SC A-Pillar (With Gauge Pod)
1. Remove your old A-pillar.
Begin by gently removing the screw cover in the top of the A-pillar
Then you can use your T-15 bit and remove the screw. Pull the A-pillar off (It has two metal clips near the bottom and the middle, as well as a plastic pin near the top)
2. Prep the new A-pillar and mount the gauge.
You'll want to remove the factory mounting brace for the boost gauge (which we're not using). You could leave it in there, as it is an Auto Meter gauge from the factory - however, your voltmeter will be rotated 90 degrees from how it should be.
Place the black mounting bracket (included with the gauge) behind the gauge hole, and then slide your gauge into place (it should be a snug fit). Don't worry if the mounting bracket doesn't come right up to the back of the gauge housing of the a-pillar.
Now, using the supplied lock-washers (star-washers) and nuts, fasten the gauge to the mounting bracket. As you get the nuts tighter and tighter, you'll notice it sucks the mounting bracket to the back of the a-pillar gauge opening.
3. Wiring up the Voltmeter.
This Auto Meter gauge includes three connections, off the harness: Ground, 12V Switched and 12V Dash Lighting. Crimp and eyelet onto the end of the ground wire, and put it between the bolt and the metal brace under the steering column.
Find the dimmer harness - and then the gray wire. This is the 12V dash lighting wire connected to the dimmer switch, and will allow the gauge to follow the gauge cluster in how it lights up (if it's light out, it won't light up, if it's not it will - you can even dim the light). Connect the white wire from the harness to the gray dimmer wire. (Just cut the gray wire in half and twist the white wire to one end, and then splice the two ends back together).
Finally, find a wire that is 12V switched - that meaning, it only receives power when the ignition is turned on. I just used a switched wire I have going to my alarm. A test light proves to be very handy here.
Note: You can hook it up to ignition-switched fuses in the fuse box, under the hood.4. Finishing up.
Reassemble your dash and mount your new a-pillar (connect the harness to the gauge at this point). The two metal clips go in the slots, and the plastic pin goes into it's hole below the screw hole. Drive the screw in, and push the cover back into place.
5. Turn the car on, everything should work!
Now, if it's not dark out, just manually turn on the lights so the dash lights will come on - so should the gauge's.
Enjoy knowing voltage!
Feel free to ask any questions.
Last edited by MP81; Oct 24, 2008 at 03:35 PM.

Senior Member
Joined: 08-12-08
Posts: 748
Likes: 0
From: Gilbert, AZ
Where is a wire that is switched? I dont know where you have your alarm is connected so thats not really helpful. What can I use as a switched wire and where is it?? Thanks
nice write up, nice gauge too, i got the cobalt series nb a/f gauge on mine...although i didnt use the white wire, i left it alone, turned out the cobalt woudlnt light up, so i ran it to a switched 12v source and its still dim...so isaid f it, i can live with only seeing the lightshow at night


Member
Joined: 08-10-08
Posts: 352
Likes: 0
From: Montreal, Canada
This is crazy
I have installed mine in a MUCH easier way (I`m talking about the connections).
I am talking about the exact same gauge here
I purchased fuse taps on e-bay for $3.
I connected the 2 wires in my fuse board on the passenger side and that's it using the fuse taps.
I didn't have to splice any wires or anything, it took 2 seconds.
The long part was to find which fuses, but here is the solution:
-12V source could be any fuse
-Switched power source: use your sunroof fuse (the voltmeter draws about ~1AMP). I had tried the IGN fuse and it didn't work for me. Sunroof if FTW! (other people have done this too) The fuse is grey if I can remember.
-Ground: I removed the side pannel similar to the one on the fuse board, but this time on the driver's side. There is a bolt there, I connected the ground there.
Installation time is about 20 minutes. VERY EASY
Only difference is that mine doesn`t dim, but I don't really care since I never play with the dimmer in my car.
I have found other threads on the forums and this is how people connected their Volt Meter.
I used the smallest gauge wiring (draws about 1 amp only) available, can't remember what it was.
Thread Starter
Senior Member
iTrader: (2)
Joined: 07-10-08
Posts: 1,708
Likes: 3
From: Washington Township, MI
So did splitting the wire.
That wire was already run to a fuse, though I don't know which one was used when the alarm was installed.
Two 12V sources? That's fine - if you want the backlight on all the time. Hence is why I connected it to the dimmer wire, so it works with the factory interior lighting/dimming.
That wire was already run to a fuse, though I don't know which one was used when the alarm was installed.
Two 12V sources? That's fine - if you want the backlight on all the time. Hence is why I connected it to the dimmer wire, so it works with the factory interior lighting/dimming.
Member
Joined: 08-10-08
Posts: 352
Likes: 0
From: Montreal, Canada
So did splitting the wire.
That wire was already run to a fuse, though I don't know which one was used when the alarm was installed.
Two 12V sources? That's fine - if you want the backlight on all the time. Hence is why I connected it to the dimmer wire, so it works with the factory interior lighting/dimming.
That wire was already run to a fuse, though I don't know which one was used when the alarm was installed.
Two 12V sources? That's fine - if you want the backlight on all the time. Hence is why I connected it to the dimmer wire, so it works with the factory interior lighting/dimming.
it's perfect


New Member
Joined: 12-31-08
Posts: 28
Likes: 0
From: Rochester
Does Cobalt make a red-lit gauge that matches the gauges on a 2009 Cobalt SS? These gauges have blue lighting and the Cobalt SS has red lighting. Looking to install a Voltmeter and Coolant tem gauge.
So I'm assuming yes, but you can basically run all of your gauge wires to those grounds/switch/dimmer sections? That way your gauges all dim properly and everything? Multiple gauges I mean..
