
Appearance: How To: Install SS/SC Front and Rear Lip on ss/na!!!

Thread Starter
Senior Member
Joined: 09-10-06
Posts: 1,891
Likes: 0
From: CLEVELAND, OHIO
How To: Install SS/SC Front and Rear Lip on ss/na!!!
Alright guys, there has been much controversy on this and can it be done, how hard is it etc. On a scale of 1-10 with 10 being the hardest this is about a level 6, it takes a lot of time, took me about 5 hours to do both.
Part Numbers:
Front lip: 12336084 dealer cost 178.24 list cost 274.65
Rear Lip: 12336082 dealer cost 190.14 list cost 292.96
Left rear grille: 89025745 dealer cost 27.03 list cost 41.64
Right rear grille: 89025744 dealer cost 43.16 list cost 66.52
All prices are shipped fyi
We will start with the front..
Tools Needed: * = Optional Tool
Flat Head Screwdriver
10mm Socket
7mm Socket
Needle Nose Pliers*
Flashlight*
Dremel
Jack and Jack Stands*
Large Blanket or sheet
Materials Needed:
1 SS/SC front lip
If you are doing this on a 2.2l you will need an SS/SC or SS/NA bumper cover
12 Clips for the lip
4 Push Pins
On to the Instructions:
Step 1: Removing The Headlights
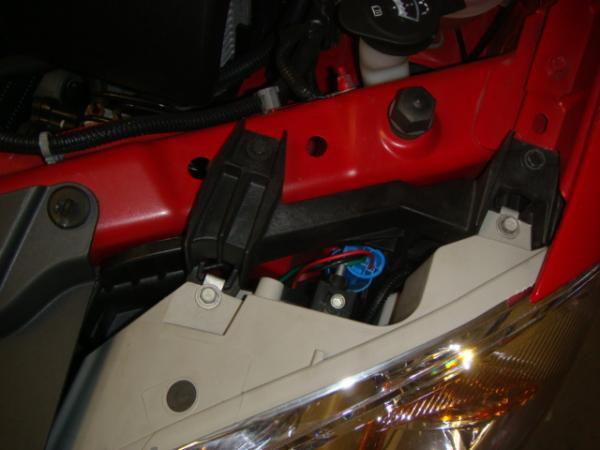
remove the 4 bolts holding the headlight and Headlight Bracket in, and then the light out, this is tricky; just play with it for a while. (10mm)
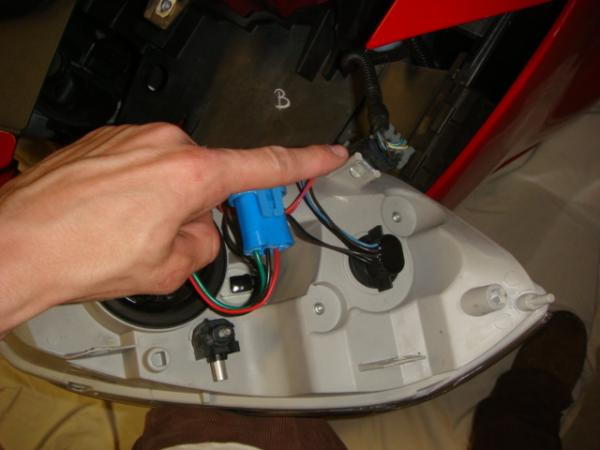
After you wiggle the light out of its place, simply unplug the light and set it to the side.
After you get the headlight out there will be 2 more bolts holding the headlight bracket in place; remove them (10mm).
When the bolts are out pull the bracket out of its place but be careful not to pull it out too far because there is a sensor hooked up to the bottom of it, i believe its the outside thermometer. Unplug it and set the bracket to the side with your headlight, and keep in mind this sensor is on the driver side only.
Repeat this step on the other Headlight.
Step 2:removing the Bumper Cover
Jack the car up if you want to, this is not nessecary but it makes everything 100x easier and more comfortable.
Remove the 4 bolts inside the wheel well (7mm) (you will need to turn the wheel all the)
There will also be 4 7mm bolts underneath the bumper too.
Repeat those 2 steps on the other side of the car.

underneath the bumper there will be 2 push pins holding the bumper, pull both of these out.

Remove the 4 push pins that are holding your grille in using that flat head screwdriver
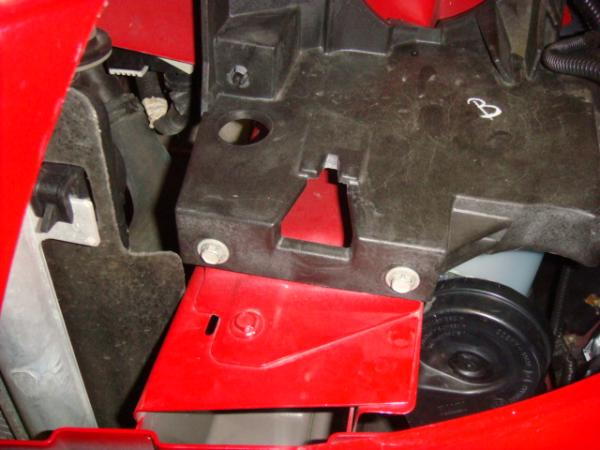
on both sides on the inside of the bumper where the headlights were, there are 3 bolts, the first 2 need to be loosend and the third one needs to be taken out completely.

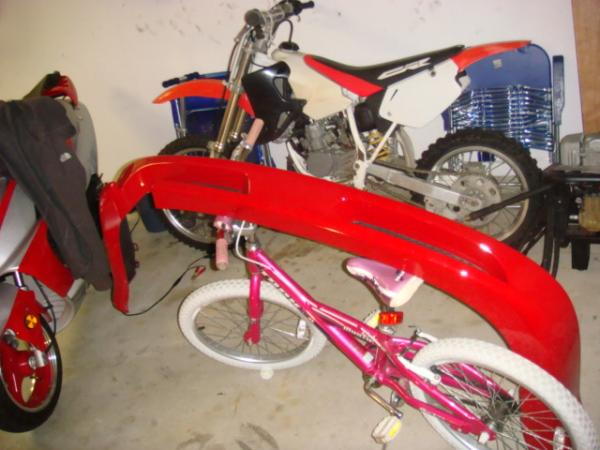
Your bumper cover should now be ready to be removed, so pull it off and set it on the blanket or sheet you brought outside.
Step 3: installing the lip
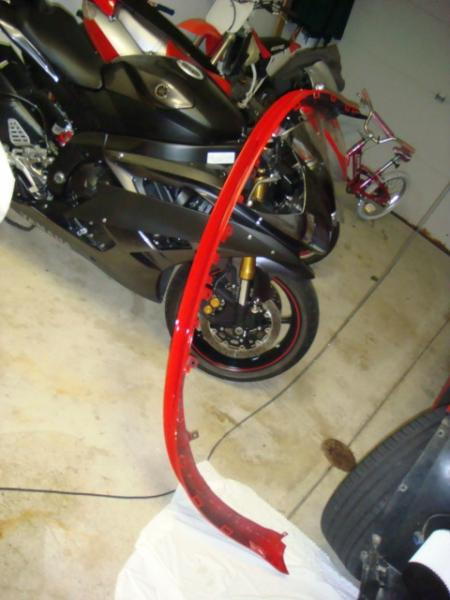
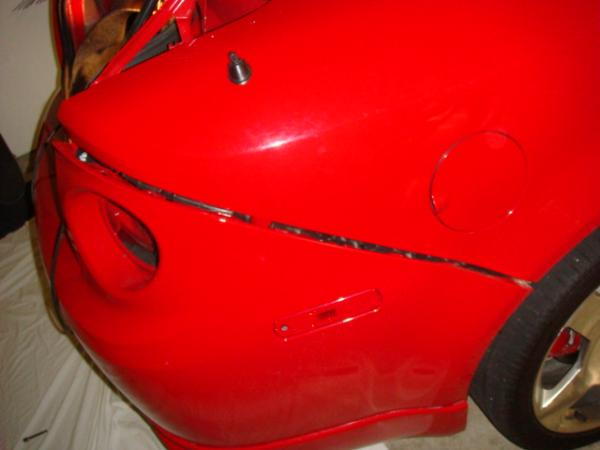
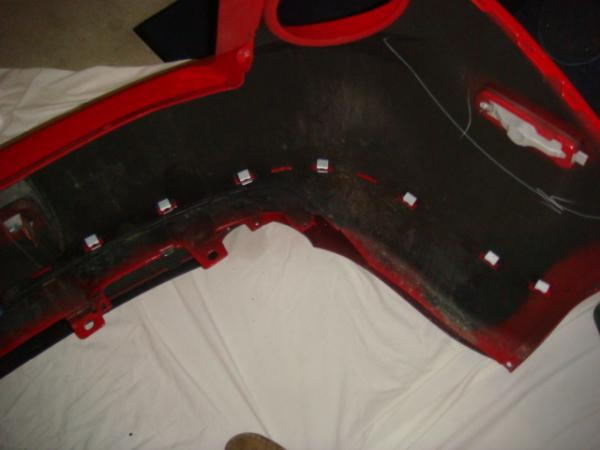
Take your dremel, and cut the slits that are factory marked on the inside of the bumper, i forgot to take a picture but they are very easy to find, when you are done your front bumper should look like this:


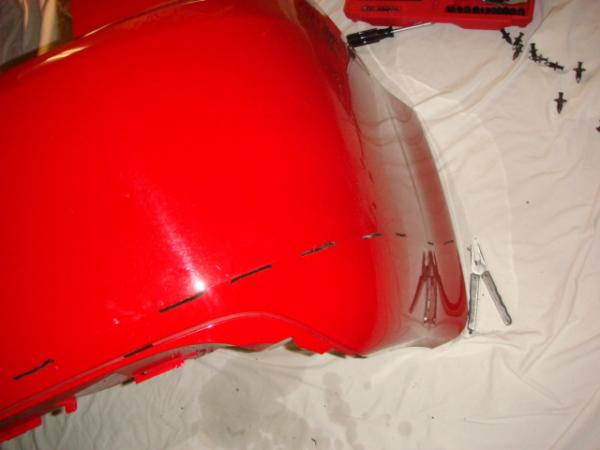
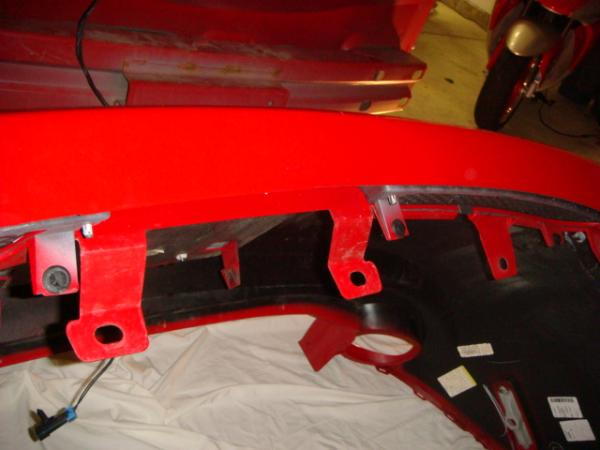
push the lip onto the bumper and count out 12 clips
Put all of the clips on

next you have to put 4 push pins in the holes that line up on the bumper and on the lip, there are 4 in a row right in the middle you cant miss em
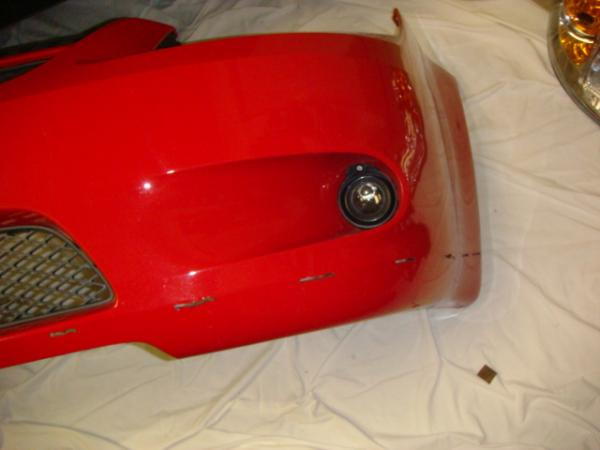
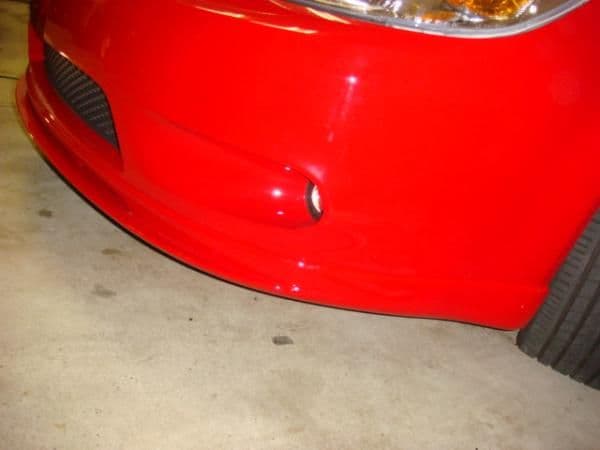
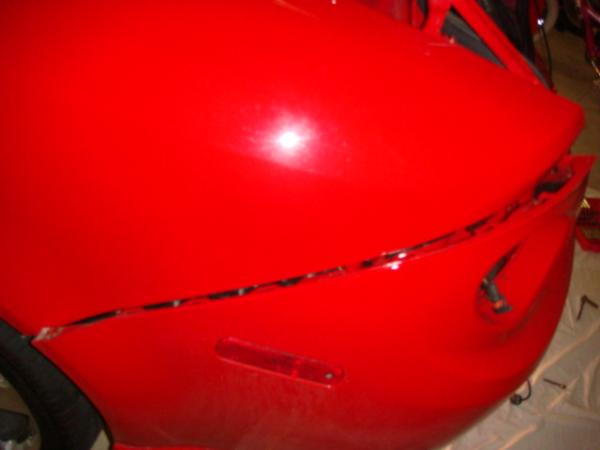
Now you just need to put the bumper back on the way you took it off and put the headlights back in, and it should turn out like this:

Now take a quick breather and you will be ready to start on the back..
Part Numbers:
Front lip: 12336084 dealer cost 178.24 list cost 274.65
Rear Lip: 12336082 dealer cost 190.14 list cost 292.96
Left rear grille: 89025745 dealer cost 27.03 list cost 41.64
Right rear grille: 89025744 dealer cost 43.16 list cost 66.52
All prices are shipped fyi
We will start with the front..
Tools Needed: * = Optional Tool
Flat Head Screwdriver
10mm Socket
7mm Socket
Needle Nose Pliers*
Flashlight*
Dremel
Jack and Jack Stands*
Large Blanket or sheet
Materials Needed:
1 SS/SC front lip
If you are doing this on a 2.2l you will need an SS/SC or SS/NA bumper cover
12 Clips for the lip
4 Push Pins
On to the Instructions:
Step 1: Removing The Headlights
remove the 4 bolts holding the headlight and Headlight Bracket in, and then the light out, this is tricky; just play with it for a while. (10mm)
After you wiggle the light out of its place, simply unplug the light and set it to the side.
After you get the headlight out there will be 2 more bolts holding the headlight bracket in place; remove them (10mm).
When the bolts are out pull the bracket out of its place but be careful not to pull it out too far because there is a sensor hooked up to the bottom of it, i believe its the outside thermometer. Unplug it and set the bracket to the side with your headlight, and keep in mind this sensor is on the driver side only.
Repeat this step on the other Headlight.
Step 2:removing the Bumper Cover
Jack the car up if you want to, this is not nessecary but it makes everything 100x easier and more comfortable.
Remove the 4 bolts inside the wheel well (7mm) (you will need to turn the wheel all the)
There will also be 4 7mm bolts underneath the bumper too.
Repeat those 2 steps on the other side of the car.
underneath the bumper there will be 2 push pins holding the bumper, pull both of these out.
Remove the 4 push pins that are holding your grille in using that flat head screwdriver
on both sides on the inside of the bumper where the headlights were, there are 3 bolts, the first 2 need to be loosend and the third one needs to be taken out completely.
Your bumper cover should now be ready to be removed, so pull it off and set it on the blanket or sheet you brought outside.
Step 3: installing the lip
Take your dremel, and cut the slits that are factory marked on the inside of the bumper, i forgot to take a picture but they are very easy to find, when you are done your front bumper should look like this:
push the lip onto the bumper and count out 12 clips
Put all of the clips on
next you have to put 4 push pins in the holes that line up on the bumper and on the lip, there are 4 in a row right in the middle you cant miss em
Now you just need to put the bumper back on the way you took it off and put the headlights back in, and it should turn out like this:
Now take a quick breather and you will be ready to start on the back..
Last edited by omgshesaboy; Jun 30, 2008 at 06:50 PM.
Thread Starter
Senior Member
Joined: 09-10-06
Posts: 1,891
Likes: 0
From: CLEVELAND, OHIO
Tools Needed:
Flat Head Screw Driver
7mm Socket
10mm Socket
Allen Keys (small not sure what the size is)
Flashlight*
Needle nose Pliers
7mm midget wrench
dremel
Materials Needed:
1 SS/SC rear lip
If you are doing this on a 2.2l you will need an SS/SC or SS/NA bumper cover
14 Clips for the lip
6 Push Pins
Step 1: Removing The Tail lights

Pop the trunk and unhook the cargo net, after it is unhooked the hook actually is a nut too, unscrew it with your hands.
Pull the trunk lining forward now, there will be 2 10mm nuts there, unscrew them and your tail light should come right out.

unplug the tail light and set it to the side.
repeat those steps for your other tail light.
Step 2: removing the bumper
next remove the 4 push pins that are across the back of your bumper

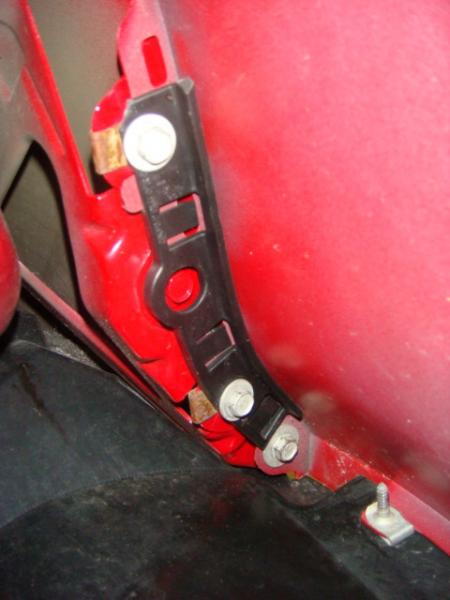
now you need to remove these two bolts, one is a small standard size allen key, i am not sure what the size is, and the small bolt is 7mm, these are on both sides of the bumper, remove them all.

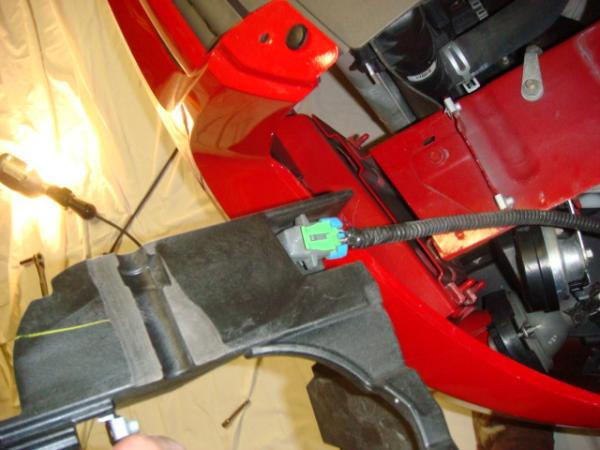
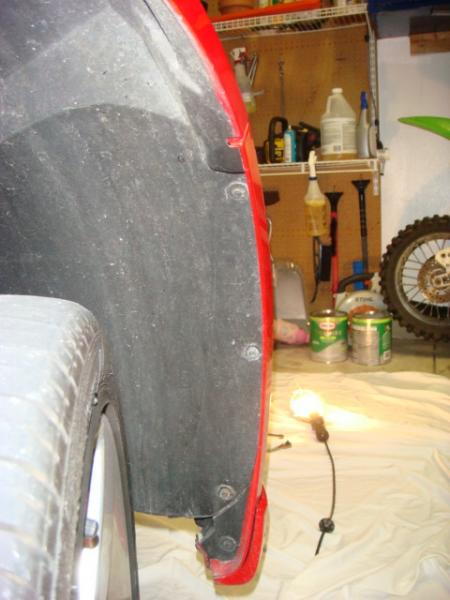
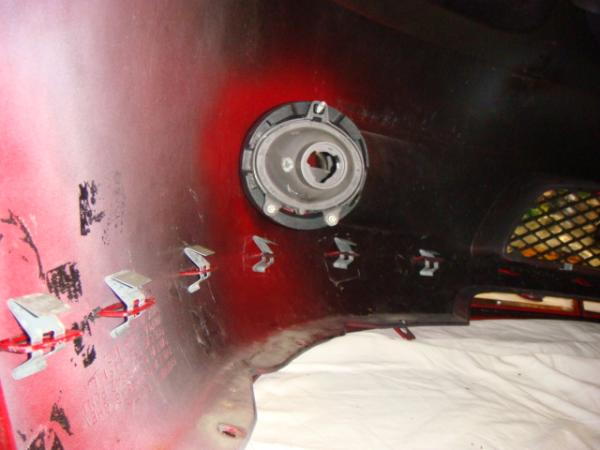
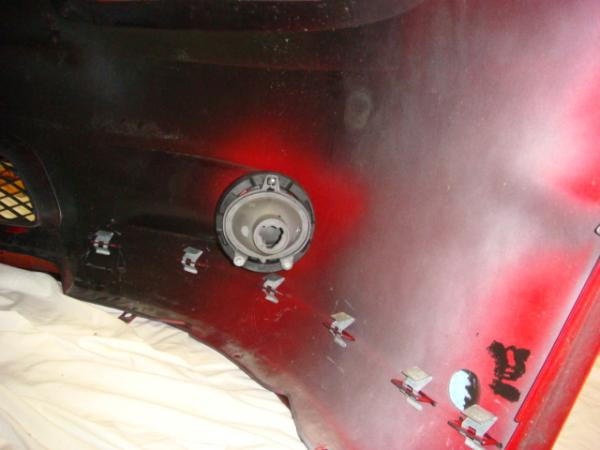
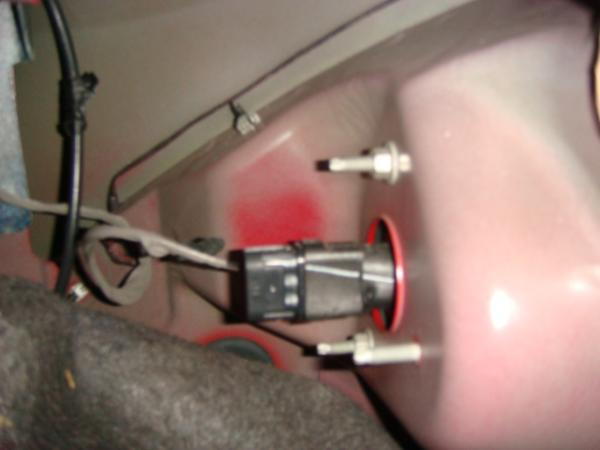
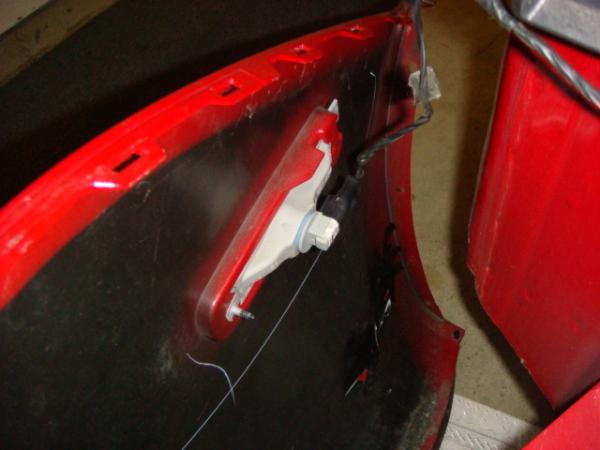
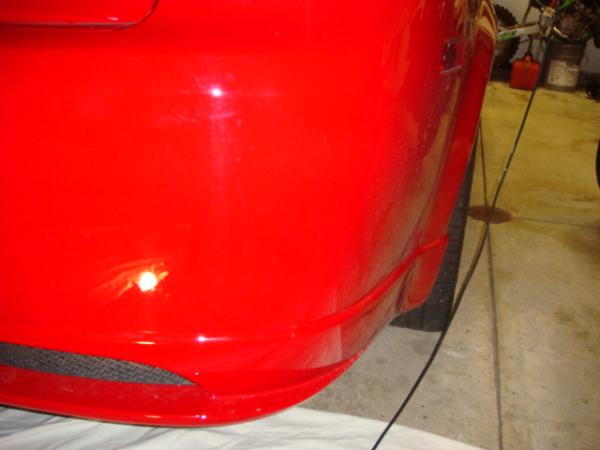
this is the hardest part of the entire install, take your 7mm midget wrench and start taking out the bolt that is behind the little flap shown in the picture, it is such a pain in the ass, there is one on both sides.
remove the 4 push pins inside the wheel wells on both sides.
once you have completed those steps your bumper cover is almost ready to come off, pull on both sides and the cover will just peel off, its not ready to come off yet though so be gentle.
underneath the car there is 4 more push pins holding the bumper up, pull them out. your bumper is ready to take off now, but there are wires attached to it so dont pull it hard or far.
unplug the side markers on both sides
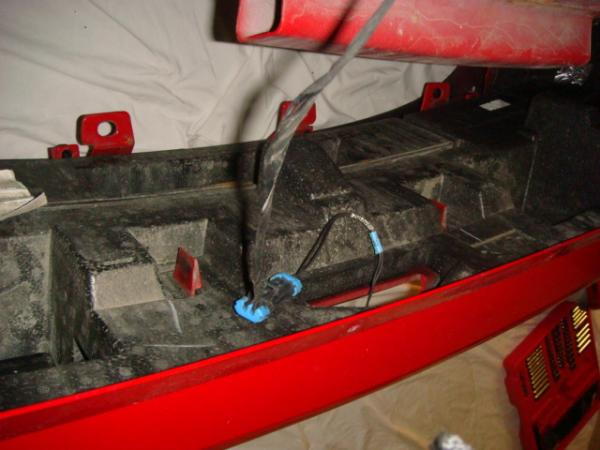
unplug the liscense plate light, your bumper will now be free from wires.

Step 3: Installing the lip


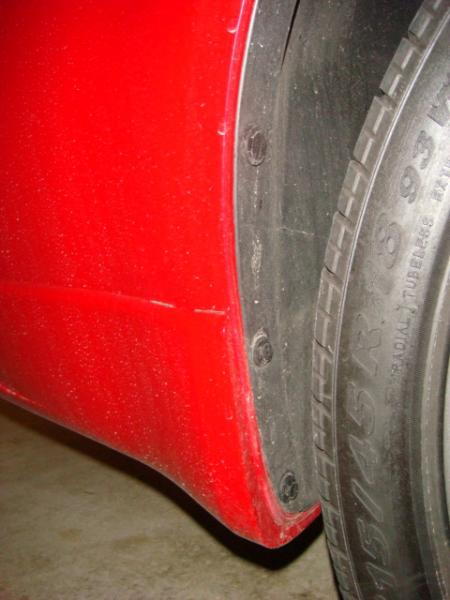
first you will need to remove the rear grille that is already on the ss/na rear bumper, after you do this cut the slits like you did on the front bumper, once again they are also clearly marked on the inside of the bumper cover.
you are now ready to put the lip on.. So Do It!

once you have pushed the lip on, put all 14 of your clips in place.
after you put the clips on you will need to put 4 push pins in the botom of the lip connecting it with the bumper.
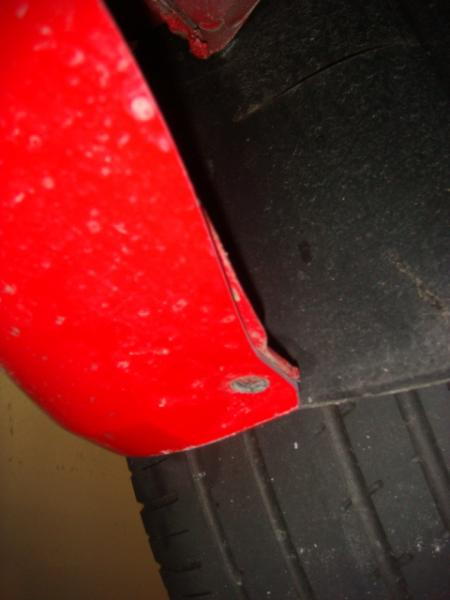
you also need to put a push pin on the end of both sides of the lip connecting it to the bumper.
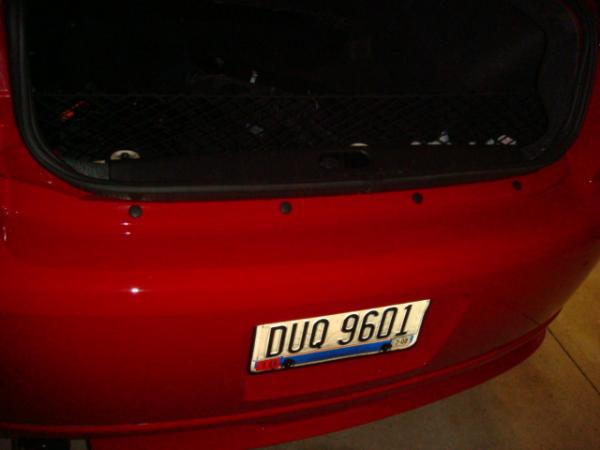
reinstall your bumper cover and your car will look like this:


Flat Head Screw Driver
7mm Socket
10mm Socket
Allen Keys (small not sure what the size is)
Flashlight*
Needle nose Pliers
7mm midget wrench
dremel
Materials Needed:
1 SS/SC rear lip
If you are doing this on a 2.2l you will need an SS/SC or SS/NA bumper cover
14 Clips for the lip
6 Push Pins
Step 1: Removing The Tail lights
Pop the trunk and unhook the cargo net, after it is unhooked the hook actually is a nut too, unscrew it with your hands.
Pull the trunk lining forward now, there will be 2 10mm nuts there, unscrew them and your tail light should come right out.
unplug the tail light and set it to the side.
repeat those steps for your other tail light.
Step 2: removing the bumper
next remove the 4 push pins that are across the back of your bumper
now you need to remove these two bolts, one is a small standard size allen key, i am not sure what the size is, and the small bolt is 7mm, these are on both sides of the bumper, remove them all.
this is the hardest part of the entire install, take your 7mm midget wrench and start taking out the bolt that is behind the little flap shown in the picture, it is such a pain in the ass, there is one on both sides.
remove the 4 push pins inside the wheel wells on both sides.
once you have completed those steps your bumper cover is almost ready to come off, pull on both sides and the cover will just peel off, its not ready to come off yet though so be gentle.
underneath the car there is 4 more push pins holding the bumper up, pull them out. your bumper is ready to take off now, but there are wires attached to it so dont pull it hard or far.
unplug the side markers on both sides
unplug the liscense plate light, your bumper will now be free from wires.
Step 3: Installing the lip
first you will need to remove the rear grille that is already on the ss/na rear bumper, after you do this cut the slits like you did on the front bumper, once again they are also clearly marked on the inside of the bumper cover.
you are now ready to put the lip on.. So Do It!
once you have pushed the lip on, put all 14 of your clips in place.
after you put the clips on you will need to put 4 push pins in the botom of the lip connecting it with the bumper.
you also need to put a push pin on the end of both sides of the lip connecting it to the bumper.
reinstall your bumper cover and your car will look like this:


Thread Starter
Senior Member
Joined: 09-10-06
Posts: 1,891
Likes: 0
From: CLEVELAND, OHIO
they are on gm parts direct but i ordered it from my parts dept.i got the stuff at cost, it was somthing like 478 dollars for both lips both grilles and the clips, then i had to get them painted and that cost 143$ for both of them, about 600$ total


i know i been buying parts left to right supercharger installed next weekend and now im gonna get the 3 inch hahn catback cause it just sounds damn nasty and i also need to save money for furniture for my new apt..haha i need a second job for all my goodies
i got all of it for 1,800 shipped wiith stage 2
Last edited by Jimmys2007CobaltSS/C; Jun 12, 2008 at 08:48 PM. Reason: Automerged Doublepost


Senior Member
Joined: 10-31-07
Posts: 2,765
Likes: 1
From: Houston, TX
Thread Starter
Senior Member
Joined: 09-10-06
Posts: 1,891
Likes: 0
From: CLEVELAND, OHIO
i can get the part numbers at work tommorow
yeah this was definatly a whole lot easier than i thought just took alot of time.
and you could do it with the bumper on the car but:
1- it would be harder than taking the bumper off
2- you couldnt cut the slits on the bumper
yeah this was definatly a whole lot easier than i thought just took alot of time.
and you could do it with the bumper on the car but:
1- it would be harder than taking the bumper off
2- you couldnt cut the slits on the bumper